Pages

November 28, 2012

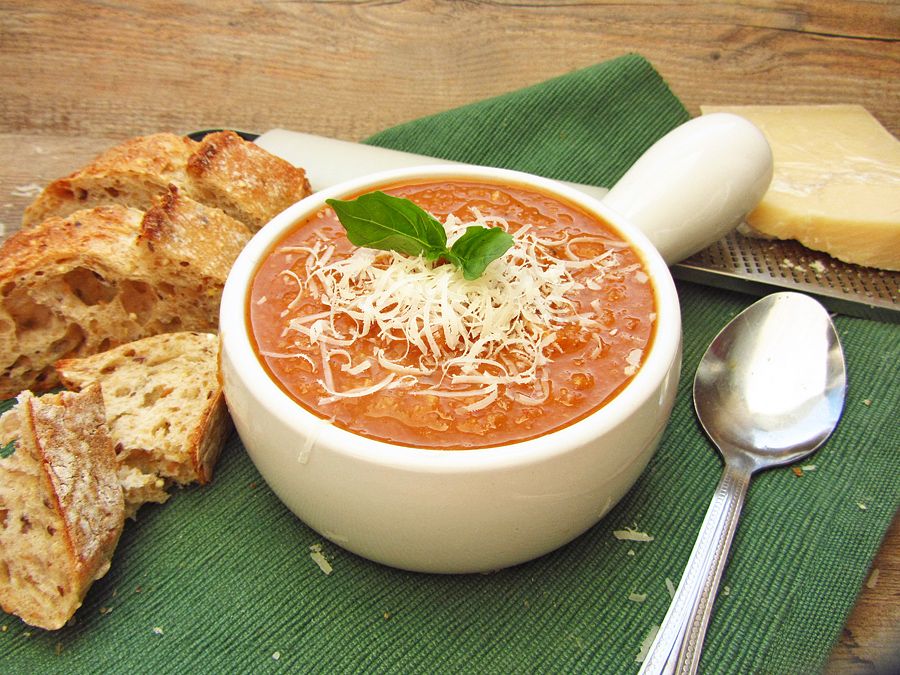
Roasted Tomato and White Bean Soup

Roasted Tomato & White Bean Soup

So I have one piece of disappointing (but not bad) news and two pieces of good news to share. The not-so-good news is that I’ve been super busy lately and this is the only recipe I have to share with you guys this week. I feel like I've been cooking a lot, but I’ve just been making easy meals (like egg sandwiches), or things that just aren’t special enough to share on the blog (like a mushroom bolognese dish that didn’t work out that well), or things that I’ve already shared before (like this tuna pasta I just made a big batch of!)

Now the good news is that I have a ton of recipe ideas that I want to try out (especially when it comes to holiday baking!), I just need to find the time!

And the second piece of good news is that this one recipe I do have to share this week is really good!
Roasted Tomato & White Bean Soup

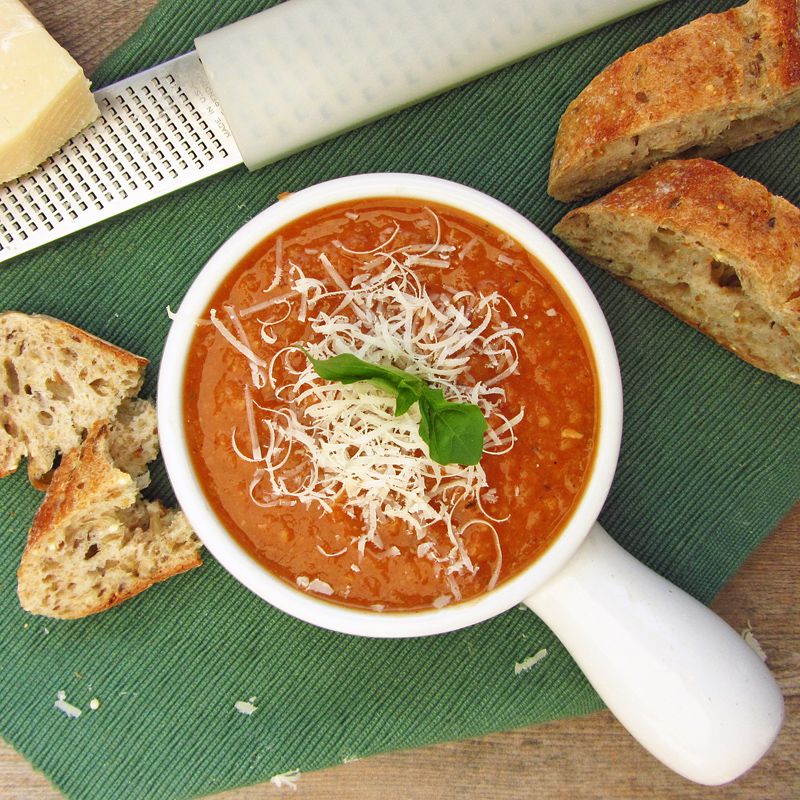
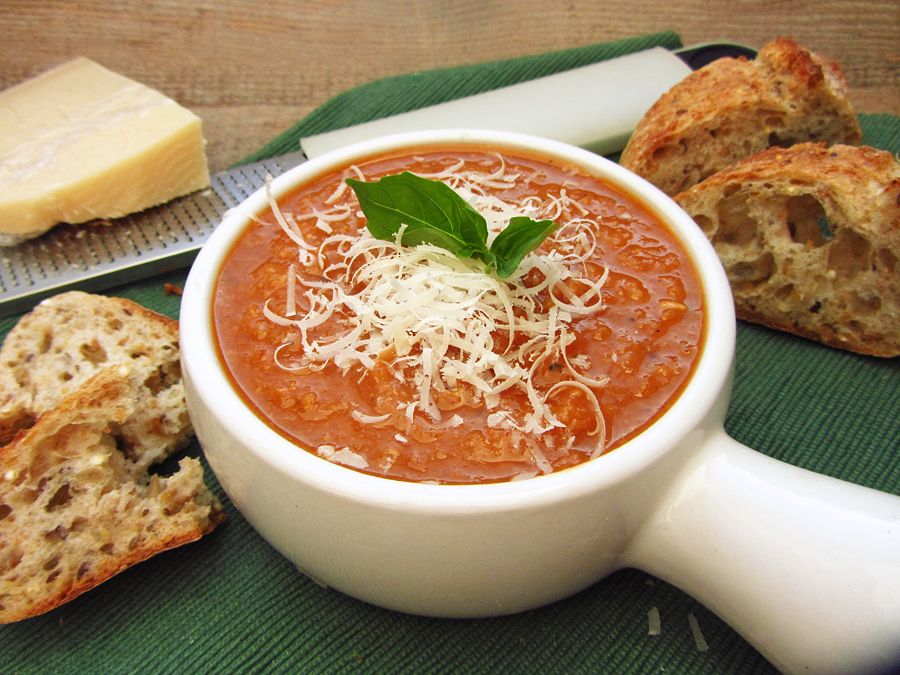
This is a warm and comforting winter soup with a rich flavour from the roasted tomatoes, and the added health benefits of protein and fibre from the addition of white beans. When I first saw this recipe, I pictured a smooth and creamy soup where the beans would be like an undetectable replacement for heavy cream. Mine didn’t turn out quite like that – I could still taste the beans and they gave the soup more of a chunky than smooth texture – but I actually liked it better that way!

Roasting the tomatoes and garlic takes some time, but very little effort, so it’s worth it! I highly recommend eating this with lots of grated parmesan cheese and a loaf of hearty bread for soaking up every last drop from the bowl!
Roasted Tomato & White Bean Soup

Roasted Tomato & White Bean Soup

Adapted from Clean Eating Magazine, October 2012

Serves 2-4, depending on desired serving size

Ingredients:

Cooking spray
1 medium yellow onion, peeled and quartered
1-1/2 pounds roma (plum) tomatoes, halved lengthwise
Salt and pepper
1 head garlic
1 (19 fl oz) can cannellini beans, rinsed and drained
2 cups low sodium chicken or vegetable broth, divided
1/2 teaspoon dried Italian seasoning
1 bay leaf
1/2 teaspoon kosher salt
1/4 teapsoon ground pepper
1/2 teaspoon sugar
Grated parmesan cheese for topping, if desired

Directions:

Preheat oven to 400°F. Line a baking sheet with aluminum foil and lightly spray with non-stick cooking spray. Spread onion and tomatoes, cut side up, in a single layer on the baking sheet. Spray with cooking spray and season with salt and pepper. Cut the tops off the head of garlic so the cloves are exposed, spray with cooking spray, and wrap with foil into an enclosed packet. Add foil packet to the baking sheet with the onions and tomatoes, and bake everything together for one hour. Set aside to cool for 10 minutes once done.

Add the roasted onion, tomatoes, and garlic (squeeze out the cloves from the skins) to a food processor and blend until smooth. Transfer to a medium saucepan.

Add beans and 1 cup stock to the food processor and blend until smooth. Add to the saucepan that holds the tomato mixture, and add the remaining 1 cup stock. Add seasonings (Italian seasoning, bay leaf, salt, pepper, sugar), bring to a boil, then reduce heat to low, cover and simmer gently for 20 minutes.

Remove bay leaf, and serve warm, with lots of grated parmesan cheese if desired (though recommended!)

*Note that if you really want a smooth texture for the soup, you may be able to achieve that by using a blender instead of the food processor, but you may have to blend in batches.

November 21, 2012

Onion Flowers

Onion Flowers

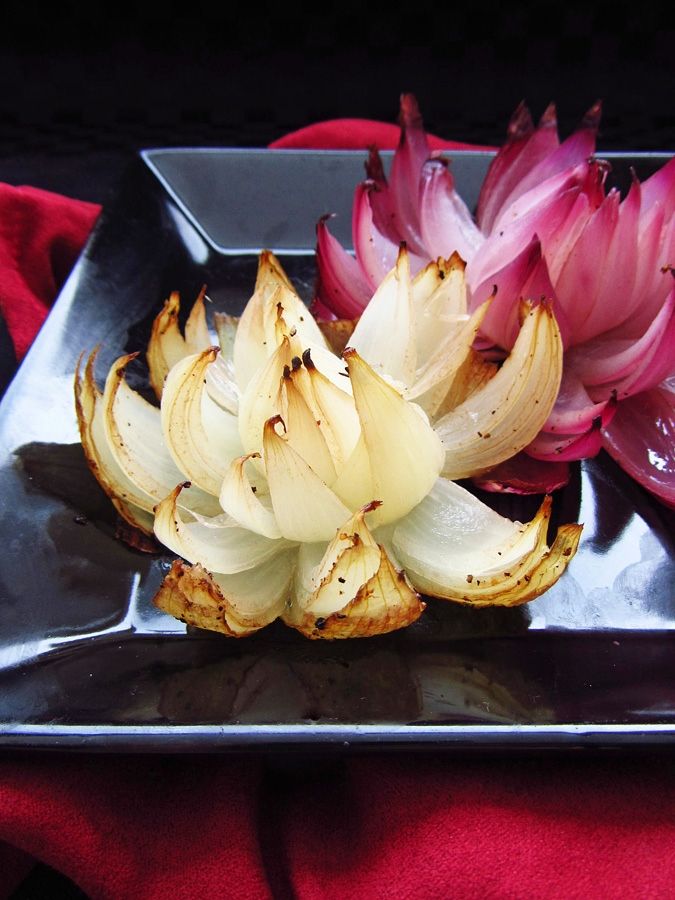
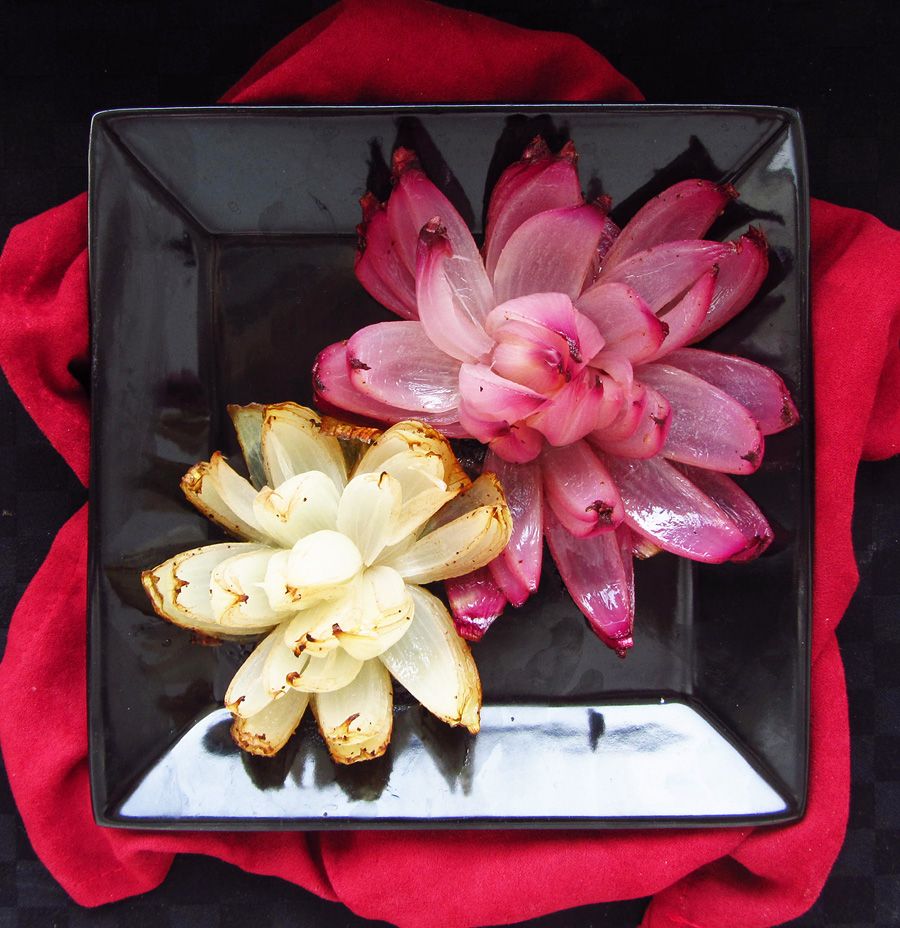
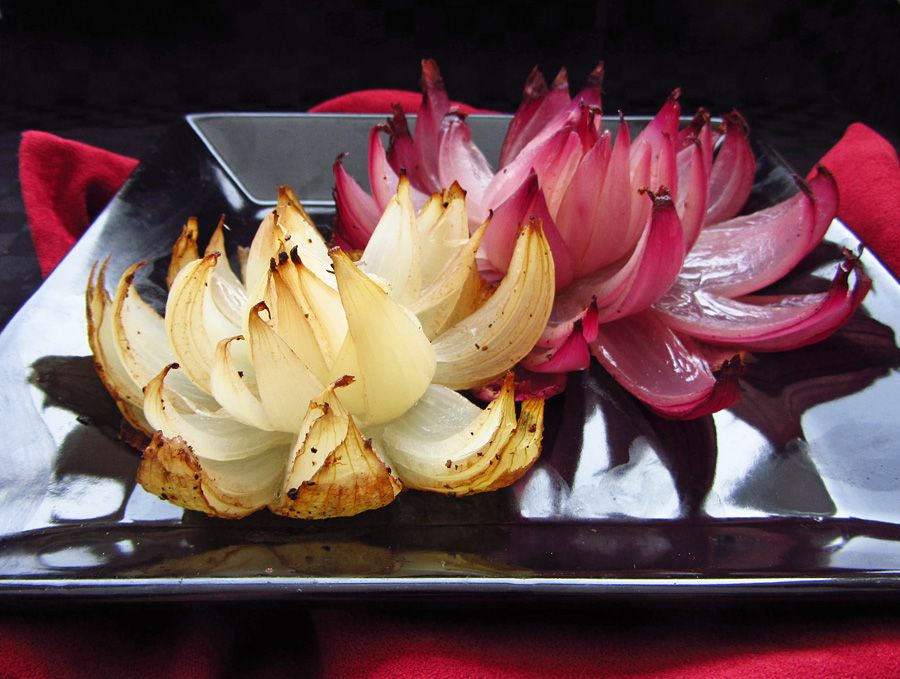
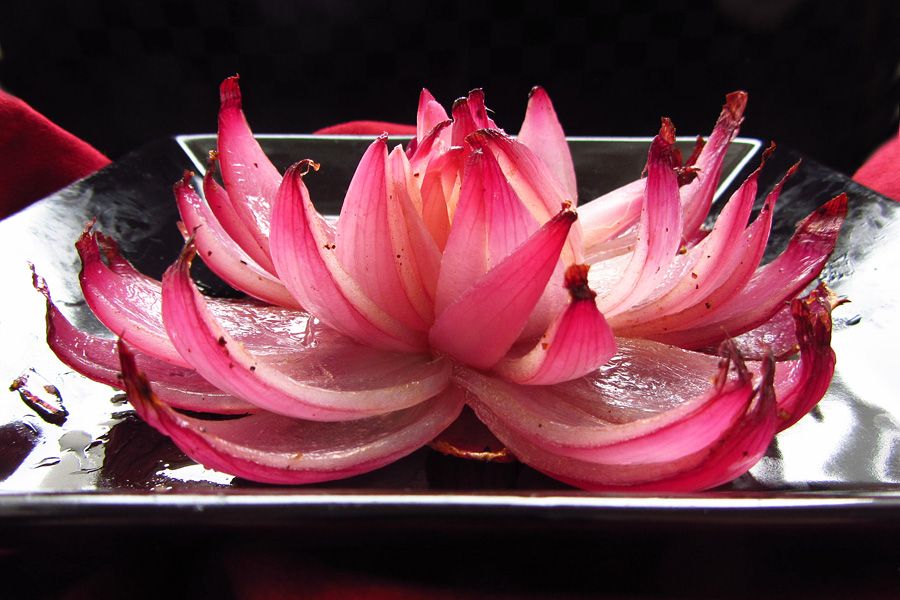
When I saw these onion flowers in LCBO’s Food & Drink magazine, I knew I had to make them. They were so pretty and I’d never seen anything like them before, but they sounded so easy to make! Growing up, I always hated onions with a passion, but now I’ve learned that onions can actually be quite sweet and delicious - but only when cooked, I still pick out raw onions!

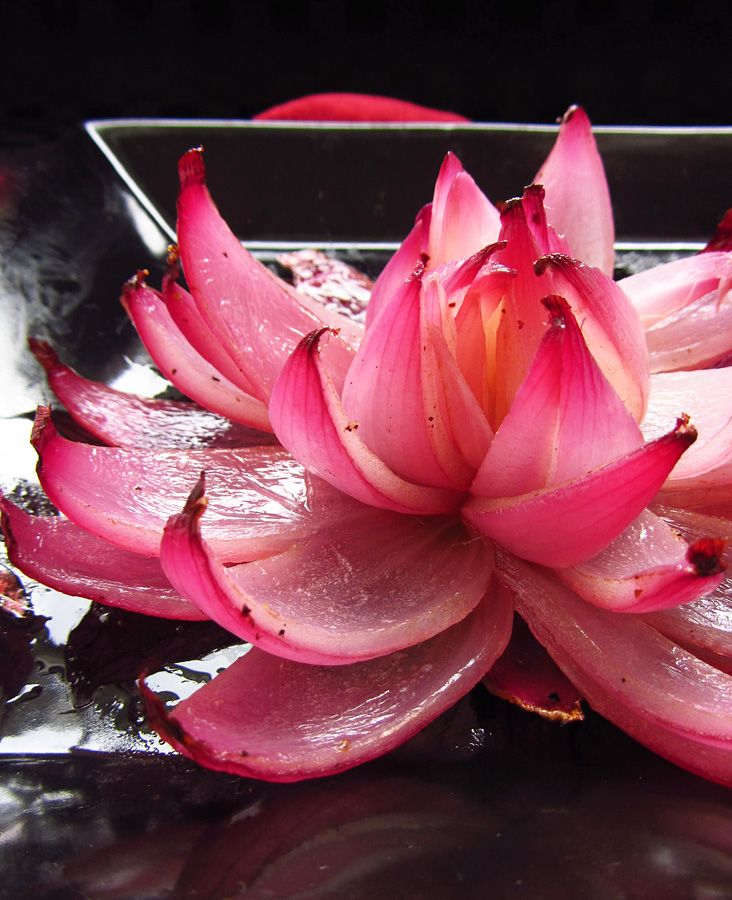
These flowers are made by simply slicing an onion into eighths, without cutting all the way through the onion so that it stays intact on the bottom, but the ‘petals’ fall down when baking to create a beautiful flower shape. The other ingredients are basic – just olive oil, balsamic vinegar, salt, and pepper – but the roasting gives the onions a really nice flavour, too!

Onion Flowers

I admit that the first time I made these, I wasn’t completely successful – all of the petals fell down without anything remaining upright in the center, which is really what gives these a flower-like look. But I realized that my mistake was slicing a little off both ends of the onions. What you should do is slice a bit off the root end of the onion so that it can stay in place, but leave the stem end intact (see the helpful diagrams at the Soup Addict if you need help determining which end is the root and which is the stem!).

There are also some helpful step-by-step photos on making these at The Project Table if you need help after reading the recipe, and there’s also a Youtube video with video instructions! (but notice how one of the onions in that video has a bit too much sliced off the top, and that one didn’t turn out as well after baking)

Onion Flowers

As you can tell from the pictures, I tried making these with both red and yellow onions, and while I liked the taste of both, I do think the red onions look a little prettier! If you want to have a mix of colours at the table though, try using a few yellow onions in addition to red!

Onion Flowers

Once you’ve got the hang of it, you’ll realize that these are really easy to make, and they make for an elegant side dish to serve at a special gathering or holiday meal.  I realize that it’s probably too late for my American friends to incorporate these into their Thanksgiving dinner tomorrow, but there are still plenty of holiday meals coming up, or you can make them any other time you want to impress your family or guests!

And while us Canadians have already celebrated Thanksgiving long ago, I’d just like to wish my American readers a very happy (and tasty!) Thanksgiving!

Onion Flowers

Recipe and Instructions can be found at the LCBO's Food & Drink website.  

I followed the directions exactly, but I added extra balsamic vinegar before serving and omitted the capers because I didn't have any.
Also, you may need to pull the 'petals' apart a little after baking to make them more flower-like! 
One more note is that while it's best to serve the onions whole for presentation, your guests may want to divide them in half at the table, as a whole onion may be a lot for some people to eat!

November 19, 2012

Brief Recap of My Brief Seoul Trip!

Sorry for the lack of posts in the last week, but I was away at a conference in Seoul, South Korea!  After my last post about some of the Korean dishes I tried in preparation for my trip, a few people expressed interest in hearing what I ended up eating in Seoul.  Unfortunately, I didn't end up eating much Korean food, or any food at all for that matter, but I thought I'd still share my experience while I work on making some new recipes to share later this week!

We (my sister and I) arrived in Seoul late Saturday night, then attended the conference from Sunday to Friday, and left Saturday morning.  Every day, the shuttle to the conference left at 6:45am (so I would wake up by 5:30), then the last meeting ended at 7:30pm, so we would get back to the hotel around 8pm.  On those nights, we could either choose to walk 20 minutes to find a restaurant, sit down to eat, and then get home late and miss out on sleep, or just eat some snacks and crash, and we always chose the latter because we were so tired!  The last couple of nights, the conference didn't end until 10 or 10:30pm, so we would get a 15 minute break around 6 to run and find food, and on those days all I had time to grab was yogurt, bananas, granola bars, and coffee!

The good news is the conference was very successful, and I still did get to try some great food at lunchtime.  I also don't mean to complain, as I still wasn't working nearly as hard as most of the other people there!  Here are some of the few pictures I took on the trip - excuse the bad quality, most were just taken quickly with my phone!

Gangnam

On the first night that we arrived, we were very tired after many hours of travelling, but still wanted to eat some dinner so we wandered around the neighbourhood (Gangnam) in search of food.  All we wanted was something to take back to the hotel, but the only restaurants we found were sit-down, and all only had Korean menus, which is a problem for a vegetarian (my sister) who can't be sure what she's ordering!  We ended up just grabbing bagels from a coffee shop, but it was actually the best bagel I've ever had!  So soft and filled with cream cheese and fig jam - yum!

fig and cream cheese bagel

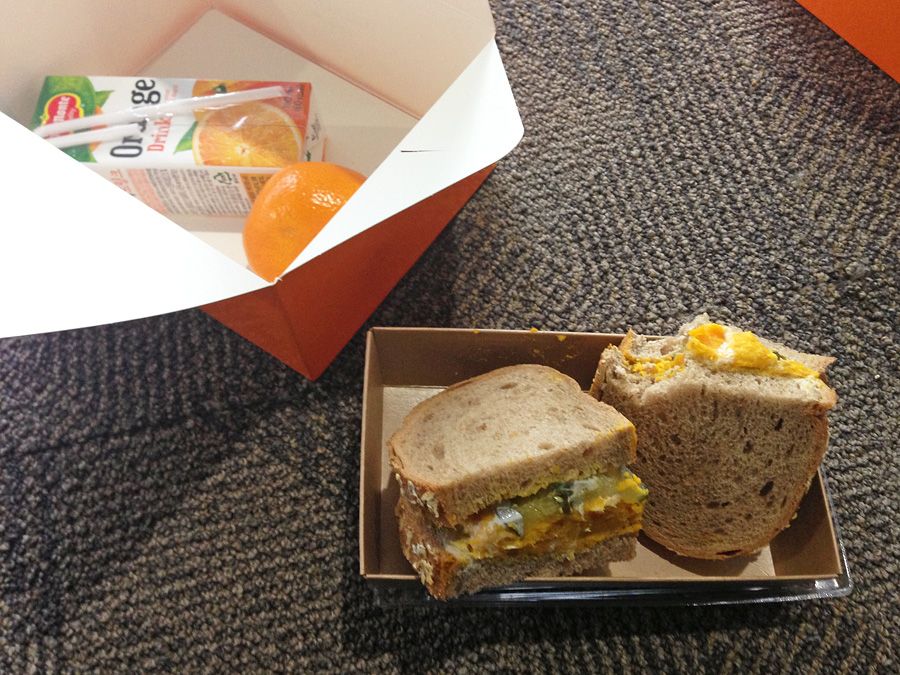
At the conference, they had boxed lunches (both meat and vegetarian) available.  On the first day, I tried the vegetarian option, which was a pumpkin sandwich. 

pumpkin sandwich lunch

I was pretty disappointed when I opened it up to find a teeny tiny sandwich that had pumpkin, pickles, raisins, and mayonnaise on it (very strange!), a little orange, and that's it!  Definitely not enough food to sustain me until 8pm!

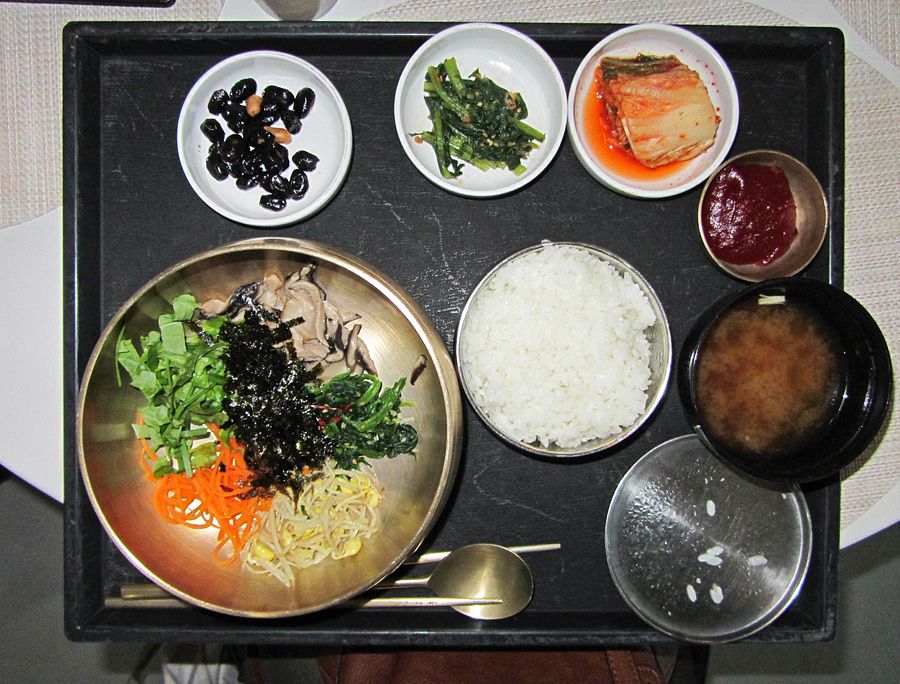
So on the following days we tried the restaurant lunch option, which had a couple different set meals available.  The vegetarian option was either a vegetable sandwich (which was pretty much just lettuce on bread) or bibimbap, so my sister and I tried the bibimbap a few days, and it was delicious!

bibimbap

The meal came with rice and a ton of different side dishes, some of which I'm not even sure what they were, and gochujang, a spicy red pepper paste.  From what I was told, you just mix everything together in the big bowl and eat!  It was much more filling than the sandwiches and I liked that I got to try some authentic Korean food!  If anyone knows what those little black things are in the top left corner, I'd love to know, as they were very tasty!

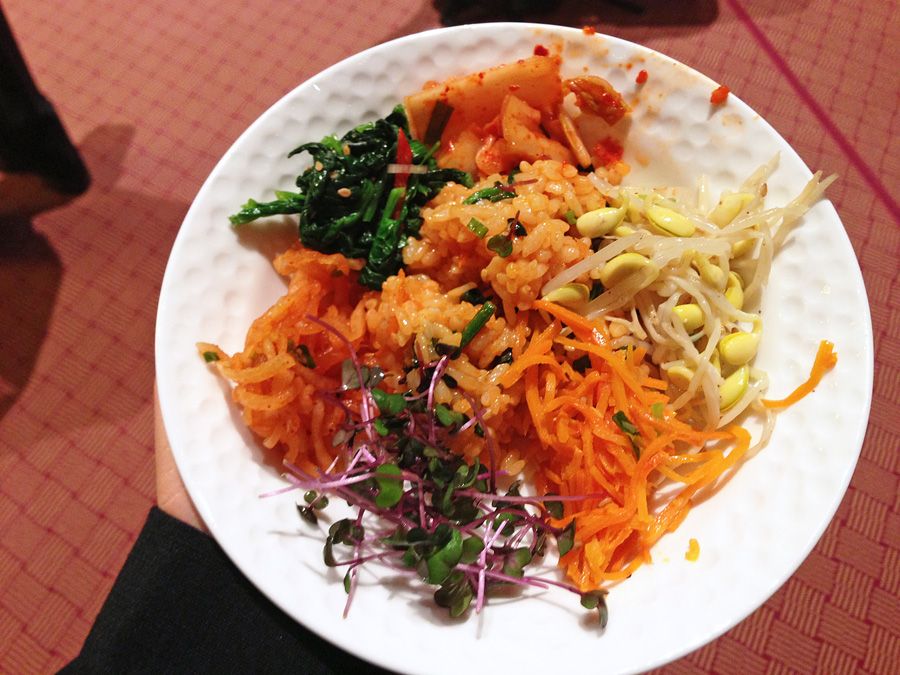
I also tried another version of bibimbap at the opening reception:

bibimbap

They had a bibimbap station, which was the only vegetarian option at the reception aside from salad, so I filled up on it!  (I'm not vegetarian, as most of you know, but I am very picky about what meat I do eat!)

On one of the conference days, our session went so late in the morning that lunch was already sold out before we could get it, so we went down to the underground mall below our conference center (COEX Mall) to find something to eat.  We ended up choosing a Japanese restaurant because it had big servings, lots of vegetarian options, and good prices! 

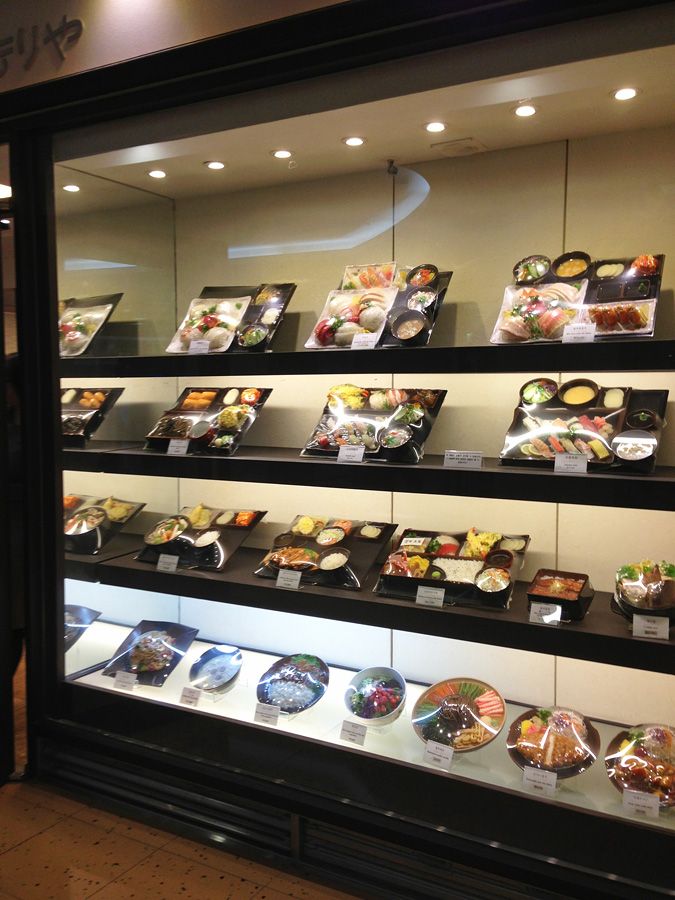
I loved how most restaurants in Seoul had displays in their front window so you could see the food options before choosing to eat there - so helpful!

Korean store window

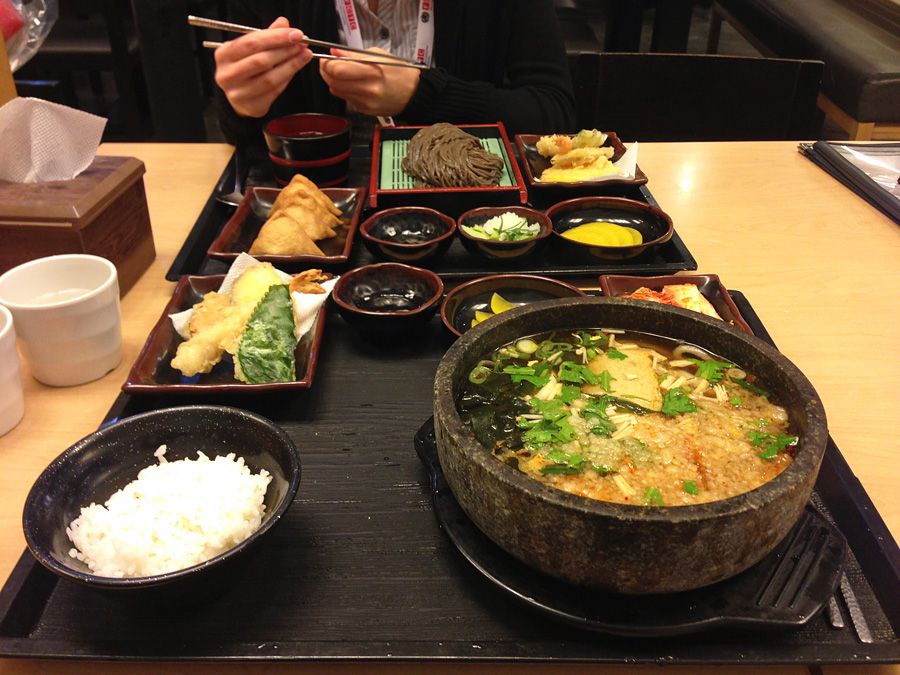
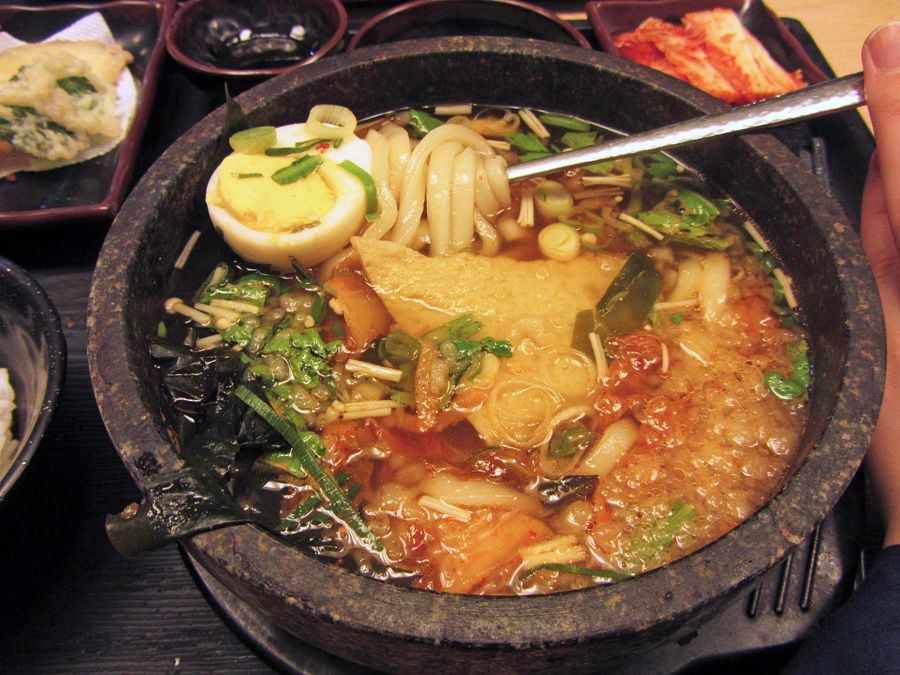
My sister ordered a buckwheat (soba) noodle meal, which you can see in the back of the picture below.  I chose a kimchi udon bowl, so that I was still incorporating some Korean flavours into my lunch!

Japanese lunch

The udon bowl was HUGE and I couldn't finish it all, but it was very tasty! 

kimchi udon bowl

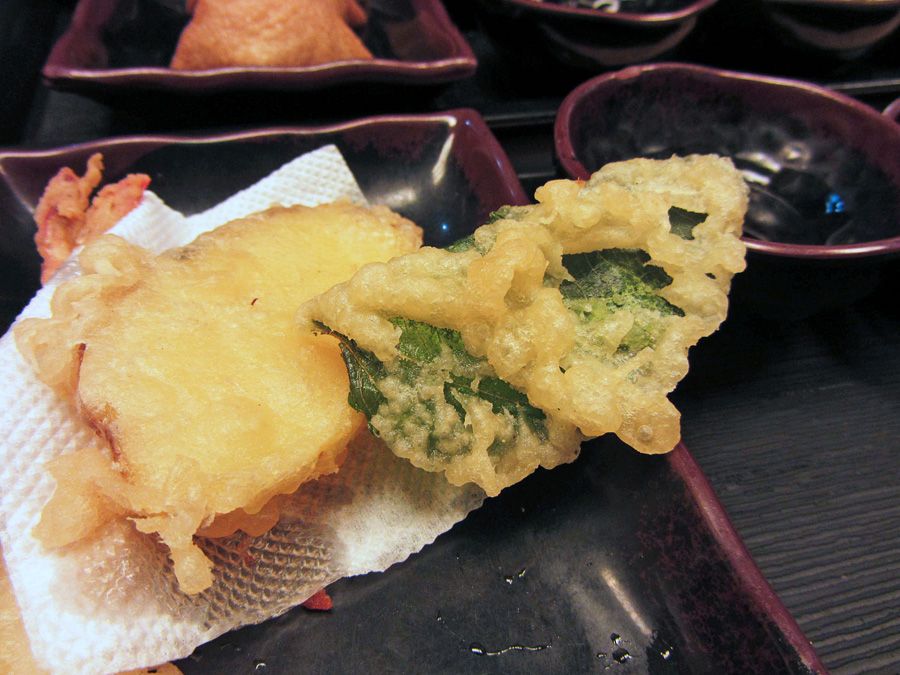
It also came with tons of side dishes, including tempura.  I think this was the first time I'd ever seen a fried (basil?) leaf as part of tempura!

tempura

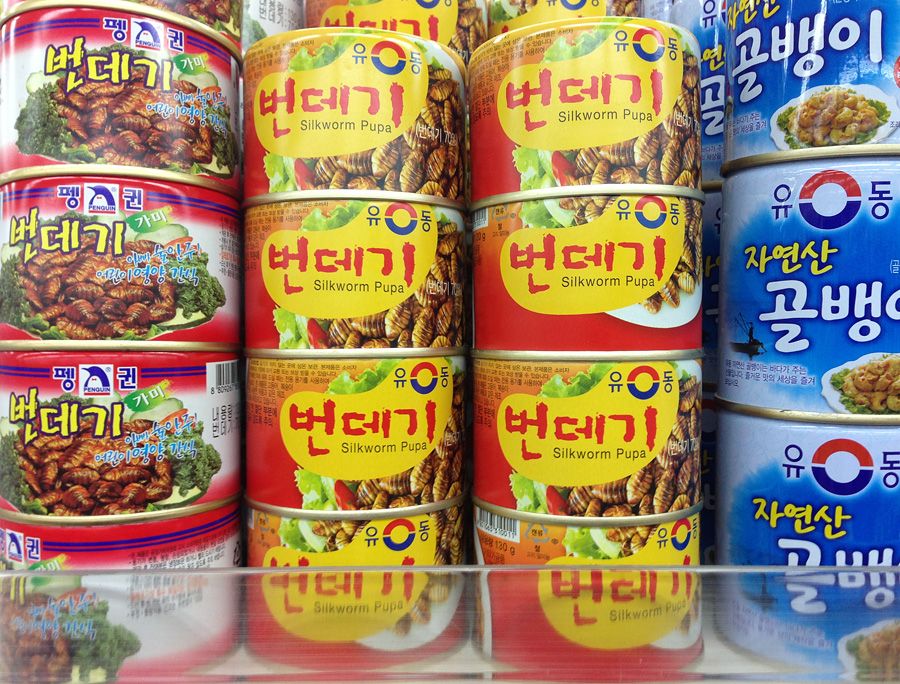
The rest of my meals were usually just grabbed from a 7-11 or supermarket.  I always love looking at groceries in other countries though, as you can usually spot some interesting finds!  One of the more unusual items I saw in a few stores was silkworm pupa.  I have no idea what you do with it, and did not buy one to find out!

silkwork pupa

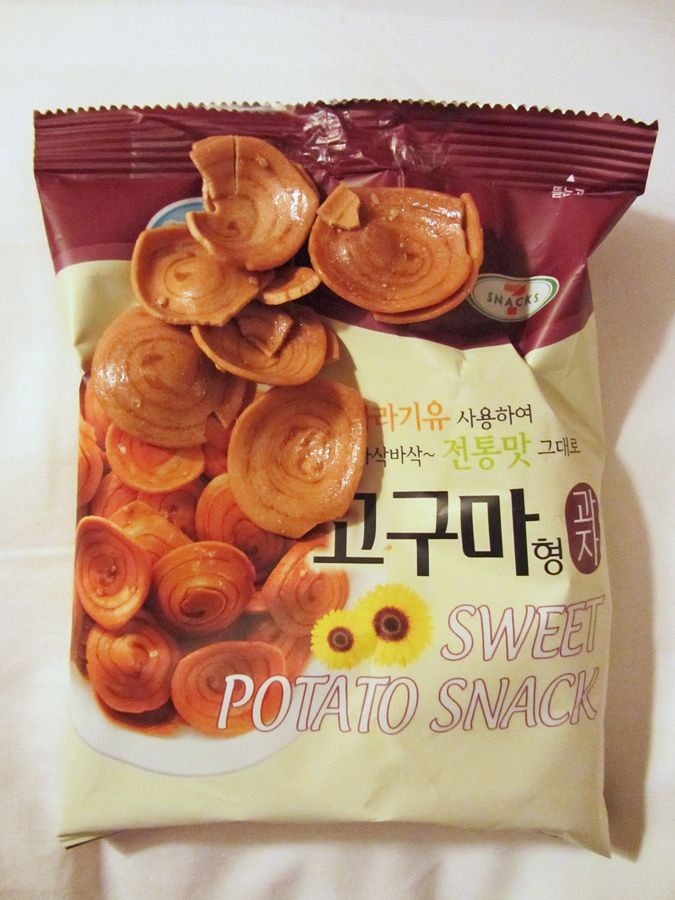
My favourite snack I tried was these sweet potato chips.  They were like a cross between candy and chips, and they were so good - I wish I bought more!

sweet potato chips

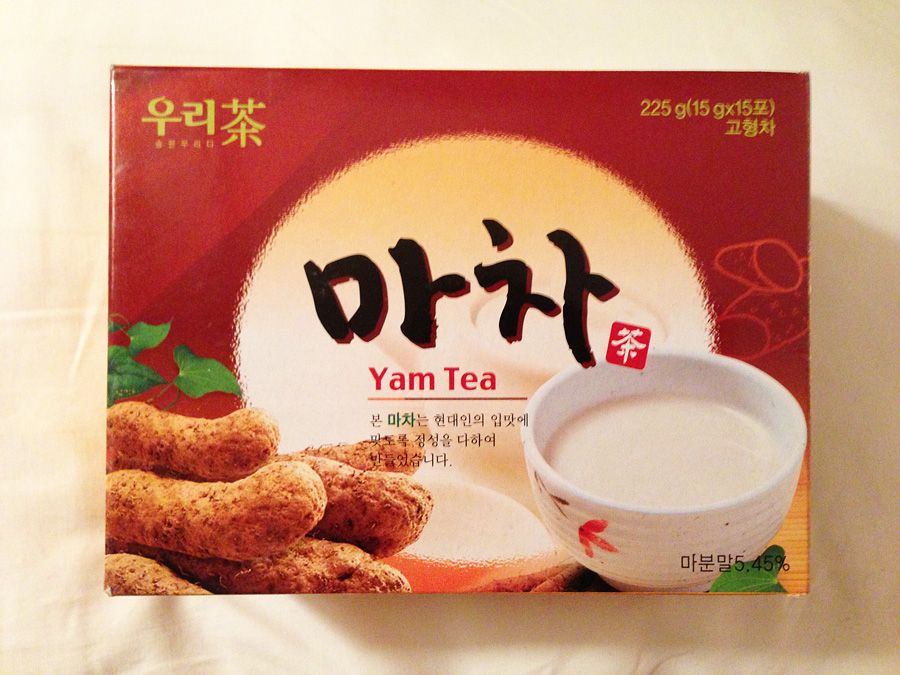
Coffee and tea seem to be very popular in Seoul.  Almost every second store was a coffee shop (I had enough flavoured lattes and coffees there to last me a while!), and every store had so many types of instant coffee and tea drinks.  I bought this yam tea to bring back with me because it was so unusual.

yam tea

Unfortunately when I got home I realized it was not traditional tea as I imagined, but a white powder that you add to hot water, and I wasn't a fan!

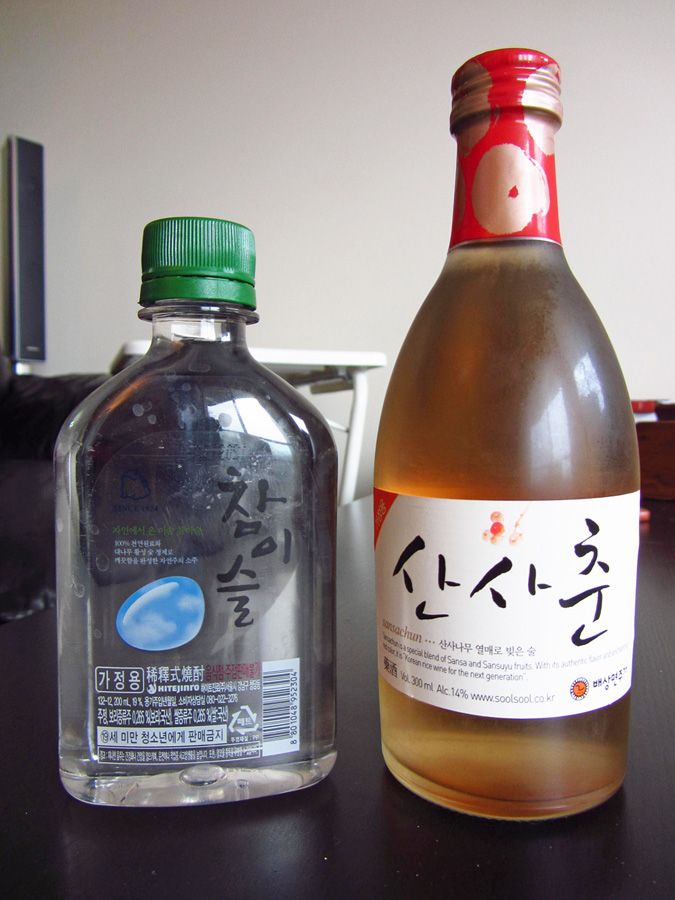
I'm more looking forward to trying the other souvenir I brought back - soju and rice wine!

soju and rice wine

Soju is a clear, slightly sweet distilled liquor that's native to Korea.  I bought that small (around 300mL) bottle on the left for just over a dollar, so it's really cheap too!  There were also a lot of rice wines and fruit wines for sale; we bought some plum wine and black raspberry wine as gifts for others, and I bought sansachun rice wine for myself.  I'm looking forward to trying both!

On the way back home, my sister and I were craving "Western" comfort food, and treated ourselves to a large rocket pizza at the airport.  It was just what we needed!

rocket pizza

A tip for travelers that most people probably know but I didn't until recently - 'rocket' is the same thing as arugula.  When I went to Australia a couple years ago, I saw 'rocket' everywhere on menus but avoided it because I had no idea what it was.  When I found out it was just arugula I was kicking myself, because I love arugula!

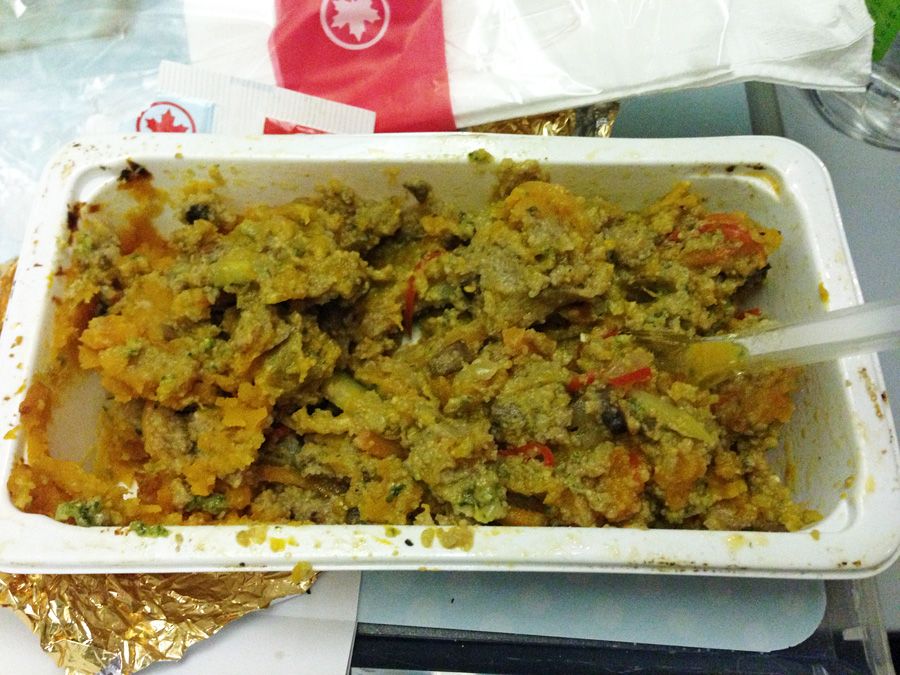
One more pic I had to share was this plane meal I had on the way home:

Plane food

It was probably the most disgusting looking thing I've ever eaten, but it was surprisingly delicious!  I know there was mashed sweet potato and vegetables in there, but I have no idea what the rest of it was made of.  I wish I knew because I almost want to try recreating it at home!

Another tip for vegetarians or veggie-friendly travelers - request a vegetarian meal for the plane when you book your ticket.  My sister and I do this for every flight we take - the meat on planes creeps me out and the vegetarian meals are usually pretty good, plus you always get delivered your special meal before everyone else!

That's it from my trip - sorry it's a bit disappointing!  I never ventured into the city center (it was a far subway ride from where we were staying), so I'm sure Seoul has a lot more to offer and you certainly shouldn't take my limited experience as representative of the food there!  I'd love to go back one day and try more!

I've spent the last couple of days catching up on sleep (I slept 12 glorious hours my first night back!) and will soon start catching up on recipes - I hope to have a new one to share later this week!

November 09, 2012

Venture into Korean Cuisine!

I'm currently on my way to Seoul, South Korea, for a conference (yes, I'm lucky to be going, but it will be 7 days straight of working twelve hour days without a free day, so it likely won't be one of my favourite trips!), and before I left I decided to try my hand at a few Korean dishes in preparation!

I'm a big fan of trying different cuisines and love making Thai and Indian dishes (among others) at home, but I've never been interested in trying Korean food because I've always assumed I don't like it.  To be fair though, I'd never really given it much of a chance, so I bought a few Korean ingredients (like kimchi and gochujang, a red pepper paste) and chose a few recipes to test out!

(Sorry in advance for the instagram pics, that's all I had for these dishes!)

kimchi and gochujang

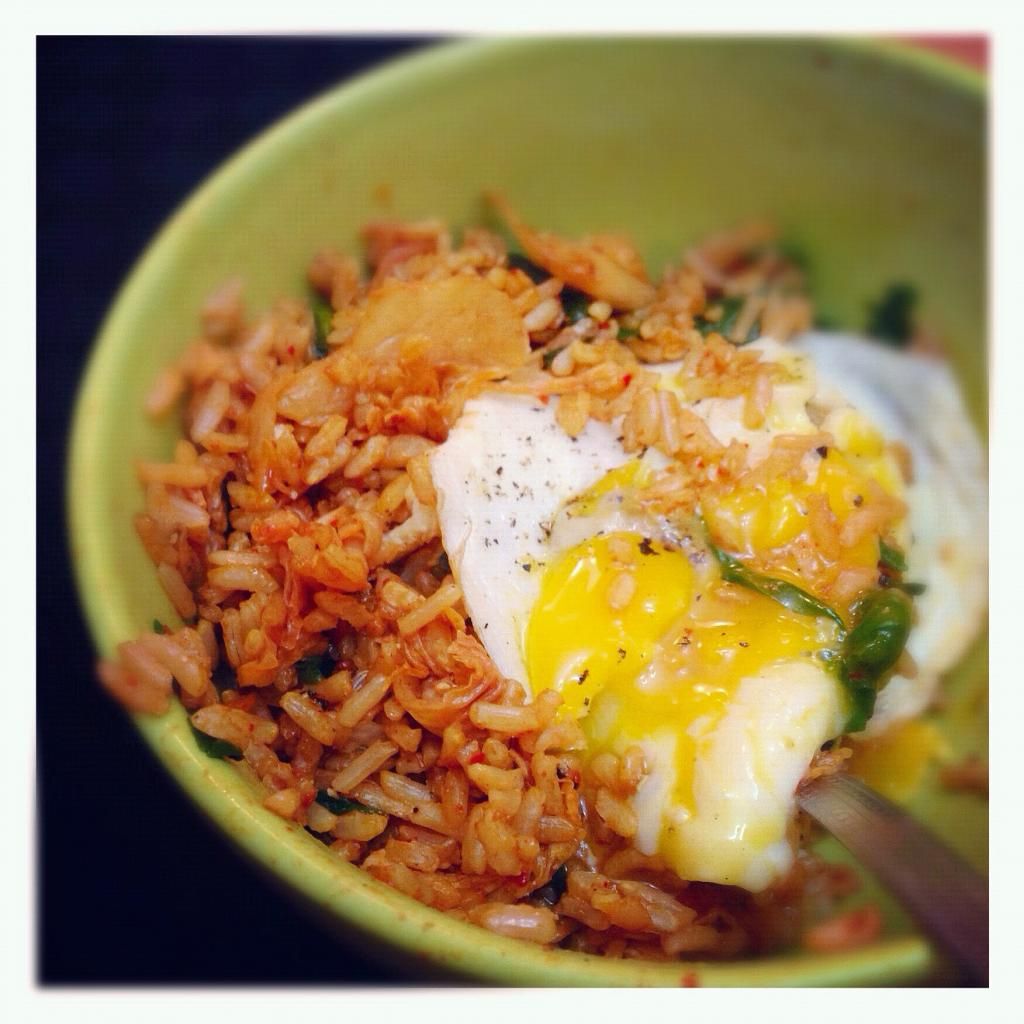
The idea of fermented cabbage didn't appeal to me that much, but I forced myself to try a piece of kimchi on its own and actually kinda liked it!  So I decided to start simple with kimchi fried rice:

kimchi fried rice

I used a recipe from the Kitchn, which I liked because it added some extra greens to the dish.  The only changes I made were to add some salt and pepper for seasoning and cook a fried egg instead of scrambled.  It was super easy to make and I thought it was a great introduction to Korean flavours.  I'm not crazy about fried rice in general, and I can't say I was CRAZY about this meal, but I still happily ate it all.

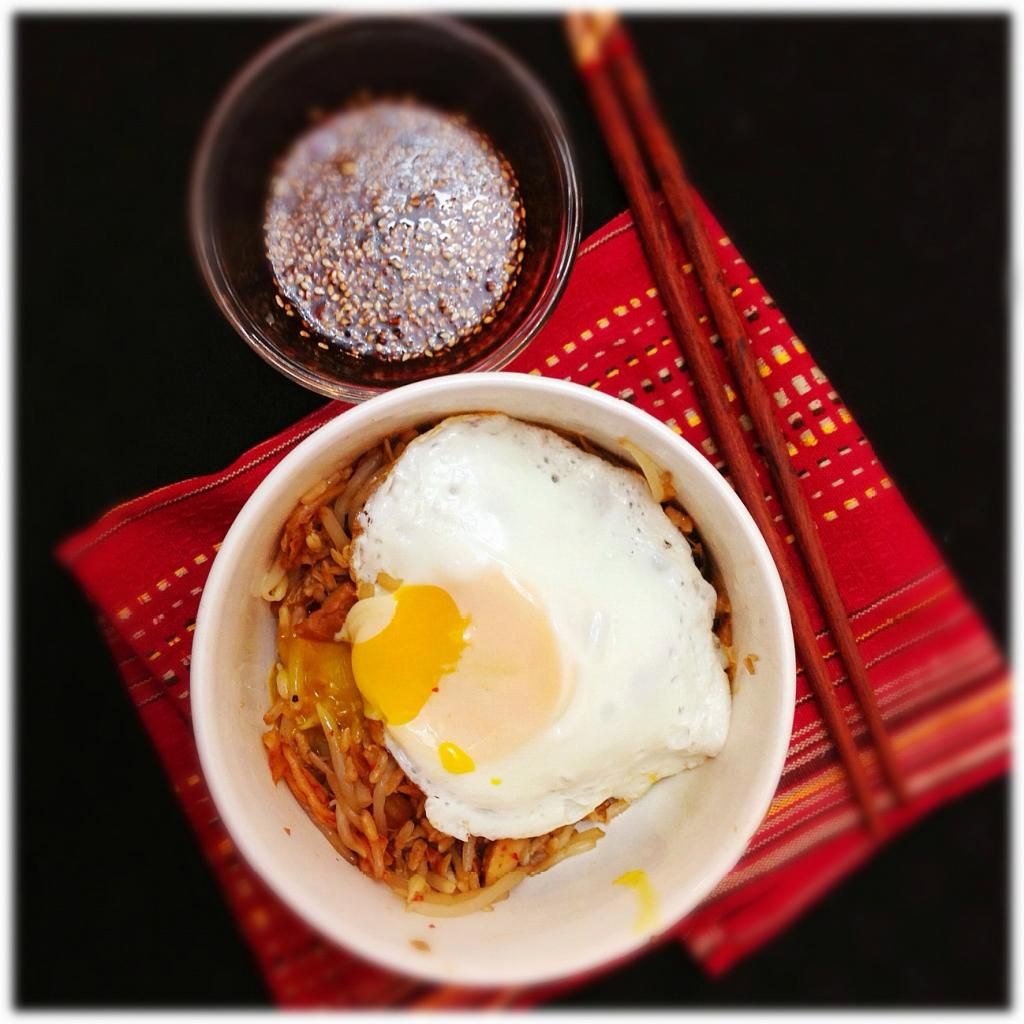
Next up, I tried kongnamul bap (beansprout rice bowl), which is kind of like a fancier version of kimchi fried rice, with the addition of bean sprouts, mushrooms, and a soy sauce dressing.

beansprout rice bowl

I used mushrooms instead of beef and topped my bowl with a fried egg, as Kevin from Closet Cooking recommends.  I liked the extra textures and flavours that the vegetables added, but did find the soy sauce very overpowering, and I'm not a huge fan of soy sauce.  I'm not sure I'd make this again any time soon, but I think that's just because of my personal preferences.

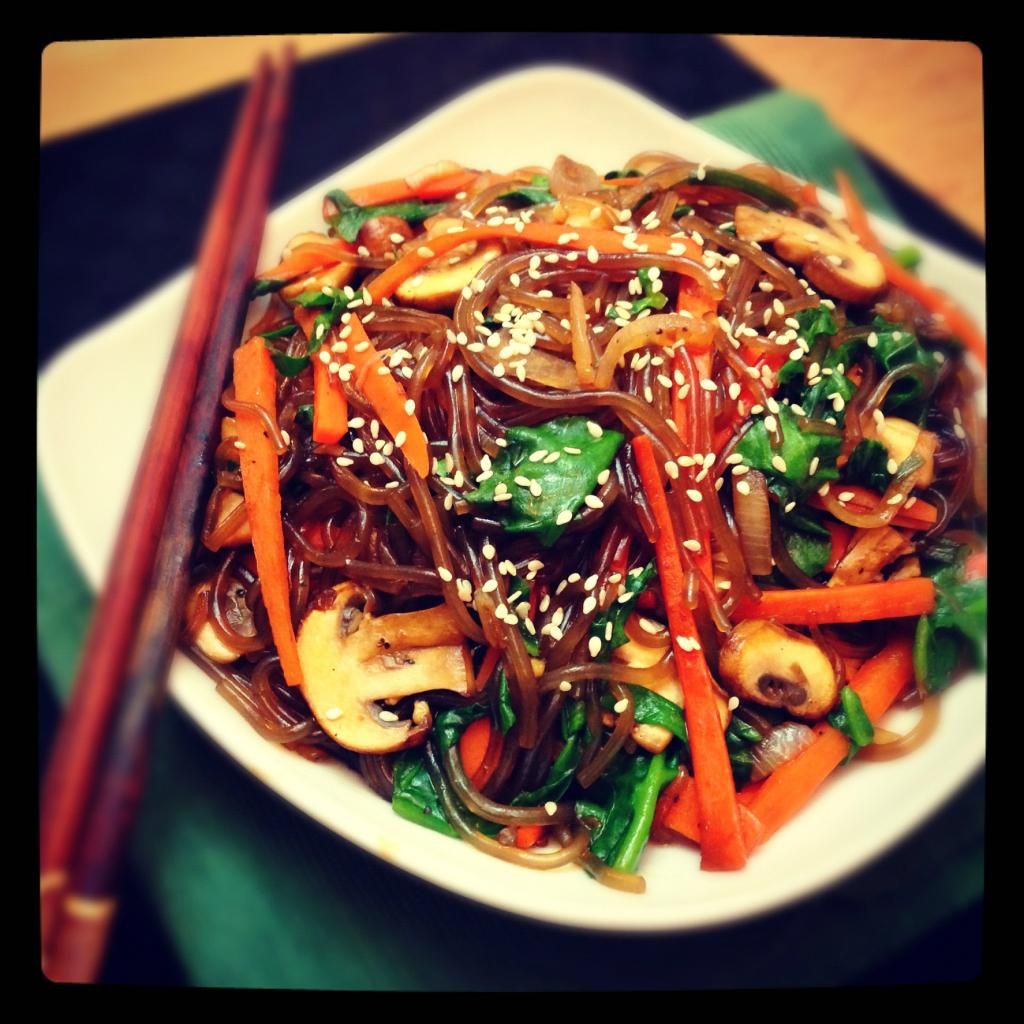
I had higher hopes for my third attempt, jap chae (or Korean glass noodles), as it's supposed to be a very popular dish, and I generally prefer noodle dishes to rice dishes.

jap chae

I had a really hard time finding the sweet potato noodles needed for this dish, but after reading the label of every single kind of noodle in the Asian market, I finally found them in a box against the wall on my way out!  They were kind of strange and chewy, but I liked them!  And the overall dish was definitely my favourite of the three; the flavours were pretty basic, but I liked that it was a bit healthier, and as I said earlier, I love noodles so much more than rice!

In the end, I don't think I can say I'm now converted to a lover of Korean food, but there are still a LOT of dishes I haven't tried yet, and I've learned that while I might not love it as much as other cuisines, I at least don't have to be afraid of it!  I'm not sure how much authentic Korean food I'll get to try in Seoul as I have a feeling that by the end of our exhausting days I'll just want to grab something from the food court and go fall asleep in my room, but I'll be sure to update you all on my eats when I get back!  (And if you have any recommendations for something I should try to get while I'm there, let me know!)

Now would also be a good time to note that I'll have limited time for blog activities while I'm away, so I won't be able to post anything next week and might be slow in responding to emails and comments, but I can't wait to get back and start working on holiday recipes! 

November 06, 2012

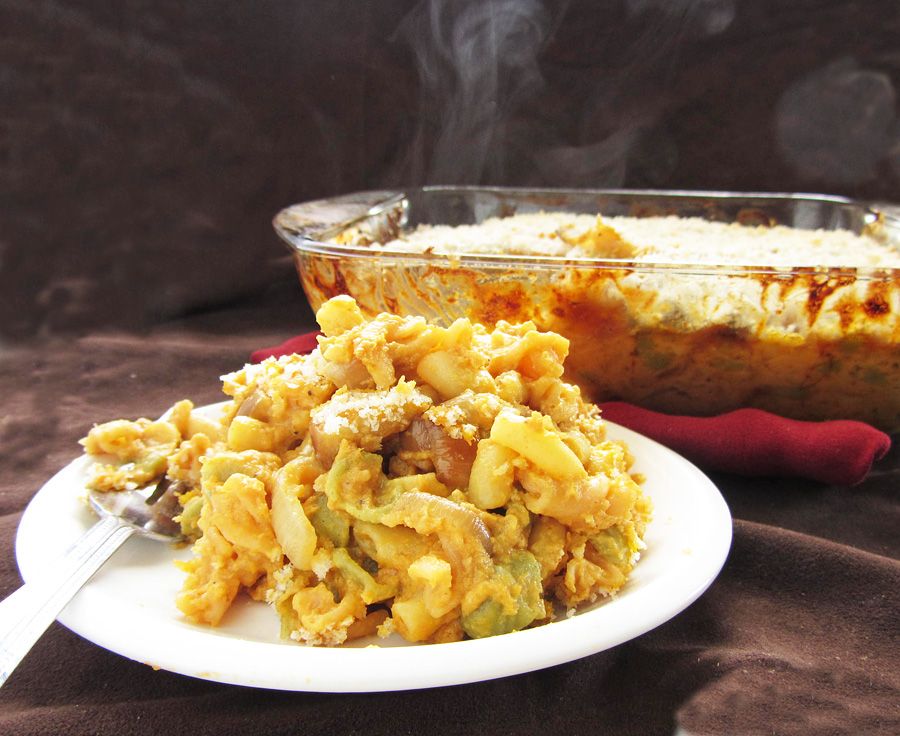
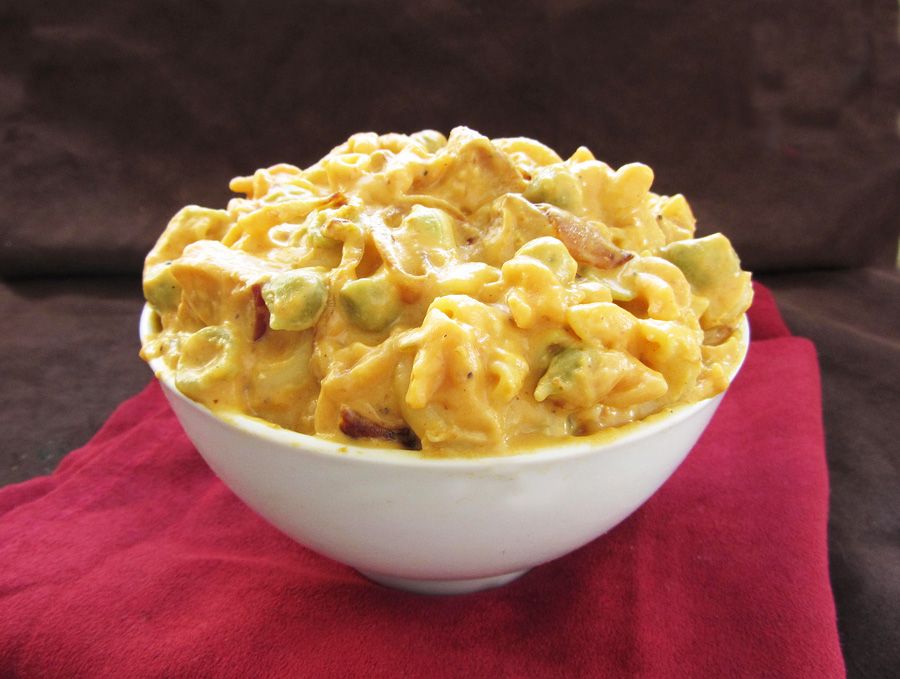
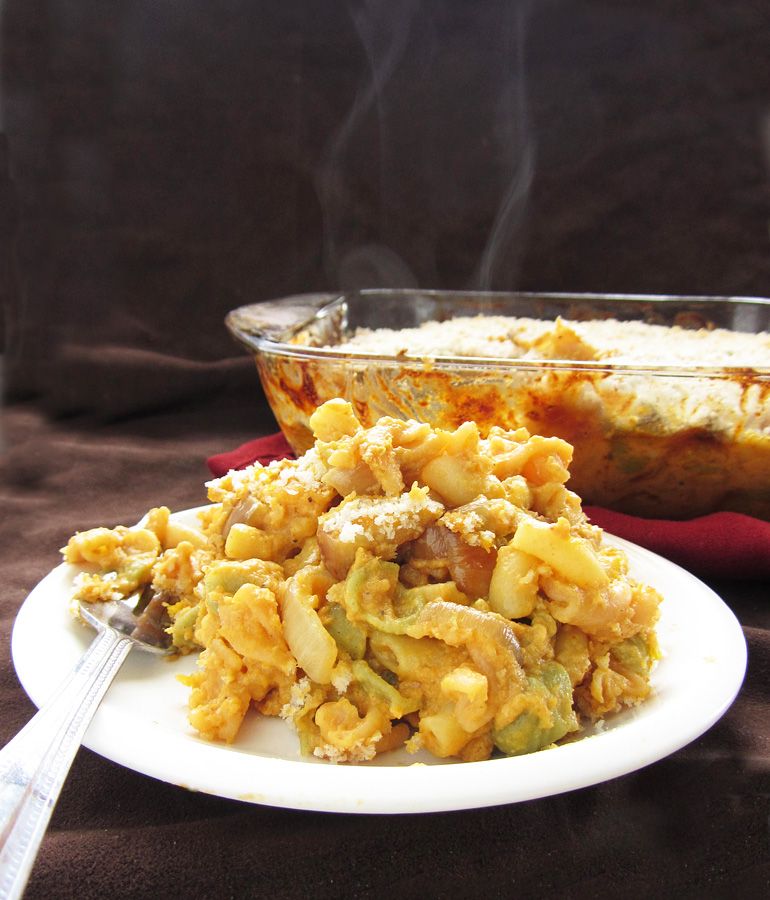
Pumpkin Mac & Cheese with Apples and Caramelized Onions

Pumpkin Mac & Cheese with Apples and Caramelized Onions

Now that I’ve seen my first official snowfall of the season and have broken out my winter hat and gloves, all I can think about are warm and cozy meals, and when it comes to comfort food, it doesn’t get much better than mac and cheese!

But as you’ve probably guessed from the title, this is no ordinary mac and cheese! And even though it might sound a little weird, I promise that it works!

Pumpkin Mac & Cheese with Apples and Caramelized Onions

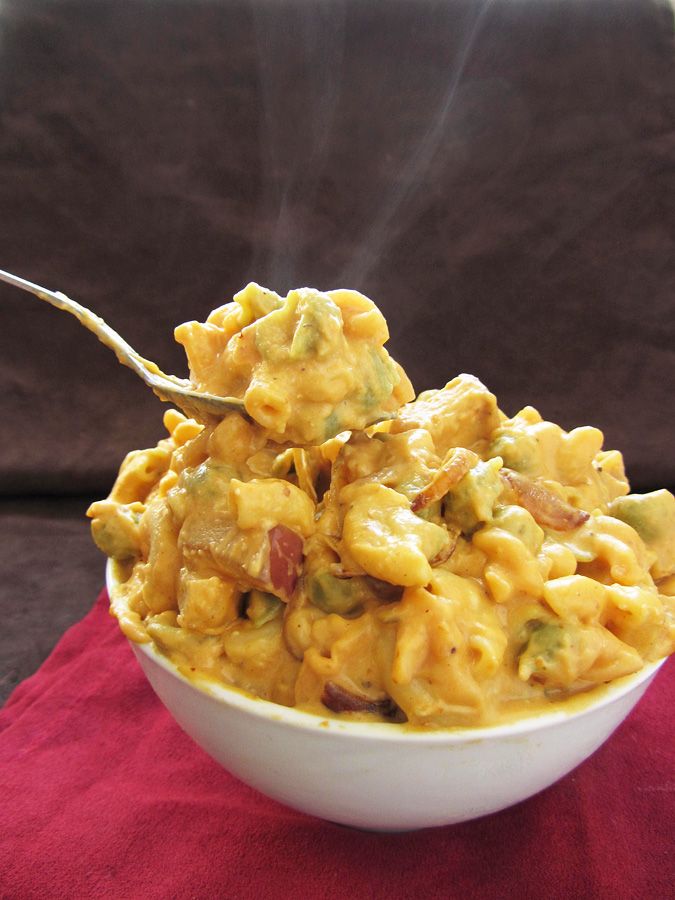
This mac and cheese has a ton of flavour going on – there’s pumpkin puree, pumpkin beer, sautéed apples, caramelized onions, and smoked applewood cheddar cheese – and it all works together so well!

I can never decide if I prefer stovetop or baked mac and cheese, so I tried this both ways. I stopped after cooking it on the stovetop and dug in to test it out. You'll probably want to do the same thing because it’s so hard to resist at this point, and I certainly wouldn't blame you!

Pumpkin Mac & Cheese with Apples and Caramelized Onions

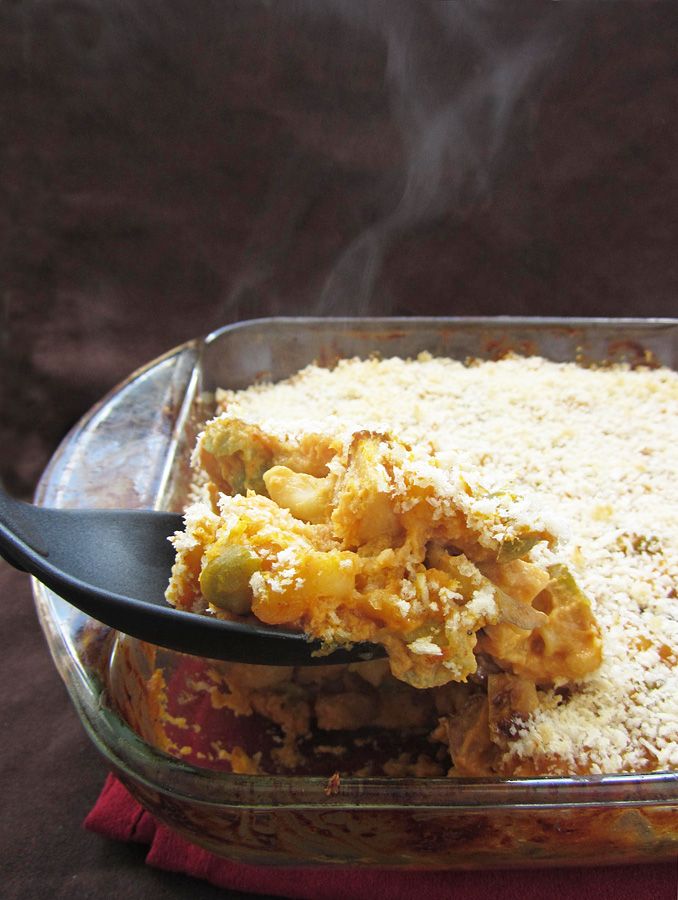
Or you could keep going; sprinkle some breadcrumbs on top and throw it in the oven so you get a crunchy topping with cheesy goodness underneath - it really just depends on how you like your mac and cheese. I loved it both ways!

Pumpkin Mac & Cheese with Apples and Caramelized Onions

I loved that the dash of maple syrup and addition of apples added a touch of sweetness to cut the richness of the cheese, but there wasn’t an apple in every bite so it was like a fun surprise every time you ate one! I also like the smokiness that the applewood smoked cheddar added, but if you don’t like smoky cheeses (my sister complained about the smell every time I heated it up), you could just use a regular sharp cheddar cheese, or I think gruyere would work well too!

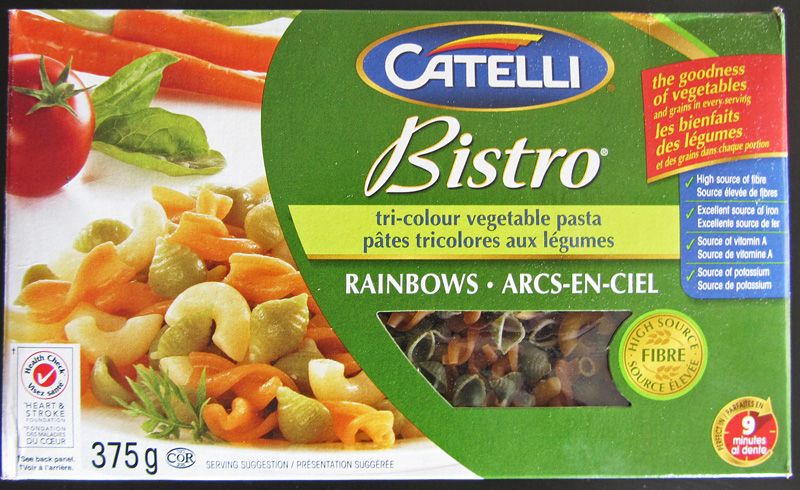
You’re probably wondering why there are strange green things in my pasta, but that’s just because I used this tri-colour vegetable pasta:

vegetable pasta

I realize this isn’t exactly a healthy meal, but with the vegetable pasta instead of regular pasta, the addition of pumpkin, apples, and onions, and using low fat milk, I like to think that it’s at least better for you than a lot of other mac and cheese recipes.

And I certainly had no problem finishing this whole dish by myself (though not all at once, of course!)

Pumpkin Mac & Cheese with Apples and Caramelized Onions

Pumpkin Mac & Cheese with Apples and Caramelized Onions

Adapted from Her Campus, who adapted from Rachel Ray

Serves 4-6

Ingredients:

8oz dry macaroni pasta (I used tri-colour vegetable pasta)
1 tablespoon olive oil
1 large onion, thinly sliced
1 apple, diced (I used Red Delicious)
2 tablespoons unsalted butter
1-1/2 tablespoons all-purpose flour
1/2 cup pumpkin beer
1 tablespoon pure maple syrup
1/2 cup evaporated 2% milk (regular 2% milk would work too)
1/2 teaspoon mustard powder
1/4 teaspoon nutmeg
Salt and pepper
1 cup pumpkin puree
1-1/4 cups grated sharp cheddar cheese (I used applewood smoked cheddar and I used 1-1/2 cups to use it up)
~1/4 cup panko bread crumbs, optional

Directions:

Preheat oven to 350°F.

Cook pasta in a large pot of salted boiling water, according to package directions.  Drain and set aside.
Meanwhile, heat olive oil in a large skillet over medium heat.  Add onions, stir to coat with oil, and let cook, stirring occasionally, about ten minutes.  Season with salt and pepper.  Let cook another 5 minutes or so and then add the chopped apples.  Continue to cook apples and onions, stirring occasionally, for an additional 15 minutes or so, until onions are caramelized and apples are softened and golden brown.  Set aside.

About ten minutes before your onions and apples are done cooking, you can start the roux.  Add butter to a medium saucepan and let melt over medium heat.  Add flour to the melted butter and whisk continuously for about a minute. Raise heat a bit and add the beer.  Reduce until almost evaporated and mixture is quite thick, then whisk in the maple syrup and milk.  Season with mustard powder, nutmeg, and salt and pepper.  Let cook until thick enough to coat the back of a spoon.  Whisk in the pumpkin then whisk in the grated cheese until incorporated.

Stir together the pasta, cheese sauce, onions, and apples.  At this point, you can serve the mac and cheese as is for a stovetop version, or you can bake it.  If you choose to bake it, spread it into an 8x8 glass baking dish and sprinkle breadcrumbs on top.  Bake in preheated oven for about 30 minutes, let cool slightly, then serve.

November 02, 2012

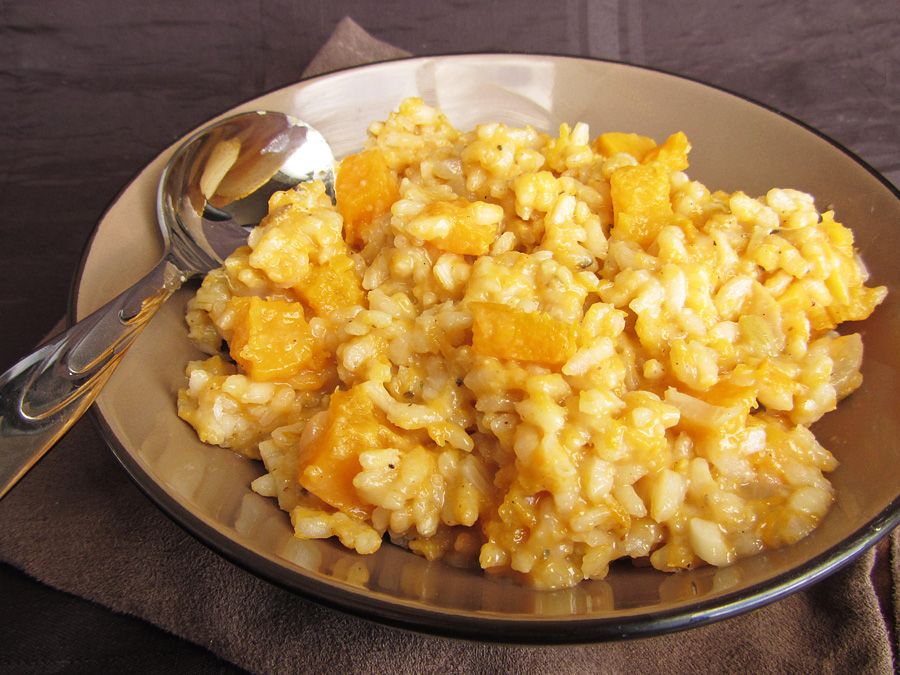
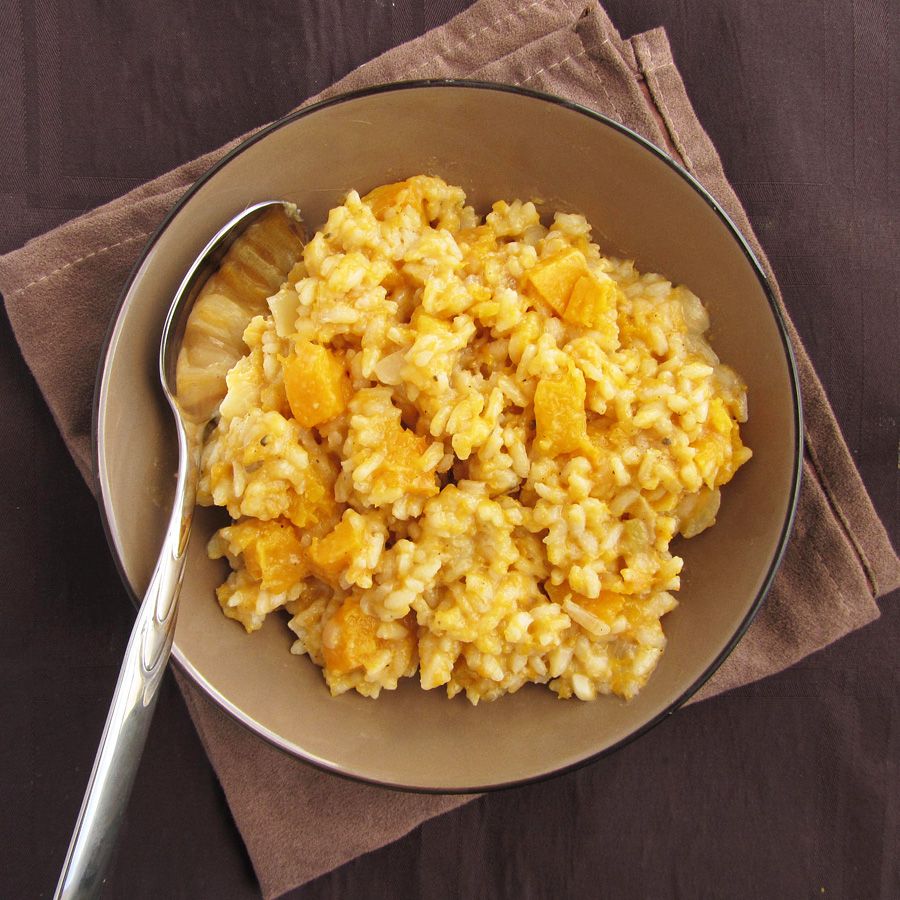
Pumpkin Ale Risotto

Pumpkin Ale Risotto

I cannot believe it’s already November!  Just last week I was walking through fallen leaves in a leather jacket; today I had to wear mittens and it snowed in my hometown this morning!  I’m even kicking off the holiday season tonight with the Holiday Home Tour in London – you get to walk through five (very nice) houses that have been professionally decorated for the holidays, and also enjoy some entertainment and treats along the way.  I admit part of the reason we go is to get a peek into other people’s elaborate homes (which are much nicer than my little apartment!), but it’s also fun to get into the Christmas spirit and start getting decorating ideas!

Even though we’re heading towards winter, I hope it’s not too late for pumpkin recipes because I’ve still got a couple good ones to share, like this pumpkin ale risotto!  I bought pretty much every type of pumpkin beer I saw this fall, and I just couldn’t drink them all fast enough so I tried to experiment with using them in my food.  I had recently seen the idea of using beer instead of wine when you’re making risotto, which got me thinking that pumpkin ale would be perfect to use in a pumpkin risotto!  I used a basic risotto recipe but replaced the white wine with pumpkin ale, added some pureed squash along with some roasted pieces of squash for texture (my grocery store was out of pumpkins but squash worked just as well), then added a bit of nutmeg and sage for seasoning.  The result was a creamy and comforting risotto with a subtle pumpkin flavour that’s perfect for either fall or winter!

Pumpkin Ale Risotto

Pumpkin Ale Risotto

Adapted from several sources, including Chow.com and Two Girls One Food Processor

Serves about 4

Ingredients:

1 (~3lb) cooking pumpkin or squash (I used butternut squash because pumpkins weren’t available at my store)
2 tablespoons olive oil, divided
Salt & pepper
4 cups (1L) low-sodium chicken or vegetable broth
1 small yellow onion, peeled and diced
2 cloves garlic, minced
1-1/2 cups dry Arborio rice
1 cup of your favourite pumpkin ale
1/4 to 1/2 teaspoon nutmeg
1/2 teaspoon dried sage or rosemary
1/4 cup grated parmesan cheese (or more if desired)

Directions:

Preheat oven to 400°F.  Peel and slice squash/pumpkin into small, 1/2-inch cubes.  Toss with 1 tablespoon olive oil and season with salt and pepper.  Transfer to a foil-lined baking sheet and roast in preheated oven for 20-25 minutes, until tender.  Mash enough cubes to make 1 cup of mashed squash/pumpkin, and reserve 1-1/2 cups of cubed squash/pumpkin.  Save any remaining squash for another use.

Add chicken or vegetable stock to a medium pot, and bring to a boil.  Reduce heat to simmer and leave gently simmering as you make the risotto.

Heat remaining tablespoon of olive oil in a large deep skillet over medium-high heat.  Add the onion and sauté until soft, about 4-5 minutes, stirring often.  Add garlic and stir for another 30 seconds, then add rice and stir for 1-2 minutes to toast the rice.  Add pumpkin ale in two additions, stirring until absorbed each time. 

Set a timer for 20 minutes, and for the duration of the timer, continuously add the simmering stock to the rice a ladle at a time, stir until absorbed by the rice, then add another ladle, stir again, etc.  Keep stirring the rice constantly with a flexible heat-proof spatula. When the 20 minutes are up, taste and ensure rice is cooked to al dente. 

Add the mashed pumpkin, nutmeg, and sage and stir until incorporated.  Season with salt and pepper, add the parmesan cheese, stir and taste, and adjust any spices or seasonings to taste (you may wish for more nutmeg or the addition of cinnamon if you really want the pumpkin flavours to come through).  Gently stir in the cubed squash/pumpkin.  Serve warm.