Pages

September 27, 2013

Chicken, Pear, & Goat Cheese Salad with Wheat Beer Vinaigrette

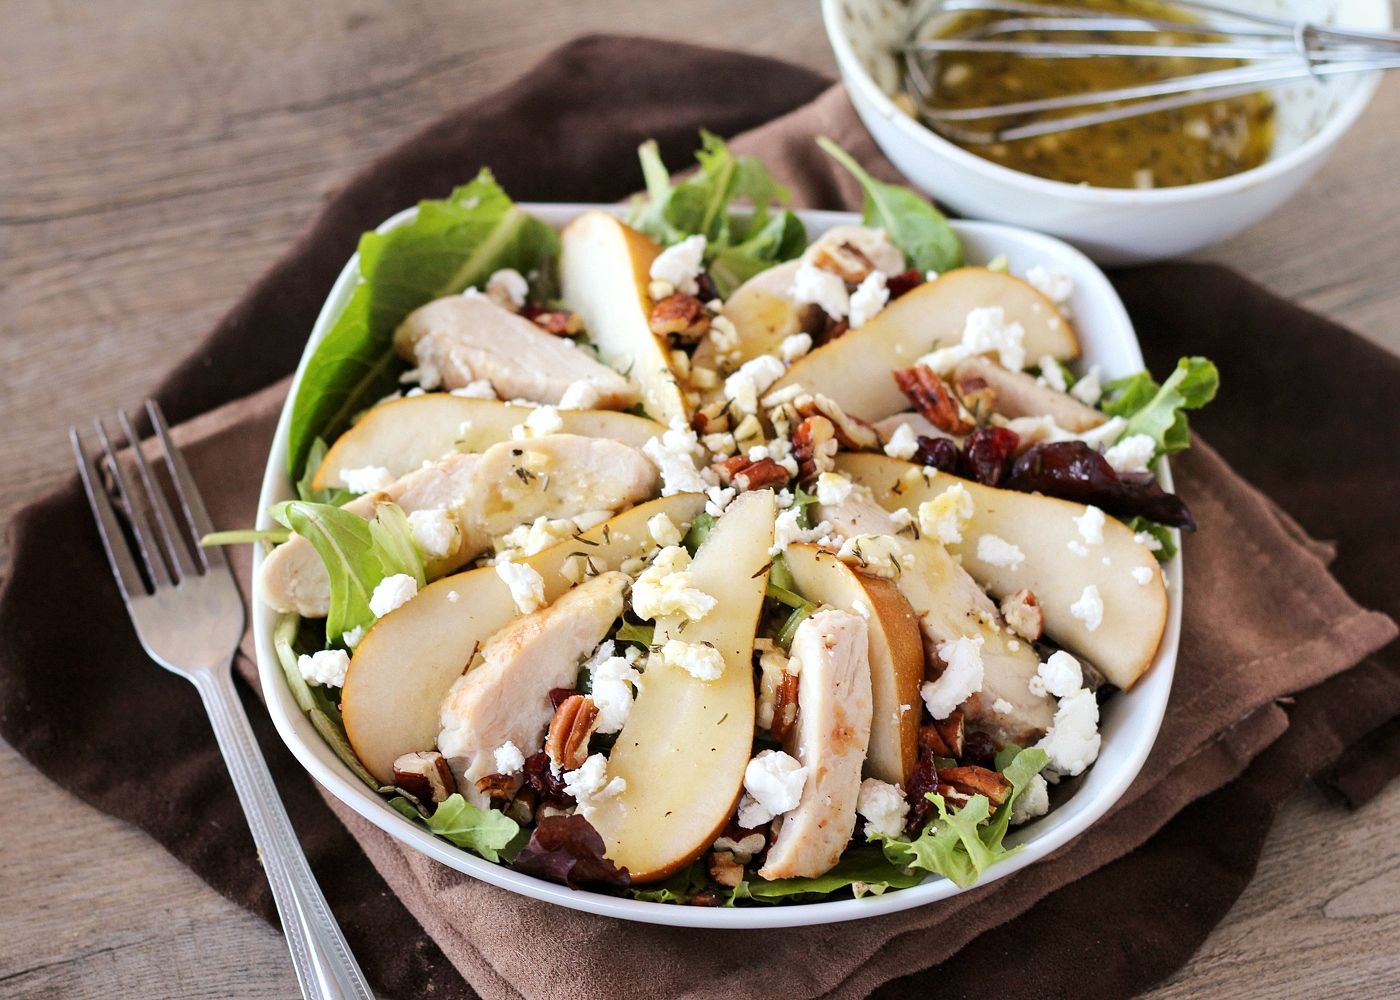
Chicken, Pear, and Goat Cheese Salad with Wheat Beer Vinaigrette

Now that fall has officially begun, I’m craving all things autumn: apples, pears, cranberries, squash, sweet potatoes, apple cider, warm drinks, and pumpkin everything, though I’ve had particular cravings for pumpkin baked goods and pumpkin pie. It’s crazy to think that (Canadian) Thanksgiving is only a couple weeks away and I haven’t made anything with pumpkin yet – I think that needs to change this weekend!

But before I start baking, my first venture into comforting fall dishes began a little healthier with this salad!
Chicken, Pear, and Goat Cheese Salad with Wheat Beer Vinaigrette

I’ve been wanting to try using beer in a vinaigrette for a while now - the house salad at a popular restaurant chain around here includes a beer dressing, and though you can’t taste it, the idea of including beer in your dressing makes the idea of salad for dinner so much more exciting!  So I found a recipe for a pear and walnut salad with wheat beer vinaigrette from Vegetarian Times and used that as a base for the salad that I had in mind.

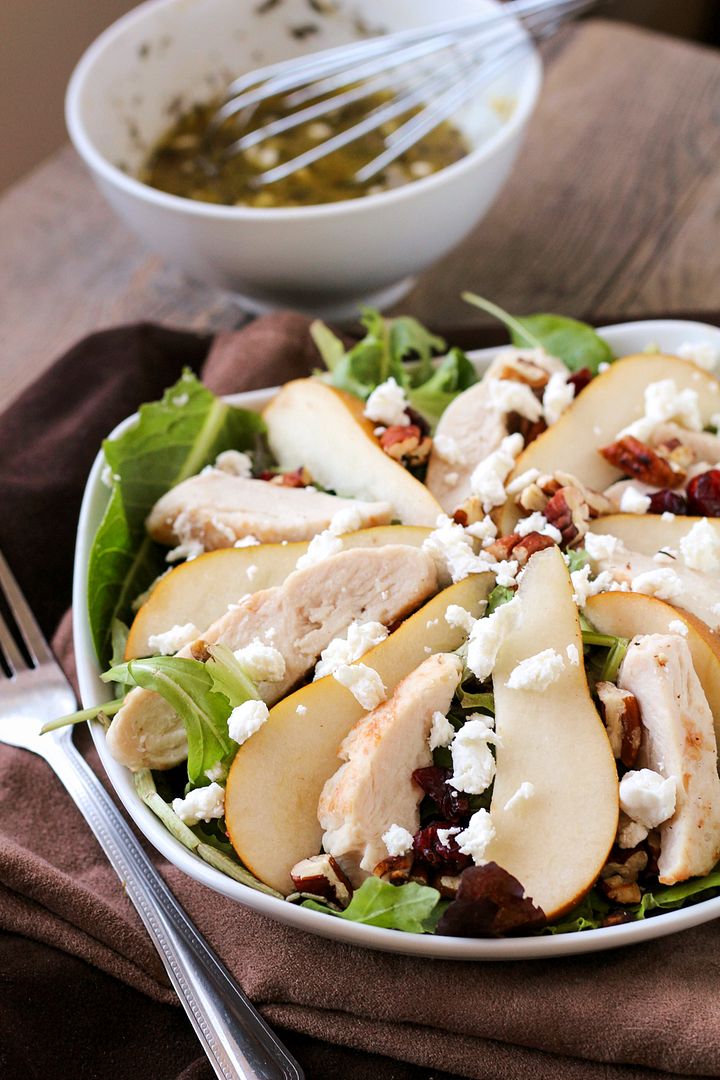
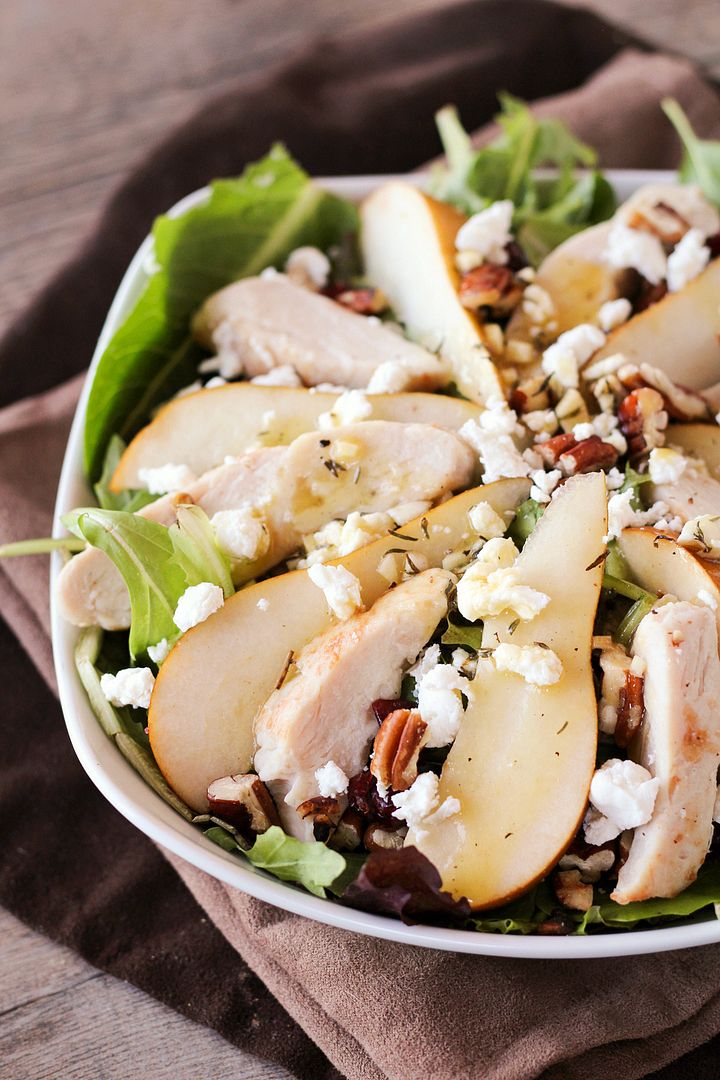
Wheat beer is pretty mild, but when you reduce it, it intensifies in flavour (which is why you don’t want to start with a strong or bitter beer).  Once you add all the other ingredients for the dressing though, you’d have no idea there’s beer in there, it just subtly enhances the flavour in a nice way that complements the other fall ingredients in the salad – including pears, goat cheese, pecans, cranberries, and chicken.
Chicken, Pear, and Goat Cheese Salad with Wheat Beer Vinaigrette

I loved this salad as is (and think it would be great for Thanksgiving!), but you could also make tons of substitutions to it to make it your own. Blue cheese instead of goat cheese would be delicious, or apples instead of pears, walnuts instead of pecans, spinach or arugula instead of mixed greens, or even leave out the chicken for a vegetarian side salad. You could also of course use any dressing you like if you don't keep beer in the house - a maple balsamic vinaigrette would probably taste great!

Hope you all enjoy the first official full weekend of fall!
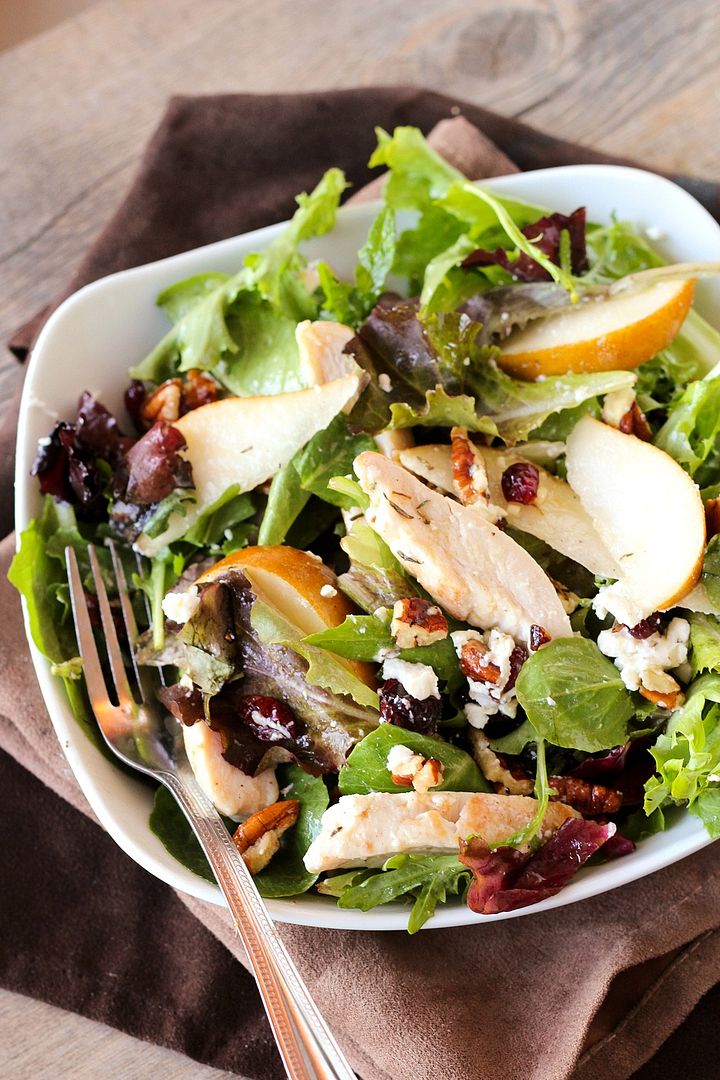
Chicken, Pear, and Goat Cheese Salad with Wheat Beer Vinaigrette

Chicken, Pear, & Goat Cheese Salad with Wheat Beer Vinaigrette

Adapted from Vegetarian Times

Serves 4 as a main dish

Ingredients:

For the Dressing:
1/4 cup + 2 tablespoons wheat beer
1 tablespoon minced shallot
1/2 tablespoon honey
1/2 tablespoon Dijon mustard
2 tablespoons balsamic vinegar
1/4 cup extra virgin olive oil
1/4 teaspoon dried thyme (optional)
1/8 teaspoon each salt and pepper

For the Salad:
~4 cups mixed salad greens
2 chicken breasts, cooked and sliced
2 ripe bosc or red-skinned pears, halved, cored and thinly sliced
3 oz goat cheese, crumbled (or as an alternative you could use blue cheese)
1/4 cup toasted pecans or walnuts
1/4 cup dried cranberries

Directions:

Prepare the vinaigrette: Add wheat beer to a small saucepan, bring to a boil, and let simmer until reduced to 2 tablespoons (about 5-7 minutes).  Remove from heat and whisk in the remaining dressing ingredients (shallot through to pepper).  Set aside.

Prepare the salad: Divide greens among 4 plates or bowls.  Top each salad with sliced chicken and pears, and sprinkle pecans, cranberries, and goat cheese on top.  Drizzle each salad with the vinaigrette and serve immediately.

Note: All amounts are approximations - adjust based on your own tastes if desired.

September 23, 2013

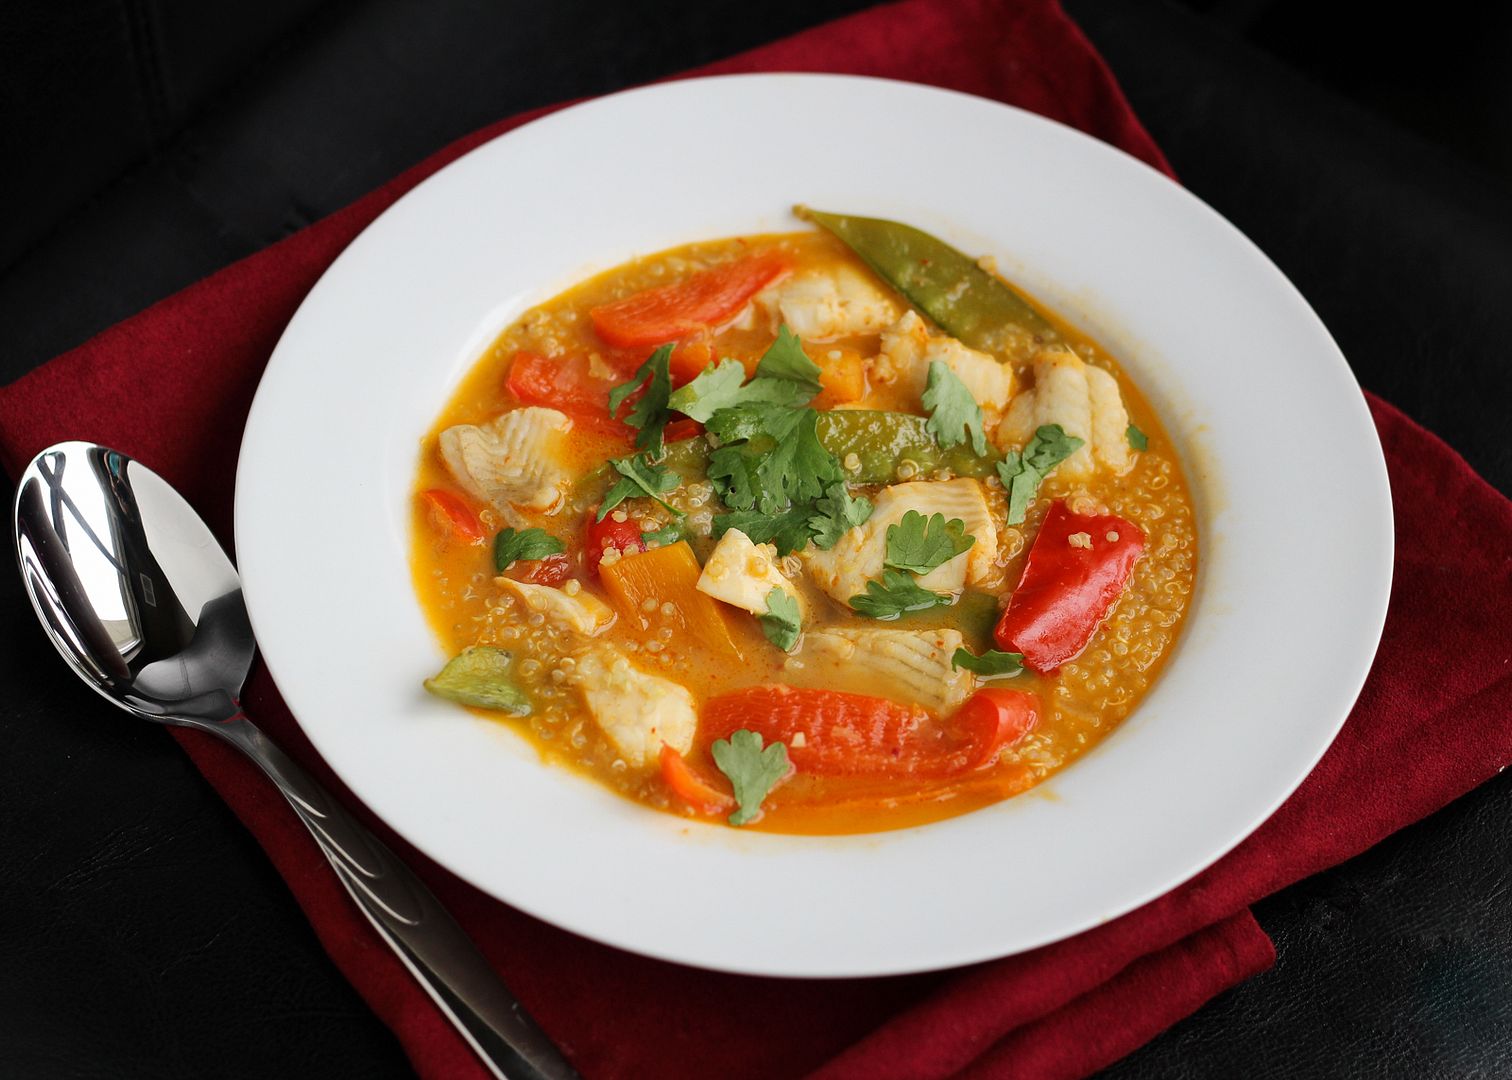
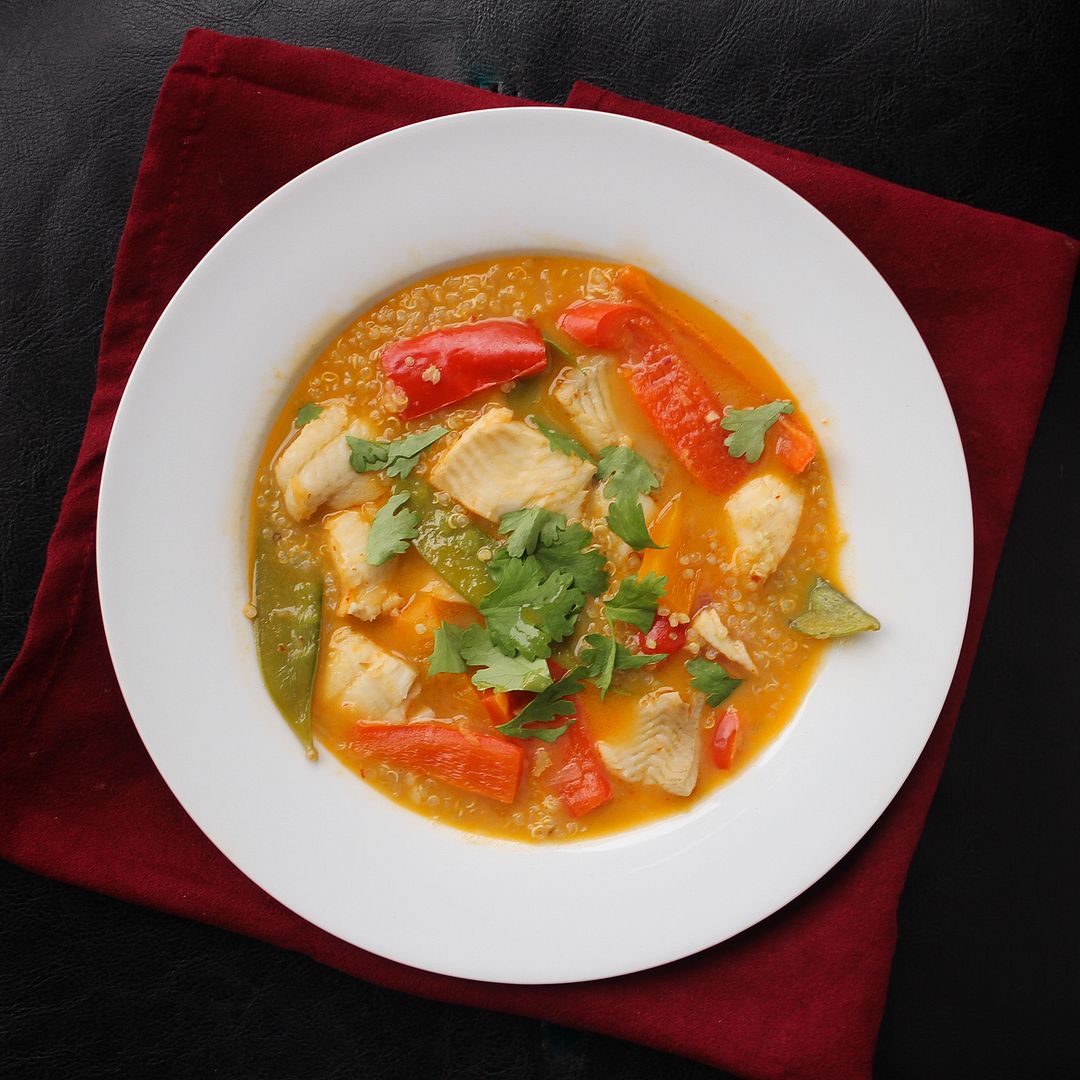
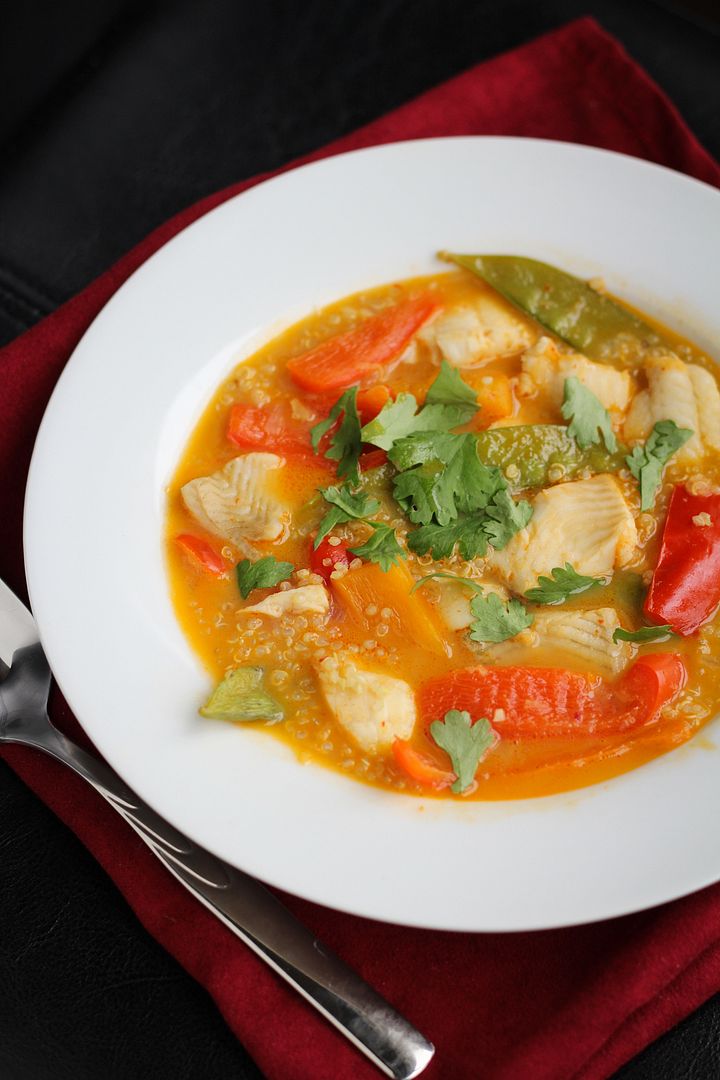
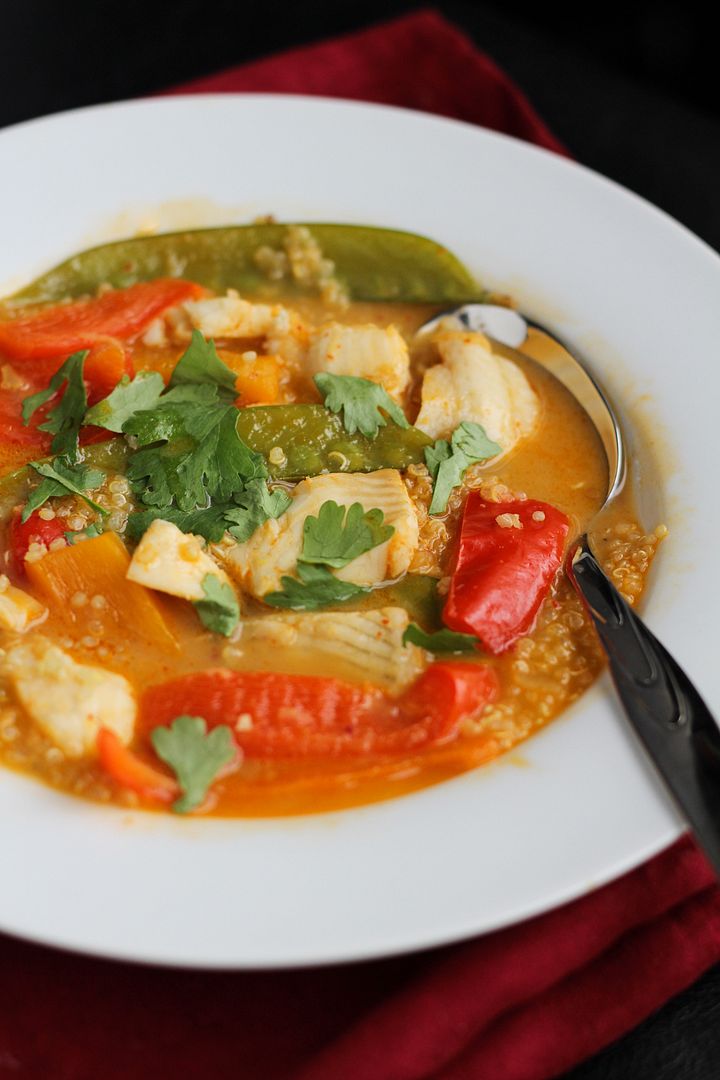
Thai Coconut Red Fish Curry with Quinoa

Thai Coconut Red Fish Curry with Quinoa

I'm super excited for today's post for two main reasons - first is that this is one of the tastiest dishes I've had in a while, and second is to announce that I've partnered with the Sustainable Seafood Blog Project!

The idea of the Sustainable Seafood Blog Project is to unite food bloggers and businesses interested in promoting sustainable seafood choices.  When Jessie from Life as a Strawberry asked if I'd be interested in joining, I admit that I was a tiny bit hesitant because while I've heard a lot about sustainable seafood lately and know that it's a really important issue, I didn't feel like I was well informed on it enough myself to talk about it with you guys.  But after a bit of research, I was happy to find out that there are so many resources out there to help consumers make smart choices, so while the idea of sustainable seafood might sound complicated, it's much easier than you might think!

Thai Coconut Red Fish Curry with Quinoa

We've all probably heard about the health benefits of eating fish, but many of us (myself included) are perhaps less aware of the impact certain fishing practises have had on the environment, including overfishing certain species of fish, damaging the environment through harmful fishing methods, and catching unwanted types of fish or marine life.

Without getting into too much detail or trying to sounding too preachy, the idea of sustainable seafood is to support fishing practices that will not damage our oceans or deplete marine life.  The infographic below (courtesy of Jessie) summarizes these issues in a much prettier way than I could put together!

The Sustainable Seafood Blog Project

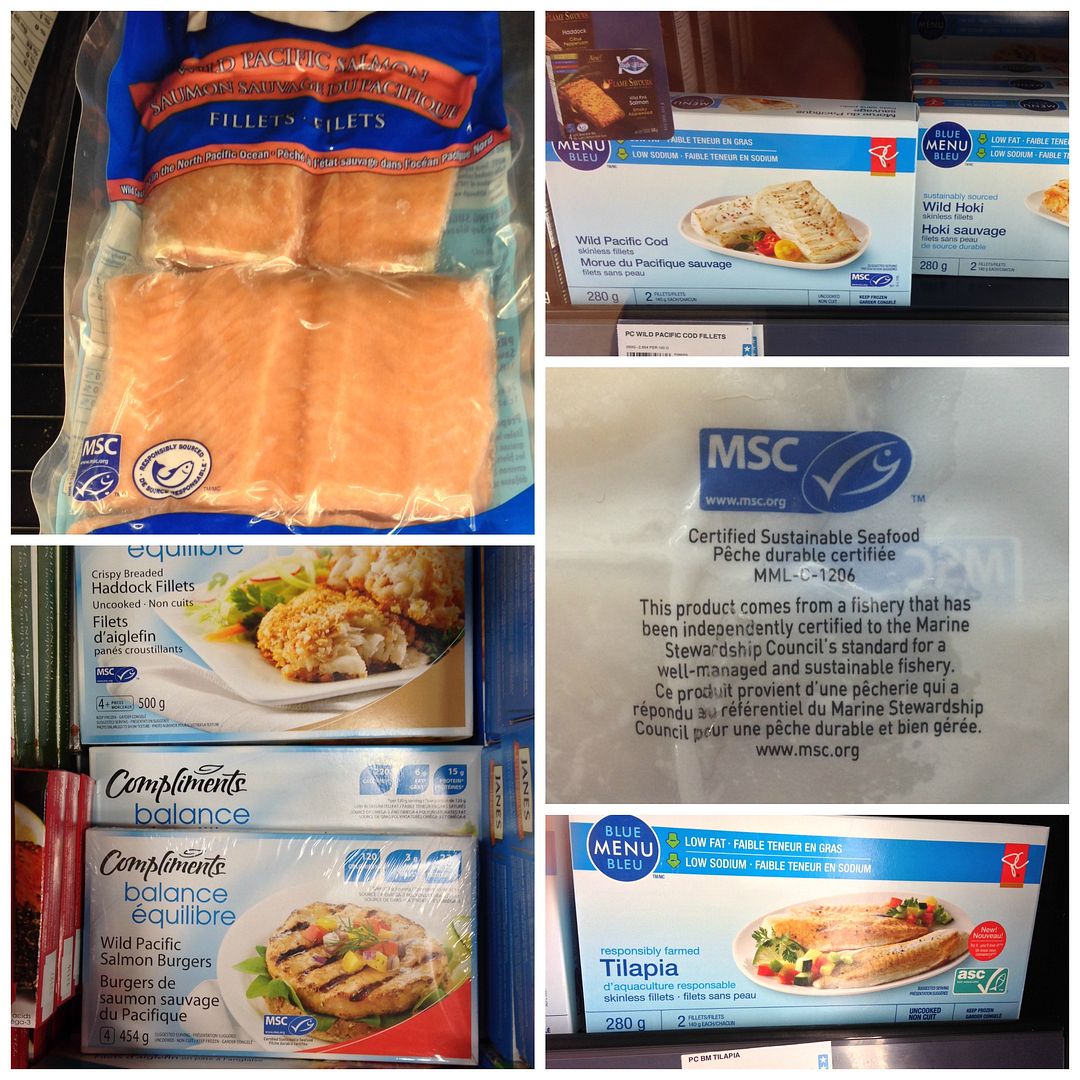
I'm happy to say that the two main grocery stores I shop at here in Ontario (Loblaw and Sobeys) have made commitments to selling sustainable seafood, and in addition, the Marine Stewardship Council has made it really easy to identify smart choices when you're shopping by just looking for their seal of approval on the product (see the blue checkmark in the images below).

I still only buy fish (or any meat) when it's on sale because it's usually expensive, but all the products pictured below were on sale and cost just as much or less than the fish without those labels, so it's nice that I didn't have to pay a fortune to choose them (unlike with organic fruits and vegetables)!

msc logo

And if you want to read more, there are tons of resources available to you, such as:

The Marine Stewardship Council
Monterey Bay Aquarium Seafood Watch
Vancouver Aquarium Ocean Wise
Sea Choice
And of course, the resources page of the Sustainable Seafood Blog Project.

Thai Coconut Red Fish Curry with Quinoa

So moving on to this recipe, this curry is one of the tastiest meals I've made in a while!  It may look a little complicated at first, but is actually really easy (sound familiar?)... All you have to do is sauté some veggies, throw in a little curry paste (I used red curry paste but green or yellow would work well too!), coconut milk, and a little chicken broth, then add the fish to simmer and that's basically it.

Most curries like this would be served with white rice, but to add a little more nutrition I decided to use quinoa, which I think tastes even better.  The flavours in this dish all come together in such a great way, and it's a pretty healthful meal too, so you can feel good about eating it for lots of reasons!

And if you like seafood, please check out these fabulous bloggers who are also part of the Sustainable Seafood project and are posting more great recipes today!


Thai Coconut Red Fish Curry with Quinoa

Thai Coconut Red Fish Curry with Quinoa

Adapted from several sources, such as recipes from The Foodie Physician and Kristen’s Kitchen

Makes 4 servings

Ingredients:

~2 cups cooked quinoa
2 teaspoons canola oil
1 medium shallot, minced
2 cloves garlic, minced
1 tablespoon grated fresh ginger
1 red bell pepper, sliced into 1” long slices
1 yellow pepper, sliced into 1” long slices
1 thai chili pepper, minced (optional for added spice)
2 tablespoons red curry paste
1 cup fat-free low sodium chicken broth
1 (400mL or 13.5oz) can light coconut milk
1 tablespoon fish sauce
1-1/2 tablespoons brown sugar
2 tablespoons fresh lime juice
150g or about 5oz snow peas
4-6 white fish fillets, cut into 1” pieces – choose a mild white fish that is a sustainable option for your region, such as wild Pacific cod, Wild Alaskan or Pacific halibut, or wild haddock (Canadian)
1/2 teaspoon salt
4 tablespoons chopped cilantro (optional)

Directions:

Cook a box of quinoa according to package directions – I ended up using about 1/2 cup cooked quinoa per serving which was approximately one 200g box.

Heat oil in a large saucepan over medium-high heat.  Add shallot and garlic and cook for about 1 minute, stirring often.  Add ginger, red and yellow peppers, and chili pepper.  Let cook for 5-7 minutes, stirring occasionally, until slightly softened.  Add curry paste, stir to coat, and let cook for another minute.  Add chicken broth and coconut milk and let simmer for 8-10 minutes.  Add fish sauce, brown sugar, and lime juice, and let simmer for another 1-2 minutes.  Add fish, cover, and let simmer 5-7 minutes, until fish is cooked through (may depend on type and thickness of fish).  Season with salt.

Add about 1/2 cup quinoa to each of four bowls.  Pour curry overtop and garnish with about 1 tablespoon cilantro, if desired.  Serve warm.
September 17, 2013

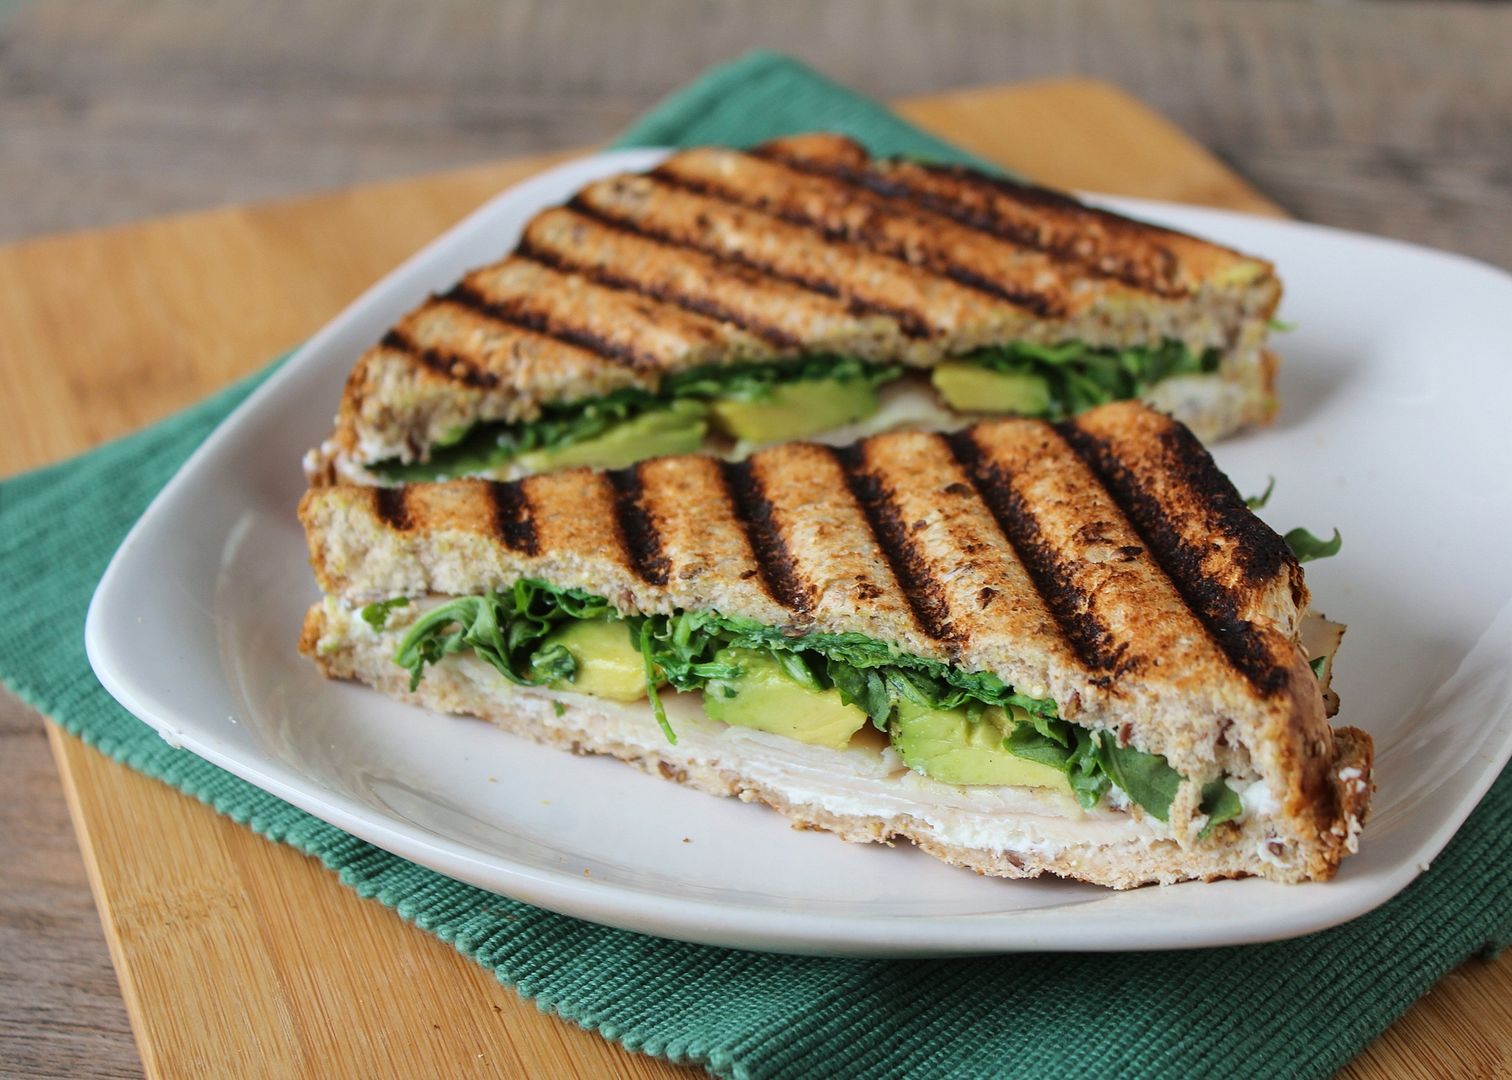
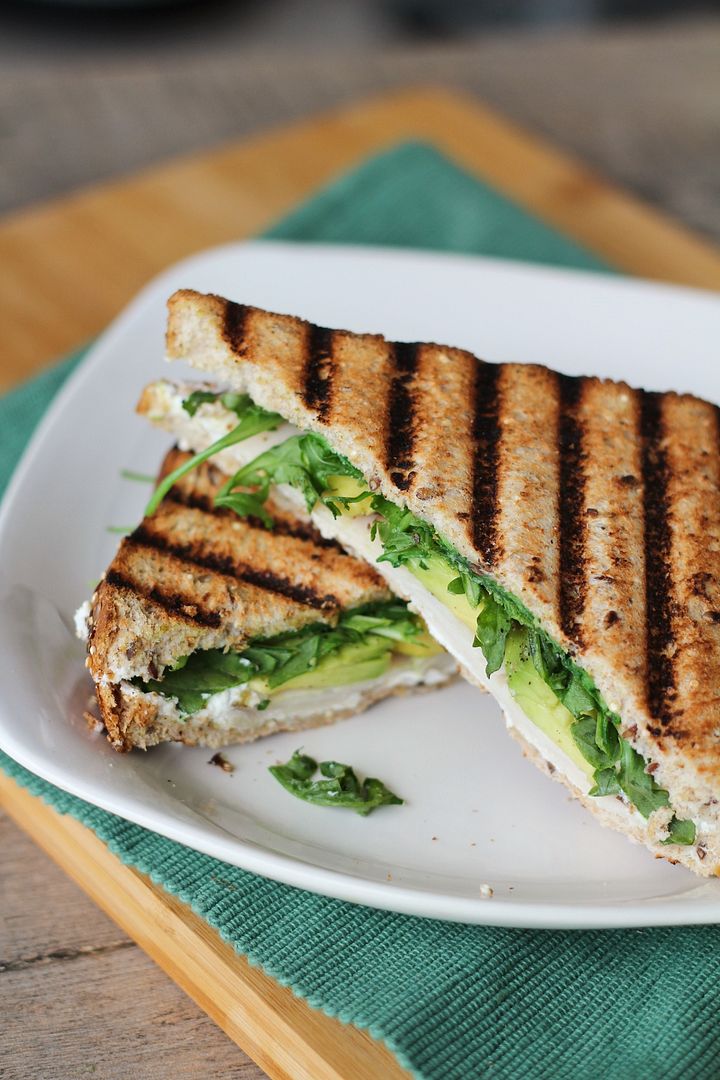
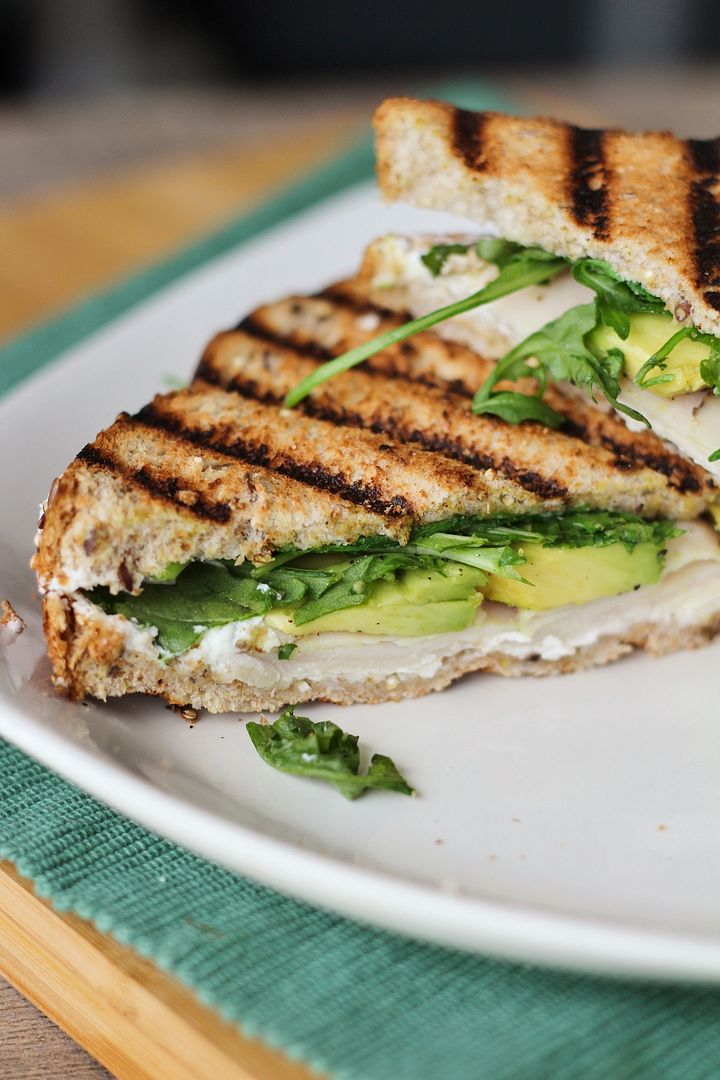
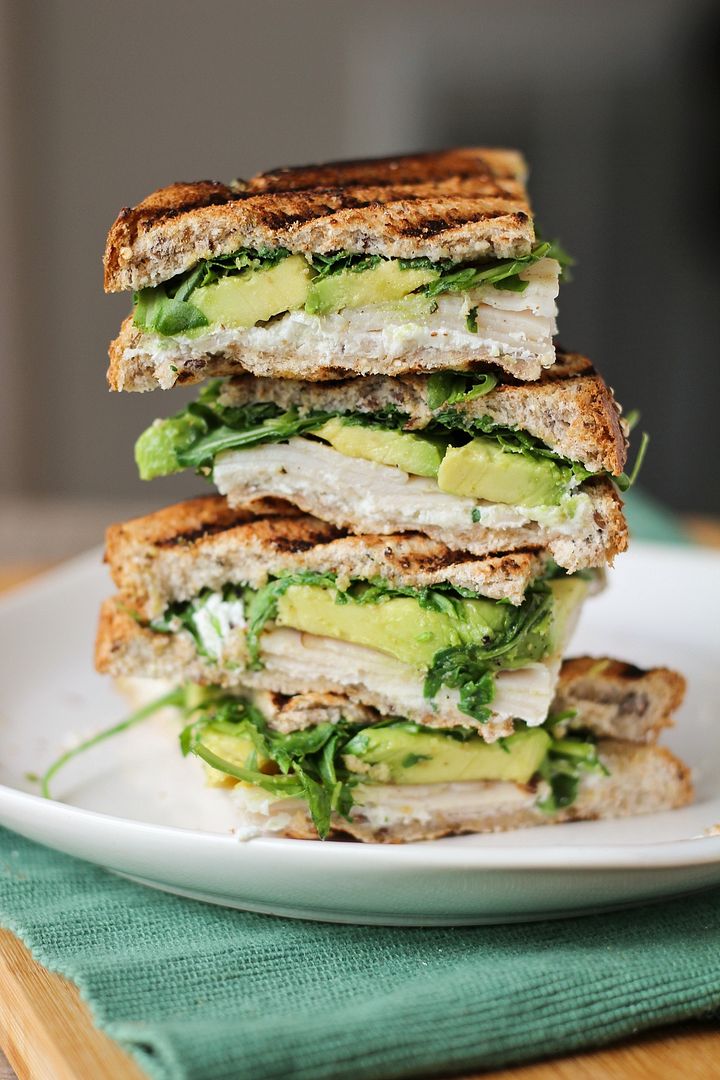
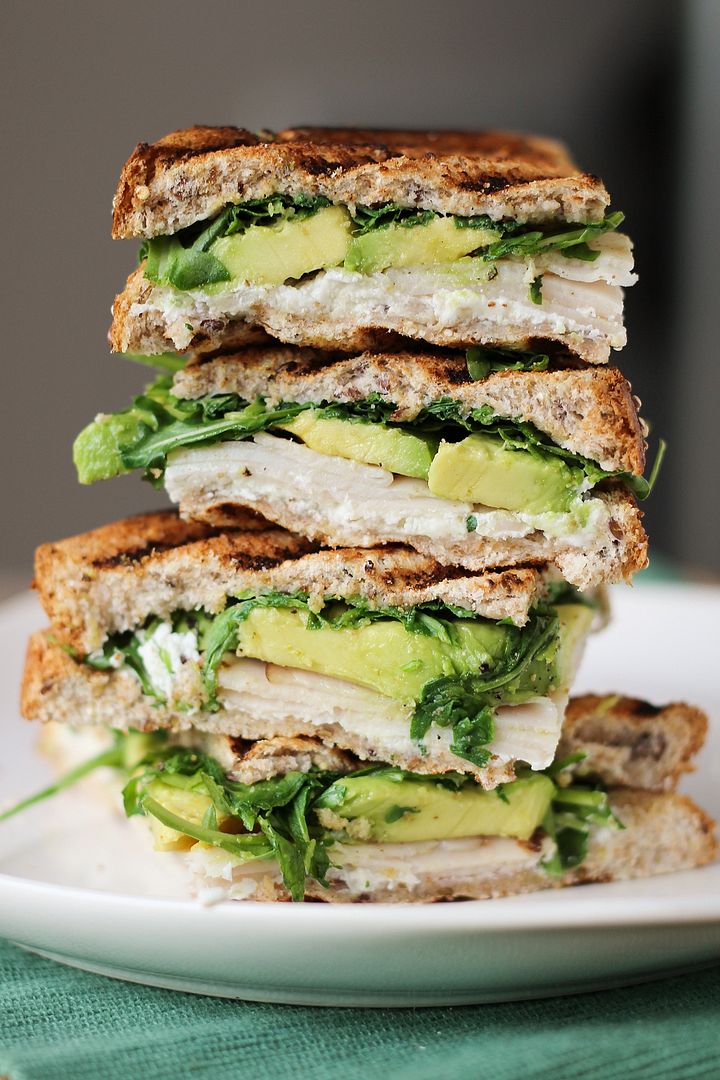
Turkey, Avocado, & Goat Cheese Panini

Turkey, Avocado, & Goat Cheese Panini

Back in the good ol’ days when my mom used to make my lunch for me to bring to school, turkey sandwiches were a staple. They usually consisted of oven roasted deli turkey meat, a little mayo, lettuce, cucumber, and cheese on a bun, and I loved them so much that they continued to be a lunch staple when I first moved out and had to start making lunch for myself.

Turkey, Avocado, & Goat Cheese Panini

(Side note: I have the best mom who made lunches for her daughters far longer than we deserved to have them made for us – thanks mom!)

Turkey, Avocado, & Goat Cheese Panini

Nowadays, I like to leave myself the minimum amount of time necessary to get ready in the morning (thus maximizing sleep-time), which means there is not a lot of time to prepare a lunch.  Leftovers are key for me – I usually make big batches of dinner so I can put it in containers in the fridge and then all I have to do in the morning is grab-and-go.  And if I have no leftovers, peanut butter and jam is usually the default.

Turkey, Avocado, & Goat Cheese Panini

(Side note: How will I ever be able to prepare lunches for children in the future if I can’t even make lunch for myself, not to mention getting them ready for school – I have a lot of admiration for parents/caregivers!)

Turkey, Avocado, & Goat Cheese Panini

This means that I’d forgotten how much I love turkey sandwiches until recently, when I bought a delicious turkey, avocado, and goat cheese sandwich from a bakery for lunch. At about $7 though, I knew I could make a much cheaper version at home, so I got right to it!

Turkey, Avocado, & Goat Cheese Panini

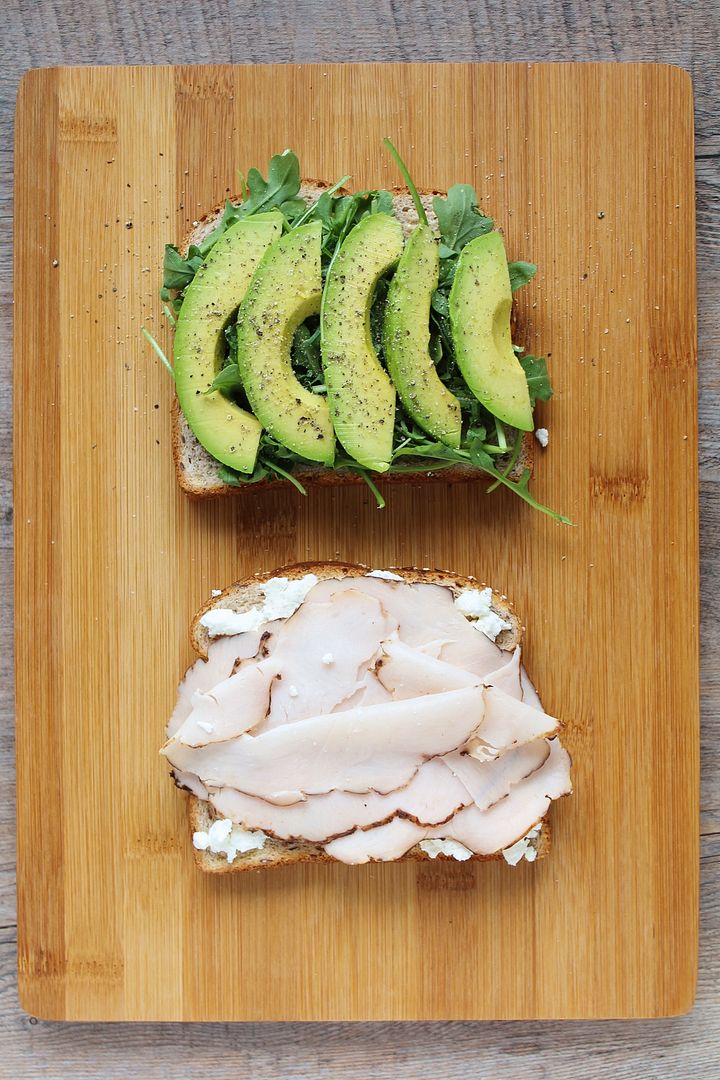
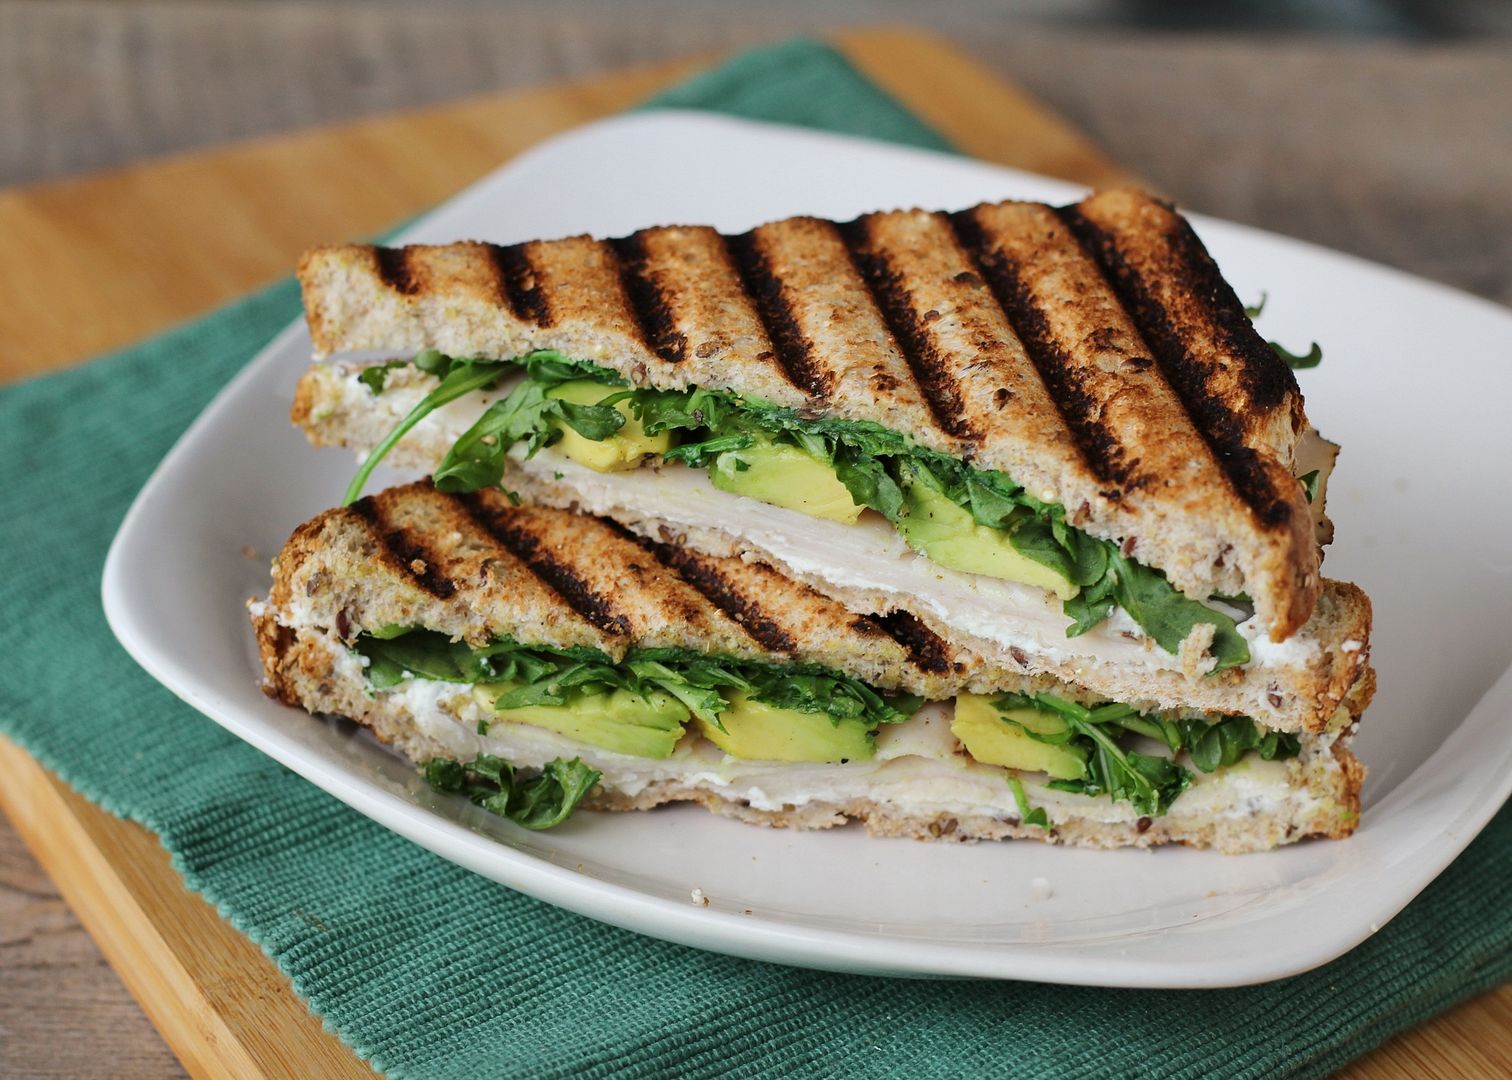
Pressed between those warm slices of whole grain bread is a combination of sliced oven-roasted turkey meat, creamy ripe avocado, a handful of peppery arugula, and a spread of tangy goat cheese. The combination of ingredients makes for a memorable sandwich that’s slightly more refined than my school days version, but is still super simple to make.  

After all this talk about making lunch in the mornings, I admit that I made this particular sandwich on a weekend (so I could have time to photograph it in the light), so I was able to make it into a panini and eat it warm.  But if you're making this in the morning (unless you have a panini maker or stove at work, in which case I'm very jealous of you), you can use the same ingredients on regular bread and it will still be delicious.  I recommend trying it as a panini too though - there's no competing with a warm pressed sandwich!

Turkey, Avocado, & Goat Cheese Panini

Turkey, Avocado, Goat Cheese, & Arugula Panini

Makes 1 sandwich

Ingredients:

2 slices of whole grain bread (I like Country Harvest flax & quinoa bread)
1 handful arugula
Half a ripe avocado, sliced
Salt & pepper
3 slices of oven-roasted deli turkey meat (more or less depending on preferences)
1-2 tablespoons goat cheese

Directions:

Layer arugula and avocado on one slice of bread and season generously with salt and pepper.  Spread goat cheese on other slice of bread and top with turkey meat.  Use desired amounts of all ingredients according to your own tastes and the size of your bread – the amounts listed in the ingredients are all suggestions.  Close your sandwich and heat in a Panini press.  If you don’t have a Panini press, you can do what I do: heat the sandwich on a griddle pan (or skillet) with a heavy pot on top of the sandwich to press it into the skillet (I put a can inside the pot to weigh it down), then flip and repeat on the other side.  Serve warm.

September 13, 2013

Frosted Mocha Brownies

Frosted Mocha Brownies

I love baking and used to bake treats all the time, but I can't even remember the last time I made a dessert before last weekend.  I actually don't eat dessert myself that often, but I like trying new recipes and sharing treats with others; the problem is that everyone I know seems to be on diets or trying to eat healthier lately (which is a good thing!), and there aren't really any big dessert-worthy celebrations in the summer, so I haven't had an excuse to bake in a long time!

This past weekend though, I had a sudden urge to bake something so I decided to stop waiting for an excuse and just make something to give away to the boyfriend's coworkers (after trying one myself, of course!).  I was in the mood for a warm and comforting dessert but wasn't quite ready to break out the apples and pumpkin yet (though now that it's cooled off, that will be up next!), so I decided to go with brownies.  Everyone loves brownies, and I had all the ingredients for these latte bars I'd had bookmarked for a while, so I went right to work!

Frosted Mocha Brownies

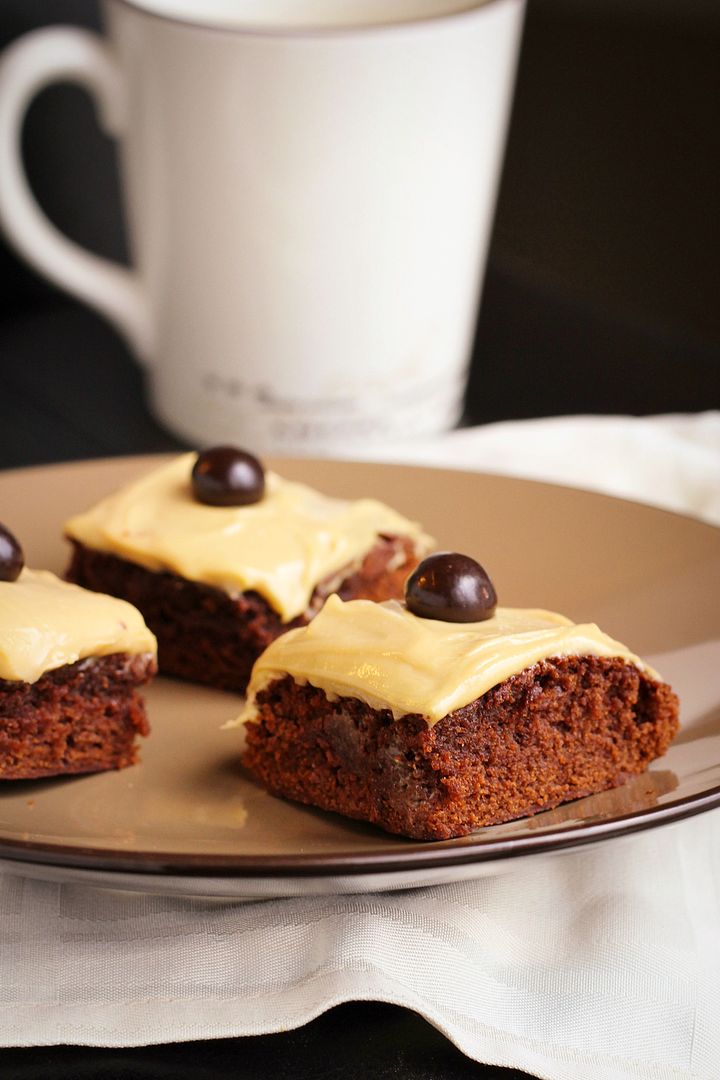
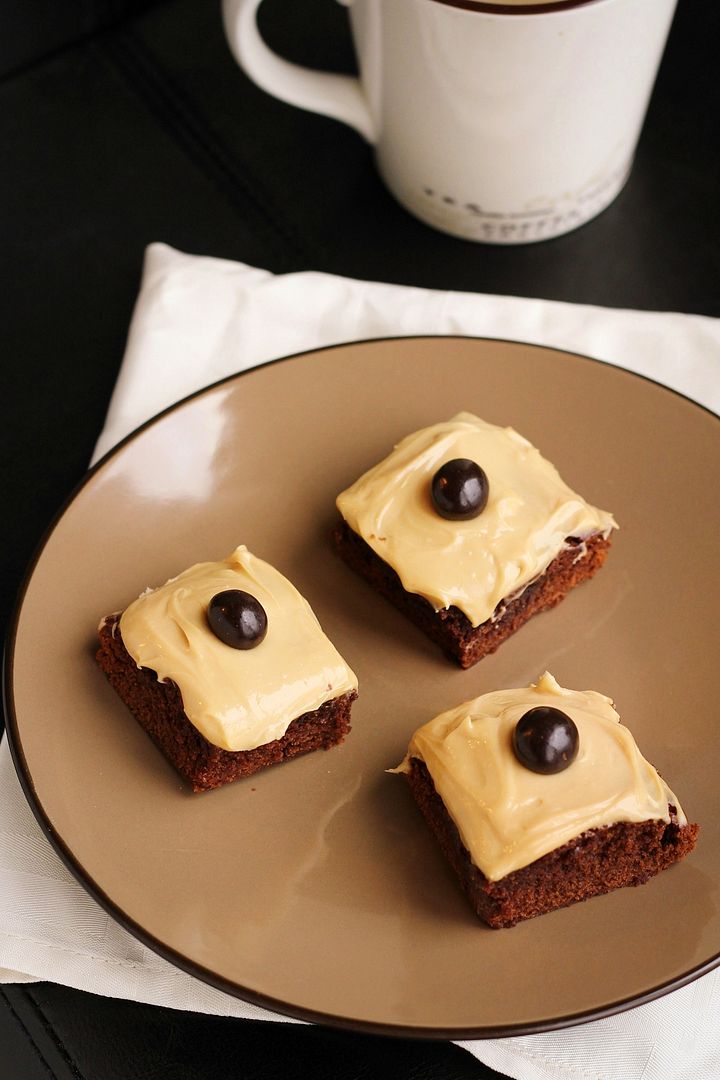
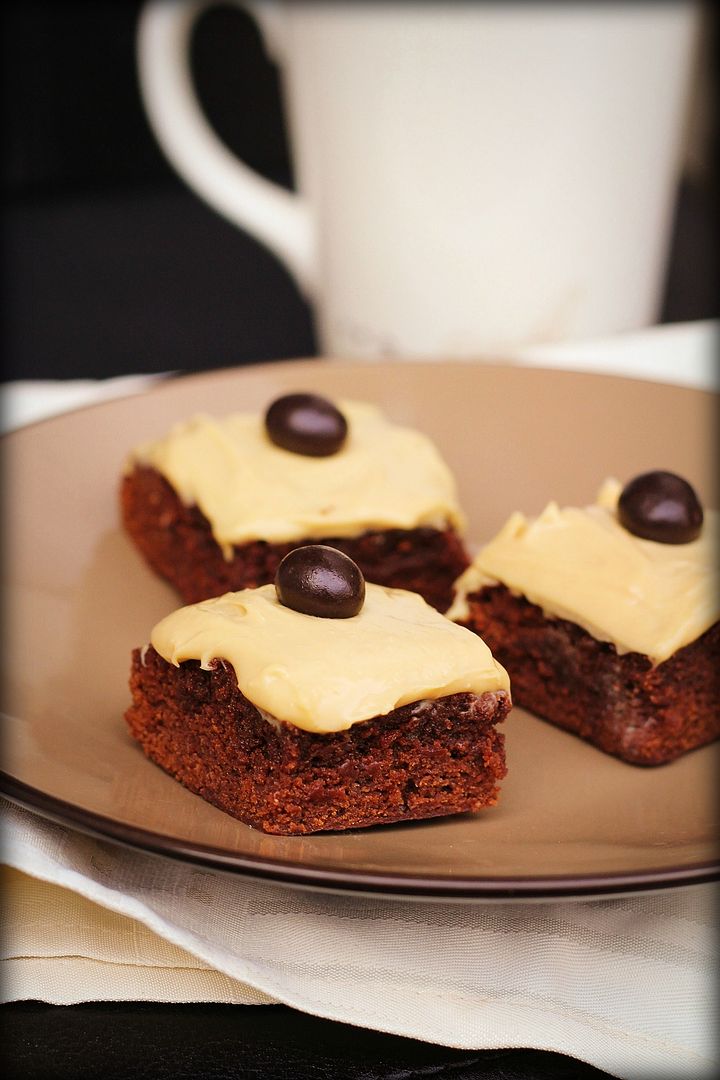
The original recipe for these bars was called 'latte bars', but since they're made up of coffee and chocolate, and mine turned out much more like brownies than bars, I'm calling them mocha brownies.  They're chewy and dense and everything you'd want a brownie to be (i.e. not too fudgey and not too cakey - just in between), with coffee in both the brownie, frosting, and the chocolate coffee beans on top, giving them the perfect amount of subtle coffee flavour.  I topped mine with a cream cheese frosting instead of buttercream because I think everything is better with cream cheese!

I'm not a huge chocolate lover but I do love coffee and I loved these bars, and so did the coworkers who were kind enough to help me eat them all!  I know the pictures are terrible (it was pretty dark out when I got time to take a few pics), but trust me that these are way better than I've made them look!

Hope you all have a great weekend!

Frosted Mocha Brownies

Frosted Mocha Brownies

Adapted from Land O Lakes

Makes one 8x8-inch pan; can be sliced into 16-20 brownies

Ingredients:

For the Brownies:
1 tablespoon instant coffee (+ 2 teaspoons hot water)
1 cup sugar
3/4 cup all-purpose flour
1/3 cup cocoa powder
1/4 teaspoon salt
1/2 cup unsalted butter, melted
2 large eggs
1 teaspoon vanilla extract

For the Frosting:
8 oz (one brick) cream cheese, softened (I used light cream cheese)
3/4 – 1 cup icing sugar
1/2 tablespoon instant coffee
1 teaspoon vanilla extract

For Topping:
16-20 chocolate covered coffee/espresso beans (or more, if desired)

Directions:

Preheat oven to 350°F.  Spray an 8x8 baking pan with non-stick cooking spray (I lined mine with parchment paper instead for easy removal after – use whatever method you like for brownies).

Prepare the brownies:  Combine instant coffee with hot water and mix until dissolved in a small bowl.  In a separate bowl, add the sugar, flour, cocoa powder, and salt, and whisk to combine.  In another separate bowl, whisk together the butter, eggs, vanilla extract, and coffee mixture until combined.  Add the wet ingredients to the dry ingredients and fold together with a spatula until just combined.  Spread the batter in the prepared pan and bake in preheated oven for 23-27 minutes, until a toothpick inserted in the middle comes out clean.

Prepare the frosting: Combine instant coffee with vanilla extract and mix to combine in a small bowl.  Beat cream cheese with an electric mixer in a large bowl or the bowl of a stand mixer, until smooth and creamy, 2-3 minutes.  Add icing sugar and mix until combined.  Add coffee-vanilla mixture and mix until combined.  Taste and add more sugar if needed (I don’t like it to be too sweet).  Keep frosting in fridge until bars have completely cooled.

Once bars have cooled, spread frosting over them (you might not need all the frosting), and slice into bars.  Top each bar with a chocolate coffee bean, or chop multiple coffee beans and sprinkle overtop.

September 10, 2013

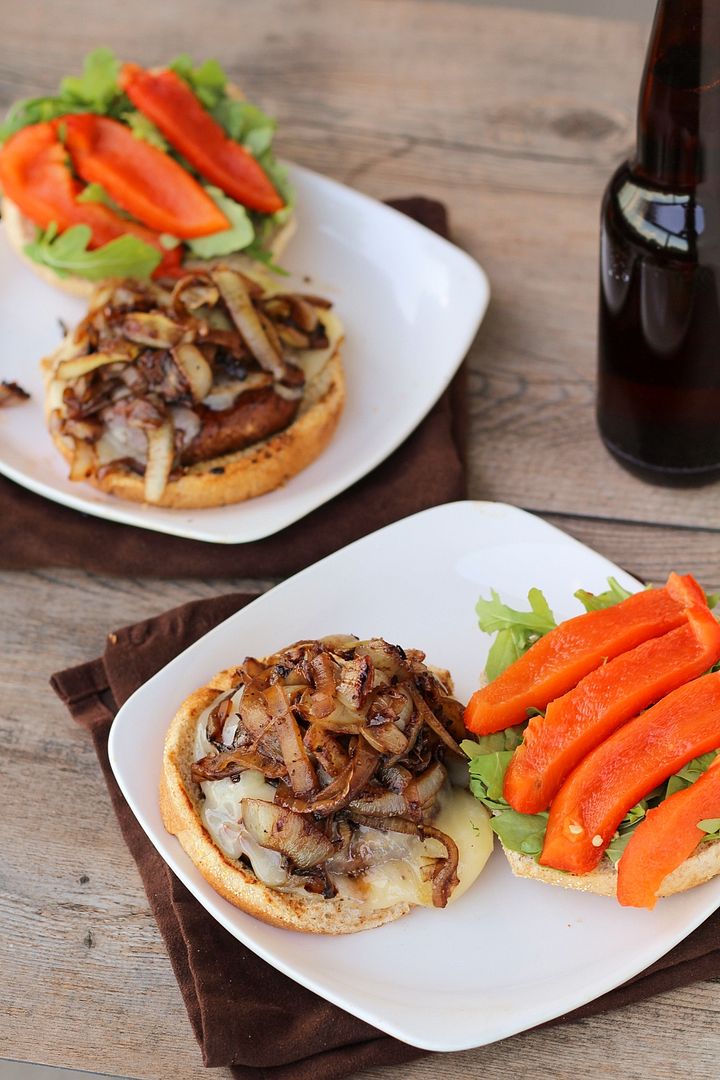
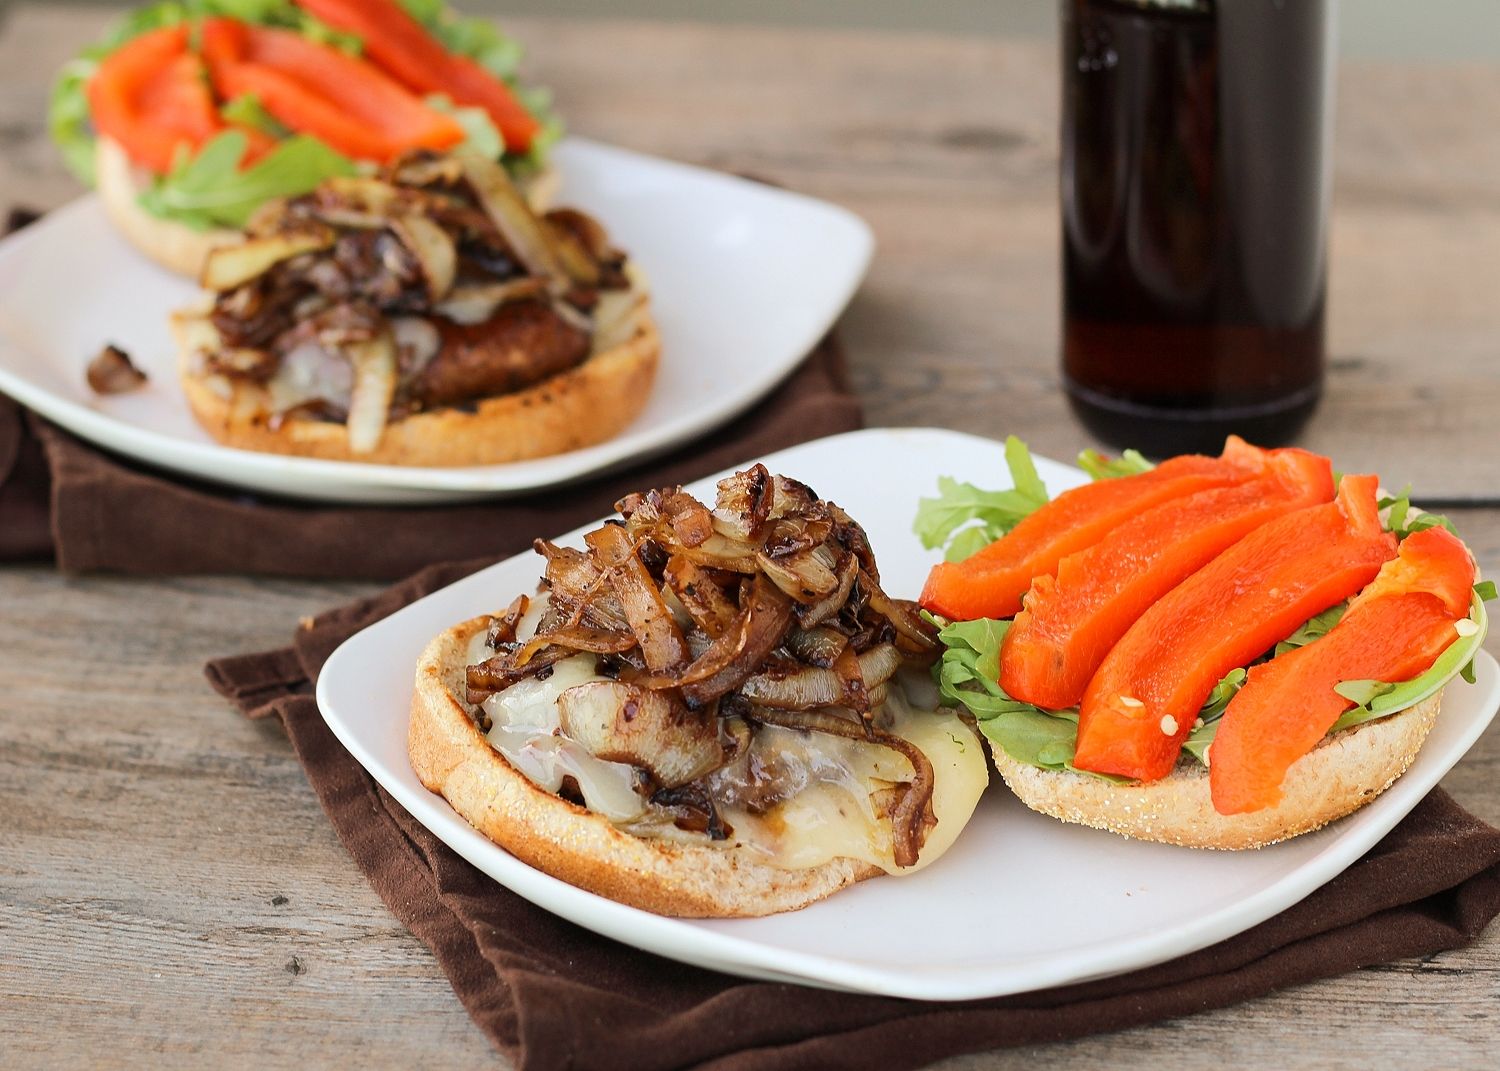
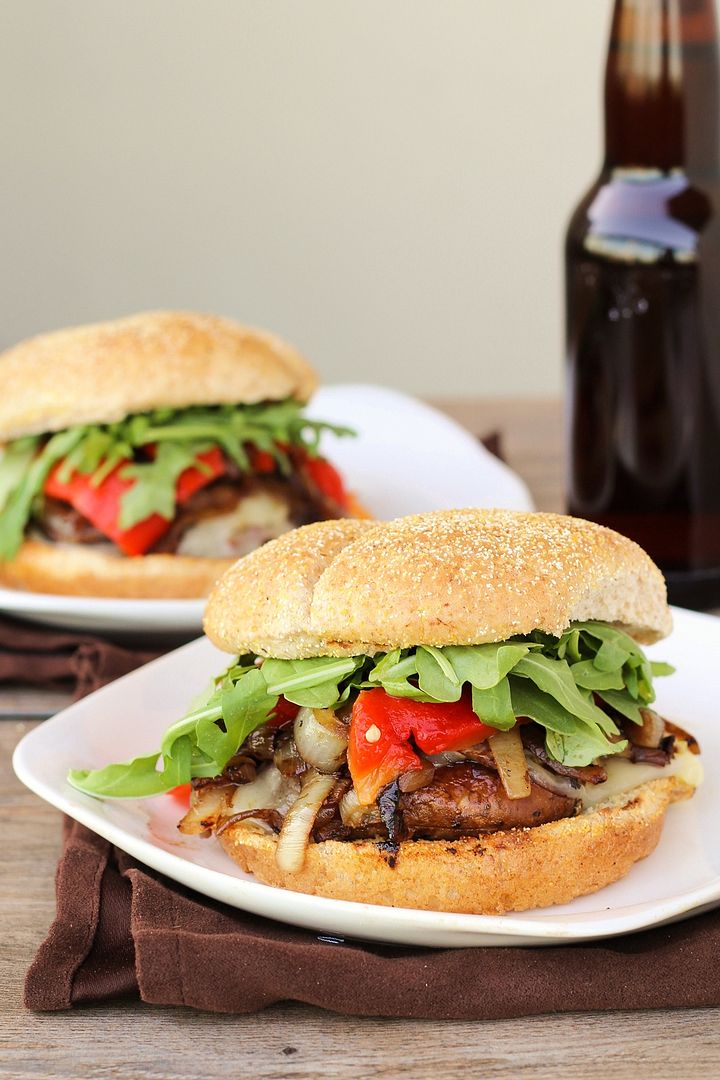
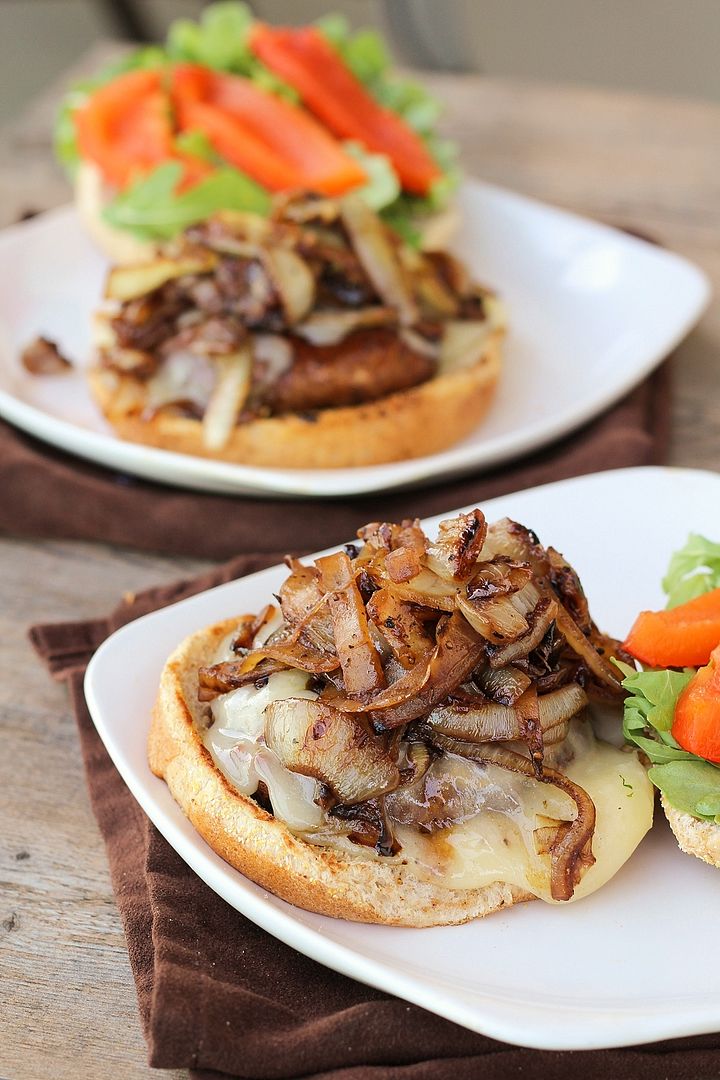
Portabella Mushroom Burgers with Provolone, Caramelized Onions, & Roasted Red Peppers

Portabella Mushroom Burgers with Provolone, Caramelized Onions, & Roasted Red Peppers

This is the last recipe that I made during summertime but hadn’t shared yet, and it’s appropriate that I waited to post it until today considering the high is 34°C (93F) here, with a humidex of over 40°C (104F) – it feels hotter today than most days we had during real “summer”!  Not that I’m complaining, because it’s lovely to get one more blast of heat before it likely cools down for good. And I’m ready for that too – football started this past weekend (go niners!), my sister went apple picking, and there was a chill in the air but still sunny skies, all of which got me pretty excited for fall!

And while burgers are usually seen more as summertime food, the earthy, smoky flavours in this particular burger make it great for this transition period into fall!

Portabella Mushroom Burgers with Provolone, Caramelized Onions, & Roasted Red Peppers

I’ve eaten portabella (or portobello, if that’s how you like to spell it) burgers a few times before but had never made one myself until now. Portabella mushrooms make a great vegetarian substitute for burgers because they have a meaty texture and earthy taste, but without the fat that usually comes along with meat burgers!

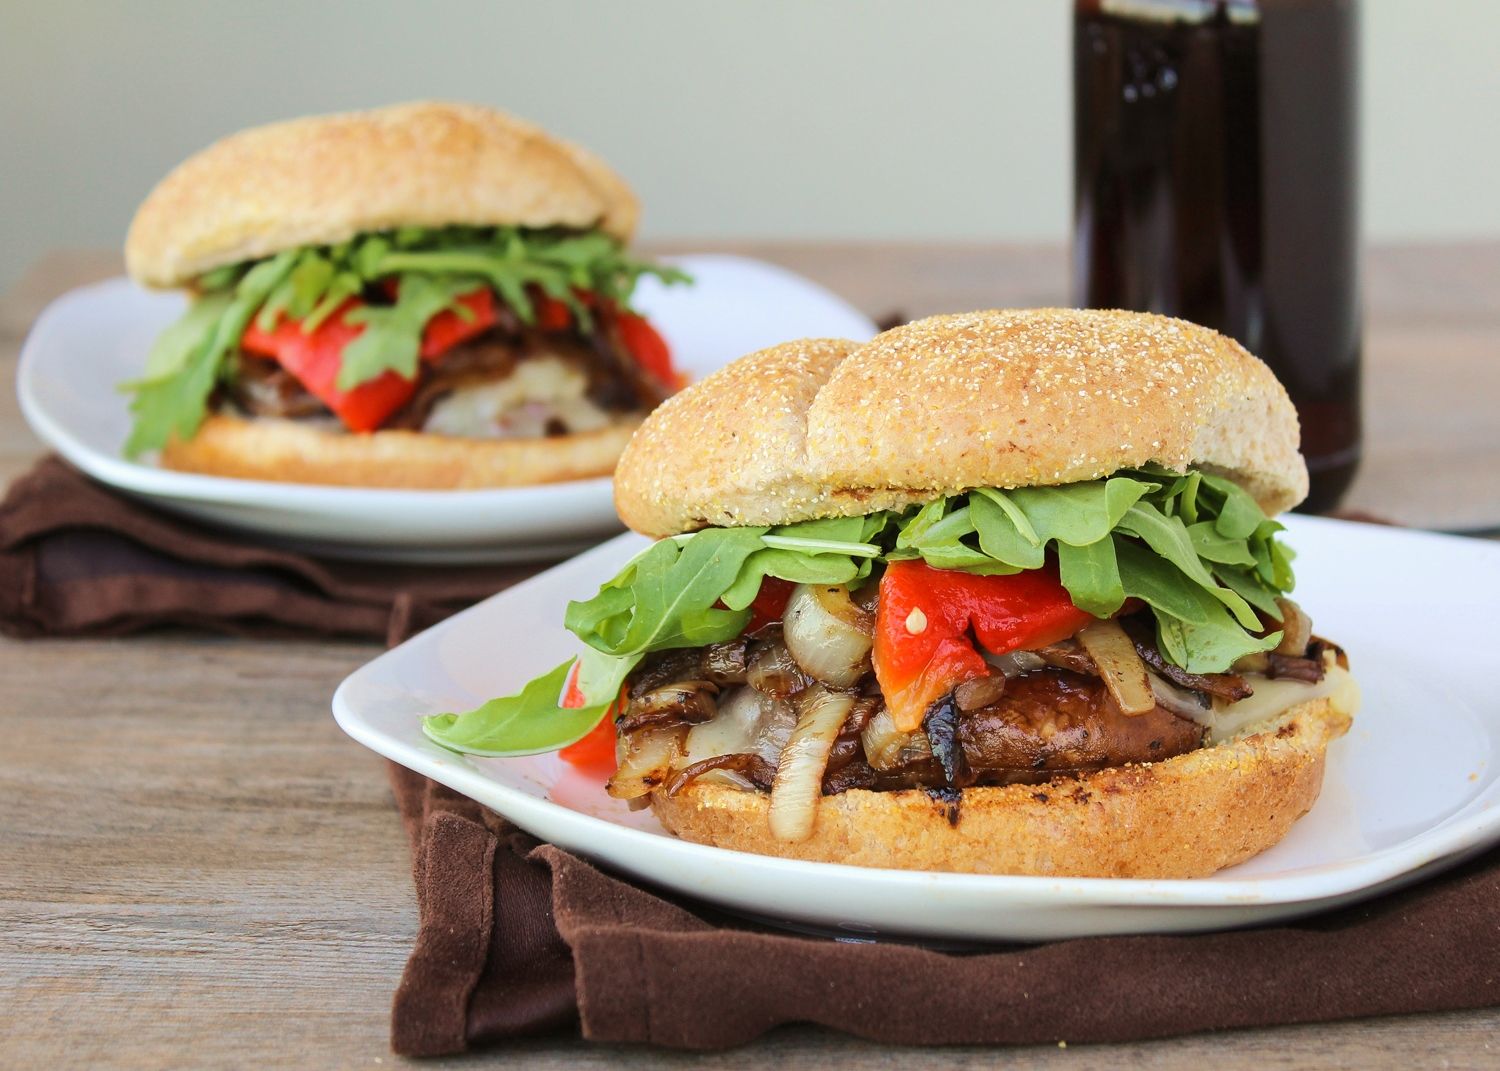
Plus mushrooms make a great canvas for piling on flavourful toppings. For my version, I decided to complement the smoky, savoury flavour of the mushrooms with caramelized onions and a little provolone cheese, which I then balanced out with sweet roasted red peppers and peppery fresh arugula.

Portabella Mushroom Burgers with Provolone, Caramelized Onions, & Roasted Red Peppers

Not only was this burger pretty healthful, but it was also packed with flavour – I devoured mine and then immediately scolded myself for not making portabella burgers earlier!

A few tips I learned along the way: 1) Marinating the mushrooms beforehand gives them extra flavour, as otherwise mushrooms on their own can be somewhat bland; 2) Be sure to spray or oil your grill/pan because the mushrooms can be somewhat sticky!; and 3) Mushrooms shrink as they cook and release moisture – I chose large buns based on their size pre-cooking, but as you can see, they didn’t fill the bun after cooking, so smaller buns would have been a better choice!

Portabella Mushroom Burgers with Provolone, Caramelized Onions, & Roasted Red Peppers

Don’t wait as long as I did to try these if you haven’t yet; and if you’re already a mushroom burger fan, feel free to share your own cooking tips or favourite recipes!

If you’re having as great as weather as we are here today, hope you get a chance to get outside and enjoy it!

Portabella Mushroom Burgers with Provolone, Caramelized Onions, & Roasted Red Peppers

Portabella Mushroom Burgers with Provolone, Caramelized Onions, & Roasted Red Peppers

Makes 2 burgers

Ingredients:

For the Mushrooms:
2 portabella mushrooms
2 tablespoons balsamic vinegar
1 tablespoon olive oil
Pinch each dried basil and oregano
1 clove garlic, minced
Salt & Pepper

For the Toppings:
1 red bell pepper
1 tablespoon olive oil, divided
1 large or 2 small yellow onions, peeled and sliced into half moons
Salt and pepper
Splash of balsamic vinegar
2 large slices of provolone cheese (enough to cover the two mushrooms)
2 handfuls of baby arugula
2 whole wheat hamburger buns

Directions:

Preheat oven to broil.

Remove stems of mushrooms and scrape out the gills, if desired.  Whisk together the vinegar, oil, basil, oregano, garlic, and a bit of salt and pepper in a small bowl.  Add mushrooms and marinade to a bowl, tossing mushrooms to coat well.  Leave to marinate for 20-30 minutes.
Rub red pepper with a teaspoon of olive oil (don’t use extra virgin olive oil as it has a lower smoke point.  Vegetable or canola oil would also work.)  Place on foil-lined baking sheet on the top rack of the oven.  Broil until dark blotches begin to appear on one side, then turn with tongs and repeat until all sides have black patches.  Amount of cooking time will vary depending on your oven and the size of your pepper; mine took around 15-20 minutes total.  When done, remove from oven and place in a bowl.  Cover tightly with saran wrap to let pepper steam (and loosen the skin) for about 15 minutes or until slightly cooled, then remove the skin, cut pepper in half, scrape out the seeds and membranes, and slice into strips.  
*Note: If you’re short on time, you can use storebought roasted red peppers in a jar.  I preferred to make my own to use less oil; it does take some time, but it can be done while you’re marinating/cooking the mushrooms and caramelizing the onions so everything finishes in roughly the same amount of time.

Meanwhile, heat 2 tablespoons of oil in a large non-stick skillet over medium heat.  Add sliced onions, stir to coat with oil, and season with salt and pepper.  Spread onions out evenly across the pan and let cook, stirring occasionally, until onions are soft and caramelized, about 25-30 minutes. Don’t stir the onions too often so they can brown, but don’t leave them alone long enough to burn or stick to the pan. Add a splash of balsamic vinegar about 20 minutes into cooking to deglaze the pan and darken the onions.  When done, set aside in a small bowl.

When mushrooms are done marinating, heat a grill or indoor grill pan over medium heat.  Brush grate with oil or spray grill pan to prevent sticking, then place mushrooms on grill with gill sides up first.  Grill for 5-7 minutes per side or until tender, brushing with the marinade a few times.  In last 2 minutes of cooking, add provolone cheese on top of each mushroom to melt.  If desired, toast buns on grill for 1-2 minutes as well.

Assemble burgers by topping the provolone mushrooms with the caramelized onions, roasted red peppers, and arugula on whole wheat buns.  Season with additional salt and pepper if desired.
September 05, 2013

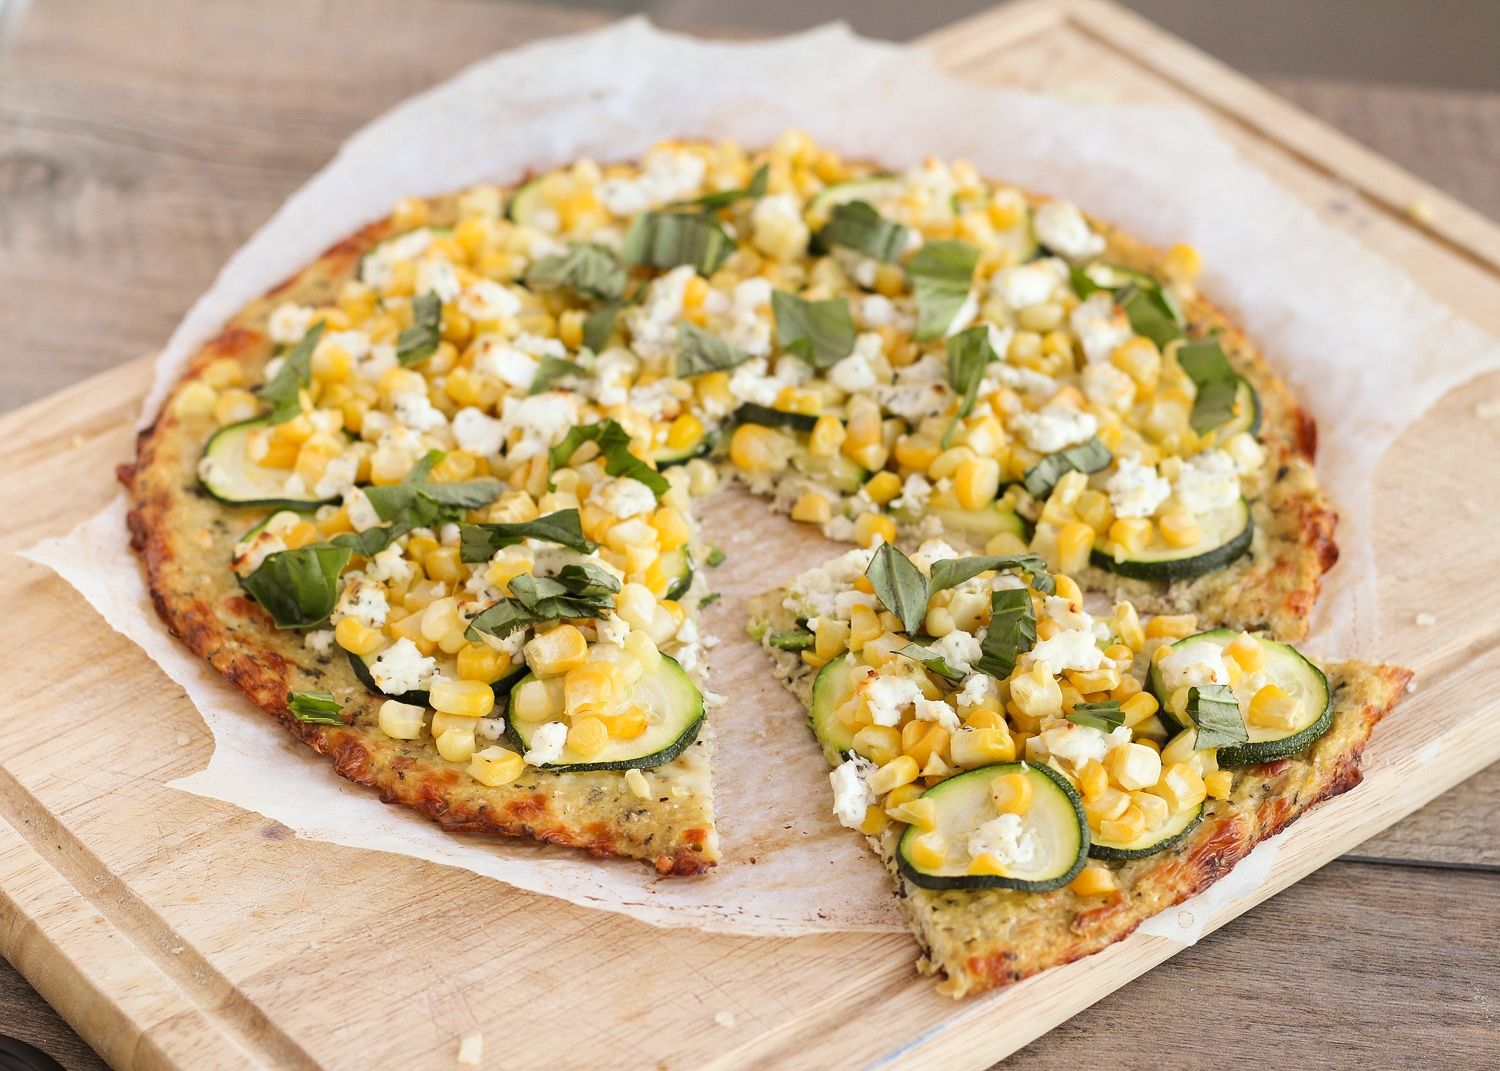
Cauliflower Crust Pizza with Corn, Zucchini, & Goat Cheese

Cauliflower Crust Pizza with Corn, Zucchini, & Goat Cheese

If you read blogs regularly or look at food on Pinterest, you've probably noticed at least a few recipes for cauliflower crust pizza before.  I've been seeing it all over the place for a while now and keep adding it to my list of things I need to try, but for some reason it took me until now to finally make it.  I admit I was skeptical that this was another fad that people go crazy for because it sounds good but in reality tastes disgusting (*cough*egg baked in an avocado*cough*), but I'm happy to report that this tastes as good as it sounds! (unless you think it sounds gross, like a certain boyfriend who shall remain unnamed, in which case you are wrong!)

If you have no idea what I'm even talking about when I refer to cauliflower crust pizza, I'll give a quick explanation of what it is.  Basically it's a breadless pizza crust that's made by mixing pulverized cauliflower with cheese, egg, and spices (if you like) to form a "crust" that is then baked and topped with any pizza toppings you like.  So it's healthier than pizza in the sense that there is actually some nutrition in the crust instead of empty carbs, but I should be clear that it's also not some sort of miracle calorie-free pizza because there is a lot of cheese in the crust, if that's what you're concerned about!

Cauliflower Crust Pizza with Corn, Zucchini, & Goat Cheese

There are lots of different recipes for cauliflower crust floating around, but I used one from The Lucky Penny Blog (with a few small changes), which Jessica from How Sweet It Is recently affirmed is the best cauliflower crust pizza recipe around, and though I haven't tried any other versions, this one worked so well that I know I won't need to (though she does have a cheese-free version if you're interested in trying it)!

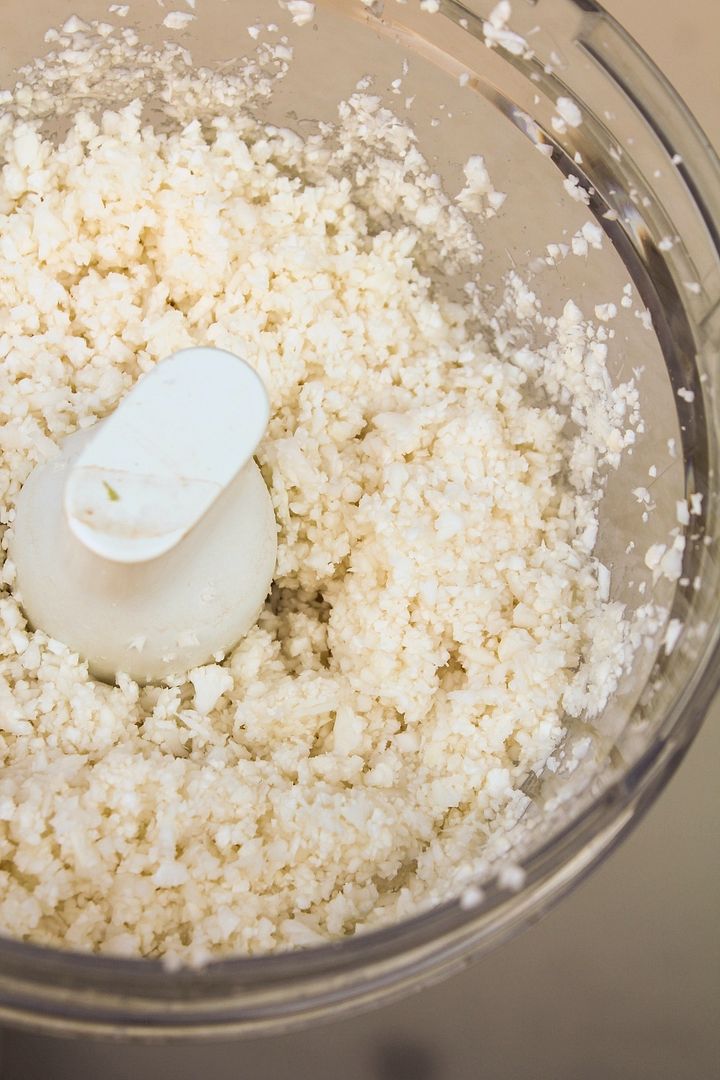
Making the crust is pretty simple.  You start by pulsing your cauliflower florets in a food processor until you get a bowl of fluffy snow-like "crumbs":

Making cauliflower crust pizza

You then cook the "crumbs" in the microwave, let them cool, then transfer them to a towel to wring out all the water.  This is probably the most important step, as it will help make sure your crust stays together later.  You'll be surprised at how much water comes out - and you'll get a bit of an arm workout during the process!

Making cauliflower crust pizza

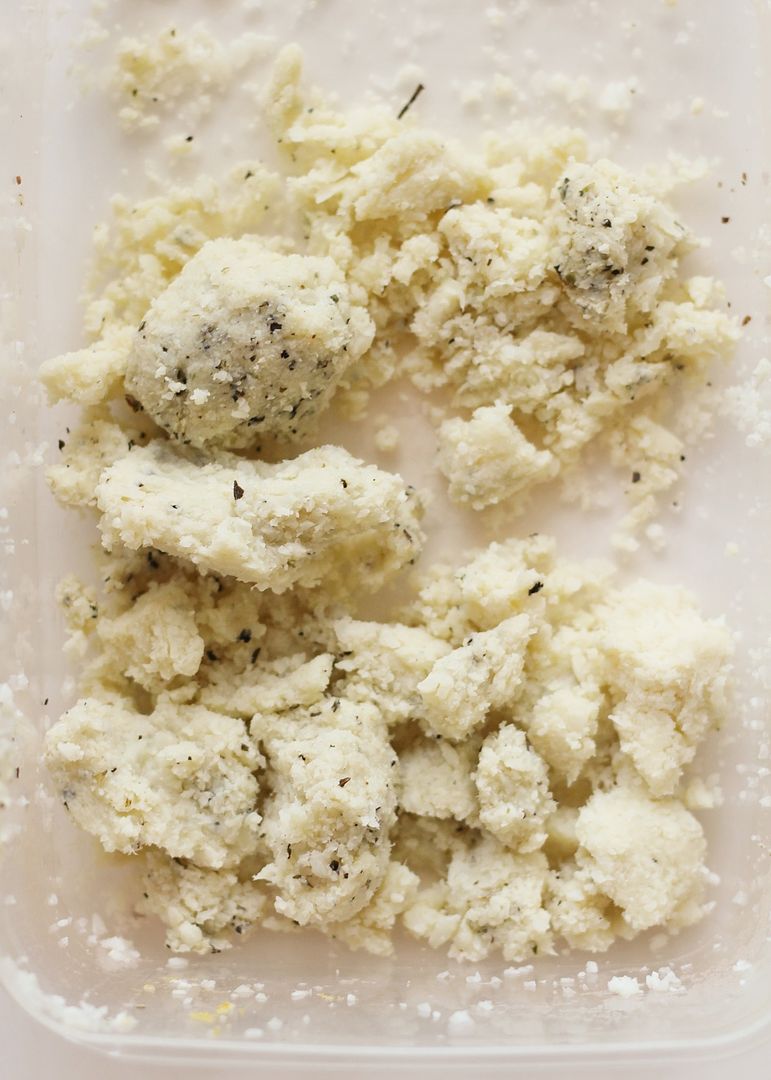
After you wring out all the moisture, the cauliflower will look completely different and if you smoosh it together with your hands it should actually stay together in clumps:

Making cauliflower crust pizza

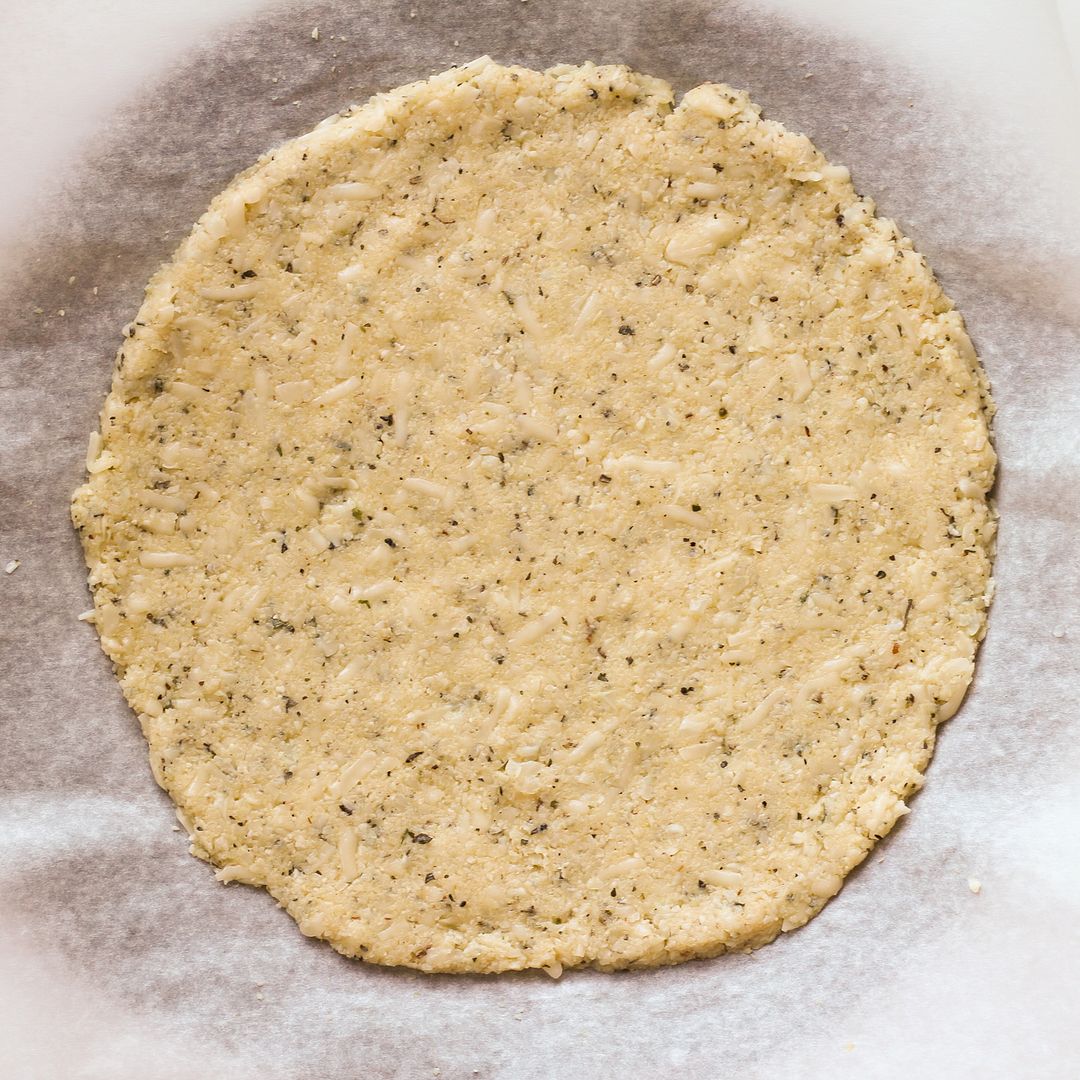
You then mix in your cheese, egg, and seasonings (if you like - I added dried basil, oregano, salt, pepper, and nutritional yeast for added cheesy flavour).  Then you pat the mixture into a pizza crust shape:

Making cauliflower crust pizza

You'll need to prebake your crust, during which time you can get all your toppings ready, then return the pizza to the oven with the toppings, wait very impatiently for it to be ready, and eat!

Cauliflower Crust Pizza with Corn, Zucchini, & Goat Cheese

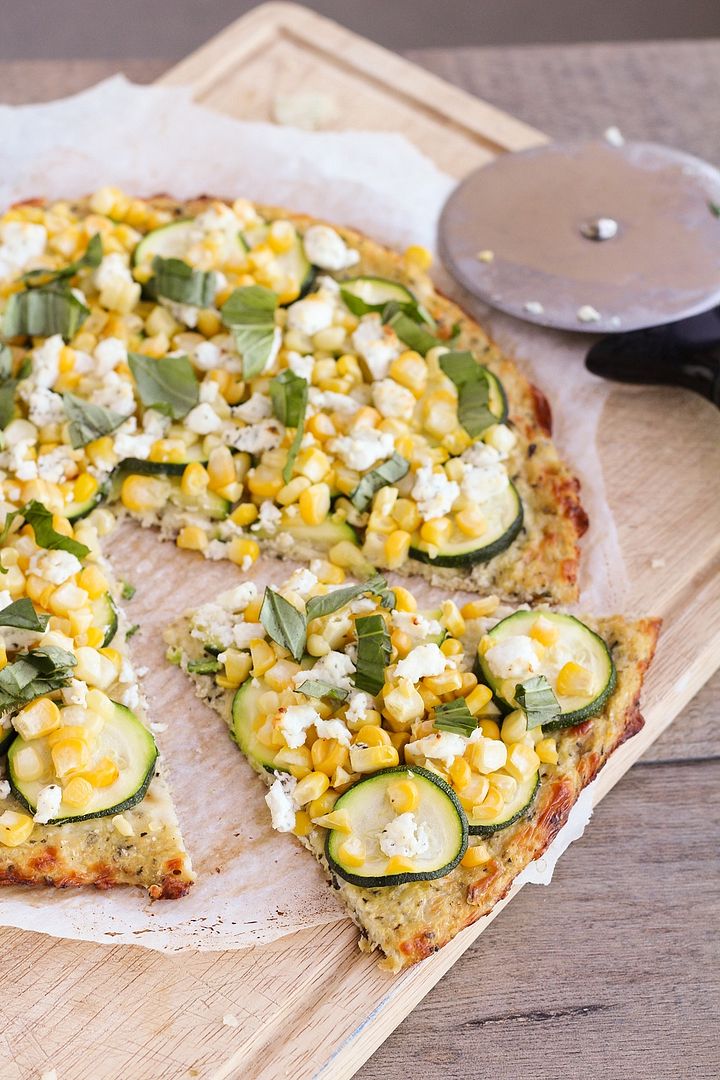
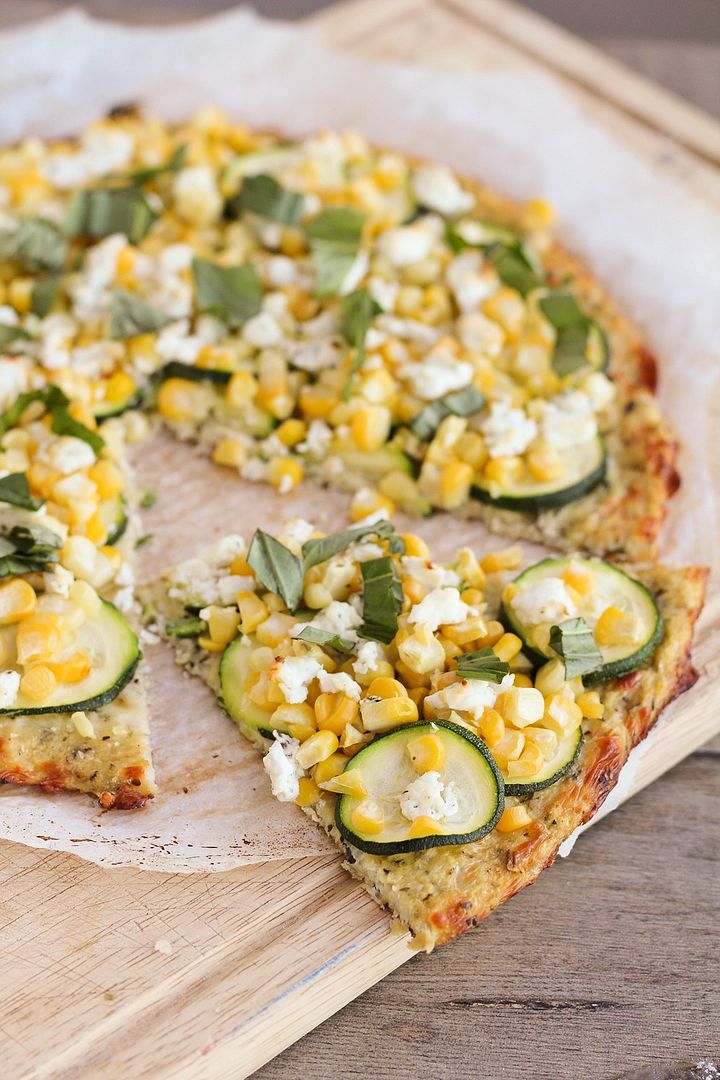
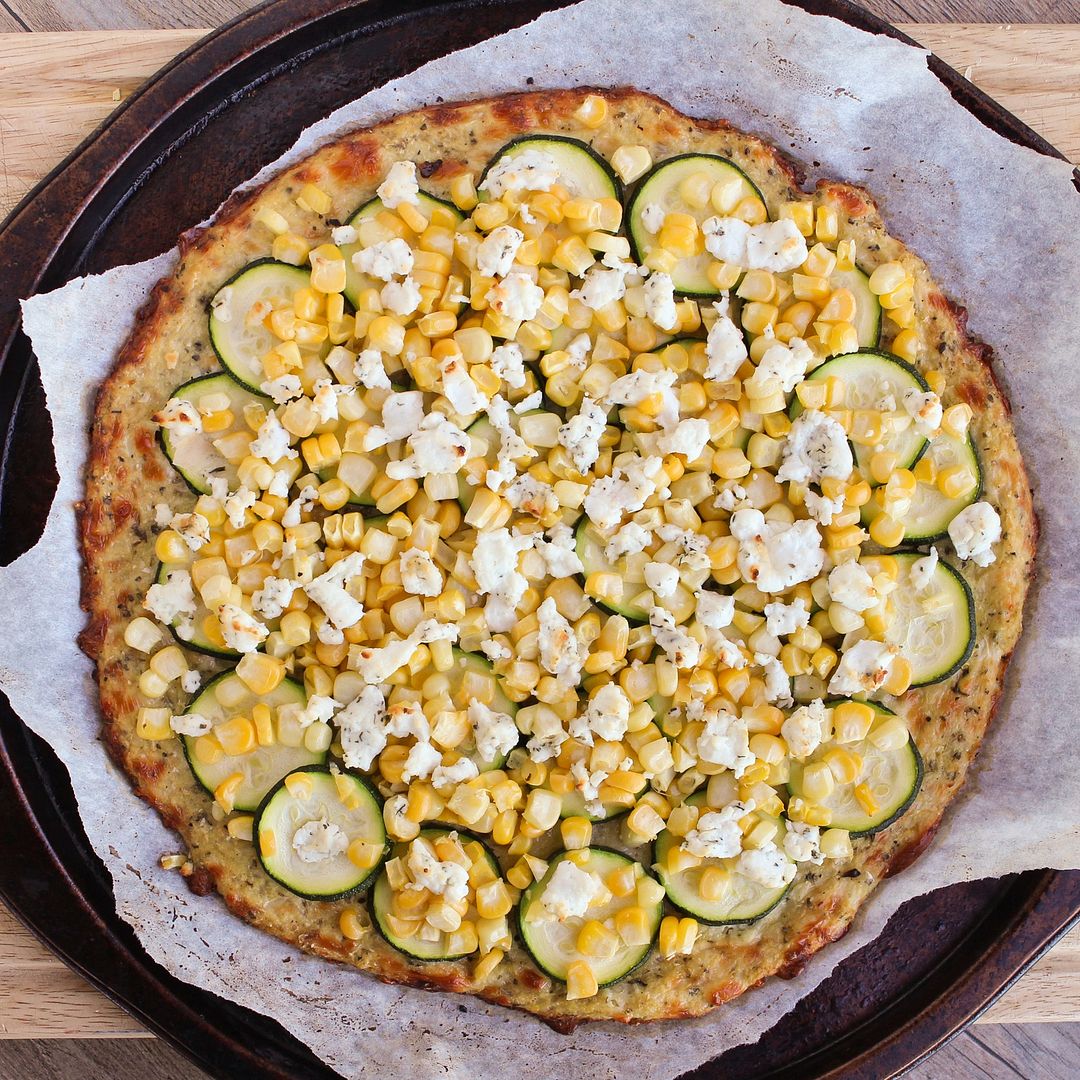
I decided to keep my toppings light and summery with corn, zucchini, and basil.  Even though the air is definitely getting chillier around here, it's still summer and there's still lots of corn and zucchini available!

I didn't use a sauce or cheese except for the goat cheese on top, as there's already cheese in the crust and I didn't want this to be too heavy.  Everything worked so well together and tasted fresh, which I loved!

Cauliflower Crust Pizza with Corn, Zucchini, & Goat Cheese

The crust was also way better than I expected!  It definitely doesn't taste anything like traditional pizza crust, so if that's what you're expecting then you'll be sadly disappointed.  Instead, it's chewy and flavourful and cheesy, and I think I actually might like it even better than regular crust!

Not that this will be replacing regular pizza for me as there's definitely still a time and place for that, but it's nice to have an alternative!

Cauliflower Crust Pizza with Corn, Zucchini, & Goat Cheese

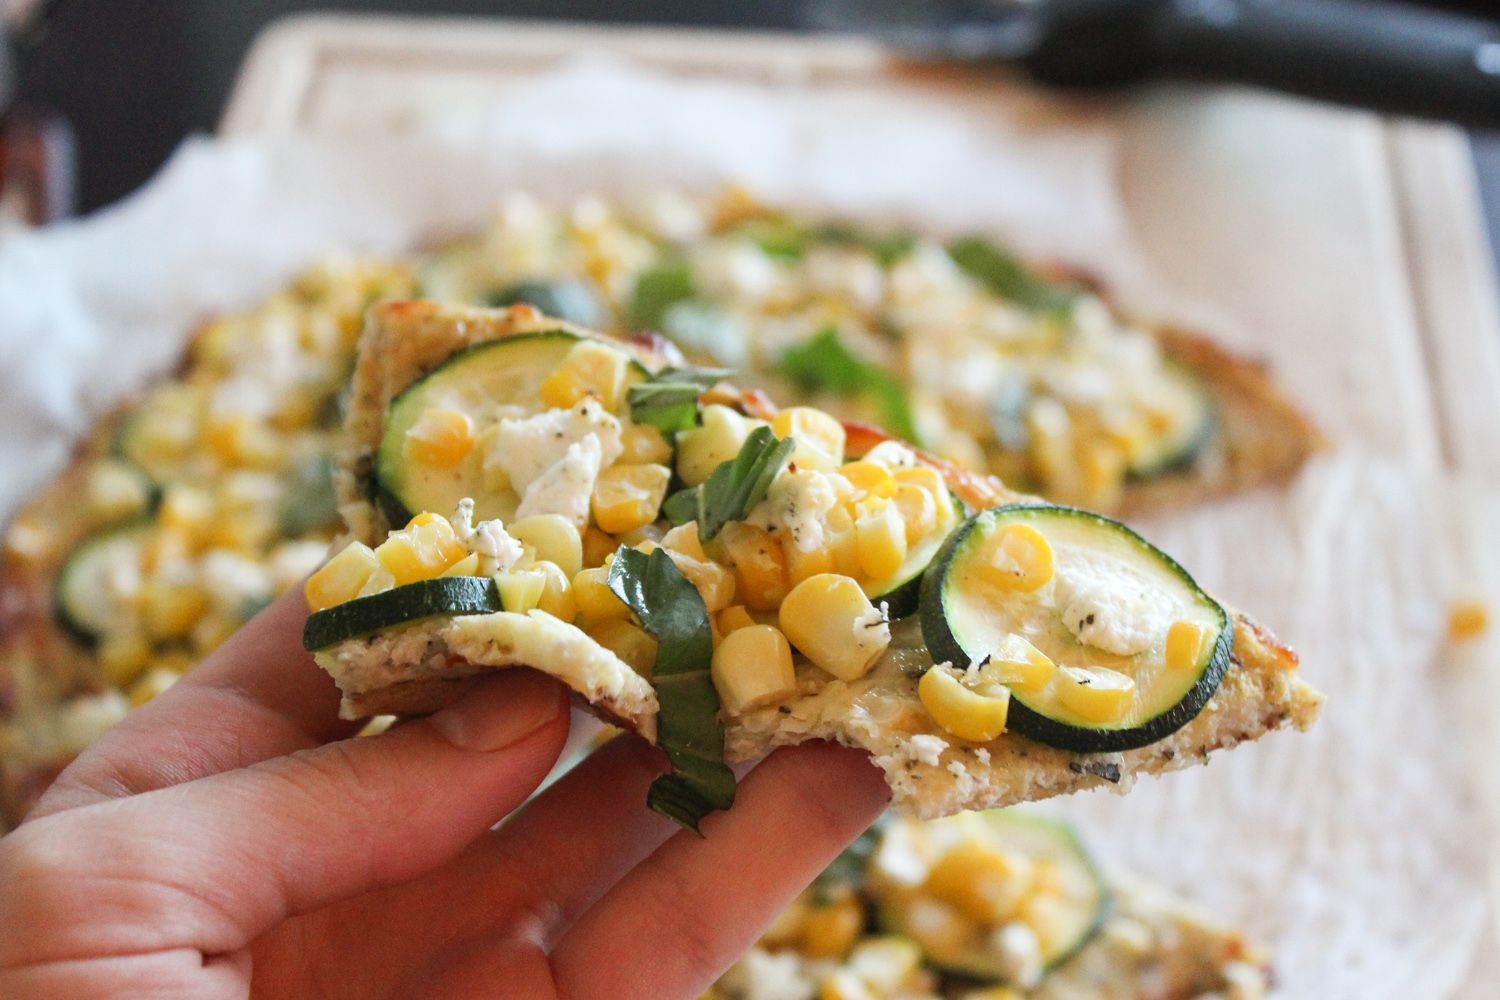
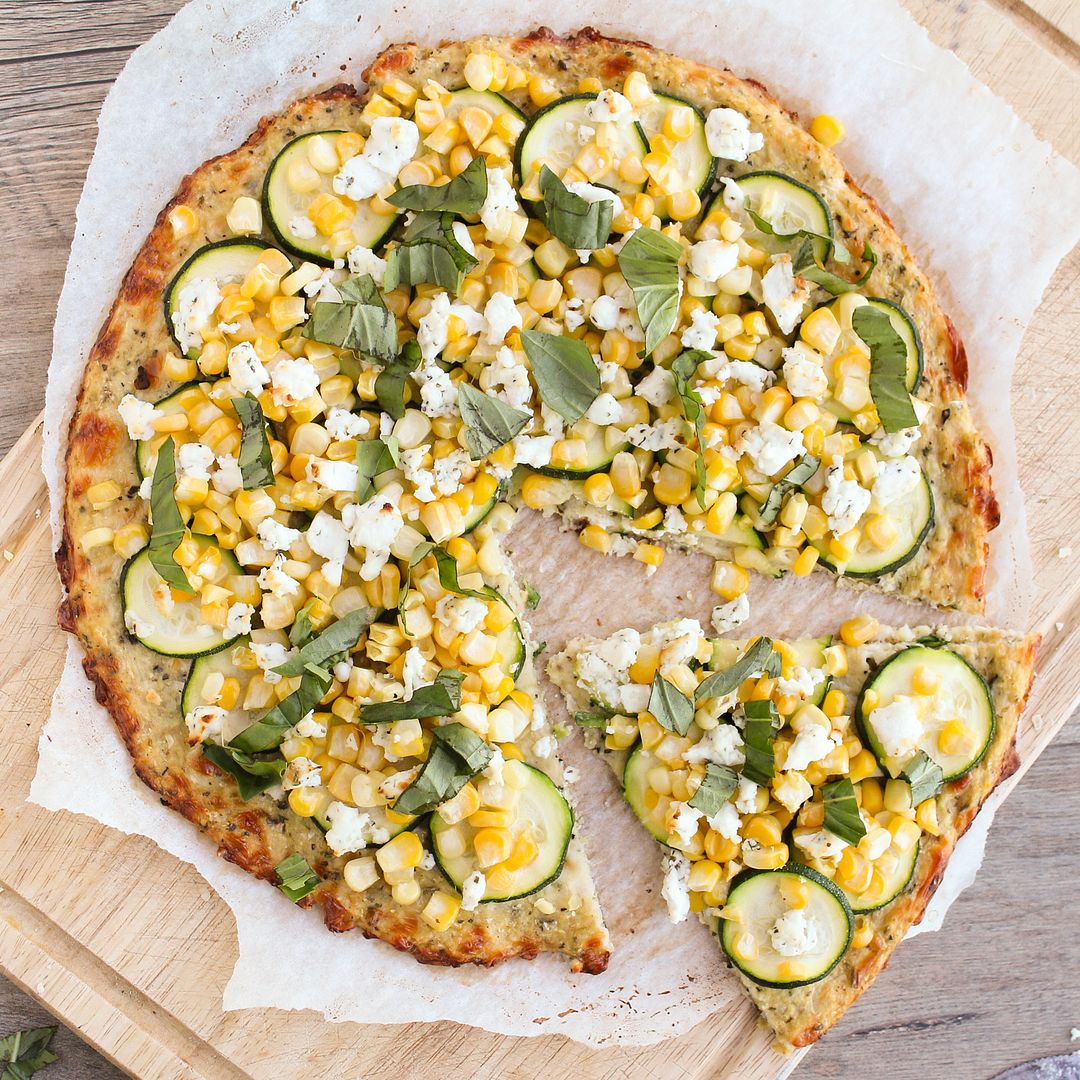
The only problem some people have noted is that the crust isn't super sturdy, so it can be hard to pick it up and eat it with your hands like regular pizza.  I found that I could still pick up the slices of pizza (see picture below for an idea - sorry it's so dark, I didn't think to take a picture until I'd already started eating), but because I chose corn as a topping, it was a bit hard to keep everything in place!  But as long as you don't mind getting a bit messy, it's worth it!  (and you can always eat with a knife and fork if you prefer!)

Cauliflower Crust Pizza with Corn, Zucchini, & Goat Cheese

Cauliflower Crust Pizza with Corn, Zucchini, & Goat Cheese

Crust recipe adapted from The Lucky Penny

Serves 2-3

Ingredients:

For the Crust:
1 medium head of cauliflower
1 cup grated part-skim mozzarella cheese
1/2 teaspoon dried basil
1/2 teaspoon dried oregano
1/2 teaspoon salt
1/4 teaspoon pepper
1 teaspoon nutritional yeast (optional)
1 large egg

For the Toppings:
1 small zucchini, sliced into thin rounds
1 ear of corn, kernels removed
2 oz herbed goat cheese (or plain goat cheese)
A few leaves of fresh basil, sliced thinly

Directions:

Preheat oven to 450°F and line a baking sheet with parchment paper.

Chop the cauliflower into florets (try to remove the stems).  Place in the large bowl of a food processor and pulse for about 30 seconds, just until all of the florets have been pulsed into very fine crumbs.  You should have about 3 cups of crumbs.  Transfer to a microwave safe bowl, cover, and microwave on high for 4 minutes.  Remove and let cool slightly.  Transfer to a clean tea towel (don’t use paper towels - they will shred), wrap up tightly in the towel, and wring all the water out of the cauliflower over the sink.  You will be surprised at how much water comes out!  Keep wringing to get as much water out of the cauliflower as you can – this will prevent the crust from crumbling.  Combine dried cauliflower with the cheese, basil, oregano, salt, pepper, nutritional yeast, and egg.  Mix to combine (I just used my hands).  Transfer to prepared baking sheet and form into a 10” thin circle.  Bake in preheated oven for 10-11 minutes.

Once crust has precooked, remove from oven and top with zucchini, corn, and goat cheese (you might not be able to fit all of the zucchini or corn kernels, depending on how big the zucchini and ear of corn were).  Top with crumbled goat cheese.  Return to oven and bake for another 15-20 minutes.  Remove from oven, top with sliced basil, season with additional pepper if desired, and serve!

Note that this is best eaten fresh - it doesn't keep very well.

September 02, 2013

Monthly Recap - August 2013

I recently started a new feature for the blog where I share bits and pieces of my life and food from the last month as a way of sharing a little more about myself with you guys (and making sure I don't forget about food and recipes I've tried from other sources!) - see July's monthly recap if you missed the first installment!

I can't believe a month has already gone by since the last recap!  But I have a lot to share from August, so let's get to it!


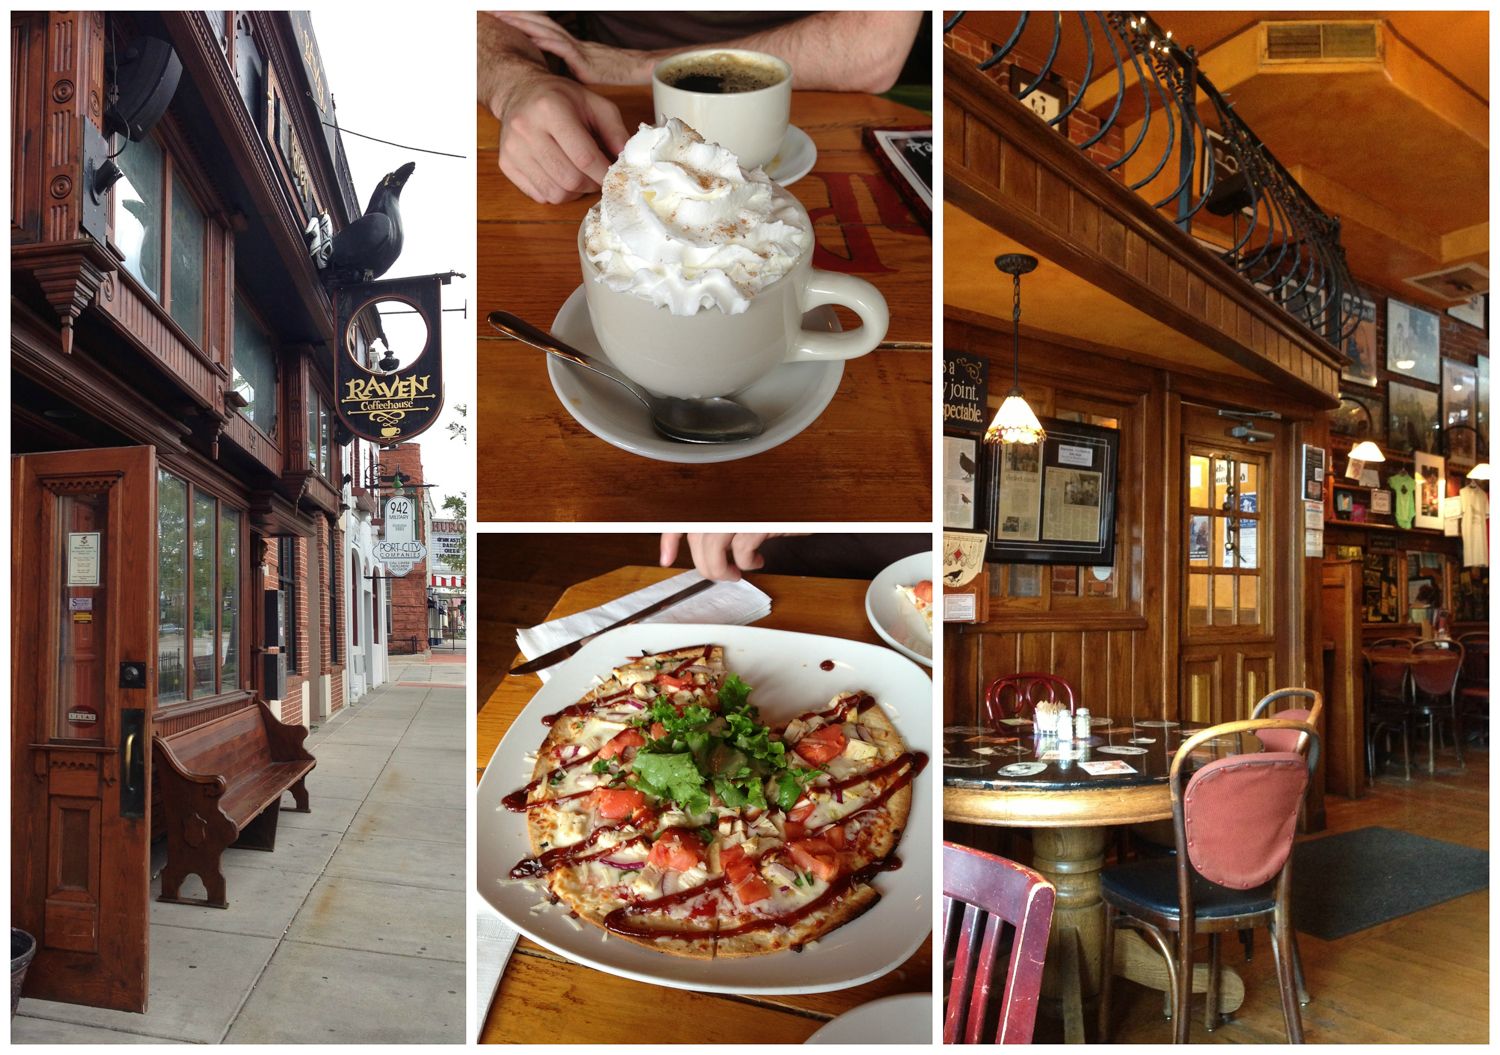
At the beginning of the month, Ryan and I took a little two-day trip down to Port Huron (Michigan) to get out of the city for a bit and do some shopping, eating, and of course, drinking - we love Michigan beer!  We loved the Raven Cafe,  which has a really unique design and offers a ton of amazing sounding drinks - pictured above is a macadamia nut yerba mate latte - yum! 


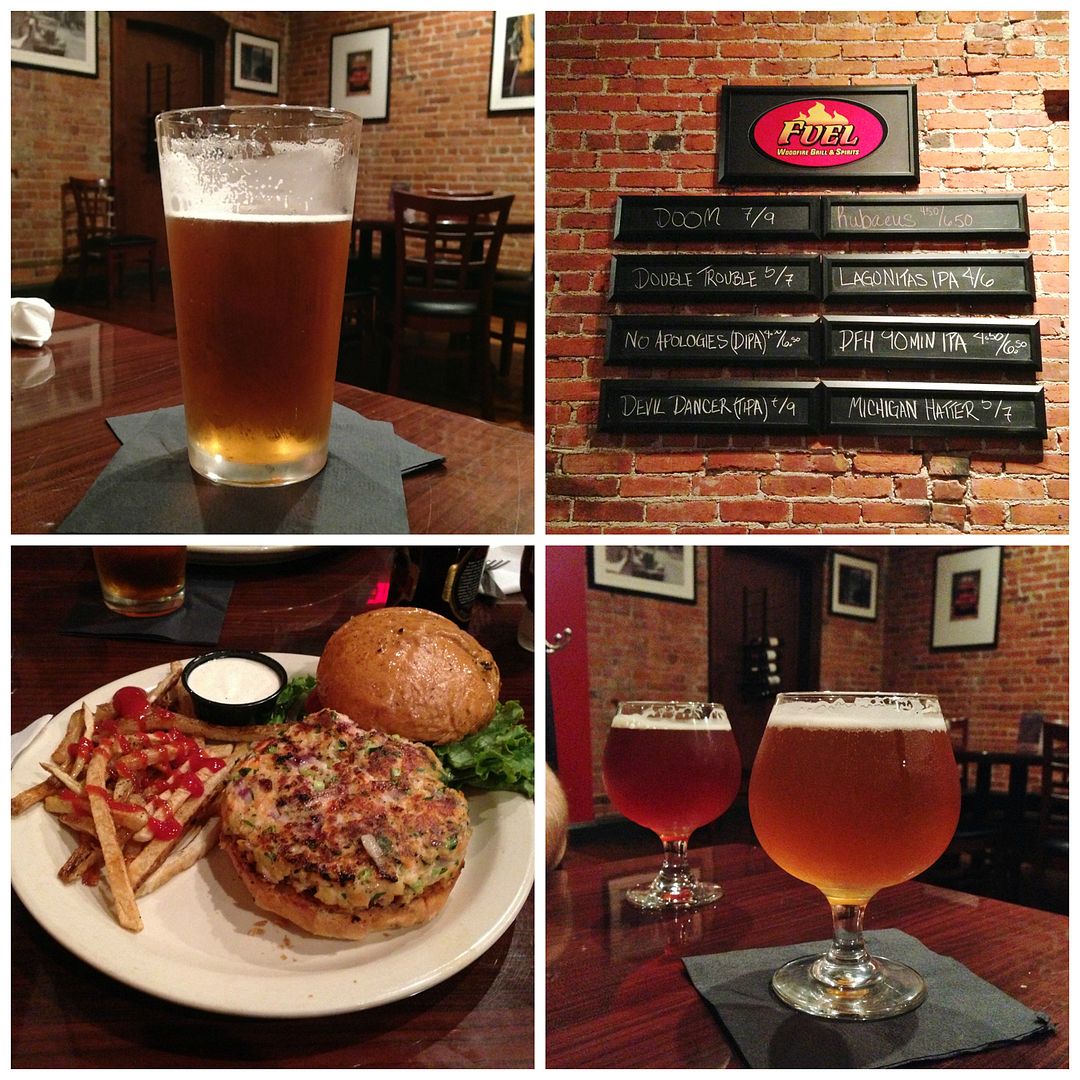
We also loved Fuel Woodfire Grill, where we shared some great craft beers we can't get here in Ontario, and I devoured a delicious salmon burger.


August is also time for the Kitchener blues festival, which apparently is the largest blues fest in North America.  My sister and I most enjoyed Big Sugar's concert (you've probably heard their songs Better Get Used to It, Diggin' a Hole, or Turn the Lights On), and I also loved that Ontario Turkey had a food truck nearby that was giving out free turkey sliders!


This month I've tried to get into running.  I like to stay active but running is not one of my preferred methods of doing so.  However, there are a couple of fun sounding races coming up this fall that I want to participate in, so I'm trying to see if I'm capable of running a 5K.  So far I don't think it will ever be possible (particularly because my knee has been acting up a lot lately), but I'm not quite ready to give up yet.  I even bought crazy bright neon shoes to try to motivate me - I can't forget to go running when those things are blinding me by the door!


I already shared the food I ate during my trip to Japan this month, but I thought I should share some pictures of some of the non-food related sights and things we did there too (and I'll try to be super brief in my descriptions).  There's so much to see in Tokyo and the streets were always so packed!


I loved nighttime when all the colourful signs were lit up (and the streets were often just as busy!).


We went to Lake Kawaguchi near Mount Fuji for a day trip.  The lake was beautiful, but unfortunately it was too cloudy that day to see the mountain itself (that's in the lower right hand corner if you can make anything out behind the clouds!).


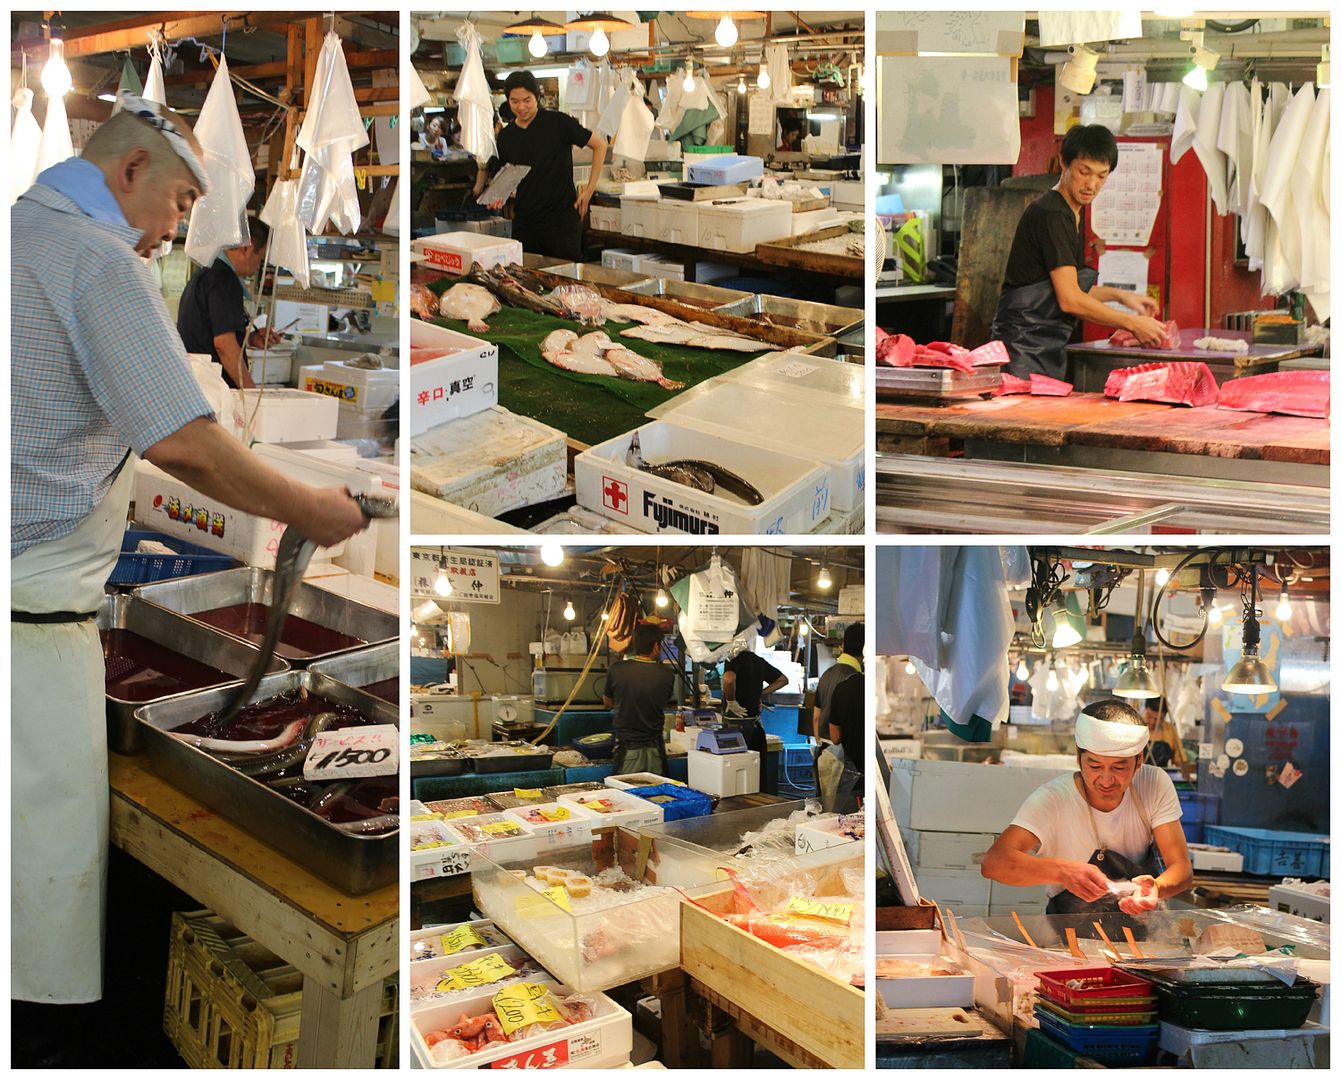
Tsukiji fish market was action-packed and a little crazy - I recommend an early morning trip there if you're planning on visiting Tokyo!


I also highly recommend going to a baseball game.  We went to see the Chiba Lotte Marines play the Seibu Lions and it was so much more exciting than North American baseball games.  There are cheerleaders, mascots, fireworks, balloons, and the crowd chants nonstop while their team is at bat - so fun!


We stopped into a cat cafe to play with some adorable cats for an hour - a unique experience to try if you love animals!


We also visited Sensoji temple, the oldest Buddhist temple in Tokyo, which was quite nice.  I'll stop here for Tokyo pics though so you don't get sick of hearing about my trip (that's pretty much all there was to share anyway).


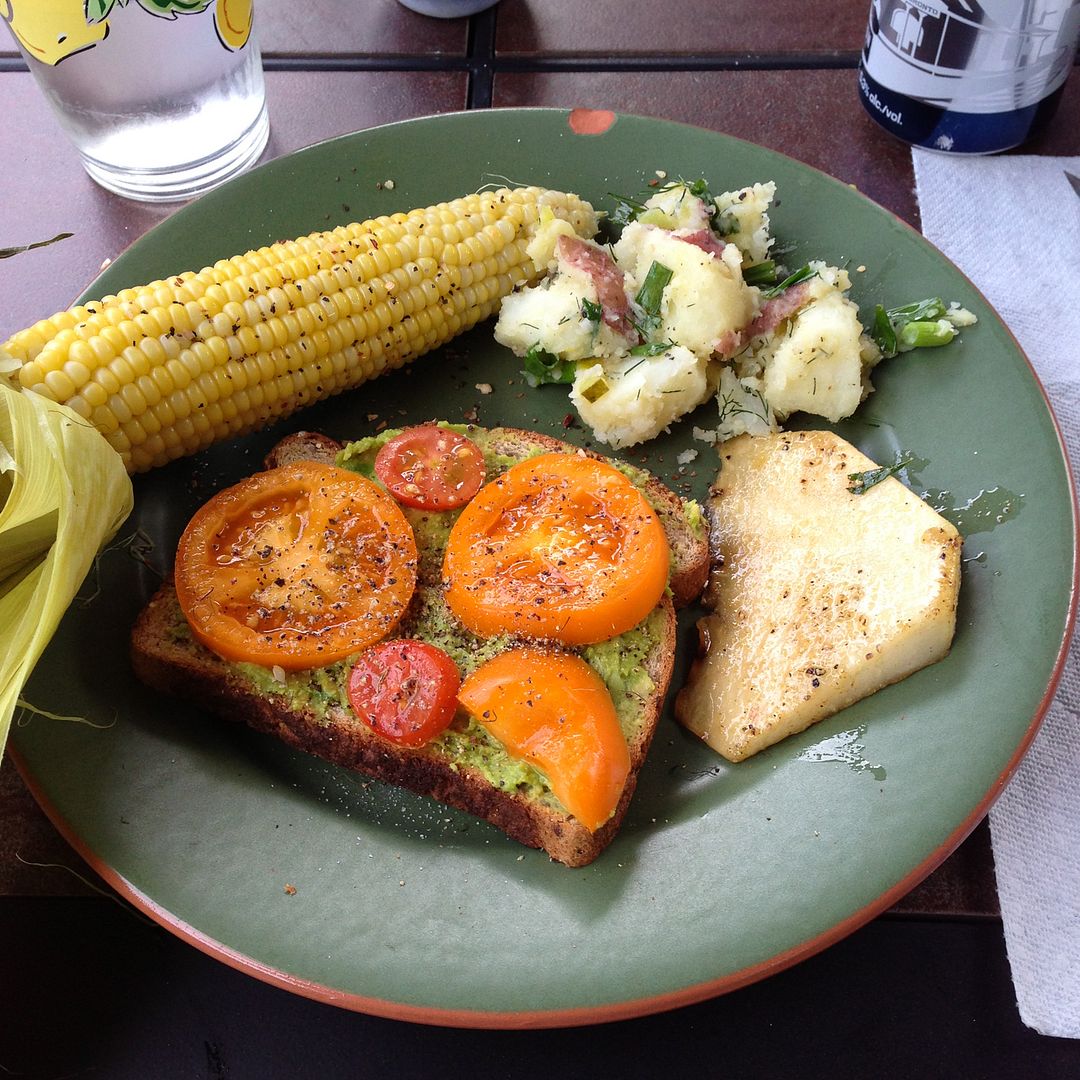
Food-wise this month, I've been loving simple meals that let summer veggies shine.  Pictured above is some local corn, grilled jicama, potato salad, and avocado & tomato toast - my fave!


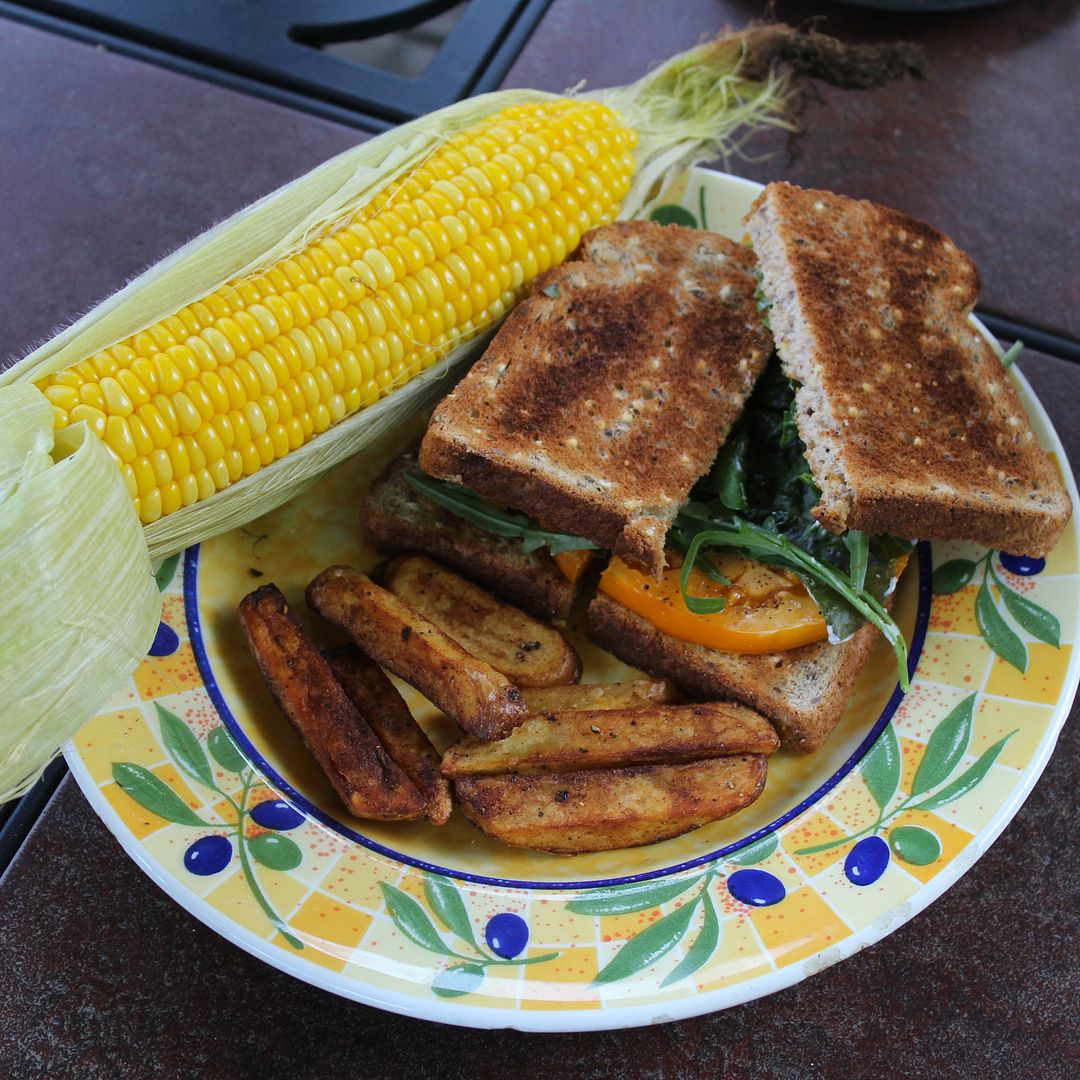
More corn and tomato sandwiches (courtesy of my parents) - we've been getting some great local corn this year and my parents' garden has also been providing tons of amazing tomatoes and veggies - I love that they share it with me!


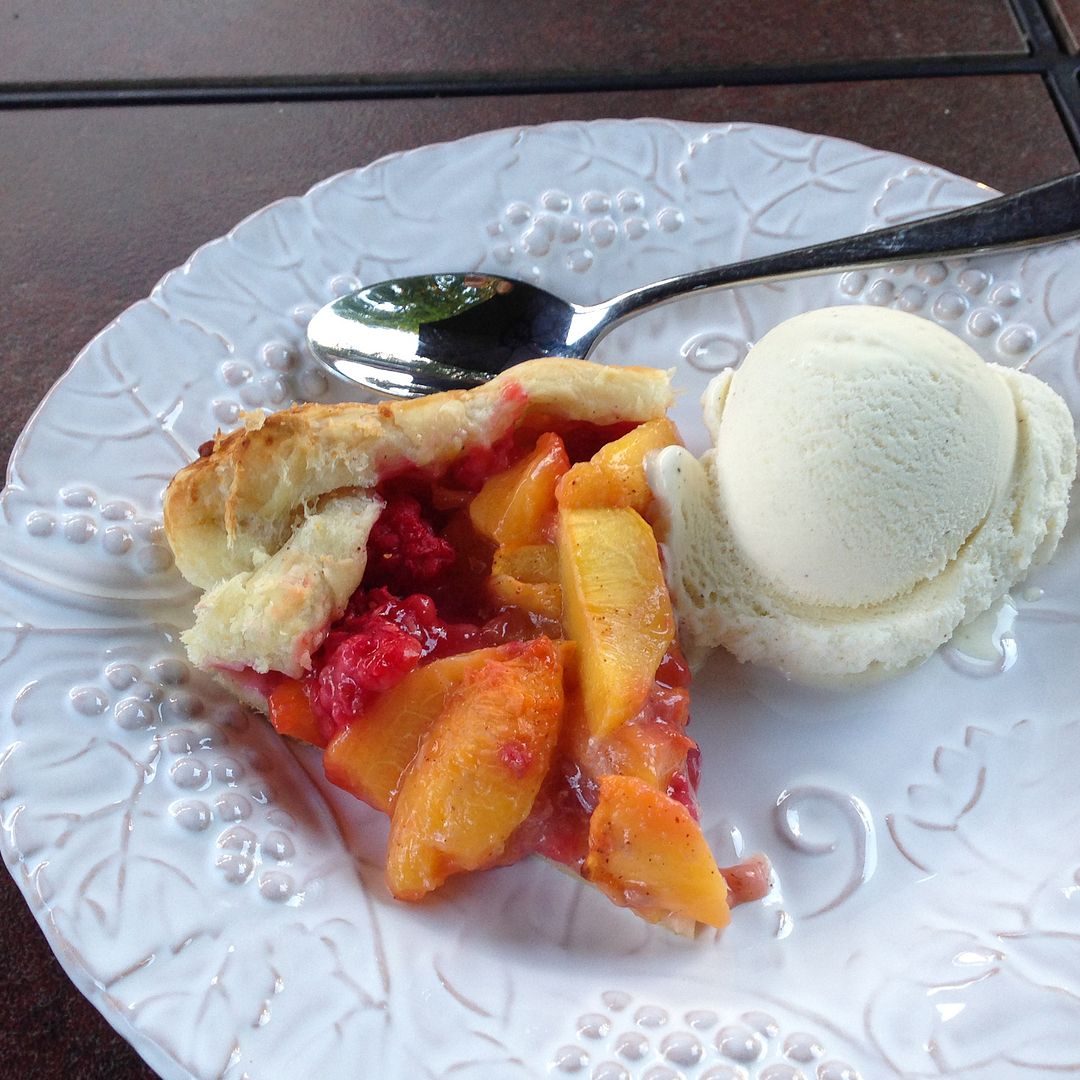
My older sister recently picked up a ton of local raspberries and peaches at the market and made us this raspberry & peach galette on puff pastry for dessert this past weekend - so good!


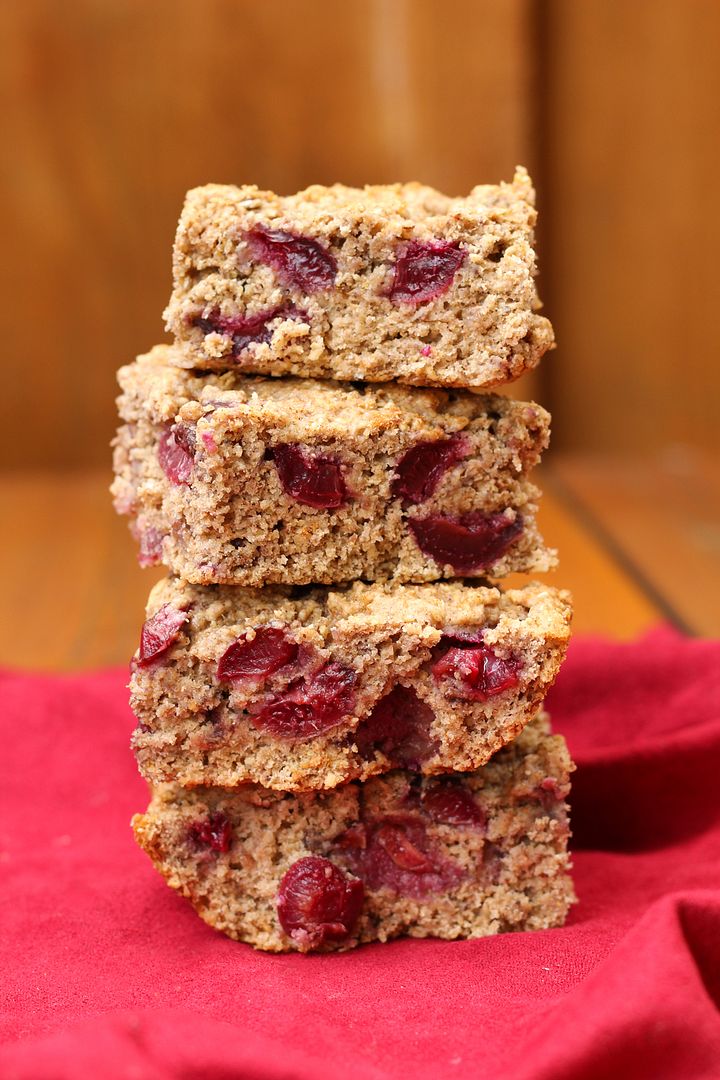
Earlier in the month I made this vegan cherry snack cake from FatFree Vegan Kitchen.  I loved the bursts of fresh cherries paired with subtle spices, and especially loved that it was healthy!


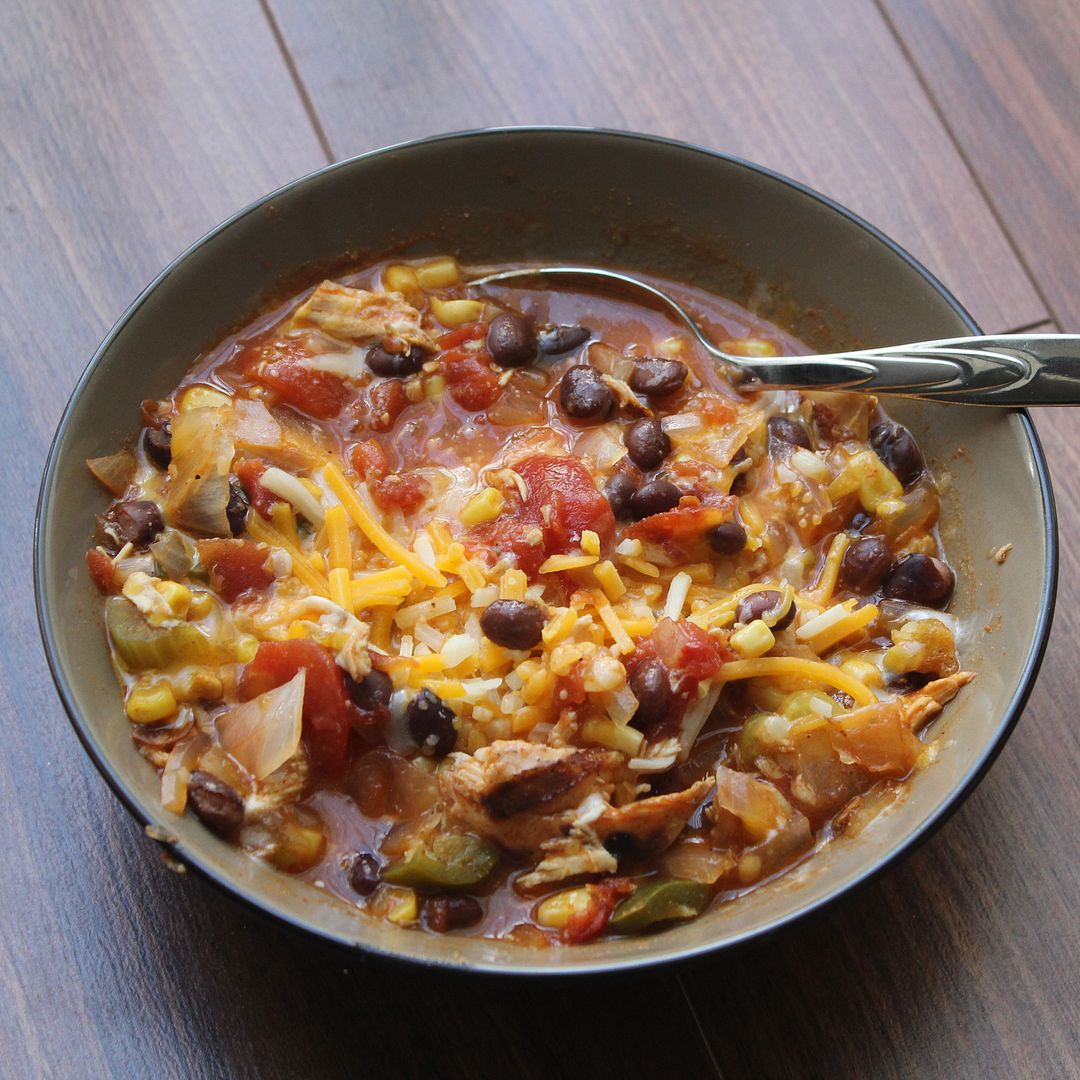
I've slowly been transitioning into fall meals lately too.  When I got back from Japan and had no food around, my boyfriend thankfully shared this buffalo chicken chili he made with peppers, onion, celery, tomatoes, black beans, corn, chicken, spices, and buffalo sauce - so comforting and just what I was craving!


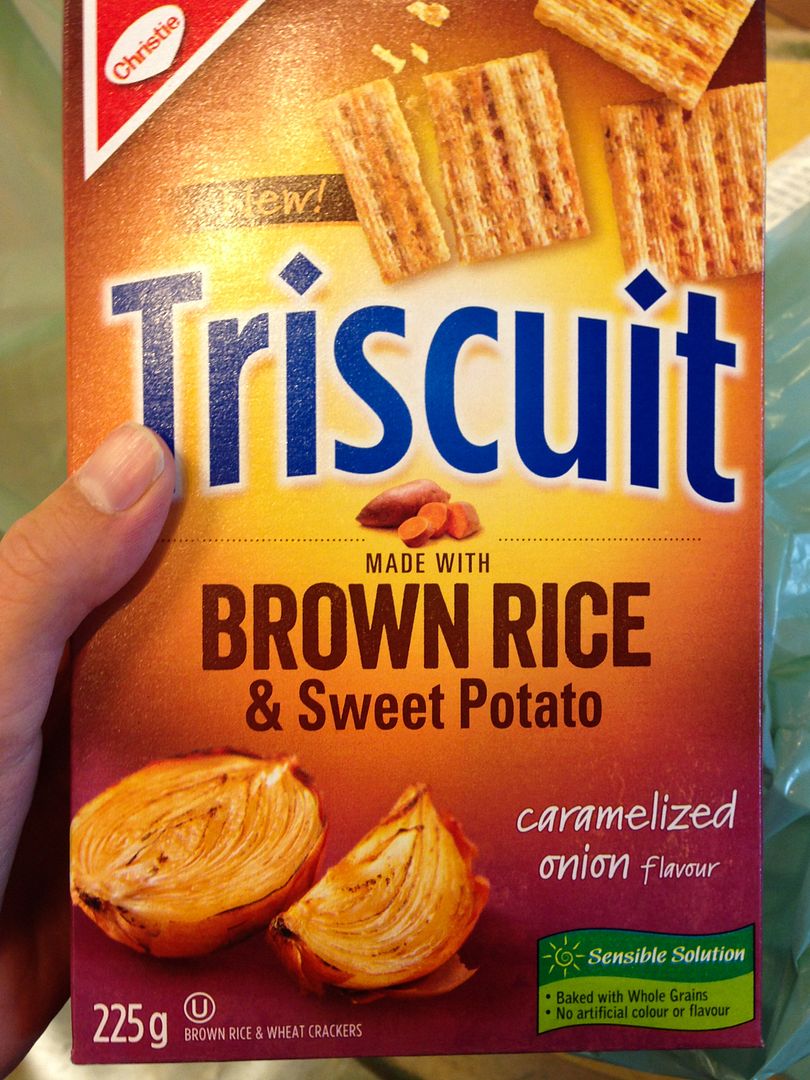
I'm loving anything caramelized onion-flavoured lately and these Triscuits are my new favourite snack.  Interesting side note - I noticed that in the US this exact same flavour is called "roasted sweet onion" instead of caramelized onion - weird, right?


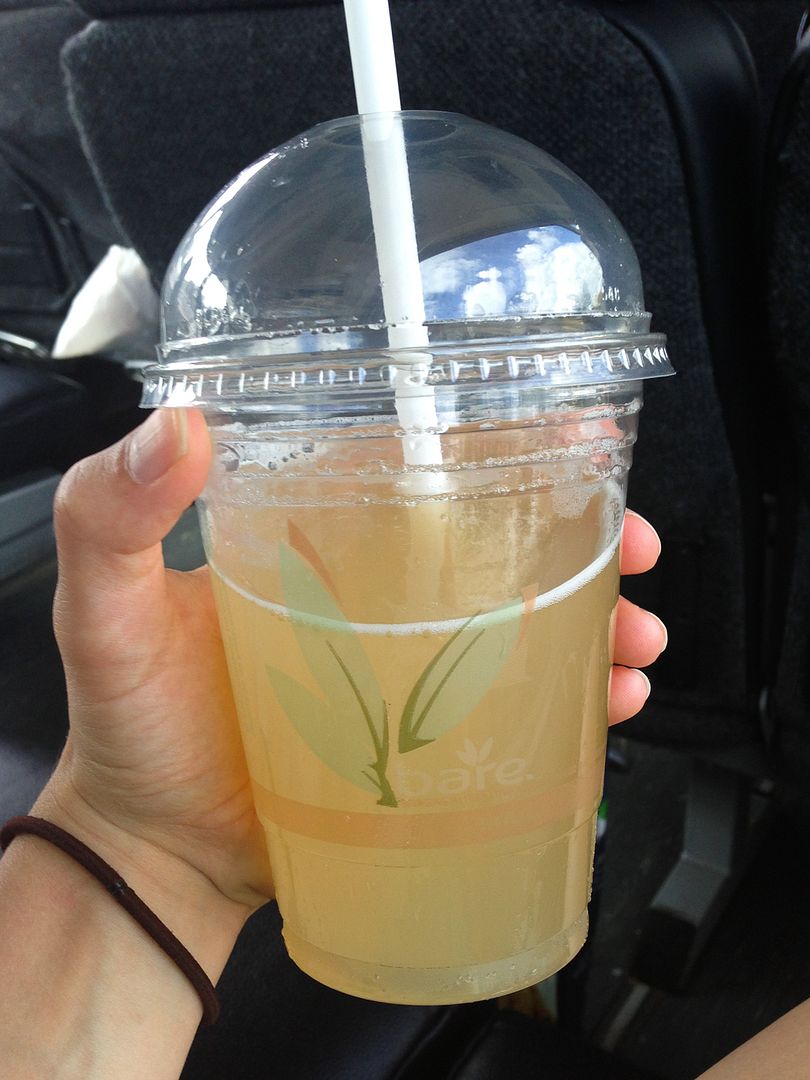
I also find myself buying more and more kombucha drinks.  I have no idea if the health claims on the bottles are really true or not, but there's something about the slightly vinegary taste that I really like.  Cafe Pyrus (a great vegan cafe) recently added a kombucha tap and my sister brought me a cup of their lemon ginger kombucha which was lovely!


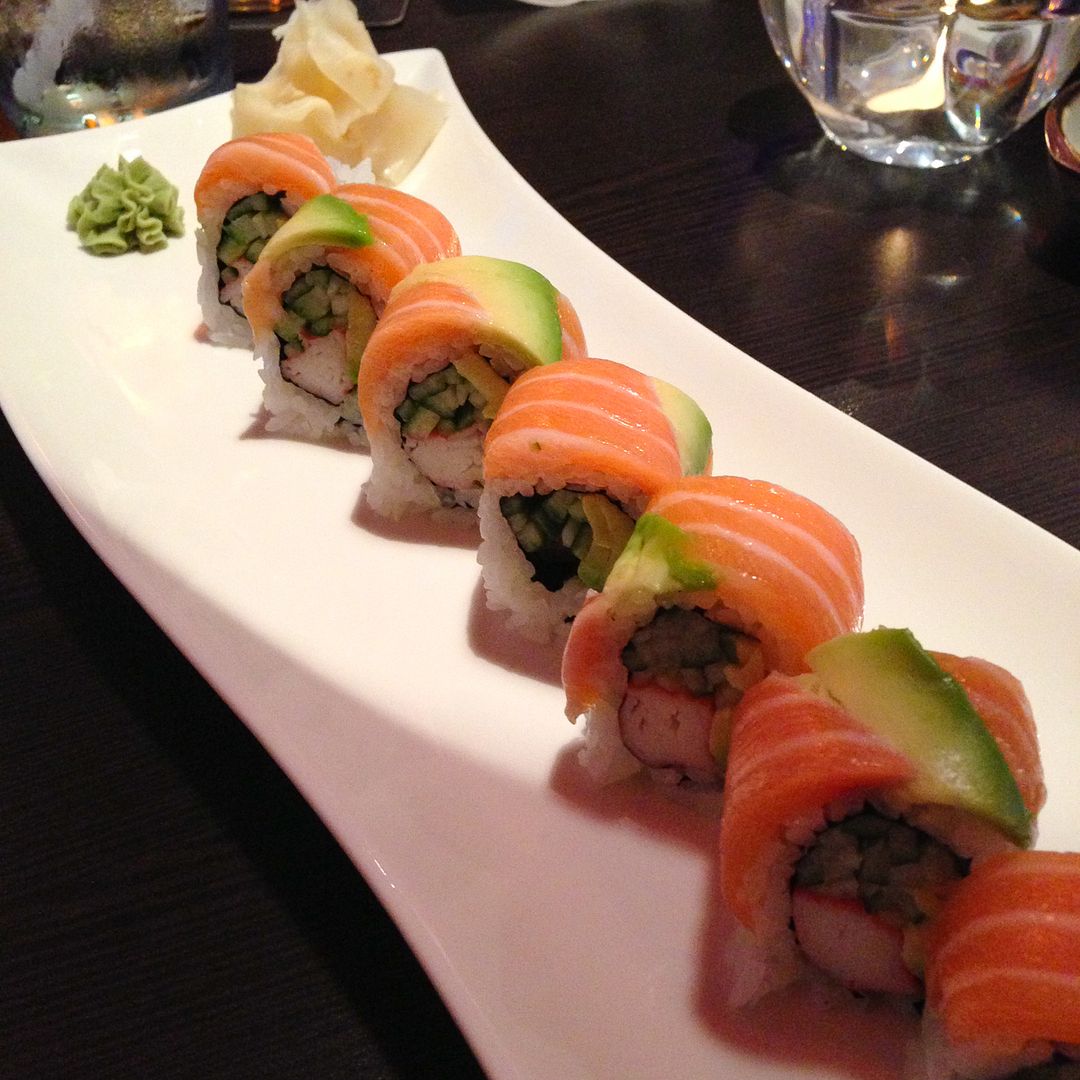
I embarrassingly didn't eat much sushi while I was in Japan, so I tried to make up for it by going out for Japanese food with a friend when I returned home.  I got a seaweed salad and the alaskan roll, which was a California roll topped with avocado and salmon - this is the kind of sushi I love!


That's it for August - I'm going to miss summer sunsets as the days start to get shorter (along with sunshine, warm weather, summer berries and veggies, patios, and festivals), but I'm also starting to look forward to fall and everything that comes with the (brief) season - especially football and pumpkin everything!

I hope everyone had a great long weekend and for those who are returning to school (or getting their kids ready for school), or starting other new ventures, I wish you all the best this September!