
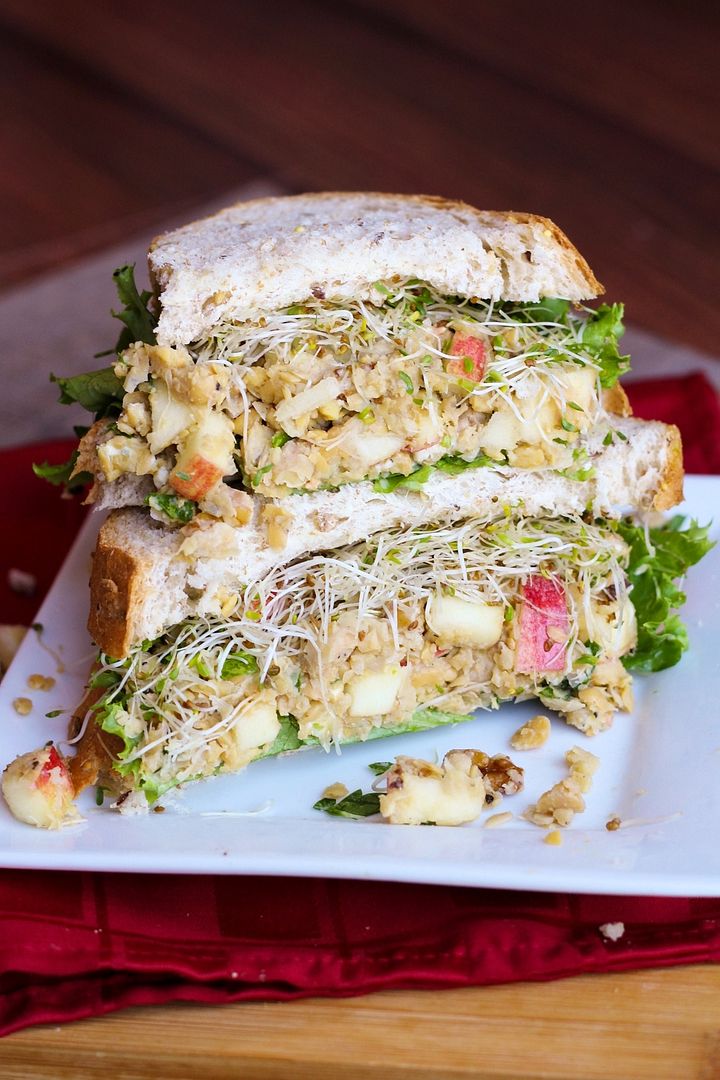
With fall well underway, I’ve been craving heartier meals that incorporate seasonal ingredients like pumpkin and apples. I’ve seen a lot of smashed chickpea or “chickpea salad” sandwiches around the web before and have wanted to try my own version for a while now. I knew I wanted the crunch of apples in there, and because I can’t get enough of the apples-blue cheese combination, I mixed my apples and chickpeas with blue cheese, throwing in some walnuts for more texture, and a quick mustard and apple cider vinaigrette for added flavour. Combined with thick slices of fresh 7 grain whole wheat bread, lettuce, sprouts, and a little extra mustard, this made for a really satisfying sandwich (when my dad saw my lunch one day he asked if I was Dagwood) that I loved!
If I’d wanted it to be more of a chickpea salad sandwich, I could have added mayo, but I don’t ever have mayo around and I liked the flavour of the mixture on its own so I left it out. Without something like mayo to get everything to stick together, the filling is a bit messy in a sandwich, but that’s all part of the fun! You could try adding some if you prefer though, or even use a mixture of mayo and plain Greek yogurt to keep this on the lighter side.
And if blue cheese isn’t your thing, here are a few other chickpea sandwiches you could try!
Smashed chickpea salad from Smitten Kitchen
Smashed chickpea and avocado salad sandwich from Two Peas & Their Pod
Curried chickpea salad sandwich from The Simple Veganista
Cranberry walnut chickpea salad sandwich from The Simple Veganista
Herbed chickpea sandwich (with feta and dill) from Martha Stewart
Smashed chickpea & pesto sandwich from Bake Your Day
Pink chickpea smash salad from Happy Healthy Life
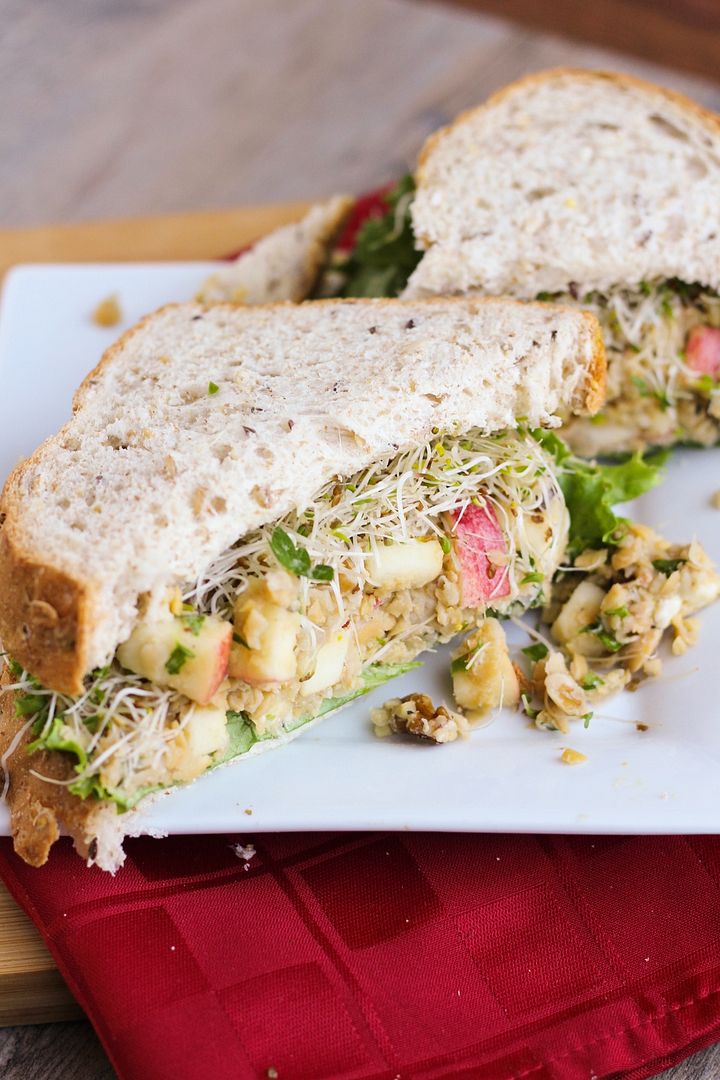
Smashed Chickpea, Blue Cheese, & Apple Sandwich
Recipe my own but inspired by many other versions of smashed chickpeas that others have created!
Makes 4 sandwiches
Ingredients:
For the Chickpea Mixture:
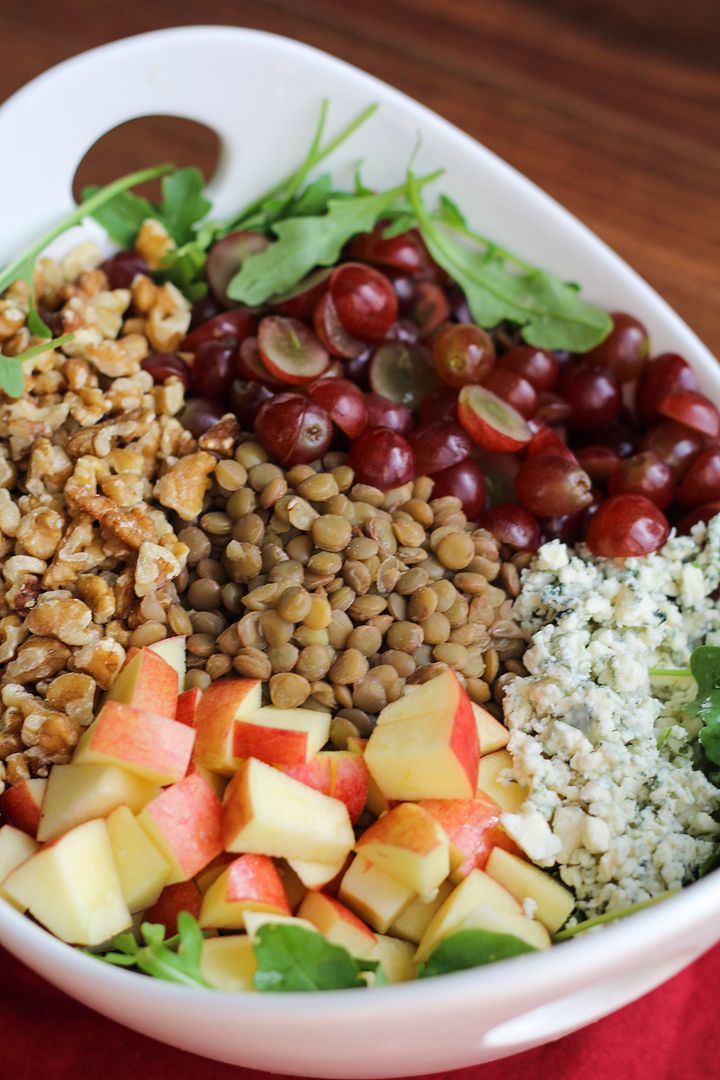
1 (540mL) can of no-salt added chickpeas, drained and rinsed
1 large apple, cored and diced – any crunchy and sweet variety that you like will work
1/4 cup chopped walnuts
2 oz crumbled blue cheese
2 tablespoons chopped parsley
1 tablespoon extra-virgin olive oil
2 teaspoons apple cider vinegar
1 teaspoon Dijon mustard
1 shallot, minced
Salt and pepper
For the Sandwiches:
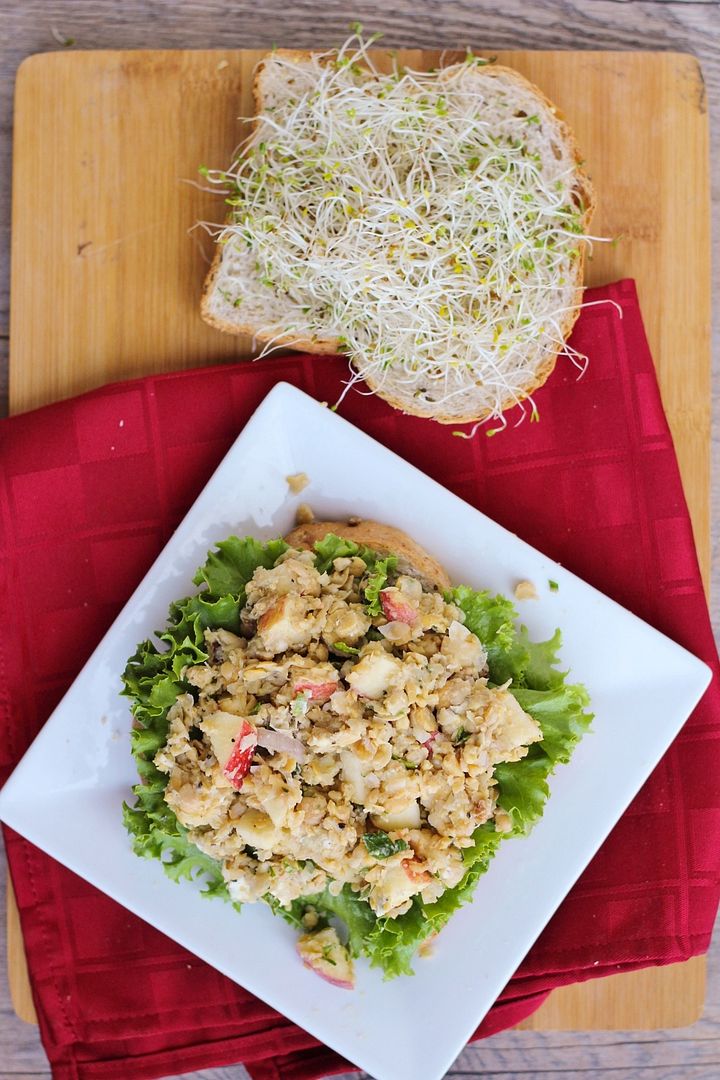
8 slices whole grain bread
Lettuce, and sprouts if desired
Extra mustard if desired (such as Dijon, honey mustard, or deli style mustard)
Directions:
In a small bowl, whisk together the olive oil, vinegar, Dijon, and shallot. Let sit for at least 5 minutes (I find this takes some of the bite out of the shallots).
Smash chickpeas with a potato masher or large fork; they don’t have to be completely smashed, just partially. I found it difficult to do with a fork so I pulsed mine several times in a food processor; this is quicker if you don’t mind washing an extra dish! Mix the apples, walnuts, blue cheese, and parsley into the chickpea mixture. Mix in the olive oil dressing and season mixture generously with salt and pepper.
Divide chickpea mixture evenly among 4 sandwiches, along with lettuce, sprouts, and extra mustard if desired (I liked these best with added mustard!). Try to flatten or “smush” the chickpea mixture onto each sandwich so it sticks together. Even still, these might be messy and I learned that it’s best to hold on to both ends of your sandwich as you’re eating to prevent the filling from falling out!

