Showing posts with label breadcrumbs. Show all posts

June 12, 2014

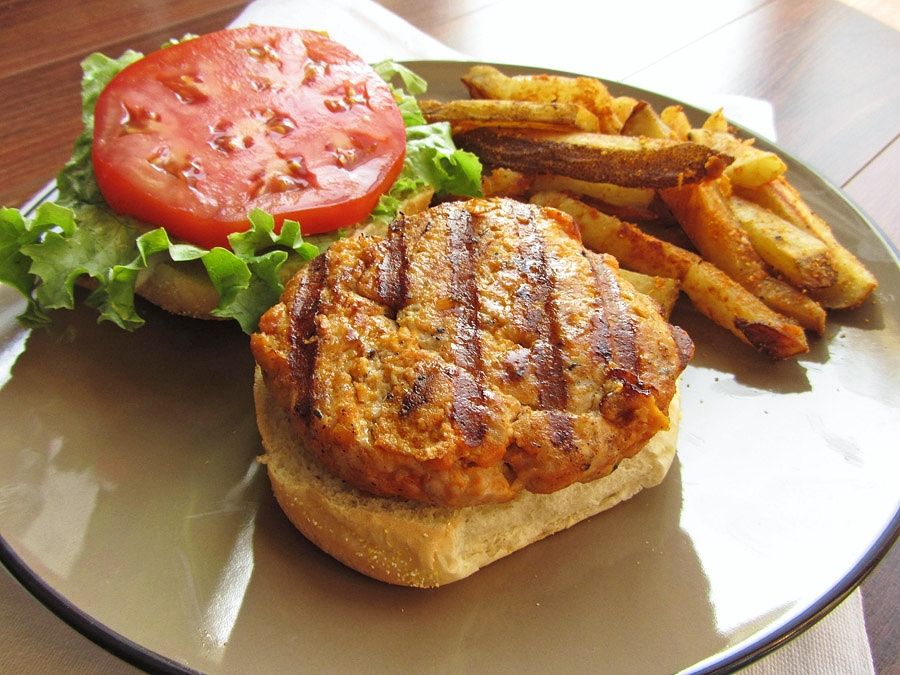
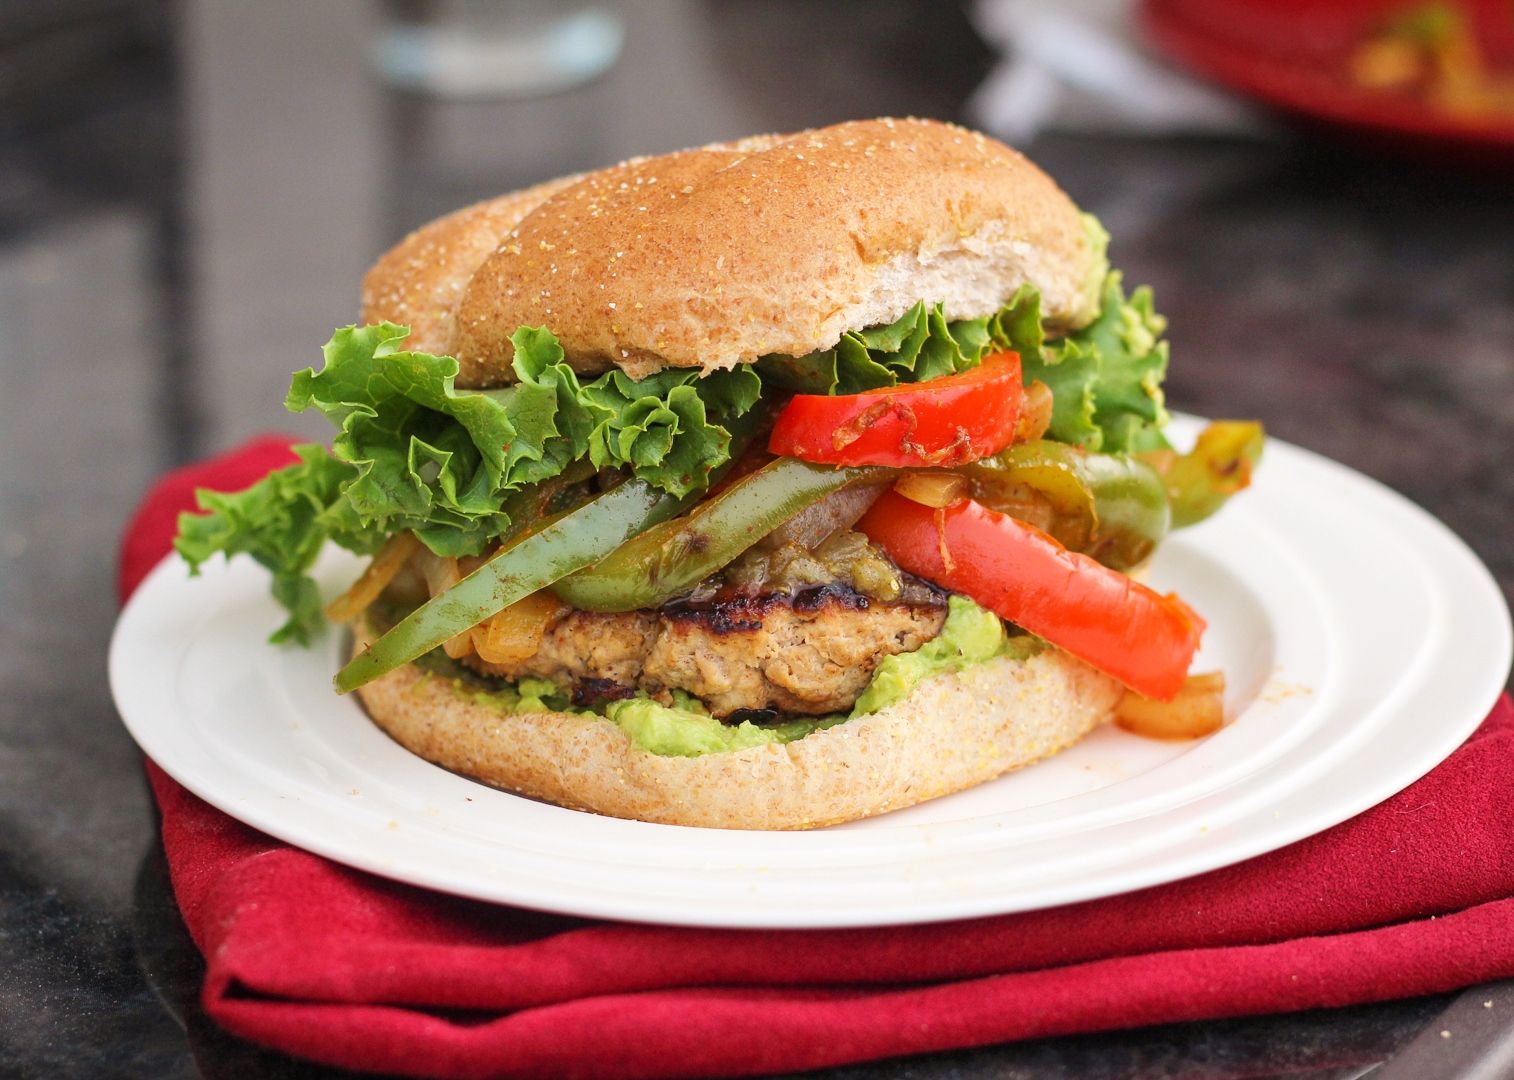
Chicken (or Turkey) Fajita Burgers

Chicken (or Turkey) Fajita Burgers

We love turkey and chicken burgers around here, and have been eating them a lot more often now that it’s summertime and I seem to crave burgers all the time.  Not only are they inexpensive (around 5 dollars of meat gives us meals for two days), but they’re so easy to make, they provide a healthy lean source of protein, they fill me up, and there are infinite flavour combinations to experiment with!

It’s hard to persuade Ryan away from our favourite buffalo chicken burgers, but I like trying new things, so recently I decided to make chicken fajita burgers.  I actually intended to use turkey but didn’t realize I’d grabbed chicken until I got home – either works though!
Chicken (or Turkey) Fajita Burgers

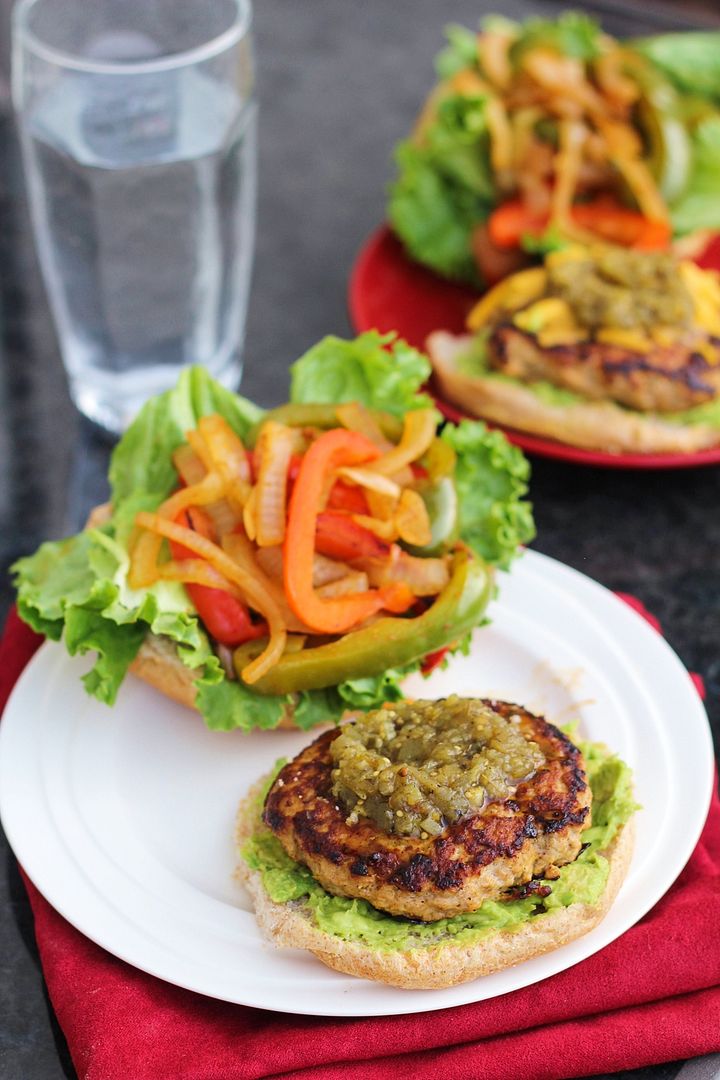
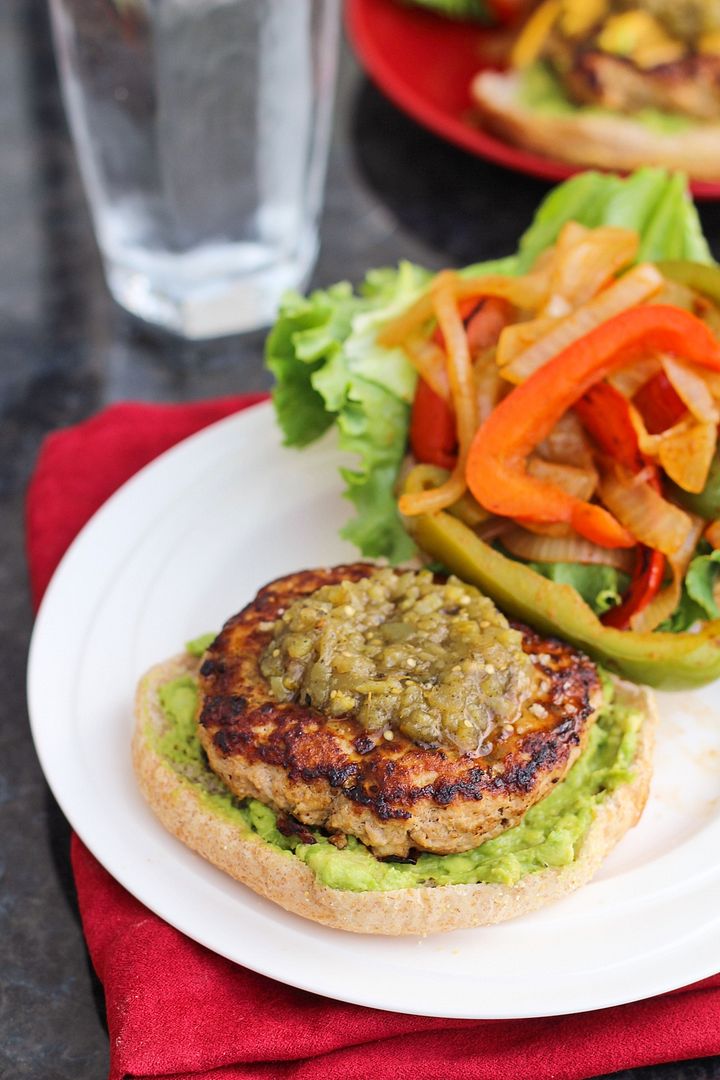
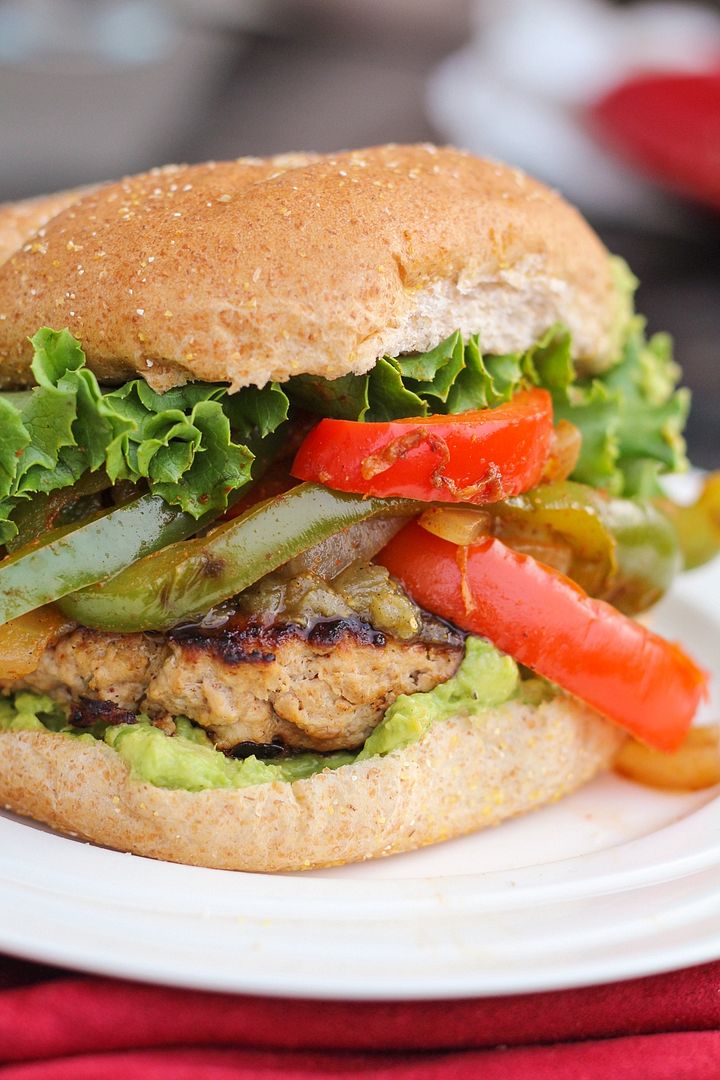
These basically taste like chicken fajitas but in burger format, thanks to the combination of fajita spices in both the burger and the veggies, the sautéed peppers and onions on top, and optional (but delicious) extras like mashed avocado, tomatilla salsa, and cheese!

The way I wrote out the recipe makes this look like a lot of ingredients and work, but it’s really not.  Most of the ingredient list is dedicated to the spices you’ll use to create your own fajita seasoning, but if you like, you can make this even easier with a premixed fajita spice!
Chicken (or Turkey) Fajita Burgers

I loved the flavour in these and all the added veggies to make them a complete meal for me!  When we ate our leftovers the next day, Ryan opted to leave off the veggies and instead top the patties with buffalo sauce, so I don’t think they’ve replaced buffalo burgers as his new favourite, but I’ll definitely keep making these as a fun alternative!

I’m off to vote (it’s Election Day in Ontario) and then join my lovely older sister for lunch for her birthday (Happy Birthday if you’re reading this!).  Hope you all have a great day and weekend!
Chicken (or Turkey) Fajita Burgers

Chicken (or Turkey) Fajita Burgers

Recipe inspired by Cooking Light with many adaptations

Makes 4 burgers

Ingredients:

Fajita Seasoning:
1 teaspoon chili powder
1 teaspoon cumin
1/2 teaspoon paprika
1/2 teaspoon garlic powder
1/4 teaspoon onion powder
1/8 teaspoon cayenne
1/4 teaspoon salt

Burgers:
1 lb lean or extra-lean ground chicken or turkey
1/4 cup tomatillo salsa
1/4 cup breadcrumbs (I used panko)
2 teaspoons fajita seasoning (above)

Veggies:
2 teaspoons olive oil
1 sweet onion, sliced
1 red bell pepper, sliced
1 green bell pepper, sliced
2 teaspoons fajita seasoning (above)

Topping:
4 whole wheat hamburger buns
1 ripe avocado, mashed with some salt and pepper
Additional tomatillo salsa
Lettuce
Cheese such as Monterey jack or pepper jack, optional

Directions:

Combine spices for fajita mixture in a small bowl.  Mix well and set aside.

To prepare burgers, transfer ground chicken or turkey to a large bowl and add salsa, breadcrumbs, and 2 teaspoons fajita seasoning.  Stir with a fork until combined.  Use your hands to shape into 4 even patties, being very gentle and not pressing the meat so you don't make tough burgers. 

Depending on how big your skillets are, heat 2 or 3 skillets over medium-high heat.  I used one skillet for the veggies and 2 for the burgers because I could only fit 2 patties per pan.  Add a little olive oil to each pan.  Add the peppers and onion to one large pan and stir.  You will let these cook until slightly softened, about 10 minutes or until the burgers are done, stirring often.  In the last 3-5 minutes of cooking, season with remaining fajita seasoning (around 2 teaspoons) and stir to coat.  Transfer to a bowl when done.

Meanwhile, add burger patties to other skillets and let cook about 4-5 minutes, flip, then cook another 4-5 minutes on the other side or until done.  If you want to add cheese, add a few slices a couple  minutes before they’re done cooking so the cheese melts slightly.

To prepare burgers, I spread the bottom bun with the mashed avocado, topped with a burger patty, which I then topped with a spoonful of tomatillo salsa.  On the top bun I added lettuce and a big pile of the sautéed veggies, then put them together.  You might end up with leftover veggies, depending on how much you put on each burger.

July 23, 2013

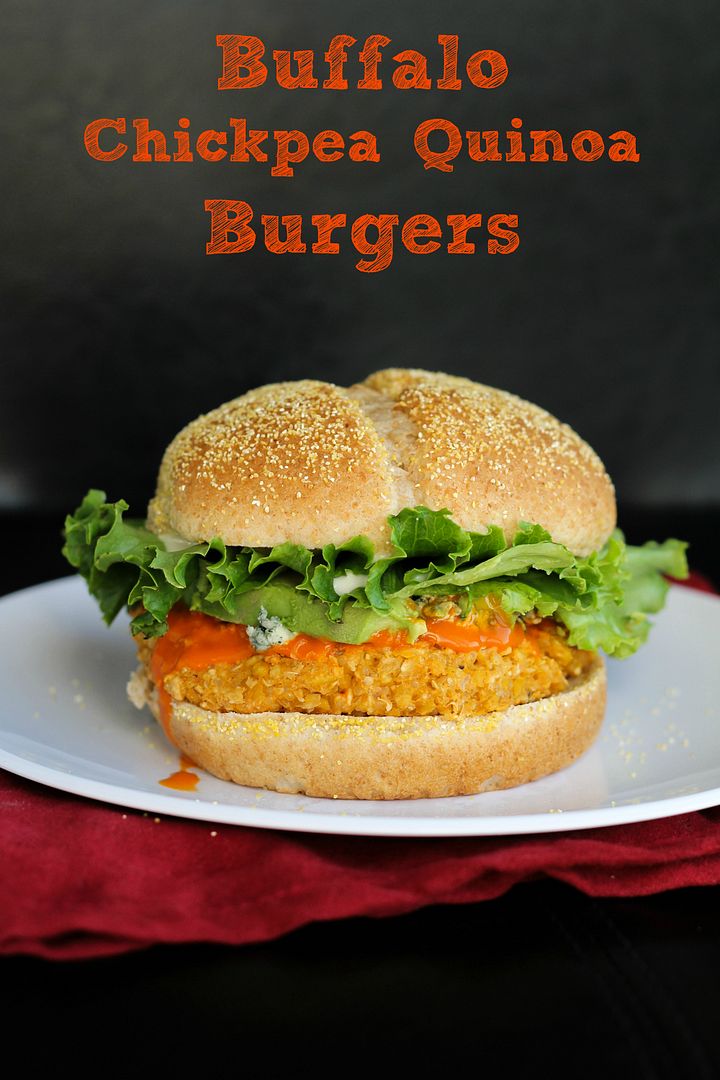
Buffalo Chickpea Quinoa Burgers

Buffalo chickpea quinoa burgers

When I made these lemon & feta chickpea quinoa burgers for my boyfriend Ryan and I last month, I was worried that he wouldn’t even be willing to try them because he doesn’t eat a lot of veggie burgers and isn’t the biggest lemon fan.  Fortunately, he not only tried them, but actually quite liked them!   Of course, he commented that they’d be much better if I’d made them with buffalo or chipotle sauce instead of lemon though.

Buffalo chickpea quinoa burgers

I love all things lemon but I’m also a big buffalo sauce fan, so I decided to give Ryan’s “manlier” version a try.  We love these buffalo chicken burgers, but finding a protein-packed vegetarian substitute to replace them with once in a while was a pretty good idea.

Turns out he knew what he was talking about, because I think I liked these even better than the lemon version!

Buffalo chickpea quinoa burgers

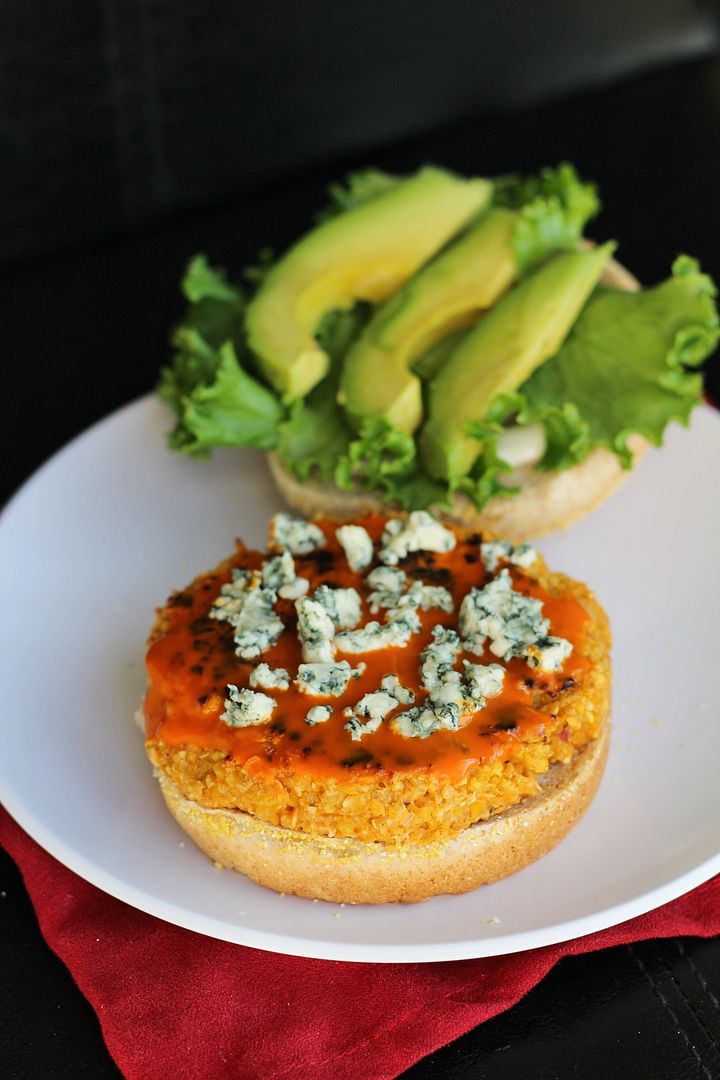
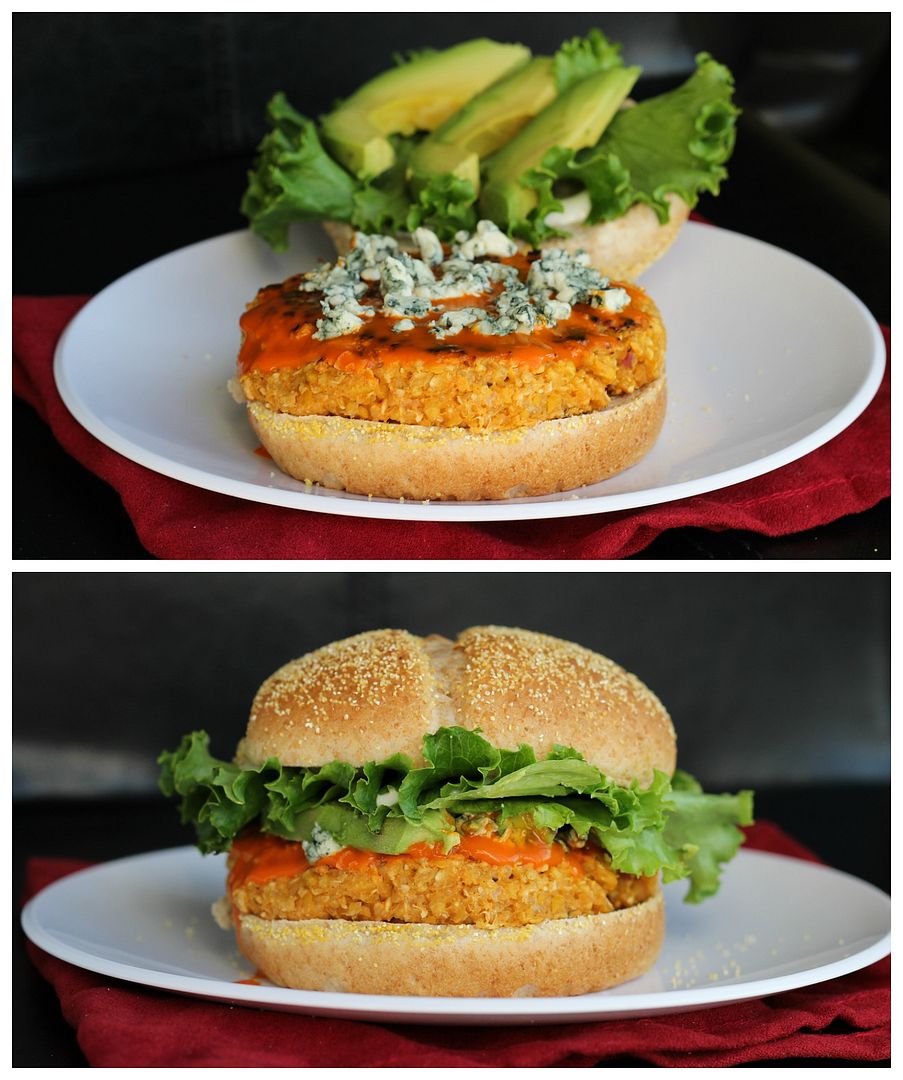
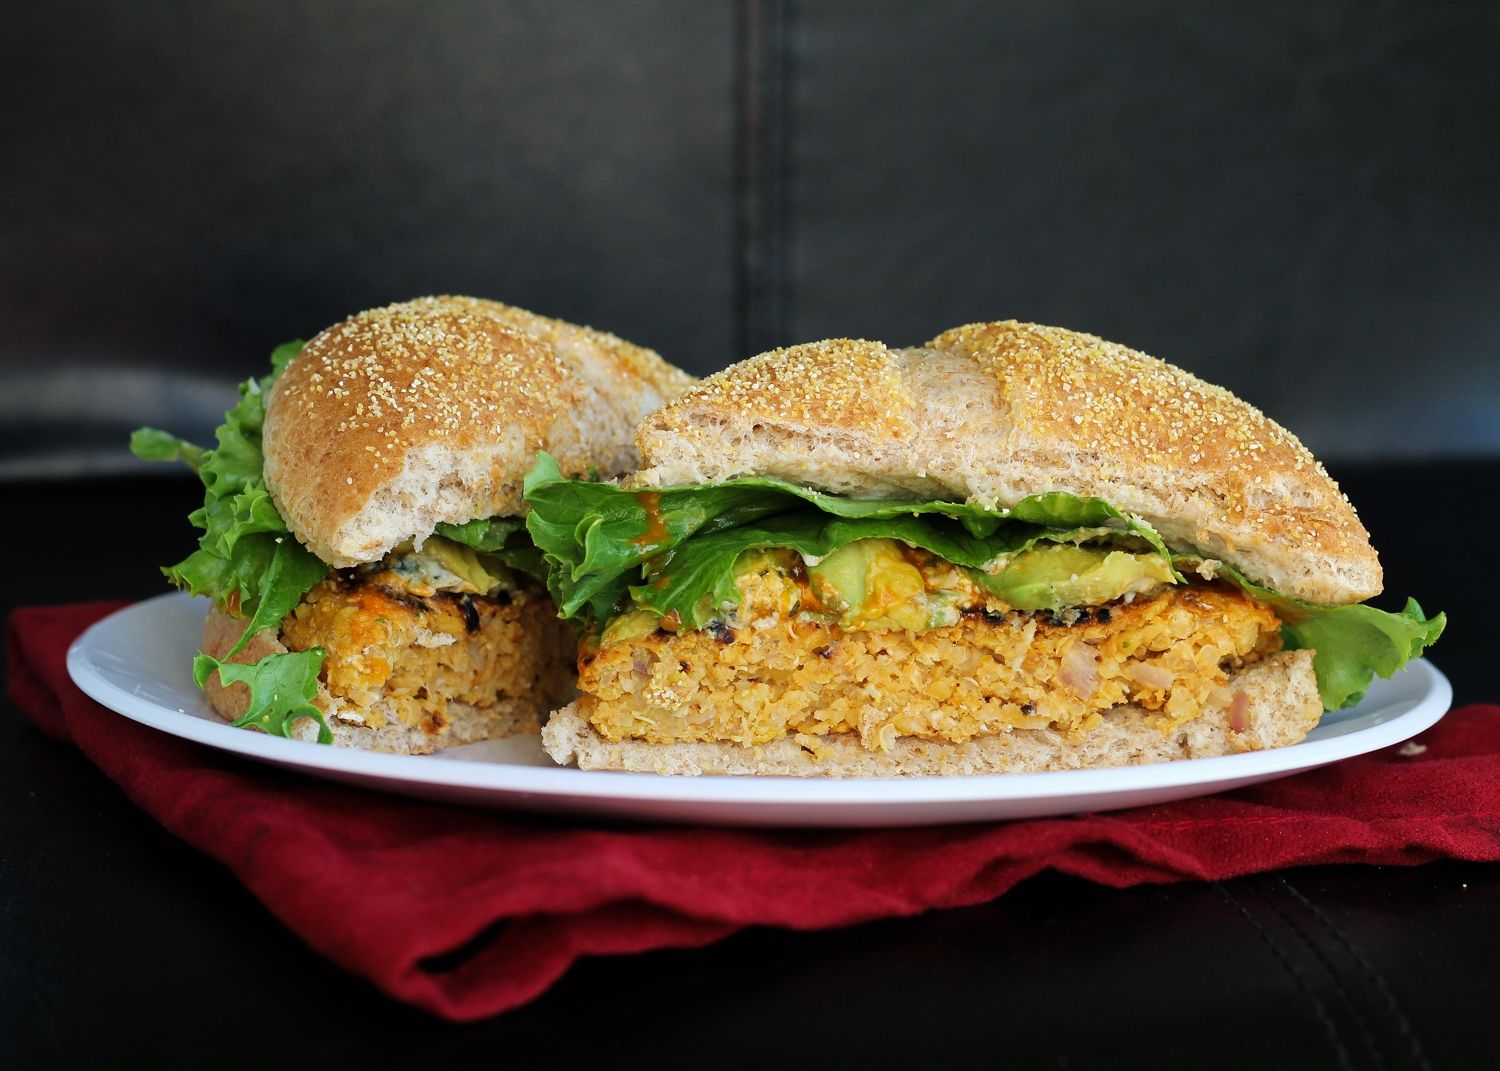
I used the same combination of chickpeas and quinoa as the base of the burger; with shallots and garlic added in for flavour and crunch; oats, breadcrumbs, and an egg to bind them; and buffalo sauce mixed into the patty and served on top for maximum buffalo flavour.  Combined with some blue cheese, lettuce, and avocado as toppings, these were hearty and full of flavour, and we both loved them!  Lesson learned: I should perhaps start listening to my boyfriend’s ideas more often.  Just don’t tell him I admitted that :)

Buffalo chickpea quinoa burgers


Buffalo Chickpea Quinoa Burgers


Makes 5 burgers

Ingredients:

For the Burgers:
1/4 cup uncooked quinoa
1 (540mL) can of chickpeas, drained and rinsed
1/2 cup rolled oats
1/4 cup minced shallot
2 garlic cloves, minced
1/4 cup buffalo sauce (your favourite brand, such as Frank's Red Hot Buffalo Wing Sauce or PC Buffalo Wing Sauce)
1 large egg, lightly beaten
1/2 teaspoon salt
1/4 teaspoon pepper
1/4 cup breadcrumbs

For Assembly:
5 whole grain hamburger buns
Crumbled blue cheese
Additional buffalo sauce
Lettuce
Ripe sliced avocado (optional)

Directions:

Bring 1/2 cup water to a boil.  Add quinoa, cover, reduce heat and let simmer 15 minutes.  Remove from heat and keep covered for 5 minutes.  Fluff with a fork and let cool slightly.

Meanwhile, add chickpeas to the bowl of a food processor or mini chopper and pulse until they are broken down into crumb-sized pieces.  Transfer to a large bowl.  Add oats to same food processor and pulse a few times to break them down into fine crumbs (but not a powder).  Add to chickpeas in large bowl.  Add to the bowl the shallots, garlic, buffalo sauce, egg, salt, and pepper.  Add the cooked quinoa.  Mix everything together with a large fork until well combined.  If mixture is still too wet to form patties, add the 1/4 cup of breadcrumbs (or enough to hold the mixture together).  Divide and shape into 5 patties.

Heat a non-stick skillet over medium-high heat and cook patties for about 4-5 minutes per side.

Assemble burgers by placing patty on bun, topping with additional buffalo sauce, a bit of blue cheese (be careful not to add too much so it’s not overpowering – I though the amount I used (in the pictures) was too much), lettuce, and avocado or tomato if desired.

January 29, 2013

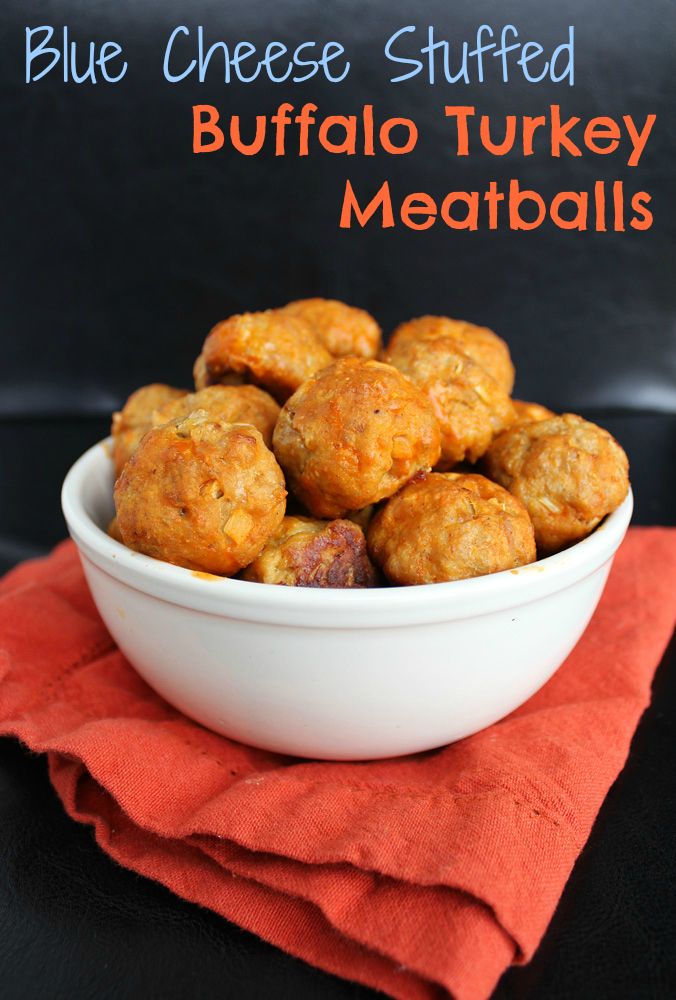
Blue Cheese Stuffed Buffalo Turkey Meatballs

Blue Cheese Stuffed Buffalo Turkey Meatballs

I know I just posted a buffalo sauce recipe, so I apologize to any buffalo-haters out there - I know it’s not for everyone, but the boyfriend and I are huge buffalo sauce fans and these meatballs would go so well with the Super Bowl so I had to share them this week!  I actually made these for us to enjoy during the playoff games two weekends ago, so I can vouch that they go very well with football!

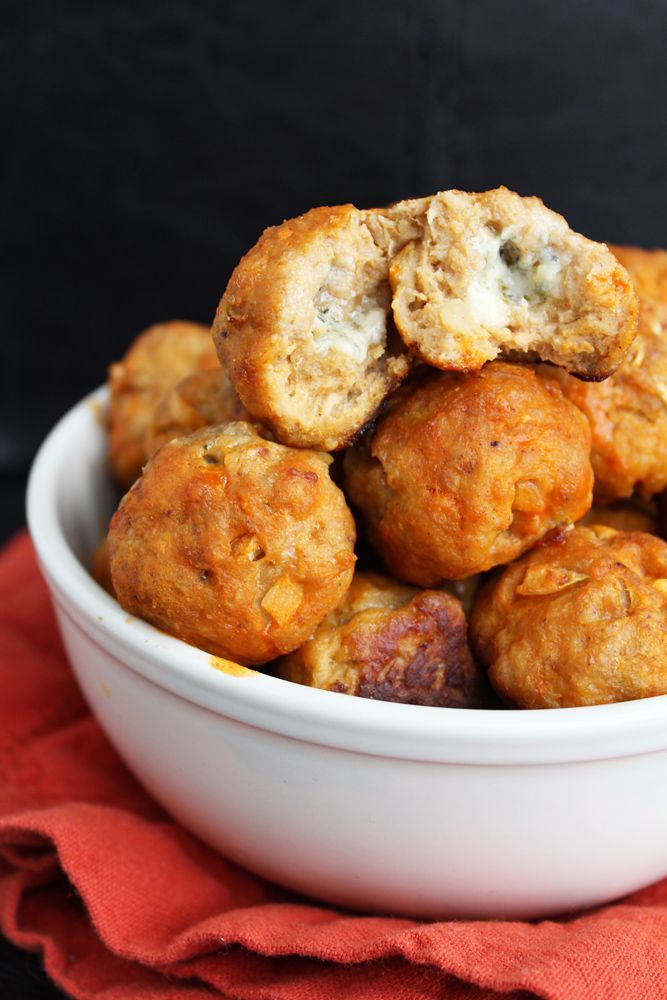
When I first thought of making buffalo-flavoured meatballs, I also came up with what I thought was a brilliant idea of stuffing blue cheese in the middle of them.  Again, I know blue cheese isn’t for everyone, but if you’re a fan of buffalo there’s a good chance you like the buffalo-blue cheese combination (and if you don’t think you do, you should give it a try!)  Of course, as soon as I started Googling I found that many other people had already had this brilliant idea long before me, but at least it confirmed that it would work!  I based my recipe on a combination of other similar ones, but used turkey instead of chicken because I just like it better, and left out the diced celery that a lot of recipes called for because I don’t like having crunchy bits in my meatballs.  Instead I added garlic, onion, and a dash of worcestershire sauce for extra flavour, and with the addition of buffalo sauce and blue cheese, these tasted (and smelled!) amazing!

Blue Cheese Stuffed Buffalo Turkey Meatballs

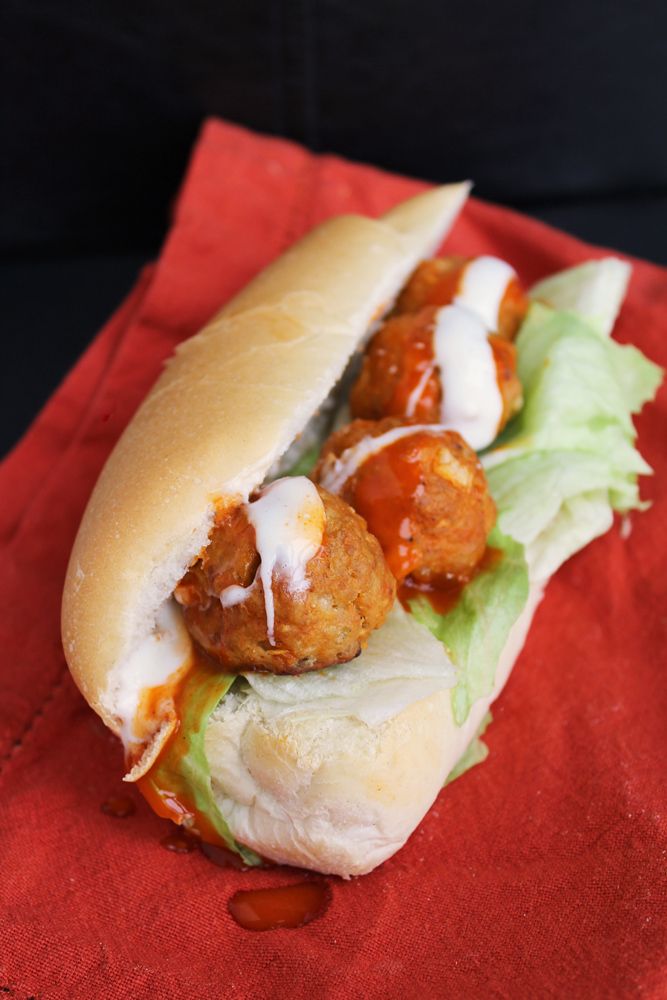
A lot of buffalo meatball recipes also call for coating them in a mixture of melted butter and hot sauce afterwards, but since we weren’t planning on eating these on their own, I thought I’d save a few calories by just drizzling them with a little buffalo sauce after baking instead.  They were still delicious on their own, but even better as meatball subs!  Add a little light ranch dressing and some crumbled blue cheese (which I completely forgot in the picture below), and you have a Super Bowl worthy sandwich - or turn them into sliders for a lighter snack!

If you’re starting to look for Super Bowl recipes and either want more buffalo ideas or want nothing to do with buffalo sauce, I’ve been collecting lots of both types of recipes on my Pinterest board!

Blue Cheese Stuffed Buffalo Turkey Meatball Sub

Blue Cheese-Stuffed Buffalo Turkey Meatballs

Adapted from Baked by Rachel

Makes about 30 meatballs

Ingredients:

1 lb lean ground turkey
3/4 cup breadcrumbs
1/4 teaspoon salt
1/4 teaspoon ground pepper
2 garlic cloves, minced
1/4 cup onion, minced (about half a yellow onion)
1 large egg, lightly beaten
1 teaspoon worcestershire sauce
1/4 cup buffalo sauce + more for drizzling
~1/3 cup crumbled blue cheese

Directions:

Preheat oven to 400°F.

Combine all ingredients for meatballs in a large bowl – turkey, breadcrumbs, salt, pepper, garlic, onion, egg, worcestershire, and 1/4 cup buffalo sauce.  Use your (clean) hands to mix everything together until well combined.

Form mixture into meatballs approximately 1 to 1.5” in size.  For each meatball, you’ll roughly form a ball, then place a few crumbles of blue cheese in the center, then push the cheese to the center so it’s covered by meat on all sides, and shape into a round ball, as shown in the pictures below.

 stuffing blue cheese in meatballs

Transfer all formed meatballs to a parchment-lined baking sheet and bake in preheated oven for 25-30 minutes, until cooked through.  Transfer meatballs to a bowl and drizzle with extra buffalo sauce to taste, tossing to lightly coat. 

Serve warm as is, as sliders, or on a sub.  For our subs, we added lettuce, more buffalo sauce, light ranch dressing, and blue cheese crumbles.

August 30, 2012

Eggplant & Zucchini Involtini with Ricotta Filling and Tomato Sauce

Eggplant and Zucchini Involtini

What is involtini you ask?  Good question, and one that even after much Googling, I’m not 100% sure I know the correct answer to.

You see, involtini are little roll-ups common in Italian cooking, that are usually made of a thin slice of meat rolled around a filling and baked with a sauce, but can also be made vegetarian using eggplant instead of meat.  The confusion lies in the fact that ‘rollatini’ seems to have the same definition.  According to Wikipedia, rollatini and involtini are actually the same thing – the dish is called involtini in Italy but over here it’s called rollatini.  That seems to clear things up except that rollatini recipes seem to more often be made with eggplant and that eggplant also seems to often be breaded.

Eggplant and Zucchini Involtini

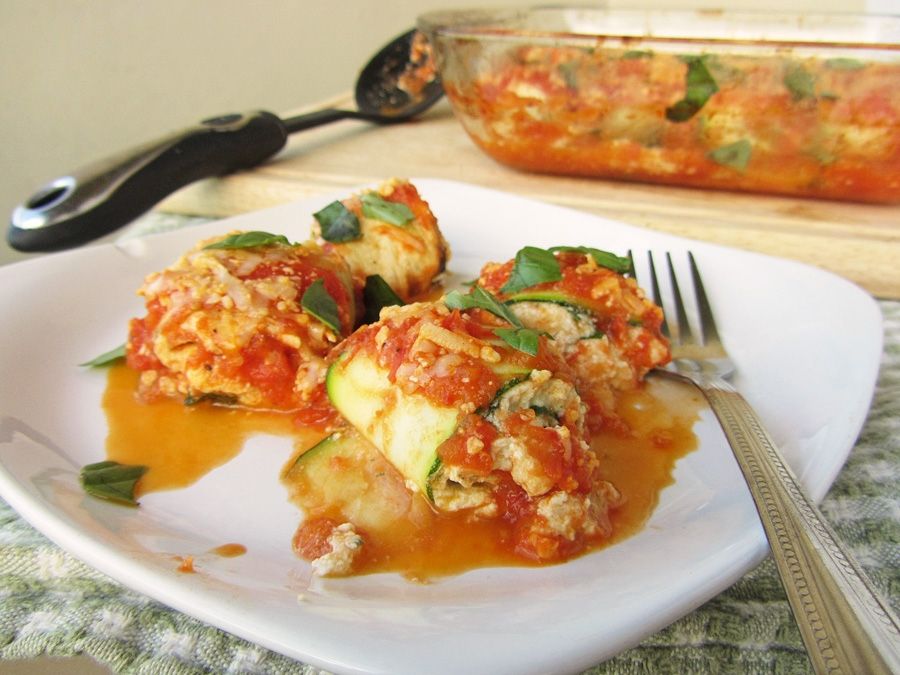
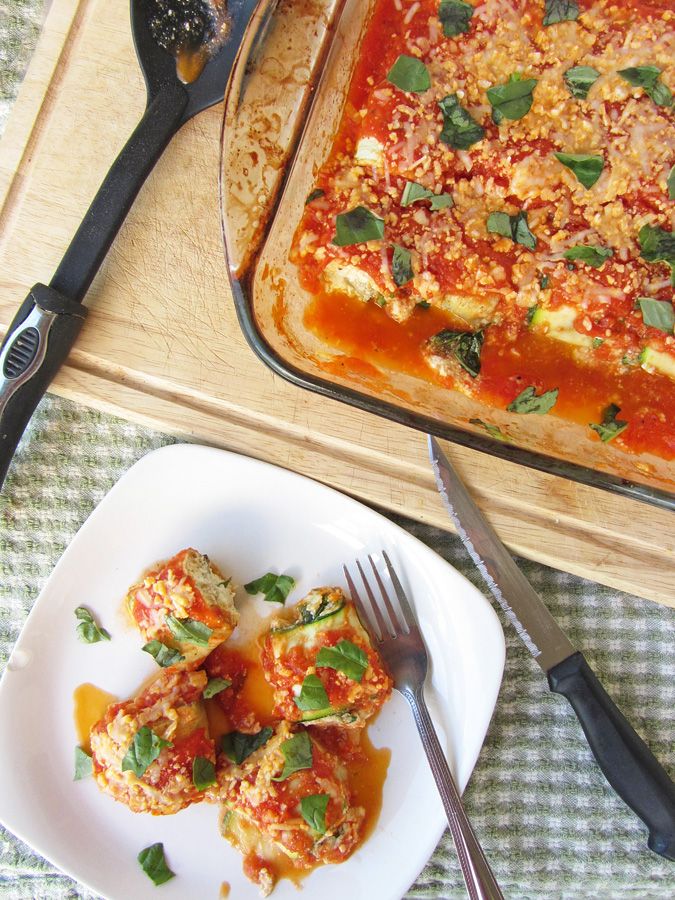
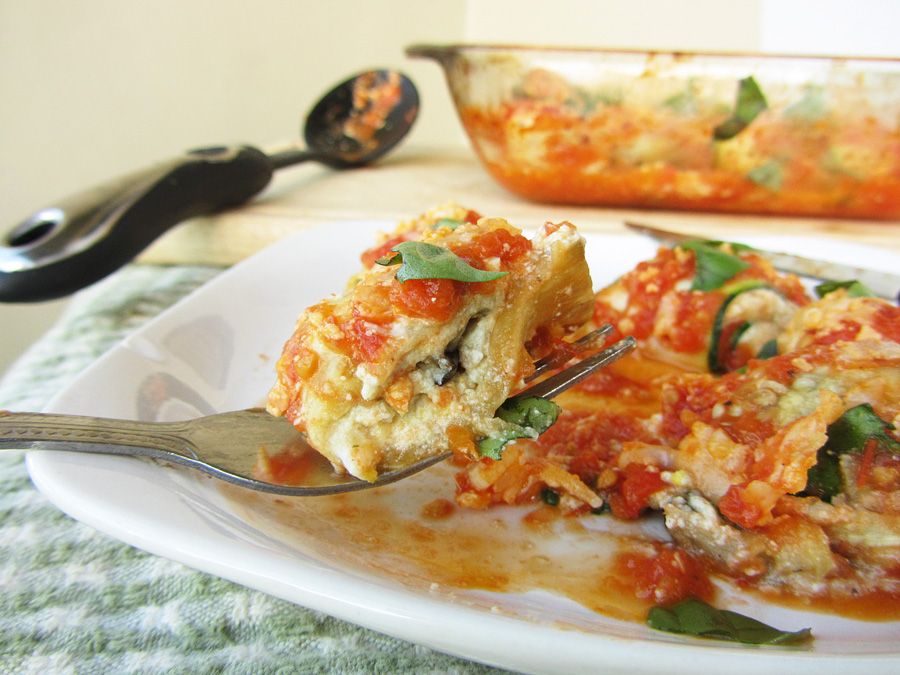
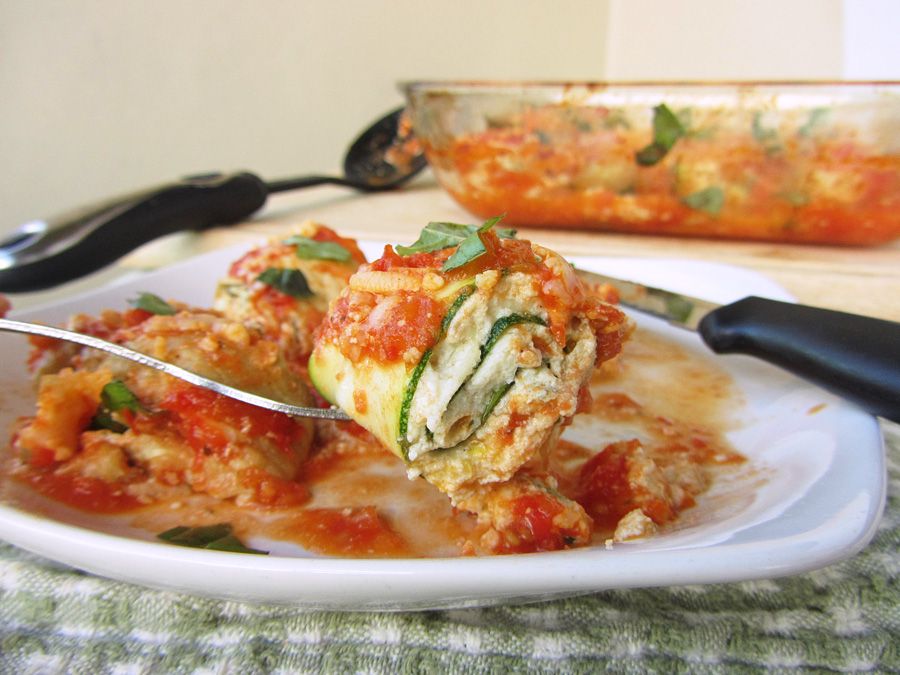
And now I’ve gone ahead and made things even more confusing for you by throwing zucchini into the mix!  I rolled up thin slices of eggplant and zucchini around a seasoned ricotta filling, then baked them in an easy homemade tomato sauce topped with parmesan cheese.  They’re comforting and warm while being light and summery at the same time, with flavours reminiscent of eggplant parmesan or lasagna.  Whether or not this should be named involtini or rollatini may be up for debate, but I don’t care because all I know for sure is that they’re really tasty!

I couldn’t decide which I liked better.  This was the eggplant roll-up – a bit more classic and comforting tasting:

Eggplant Involtini

And the zucchini version is pictured below – it was more fresh and light tasting and looked a little prettier! 

Have you heard of involtini/rollatini before?  I'm curious to hear what you call it!

Zucchini Involtini

Eggplant & Zucchini Involtini with Ricotta Filling and Easy Tomato Sauce

Adapted from Cooking Light and The Fig Tree

Serves 4 (four involtini each)

Ingredients:

1 large eggplant
1 large zucchini
Cooking spray
Salt & Pepper

For the Tomato Sauce:
1 tablespoon olive oil
1-1/2 pounds ripe tomatoes, roughly chopped
2 garlic cloves, crushed
1/2 tablespoon balsamic vinegar
Salt & Pepper

For the Filling:
1 large egg
300g (~10oz) light ricotta
1/4 cup grated parmesan cheese
1/4 cup breadcrumbs (I used Italian seasoned breadcrumbs)
1/4 cup chopped basil
1 teaspoon lemon zest
1 teaspoon lemon juice
1/2 teaspoon salt
Pepper

For Topping:
1/4 cup grated parmesan
Sprinkle of chopped basil

Directions:

Preheat oven to broil and adjust oven rack to top third of oven.  Slice the eggplant and zucchini lengthwise into thin (1/4-inch thick) slices, producing 16 slices total (8 of each, if desired).  I also sliced the skin off my eggplant slices because I'm not a big fan of the skin, but it's not necessary if you don't mind it.  Line a baking sheet with foil and spray with cooking spray.  Lay eggplant and zucchini slices on the baking sheet and sprinkle with salt and pepper.  Broil for about 3-5 minutes per side, flipping over before broiling the other side.

Note – with my zucchini, I just used a vegetable peeler to very thinly slice the zucchini, and didn’t bother pre-cooking it.  This resulted in a firmer texture, so if you prefer that, you can skip the broiling step for the zucchini.  I recommend broiling the eggplant though.

Meanwhile, prepare the tomato sauce by adding all ingredients (olive oil, tomatoes, garlic, balsamic, salt and pepper) to a medium saucepan, bringing to a boil, then reducing heat to a simmer and simmering for 15 minutes.  Remove from heat and let cool, then transfer to a food processor and puree.

Prepare the filling by mixing all ingredients (egg to pepper) together in a large bowl.

Reduce oven heat to 375°F.  Pour about a third of the tomato sauce into the bottom of an 8x8 glass baking dish.  Spread 2 tablespoons of ricotta mixture onto each eggplant and zucchini slice, then roll up like a jelly roll.  Place rolls seam side down into the baking dish, and top with remaining tomato sauce.  Sprinkle with 1/4 cup parmesan cheese, then bake for 25 minutes.  Sprinkle with fresh chopped basil and serve.

July 03, 2012

Buffalo Chicken Burgers

Buffalo Chicken Burgers

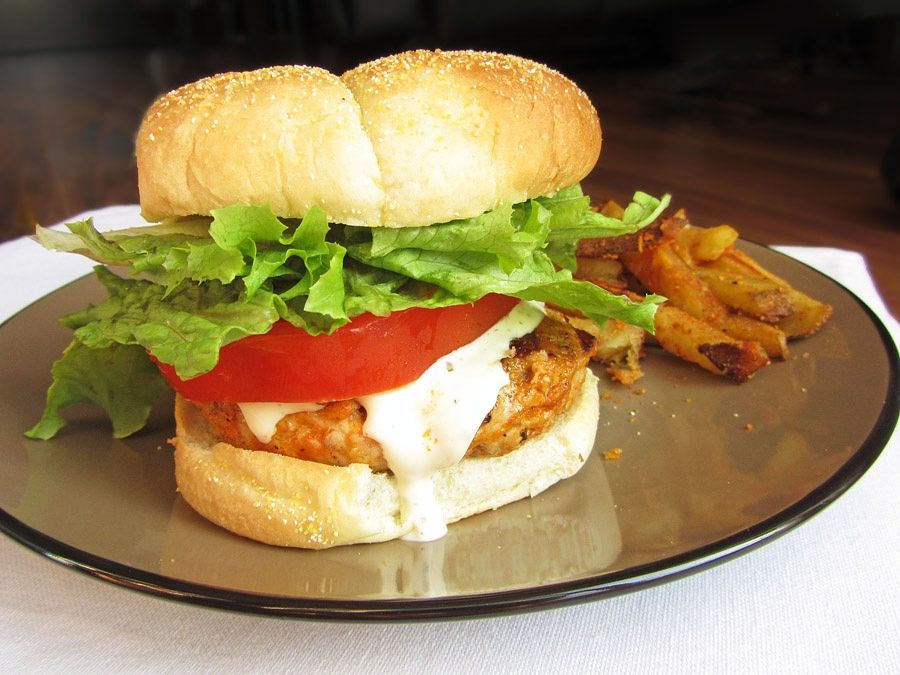
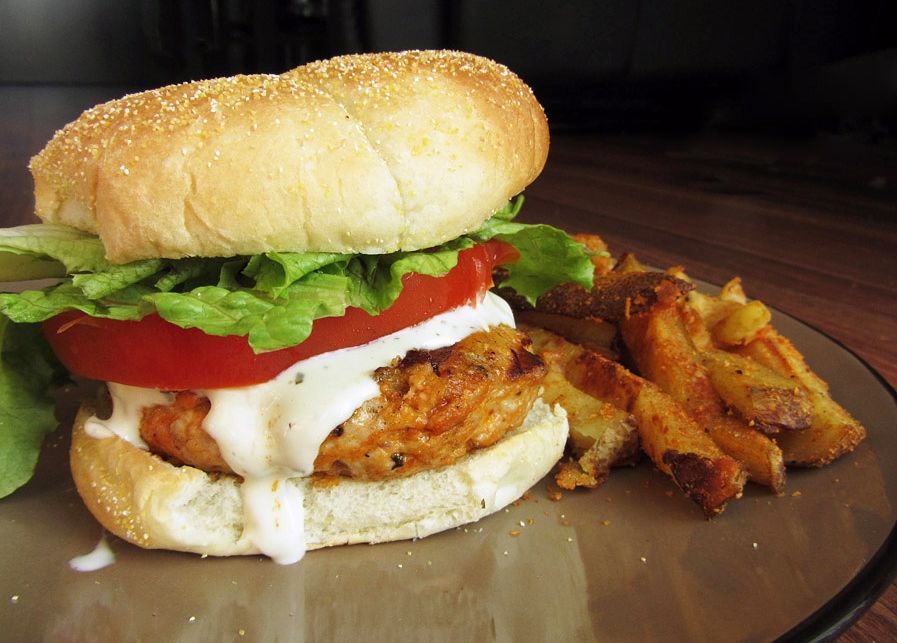
I had a great long weekend this past weekend, including a Canada Day party, fireworks, plenty of time in the sun relaxing with family and Ryan, and lots of great food!  The best thing I ate this weekend had to be these buffalo chicken burgers that are one of Ryan and my favourite meals.  And with 4th of July barbecues likely in store for many of my American readers tonight and tomorrow, I thought this would be a great recipe to share today!

These are ridiculously easy to make, and Ryan and I always love them every time we make them.  We’re both big fans of anything buffalo wing flavoured, so infusing that flavour into a juicy homemade chicken burger with fresh toppings and lots of sauce makes for a pretty amazing dinner, and so much better than any storebought frozen chicken burgers, which we have not had good experiences with!

Buffalo Chicken Burgers

I know the pictures of this burger don’t do it justice, but this was one of those times when I just wanted to eat my dinner while it was still hot, without having to worry about styling it, finding good lighting to photograph it in, taking a million shots to get the best angle, and then reheating it before eating because by that time it would be ice cold.  Instead, I took a few quick pictures right before I ate it, so they’re not great but at least you know I didn’t spend forever making my burger look as pretty as possible but not at all how it would look in real life.  What you see is what you get!  (Well, except that when I took the pictures, I’d forgotten to add the extra buffalo sauce, which for me is a must!)

If you’re looking for a new and exciting way to eat chicken burgers this summer, or a healthier alternative to a beef burger, give these a try!  If you’re a buffalo wing fan, you won’t be disappointed! 

And happy Independence Day to my friends south of the border!

Buffalo Chicken Burgers

Buffalo Chicken Burgers

Adapted from How Sweet It Is

Serves 4

Note: I have made these many times as both chicken and turkey burgers - both work!

Ingredients:

For the burger patties:

1 lb (450g) ground lean or extra-lean chicken (or ground lean turkey may also be used!)
1/2 teaspoon salt
1/2 teaspoon pepper
1/2 teaspoon italian seasoning
1/2 teaspoon paprika
1/4 cup buffalo wing sauce or Frank's red hot sauce
1/4 cup breadcrumbs
1/4 cup grated parmesan cheese

For the rest of the burgers:
4 whole wheat burger buns
Lettuce
Tomato
Buffalo sauce
Low-fat ranch or blue cheese dressing
Cheddar cheese (optional)

Directions:

Mix up all ingredients for the chicken (or turkey) patties in a large bowl (using a fork, potato masher, or clean hands) until well blended, but being careful not to overmix. Form into four patties and press a small indentation in the center of each patty. Always be sure when making burger patties not to press hard on the meat or you will end up with tough patties - be as gentle as possible with every step!

If cooking on the barbecue: Preheat grill to medium to medium-high heat and lightly oil or spray. Grill for 4-5 minutes per side, or until the internal temperature reaches 165°F. In the last couple minutes of cooking, place cheese on burger to melt, if desired.

If cooking on the stovetop: Preheat two large non-stick skillets over medium-high heat. Cook the patties in the skillets for about 8-10 minutes total, flipping halfway, until cooked through. In the last couple minutes of cooking, place cheese on burgers to melt, if desired.

Place burgers on buns and top with lettuce, tomato, and desired sauces.

I like to serve these with baked sweet potato fries or as pictured above, Emeril Lagasse's oven baked parmesan paprika fries.

April 10, 2012

Thai Turkey & Carrot Meatballs

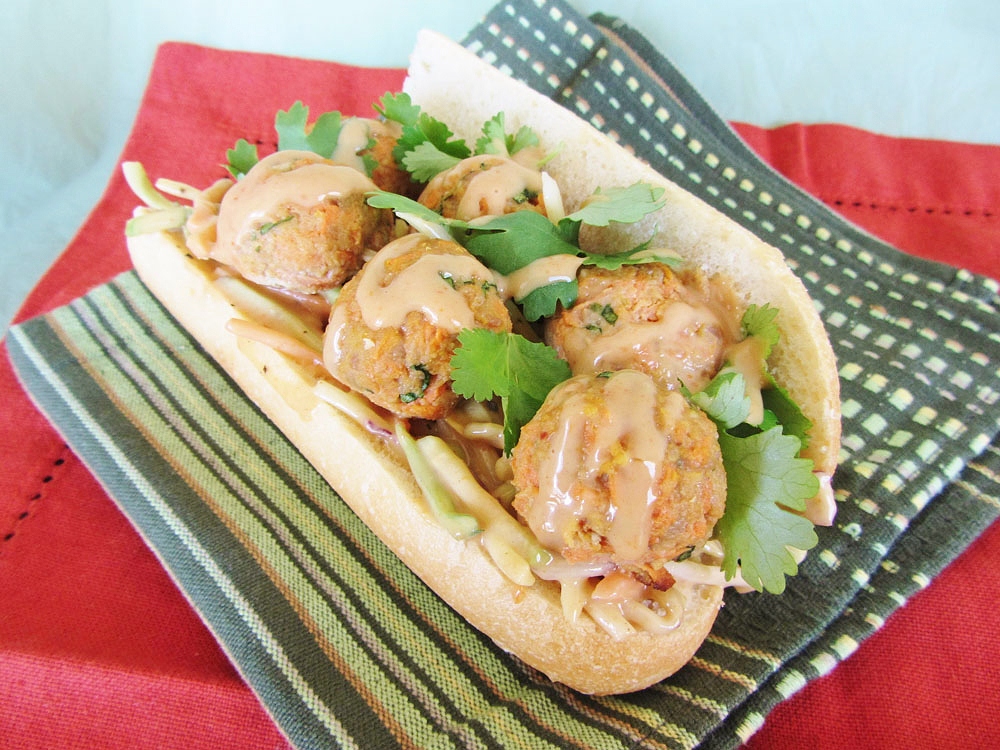
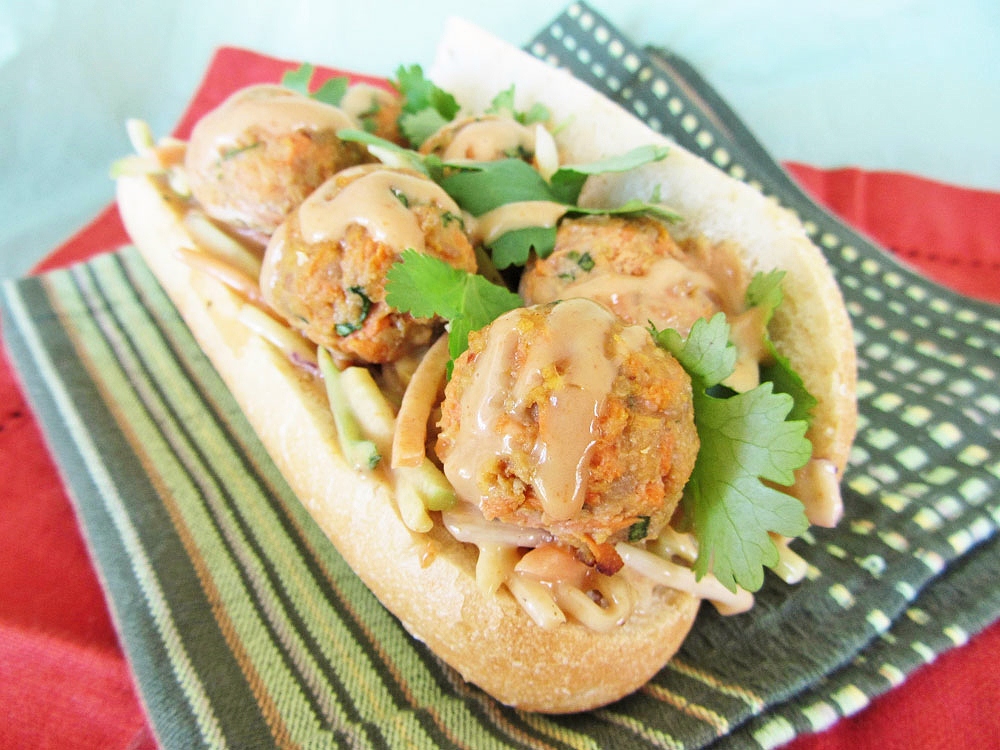
thai turkey carrot meatball subSince I returned home from my brief trip to Thailand, I've been really eager to try my hand at cooking Thai dishes at home. I wish I could say that this recipe was a brilliant and creative attempt at recreating Thai flavours in my own dish, but I actually made this dish a couple of months before I even went there, and it wasn't my idea but was inspired by an intriguing recipe I found from Foodland Ontario.

Nevertheless, these little turkey and carrot meatballs do pack a ton of Thai ingredients like ginger, lime, cilantro, fish sauce, and chili hot sauce, and they make for a juicy and tasty little bite that's bursting with flavour! They obviously aren't a dish you'd expect to find in Thailand, but I thought they were a really nice way of incorporating some Thai flavours into more of a familiar Western-style dish.

I also love that these are fairly healthy because they're baked instead of fried, and they're made with lean ground turkey, lots of carrots, and other good-for-you ingredients like ginger, garlic, and cilantro. I can imagine a vegetarian version made with something like lentils and cashews, though I haven't tried that yet - maybe that will be my next project!

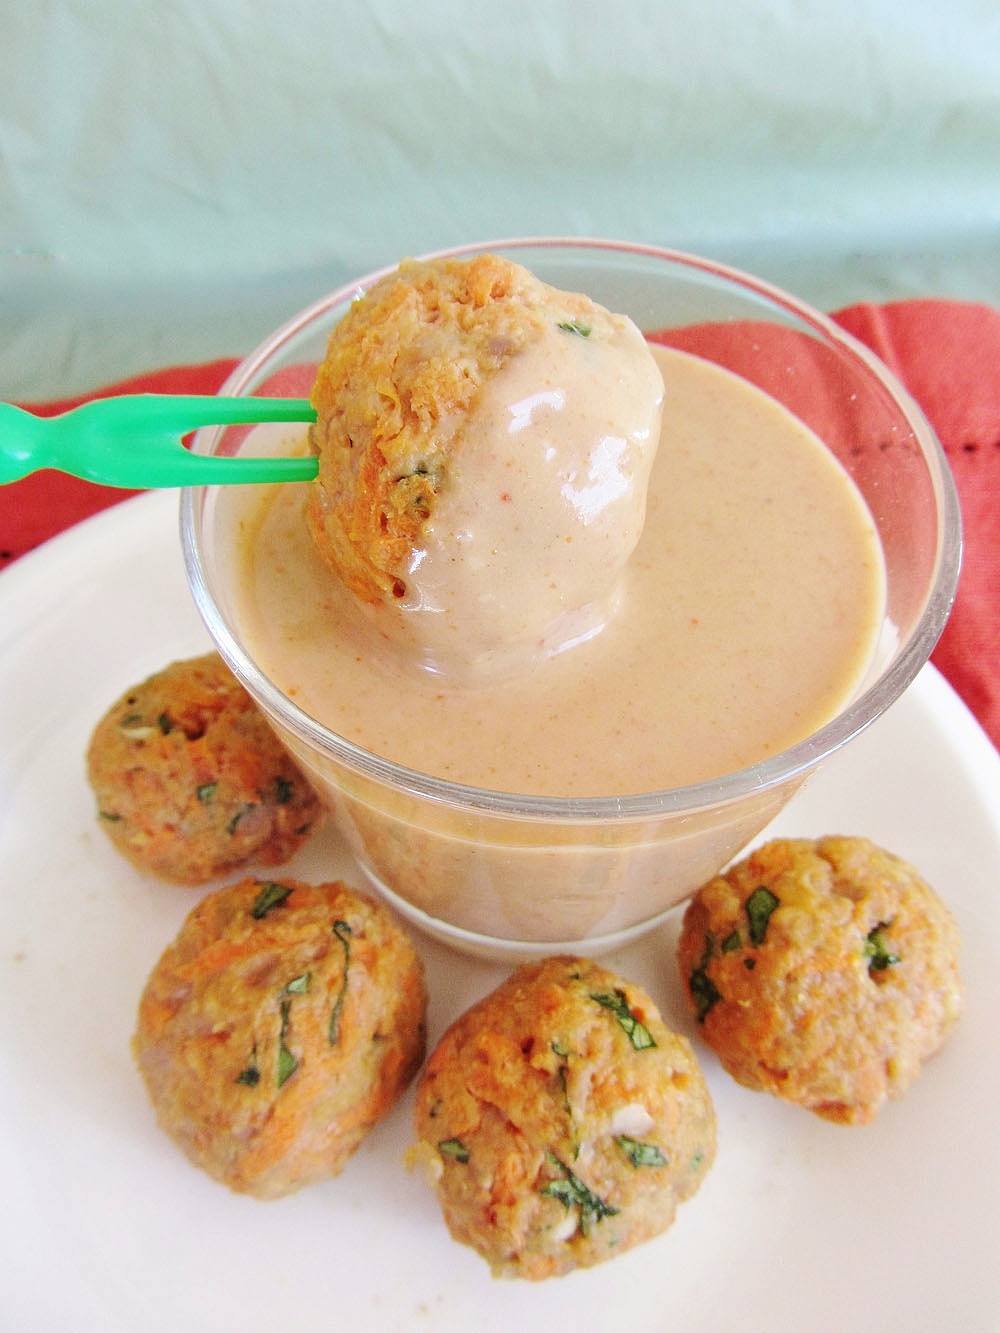
thai turkey carrot meatballsThese are really easy to make and the recipe makes a ton of meatballs, so they can serve a big group as a party appetizer, or can be frozen to be eaten later in any recipe you like! I ate some of mine on their own with the peanut dipping sauce suggested in the original recipe. I wasn't a fan of the sauce because it had a coconut milk base that was too sweet for me, but with a regular peanut sauce or Thai chili sauce, these would be great!

I then discovered that throwing the meatballs in a sub bun with carrot slaw, cilantro, and lots of peanut sauce made for one of the best sandwiches I've ever had. It was really messy but as long as I ate it in private so no one would see my sauce covered face and hands, it was amazing! I think the meatballs would also be great in a peanut noodle dish or a coconut curry soup - be creative and let me know what works!

I hope to start experimenting with more authentic Thai dishes soon, and hopefully I'll end up with a few successful recipes to share with you guys!

thai turkey carrot meatball sub
Thai Carrot & Turkey Meatballs

Adapted from Foodland Ontario, as seen on 50Plus

Makes about 50 small meatballs

Ingredients:

3 cups grated carrot (about 2-3 large carrots, weighing about 1 pound total)
2 cloves garlic, minced
1 large egg
1/2 cup minced cilantro
1 tablespoon grated fresh ginger
2 tablespoons fresh lime juice
1/4 teaspoon lime zest
1 tablespoon honey
2 teaspoon fish sauce
1 teaspoon chili-garlic sauce (or more for more spice)
1/2 teaspoon salt
1-1/2 teaspoons ground coriander
1 pound lean ground turkey
1/2 cup breadcrumbs

Directions:

Preheat oven to 375F. Line two baking sheets with parchment paper.

Add all ingredients except for the last two (breadcrumbs and turkey) to a large bowl and mix well. Add breadcrumbs and ground turkey and mix in until everything is thoroughly combined.

Roll about 1 tablespoon of the turkey mixture into a ball and place on the parchment paper-lined baking sheet. Repeat with the rest of the mixture, until you have about 50 meatballs. Place in preheated oven and bake 12-16 minutes, rotating pans halfway through, until meatballs are firm and no longer pink inside.

Serve warm on skewers with a peanut sauce dip, sweet chili sauce, or other dipping sauce.

To make Meatball Subs:

I used a white baguette for the bun, covered the bottom half in a storebought broccoli-carrot slaw that I'd coated in a good amount of (storebought) peanut sauce, placed as many turkey meatballs as I could fit on top of that, sprinkled some fresh cilantro on top, then added another drizzle of peanut sauce.

January 06, 2012

Black Eyed Pea Patties with Fresh Salsa

black eyed pea patties with salsaThough eating black eyed peas on New Year's Day is supposed to bring prosperity and luck for the year, I've never eaten them on New Years, or on any other day of my life for that matter (that I can remember anyway). Ryan and I have our own tradition on New Year's Day of eating McDonald's - I don't know why, but it's one of those things that we keep doing just "because it's tradition". I only agree to it because it reminds me that I never even enjoy McDonald's when I get it, so I'm probably more likely to avoid it the rest of the year!
This year I also wanted to try my first black eyed peas, but the traditional dish of Hoppin' John doesn't appeal to me. Instead, I decided to try something a little different by using black eyed peas in a veggie burger. Even though I ate this a few days after New Year's Day, I'm hoping they'll still bring me some luck this year. And if not, at least I got a delicious meal (plus lots of leftovers) out of them!

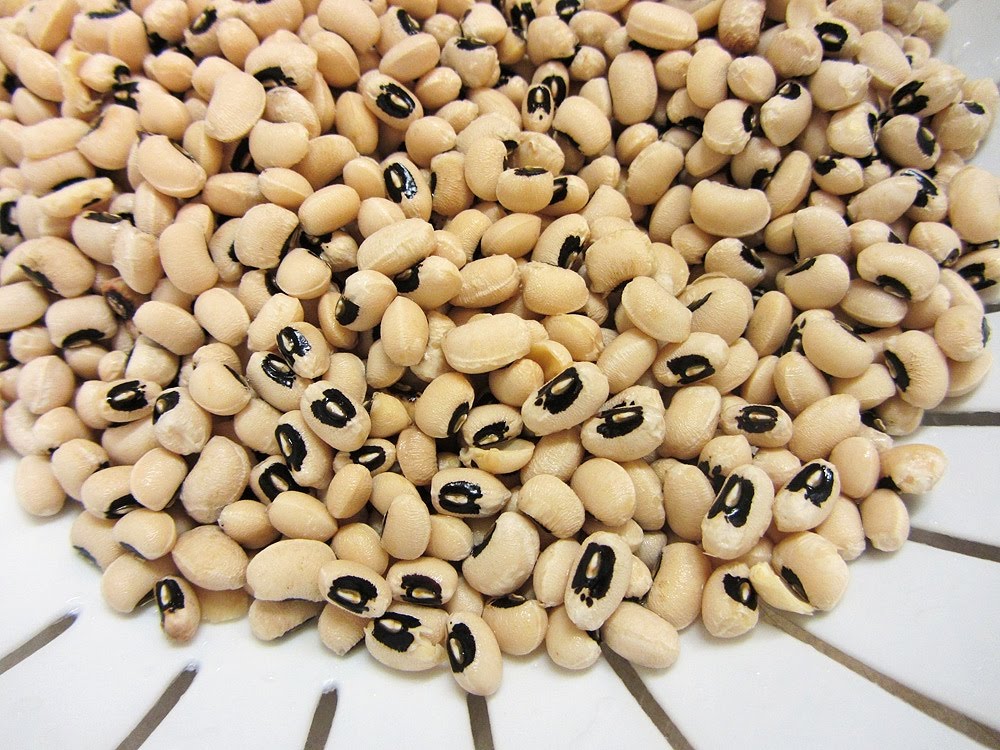
The original recipe for these burgers called for canned black eyed peas, but I couldn't find them at my grocery store so I bought the dried kind. I was so fascinated by them when I poured them out of the bag; aren't they pretty?

black eyed peasThe dried kind obviously increase the prep time for this dish because they have to cook for an hour, but they don't require any work other than throwing them in a pot of water. And since they're getting mashed up after anyway, it doesn't matter if they get a little mushy or stick to the pot. If you want to use the canned beans though, I'm sure the final dish will turn out just as good!

Once the beans cooked, I mashed them up and mixed them with some red pepper, jalapeno, cilantro, and other spices to make a very flavourful burger patty (that actually looked a lot like a meat burger too). They held together really well after cooking, and I would have been quite happy to eat the patty on its own (or with a dollop of sour cream), but the addition of the salsa really made this dish burst with flavour. I changed a few things with the salsa and ended up with a mixture of tomato, red pepper, avocado, jalapeno, garlic, cilantro, and lime juice, which once again I would have been happy to eat alone with a spoon, but it complemented the burgers really well! I haven't tried eating them like a burger but I imagine they would be delicious on a bun with the salsa piled on top too.

I took really quick pictures of the leftovers before I left for school and I didn't have time to figure out a way to get good lighting or to make these patties look appealing, so you'll just have to trust me that they taste a lot better than they look here!

tomato, red pepper, avocado and lime salsaBlack Eyed Pea Patties with Fresh Salsa
 
Adapted from Cooking Light

Serves 4 (2 patties each)

Ingredients:

2 cups dried black eyed peas
1 large egg
1/4 cup breadcrumbs
1 ½ teaspoons cumin
1 teaspoon chili powder
3 garlic cloves, minced (divided)
1 jalapeno, minced (divided)
1 red bell pepper, finely chopped (divided)
7 tablespoons chopped cilantro (divided)
1/2 teaspoon salt (divided)
2 tomatoes, chopped
1 ripe avocado, peeled and chopped
Juice of half a lime

Directions:

Rinse the black eyed peas and pick out any debris. Bring to a boil in 6 cups of water, then cover and simmer about 1 hour, or until tender (or follow cooking instructions on the package). Mash in a large bowl.
Add the egg, breadcrumbs, cumin, and chili powder to the bowl with the black eyed peas.

Transfer 1 teaspoon minced jalapeno, 1/2 teaspoon minced garlic, half of the chopped red pepper, 3 tablespoons chopped cilantro, and 1/4 teaspoon salt to a small bowl for the salsa.

Add the remaining garlic, jalapeno, red pepper, cilantro, and salt to the bowl with the black eyed peas.

Heat two large non-stick skillets over medium-high heat and spray with cooking spray. Thoroughly mix the black eyed pea mixture together, then form into 8 patties (I just use my hands). Cook 4 patties in each skillet for about 4 minutes per side, or until browned.

Meanwhile, complete the salsa by adding the tomatoes, avocado, and juice of half a lime to the small bowl (with the jalapeno, garlic, red pepper, cilantro, and salt). Mix together with a spoon.

Serve patties warm, topped with salsa. You could also serve them on a bun with the salsa if desired.

black eyed pea patties with salsa

December 06, 2011

Italian Stuffed Mushrooms with Goat Cheese

stuffed mushrooms
When Mushrooms Canada asked Canadian Food Bloggers to share a holiday recipe using mushrooms, I thought that an elegant and crowd-pleasing appetizer recipe would be perfect. I remembered seeing a recipe for stuffed portabella mushrooms, then came up with what I thought was a brilliant idea to stuff smaller crimini mushrooms with some sort of creamy goat cheese mixture. I turned to Google to see if there was anything similar out there for inspiration, only to discover that pretty much every other person in the world has already had this idea before me. Apparently I’m not so brilliant after all.

I decided to still go ahead with the stuffed mushrooms because I’ve never tried them before, and with that many recipes out there, they must be good! Since it was too overwhelming to try to choose a recipe from all the options, I ended up just making up my own mixture based on what I thought would taste good. I’m calling them ‘Italian’ stuffed mushrooms because the ingredients I chose seemed to form an Italian theme (sundried tomatoes, garlic, breadcrumbs, parsley, basil, parmesan..), but true Italians may disagree with me :)

When the warm, savory little mushrooms came out of the oven bubbling with cheese, I couldn’t resist biting into one right away. Of course, I immediately spit it out because it was scalding hot, then stood there impatiently waiting for them to cool down, the torture from the smell growing every second. When they were cool enough to eat, I scarfed one down, then another, and another .. they were so good! I shared only a couple with my sister to get a second opinion (she confirmed they were delicious), then ate more for dinner and the rest for lunch the next day (they were definitely best fresh out of the oven but I still enjoyed them reheated the following day).

I cannot believe I haven’t tried these earlier, but I plan on making up for all my years without stuffed mushrooms by making them any chance I get from now on! I will especially make sure they make an appearance at at least one holiday gathering this month because I know everyone else in my family will love them too. I also want to try one of the many other versions out there but I feel like I don’t even need another recipe because I liked this one so much! Maybe one day :)

stuffed mushrooms
Italian Stuffed Mushrooms with Goat Cheese

Makes about 10-15 stuffed mushrooms - Plan on 1-2 per person as an appetizer

Ingredients:

8-10 oz cremini mushrooms (about 10-15 mushrooms, depending on the size - I found the smaller, the better)
1 tablespoon olive oil
1 shallot, minced
2 cloves of garlic, minced
3 tablespoons finely chopped sundried tomatoes (I used about 4-5 dried tomatoes, redhydrated as per package instructions, but you could also use the oil-packed kind)
4 oz goat cheese
2 tablespoons Italian breadcrumbs
2 tablespoons chopped fresh parsley
1/2 teaspoon dried basil (or 1-2 teaspoons chopped fresh basil)
1/4 teaspoon pepper
2 tablespoons grated parmesan cheese

*Note: The Italian breadcrumb mixture I used already contained salt, but if you are using plain breadcrumbs you may wish to add a pinch of salt or other seasonings along with the pepper.

Directions:

Preheat oven to 375°F.

Wipe mushrooms with a damp paper towel to clean (don’t wash as the mushrooms will absorb the water). Break off the stems and set them aside. Gently scoop out the gills inside the mushroom (I used 1/4 teaspoon measuring spoon to do this) and discard, being careful not to break through the mushrooms.

Spray a baking sheet with cooking spray and set mushrooms on the pan with the hollowed side facing up. Bake for 10 minutes at 375°F. Pools of water will form in the hollowed out part of the mushroom. Remove baking sheet from oven and pour out the water from each mushroom, then replace mushrooms on sheet.

Meanwhile, dice the reserved mushroom stems. Heat olive oil in a large pan over medium-high heat. Add diced stems and shallot and cook until lightly browned, about 4-5 minutes, stirring often. Add garlic and saute for another 30 seconds or so. Transfer mixture to a bowl.

Add chopped sundried tomatoes, goat cheese, breadcrumbs, parsley, basil, and pepper to the bowl and mix everything together until smooth and thoroughly combined.

Spoon goat cheese mixture into the mushrooms. Top each with a light sprinkle of parmesan. Bake for 15-20 minutes at 375°F.

Remove from oven and top with additional chopped parsley, if desired. Serve warm.

Ingredient Index

Related Posts Plugin for WordPress, Blogger...