Showing posts with label broth - vegetable. Show all posts

October 28, 2014

Southwestern Quinoa Stuffed Pepper Jack O' Lanterns

Southwestern Quinoa Stuffed Pepper Jack O' Lanterns - easy and fun dinner idea for Halloween!

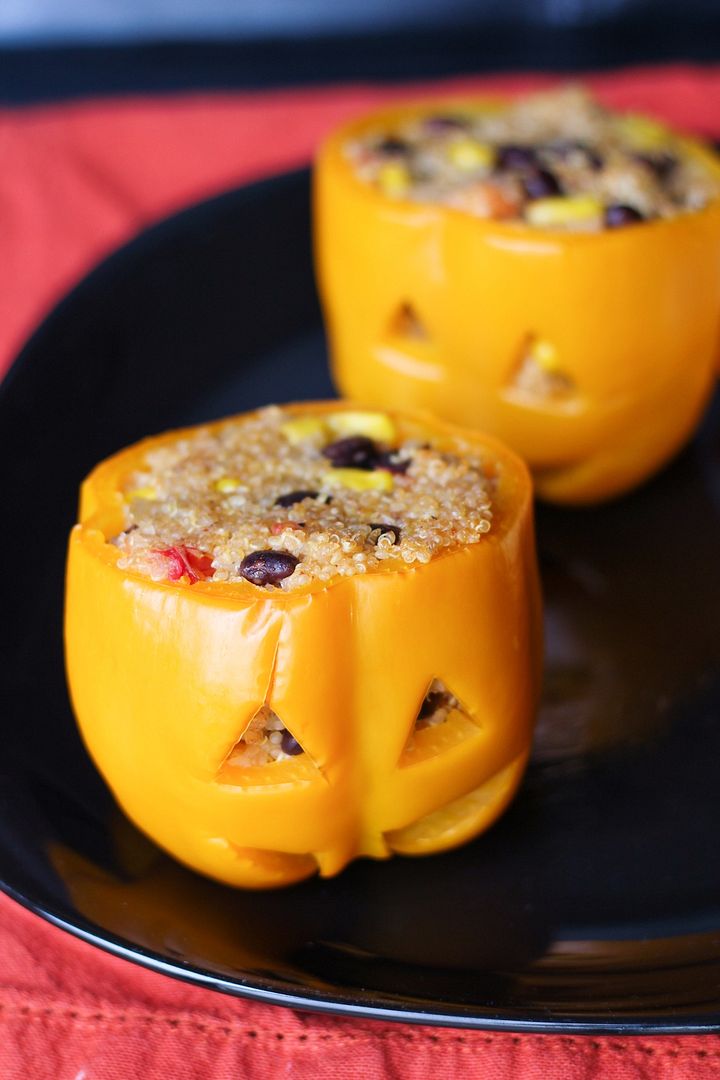
I love making cute Halloween themed treats, and dinner ideas are even better since there are already so many sweets around this time of year.  I've seen the idea of carving stuffed peppers like jack o' lanterns on several blogs before and wanted to try it for myself this year.  Even though I'm certainly not the first to try these, they turned out so cute and tasty that I had to share them with you guys!

Southwestern Quinoa Stuffed Pepper Jack O' Lanterns - easy and fun dinner idea for Halloween!

These are also really easy to make and completely customizable!  Just find some orange peppers, cut the tops off and scrape out any seeds or ribs inside, then carve your jack o lantern face with a small knife.  You don't want to cut out too big of holes so that the filling could escape, but even though these are a lot smaller to work with than pumpkins, I found them much easier to "carve"!

After prepping your little pumpkin lookalikes, you make your filling, stuff the insides of the peppers, and bake them to soften the peppers.  I also like to parboil the peppers first to reduce the amount of time needed to soften the peppers in the oven later, which will also help save time if you're trying to make these on Halloween evening before trick or treating starts!
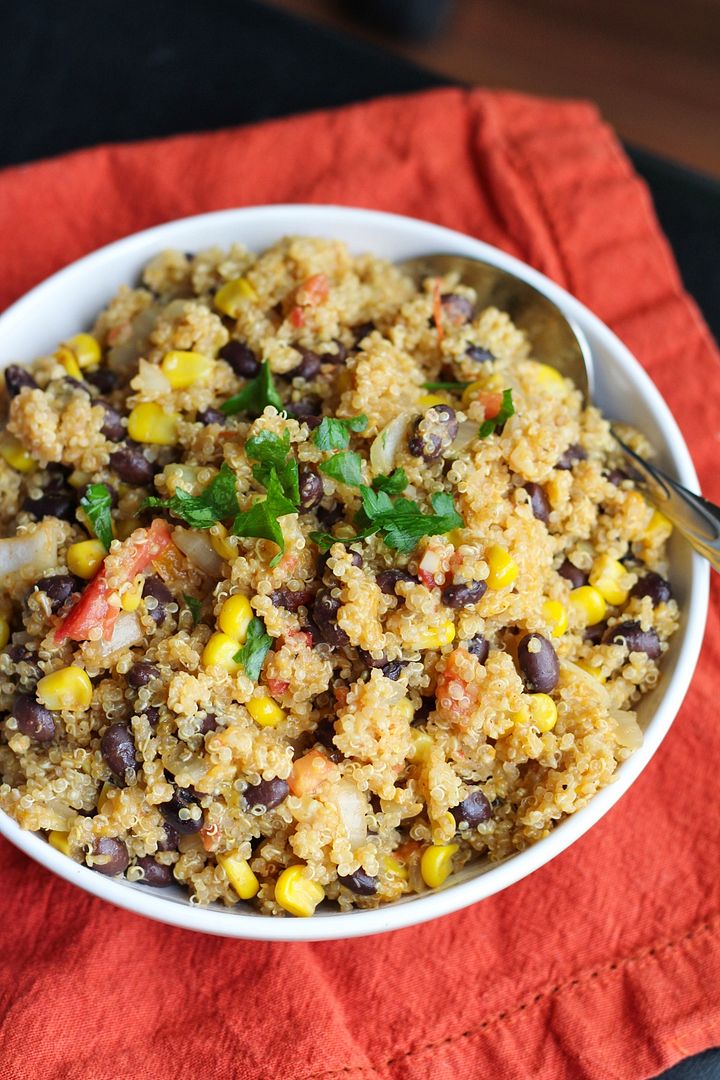
southwestern quinoa

I filled mine with one of my favourite southwestern-flavoured quinoa mixtures, which is vegetarian and pretty healthy too.  I cook the quinoa in vegetable broth which is important for giving it more flavour, then mix in some sauteed onion and garlic, tomatoes, black beans, corn, spices, and cheese.  You could add in more vegetables like spinach or mushrooms if you like, or leave out the spices if your kids won't like them.

I'm going to a Halloween potluck tomorrow and plan on making some scary cookies so if those turn out well I'll have another treat to share later this week!  Happy week of Halloween!
Southwestern Quinoa Stuffed Pepper Jack O' Lanterns - easy and fun dinner idea for Halloween!

Southwestern Quinoa Stuffed Pepper Jack O’ Lanterns

Serves 4-6

Ingredients:

2 cups vegetable broth
1 cup dry quinoa
4-6 orange bell peppers
1 teaspoon olive oil
1 yellow onion, diced
1 clove garlic, minced
2 small tomatoes, diced
1 (540mL) can black beans, drained and rinsed
1 cup corn kernels (thawed if frozen)
1 teaspoon cumin
1/2 teaspoon chili powder
Salt and pepper
1 cup shredded cheddar cheese (or Mexican or taco blend)

Directions:

Bring 2 cups of vegetable broth to a boil in a medium saucepan.  Add quinoa, cover, reduce heat to simmer and let simmer for 15 minutes.  Remove from heat and let sit, covered, for 5 minutes.  Remove lid and fluff with a fork.

Meanwhile, cut the tops off the bell peppers and use a knife to scrape out the remaining seeds and ribs of the pepper, leaving the pepper in tact (as seen in pictures).  Leave the tops aside if you wish to include them for presentation later.  Bring a large pot of water to a boil, with enough water to cover the peppers.  Add peppers and let simmer for about 4 minutes, until slightly softened.  Carefully remove and set aside.

Preheat oven to 350°F.

In a medium pan, heat oil over medium-high heat.  Add onion and saute for about 5 minutes, stirring often, until softened.  Add garlic and saute for 30 seconds, stirring. Add tomatoes, black beans, corn, cumin, and chili powder, and season with salt and pepper.  Stir and saute for a few minutes.  Remove from heat, stir in quinoa and cheddar cheese and mix until incorporated.

Spoon quinoa mixture into the peppers.  There should be enough to fill 6 peppers or you can really fill 4 peppers quite full, and might still have some quinoa leftover.  You could also just stop now and eat the quinoa on its own!  Leave tops off the peppers, spray a 9x13 glass baking dish with non-stick cooking spray, and place filled peppers standing up in the dish.  Cover with aluminum foil and bake in preheated oven for 25-35 minutes, until peppers are softened to your liking (I did 25 minutes as I was impatient but would have preferred 30).  Remove and serve with tops on the peppers if desired.  Eat by slicing everything up with a knife and fork and eating the quinoa and pepper together.


--------------------------------------------------------------------------------------------------
For more Halloween dinner ideas, try these:

Halloween mummy potatoes with turkey meatballs

Halloween Mummy Potatoes with Meatballs

Pumpkin, chicken, & goat cheese quesadillas

Pumpkin, Chicken, & Goat Cheese Quesadillas(for Halloween!)

September 19, 2014

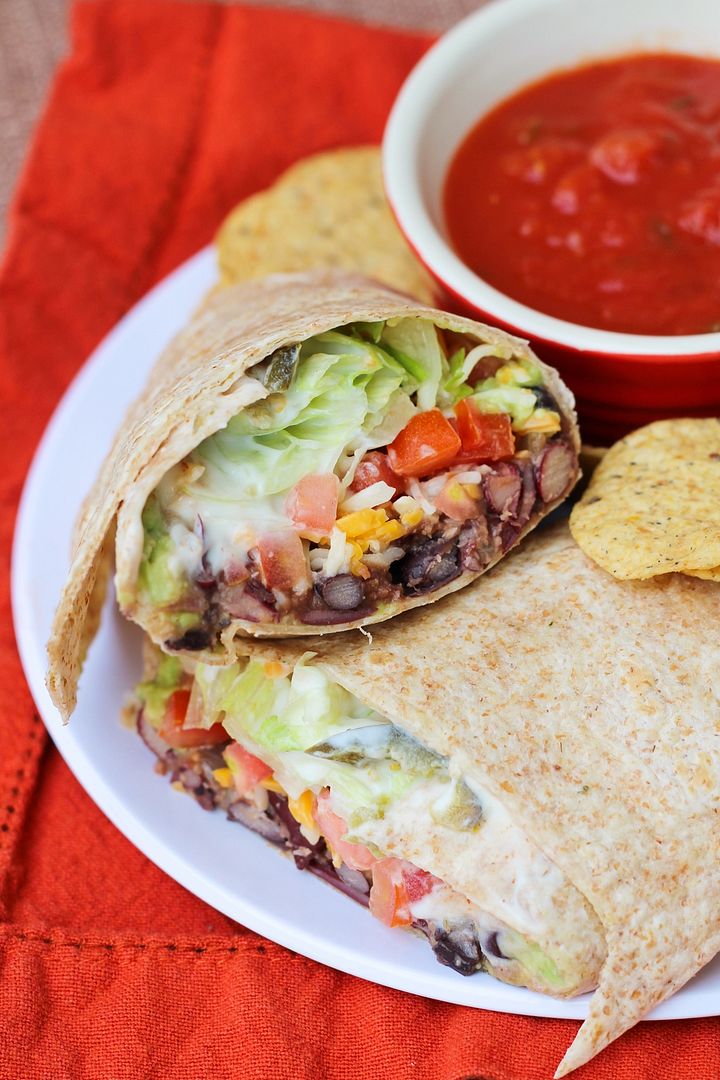
Chipotle Bean Burritos

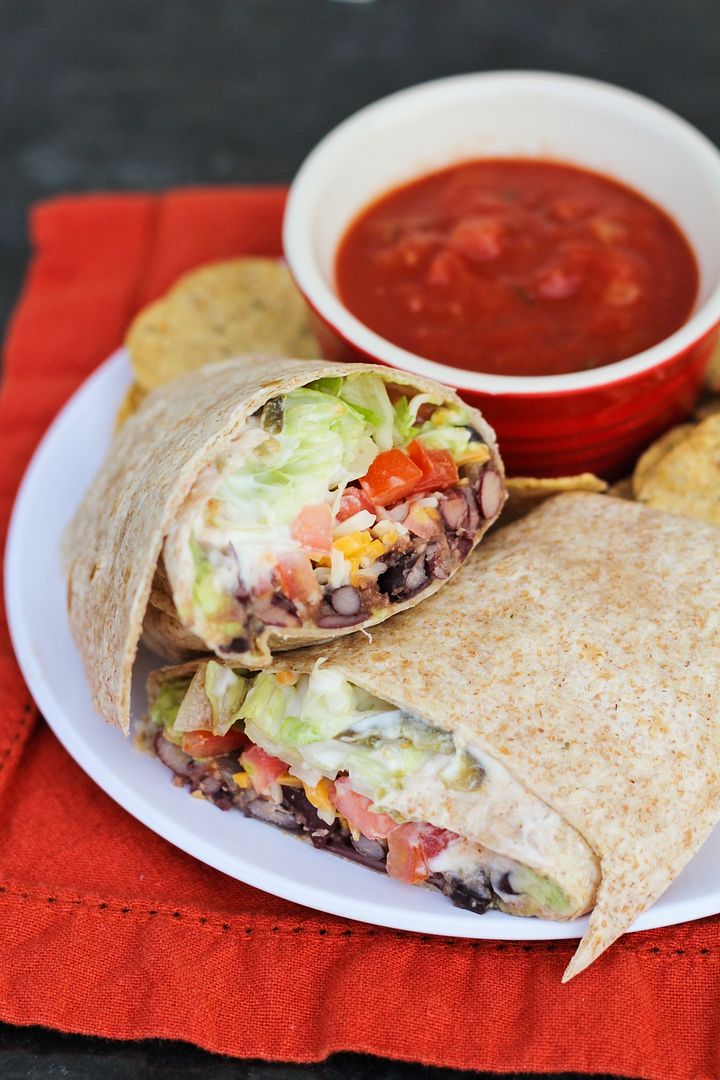
Chipotle Bean Burritos

As much as I love cooking, I don’t like having to coordinate a bunch of dishes at once or cook multiple nights in a row, so meals that consist of one dish and make lots of leftovers are a favourite around here. And these burritos fit the bill perfectly!

I consider these a fairly healthy version of a burrito with beans instead of meat, some veggies, low-fat sour cream, not too much cheese, and whole wheat tortillas (which taste just as good as regular tortillas in my opinion!).
Chipotle Bean Burritos

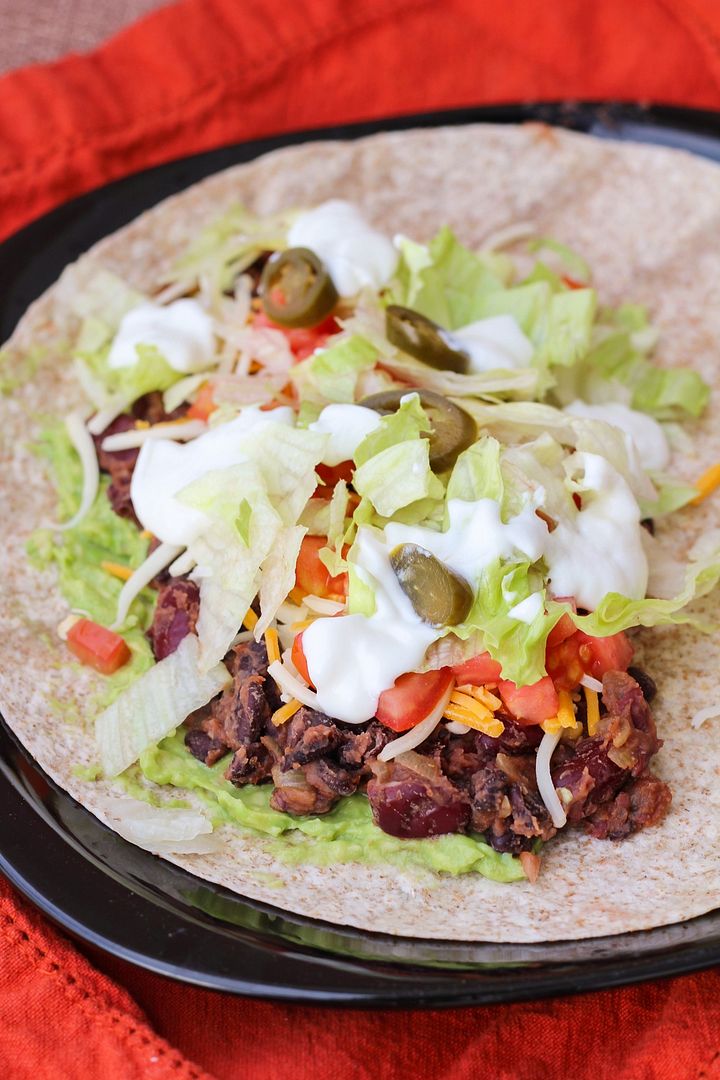
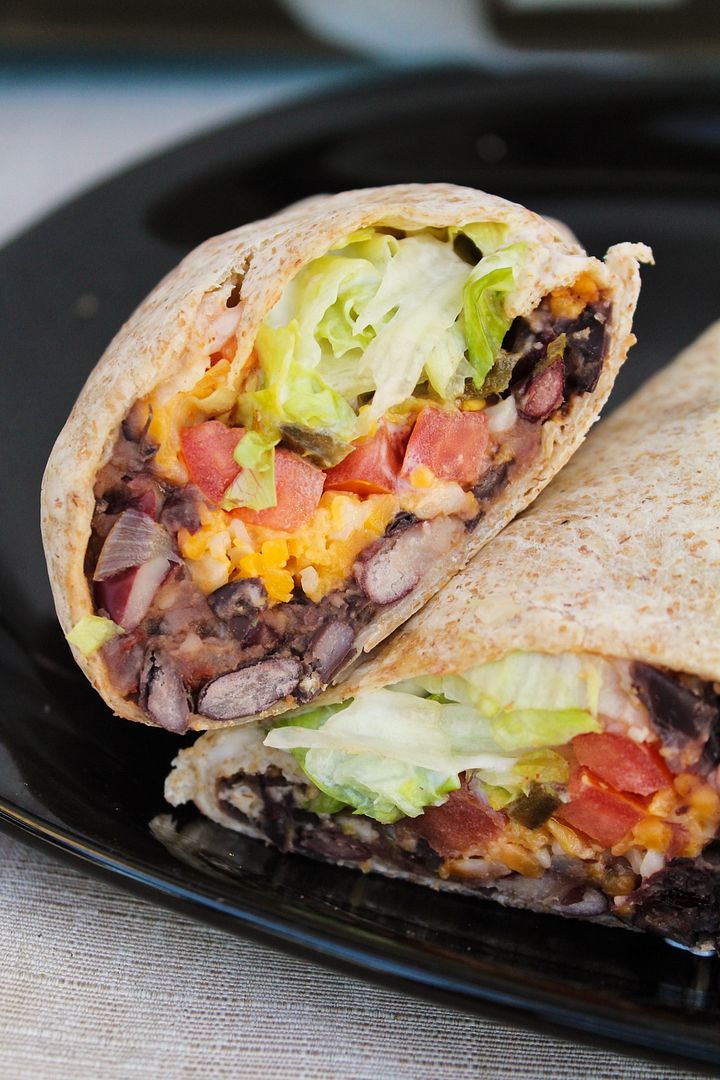
These also involve fairly minimal effort to make, and make six servings, which meant lots of leftovers for us!  To prepare them, a mixture of black beans and kidney beans gets cooked with some onion, garlic, vegetable broth, spices, chipotle sauce, and salsa to give it lots of flavour. It’s then rolled up with lettuce, tomatoes, mashed avocado, cheese, sour cream, a few pickled jalapenos, and some chipotle hot sauce for a packed and flavour-filled meal-in-one.

Chipotle Bean Burritos

We ate these three nights in a row this week and liked them more each time. That may have to do with my getting much better at rolling them with more practice (the last picture was the third night’s burrito which I thought looked much better than the first!)

Ryan commented on how good these are each time too and said they’re way better than beef burritos, and I’d have to agree! (though I don’t like beef anyway, so I’m a little biased)

Chipotle Bean Burritos


Chipotle Bean Burritos

Adapted from Cooking Light

Serves 6

Ingredients:

For the bean mixture:
1 teaspoon canola or olive oil
2 cloves of garlic, minced
1 small yellow onion, diced
1/2 teaspoon chipotle chile powder*
1/4 teaspoon salt
1/2 cup vegetable broth
1 (540mL) can black beans, drained and rinsed
1 (540mL) can kidney beans, drained and rinsed
1/2 cup chunky salsa – Mild or medium depending on your preference.  You could also use a chipotle salsa for more chipotle flavour!
2 teaspoons chipotle chile in adobo

Remaining burrito ingredients:
6 large (10-inch) whole wheat tortillas
2 large or 3 small ripe avocados
~1 cup shredded cheddar or monterey jack cheese (or a blend of cheese)
3 plum tomatoes, diced
1-1/2 to 2 cups shredded iceberg lettuce
~1/4 cup pickled jalapenos, optional
~6 tablespoons low-fat sour cream
Chipotle or regular hot sauce, optional

*I get chipotle chile powder at the bulk store.  If you can't find it, you can use a combination of regular chile powder and some cumin for spice.

Directions:

Heat oil in a large non-stick saucepan over medium heat.  Add onion and saute about 5 minutes, stirring often, until translucent and starting to turn golden brown.  Add garlic and saute for 30 seconds.  Add chile powder and salt and stir to coat for another 30 seconds.  Stir in vegetable broth and beans and bring to a boil.  Let simmer about 7-10 minutes, or until no liquid remains. Remove from heat and stir in salsa and chipotle sauce.  Partially mash mixture.

Warm tortillas up for about 30 seconds in the microwave, wrapped in damp paper towel, so they are easier to roll.  To form burritos, spread 1/6 of the bean mixture (so it divides evenly among 6 burritos) onto one half of the tortilla, leaving about a 1-inch border.  Top with avocado, cheese, tomatoes, lettuce, pickled jalapenos, sour cream, and hot sauce (again dividing evenly among 6 burritos).  Roll up the side closest to the filling, then fold in each end, and roll the burrito toward the empty side of the tortilla, wrapping the filling completely.  Others prefer to fold in the sides of the burrito first, then roll up from the bottom.  I've also seen starting with the filling in the middle.  Use whatever method works for you but make sure to roll tightly and keep the filling in!
Serve while filling is still slightly warm.  I like to warm my completed burrito up in the toaster oven for a couple minutes before eating to make sure it's warm throughout.

If you have leftovers, keep everything separate.  Warm bean mixture up in the microwave and then prepare burrito as before.

May 16, 2014

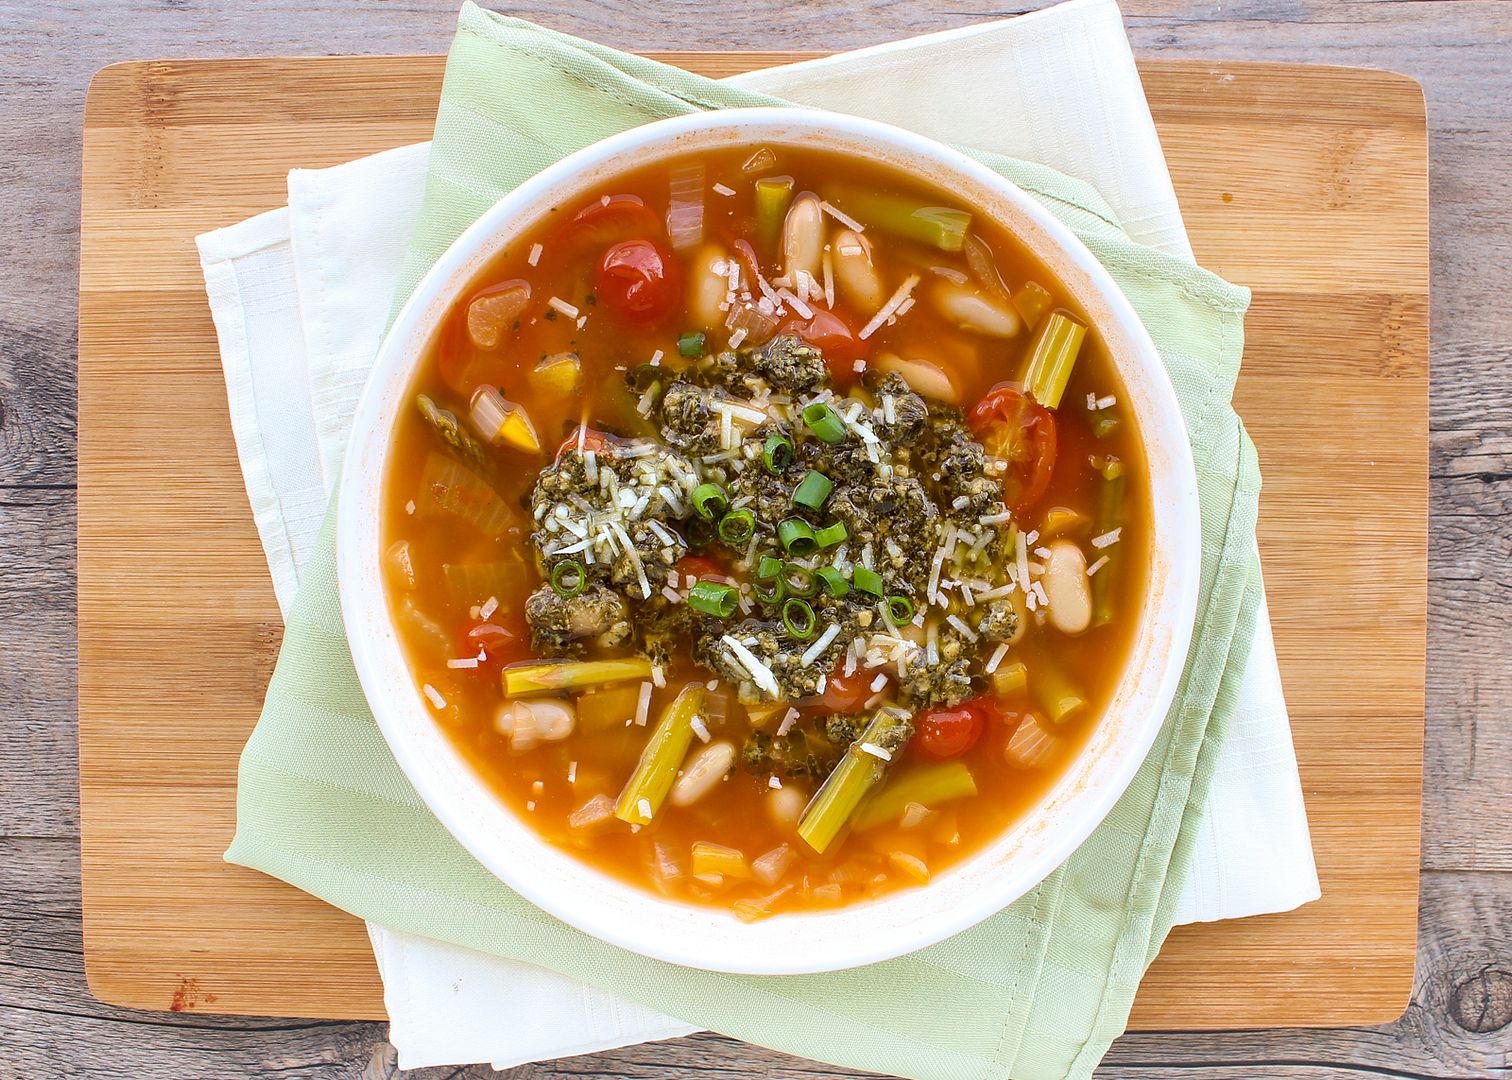
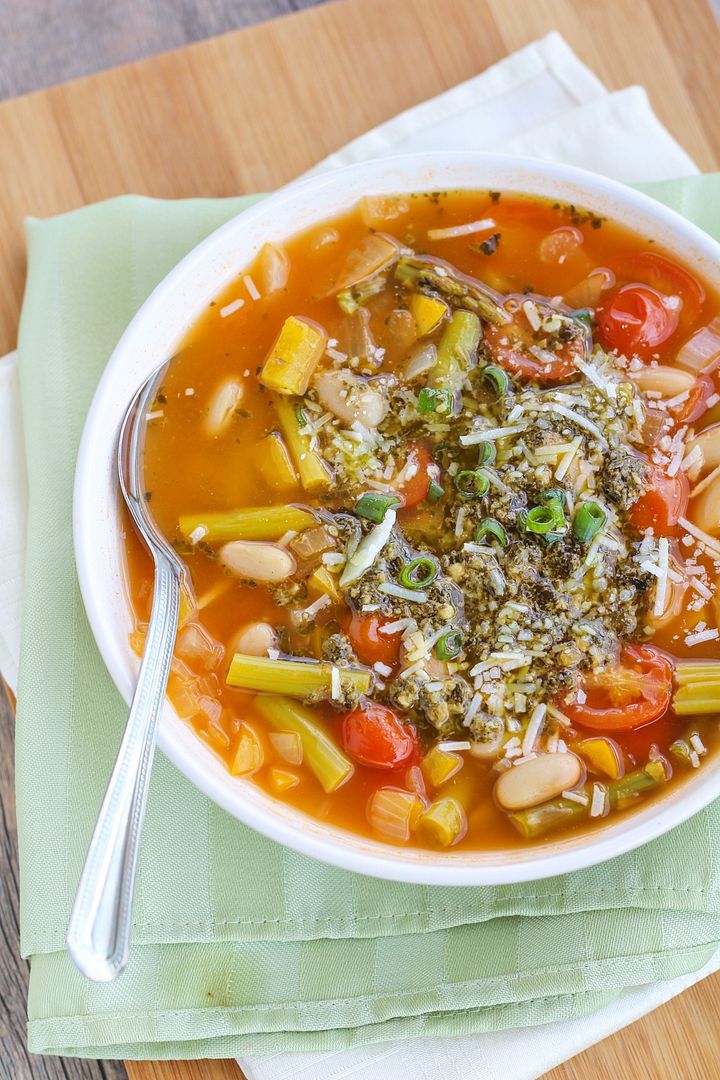
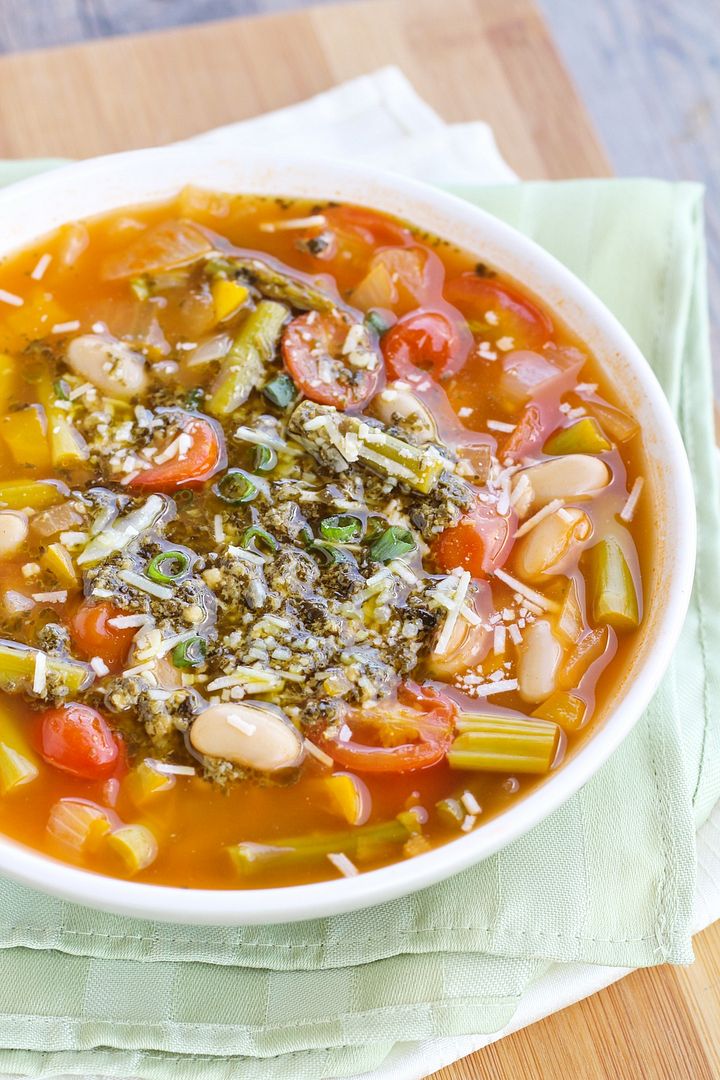
Spring Vegetable Minestrone with White Beans & Pesto

Spring Vegetable Minestrone with White Beans & Pesto

After a tease of summer-like weather last weekend, we've been making up for it all week here with rain, rain, and more rain.  Just in time for the long weekend!

For us Canadians, this May long weekend is sort of the unofficial kickoff to summer, but almost invariably ends up being cold and rainy.  So while soup isn't the type of recipe you would normally kick off a late May long weekend with, it's pretty appropriate for this wet and rainy spring weather we've been experiencing!

Spring Vegetable Minestrone with White Beans & Pesto

This is not a traditional minestrone soup, using asparagus and yellow peppers for some bright spring flavour along with the tomatoes, white beans for protein, no pasta, and with pesto and parmesan added in at the end for a boost of richness and flavour.

I realize now that my pictures don't really do this soup justice with the way I slightly overcooked my asparagus and then pretty much covered the whole bowl in pesto, but I do love pesto!  This was the perfect type of comfort spring food that's needed this time of year as we patiently wait for summer to kick in for good - hopefully not that long now!

Spring Vegetable Minestrone with White Beans & Pesto

Spring Vegetable Minestrone Soup with White Beans and Pesto

Adapted from Food & Drink Magazine

Serves 4-6

Ingredients:

1 tablespoon olive oil
3 cloves garlic, minced
2 small yellow onions, peeled and diced
2 cups finely chopped yellow bell peppers, (about 1-1/2 peppers; red or orange would also work)
1 tablespoon tomato paste
1 cup halved grape tomatoes
1 (540mL) can cannellini or white kidney beans, rinsed and drained
6 cups vegetable broth (I use low-sodium broth)
1-1/2 cups chopped asparagus (half inch pieces; woody ends of asparagus removed)
Salt and pepper

For Topping:
~1 tablespoon prepared pesto per serving
Grated parmesan cheese
Chopped fresh basil, parsley, or green onion (optional)

Directions:

In a large saucepan, heat oil over medium heat.  Add garlic and sauté for 30 seconds.  Add onions and peppers and sauté for another 10 minutes, stirring often.

Add tomato paste and sauté for 30 seconds, stirring often.  Add grape tomatoes and sauté for another minute.  Add white beans and vegetable stock, bring to a boil, cover, and let simmer 10 minutes.  Add asparagus and simmer for another 5-10 minutes, or until all vegetables are tender (I did 10 minutes and my asparagus was a little overdone).  Season to taste with salt and pepper.

Divide among bowls and serve warm, topped with pesto, parmesan cheese, and herbs, if desired.  Season with additional salt and pepper if needed.

March 25, 2014

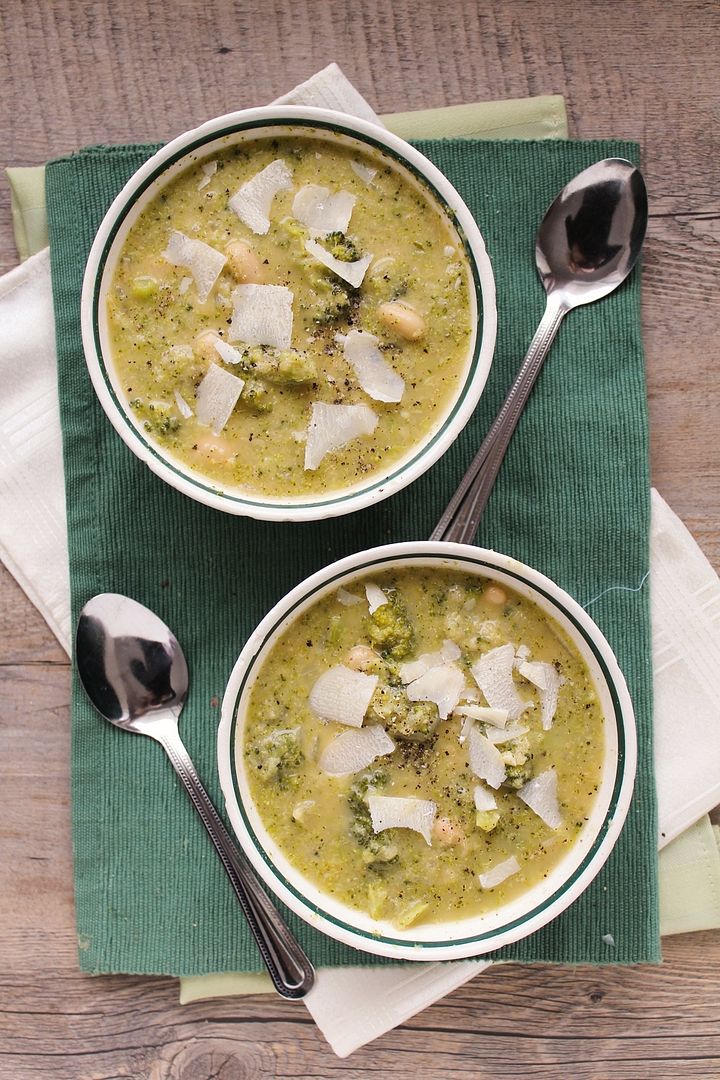
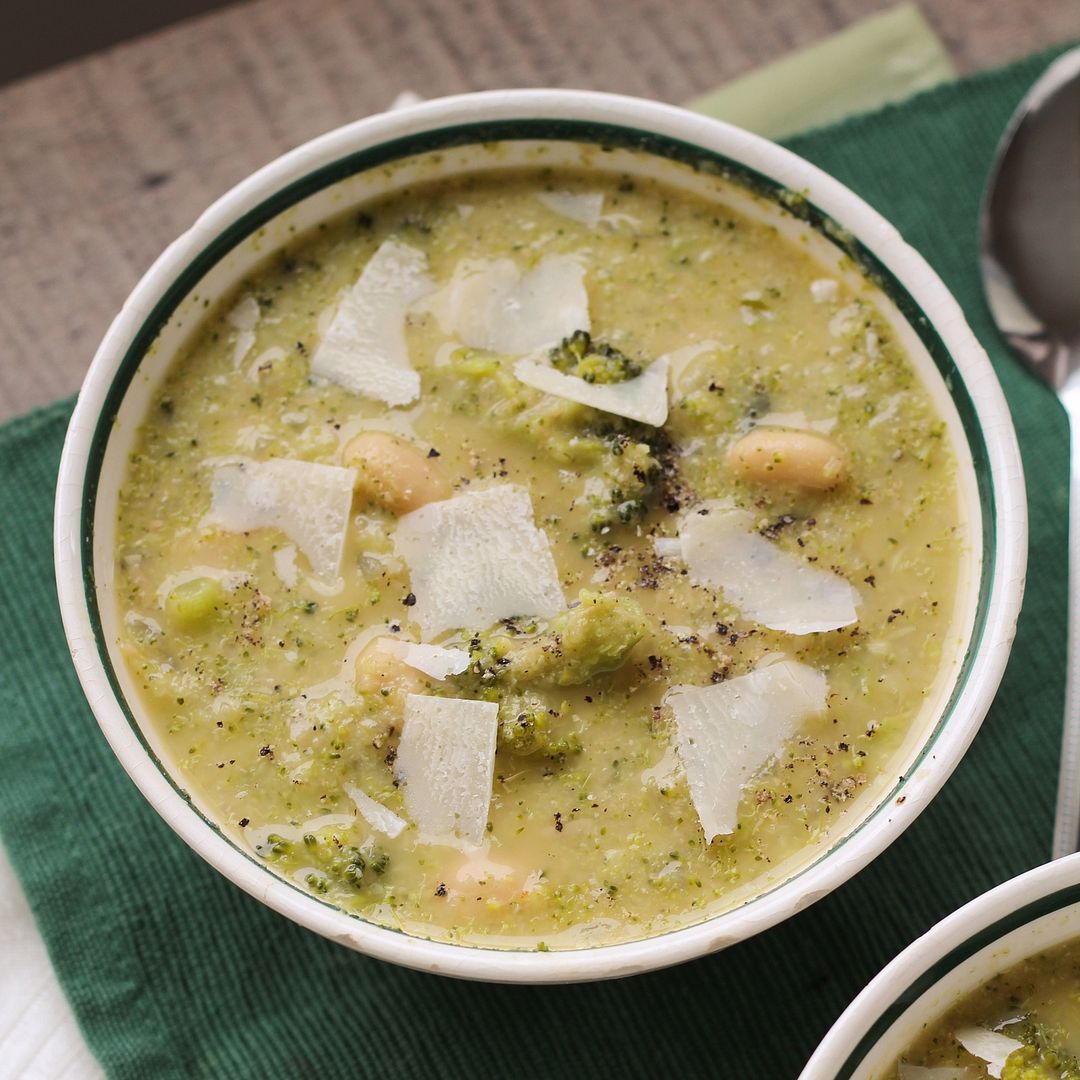
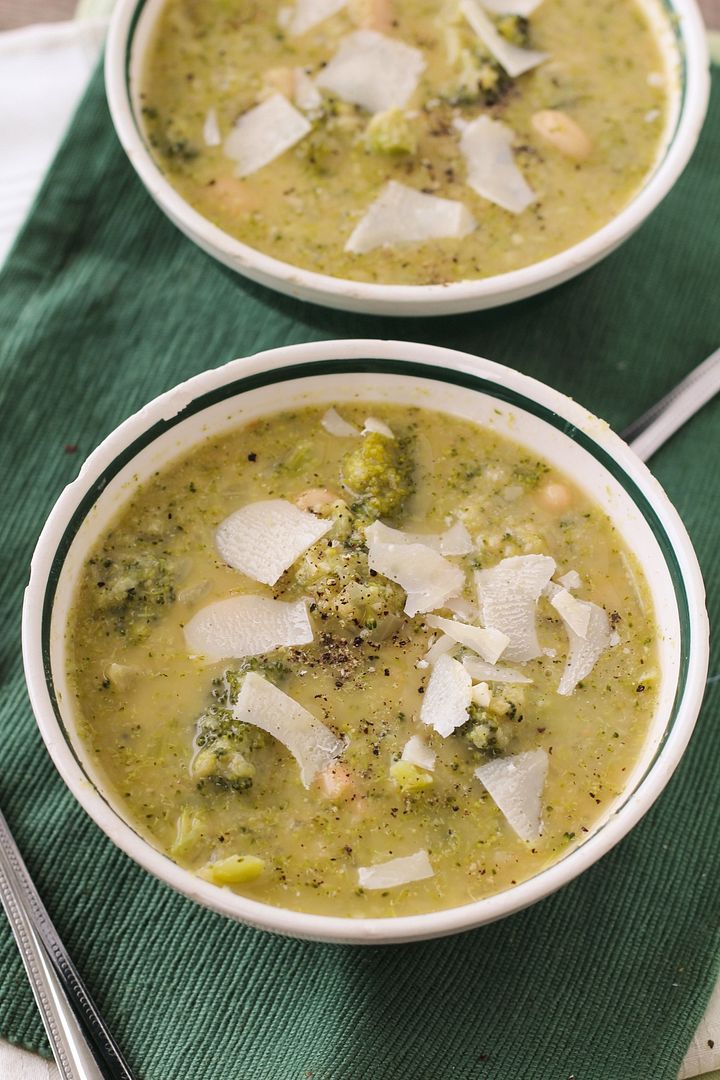
Broccoli White Bean Soup

Broccoli White Bean Soup

Winter is still showing no signs of slowing down here in Ontario, so despite it technically being spring, I'm still eating comfort food like cozy warm soups.  Which I'm not complaining about, as soups (at least the versions I make) are one of the easiest and quickest meals to prepare and they make great leftovers to be welcomed home to after a cold bus ride home after school!

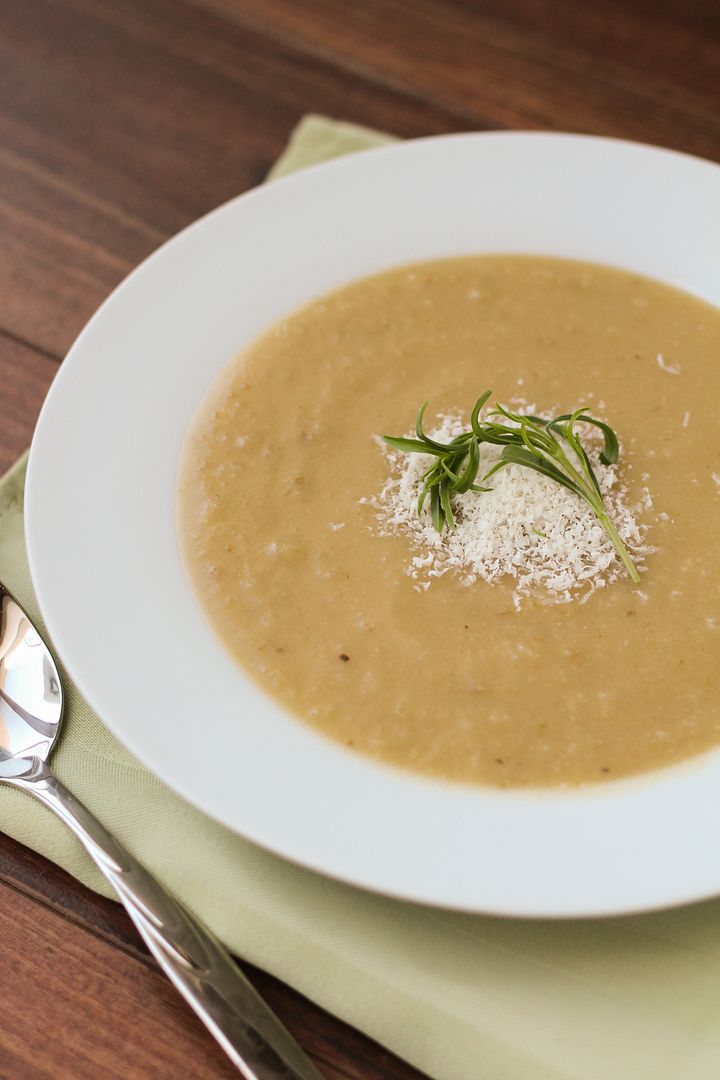
This broccoli white bean soup is not only quick and easy to prepare but is nutritious and filling too.  I've used beans as a soup thickener before (like in this curried chickpea and kale soup or this roasted tomato white bean soup) and though it doesn't give it the same silky smooth texture that full fat cream would, I actually prefer the slightly chunky texture and thickness that beans add, not to mention it's a great way to sneak in protein to a vegetable soup!

Broccoli White Bean Soup

In addition to the white beans, this simple soup mainly just consists of broccoli and vegetable broth along with some basic flavourings like onion, garlic, and lemon juice.  I added nutritional yeast to the soup to give it a bit of cheesy, nutty flavour (and added nutrition) without any cheese, but some shavings of good quality parmesan on top are also critical for flavour.  I decided to only halfway puree my soup to leave some texture in it, but you can definitely puree it all if you prefer a smooth soup.

While you won't trick anyone into thinking this is a traditional butter, cream, and cheese filled broccoli soup, it's a great alternative if you're looking for a more nutritious but still comforting version of broccoli soup!

Broccoli White Bean Soup

Broccoli White Bean Soup

Adapted from Whole Living

Serves around 3-4

Ingredients:

1 head of broccoli, chopped into florets
1 tablespoon olive oil
1 medium to large yellow onion, diced
2-3 cloves garlic, minced
1 (540mL) can of no-salt added white kidney beans or cannellini beans, drained and rinsed
2 1/2 cups low-sodium vegetable broth
1/4 teaspoon red pepper flakes
1/4 cup nutritional yeast (or grated parmesan if desired)
1 teaspoon lemon juice
Salt and pepper (I used around 1/2 teaspoon each)
Shaved parmesan for topping

Directions:

Steam broccoli in a steamer basket, covered over simmering water, for about 3-4 minutes, until bright green and tender.  Set aside.

In a large saucepan, heat oil over medium heat.  Add onion and garlic and sauté until softened and translucent, about 6-7 minutes.  Add the beans and broth and bring to a simmer.  Add broccoli and red pepper flakes and stir.  Remove from heat and puree about half to two-thirds of the soup either by transferring to a blender or using an immersion blender.  I wanted to leave some texture to the soup, but you can puree all of it if you prefer the soup to be smooth.  Return to saucepan and stir.  Stir in the nutritional yeast, lemon juice, and season with salt and pepper to taste.

Serve warm, topped with shaved parmesan.

February 25, 2014

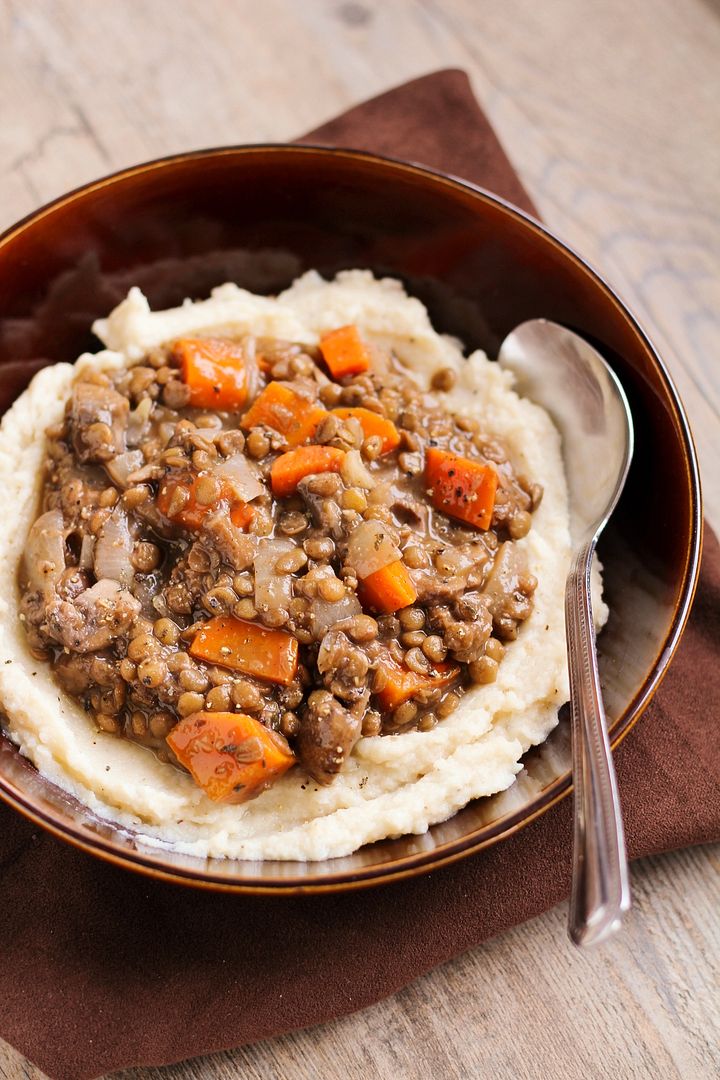
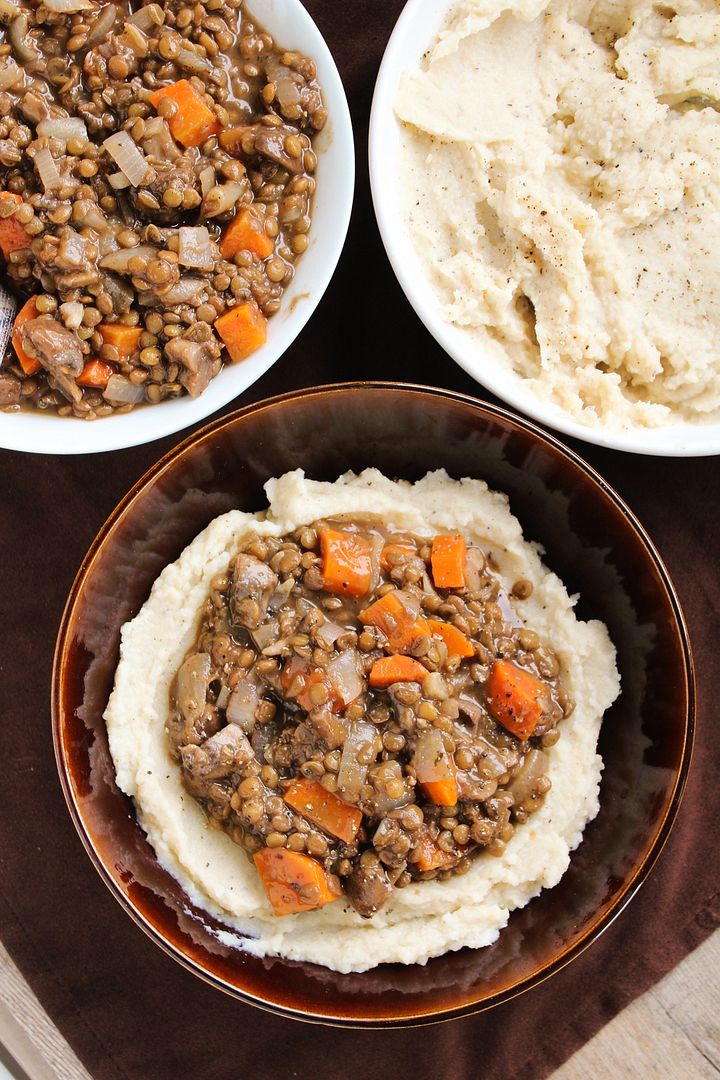
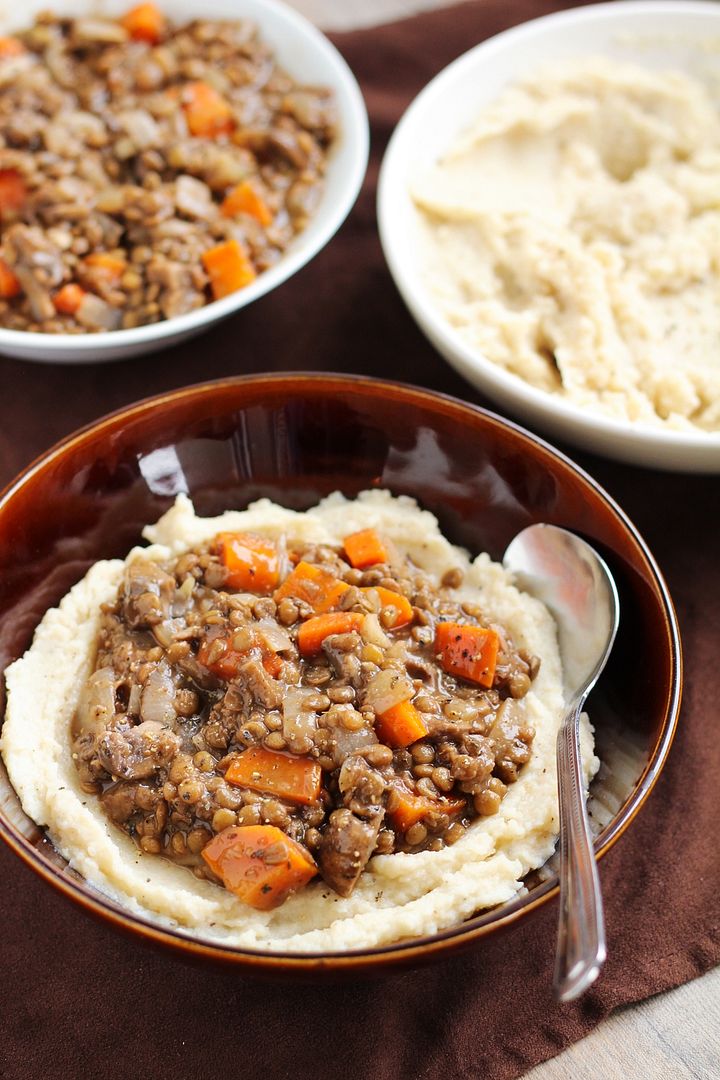
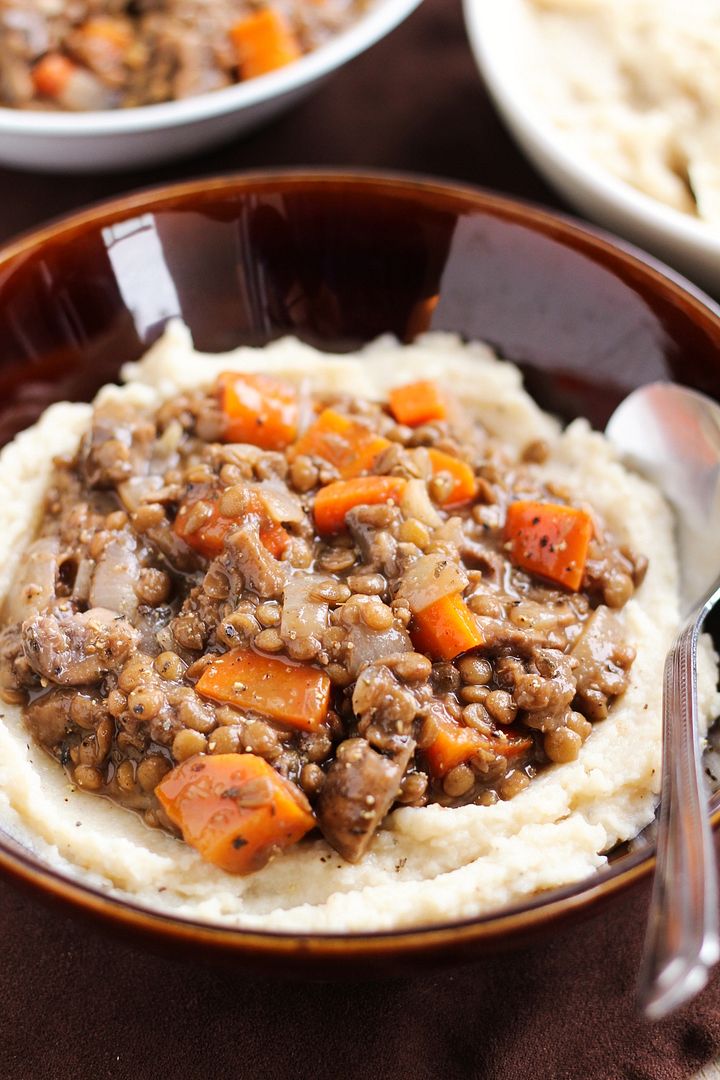
Lentil & Vegetable Stew with Cauliflower White Bean Puree

Lentil & Vegetable Stew with Cauliflower White Bean Puree

So I realize this isn't the most attractive looking plate of food you've ever seen...  I was cringing as I put together this post, wondering why I thought brown on brown on brown was a good idea for food styling, or why I didn't add a garnish on top for some colour.  I will hopefully redo these photos in the future, but I wanted to make sure I shared this now while you're still in the mood for hearty winter comfort food.  Not that winter seems to be showing any signs of ending soon!

Hopefully you're willing to get past appearances here because I promise the taste is worth it.  And not only is this dish comforting, filling, and full of flavour, but it's also really good for you!

Lentil & Vegetable Stew with Cauliflower White Bean Puree

This stew is made with lentils (obviously), onion, garlic, mushrooms, carrots, vegetable broth, plenty of seasonings, and a splash of red wine for good measure.  So you're getting a ton of vitamins, fiber, and protein to fill you up and keep you energized through the day or night.  I love using lentils in meals because they're a great source of protein, they're easy to cook, and they're really cheap!

And to make this even more of a protein power bowl, I pureed white beans with cauliflower to serve as the base for the stew.  Steaming and pureeing cauliflower is one of my favourite ways to eat it and I honestly like it even better than regular mashed potatoes.  Sometimes I'll puree cauliflower with chickpeas or white beans and some flavourful mustard and just eat that for dinner on its own, but it goes even better with a hearty stew on top! 

Lentil & Vegetable Stew with Cauliflower White Bean Puree


In case you're skeptical, or plan on serving this to picky eaters, I told Ryan that the cauliflower was just mashed potatoes, and after I'd finished watching him eat his meal while trying to hold in my evil grin the whole time, I told him it was really cauliflower and beans and he was completely surprised!

You can also eat the stew on its own if you prefer, and if your leftovers thicken up more than you like in the fridge, just add a splash of water or vegetable broth before you warm it up (this makes great lunch leftovers!)

It may not be pretty, but this is just what you need to get through these never ending winter days!

Lentil & Vegetable Stew with Cauliflower White Bean Puree

Lentil & Vegetable Stew with Cauliflower White Bean Puree

Recipe adapted from Unprocessed People’s Lentil Not Roast

Makes about 4 servings

Ingredients:

For the Lentil Stew:
1 cup dry green or brown lentils
2 teaspoons olive oil
1 lb (two 8oz containers) white or crimini mushrooms, chopped (around 2.5 cups)
2 large carrots, peeled and diced
2 medium yellow onions, peeled and diced
3 cloves garlic, minced
1/2 teaspoon cumin
1/2 teaspoon dried oregano
1/2 teaspoon dried basil
1/2 tablespoon dried thyme
1 tablespoon tomato paste
2 teaspoons cornstarch
1/2 cup red wine
2 cups low-sodium vegetable broth
2 bay leaves
2 teaspoons Worcestershire sauce (use vegetarian Worcestershire sauce to keep this vegetarian/vegan)
Salt and pepper

For the Cauliflower:
1 large head of cauliflower, chopped into florets
3 cloves garlic, crushed
1 can white kidney beans, drained and rinsed
2 teaspoons extra virgin olive oil
~1/2 teaspoon each salt and pepper

Directions:

Bring 2 cups water to a boil in a medium saucepan.  Add lentils, reduce heat to medium-low, and let simmer uncovered for 20-30 minutes, until cooked through and water is absorbed. Set aside when done.

Meanwhile, in a separate large saucepan or dutch oven, heat olive oil over medium heat.  Add mushrooms, carrots, onion, garlic, and dry seasonings (cumin through thyme), stir, and let cook for around 5-7 minutes, stirring often.  Add tomato paste, stir to coat, and let cook for about a minute. Add cornstarch, stir to coat, and cook for another minute.  Add red wine and let simmer for about 3 minutes.  Add vegetable broth and bay leaves and lower heat to a simmer.  Add lentils and let simmer for at least 5 minutes.  Remove bay leaves, stir in Worcestershire sauce, and season to taste with salt and pepper.

While your lentil stew is simmering, prepare the cauliflower bean mash.  Add cauliflower and garlic to a steamer basket and steam over boiling water, covered, for about 10 minutes.  Transfer to a food processor, add white beans, and process until smooth.  Slowly add olive oil, then season with salt and pepper.

Serve lentil stew warm over pureed cauliflower.  Garnish with chopped parsley if desired.

January 13, 2014

White Chickpea Chili

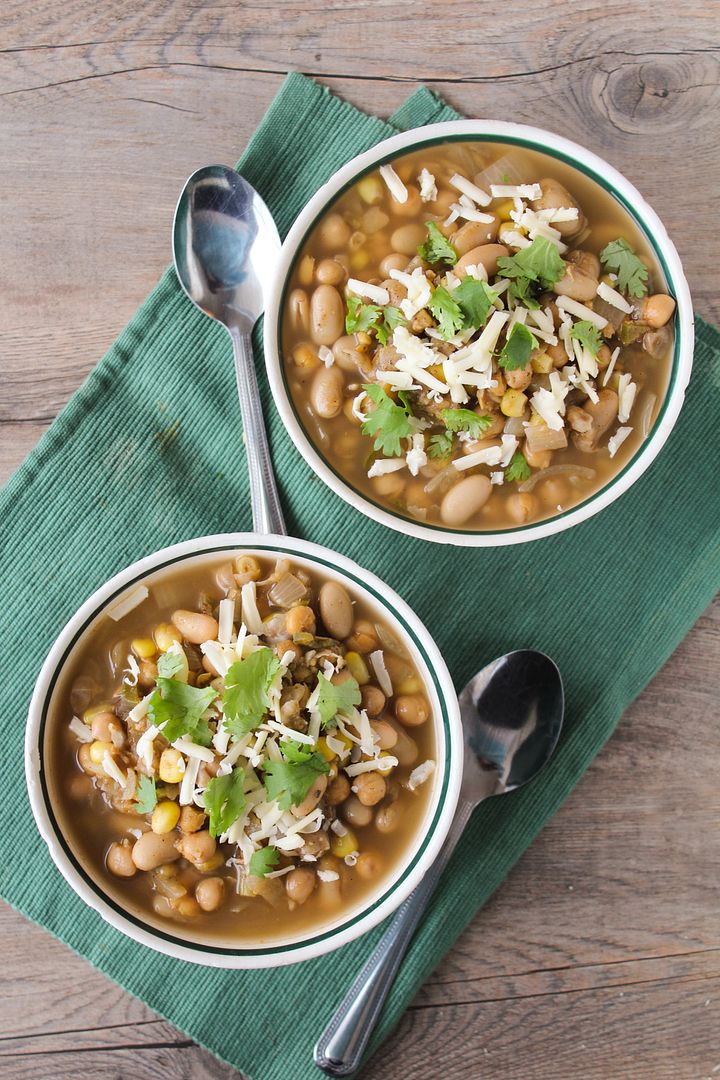
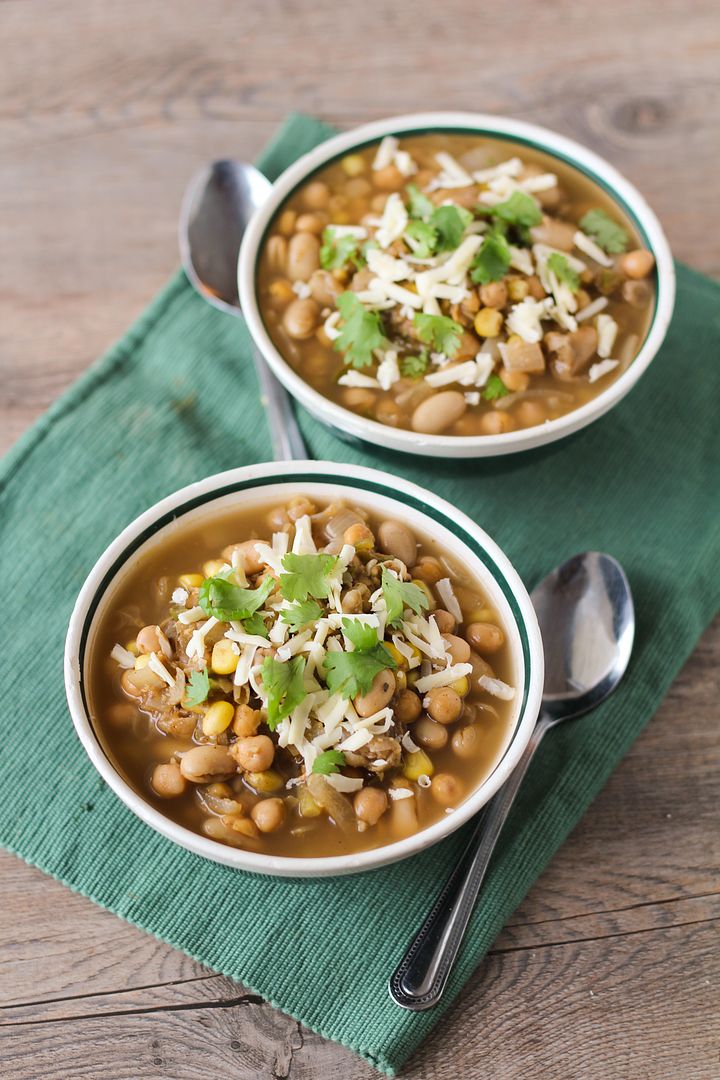
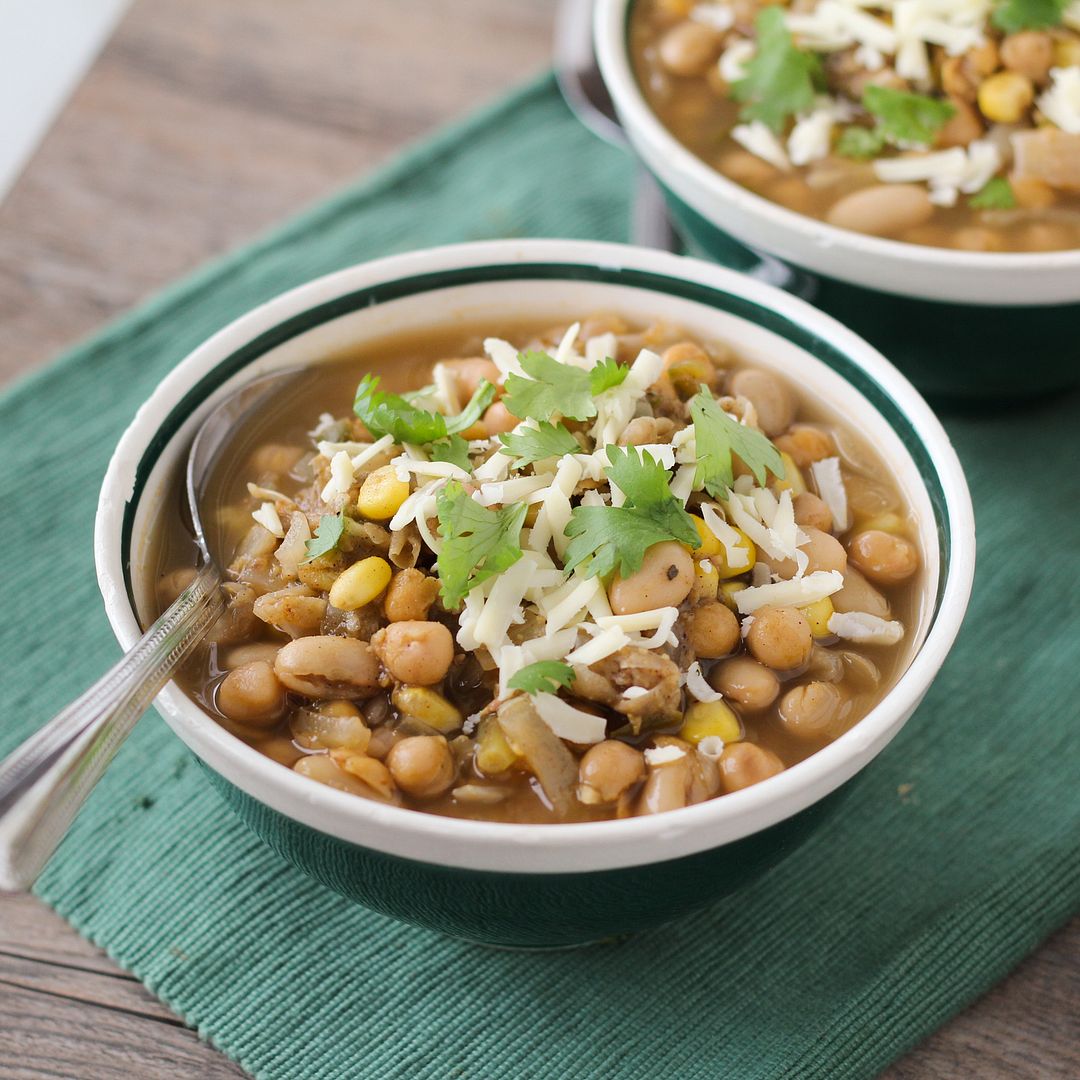
White Chickpea Chili - a healthy and easy vegetarian twist on white chicken chili

With the cold weather a lot of us experienced last week (except those lucky people in California!), I’m sure we’ve all been eating lots of warm comfort food lately.  When it gets that cold out all I want for dinner is soup, stew, or chili, but as these can often involve a lot of cooking time to develop enough flavour, during the week I need something that’s a little more quick and easy to prepare.  

Enter white chickpea chili!

White Chickpea Chili - a healthy and easy vegetarian twist on white chicken chili

I love white chicken chili as a refreshing change from tomato-based versions, but I decided to make it a little easier and cheaper to make by using all beans and no chicken.  This vegetarian white chili includes mashed chickpeas throughout for thickness, whole chickpeas and white beans for texture (and tons of protein, so you won’t miss the meat!), some corn for a little sweetness, jalapeno for spice, and then vegetable broth, garlic, onions, and seasonings for plenty of flavour.

You end up with a healthy vegetarian chili that’s inexpensive, easy and fairly quick to make, and full of flavour.  Perfect for these cold winter nights, and also Sunday playoffs if you usually associate football with chili (and if you're still watching - my team's still in it so I'm all about the football food!)

Hope you all had a good weekend and are dethawing a bit now!

White Chickpea Chili - a healthy and easy vegetarian twist on white chicken chili

White Chickpea Chili

Adapted from The Neely’s white chicken chili recipe

Serves about 4

Ingredients:

1 teaspoon olive or canola oil
1 large or 2 small yellow onions, chopped
2 cloves garlic, minced
1 jalapeno, minced (use more if you want it to be spicier)
2 (540mL) cans chickpeas, drained and rinsed, divided
1 (540mL) can white kidney beans, drained and rinsed
2 teaspoons ground cumin
1 teaspoon chili powder
1 teaspoon dried oregano
4 cups low sodium vegetable broth
1 tablespoon fresh lime juice
1 cup frozen corn kernels
Salt and pepper to taste

Toppings:
Shredded white cheddar cheese
Chopped fresh cilantro
Light sour cream
Chopped ripe avocado (not pictured in my version but it would be a nice addition!)

Directions:

Heat oil in a large saucepan or Dutch oven over medium-high heat. Add onions, garlic, and jalapeno, stir to coat with oil, and sauté until soft and fragrant, stirring occasionally, about 5 minutes.

Meanwhile, rinse and drain your cans of beans, keeping one can of chickpeas separate. Transfer those chickpeas (1 can) to a medium bowl and mash with a potato masher until most beans have been smashed. Set aside.

Add cumin, chili powder, and oregano to the onion mixture in the pan. Stir to coat and let cook for about 1 minute. Add vegetable broth, lime juice, corn kernels, mashed beans, and remaining beans. Bring to a boil, then reduce heat to simmer and let cook about 10-15 minutes.

Season with salt and pepper to taste. Serve warm in bowls topped with shredded cheese, cilantro, a dollop of sour cream, avocado, and additional lime wedges, if desired.

August 29, 2013

Golden Summer Squash & Corn Soup

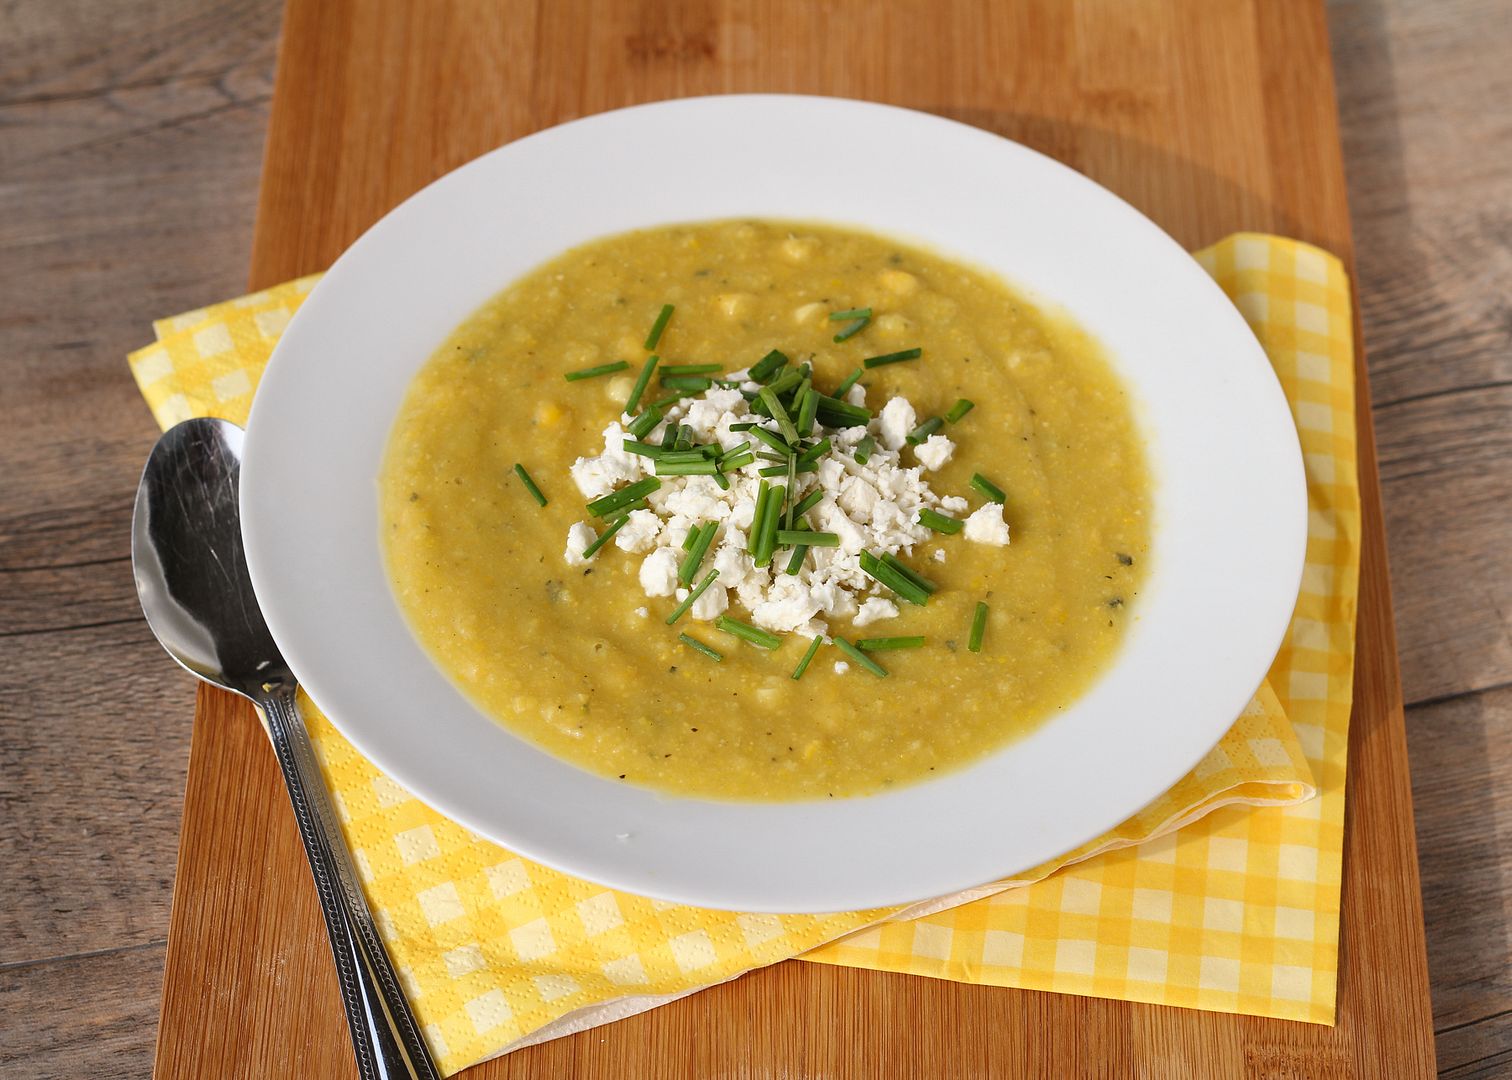
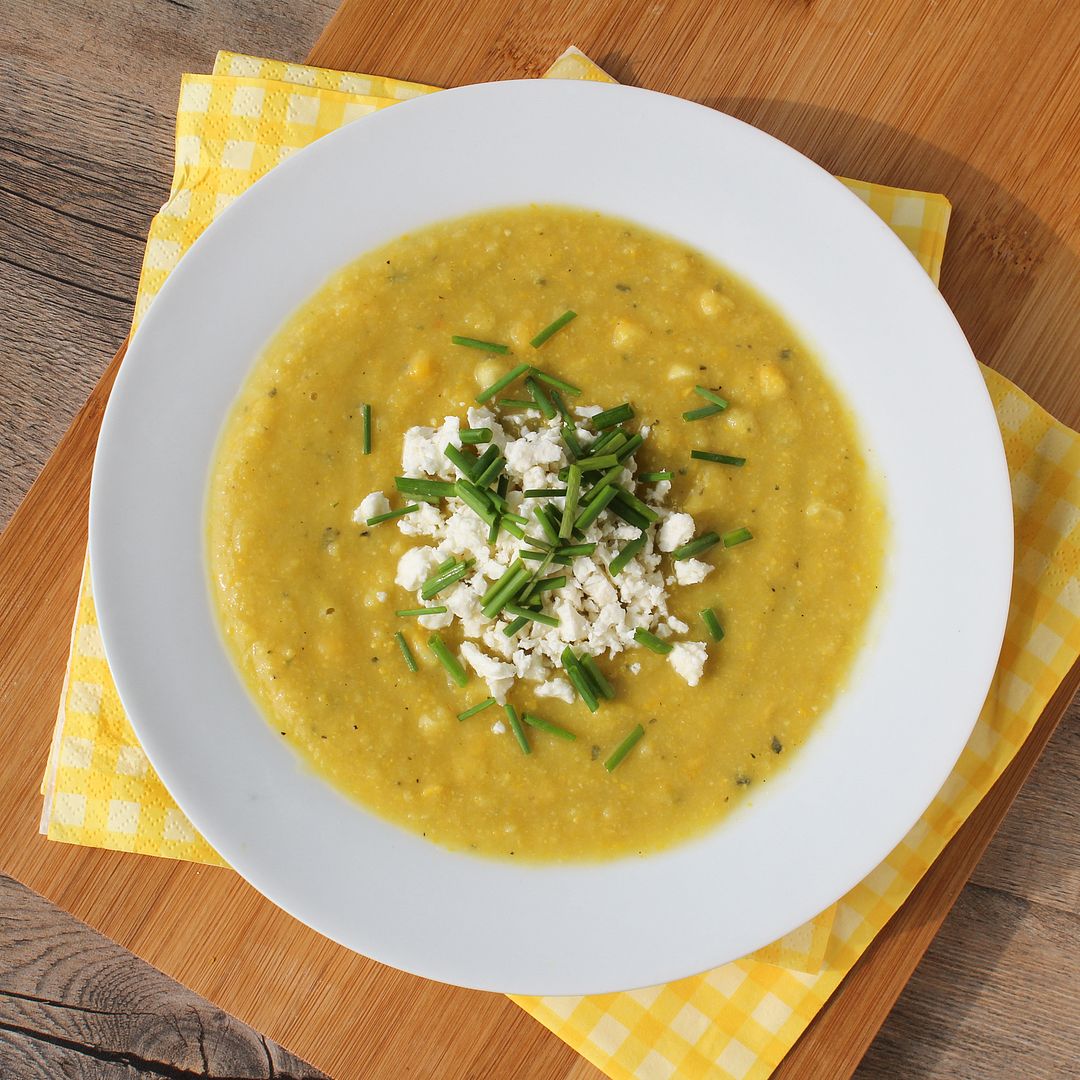
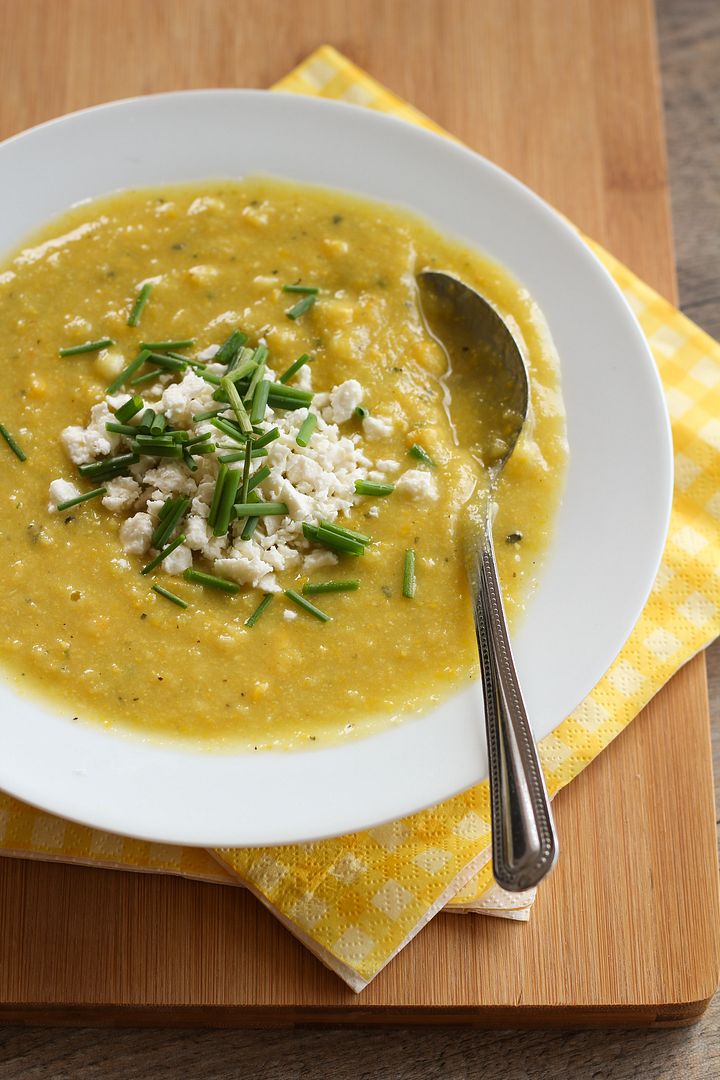
Golden Summer Squash and Corn Soup, topped with Feta & Chives

I apologize that I haven't been able to share a recipe post in a couple of weeks now!  I thought I would have plenty of downtime in Japan for blogging, but it turned out I barely even had time to email my family at night - not that I'm complaining, because it meant I was keeping busy there and seeing lots of sights!  Now that I'm home though, I'm so excited to be able to get back into a routine, including blogging and cooking for myself again!

I had a lot of great food in Japan, but considering I didn't know all the ingredients that went into my meals (or sometimes what my meal even was), it's nice to be able to make my own meals now where I can control exactly what goes into them.  And with summer flying by, all I've been wanting to throw into my meals lately is tons of summer veggies!  I also caught a pretty bad cold in Japan that I've been suffering through all week, so I knew as soon as I got back that I wanted to make a summer soup.

Golden Summer Squash and Corn Soup, topped with Feta & Chives

I'd bookmarked this golden summer squash and corn soup from Eating Well (one of my favourite recipe sources) a while ago, so I knew this was the perfect opportunity to finally make it.  The soup is pretty simple - basically you sauté some onions and summer squash, puree them with vegetable broth, add some fresh corn, and top with feta and chives.  I made a few changes to the original recipe, like using veggie broth instead of chicken, onion plus garlic instead of shallots (mostly because I didn't have any), adding some jalapeno for spice and an extra cob of corn to be pureed with the squash, and using dried basil and fresh chives as the herbs (but you can use whatever you like). 

This soup was bright and summery but warm and comforting at the same time.  I especially loved the chunks of feta, which sounded like a strange addition at first, but surprisingly worked pretty well.  While this hasn't exactly helped my cold this week, it definitely satisfied my craving for a fresh homemade summer meal!

Golden Summer Squash and Corn Soup, topped with Feta & Chives

Summer Squash and Corn Soup with Feta & Chives

Adapted from Eating Well

Makes 4-6 servings

Ingredients:

1 teaspoon olive oil
1 medium yellow onion, peeled and chopped
1-1/2 pounds yellow summer squash (the ones that look like zucchini) (about 3 medium squash), chopped
1 clove garlic, minced
2 ears of fresh corn, kernels removed (divided)
3 cups vegetable broth
1/2 teaspoon dried basil
1/2 teaspoon salt (or more, to taste)
1/4 teaspoon pepper
1/2 a jalapeno, minced (or a whole pepper for more spice)
2 teaspoons lemon juice
~1/4 cup chopped chives
~1/4 cup crumbled feta cheese

Directions:

Heat oil in a large saucepan over medium heat.  Add onion and cook until softened, 3-5 minutes, stirring often.  Add squash and cook until it starts to soften, about 5 minutes, stirring occasionally.  Add kernels from one ear of corn along with the garlic, stir, and cook another 3-5 minutes, stirring occasionally.  Add vegetable broth, basil, salt, and pepper, bring to a boil, reduce heat to a simmer and let simmer about 5 minutes. 

Transfer mixture to a blender in 3 batches, being careful not to fill the blender too high as the mixture will be hot.  Puree each batch until smooth, transferring the pureed portions to a separate large measuring cup or bowl as you go.  Once everything has been pureed, return it all to the saucepan over medium heat.  Add the remaining corn along with the jalapeno, and let simmer gently for another 5 minutes.

Remove from heat and stir in the lemon juice.  Add additional seasoning to taste at this point.  Serve warm and top each portion with about 1 tablespoon each of feta and chives (or more, if desired).

July 09, 2013

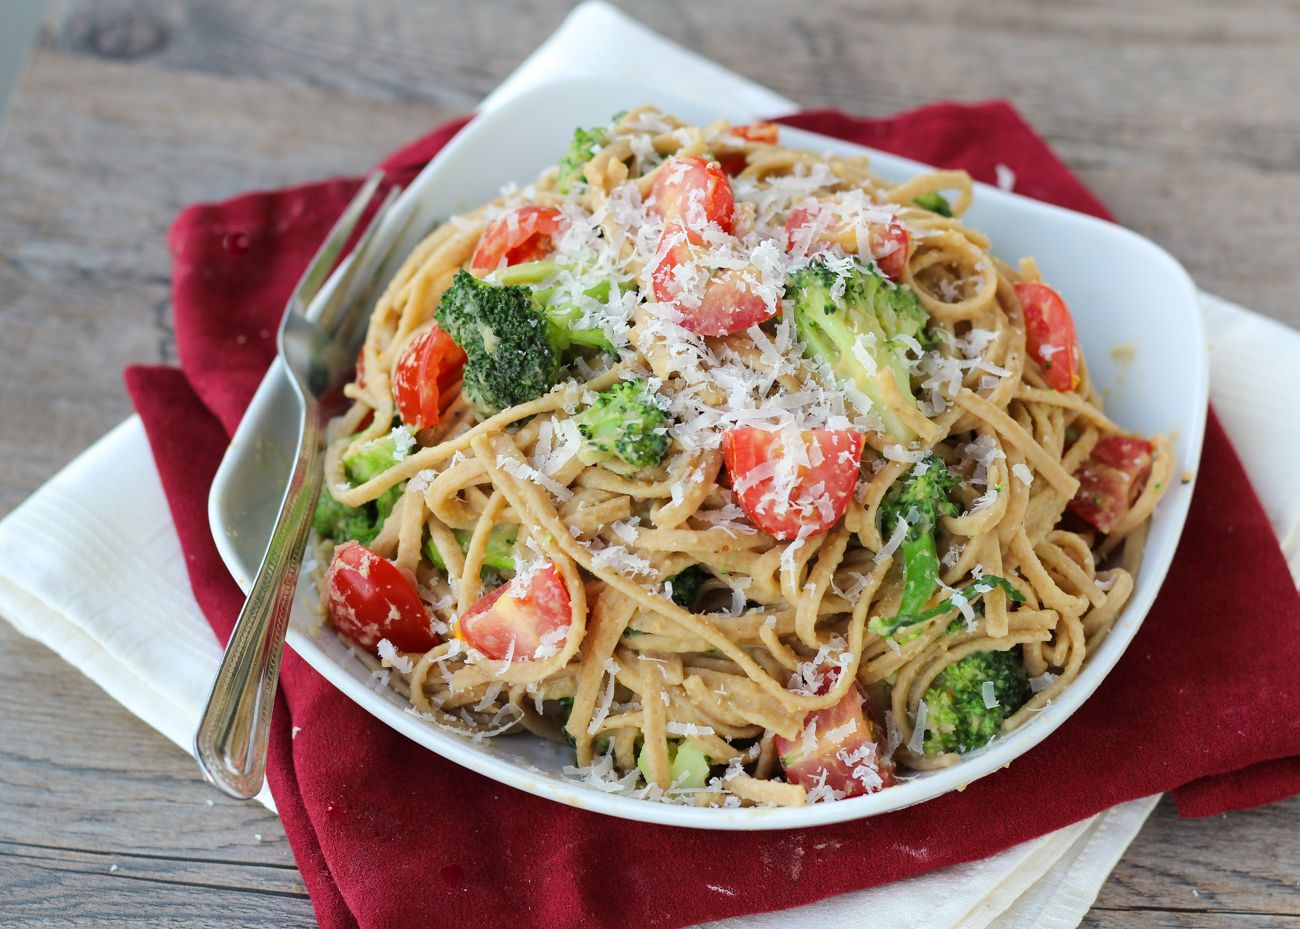
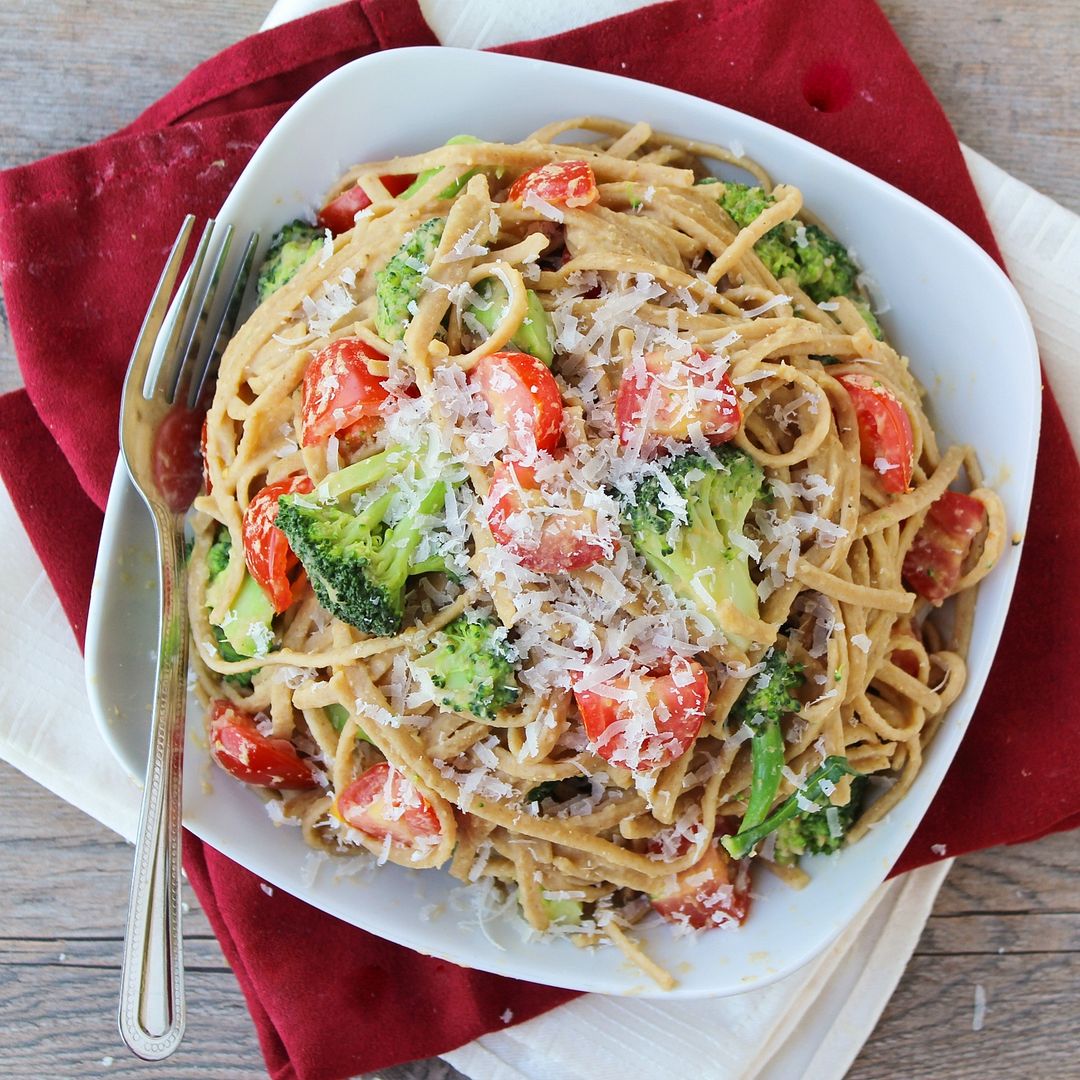
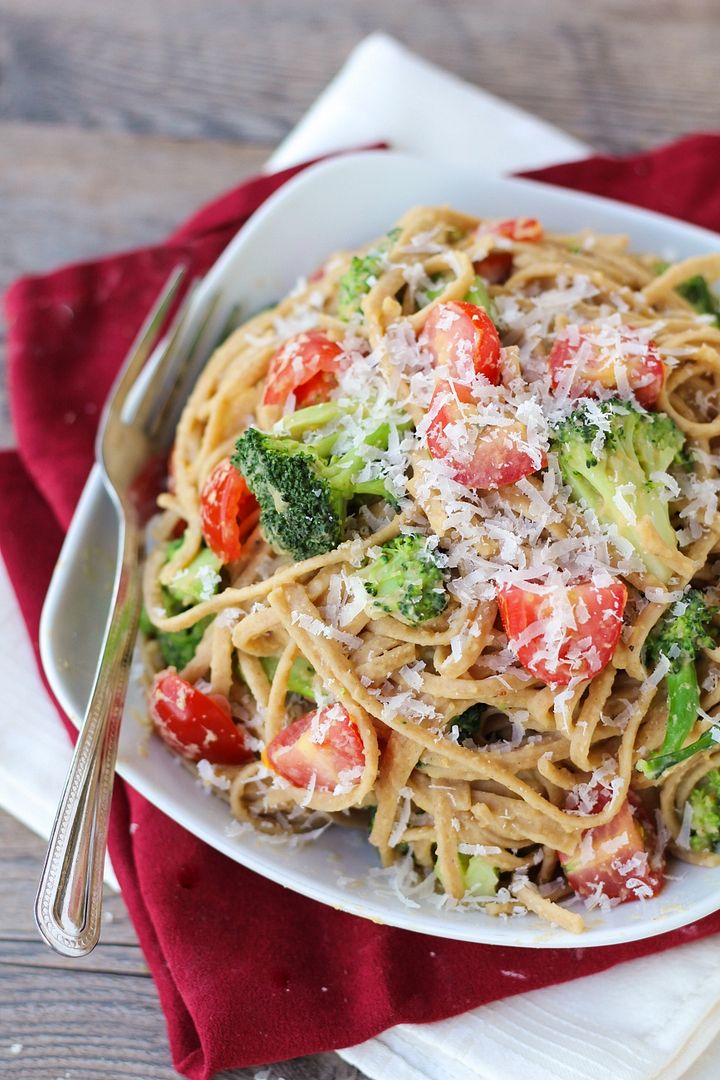
Whole Wheat Pasta with Chickpea Sauce, Broccoli, & Tomato

Healthy vegetarian whole wheat pasta with broccoli, tomatoes, and chickpea sauce!

I got back from my little vacation up north almost a week ago now and somehow I still haven’t cooked a meal for myself yet.  Usually I’m dying to get back to cooking my own meals when I return from a trip, but this time I’ve been too busy to go grocery shopping or plan a meal and have therefore been eating a lot of peanut butter and jam sandwiches (thankfully I froze some fresh blueberry chia jam before I left) over the last week!  But seeing as I used up the last of my frozen bread today, I think tonight I’ll finally force myself to go shopping and make some food to get me through the rest of the week!

One of my go-to meals when I need an inexpensive and healthy meal that will give me leftovers for lunches through the week is this chickpea pasta.  A sauce that’s made out of chickpeas may sound a little weird, but it tastes so good!  I want to say it tastes like a white wine cream sauce but I’m sure someone who regularly eats cream sauces will disagree, so I’ll just say that it’s hard to guess it’s a chickpea sauce (unless you’re looking closely at the texture, which is of course a little chunkier than a cream sauce).  

Healthy vegetarian whole wheat pasta with broccoli, tomatoes, and chickpea sauce!

I’ve adapted this Cooking Light recipe over several meals to my own liking, so that in my version I eliminate the raw garlic as I don’t think it’s needed, add cooked onion to the sauce for more flavour, use vegetable broth instead of chicken (not just to make it vegetarian but because I think it tastes better in this dish), and I add broccoli and increase the amount of veggies.  I also like to use whole wheat pasta and have tried shells, rotini, and linguine – they all work.  Feel free to use whatever vegetables you want too – mushrooms, zucchini, peppers, leafy greens – they’d all be great if you want to boost the nutrients even more.  

With the protein in the chickpea sauce, this makes a great vegetarian meal that will fill you up to power you through the rest of the work day, which, along with coffee, I will definitely be needing this week!

Healthy vegetarian whole wheat pasta with broccoli, tomatoes, and chickpea sauce!

Whole Wheat Pasta with Broccoli, Tomato, & Chickpea Sauce

Adapted from Cooking Light

Serves 4-6

Ingredients:

1 tablespoon olive oil
1 small onion, chopped
3 cloves garlic, minced
3/4 teaspoon kosher salt
1/4 teaspoon red pepper flakes
1 (540mL) can chickpeas, drained and rinsed
1-3/4 cups vegetable broth
375g (one box) uncooked whole wheat pasta (any type works)
1 head of broccoli, chopped into florets
1 pint grape tomatoes, halved
1-1/2 tablespoons fresh lemon juice
Grated parmesan cheese for topping
Salt and pepper for extra seasoning

Directions:

Heat oil in a large saucepan over medium heat. Add onion and sauté until softened, about 4 minutes, stirring often. Add garlic and stir for another minute. Add salt, red pepper flakes, chickpeas, and vegetable stock. Bring to a boil, cover, reduce heat, and simmer 15 minutes.

Meanwhile, cook pasta in salted boiling water according to package directions. During the last few minutes of cooking, place broccoli in a steamer and set covered over the boiling water until bright green. Drain broccoli and pasta, reserving 1/4 cup of the pasta water.

Place chickpea mixture in a food processor. Add lemon juice and reserved pasta water and blend until smooth. Season with additional salt and pepper if desired.

Combine chickpea sauce, pasta, broccoli, and tomatoes in a saucepan or large bowl and toss to combine. Serve warm, topped with grated parmesan cheese.  Season again with salt and pepper if needed.

May 29, 2013

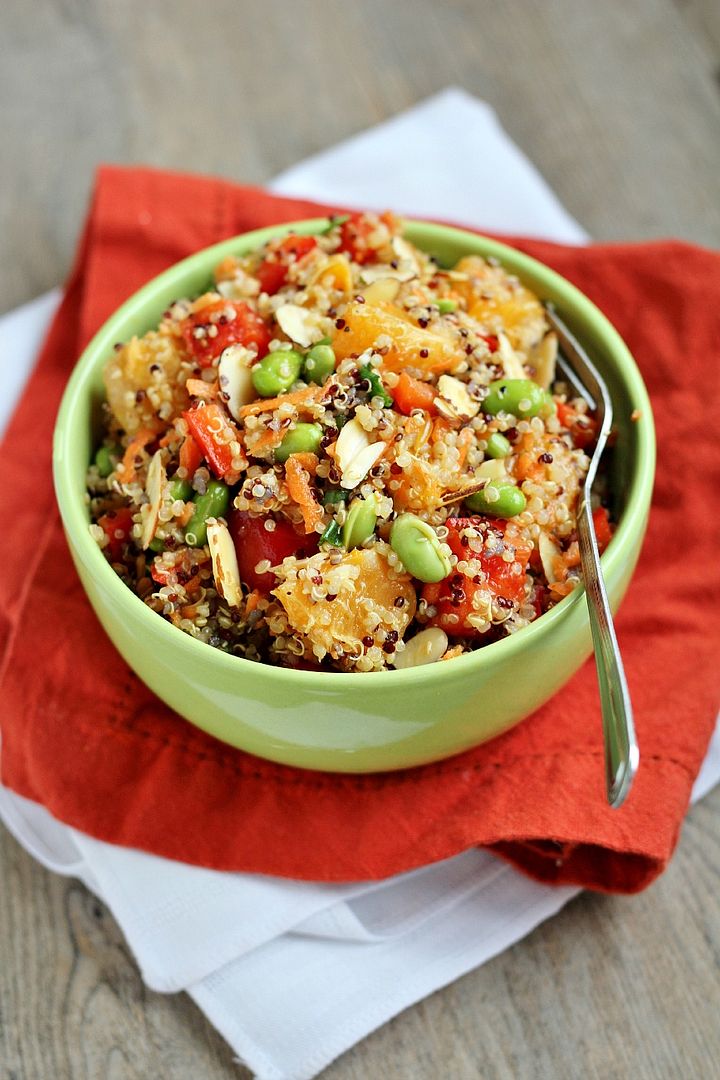
Asian-Inspired Mandarin Quinoa Salad

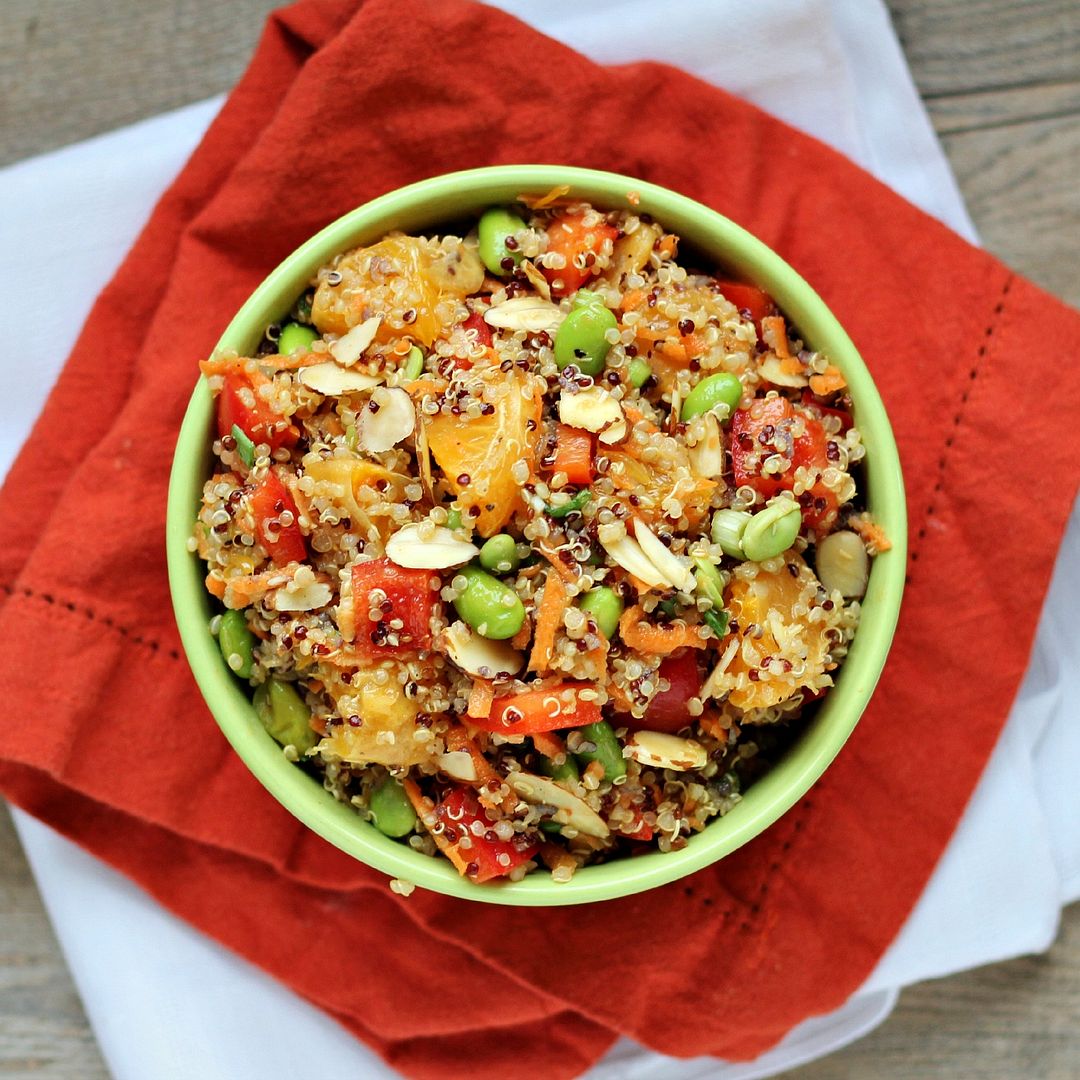
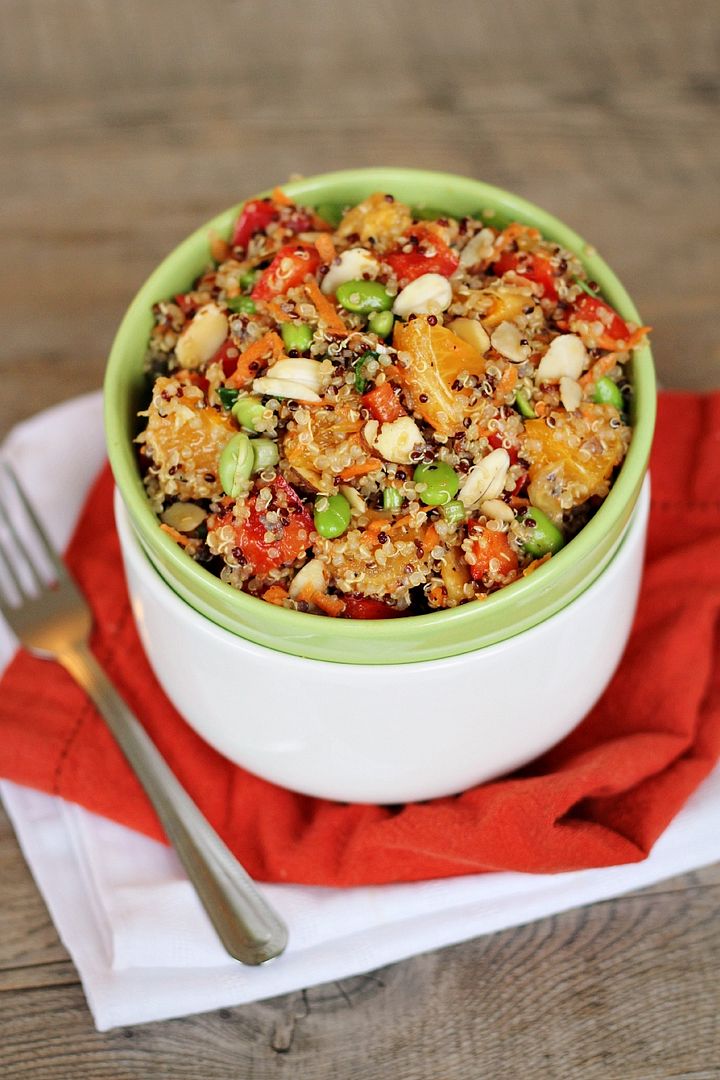
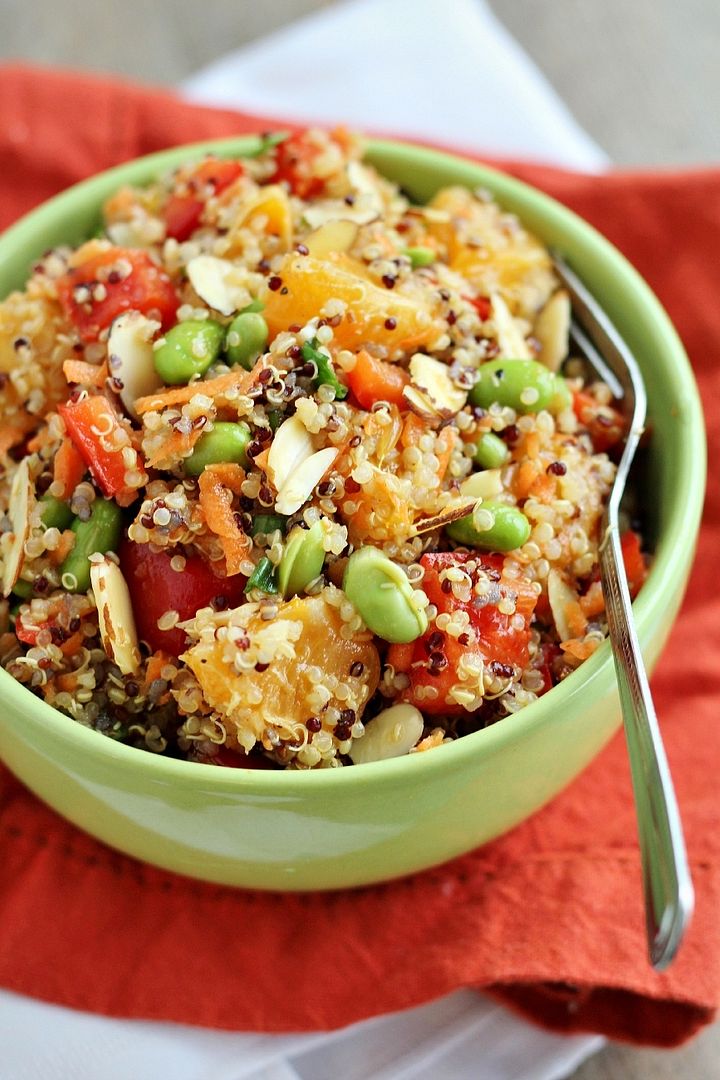
Asian-Inspired Mandarin Quinoa Salad

I don’t know if it’s the call of summertime (and bikinis) or just the longer hours of daylight available in a day, but over the past month I’ve started fitting a lot more exercise into my schedule.  I’d only just started getting into fitness in January but started off pretty slowly so I didn’t overdo anything (I have a bad knee that likes to act up a lot), but when new fitness classes became available in May, my sister and I started trying out a bunch and so far we've kept it up!

I’ve discovered a love for Zumba (my favourite of all classes; I am hopeless when it comes to the more salsa-esque moves but it is still so fun!) and yoga, along with a love/hate relationship with bootcamp style classes, which are so hard but also so effective!  And tonight I’m going to try my first AquaZumba class (basically Zumba in the water), which should be interesting!

Asian-Inspired Mandarin Quinoa Salad

All this exercise not only has me craving healthy food more, but also needing quick dinners that can be waiting for me in the fridge when I get home later than normal and am starving! I especially love quinoa salads for this purpose because they keep well in the fridge, are full of protein, and can be customized to endless flavour combinations!

Asian-Inspired Mandarin Quinoa Salad

I’ve been wanting to try an Asian flavoured quinoa for a while, and when I started thinking of ingredients to include in one, I remembered this mandarin chicken salad I made a while ago and loved.  So I decided to incorporate many of those same ingredients into a quinoa salad – I kept the red pepper, carrot, edamame, and mandarin oranges, added green onion, almonds, and orange juice in the dressing, and left out the chicken because there was already plenty of protein in this salad from the quinoa, edamame, and almonds (though you could certainly add chicken if you like!).

This was so fresh and every bite was full of flavour, with a wide range of textures from the crunchy red peppers to juicy oranges and buttery soft edamame.  Regardless of whether I can keep up my fitness motivation or not, I know I’ll still be making this quinoa many more times this summer!

Asian-Inspired Mandarin Quinoa Salad

Asian-Inspired Mandarin Quinoa Salad

Makes 2-3 main dish servings or around 6 side dish servings

Ingredients:

For the Quinoa:
1 cup uncooked quinoa (I used golden & black mix)
1 cup vegetable broth, optional
1 cup shelled frozen edamame
1 red bell pepper, chopped
1 to 1.5 mandarin oranges, peeled and chopped
2 large carrots, grated
2 green onions, chopped
1/4 cup sliced almonds, toasted if desired (I was too lazy but almonds are usually better toasted!)

For the Dressing:
2 tablespoons fresh mandarin orange juice (squeezed from about half a mandarin)
2 tablespoons rice vinegar
2 tablespoons sesame oil
1/2 teaspoon chili garlic sauce (optional for a bit of spice)
1-1/2 teaspoons honey (use agave or brown sugar to make this dish vegan)
2 teaspoons soy sauce
1 garlic clove, minced
Dash each of salt and pepper

Directions:

Bring 1 cup water and 1 cup vegetable broth to a boil in a medium saucepan.  Add quinoa, cover, and reduce heat to simmer for 15 minutes.  Remove from heat and let sit, covered, for 5 minutes, then remove lid and fluff with a fork.  Let quinoa cool.  (Note that the vegetable broth is optional to add a little extra flavour; if you choose not to use it then use 2 cups water total instead)

Meanwhile, cook edamame according to package directions - I added my edamame beans to 1 cup of boiling water, let them simmer for 3-4 minutes, then drained and rinsed them.  Also whisk together all ingredients for the dressing in a small bowl and set aside.

Once quinoa has cooled to room temperature, combine quinoa, edamame, red pepper, oranges, carrots, green onions, and almonds in a large bowl.  Pour dressing overtop and mix to combine.  Serve at room temperature or chilled.

March 01, 2013

Kenyan Ugali with Peanut Stew

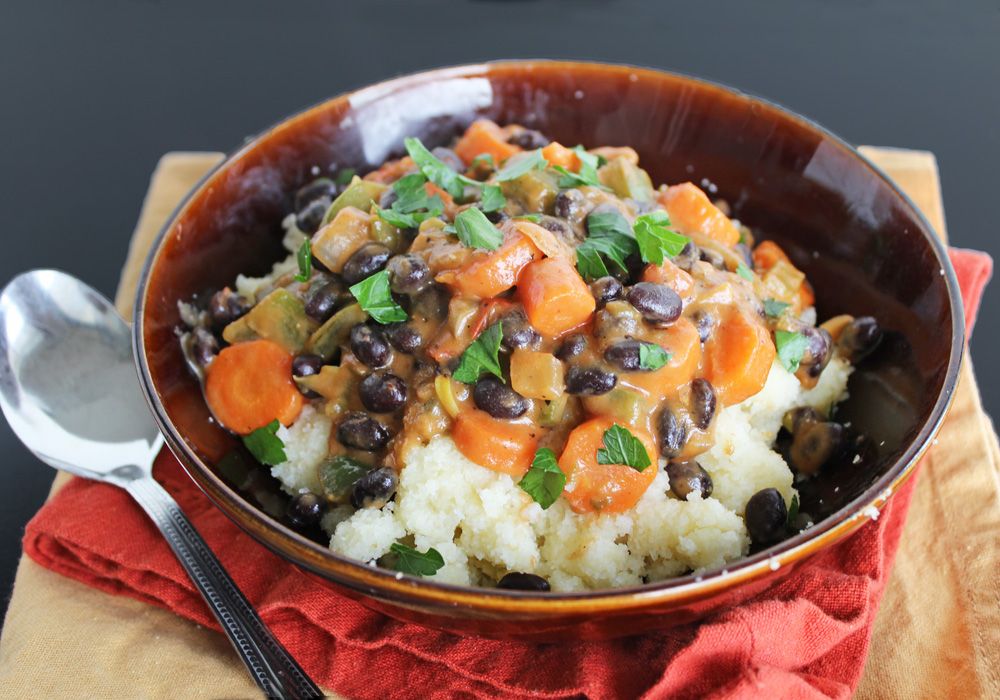
Kenyan Ugali with Peanut Stew

So it's been a fairly busy and stressful week here, with tons of school work I’m behind on, blog problems, knee problems, and icky weather, among other things.  And during weeks like that, it’s amazing what some comfort food (and a bottle of wine) can do to help you relax in the evening!

This dish probably isn’t what most people would think of as comfort food, but it’s definitely one of those hearty and cozy meals that fills your belly and warms your soul, and just so happens to be one of the tastiest meals I’ve had in a while.

 Kenyan Ugali with Peanut Stew

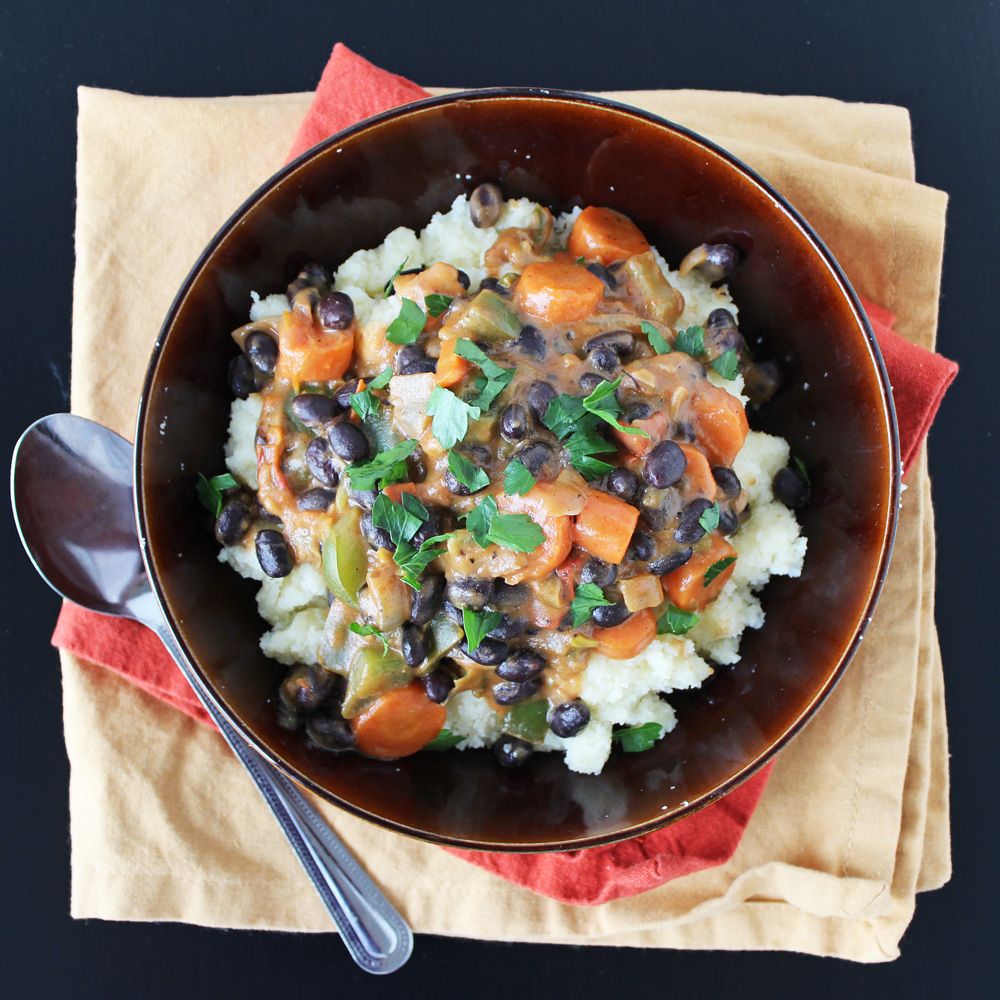
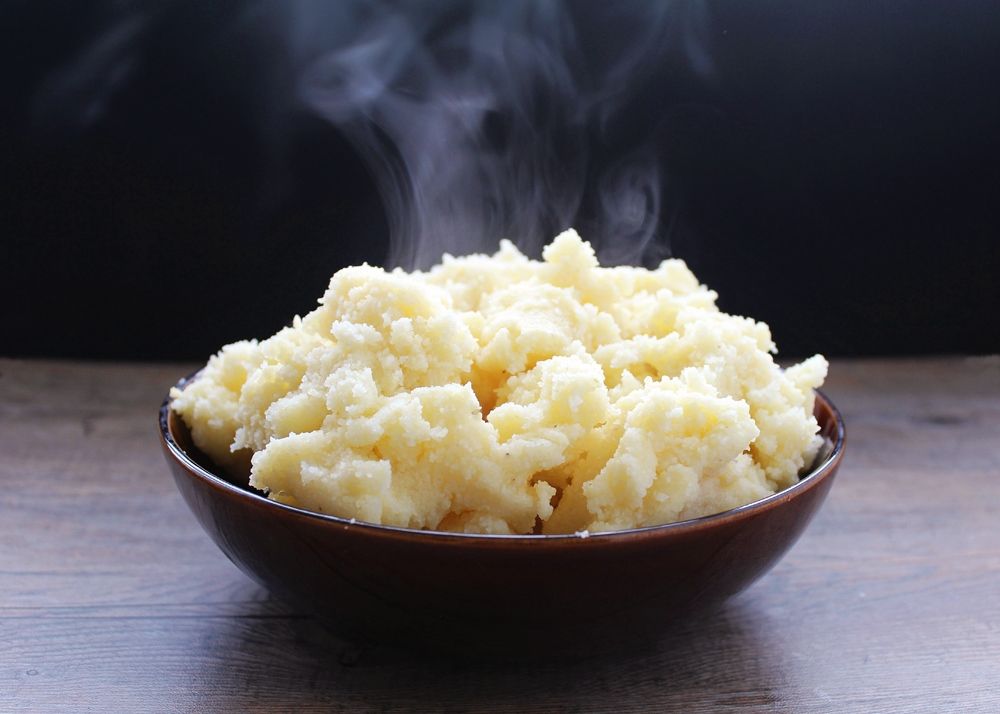
I’m sure some of you are waiting for me to explain what on earth “ugali” is, and to be honest, I’d never heard of it until I made this dish. From what I’ve learned, it’s a starchy staple dish in several African countries.  It’s very similar to polenta, and is made of just white corn meal that’s cooked with water to a thick, dough-like consistency (not creamy and smooth like polenta), and it's usually eaten with some sort of meat or vegetable stew. Fortunately my sister has been to Kenya and tried ugali a few times there, so she was able to give me some advice as I was making it and assure me that the thick texture was how it’s supposed to be!

Ugali is super easy to make and also really cheap – all you need is cornmeal! (I found white cornmeal in the Mexican section of my regular grocery store). And though it’s normally made with water, I used half vegetable broth to cook my cornmeal just to infuse some extra flavour into it. The consistency of the final product is so thick that you could grab a ball of it in your hand (and indeed you can use that to dip into other dishes or grab meats or veggies), and while I think it would normally be served in one big ball in the shape of a bowl, I broke mine up a bit so you could see the texture here:

Ugali

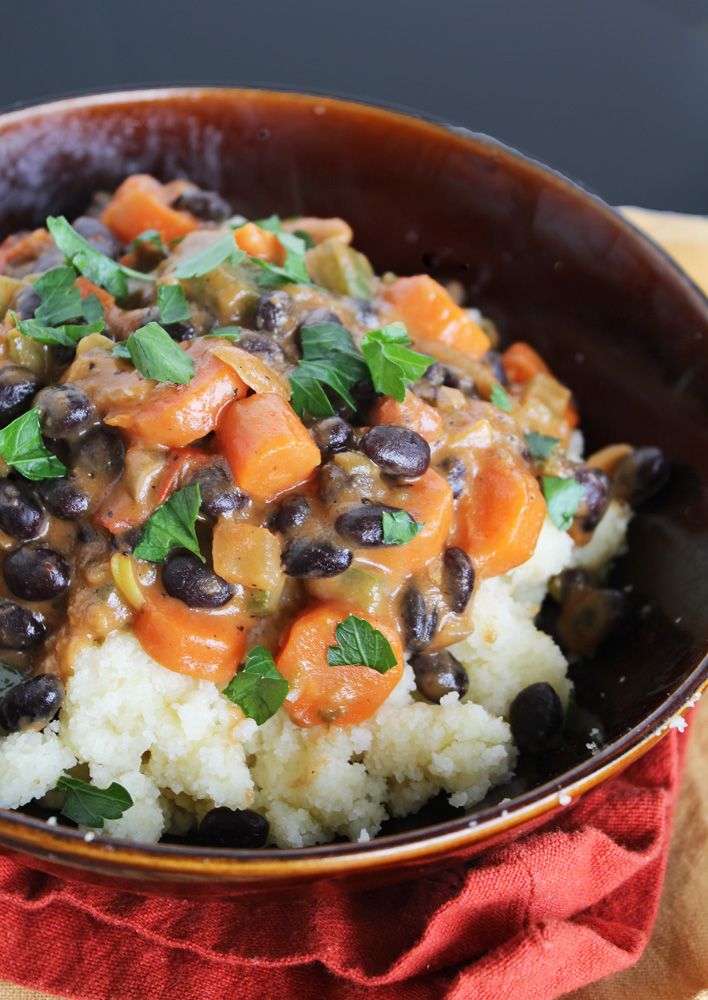
The ugali makes a great base for a stew, and I paired mine with a rich and creamy peanut vegetable stew.  I added carrots, black beans, and parsley to the original recipe, so I’m not sure how authentic my stew is or if it would ever be eaten with ugali, but it was so good that I didn’t care!  The finished dish was full of veggies and protein, was super filling, and just so hearty and comforting.  If you’re in need of a dish to warm your soul and are looking to try something new and a little different for dinner, I highly encourage you to give this a try! 

And if you like trying new cuisines, my friend Courtney just redesigned her site with a focus on ethnic vegetarian food, so go check it out at The Fig Tree!

 Kenyan Ugali with Peanut Stew

Kenyan Ugali with Peanut Stew

Adapted from The Ethnic Vegetarian

Serves 4-6

Ingredients:

For the peanut stew:
1 tablespoon olive oil
1 medium yellow onion, chopped
3 cloves garlic, minced
2 tomatoes, chopped
1 green bell pepper, chopped
2 carrots, peeled and diced
1/2 a jalapeno or chile, seeds and veins removed, minced
Dash of cayenne pepper
Salt and pepper
1 can black beans, drained and rinsed
1/2 cup smooth peanut butter
1/2 cup hot water

For the ugali:
2 cups vegetable broth
2 cups water
1/2 teaspoon salt (optional)
4 cups white cornmeal

Chopped parsley for serving (optional)

Directions:

Heat olive oil in a large nonstick skillet over medium high heat.  Add onion and saute until softened, about 5 minutes, stirring occasionally.  Add garlic, tomatoes, green pepper, carrots, jalapeno, cayenne, and salt and pepper to taste.  Let cook for 10-15 minutes, stirring often.  Mix together the peanut butter and hot water in a small bowl until smooth.  Add black beans and peanut butter mixture to the vegetables and let cook on low heat for about 10 minutes, until thickened slightly.

Meanwhile, bring the vegetable broth and water for the ugali to a boil in a medium saucepan.  Slowly and gradually add the white cornmeal, stirring constantly with a whisk to prevent lumps from forming.  Reduce heat to medium-low and continue to stir regularly until the mixture pulls away from the sides of the pot and becomes very thick, about 10 minutes (mine took less time).  Remove from heat.

Serve by dividing ugali among bowls and spooning peanut stew overtop.  Top with parsley and season with additional salt and pepper, if desired.

February 19, 2013

Beet & Potato Soup

Beet & Potato Soup

I hope that those of you who had the day off yesterday enjoyed your long weekend!  Yesterday was a holiday for many of us here in Ontario - we don’t celebrate President’s Day (obviously, as we don’t have presidents in Canada), but we do celebrate Family Day on the third Monday of every February. 

I love the idea of a holiday that celebrates the family and encourages families to spend time together.  This was actually the first year that every member of my family had the day off and could get together, so we took the opportunity to go for a wintery family walk along a trail around a frozen pond.  Even though I think I risked my life a thousand times because the trail was pretty much all ice and my boots do not seem to have even the slightest bit of traction, it was still a great way to get outdoors and spend some time with my wonderful family!  Here’s a little glimpse of our walk – the ducks were my favourite part :)

winter walk

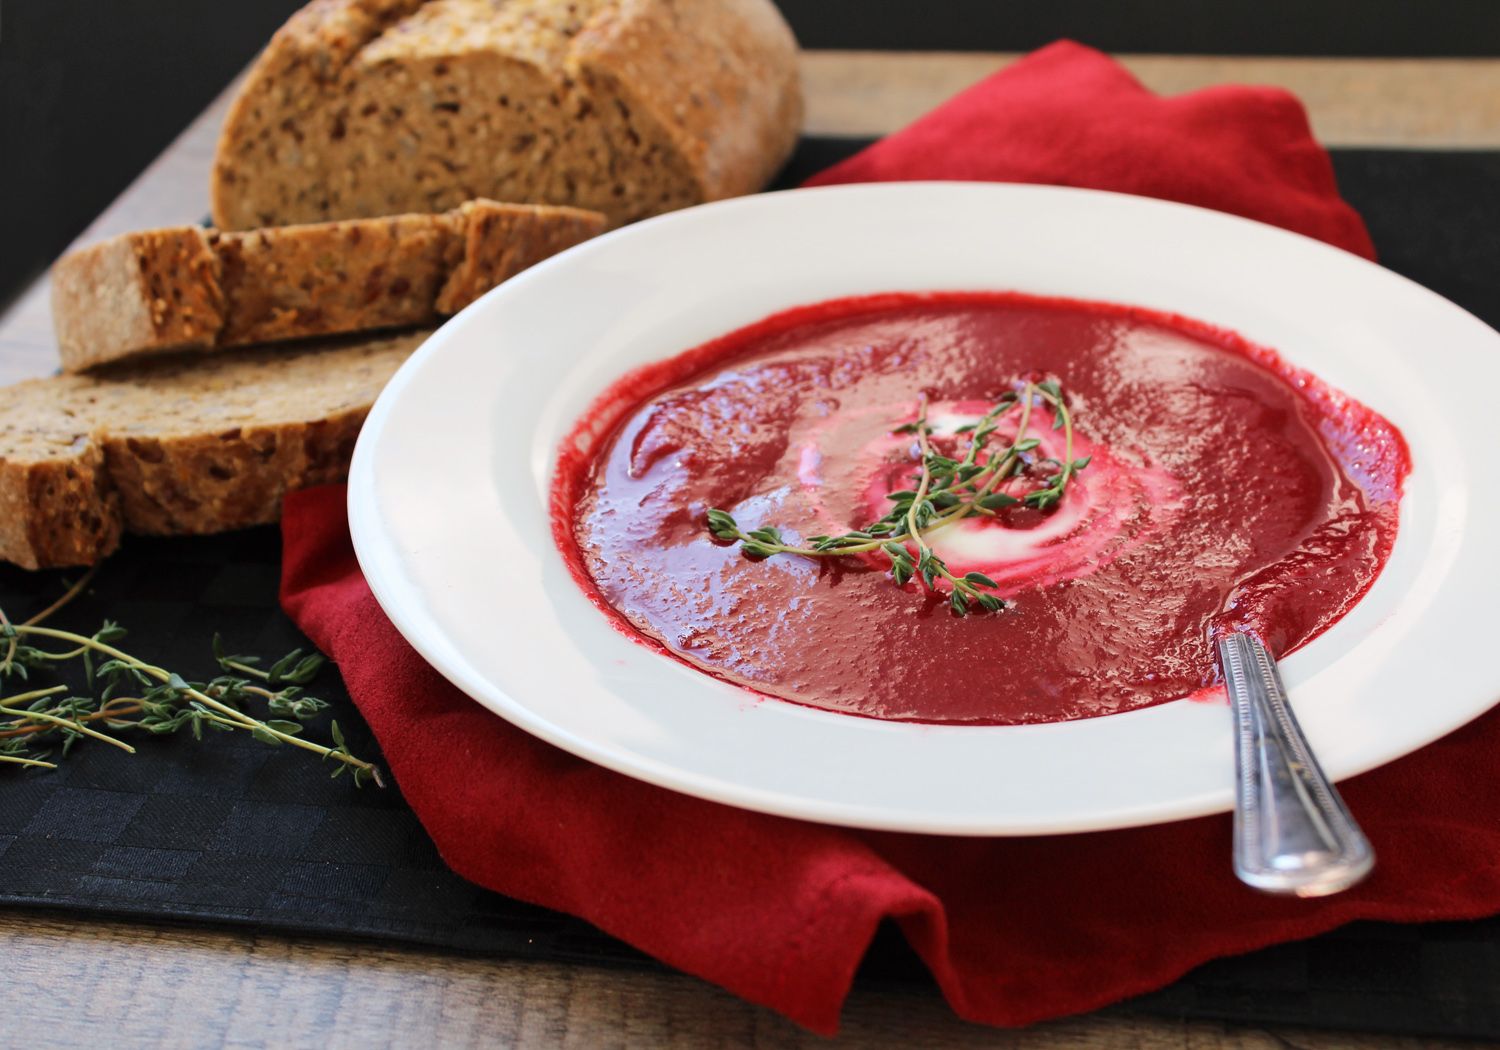
After spending a day outside in the cold, nothing is more comforting than a warm bowl of thick soup and a hearty loaf of bread.  Unfortunately I didn’t have any of this beet and potato soup left to enjoy so I had to settle for an Earl Grey tea latte from Starbucks, but just looking at these photos as I prepared them for this post had me craving this soup so bad!

Beet & Potato Soup

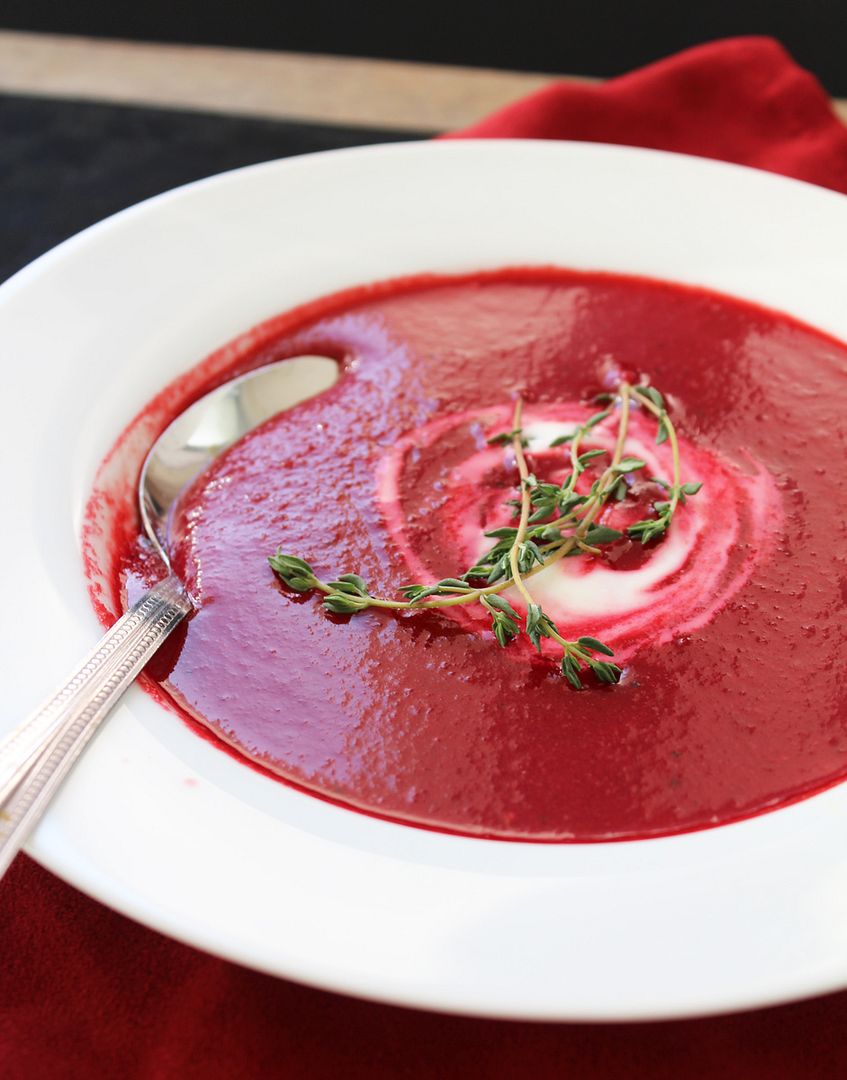
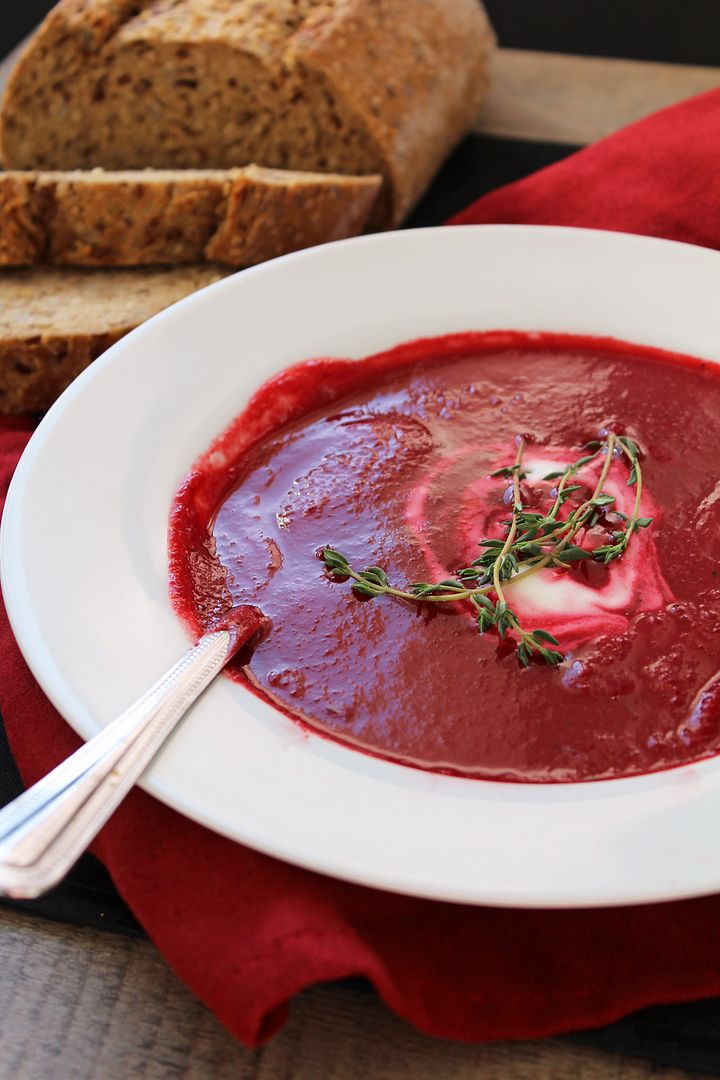
I won't bore you with a long description of this soup except to say that it’s thick and creamy but still healthy, and is a gorgeous red colour! The first time I made this I used chicken broth but thought it didn’t quite work, so the next time I used vegetable broth, and also increased the cumin for more spice and let the soup simmer longer so the flavours would intensify, and it was so much better! If you hate beets, I’m not going to try to convince you to try this because the beet flavour is really front and center, but if you’re a beet lover like me then you will love this!

Beet & Potato Soup

Beet & Potato Soup

Adapted from Cooking Light

Serves 3-6, depending on serving size

Ingredients:

1 tablespoon olive oil
1 medium yellow onion, chopped
2 cloves garlic, minced
1/2 teaspoon salt
1/4 teaspoon pepper
1 teaspoon cumin
4 cups vegetable broth
1 pound of beets, peeled and quartered
1/2 pound yellow potatoes, peeled and cubed
1 bay leaf
1-2 sprigs of fresh thyme
2 teaspoons fresh lemon juice
1 teaspoon honey or agave
Sour cream or plain yogurt for topping

Directions:

Heat oil in a large saucepan over medium-high heat.  Add onion and sauté for about 5 minutes, stirring occasionally, until softened.  Add garlic and cook for another 30 seconds.  Add salt, pepper, and cumin, stir to coat and cook for another 30 seconds. 

Add vegetable broth, beets, potato, bay leaf, and thyme.  Bring to a boil, then reduce heat and let simmer for 30-35 minutes, until beets and potato are tender.  Remove bay leaf and thyme sprigs.  If soup has reduced considerably, add a splash of water.

Puree soup in three batches in a blender. Remove the plastic stopper in the blender lid and cover with a paper towel or tea towel to let steam escape.  After pureeing each batch, transfer to a bowl, then once all the soup has been pureed, transfer back to the saucepan to heat through, if necessary.  Add 2 teaspoons of lemon juice and taste.  Add an additional teaspoon of lemon juice and 1 teaspoon of honey or agave to sweeten, if desired.

Serve each portion with a swirl of sour cream or yogurt.  Season with salt and pepper if desired.

January 11, 2013

Roasted Garlic & Shallot Soup

Roasted Garlic & Shallot Soup

Since my cold doesn't seem to be going anywhere, I tried to help it along this week with a big batch of garlic soup!  I remember reading somewhere that raw garlic is good for colds, and in the past I've tried horrible things like making garlic tea and scarfing down pieces of bread with raw cloves of garlic hidden inside.  But since those things probably don't make a difference anyway, this time I decided to go ahead and roast the garlic and turn it into a warm and comforting soup so I could at least enjoy a delicious meal in my runny, stuffy, coughy misery!

Roasted Garlic & Shallot Soup

Some of the reviews of the original recipe on Cooking Light said it had no flavour, but I don't know what they're talking about - I found that the roasted garlic and shallots provided so much flavour on their own, and then you add sauteed onions, white wine, vegetable broth, and fresh thyme - how much more flavour could you need?  I also made a few changes to the recipe, like using yellow fleshed potatoes instead of Russets because I find they have better flavour, substituting the chicken broth for vegetable to make it vegetarian, eliminating the blue cheese croutons and just topping the soup with parmesan to make it easier, and using skim milk instead of 2% so it was even lighter.

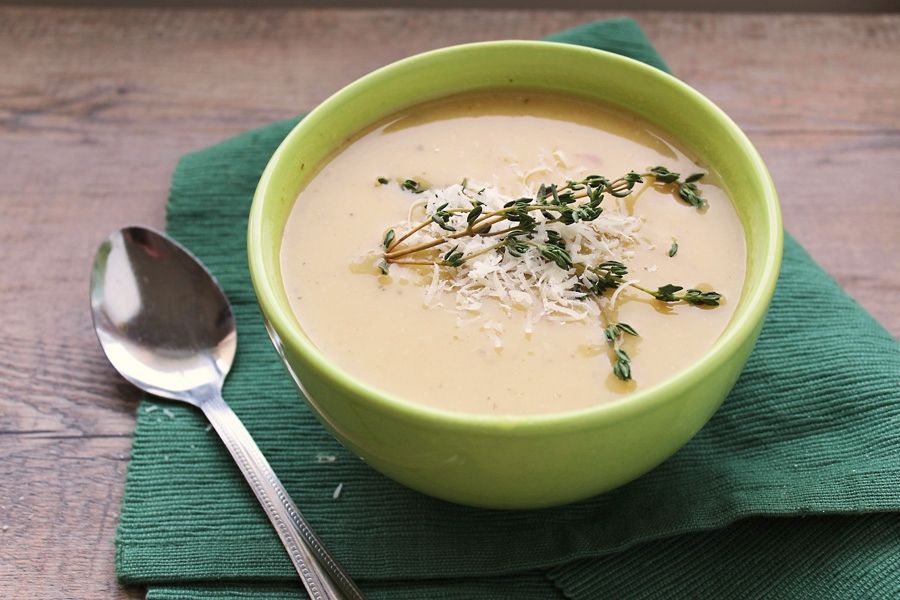
Don't be scared by the amount of garlic in this - it all gets roasted, which I can testify is about a million times better than eating whole cloves of garlic raw!  And while this may not have helped my cold at all, it still made me feel better to have this waiting for me for dinner every night this week!

roasted garlic and shallot soup

*The above picture was taken in Jan 2014 - same recipe, just used savory instead of thyme as I didn't have any thyme (and used better lighting!).

Roasted Garlic & Shallot Soup

Adapted from Cooking Light

Makes about 4 bigger portions or 8 smaller portions

Ingredients:

5 whole garlic heads, unpeeled (about 40-50 cloves) - try to use good quality garlic if possible as it will have more flavour than the cheap packages of imported garlic - I've learned that lesson!
3 tablespoons olive oil, divided
1 teaspoon salt, divided
1 teaspoon freshly ground black pepper, divided
10 shallots, unpeeled (about 3/4 pound)
2 cups coarsely chopped onion (about 2 small yellow onions)
1 cup dry white wine (I used Sauvignon Blanc), at room temperature
3 cups vegetable stock
2 cups (1/2-inch) cubed peeled yellow-fleshed potato (about 3/4 pound)
1 teaspoon chopped fresh thyme
1 cup skim or 2% milk, at room temperature
Grated parmesan cheese plus extra thyme for topping (optional)

Directions:

Preheat oven to 400°F. Remove the outside layer of white papery skin from the garlic, cut the tops off each head, and place on tin foil. Drizzle with 1 tablespoon olive oil and sprinkle with 1/4 teaspoon salt and 1/4 teaspoon pepper. Wrap with foil and place on a baking sheet, then roast for 10 minutes in preheated oven. Meanwhile, prepare a shallot foil package by drizzling shallots with 1 tablespoon oil, sprinkling with 1/4 teaspoon salt and 1/4 teaspoon pepper, and wrapping with foil. After the 10 minutes have passed, add the shallots to the pan and continue to roast both the garlic and shallots for another 25 minutes. Remove from oven and let cool until cool enough to handle. Squeeze garlic out of the skins and peel shallots, discarding skins.

While garlic and shallots are cooling, heat 1 tablespoon oil in a Dutch oven over medium heat. Add onion, and cook for 6-10 minutes, stirring occasionally, until softened and lightly browned. Add garlic cloves, peeled shallots, and wine. Reduce heat and simmer uncovered for 5 minutes.

Stir in vegetable stock, potatoes, and thyme. Bring to a boil, then cover, reduce heat, and let simmer for 20-25 minutes, until potatoes are tender. Cool slightly, then puree in batches in a blender (I did mine in 3 batches), transferring pureed portion to a bowl each time. Pour pureed soup back into Dutch oven, stir in milk, 1/2 teaspoon salt, and 1/2 teaspoon pepper. Reheat for about 5 minutes, taste, and adjust any seasonings if necessary.

Top each portion with grated Parmesan cheese and a sprinkling of fresh thyme, if desired.

December 06, 2012

Curried Chickpea & Kale Soup

Curried Chickpea & Kale Soup

I’ve made three holiday cookies/dessert recipes over the last week, I’ll be making two more for our annual department cookie swap tomorrow, and I’ll be coming home from the cookie swap with an entire container full of about a million more cookies… I’m certainly not complaining, but around this time of year I always try to make sure I make my meals as healthy and nourishing as possible to help balance out the excessive cookie consumption a little!

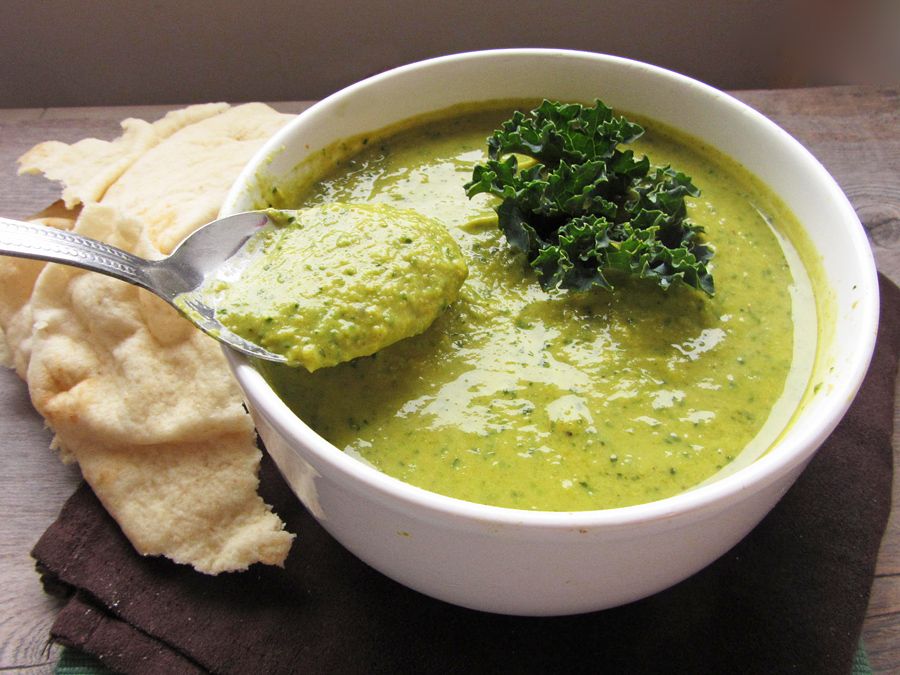
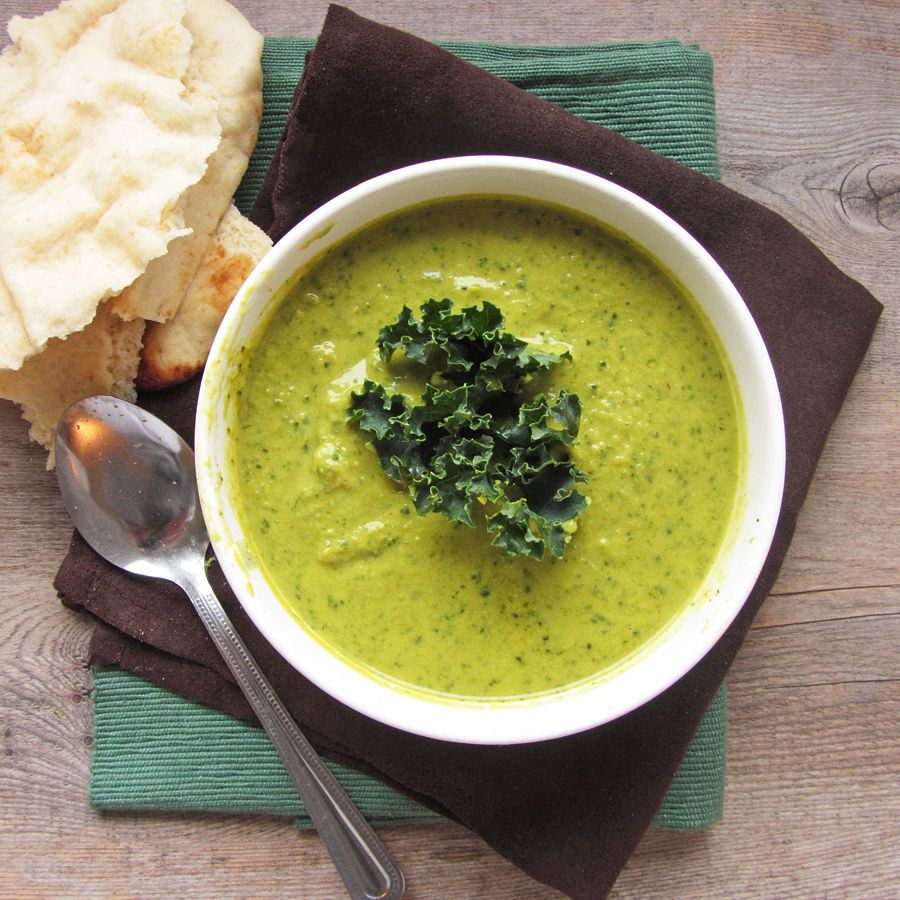
When I saw this pretty green soup in Clean Eating magazine, I knew it was just what I needed, plus it featured a flavour combination – curry powder, kale, chickpeas, and coconut milk – that I hadn’t seen before in a soup!  And it used beans as a thickener, which I liked so much from the roasted tomato & white bean soup I tried last week.

The flavours in this soup all work together and make a thick and filling soup that you can feel good about eating!  You could probably fit a lot more kale in there too if you want to feel even better about it! The original recipe had a quick, 15 minute preparation, but I decided to sauté some onions, garlic, and ginger first to add some flavour.  This made my version slightly longer to prepare, but it’s still really easy to make on a weeknight, leaving you plenty of time left in the evening to bake some cookies :)

Curried Chickpea & Kale Soup

Curried Chickpea & Kale Soup

Adapted from Clean Eating Magazine, Quick & Easy Meals Special Issue

Serves 4

Ingredients:

1 teaspoon olive oil
1 medium yellow onion, diced
2 cloves garlic, minced
2 teaspoons minced fresh ginger
1 tablespoon curry powder
1 teaspoon cumin
2 cups vegetable stock
2 cups low fat coconut milk (canned)
2 cans (15-19 fl oz each) chickpeas, rinsed and drained
2 cups packed torn kale leaves
1 teaspoon honey or agave
Salt & Pepper

Directions:

Heat oil in a large saucepan over medium-high heat. Add onion and sauté until soft and translucent, about 4-5 minutes. Add garlic and ginger and sauté for another 30 seconds to 1 minute, stirring occasionally. Add curry powder and cumin and stir together for about 30 seconds, until fragrant. Add vegetable stock, coconut milk, chickpeas, and kale, and let simmer for about 10 minutes, stirring occasionally.

Transfer soup to a blender in two batches, remove the plastic stopper from the top of the blender and cover with a paper towel to allow steam to escape. Puree until smooth, then return to saucepan. Add honey and season with salt and pepper to taste, reheating the soup for a couple of minutes. If the soup is too thick, add more vegetable stock or water to thin it out to desired consistency.

Serve warm with naan bread.

November 02, 2012

Pumpkin Ale Risotto

Pumpkin Ale Risotto

I cannot believe it’s already November!  Just last week I was walking through fallen leaves in a leather jacket; today I had to wear mittens and it snowed in my hometown this morning!  I’m even kicking off the holiday season tonight with the Holiday Home Tour in London – you get to walk through five (very nice) houses that have been professionally decorated for the holidays, and also enjoy some entertainment and treats along the way.  I admit part of the reason we go is to get a peek into other people’s elaborate homes (which are much nicer than my little apartment!), but it’s also fun to get into the Christmas spirit and start getting decorating ideas!

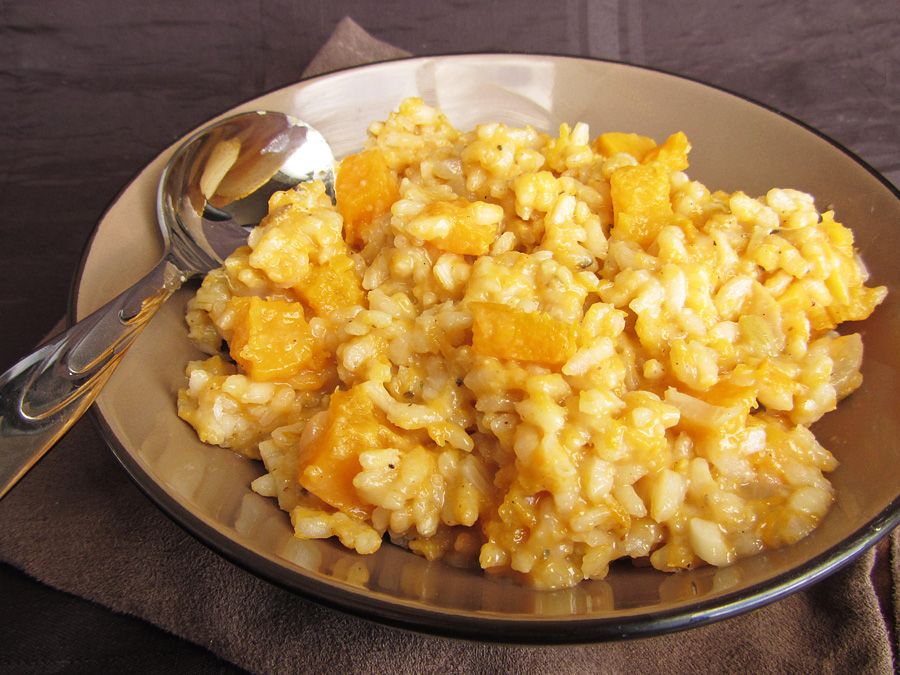
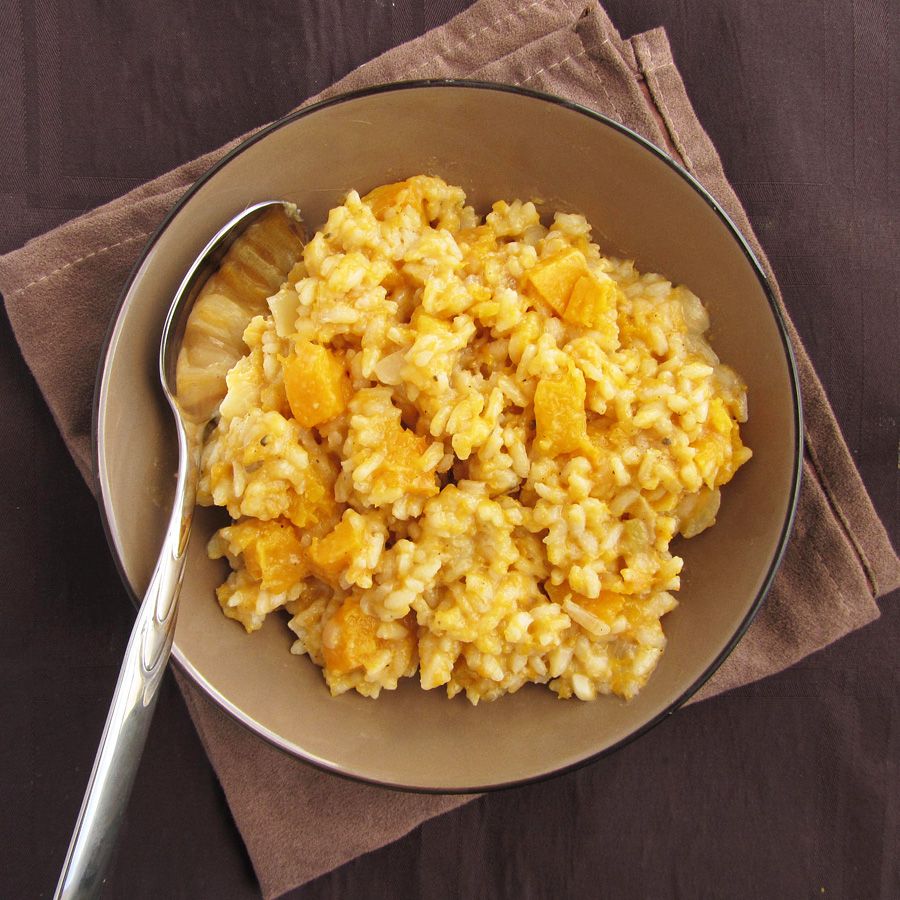
Even though we’re heading towards winter, I hope it’s not too late for pumpkin recipes because I’ve still got a couple good ones to share, like this pumpkin ale risotto!  I bought pretty much every type of pumpkin beer I saw this fall, and I just couldn’t drink them all fast enough so I tried to experiment with using them in my food.  I had recently seen the idea of using beer instead of wine when you’re making risotto, which got me thinking that pumpkin ale would be perfect to use in a pumpkin risotto!  I used a basic risotto recipe but replaced the white wine with pumpkin ale, added some pureed squash along with some roasted pieces of squash for texture (my grocery store was out of pumpkins but squash worked just as well), then added a bit of nutmeg and sage for seasoning.  The result was a creamy and comforting risotto with a subtle pumpkin flavour that’s perfect for either fall or winter!

Pumpkin Ale Risotto

Pumpkin Ale Risotto

Adapted from several sources, including Chow.com and Two Girls One Food Processor

Serves about 4

Ingredients:

1 (~3lb) cooking pumpkin or squash (I used butternut squash because pumpkins weren’t available at my store)
2 tablespoons olive oil, divided
Salt & pepper
4 cups (1L) low-sodium chicken or vegetable broth
1 small yellow onion, peeled and diced
2 cloves garlic, minced
1-1/2 cups dry Arborio rice
1 cup of your favourite pumpkin ale
1/4 to 1/2 teaspoon nutmeg
1/2 teaspoon dried sage or rosemary
1/4 cup grated parmesan cheese (or more if desired)

Directions:

Preheat oven to 400°F.  Peel and slice squash/pumpkin into small, 1/2-inch cubes.  Toss with 1 tablespoon olive oil and season with salt and pepper.  Transfer to a foil-lined baking sheet and roast in preheated oven for 20-25 minutes, until tender.  Mash enough cubes to make 1 cup of mashed squash/pumpkin, and reserve 1-1/2 cups of cubed squash/pumpkin.  Save any remaining squash for another use.

Add chicken or vegetable stock to a medium pot, and bring to a boil.  Reduce heat to simmer and leave gently simmering as you make the risotto.

Heat remaining tablespoon of olive oil in a large deep skillet over medium-high heat.  Add the onion and sauté until soft, about 4-5 minutes, stirring often.  Add garlic and stir for another 30 seconds, then add rice and stir for 1-2 minutes to toast the rice.  Add pumpkin ale in two additions, stirring until absorbed each time. 

Set a timer for 20 minutes, and for the duration of the timer, continuously add the simmering stock to the rice a ladle at a time, stir until absorbed by the rice, then add another ladle, stir again, etc.  Keep stirring the rice constantly with a flexible heat-proof spatula. When the 20 minutes are up, taste and ensure rice is cooked to al dente. 

Add the mashed pumpkin, nutmeg, and sage and stir until incorporated.  Season with salt and pepper, add the parmesan cheese, stir and taste, and adjust any spices or seasonings to taste (you may wish for more nutmeg or the addition of cinnamon if you really want the pumpkin flavours to come through).  Gently stir in the cubed squash/pumpkin.  Serve warm.

Ingredient Index

Related Posts Plugin for WordPress, Blogger...