Showing posts with label cheese - blue. Show all posts

October 02, 2014

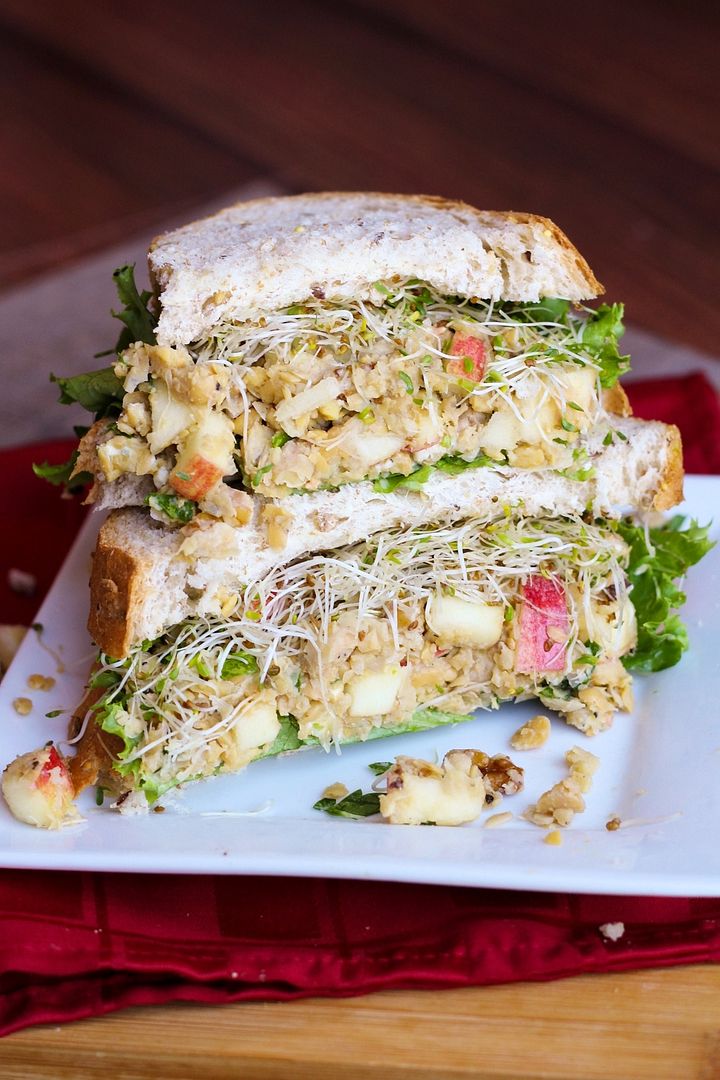
Smashed Chickpea, Blue Cheese, & Apple Sandwich

Smashed Chickpea, Blue Cheese, Apple, and Walnut Sandwich - a healthy and hearty vegetarian lunch idea!

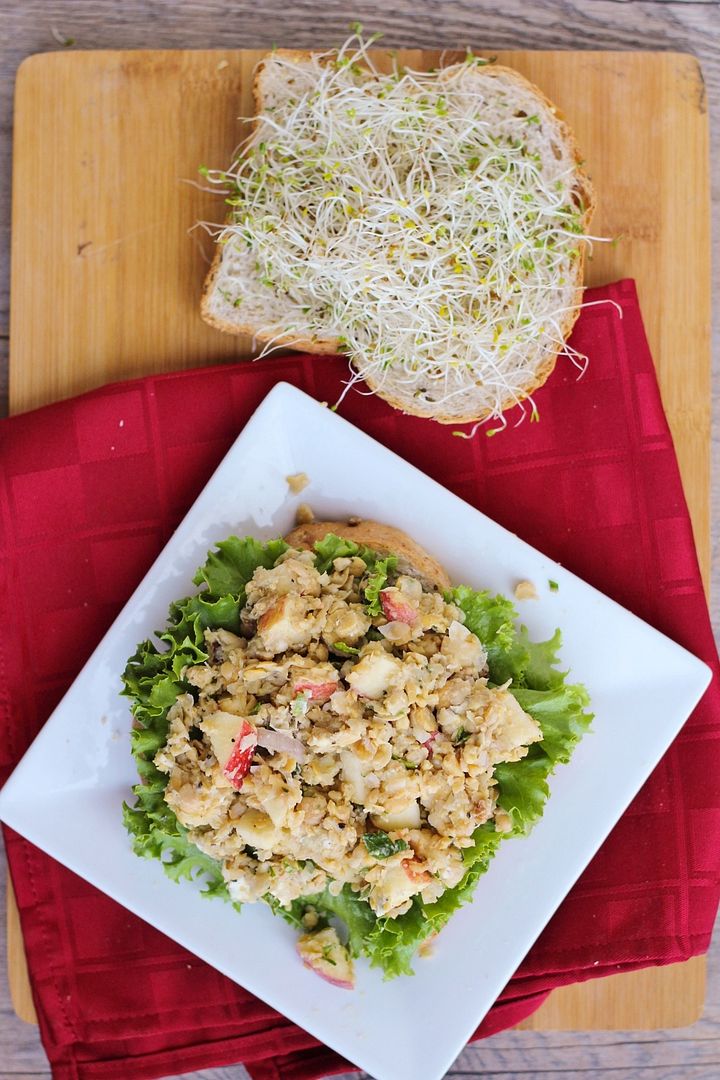
With fall well underway, I’ve been craving heartier meals that incorporate seasonal ingredients like pumpkin and apples. I’ve seen a lot of smashed chickpea or “chickpea salad” sandwiches around the web before and have wanted to try my own version for a while now. I knew I wanted the crunch of apples in there, and because I can’t get enough of the apples-blue cheese combination, I mixed my apples and chickpeas with blue cheese, throwing in some walnuts for more texture, and a quick mustard and apple cider vinaigrette for added flavour. Combined with thick slices of fresh 7 grain whole wheat bread, lettuce, sprouts, and a little extra mustard, this made for a really satisfying sandwich (when my dad saw my lunch one day he asked if I was Dagwood) that I loved!
Smashed Chickpea, Blue Cheese, Apple, and Walnut Sandwich - a healthy and hearty vegetarian lunch idea!

If I’d wanted it to be more of a chickpea salad sandwich, I could have added mayo, but I don’t ever have mayo around and I liked the flavour of the mixture on its own so I left it out. Without something like mayo to get everything to stick together, the filling is a bit messy in a sandwich, but that’s all part of the fun! You could try adding some if you prefer though, or even use a mixture of mayo and plain Greek yogurt to keep this on the lighter side.

And if blue cheese isn’t your thing, here are a few other chickpea sandwiches you could try!

Smashed chickpea salad from Smitten Kitchen
Smashed chickpea and avocado salad sandwich from Two Peas & Their Pod
Curried chickpea salad sandwich from The Simple Veganista
Cranberry walnut chickpea salad sandwich from The Simple Veganista
Herbed chickpea sandwich (with feta and dill) from Martha Stewart
Smashed chickpea & pesto sandwich from Bake Your Day
Pink chickpea smash salad from Happy Healthy Life
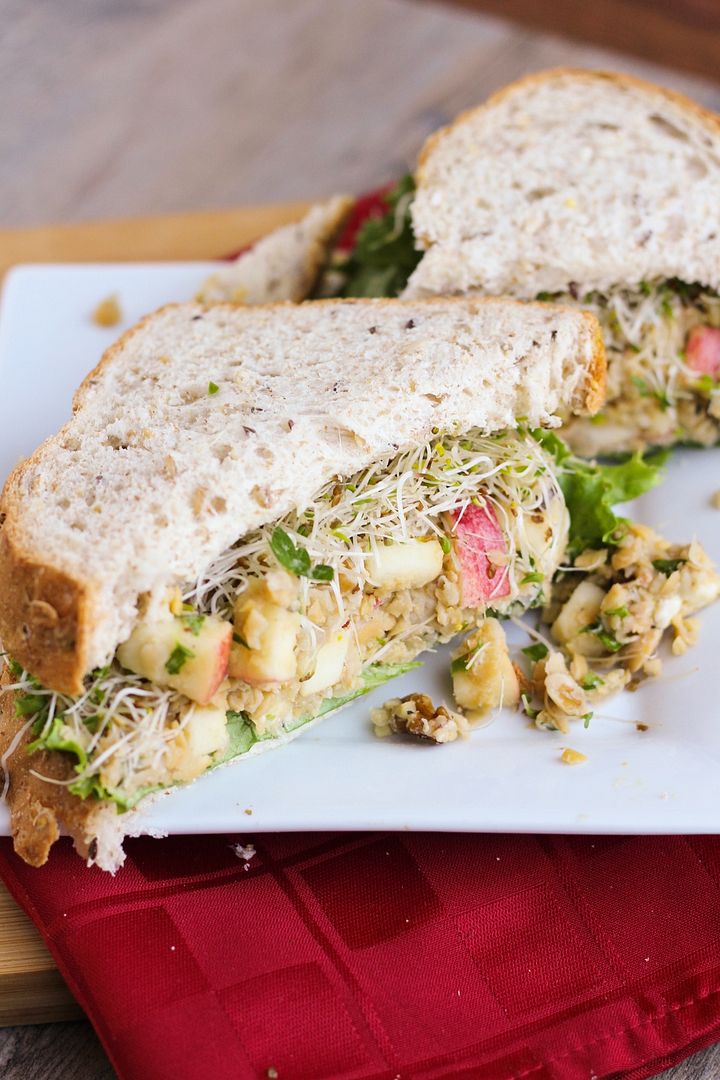
Smashed Chickpea, Blue Cheese, Apple, and Walnut Sandwich - a healthy and hearty vegetarian lunch idea!

Smashed Chickpea, Blue Cheese, & Apple Sandwich

Recipe my own but inspired by many other versions of smashed chickpeas that others have created!

Makes 4 sandwiches

Ingredients:

For the Chickpea Mixture:
1 (540mL) can of no-salt added chickpeas, drained and rinsed
1 large apple, cored and diced – any crunchy and sweet variety that you like will work
1/4 cup chopped walnuts
2 oz crumbled blue cheese
2 tablespoons chopped parsley
1 tablespoon extra-virgin olive oil
2 teaspoons apple cider vinegar
1 teaspoon Dijon mustard
1 shallot, minced
Salt and pepper

For the Sandwiches:
8 slices whole grain bread
Lettuce, and sprouts if desired
Extra mustard if desired (such as Dijon, honey mustard, or deli style mustard)

Directions:

In a small bowl, whisk together the olive oil, vinegar, Dijon, and shallot.  Let sit for at least 5 minutes (I find this takes some of the bite out of the shallots).

Smash chickpeas with a potato masher or large fork; they don’t have to be completely smashed, just partially.  I found it difficult to do with a fork so I pulsed mine several times in a food processor; this is quicker if you don’t mind washing an extra dish!  Mix the apples, walnuts, blue cheese, and parsley into the chickpea mixture.  Mix in the olive oil dressing and season mixture generously with salt and pepper.

Divide chickpea mixture evenly among 4 sandwiches, along with lettuce, sprouts, and extra mustard if desired (I liked these best with added mustard!).  Try to flatten or “smush” the chickpea mixture onto each sandwich so it sticks together.  Even still, these might be messy and I learned that it’s best to hold on to both ends of your sandwich as you’re eating to prevent the filling from falling out!

June 25, 2014

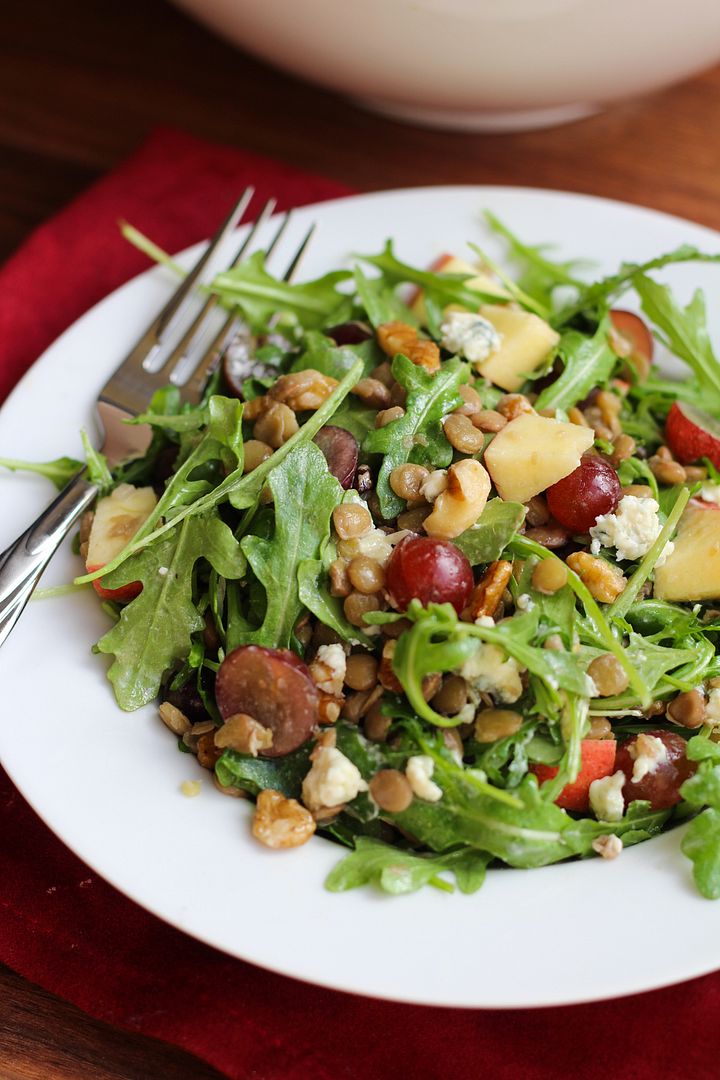
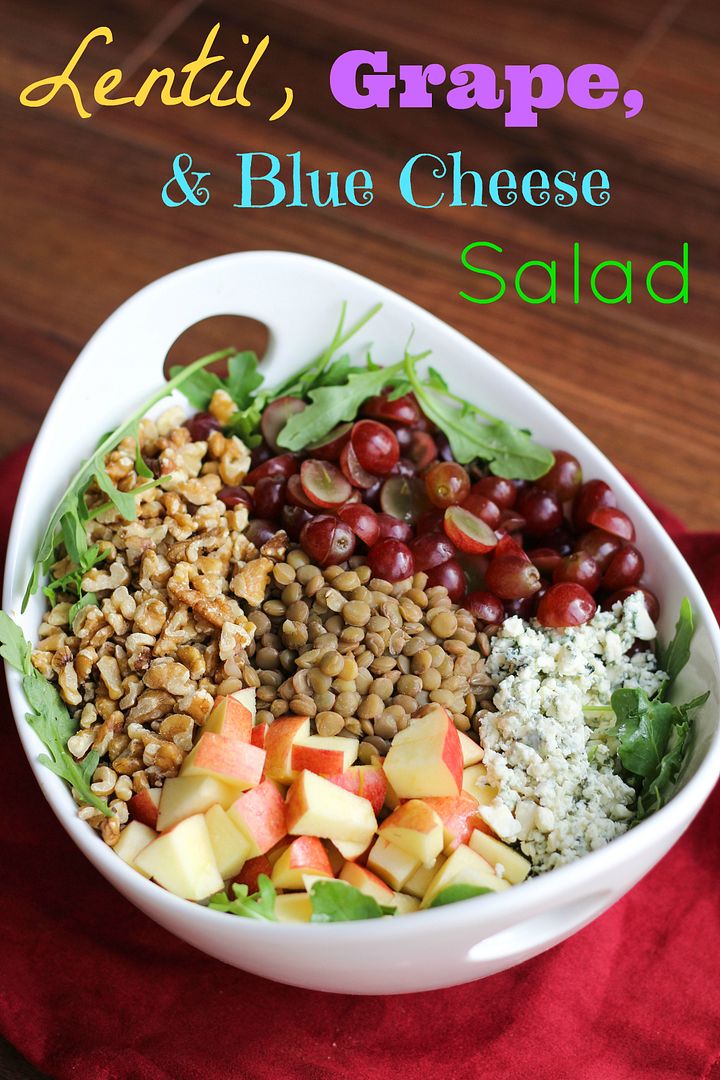
Lentil, Grape, & Blue Cheese Arugula Salad

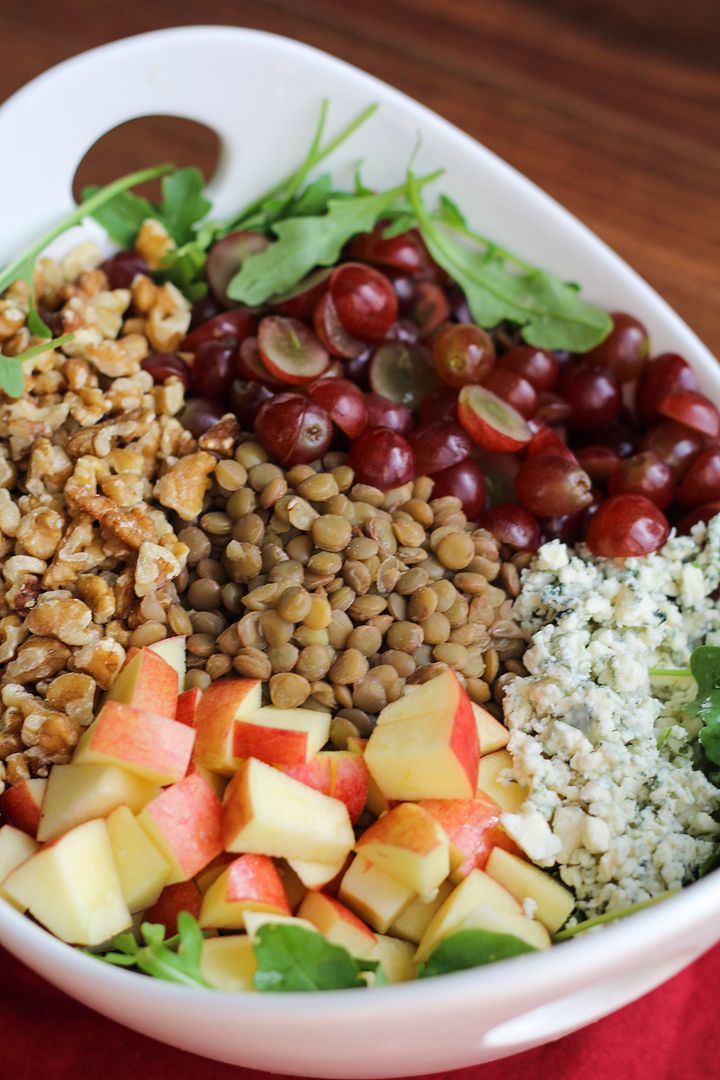
Lentil, Grape, Apple & Blue Cheese Arugula Salad

Now that it's officially summer, I've been craving salads for dinner a lot more, but my salads have to be interesting to keep me interested, with plenty of different textures and flavours and a good source of protein - usually either beans, quinoa, edamame, or lentils.

Lentil, Grape, Apple & Blue Cheese Arugula Salad

I saw the combo of grapes and blue cheese somewhere a while ago and have been thinking about how to use them together since.  Because lentils have a pretty earthy flavour that need brightening up from other ingredients, I figured they would make the perfect base for a salad with grapes for sweetness and the sharp flavour of blue cheese that I can't even describe because it tastes like nothing else (in a good way!)

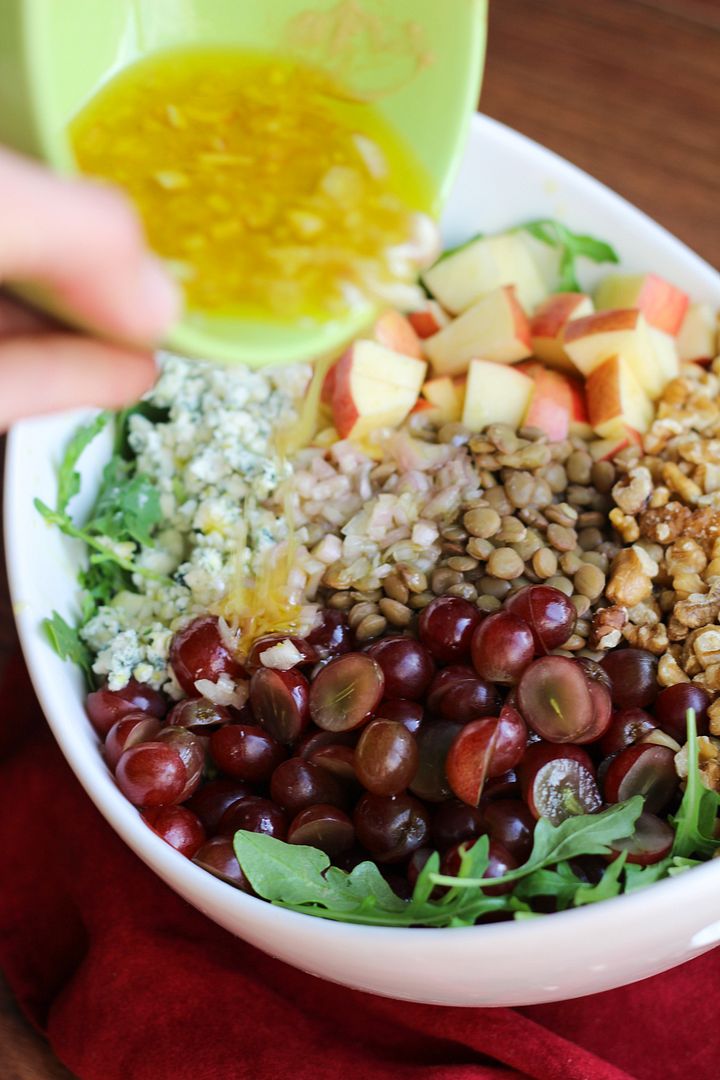
Lentil, Grape, Apple & Blue Cheese Arugula Salad

After doing a bit of searching I found out that lentils.ca, one of my favourite resources for lentil information and recipes, had a recipe along the lines of what I was looking for, with lentils, arugula, grapes, blue cheese, and walnuts.  I followed their lead, adding apples for crunch (a necessary addition, in my opinion), using a slightly different dressing, and leaving the walnuts raw instead of candying them (though that would probably be good too; I was just lazy).

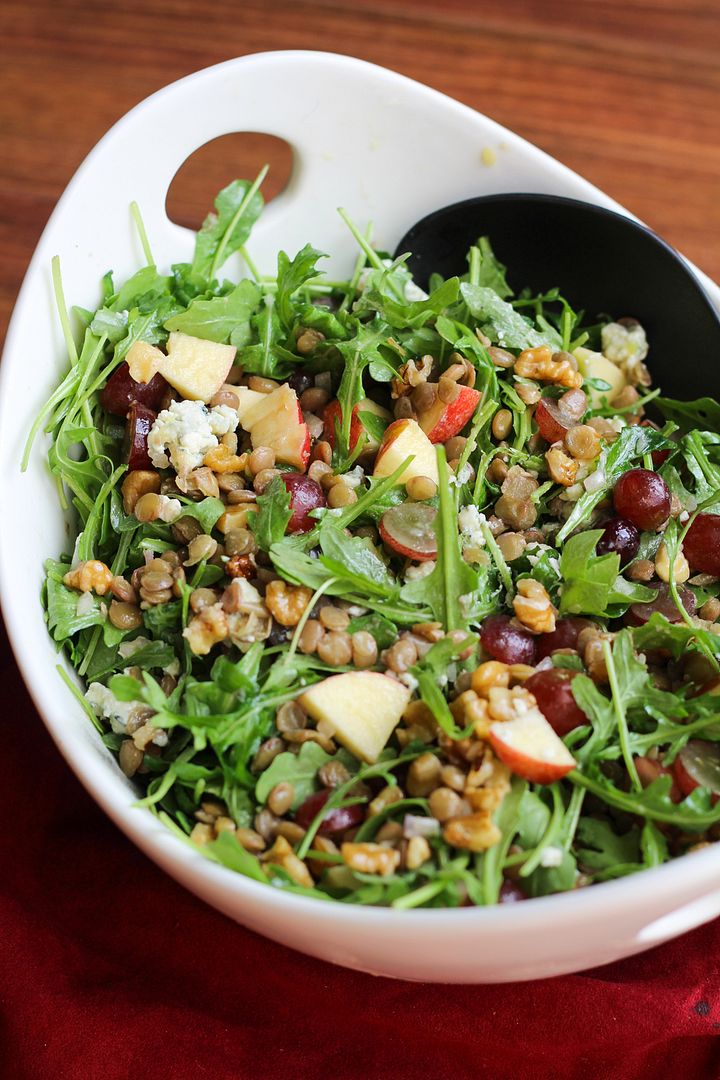
Lentil, Grape, Apple & Blue Cheese Arugula Salad

Not only did this make for a healthful meal with plenty of fiber, protein, and vitamins, but it had such a great combination of flavours and textures.  I loved how the bursts of sweet grapes and crunchy apples balanced out the sharp arugula and blue cheese along with the nutty, earthier flavours in the lentils and walnuts.
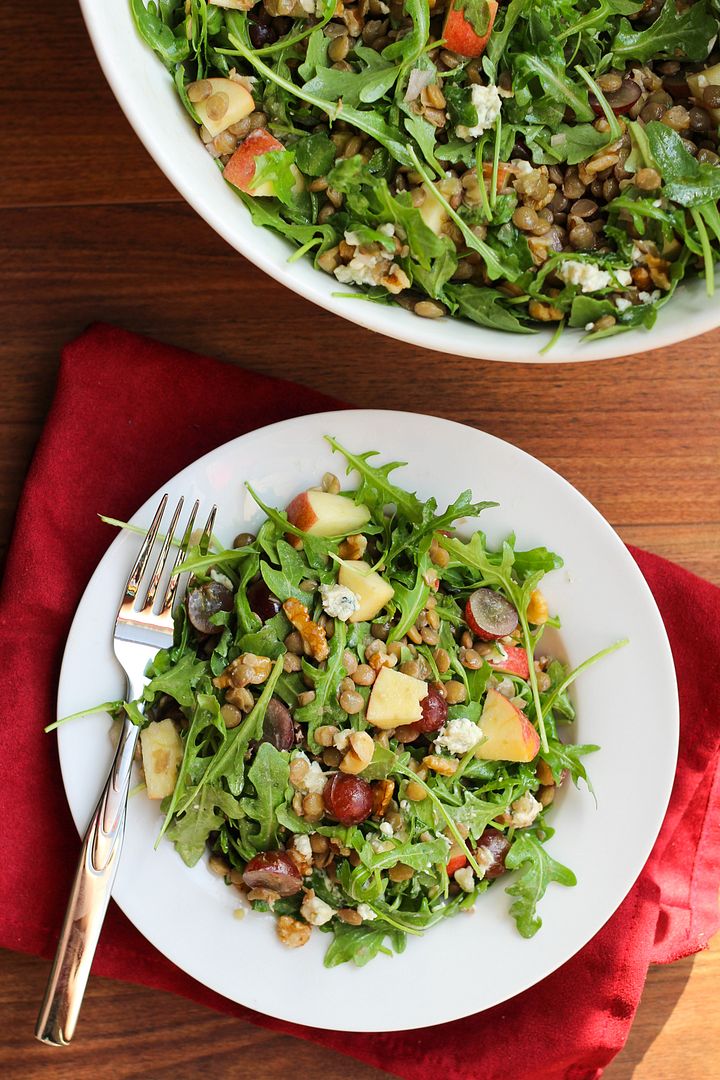
Lentil, Grape, Apple & Blue Cheese Arugula Salad

You could eat this as a main course on its own or as a side dish.  We ate some of our leftovers piled on top of whole wheat naan bread as a sort of knife-and-fork salad, which we really enjoyed.  Ryan thought this dish would have been better covered in buffalo sauce, which I strictly forbade, but considering he was willing to eat it for three meals in a row (and it was pretty inexpensive for the amount of food we got), I'd say it won him over!

Lentil, Grape, Apple & Blue Cheese Arugula Salad

Lentil, Grape, & Blue Cheese Arugula Salad

Recipe inspired by Lentils.ca

Serves 4-6

Ingredients:

Lentils:
4 cups water
1 cup (dry) green or brown lentils
1/2 teaspoon salt

Dressing:
3 tablespoons extra-virgin olive oil
2 tablespoons red wine vinegar
2 teaspoons honey
1 teaspoon Dijon mustard
1 shallot, minced
1/4 teaspoon each salt and pepper

Salad:
1-1/2 cups red seedless grapes, halved
1 apple, diced (I used a gala)
3/4 cup chopped walnuts, lightly toasted if desired
1/2 cup crumbled blue cheese (you could use up to 3/4 cup for a stronger blue cheese flavour)
5oz baby arugula

Directions:

Rinse lentils.  Bring water, salt, and lentils to a boil in a medium saucepan.  Reduce heat to a simmer and cook until lentils reach desired texture, about 15 minutes.  Drain excess water and let lentils cool to room temperature.

Meanwhile, prepare dressing by whisking together the olive oil, vinegar, honey, shallot, salt, and pepper in a small bowl.  Set aside.

Add cooled lentils, grapes, apple, walnuts, and blue cheese to the arugula.  Add dressing and toss to combine.  Season with additional salt and pepper if desired.  Eat on its own as a main course or as  side courses.  It’s also good on top of naan bread!

October 08, 2013

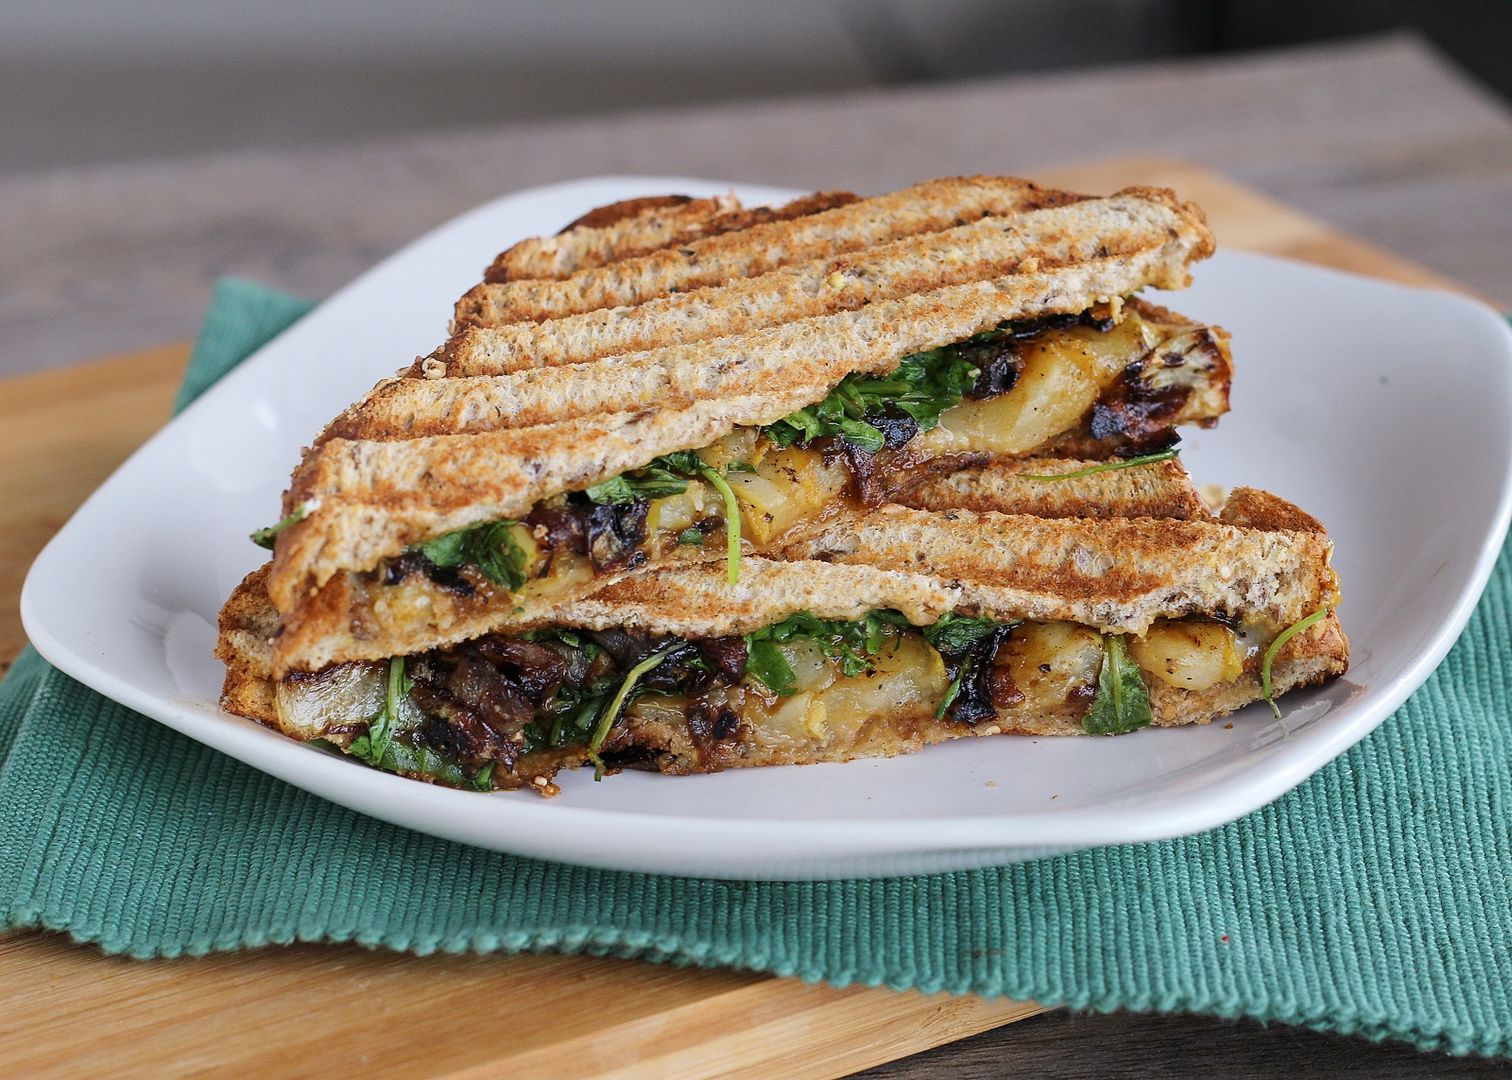
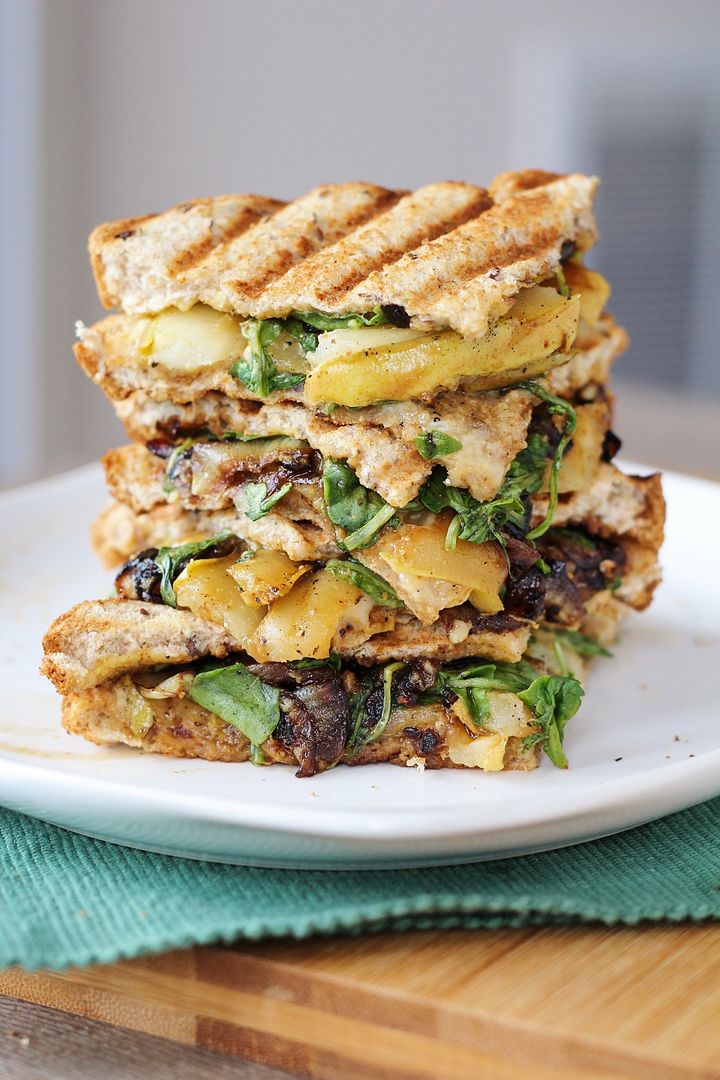
Pear, Blue Cheese, & Caramelized Onion Panini

Pear, Blue Cheese, & Caramelized Onion Panini

I know I just posted a panini recipe fairly recently, but this new panini was so good that I had to share it with you guys immediately!

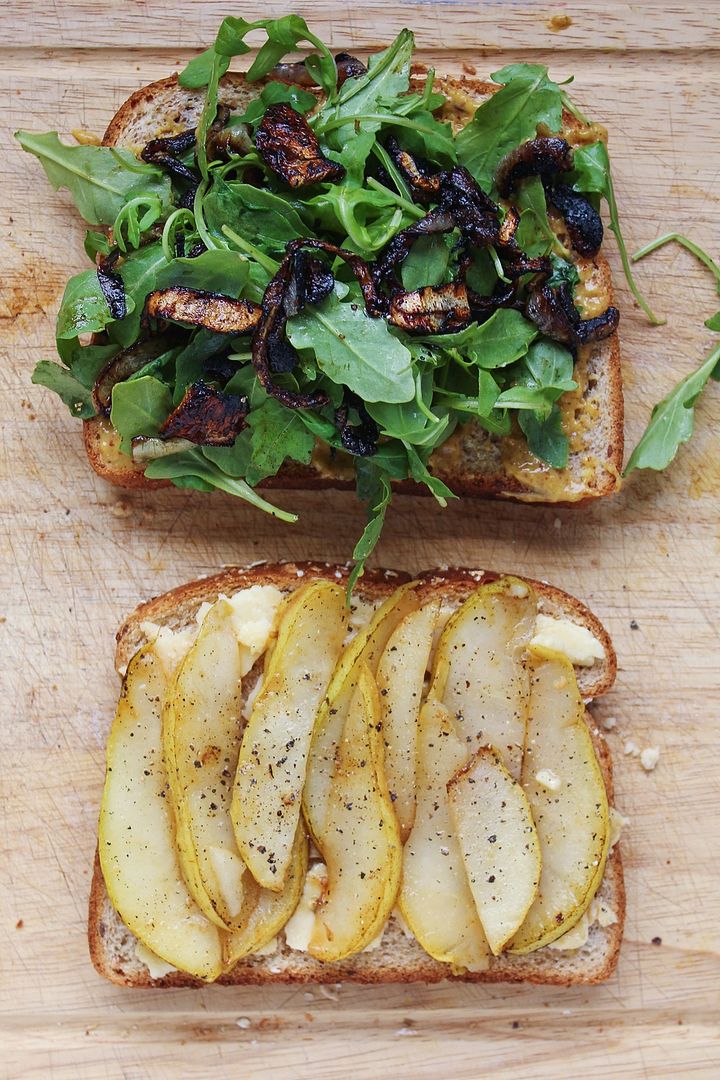
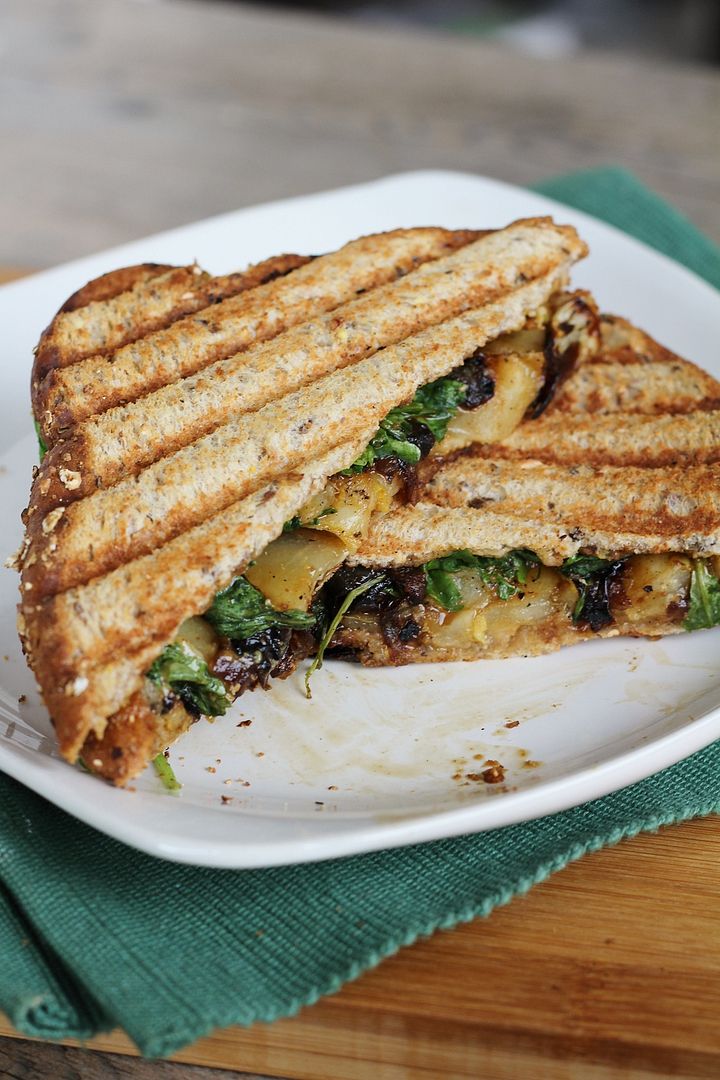
I also know that these pictures are extremely similar to the last set, but there are only so many ways you can photograph a sandwich. The one thing I don’t like about paninis is that because everything gets pressed together, whatever's between the bread is almost impossible to show in photos (and what parts you can see look indistinguishable).  But I love making and eating paninis, so you’ll have to use your imagination a little to see through those pieces of bread to the deliciousness that’s in between them!  Here's a little help - this is what was inside my sandwich before I pressed it together:

Pear, Blue Cheese, & Caramelized Onion Panini

I wanted to make an autumn-ish panini with one of my favourite flavour combinations – pears or apples with blue cheese and caramelized onions.  I’ve used at least a couple of these ingredients together in the past, like in these apple, caramelized onion, and blue cheese naan pizzas, apple turkey burgers with caramelized onions and brie, and roasted potatoes and green beans with caramelized onions and blue cheese – there’s something about caramelized onions and blue cheese together that I just can't get enough of.  

Add in some juicy, lightly sautéed pears, some peppery arugula and spicy honey Dijon, press it together until it's warm and melty, and you have what may be my new favourite sandwich!

Pear, Blue Cheese, & Caramelized Onion Panini

And before someone points it out, yes I’m aware that the onions as pictured above are much more on the burnt side than the caramelized side – I swear I do know how to caramelize onions, but I only had a tiny onion to work with that had been open in the fridge plus I was in a big rush when I made this.  Too thin slices + too high heat = burnt onions.  Try not to make the same mistake I did, but if you’re really in a hurry, you could leave them out and this panini would still be delicious; I recommend making time to add them in though - caramelized onions make everything better!  Plus they can always be made ahead of time and stored in the fridge to add to all sorts of things!

I’ve also been on a big blue cheese kick lately, adding it to anything I can think of, but I know a lot of you don’t like blue cheese (though I cannot understand why!), so you could substitute something like brie or gruyere instead if you like.  Your sandwich will have a different flavour profile, but will still be amazing and even more melty!

Pear, Blue Cheese, & Caramelized Onion Panini

Pear, Blue Cheese, Caramelized Onion, & Arugula Panini

Adapted from Clean Eating

Makes 1 sandwich

Ingredients:

1/2 tablespoon olive oil
1/2 medium-large yellow or red onion, thinly sliced
Salt & Pepper
1 teaspoon balsamic vinegar (optional)
1/2 ripe pear, cored and thinly sliced
2 slices whole grain bread
2 teaspoons honey Dijon mustard
1/2 oz blue cheese, sliced thinly
Handful of baby arugula

Directions:

Heat oil in a medium to large skillet over medium heat.  Add onions, stir to coat with oil, and season with salt and pepper.  Let cook over medium-low heat, stirring occasionally, until onions are soft and caramelized, about 25-30 minutes.  I like to add a splash of balsamic vinegar in the last few minutes of cooking to deglaze the pan and add some flavour to the onions, but this step is optional.

Remove onions from pan, and add sliced pear.  Cook over medium heat for around 3 minutes, until softened and slightly golden coloured.  Remove from heat.

Spread mustard on one slice of bread, top with arugula, onions, pears, and blue cheese, and the other piece of bread.  Heat in a panini press, or if you don’t have one, heat the sandwich on a griddle pan (or skillet) with a heavy pot on top of the sandwich to press it into the skillet (I put a can inside the pot to weigh it down), then flip and repeat on the other side.  Serve warm.

July 23, 2013

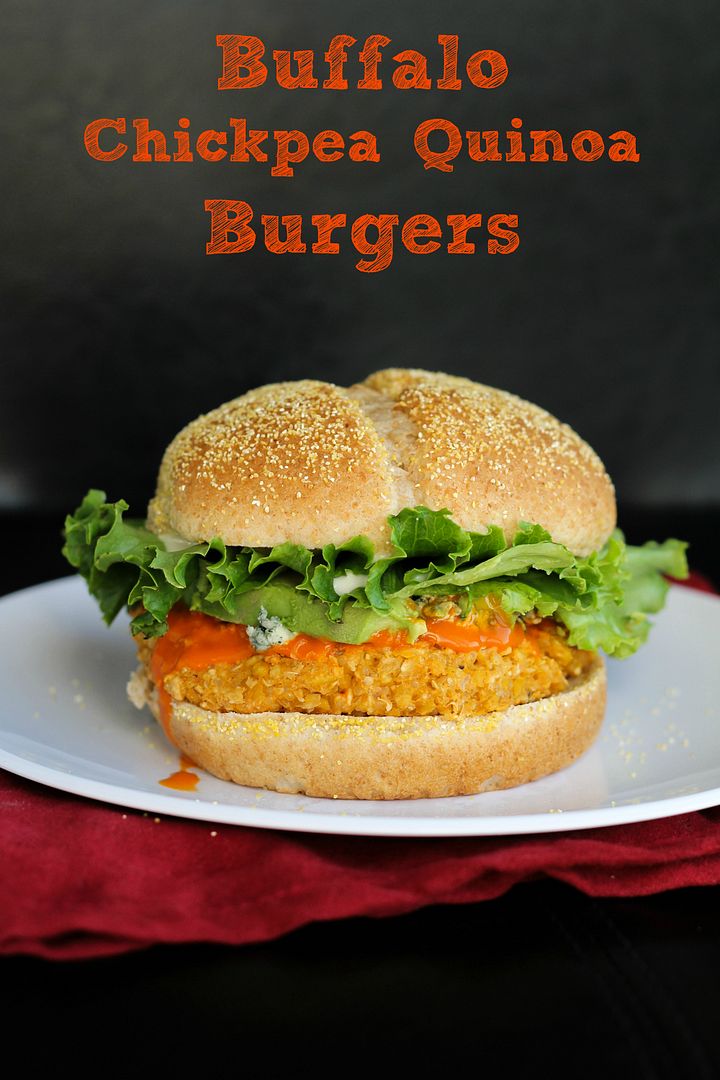
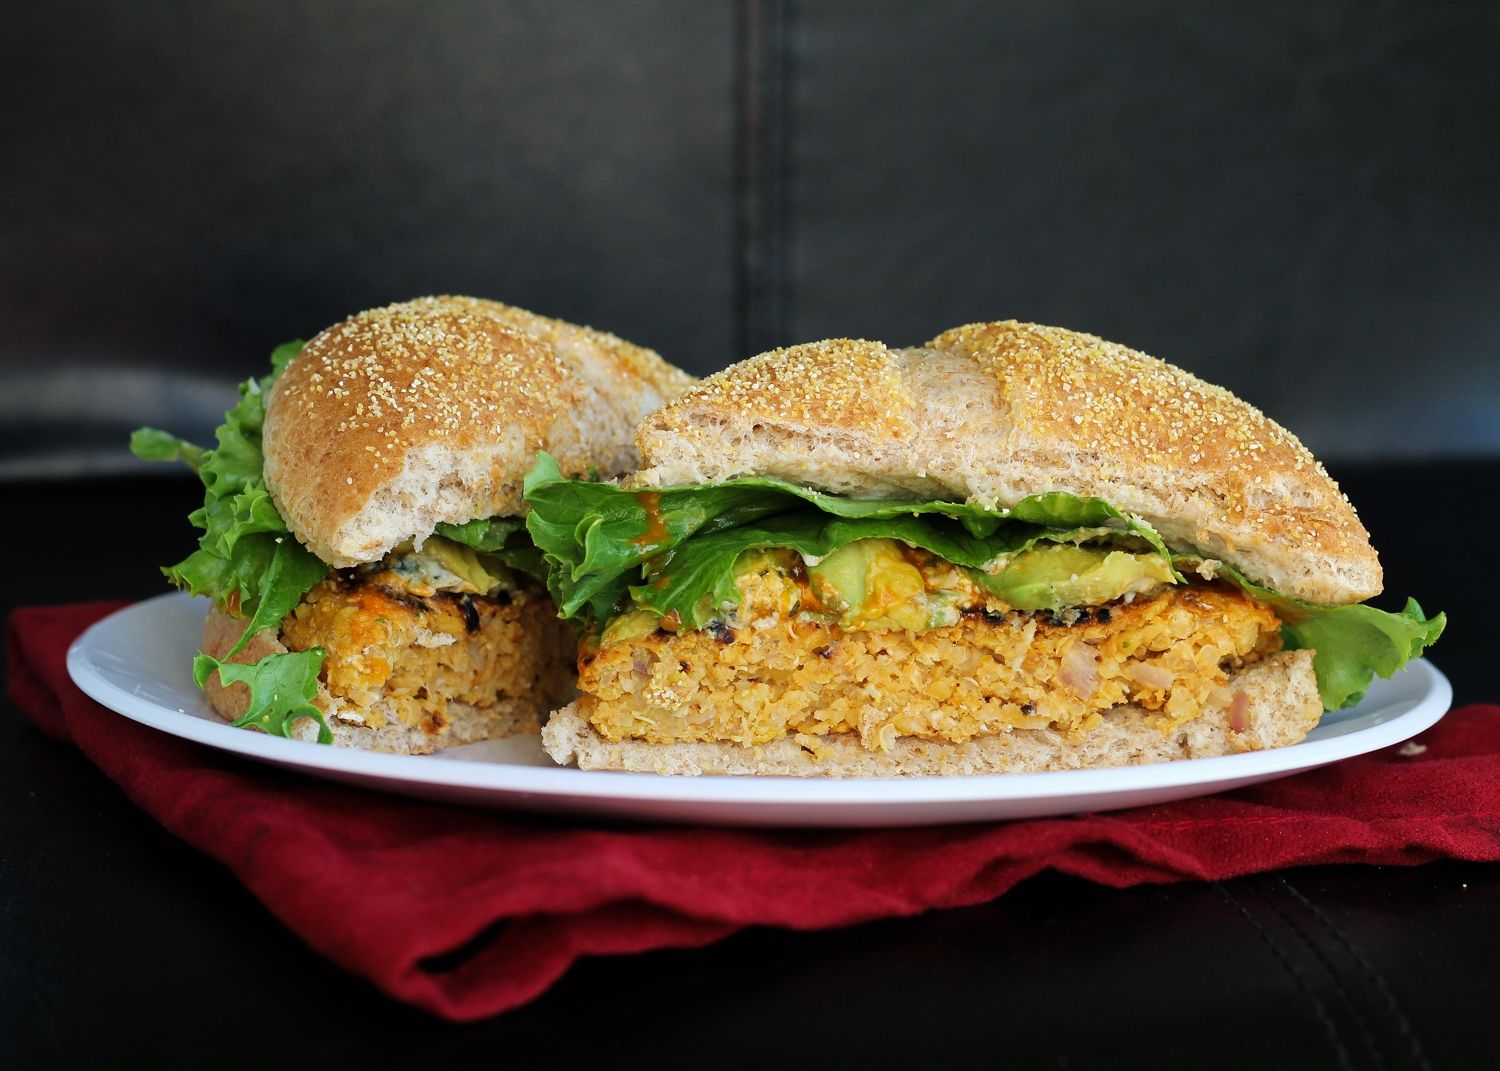
Buffalo Chickpea Quinoa Burgers

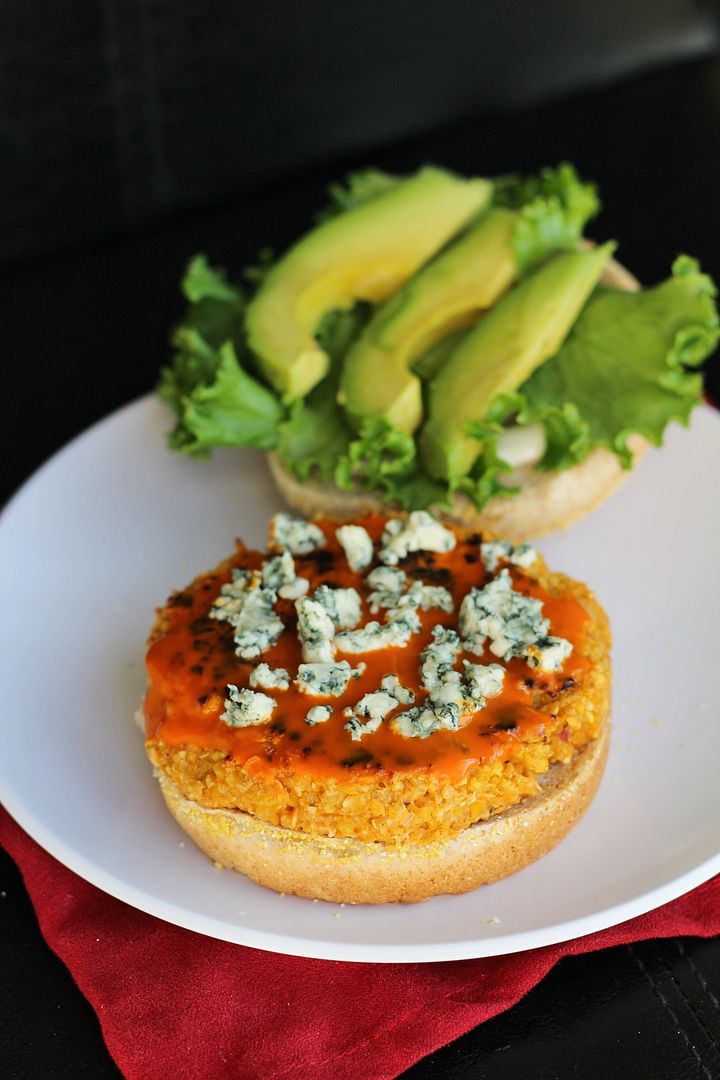
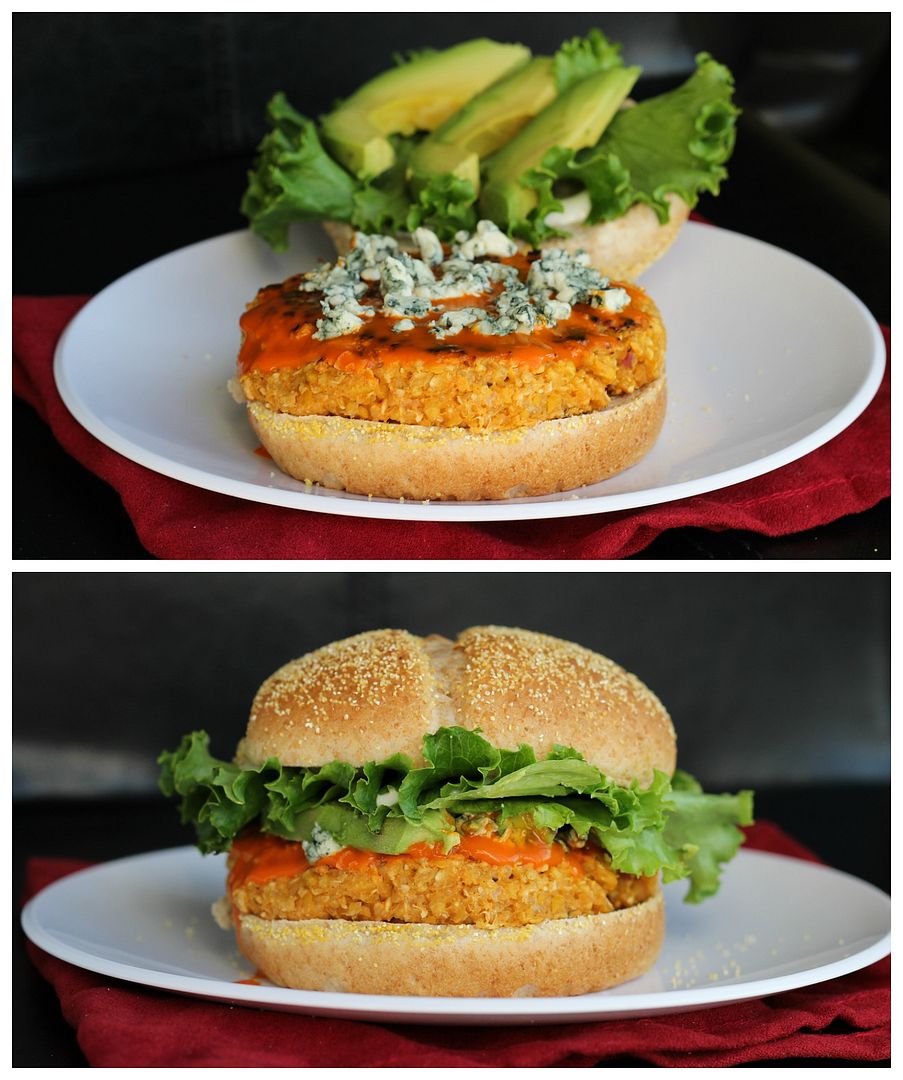
Buffalo chickpea quinoa burgers

When I made these lemon & feta chickpea quinoa burgers for my boyfriend Ryan and I last month, I was worried that he wouldn’t even be willing to try them because he doesn’t eat a lot of veggie burgers and isn’t the biggest lemon fan.  Fortunately, he not only tried them, but actually quite liked them!   Of course, he commented that they’d be much better if I’d made them with buffalo or chipotle sauce instead of lemon though.

Buffalo chickpea quinoa burgers

I love all things lemon but I’m also a big buffalo sauce fan, so I decided to give Ryan’s “manlier” version a try.  We love these buffalo chicken burgers, but finding a protein-packed vegetarian substitute to replace them with once in a while was a pretty good idea.

Turns out he knew what he was talking about, because I think I liked these even better than the lemon version!

Buffalo chickpea quinoa burgers

I used the same combination of chickpeas and quinoa as the base of the burger; with shallots and garlic added in for flavour and crunch; oats, breadcrumbs, and an egg to bind them; and buffalo sauce mixed into the patty and served on top for maximum buffalo flavour.  Combined with some blue cheese, lettuce, and avocado as toppings, these were hearty and full of flavour, and we both loved them!  Lesson learned: I should perhaps start listening to my boyfriend’s ideas more often.  Just don’t tell him I admitted that :)

Buffalo chickpea quinoa burgers


Buffalo Chickpea Quinoa Burgers


Makes 5 burgers

Ingredients:

For the Burgers:
1/4 cup uncooked quinoa
1 (540mL) can of chickpeas, drained and rinsed
1/2 cup rolled oats
1/4 cup minced shallot
2 garlic cloves, minced
1/4 cup buffalo sauce (your favourite brand, such as Frank's Red Hot Buffalo Wing Sauce or PC Buffalo Wing Sauce)
1 large egg, lightly beaten
1/2 teaspoon salt
1/4 teaspoon pepper
1/4 cup breadcrumbs

For Assembly:
5 whole grain hamburger buns
Crumbled blue cheese
Additional buffalo sauce
Lettuce
Ripe sliced avocado (optional)

Directions:

Bring 1/2 cup water to a boil.  Add quinoa, cover, reduce heat and let simmer 15 minutes.  Remove from heat and keep covered for 5 minutes.  Fluff with a fork and let cool slightly.

Meanwhile, add chickpeas to the bowl of a food processor or mini chopper and pulse until they are broken down into crumb-sized pieces.  Transfer to a large bowl.  Add oats to same food processor and pulse a few times to break them down into fine crumbs (but not a powder).  Add to chickpeas in large bowl.  Add to the bowl the shallots, garlic, buffalo sauce, egg, salt, and pepper.  Add the cooked quinoa.  Mix everything together with a large fork until well combined.  If mixture is still too wet to form patties, add the 1/4 cup of breadcrumbs (or enough to hold the mixture together).  Divide and shape into 5 patties.

Heat a non-stick skillet over medium-high heat and cook patties for about 4-5 minutes per side.

Assemble burgers by placing patty on bun, topping with additional buffalo sauce, a bit of blue cheese (be careful not to add too much so it’s not overpowering – I though the amount I used (in the pictures) was too much), lettuce, and avocado or tomato if desired.

May 07, 2013

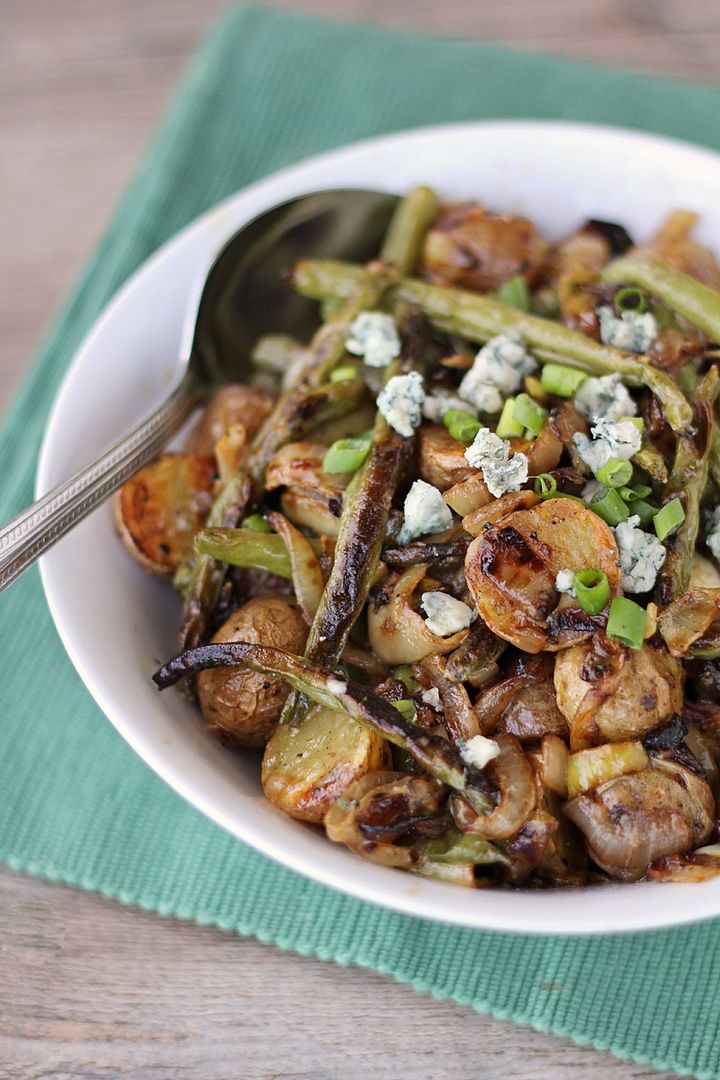
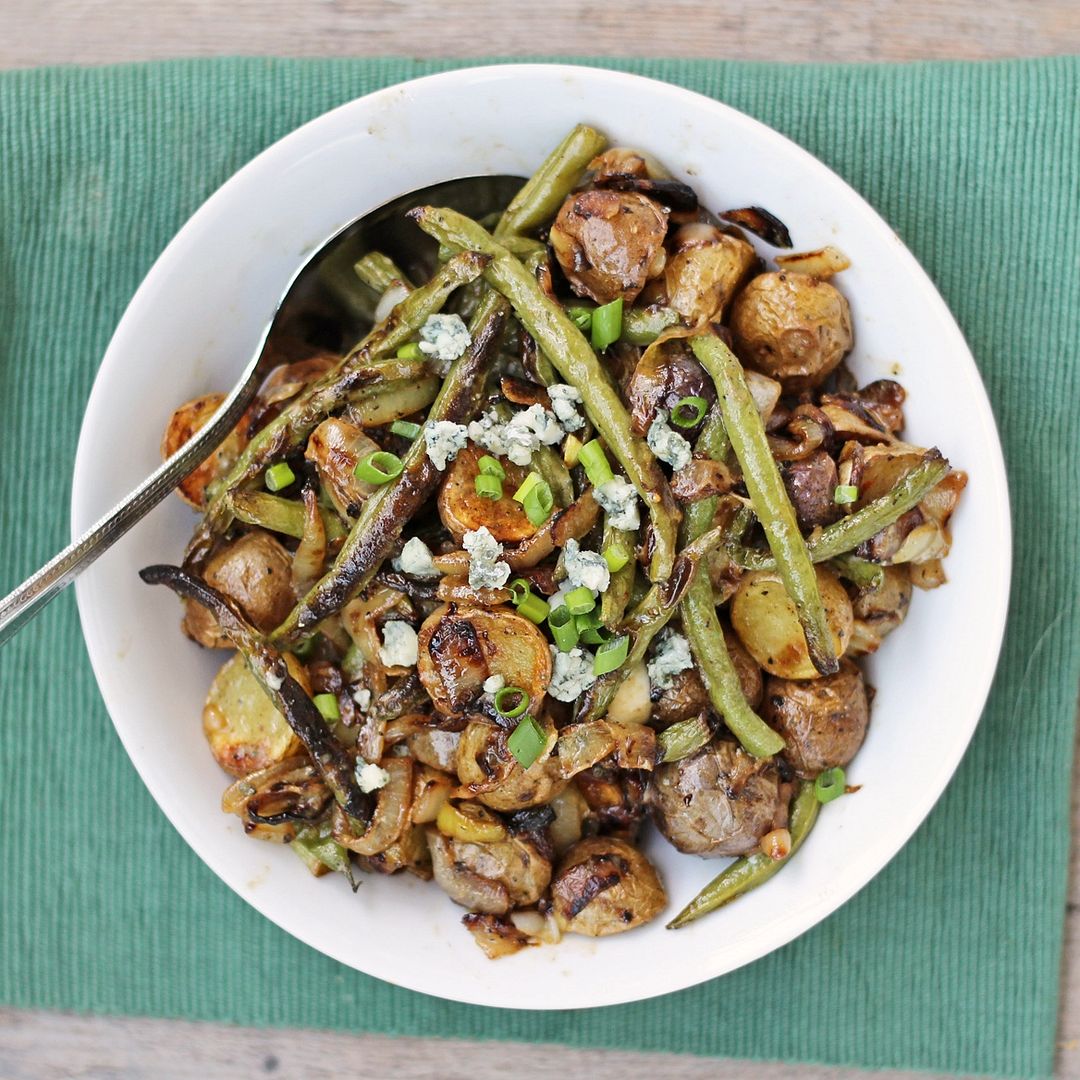
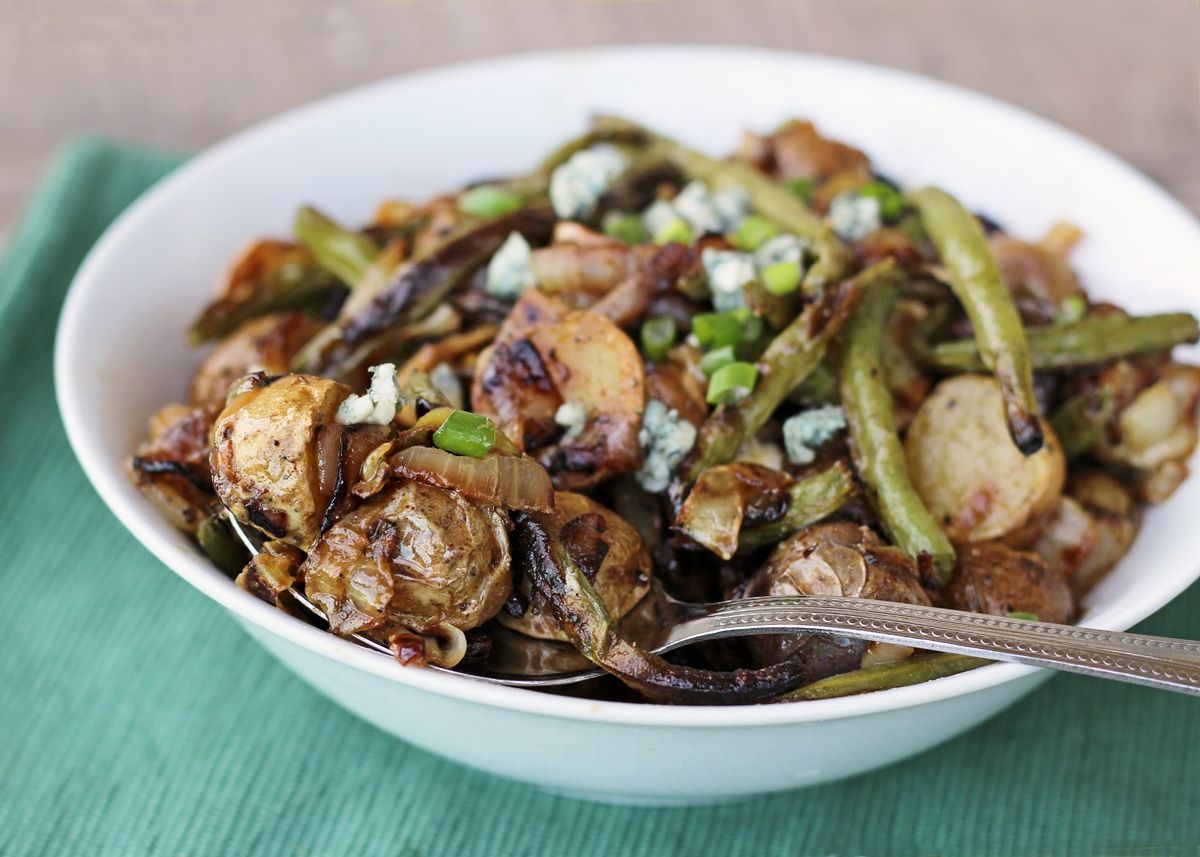
Roasted Potatoes and Green Beans with Caramelized Onions & Blue Cheese

Roasted Potatoes and Green Beans with Caramelized Onions & Blue Cheese

The weather has been absolutely gorgeous in Southern Ontario lately and I am loving everything about it (except how hard it is to get work done when you know how nice it is outside)!  This past weekend I wore shorts out for the first time this year, the farmer's market was outdoors and even had some local produce available, and I spent some time in the park reading and taking pictures of the beautiful flowers that the April showers brought!

may flowers

I also made some delicious meals with the veggies and cheese I bought at the market, my favourite of which being this twist on a potato salad.

I was never a big fan of potato salads growing up because I usually had the cold, mayonnaise-covered versions, but warm potato salad is a totally different story.  I love this warm dijon roasted asparagus & potato salad, and but this green bean, caramelized onion, and blue cheese version might be even better!  In this dish, mini potatoes get roasted with green beans until they're both nice and browned up, while onions caramelize on the stovetop at the same time.  Then they get mixed together, tossed in a blue cheese dressing, and sprinkled with green onions and a little more blue cheese for good measure.  Needless to say, you have to like blue cheese to appreciate this dish!

Roasted Potatoes and Green Beans with Caramelized Onions & Blue Cheese

I don't know when potato salad stops being a salad and starts being just roasted potatoes, but whatever you call this, it's so good - you just have to get past the somewhat boring colours that made it hard to look good in photos!  This would be a great side dish to go with steak or burgers this summer, but I liked it so much I just ate it on its own!

Roasted Potatoes and Green Beans with Caramelized Onions & Blue Cheese

Roasted Potatoes and Green Beans with Caramelized Onions & Blue Cheese

Adapted from Eating Well

Serves about 6 as a side dish

Ingredients:

1-1/2 pounds mini potatoes, scrubbed and cut in half (I used a mix of red, white, and blue potatoes)
8 ounces green beans, ends trimmed
5 teaspoons extra virgin olive oil, divided
Salt & pepper
2 medium yellow onions, peeled and sliced
2 tablespoons white wine vinegar
2 teaspoons Dijon mustard
3 tablespoons crumbled blue cheese
Additional blue cheese and sliced green onions for topping

Directions:

Preheat oven to 450°F.  Toss potatoes and green beans with 2 teaspoons oil and season with salt and pepper.  Spread evenly on a foil-lined baking sheet and roast in preheated oven for 25-30 minutes, stirring once, until tender and golden brown.

Caramelize your onions at the same time that the potatoes are roasting.  Heat 2 teaspoons olive oil in a large skillet over medium heat.  Add onions, stir to coat with oil, and season with salt and pepper.  Spread onions out evenly across the pan and let cook, stirring occasionally, until onions are soft and caramelized, about 25-30 minutes.  Don’t stir the onions too often so they can brown, but don’t leave them alone long enough to burn or stick to the pan (though I like the burnt bits in this potato salad!) 

Meanwhile, prepare the dressing by whisking together the vinegar, Dijon, blue cheese, and 1 teaspoon oil in a small bowl.

When onions and potatoes are both done, combine them in a bowl and add dressing while warm.  Toss to coat.  Serve warm, topped with additional crumbled blue cheese and chopped green onions or chives, if desired.

April 19, 2013

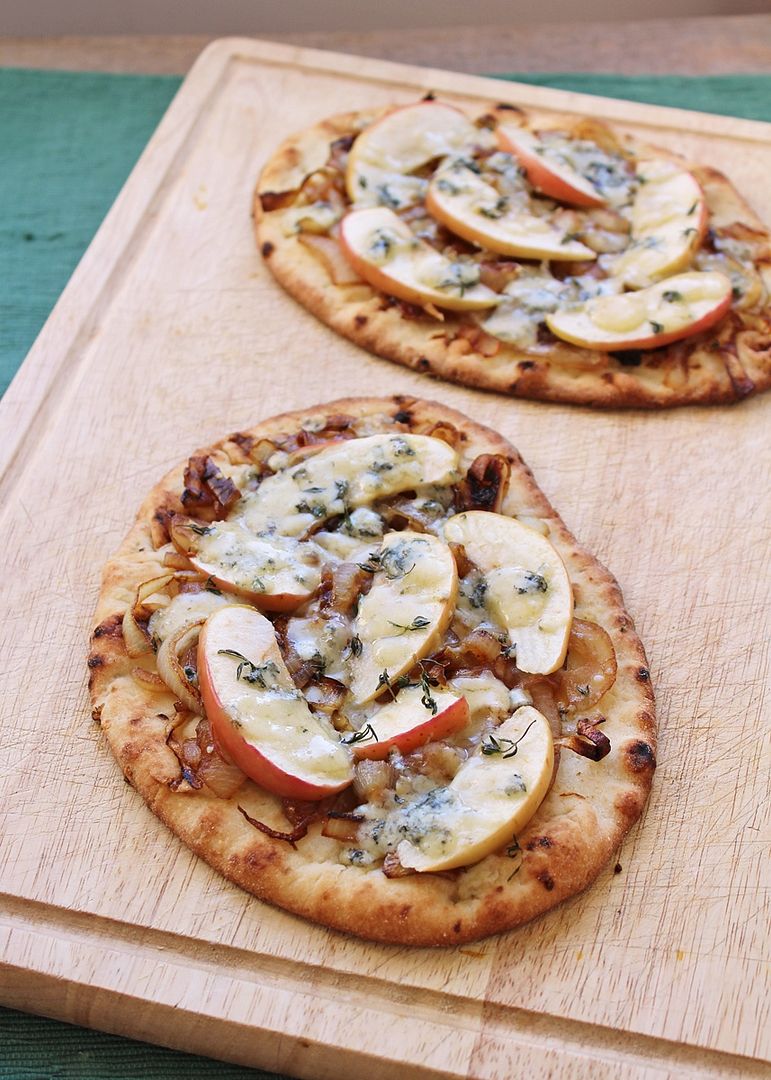
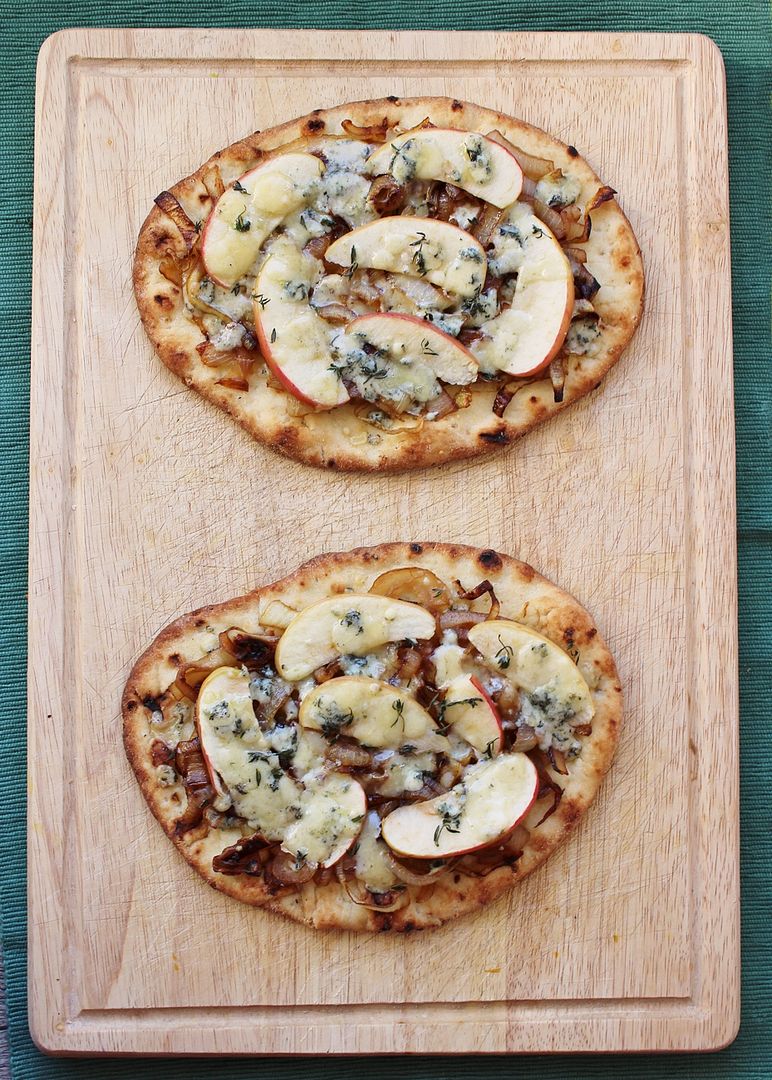
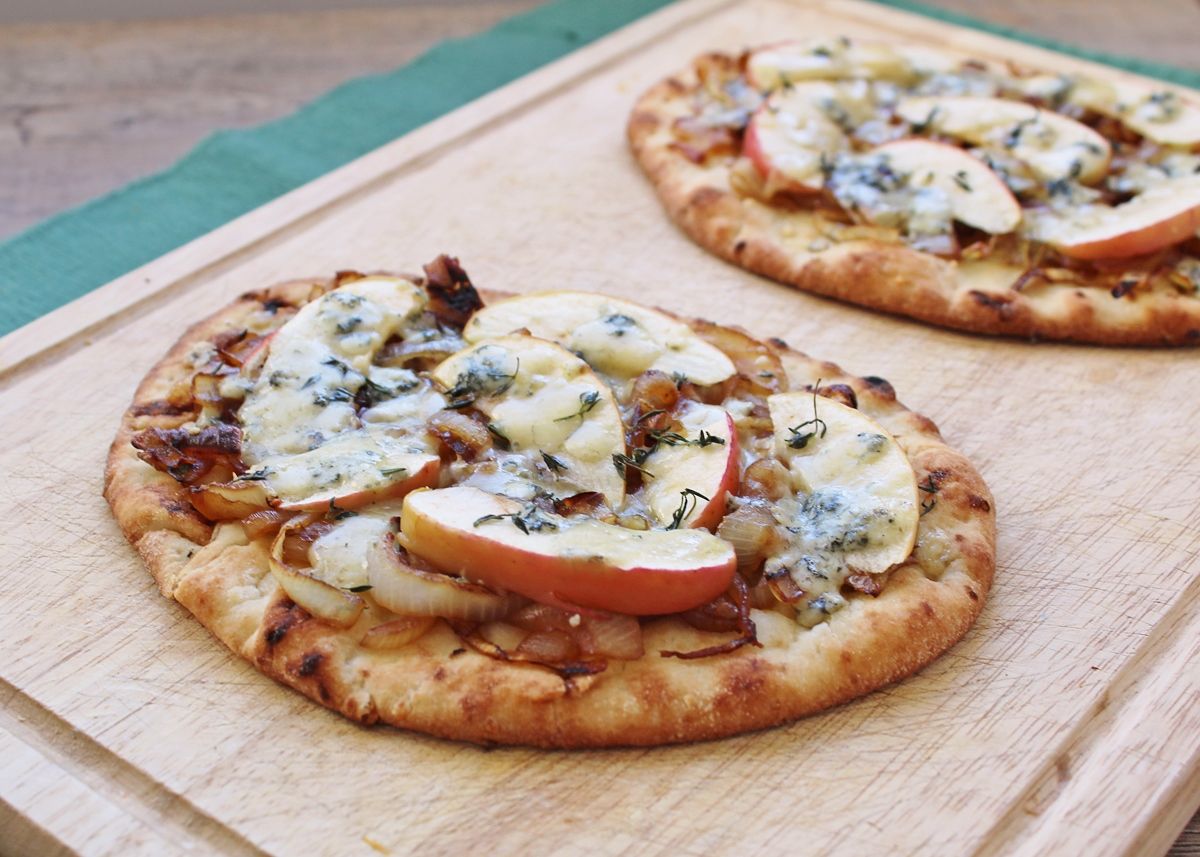
Caramelized Onion, Apple, and Blue Cheese Naan Pizzas

Caramelized Onion, Apple, and Blue Cheese Naan Pizzas

I think naan pizzas might be my new favourite thing; I've already expressed my love for breakfast naan pizzas with an egg on top, but I can confirm that dinner pizzas are just as good! Especially when you're cooking dinner for one (like I am the majority of the time) - Just take a piece of naan out of the package (and whole wheat works great for a healthier option!), top it with desired toppings, bake for about 10 minutes, and you have a delicious light thin-crust pizza for one!

While you can pretty much top them with anything you like, if you like blue cheese, you have to try this combination of apples, blue cheese, and caramelized onions first - this was seriously one of my favourite things I've eaten in a while!

Caramelized Onion, Apple, and Blue Cheese Naan Pizzas

I already knew that blue cheese and apples go well together because they're some of my favourite salad ingredients, but adding caramelized onions and a sprinkle of thyme made for an amazing combination of flavours.  I even found a caramelized onion flavoured naan bread to use as my pizza base, which went perfectly, but if you can't find them, just use regular or whole wheat naan and these will still be delicious.

Speaking of pizza, I'm off to go enjoy a pizza lunch with my office - Hope you all have a great weekend!

Caramelized Onion, Apple, and Blue Cheese Naan Pizzas

Caramelized Onion, Apple, and Blue Cheese Naan Pizzas

Serves 4 (1 naan pizza each).  I recommend serving them with a side salad.

Ingredients:

1 tablespoon olive oil
2 large sweet onions, peeled and sliced into half moons
Pinch of salt and pepper
1/2 teaspoon sugar
1 tablespoon balsamic vinegar
4 caramelized onion flavoured naan breads (if you can’t find them, plain naan is fine)
1 Gala apple, thinly sliced right before using
4-5 oz blue cheese, crumbled (or about 1/2 cup crumbled)
1 teaspoon fresh thyme

Directions:

First, caramelize the onions (this can be done ahead of time, just keep them in the fridge).  Heat oil in a large skillet over medium heat.  Add onions, stir to coat with oil, and season with salt and pepper.  Spread onions out evenly across the pan and let cook, stirring only occasionally, until softened, about 15-20 minutes.  Add sugar and balsamic vinegar, stir to coat, and let cook for an additional 10-15 minutes, stirring only occasionally.  Once they are caramelized to your liking, remove from pan and set aside.

Preheat oven to 400°F.  Prepare naan pizzas by dividing toppings evenly among each naan bread.  Top each first with a layer of caramelized onions, followed by sliced apples, crumbled blue cheese, and fresh thyme.  Bake in preheated oven for 10-12 minutes and serve.

April 04, 2013

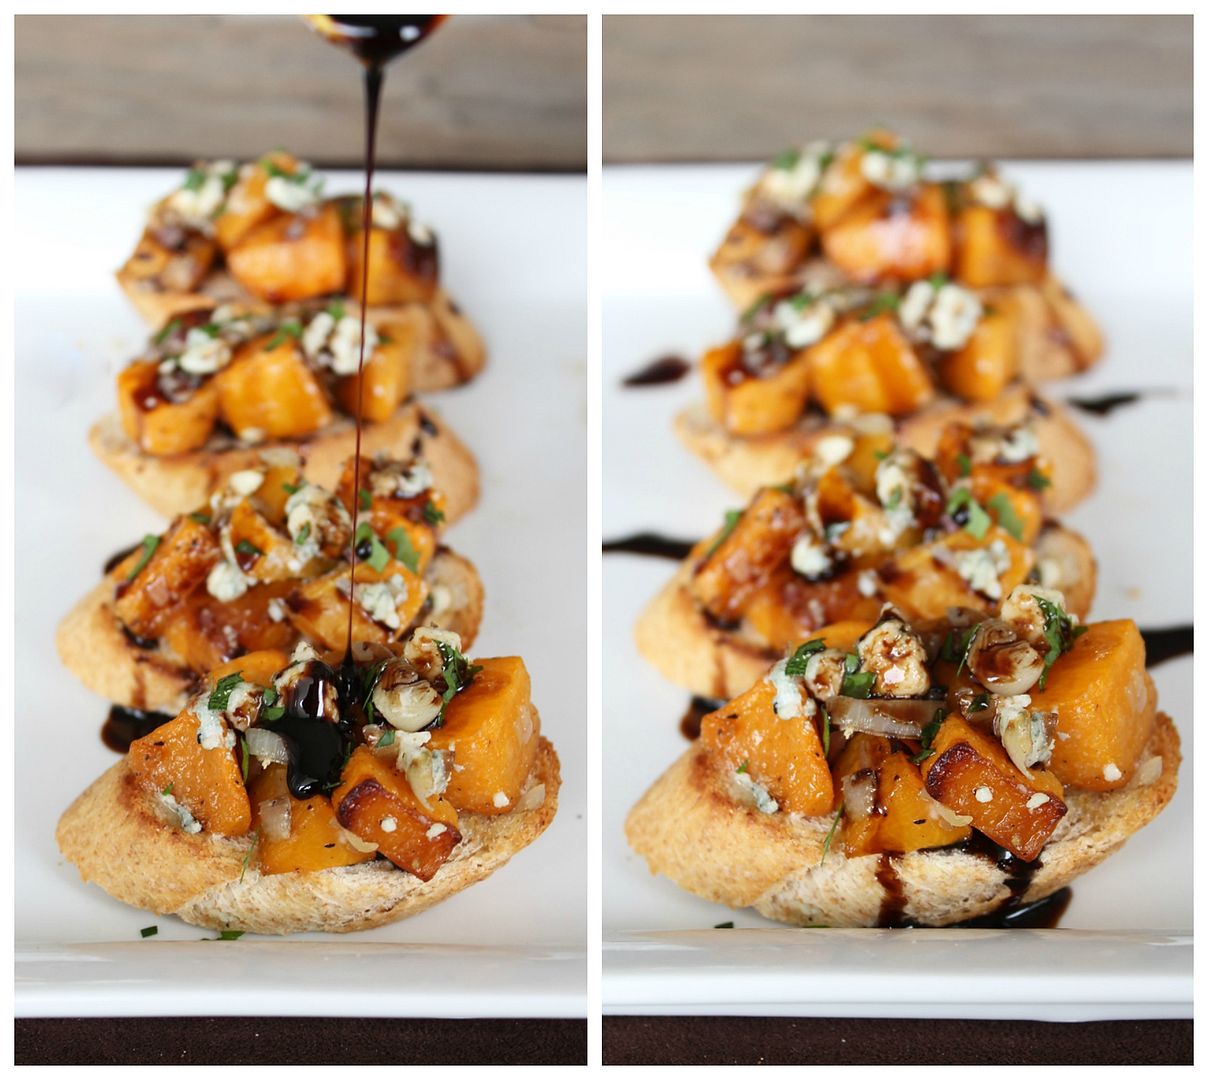
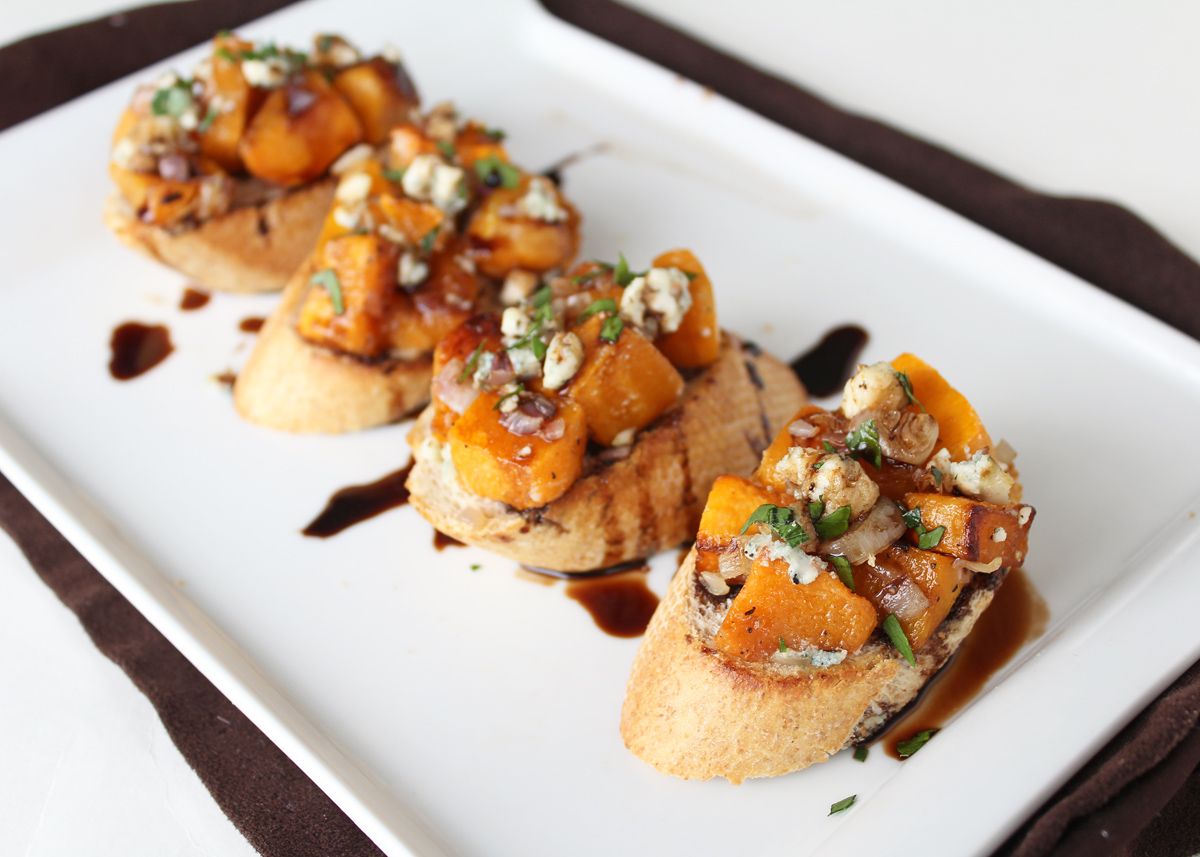
Butternut Squash & Blue Cheese Crostini

Butternut Squash and Blue Cheese Crostini

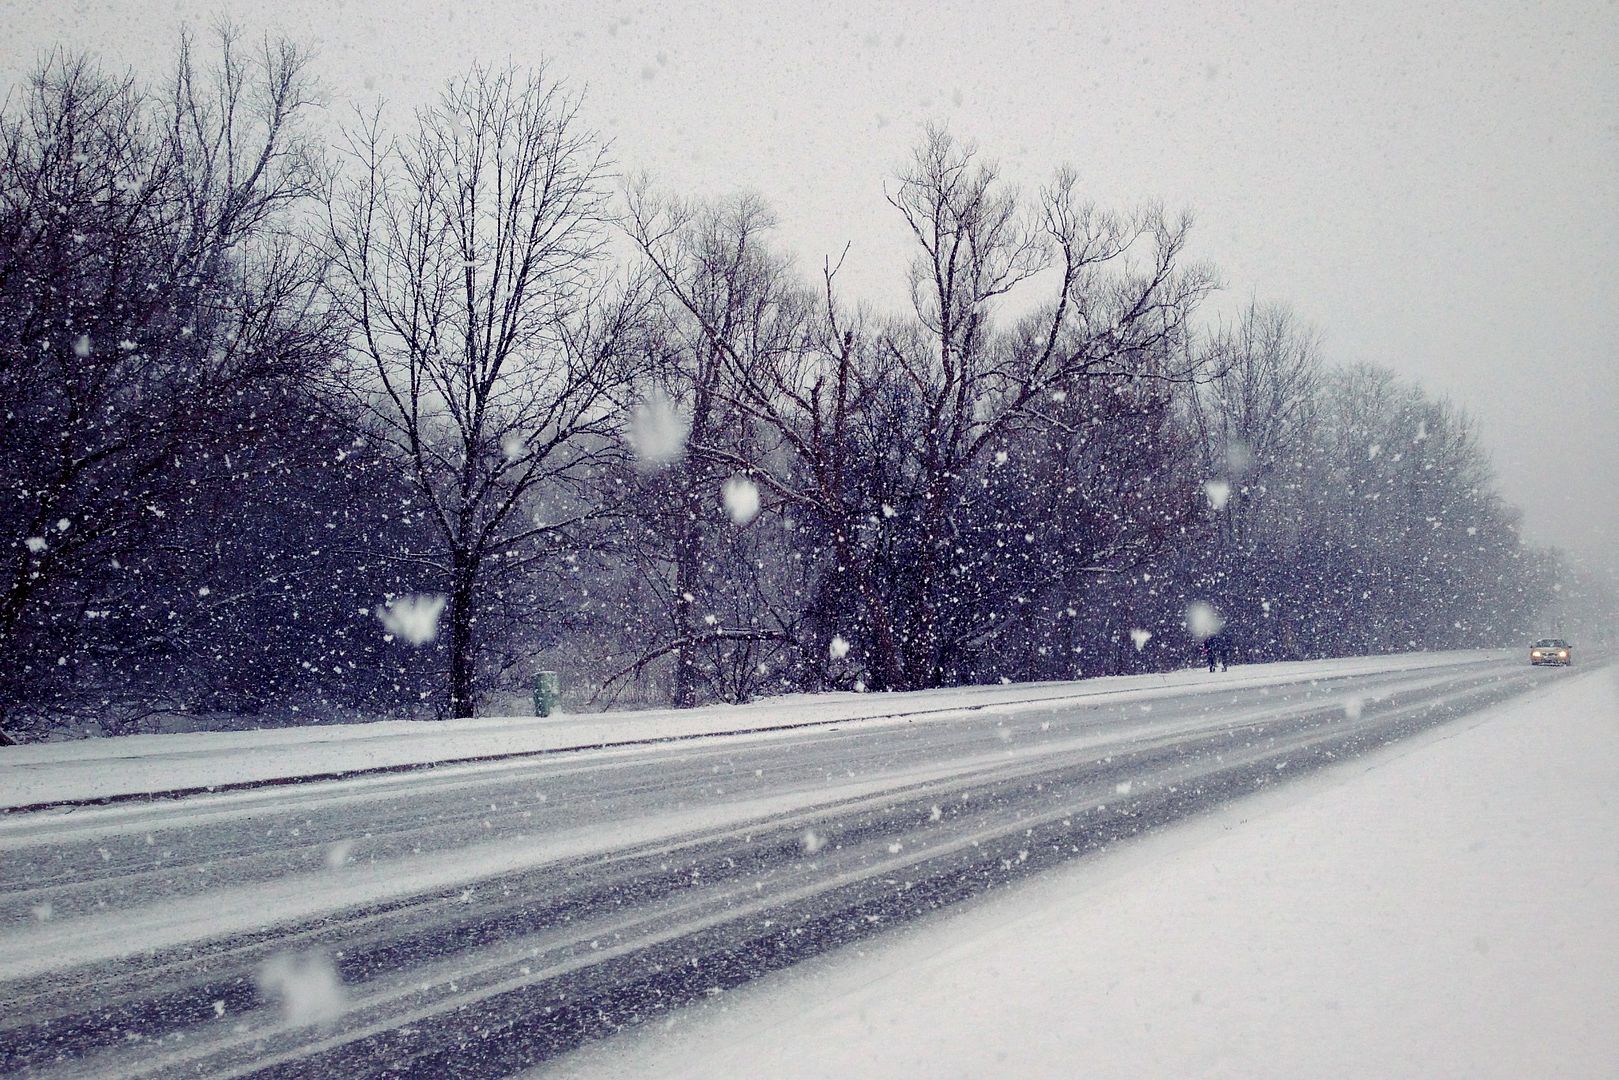
So I promise this is the last time I'll complain about snow on here (especially because I know a lot of people have even worse weather right now), but it was practically a blizzard on my way to school yesterday!

snow on april 3rd

It was actually a very beautiful and peaceful falling snow; I would have loved it in November-December and tolerated it in January-February, but it was just hard to appreciate in April!  I need the snow to stop so the already too short season for spring vegetables here (in Ontario) doesn't get any shorter!

But while I'm (impatiently) waiting, I'm at least happy to extend the season of delicious winter ingredients like butternut squash a little further.  And using squash atop crostini not only feels light enough to help transition my meals into Spring, but also makes for what is probably my new favourite appetizer!

Butternut Squash & Blue Cheese Crostini

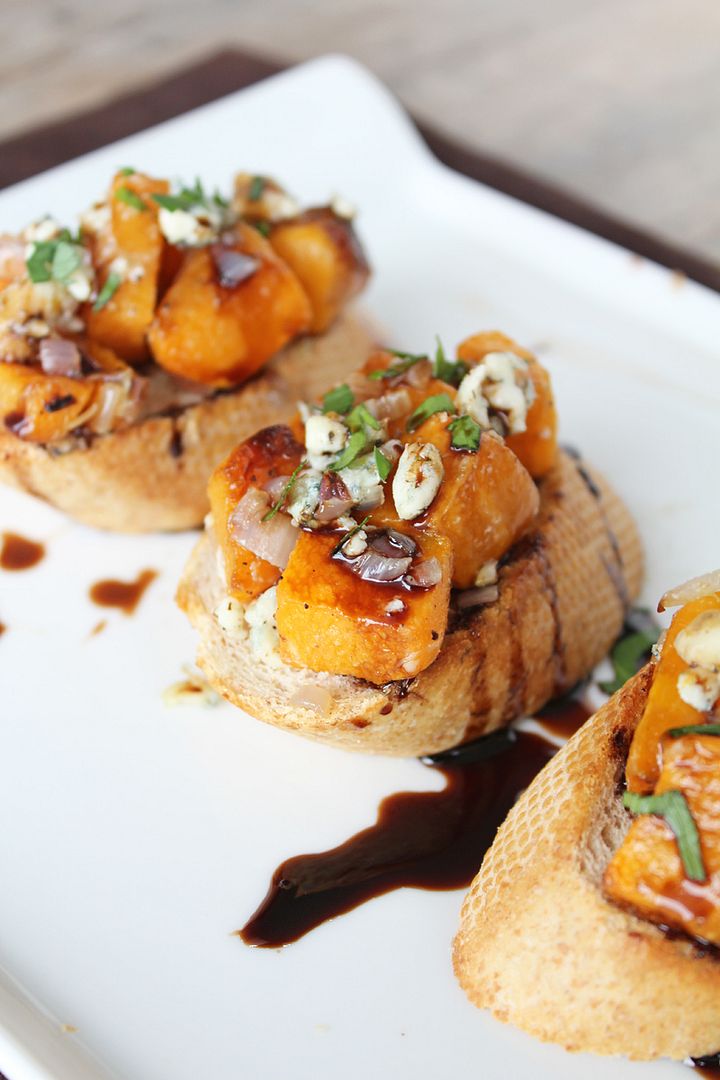
This was my first time pairing squash and blue cheese together and the combination worked so well together!  I wanted to add caramelized onions because I thought that would make the flavour combination even better, but to keep things on a smaller scale I sauteed some minced shallots instead, which worked even better.  Add a drizzle of balsamic reduction to bring it all together and you have an elegant and flavourful appetizer that would be a unique addition to any party! Or if you want to make this into a meal for yourself and don't love crostini, the squash and blue cheese mixture on its own was delicious and would taste amazing mixed into a salad with a balsamic dressing.

It's looking much better out today so fingers crossed I'll have a Spring recipe to share next week! :)

Butternut Squash & Blue Cheese Crostini

Butternut Squash & Blue Cheese Crostini with Balsamic Reduction

Makes about 10 crostini

Ingredients:

1 pound butternut squash cubes, about ½-inch wide
2 tablespoons olive oil, divided
Salt and pepper
1 large shallot, minced
~1/4 cup balsamic vinegar
1 whole wheat baguette, sliced diagonally into about 10 slices (you may not use the whole loaf)
1 to 1.5 ounces blue cheese, crumbled

Directions:

Preheat oven to 400°F.  Toss butternut squash cubes with 1 tablespoon olive oil and season with salt and pepper.  Spread on a foil-lined baking sheet and roast in preheated oven for 25-35 minutes, until tender and cooked through.

Meanwhile, add balsamic vinegar to a small saucepan and bring to a boil.  Let simmer until reduced to only about 1 tablespoon – it should be thicker and syrupy.  Remove to a small bowl to let cool.

Heat remaining olive oil in a medium skillet over medium-high heat. Add minced shallot and cook until golden brown, stirring often, about 5 minutes.

Once squash is done, leave oven on, and spray baguette slices with cooking spray.  Set on baking sheet and let toast in oven for about 3-5 minutes, until crispy.

Meanwhile, mix squash with shallots and blue cheese in a large bowl.

Assemble the crostini:  Spoon the butternut squash mixture onto each toasted baguette slice.  Drizzle with balsamic reduction and serve warm or at room temperature.

Note: I added a tiny amount of minced parsley to add some green on top of the crostini for visual purposes, but basil would probably work well too if you like!

January 29, 2013

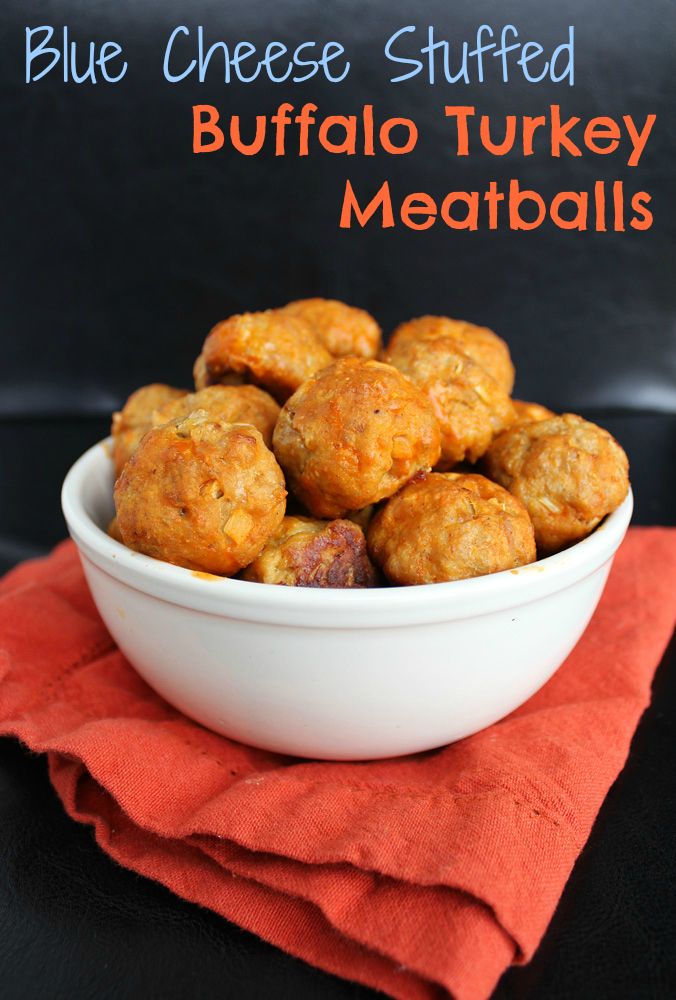
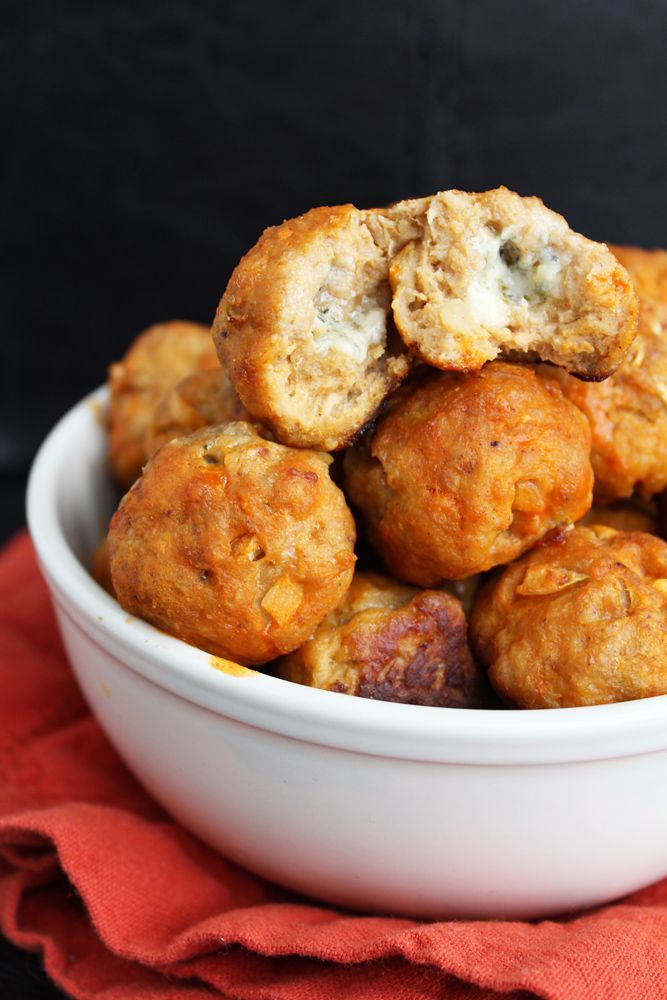
Blue Cheese Stuffed Buffalo Turkey Meatballs

Blue Cheese Stuffed Buffalo Turkey Meatballs

I know I just posted a buffalo sauce recipe, so I apologize to any buffalo-haters out there - I know it’s not for everyone, but the boyfriend and I are huge buffalo sauce fans and these meatballs would go so well with the Super Bowl so I had to share them this week!  I actually made these for us to enjoy during the playoff games two weekends ago, so I can vouch that they go very well with football!

When I first thought of making buffalo-flavoured meatballs, I also came up with what I thought was a brilliant idea of stuffing blue cheese in the middle of them.  Again, I know blue cheese isn’t for everyone, but if you’re a fan of buffalo there’s a good chance you like the buffalo-blue cheese combination (and if you don’t think you do, you should give it a try!)  Of course, as soon as I started Googling I found that many other people had already had this brilliant idea long before me, but at least it confirmed that it would work!  I based my recipe on a combination of other similar ones, but used turkey instead of chicken because I just like it better, and left out the diced celery that a lot of recipes called for because I don’t like having crunchy bits in my meatballs.  Instead I added garlic, onion, and a dash of worcestershire sauce for extra flavour, and with the addition of buffalo sauce and blue cheese, these tasted (and smelled!) amazing!

Blue Cheese Stuffed Buffalo Turkey Meatballs

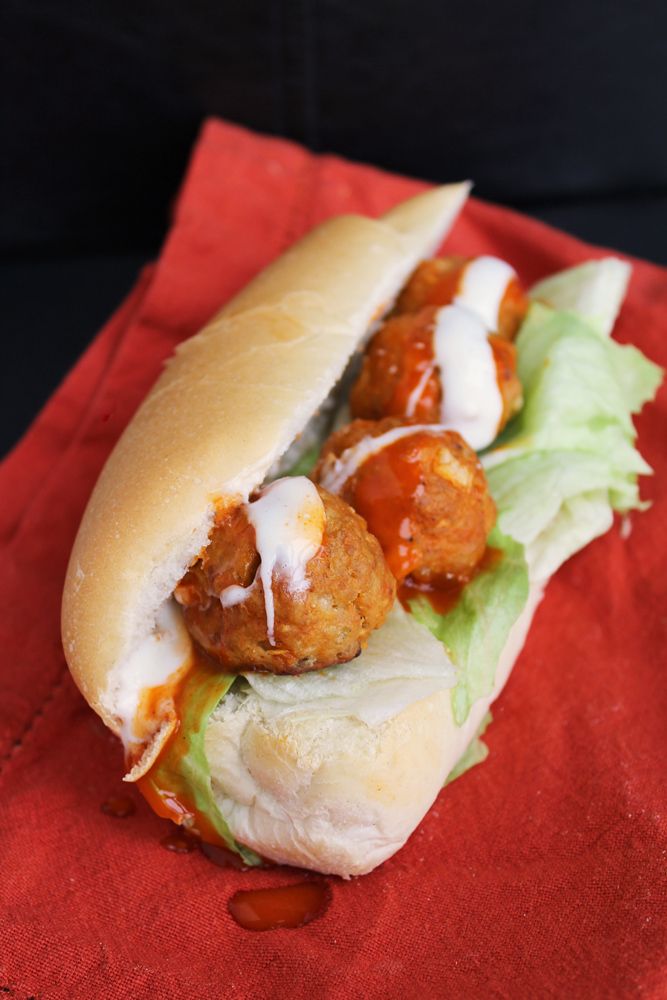
A lot of buffalo meatball recipes also call for coating them in a mixture of melted butter and hot sauce afterwards, but since we weren’t planning on eating these on their own, I thought I’d save a few calories by just drizzling them with a little buffalo sauce after baking instead.  They were still delicious on their own, but even better as meatball subs!  Add a little light ranch dressing and some crumbled blue cheese (which I completely forgot in the picture below), and you have a Super Bowl worthy sandwich - or turn them into sliders for a lighter snack!

If you’re starting to look for Super Bowl recipes and either want more buffalo ideas or want nothing to do with buffalo sauce, I’ve been collecting lots of both types of recipes on my Pinterest board!

Blue Cheese Stuffed Buffalo Turkey Meatball Sub

Blue Cheese-Stuffed Buffalo Turkey Meatballs

Adapted from Baked by Rachel

Makes about 30 meatballs

Ingredients:

1 lb lean ground turkey
3/4 cup breadcrumbs
1/4 teaspoon salt
1/4 teaspoon ground pepper
2 garlic cloves, minced
1/4 cup onion, minced (about half a yellow onion)
1 large egg, lightly beaten
1 teaspoon worcestershire sauce
1/4 cup buffalo sauce + more for drizzling
~1/3 cup crumbled blue cheese

Directions:

Preheat oven to 400°F.

Combine all ingredients for meatballs in a large bowl – turkey, breadcrumbs, salt, pepper, garlic, onion, egg, worcestershire, and 1/4 cup buffalo sauce.  Use your (clean) hands to mix everything together until well combined.

Form mixture into meatballs approximately 1 to 1.5” in size.  For each meatball, you’ll roughly form a ball, then place a few crumbles of blue cheese in the center, then push the cheese to the center so it’s covered by meat on all sides, and shape into a round ball, as shown in the pictures below.

 stuffing blue cheese in meatballs

Transfer all formed meatballs to a parchment-lined baking sheet and bake in preheated oven for 25-30 minutes, until cooked through.  Transfer meatballs to a bowl and drizzle with extra buffalo sauce to taste, tossing to lightly coat. 

Serve warm as is, as sliders, or on a sub.  For our subs, we added lettuce, more buffalo sauce, light ranch dressing, and blue cheese crumbles.

Ingredient Index

Related Posts Plugin for WordPress, Blogger...