Showing posts with label cheese - feta. Show all posts

April 02, 2015

Roasted Carrot Crostini with Dill Pesto & Feta

Roasted Carrot Crostini with Lemon Dill Pesto and Feta - an appetizer with bright Spring flavors that's perfect for Easter or anytime!

I'm happy I decided to try to start posting recipes again just in time for Easter.  I love all food-related holidays but Easter is especially nice because after the heavier meals at Thanksgiving and Christmas, we now get to celebrate bright and fresh flavours that go along with the start of springtime.

Roasted Carrot Crostini with Lemon Dill Pesto and Feta - an appetizer with bright Spring flavors that's perfect for Easter or anytime!

Whenever I try to think of Easter recipes my mind always goes straight to carrots.  As part of our Easter dinner last year, my sister made roasted carrots and radishes with a lemon dill pesto (inspired by With Food + Love) and the flavours worked really well together.  So I decided to turn that concept into an appetizer, with the addition of feta because feta makes everything better!

Roasted Carrot Crostini with Lemon Dill Pesto and Feta - an appetizer with bright Spring flavors that's perfect for Easter or anytime!

This dish looks a little fancy but is really easy to prepare. I just chopped and roasted some carrots in the oven, then whipped together a lemony dill pesto in the food processor.  I toasted some whole wheat baguette slices, spread some of the pesto on top, then topped them with the carrots and feta. I loved how the bright flavours of the pesto balanced out the earthy carrots and salty feta.

I'm in charge of apps for our family's Easter dinner this year so I think I'll be making these again!  I hope you all enjoy the long weekend and have a happy Easter if you're celebrating it!

Roasted Carrot Crostini with Lemon Dill Pesto and Feta - an appetizer with bright Spring flavors that's perfect for Easter or anytime!

Roasted Carrot Crostini with Lemon Dill Pesto & Feta

Serves 10-15

Ingredients:

For the carrots:
1-1/2 lbs carrots, peeled and chopped into small, about ¼-½” pieces
1-2 teaspoons olive oil
Salt and pepper

For the lemon dill pesto:
1-1/2 cups packed fresh dill
1/2 cup packed fresh parsley leaves
2 cloves garlic, minced
1/4 cup chopped walnuts
2 tablespoons fresh lemon juice
2 tablespoons extra virgin olive oil
1/4 teaspoon each salt and pepper

Other:
1/4 to 1/3 cup crumbled feta
1 large baguette, sliced diagonally into thin slices (I used a whole wheat ciabatta loaf)

Directions:

Preheat oven to 400°F. Toss carrots with olive oil, season with salt and pepper, and spread on a foil-lined baking sheet.  Roast in preheated oven for about 30 minutes, tossing halfway through.

Meanwhile, prepare dill pesto.  Place all ingredients (dill, parsley, garlic, walnuts, lemon juice, oil, salt, and pepper) in the bowl of a food processor (I used the smaller bowl) and process until the pesto is as smooth as you can get it.  Taste and adjust any seasoning or amounts to your liking if necessary.

When carrots are done, leave oven on, and spray baguette slices with cooking spray.  Set on baking sheet and let toast in oven for about 3-5 minutes, until toasted.

Prepare crostini by spreading pesto on baguette slices, top with crumbled feta and roasted carrots, and garnish with chopped parsley if desired.  Serve while carrots are still warm.

June 03, 2014

Gluten-Free Moroccan Macaroni Bowl (+ a giveaway!)

Gluten-Free Moroccon Macaroni Bowl with Roasted Cauliflower & Chickpeas

I don't follow a gluten-free diet or think of gluten as an evil thing to avoid, but I know there are a lot of people out there who have to avoid it for health reasons, and for their sake I'm happy that there now seem to be so many gluten-free alternatives out there.  People should not have to go without food like pasta!

Catelli pasta is one of my favourite brands here in Canada because they offer so many alternatives to regular white pasta.  I love their line with vegetables in the pasta, but I usually buy the whole grain pasta.  Last year they launched a line of gluten-free pasta including penne, fusilli, and spaghetti, and recently they added macaroni to the line-up and asked if I wanted to give it a try. 

Turns out it tastes just like regular pasta, even though it's made from white and brown rice, corn, and quinoa.  I still prefer using whole grain pasta whenever I can, but it's nice to know there's a tasty alternative out there for those with gluten sensitivities or intolerance, or for me to use in dishes where whole wheat doesn't really work as well, like in this pasta bowl.

Gluten-Free Moroccon Macaroni Bowl with Roasted Cauliflower & Chickpeas

Catelli has lots of awesome pasta recipes on their site, and I decided to go with a Moroccan version to test out this pasta, and I'm so glad I did!  Everything about this pasta is so different from your typical tomato sauce pasta, and even though it looks like there are a lot of strange ingredients in this, they all work together so well!

Instead of a sauce, this pasta is tossed with a light dressing full of fresh lemon flavour and lots of spices.  You also use some of this dressing to roast some cauliflower and chickpeas, giving them awesome flavour and texture.  I never roast chickpeas for pasta, usually tossing them in raw, but now I always want to eat them this way - I love that they get a little crispy!  Also mixed in there are some green olives, sliced dried apricot, feta cheese, and mint leaves.  I know it sounds a little weird, but trust me that it all the ingredients are balanced and together make an amazing flavour, so don't leave anything out!  I couldn't stop eating this right after I made it and already look forward to making it again.

Gluten-Free Moroccon Macaroni Bowl with Roasted Cauliflower & Chickpeas

If you want to try out this gluten-free pasta yourself, you can get a coupon for $1.00 off here.  And if you're lucky (and live in Canada), you have a chance to win a whole year's supply of Catelli's gluten-free macaroni!

To enter to win this awesome prize (with a retail value of approximately $180), please follow the instructions in the Rafflecopter widget below - there are three ways to enter: leaving a comment on this blog, following me on Facebook, or on Twitter - pick one or all three for more entries!

Catelli Gluten Free Macaroni

Please be sure to enter with a valid e-mail address or Facebook account so I can contact you if you're randomly selected as the winner.  The contest will close at midnight EST on Sunday, June 8th, 2014.  Please note that as this is a Canadian product, this contest is open to Canadians only (sorry, American friends!)

a Rafflecopter giveaway

And don't forget to check out the recipe below!

Disclosure: This is not a sponsored post.  I received one box of pasta to make this recipe but was not compensated in any other way for my time, ingredients, or thoughts, which are all my own :) I just thought this was a great giveaway opportunity for my readers!

Gluten-Free Moroccon Macaroni Bowl with Roasted Cauliflower & Chickpeas

Gluten-Free Moroccan Macaroni Bowl with Roasted Cauliflower & Chickpeas

Slightly adapted from Catelli Pasta

Makes 4-6 servings

Ingredients:

1 (540mL) can of no-salt added chickpeas, drained and rinsed
4 cups cauliflower florets (about 1 small head or 3/4 of a larger head)
1/3 cup fresh lemon juice
1/4 cup olive oil
2 tablespoons honey
1 tablespoon minced or grated fresh ginger
2 cloves garlic, minced
1 tablespoon ground cumin
1 teaspoon cinnamon
1/2 teaspoon each salt and pepper
1 box (340g) Catelli® Gluten Free Macaroni
3/4 cup slivered dried apricots
1/3 cup sliced green olives
1 cup crumbled feta
3/4 cup loosely packed chopped fresh mint leaves

Directions:

Preheat oven to 400°F and line a large baking sheet (I used two) with parchment paper or foil.  Add cauliflower and chickpeas to a large bowl.  Whisk lemon juice, oil, honey, ginger, garlic, cumin, cinnamon, salt, and pepper in a small bowl until combined.  Drizzle 3 tablespoons of the dressing over the cauliflower and chickpeas and toss to combine.  Spread cauliflower and chickpeas onto prepared baking sheets in an even layer.  Roast in preheated oven for 30 minutes or until browned, tossing halfway through.

Meanwhile, cook pasta according to package directions.  Reserve 1/2 cup of the cooking water before draining.  Toss cooked pasta with roasted cauliflower and chickpeas, apricots, olives, feta, mint, reserved pasta water, and reserved lemon dressing.  Stir until combined and serve warm.

August 29, 2013

Golden Summer Squash & Corn Soup

Golden Summer Squash and Corn Soup, topped with Feta & Chives

I apologize that I haven't been able to share a recipe post in a couple of weeks now!  I thought I would have plenty of downtime in Japan for blogging, but it turned out I barely even had time to email my family at night - not that I'm complaining, because it meant I was keeping busy there and seeing lots of sights!  Now that I'm home though, I'm so excited to be able to get back into a routine, including blogging and cooking for myself again!

I had a lot of great food in Japan, but considering I didn't know all the ingredients that went into my meals (or sometimes what my meal even was), it's nice to be able to make my own meals now where I can control exactly what goes into them.  And with summer flying by, all I've been wanting to throw into my meals lately is tons of summer veggies!  I also caught a pretty bad cold in Japan that I've been suffering through all week, so I knew as soon as I got back that I wanted to make a summer soup.

Golden Summer Squash and Corn Soup, topped with Feta & Chives

I'd bookmarked this golden summer squash and corn soup from Eating Well (one of my favourite recipe sources) a while ago, so I knew this was the perfect opportunity to finally make it.  The soup is pretty simple - basically you sauté some onions and summer squash, puree them with vegetable broth, add some fresh corn, and top with feta and chives.  I made a few changes to the original recipe, like using veggie broth instead of chicken, onion plus garlic instead of shallots (mostly because I didn't have any), adding some jalapeno for spice and an extra cob of corn to be pureed with the squash, and using dried basil and fresh chives as the herbs (but you can use whatever you like). 

This soup was bright and summery but warm and comforting at the same time.  I especially loved the chunks of feta, which sounded like a strange addition at first, but surprisingly worked pretty well.  While this hasn't exactly helped my cold this week, it definitely satisfied my craving for a fresh homemade summer meal!

Golden Summer Squash and Corn Soup, topped with Feta & Chives

Summer Squash and Corn Soup with Feta & Chives

Adapted from Eating Well

Makes 4-6 servings

Ingredients:

1 teaspoon olive oil
1 medium yellow onion, peeled and chopped
1-1/2 pounds yellow summer squash (the ones that look like zucchini) (about 3 medium squash), chopped
1 clove garlic, minced
2 ears of fresh corn, kernels removed (divided)
3 cups vegetable broth
1/2 teaspoon dried basil
1/2 teaspoon salt (or more, to taste)
1/4 teaspoon pepper
1/2 a jalapeno, minced (or a whole pepper for more spice)
2 teaspoons lemon juice
~1/4 cup chopped chives
~1/4 cup crumbled feta cheese

Directions:

Heat oil in a large saucepan over medium heat.  Add onion and cook until softened, 3-5 minutes, stirring often.  Add squash and cook until it starts to soften, about 5 minutes, stirring occasionally.  Add kernels from one ear of corn along with the garlic, stir, and cook another 3-5 minutes, stirring occasionally.  Add vegetable broth, basil, salt, and pepper, bring to a boil, reduce heat to a simmer and let simmer about 5 minutes. 

Transfer mixture to a blender in 3 batches, being careful not to fill the blender too high as the mixture will be hot.  Puree each batch until smooth, transferring the pureed portions to a separate large measuring cup or bowl as you go.  Once everything has been pureed, return it all to the saucepan over medium heat.  Add the remaining corn along with the jalapeno, and let simmer gently for another 5 minutes.

Remove from heat and stir in the lemon juice.  Add additional seasoning to taste at this point.  Serve warm and top each portion with about 1 tablespoon each of feta and chives (or more, if desired).

August 09, 2013

Summer Salad with Chicken, Corn, Tomato, Avocado, & Feta

Summer Salad with Chicken, Corn, Tomato, Avocado, Cucumber, & Feta

It's been another stressful week with my schoolwork not going at all how I want it to, and with the summer rapidly flying by, my boyfriend and I decided we needed to take a little road trip this week to get away and clear our minds (and enjoy the summer!).  So we took a short overnight trip across the border to Michigan, where we did some shopping and exploring and later went out for dinner and a few drinks.  We both love Michigan craft beer so it was nice to be able to enjoy some of it on tap for a change!

Summer Salad with Chicken, Corn, Tomato, Avocado, Cucumber, & Feta

Of course, after overindulging in beer and some not-so-healthy food, we both wanted something light and nutritious for dinner the day we returned.  And because all I could think about was stuffing my face with a bowl full of vegetables, it didn't take long for me to run over to the market and grab everything I needed for a big fresh summer salad.  It hit the spot perfectly!

Summer Salad with Chicken, Corn, Tomato, Avocado, Cucumber, & Feta

This salad celebrates fresh summer produce and includes pretty much all of my favourite things to eat.  I started with a bed of romaine and spinach as the base, which I topped with sliced chicken breast, a mix of local cherry and grape tomatoes, fresh corn, crisp cucumber, creamy cubes of ripe avocado, and a bunch of crumbled feta.  And because I wanted to keep things as simple as possible, I tossed it all in a storebought light balsamic vinaigrette.

Summer Salad with Chicken, Corn, Tomato, Avocado, Cucumber, & Feta

I feel a little silly posting this salad because it really doesn't require a recipe - I didn't measure any of the ingredients and just threw everything in the bowl in what looked like good proportions to me.  But we both loved the combination of ingredients in this salad so much that I had to share it with you guys!

I wrote out a rough guide to what I did anyway, but really you can just use any amounts you like - and the more the better!

Summer Salad with Chicken, Corn, Tomato, Avocado, Cucumber, & Feta

I also feel a little silly because last summer I shared this summertime chickpea chopped salad (which I also loved) and it's super similar to this one, but I can't help it, I love summer salads!  And fresh veggies like tomatoes and corn won't taste this good for much longer, so it's best to eat as much of them as you can while they're around - enjoy!

Summer Salad with Chicken, Corn, Tomato, Avocado, Cucumber, & Feta

Summer Salad with Chicken, Corn, Feta, Tomato, Cucumber & Avocado

Serves 2-3 as a main course

Ingredients:

2 boneless, skinless chicken breasts, cooked and sliced or shredded
2 ears of fresh corn
Desired amount of greens – I used about 6 large romaine leaves plus 4 big handfuls of baby spinach
1 ripe avocado, peeled and diced
Half to one English cucumber, peeled if desired, and chopped
Desired amount of cherry or grape tomatoes, halved – I used about half a pint
Crumbled feta cheese – adjust amount to your own liking – I like lots!
Salad dressing – I used a storebought light balsamic vinaigrette, but any vinaigrette or light Italian, ranch, or yogurt dressing would work

Directions:

Cook corn however you like to eat it – i.e. roasted, grilled, or boiled.  I cooked mine in a large pot of boiling water for 6 minutes.  Once cooled slightly, use a large knife to slice off the corn kernels (a bundt pan works well for this).  I cooked my chicken breasts on the stovetop at the same time as the corn.  Meanwhile, prepare all other salad ingredients.  Toss everything together in a large bowl to combine and adjust any ingredient amounts according to your own liking.  Toss with just enough dressing to coat (I added my dressing to individual servings).  Enjoy!

August 06, 2013

Lemony Lentil Salad with Dill & Feta

Lemony Lentil Salad with Dill & Feta

As I mentioned in my recap of things I made and did in July, I was recently reminded of how much I love lentil salads when I tried a recipe from My New Roots.  Not only are they easy to make and highly adaptable to different flavours and ingredients, but they usually make a lot of leftovers that are great for packing filling lunches, plus they’re super healthy – lentils are low in fat and really high in protein and fiber.

So as soon as I finished all the leftovers from the last lentil salad I tried (and there were a lot of leftovers!) I immediately made a new one, and I’m going to try to keep this up as much as possible, considering I now have three giant bags of lentils in my cupboard to use up!  

Lemony Lentil Salad with Dill & Feta

While the last lentil salad I tried was heavily spiced, this time I wanted something more bright and summery.  I knew I wanted to use lemon and dill, so when I came across a recipe for a lemony lentil salad with dill and feta from Eating Well I knew I was on the right track.  Of course, I can never seem to leave a recipe alone, so I made a few changes, starting with using dry lentils instead of canned lentils (canned are still fine, but if you’re concerned about sodium then it’s best to use dry - I use them because they're cheaper and easy to cook).  I also used shallot instead of red onion, added a clove of garlic, used more cucumber and replaced the red pepper with cherry tomatoes, and for the dressing I added a bit of honey for sweetness, reduced the lemon juice (it’s still very lemony!) and reduced the olive oil from 1/3 cup down to 2 tablespoons, which was plenty of oil for me.

I loved the balance of the lemony dressing with the salty feta, along with the bright flavour of dill and the crunch of summer veggies.  I threw a handful of fresh arugula into each serving to make it more salad-like and also cut the strong lemon flavour down to just the right amount (so I recommend this step!)

I hope you guys love lentils as much as I do, and if you think you don’t, perhaps it’s time to give them another try!

Lemony Lentil Salad with Dill & Feta

Lemony Lentil Salad with Dill & Feta

Adapted from Eating Well

Makes 4-6 servings

Ingredients:

1-1/4 cups dry brown or green lentils
1/4 cup fresh lemon juice (from about 1 lemon)
1/3 cup chopped fresh dill
2 tablespoons minced shallot
1 clove garlic, minced
2 teaspoons Dijon mustard
1/2 teaspoon honey or agave
1/4 teaspoon each salt and pepper
2 tablespoons extra virgin olive oil
1-1/2 cups chopped cucumber
1 cup chopped grape or cherry tomatoes
3/4 to 1 cup crumbled feta cheese
Arugula for serving

Directions:

Combine lentils with about 3.5 cups of water (enough to cover them by a couple of inches) in a medium or large saucepan.  Bring to a boil, cover, reduce heat to a simmer, and let simmer for 15-20 minutes until tender (but not mushy!).  Remove from heat, drain, and rinse with cold water to cool.

While lentils are cooking, prepare dressing by whisking together the lemon juice, dill, shallot, garlic, mustard, honey, salt, and pepper in a small bowl.  Slowly add the olive oil until combined. 

Toss cooled lentils with the dressing.  Mix in the cucumber, tomatoes, and desired amount of feta and toss to combine.  Season with additional salt and pepper, if desired.  Serve in bowls with a big handful of arugula added to each, if desired.

July 04, 2013

Strawberry, Avocado, & Feta Salsa

Strawberry, Avocado, & Feta Salsa

Sorry for the lack of activity around here lately, but I just returned from a wonderful week-long trip to visit family up in Northern Ontario.  I had fully intended to continue posting while I was away, but time went by way too quickly and to be honest, it felt pretty nice to keep my laptop closed for most of the week and spend my time visiting and just relaxing instead.  We also had beautiful weather so I spent a lot of time outside, with plenty of beach time, a few moments of attempting to brave the freezing cold lake water, going for walks, watching some great Canada Day fireworks, and getting eaten alive by bugs!

It was a great week, but now I'm busy trying to catch up on work and everything else I've missed, so today's post will be rather short!  And since the majority of my readers are American and hopefully spending some time outside or visiting with family themselves for July 4th, I'm assuming you won't want to read a long post today either!

Strawberry, Avocado, & Feta Salsa

This is a simple salsa to throw together that celebrates strawberry season by pairing fresh strawberries with diced avocado, feta cheese, basil, lime juice, and a bit of jalapeno for spice.  It might sound a little weird, but everything works together in a wonderful way!

Strawberry, Avocado, & Feta Salsa

This is fantastic eaten as a dip for tortilla chips but works equally well as a fresh summer crostini.  I have a feeling it would also pair well with chicken for a main course, and since I'll likely be making this plenty more this summer, I'll be sure to test it out!

I hope my Canadian friends had a great long weekend this past weekend and that my American friends enjoy their celebrations today!

Strawberry, Avocado, & Feta Salsa

Strawberry, Avocado, & Feta Salsa

Serves a small group as an appetizer; if you’re serving a larger group, double the ingredients

Ingredients:

1 cup diced strawberries
1/2 cup diced ripe avocado
1-1/2 tablespoons minced shallot
1/2 a jalapeno, minced (seeds removed for less spice)
1/3 cup crumbled feta cheese
1/2 teaspoon lime zest
1 tablespoon + 1 teaspoon fresh lime juice
1/4 cup chopped basil leaves
1 teaspoon sugar
Freshly ground pepper

Directions:

Add all ingredients to a bowl and mix to combine.  Taste and adjust any amounts to your liking if necessary.  Serve in a bowl as a dip for tortilla or pita chips, or spread on toasted baguette slices to serve as crostini.

June 11, 2013

Lemon Chickpea Quinoa Burgers

Lemon Chickpea Quinoa Burgers

I love those free little newspaper/magazines that grocery stores put out to advertise their new products every season, mostly because I love anything that’s free, but also because I’m always looking for new sources of inspiration for ingredients and recipes.  It’s not often that I find a recipe I actually like in there, but when I saw these lemon chickpea quinoa burgers in the latest issue of Inspired (by Sobeys), I was intrigued because I’ve never seen anything quite like it.

So, I got right to work making my own version, with shallots instead of red onion, basil instead of parsley, more oats to firm the mixture up a bit, and a lemon yogurt sauce to serve with them.  I also refrained from processing the whole mixture to keep some texture in them, and I pan-fried my burgers instead of barbequing them (because I don’t have a bbq), but I think they’d be firm enough to bbq if you want to give it a try!

Lemon Chickpea Quinoa Burgers

I loved the texture of the burgers, which held their shape and had a bit of crunch from the quinoa, and I loved the bright lemon flavour that really shone through in both the burgers and yogurt sauce.  I also think they would work really well as cute little vegetarian sliders at a bbq!

And as far as burgers go, these are pretty darn healthy!  They’re full of protein from the addition of chickpeas, quinoa, and Greek yogurt, as well as fiber from the oats and whole grain buns, and vitamins from the veggies and lemon.  

Lemon Chickpea Quinoa Burgers

After tasting them, I did think they needed a little something extra to balance out all the lemony-ness, so the next night I added feta cheese on top of the burger, and the saltiness of the feta was the perfect thing to balance out the sour lemon.  So don’t leave out the feta!

(I had to take a quick shot the next night to document the feta since it wasn’t in any of the other pictures.  I went a little heavy with the feta, but a lot of it falls out anyway!  The sauce is still there, on top of the lettuce):

Lemon Chickpea Quinoa Burgers

Of course, the boyfriend said that these were good, but that next time I should maybe make them with buffalo or chipotle sauce instead of lemon (he’s not much of a lemon person, except for lemon poppy seed bread). 

But while these may not be much of a manly burger, I think the fact that he was willing to eat them for dinner three nights in a row shows that they’re still pretty tasty!

Lemon Chickpea Quinoa Burgers

Lemon Chickpea Quinoa Burgers

Adapted from Inspired

Makes 5 burgers

Ingredients:

For the Burgers:
1/4 cup uncooked quinoa
1 (540mL) can of chickpeas, drained and rinsed
1/2 cup rolled oats
1/4 cup minced shallot
2 garlic cloves, minced
1 tablespoon lemon zest
2 tablespoons fresh lemon juice
1 large egg, lightly beaten
1 teaspoon cumin
1/2 teaspoon salt
1/2 teaspoon pepper
2-3 tablespoons packed minced basil (or parsley if you like)

For the Sauce:
1/2 cup plain Greek yogurt
1 tablespoon fresh lemon juice
1 tablespoon minced basil
Salt and pepper

For Assembly:
5 whole grain hamburger buns
Lettuce
Feta cheese (low-fat, if desired)

Directions:

Bring 1/2 cup water to a boil.  Add quinoa, cover, reduce heat and let simmer 15 minutes.  Remove from heat and keep covered for 5 minutes.  Fluff with a fork and let cool slightly.

Meanwhile, add chickpeas to the bowl of a food processor or mini chopper and pulse until they are finely ground.  Transfer to a large bowl.  Add oats to same food processor and pulse a few times to break them down into fine crumbs (but not a powder).  Add to chickpeas in large bowl.  Add to the bowl the shallots, garlic, lemon zest, lemon juice, egg, cumin, salt, pepper, and basil.  Add quinoa.  Mix everything together with a large fork until well combined.  (note: leave the egg to mix in last if you want to be able to taste the mixture first and adjust seasonings or lemon juice to your liking). Divide and shape into 5 patties.

Heat a non-stick skillet over medium-high heat and cook patties for about 4-5 minutes per side.

Meanwhile, prepare yogurt sauce by mixing yogurt, lemon juice, and basil, and seasoning with salt and pepper to taste.

Assemble burgers with yogurt sauce, lettuce, and feta on whole grain buns.

September 21, 2012

Greek Quinoa Wraps with Tzatziki

Greek Quinoa Wraps with Tzatziki

A couple of months ago, I made these Southwestern quinoa wraps with chipotle yogurt dressing and absolutely loved them – Even better, Ryan (who is usually skeptical of quinoa) loved them, which made them an even bigger success!   

I knew this was something I’d want to repeat often for a healthy, protein-filled lunch, so I started thinking of other versions that I could make to change things up a little.  Since I loved this Greek quinoa with cucumber, tomatoes, olives, and feta (which I’ve talked about in my summer quinoa recipe roundup), I decided to use it in a wrap combined with an easy tzatziki sauce.

Greek Quinoa

I already knew the quinoa on its own was delicious, but combined with a cool and creamy yogurt sauce, crisp lettuce, and a whole wheat tortilla wrap, it’s even better – plus its more filling this way, making it a great healthy option for lunch or dinner.

Greek Quinoa Wraps with Tzatziki

I don’t recommend making the wraps too far ahead of time because the tzatziki could make the wraps soggy, but I found that making a wrap in the morning and eating it for lunch was still fine – just make sure you lay the lettuce down first before the sauce to protect the tortilla from getting soggy!

Greek Quinoa Wraps with Tzatziki

I hope you all have a great weekend!  I’ll be back on Monday for a great giveaway for my Ontario readers, so be sure to stop back then!  And now that it’s official Fall, I’ll have plenty of fall recipes coming your way soon!

PGreek Quinoa Wraps with Tzatziki

Greek Quinoa Wraps with Tzatziki

Quinoa component adapted from Two Peas & Their Pod

Makes about 6 wraps

Ingredients:

For the tzatziki:
1 medium English cucumber
1-1/2 cups nonfat plain yogurt or plain Greek yogurt
1 teaspoon lemon juice
Salt and pepper

For the Quinoa:
2 cups water
1 cup dry quinoa, rinsed
1 cup chopped peeled cucumber
1 cup halved grape tomatoes
1/4 cup pre-sliced kalamata olives
1/4 cup chopped parsley
1/3 cup crumbled low-fat feta cheese
3 tablespoons olive oil
2 tablespoons red wine vinegar
1/2 teaspoon sea salt
1/4 teaspoon ground pepper
Optional: Add red onions for more crunch (I just don't like red onions), or chickpeas for more bulk

For the Wraps:
6 twelve grain or whole wheat tortillas
Romaine lettuce
Tzatziki (above)
Greek quinoa (above)

Directions:

Prepare the tzatziki:

Peel the cucumber, cut it in half lengthwise, and scoop out the seeds.  Grate the flesh into a strainer, sprinkle with salt, and let sit for 20 minutes.  Use your hands or a paper towel to squeeze out as much liquid as you can from the cucumber.

Add the cucumber to the yogurt.  If you have time, you can strain the yogurt through a cheesecloth for a couple of hours first to drain out some of the water and thicken it, but I don’t bother.  Add lemon juice, mix everything together, and season with salt and pepper to taste.  Keep in refrigerator until ready to use.

Prepare the quinoa:

Bring 2 cups of water to a boil in a medium saucepan.  Add quinoa, cover, and reduce to a simmer for 15 minutes.  Remove from heat and keep covered for 5 minutes.  Remove lid, fluff with a fork, and transfer to a large bowl to let cool.

Meanwhile, mix the cucumber, tomatoes, olives, parsley, and feta together in a medium bowl.  In a separate small bowl, whisk together the olive oil, red wine vinegar, salt and pepper for the dressing.

Add the cucumber mixture to the quinoa and toss together.  Drizzle the dressing overtop, and mix to coat.  Season with additional salt and pepper if desired.

Prepare wraps:

Lay a lettuce leaf in the center of each wrap.  Top with tzatziki sauce and quinoa, wrap, and serve.

September 14, 2012

Eggplant & Zucchini Pasta with Chickpeas and Feta

Eggplant & Zucchini Pasta with Chickpeas, Olives and Feta

Because it's Friday, I'm sure you guys would rather hear me talk about something entertaining rather than making this entire post about pasta, right?  If you answered no, then skip down towards the end where I will tell you all about this lovely pasta dish, but if you answered yes, then you are about to hear about my first adventure in celebrity stalking!

Last Saturday, my sisters and I went to the vegetarian food festival in Toronto (which my sister Genevieve wrote all about on her blog Vanilla & Spice, if you're interested).  The Toronto International Film Festival (TIFF) also happened to be on, which is a pretty big deal and draws lots of celebrities.  Before we left for Toronto in the morning, I quickly researched if any big celebs would be there at the same time as us, and noted the time for a Johnny Depp red carpet!  We ended up heading over there half an hour early, thinking we would have a great spot if he did show up, but little did we know that people show up super early to these things, and it was already packed!  I knew I would never see anything down on the ground, so I found a lovely spot up a bit higher, in the middle of a bush.  Literally, I stood in the middle of a bush, in a pile of mud, with branches in my hair, and a guy blowing cigarette smoke directly in my face from beside me, for half an hour, waiting to catch a glimpse of Johnny Depp.  And guess what?  It paid off!  I got to see him (and Natalie Maines from the Dixie Chicks) from about 15-20 feet away and took lots of pics - it was so exciting being part of a big crazy screaming crowd and being so close to such a big celebrity!

I guess celebrity stalking is addicting, because my sister and I decided to head back to Toronto Monday evening after we heard that Ben Affleck was going to be at a red carpet premiere.  We arranged it so that we would take a Greyhound that would arrive in Toronto at 5:30, we'd walk a block to one premiere where we would arrive in plenty of time to see Bill Murray and Laura Linney before their movie premiering at 6:30, then walk another block to the 7:00 premiere featuring Ben Affleck and Rachel McAdams, then head back home.  It involved a lot of bus riding, but we knew it would be worth it!

Eggplant & Zucchini Pasta with Chickpeas, Olives and Feta

Unfortunately, this plan didn't work out so well.  The bus ended up being an hour late arriving in Toronto.  ONE WHOLE HOUR!!  I was fuming!  So when we finally pulled in at 6:30 (after leaving our home over 3 hours earlier), we sprinted past the first theatre, which already had no one left outside, and continued on to Ben's theatre, praying we didn't miss him.  There was still a humongous crowd, which was a good sign!  As I stood balanced against a filthy pole (which I didn't realize was staining my butt until later), we overheard others in the crowd talking about how they had already seen Bill, Laura, and Rachel, but that Ben still hadn't arrived, so we were counting on him to save our night and make this trip worth it.  We waited .. and waited ... and waited .. until we were pretty much the only ones left waiting and realized that Ben had decided not to show up after all. 

Our friend in Toronto ended up saving our night by taking us out for a delicious feast of all-you-can-eat sushi, but we were still pretty disappointed about Ben.  I'm veeeery tempted to go back tonight to see Matthew McConaughey, who is supposed to be making an appearance, but I'm too worried that things won't work out again (especially trying to get to Toronto with Friday rush hour traffic), so I think I'll play it safe and spend the weekend resting and recovering from this cold!

Eggplant & Zucchini Pasta with Chickpeas, Olives and Feta

My story really didn't have a point except to distract you from your work for a while, and it has nothing to do with this pasta either, so I'm not even going to try to connect the two here!

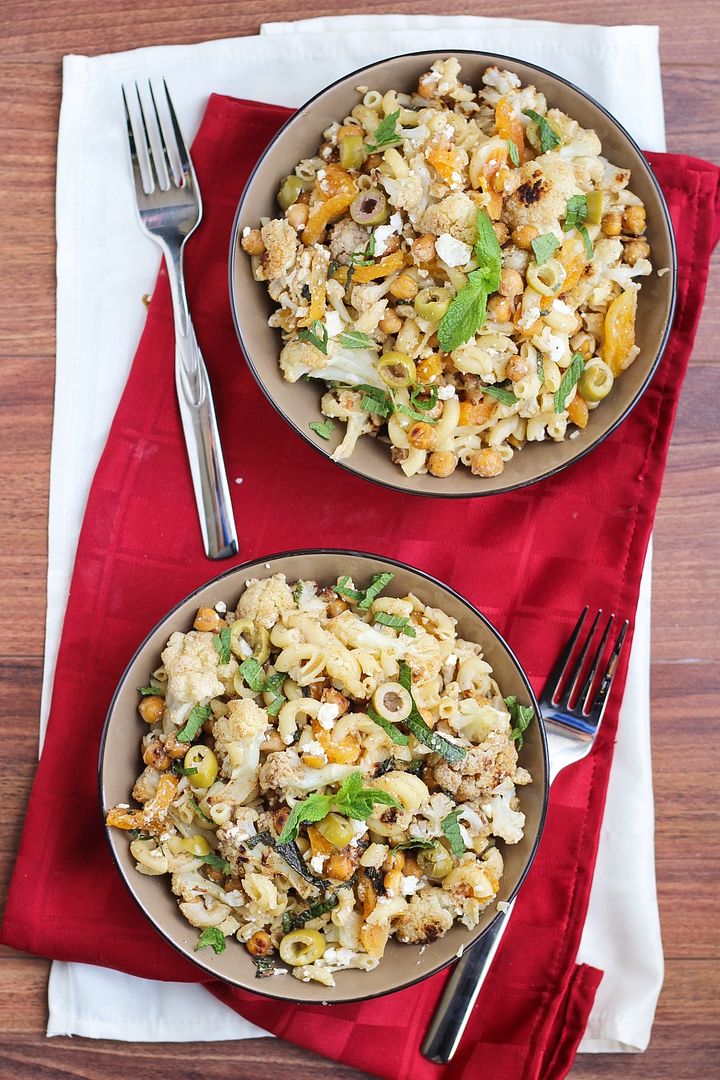
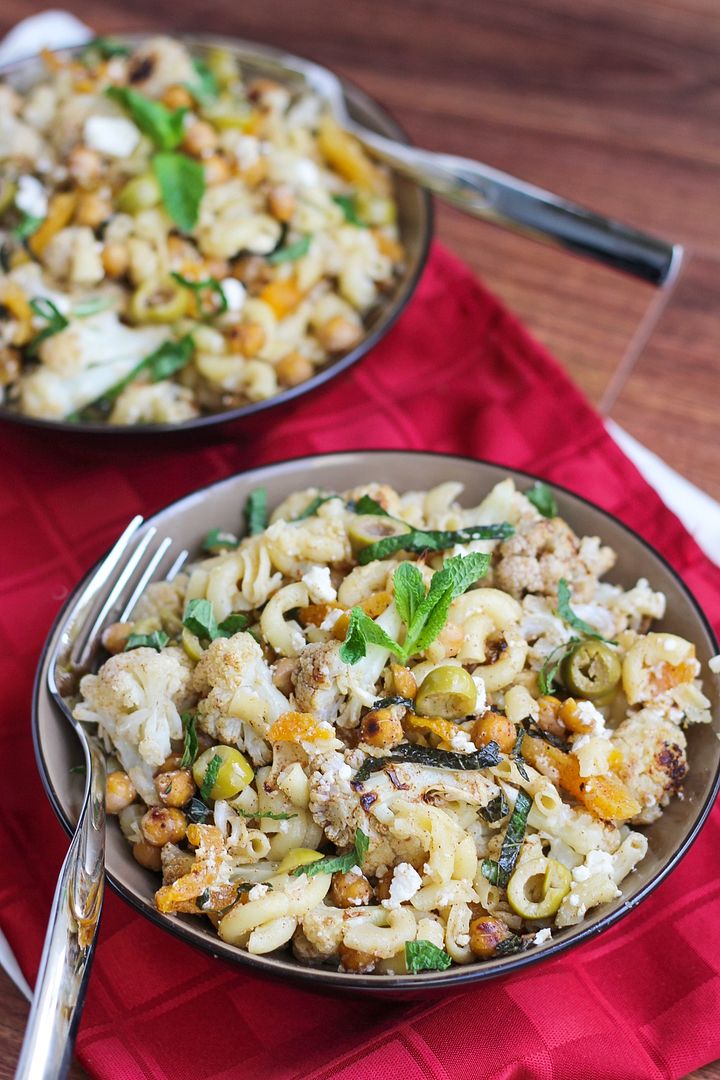
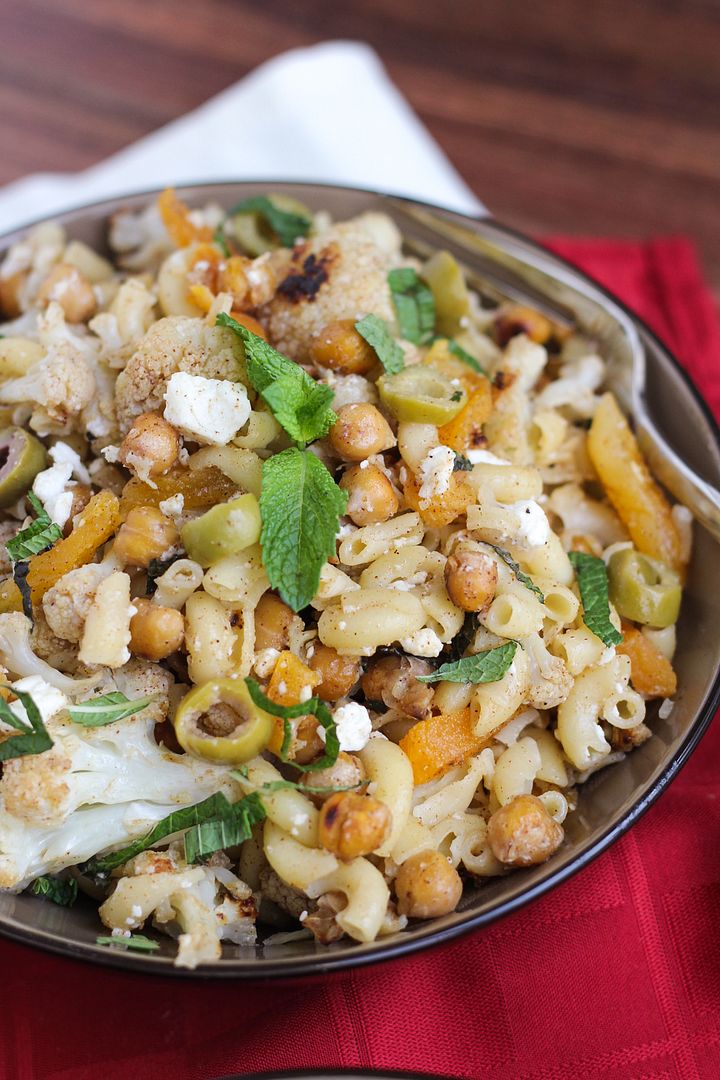
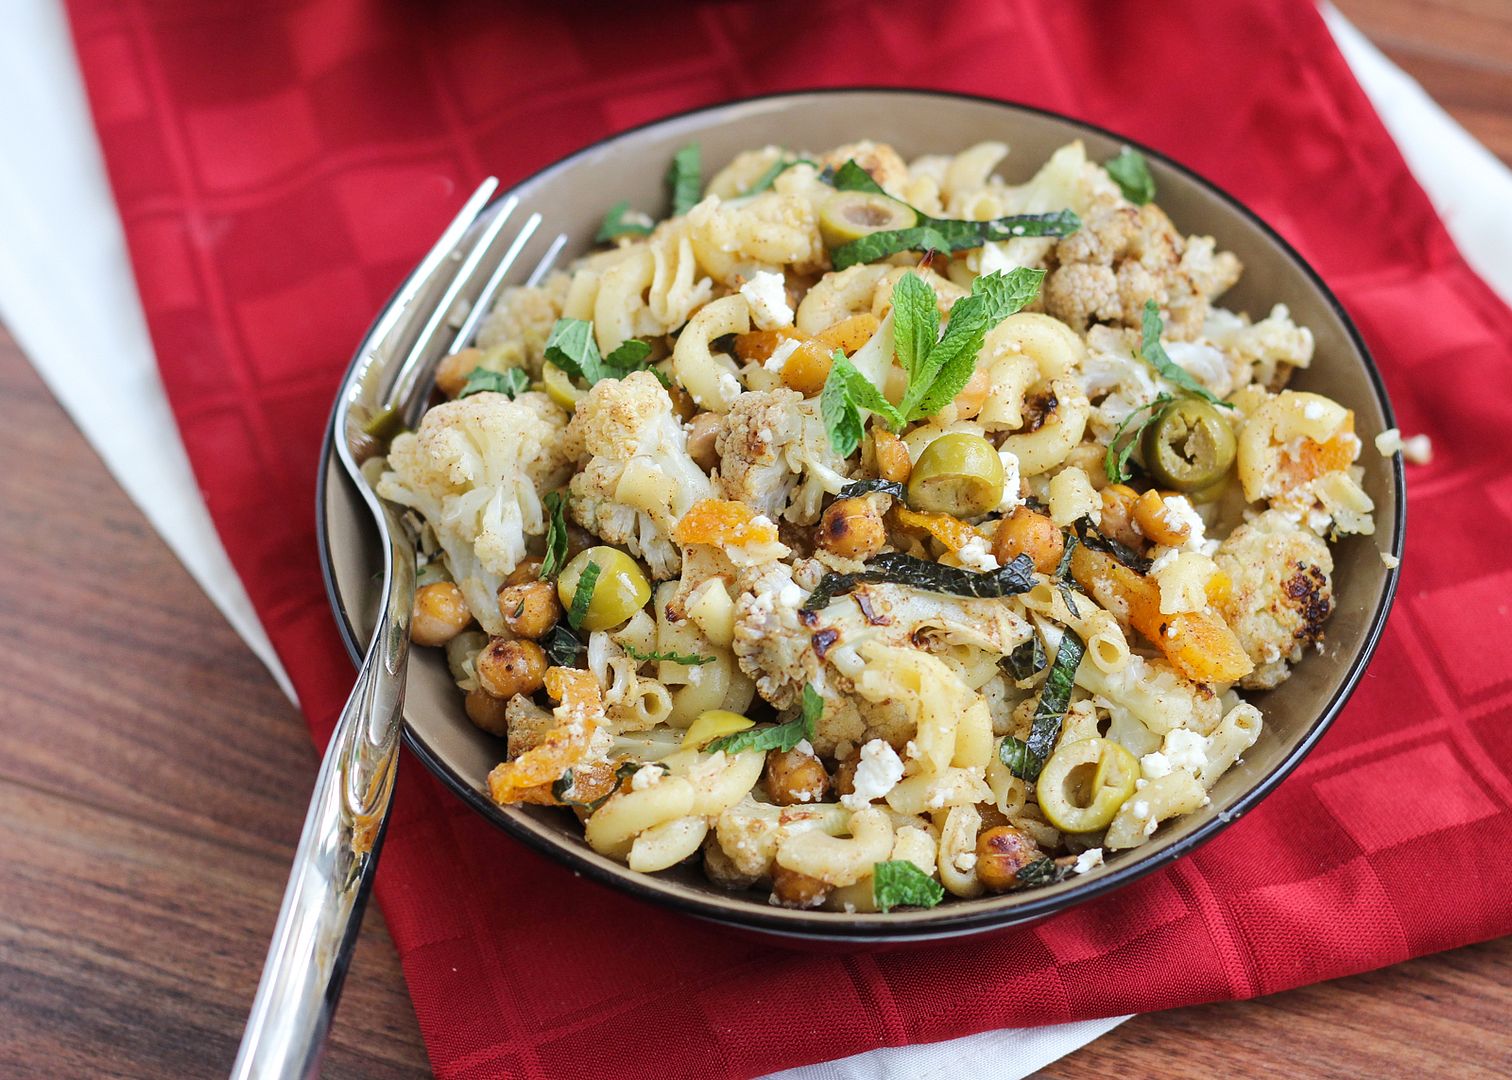
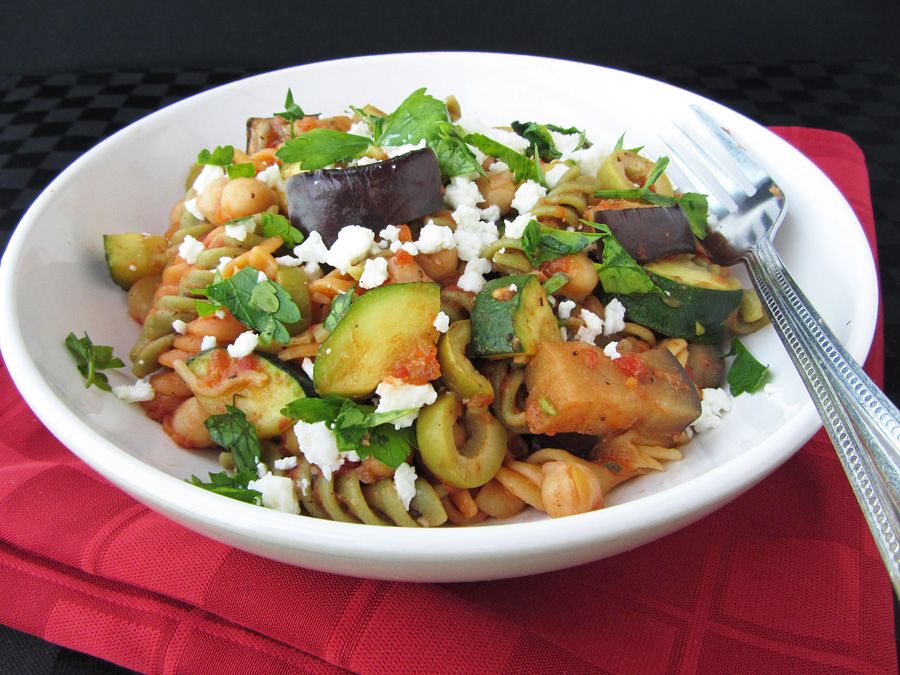
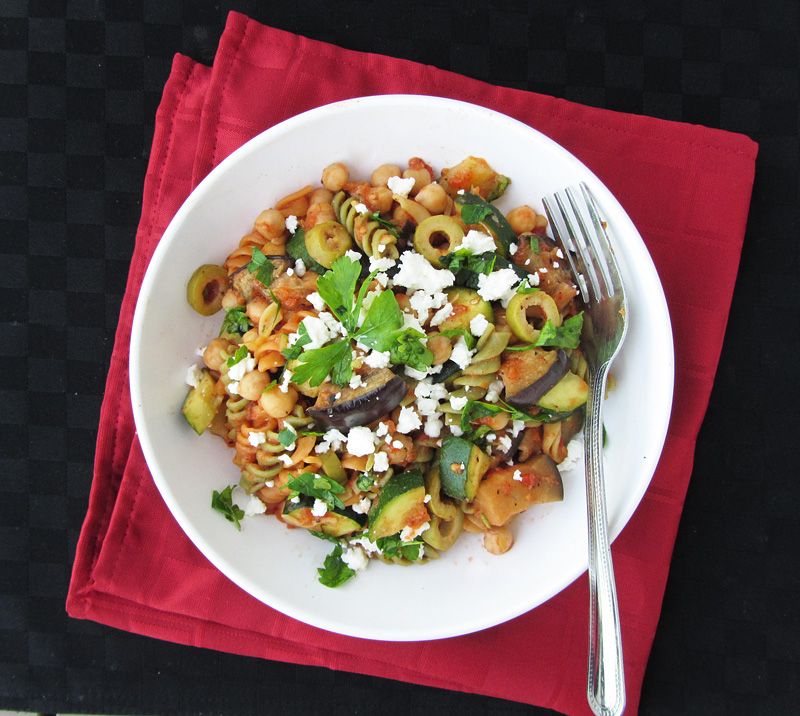
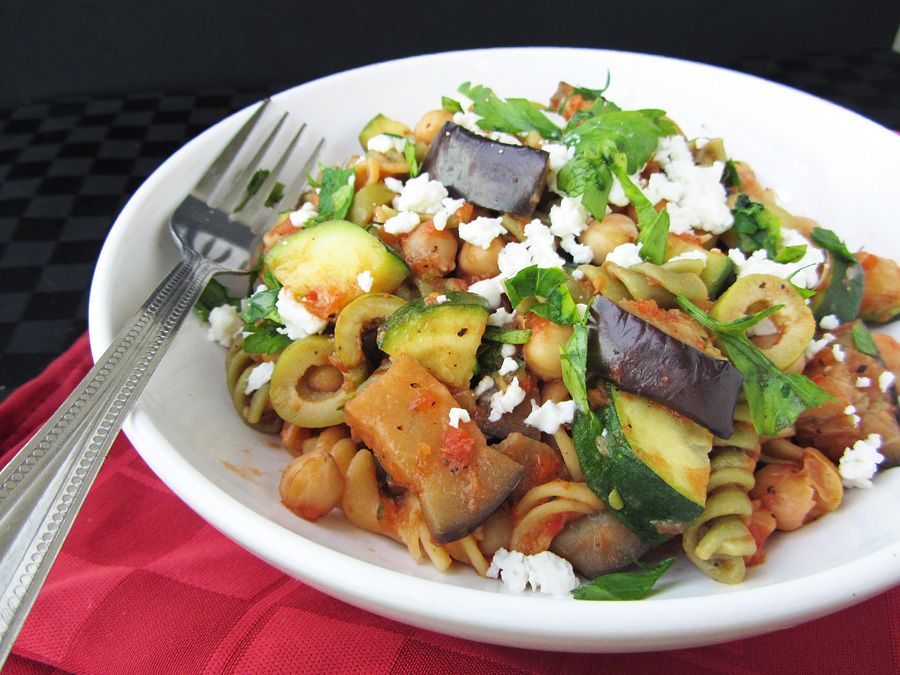
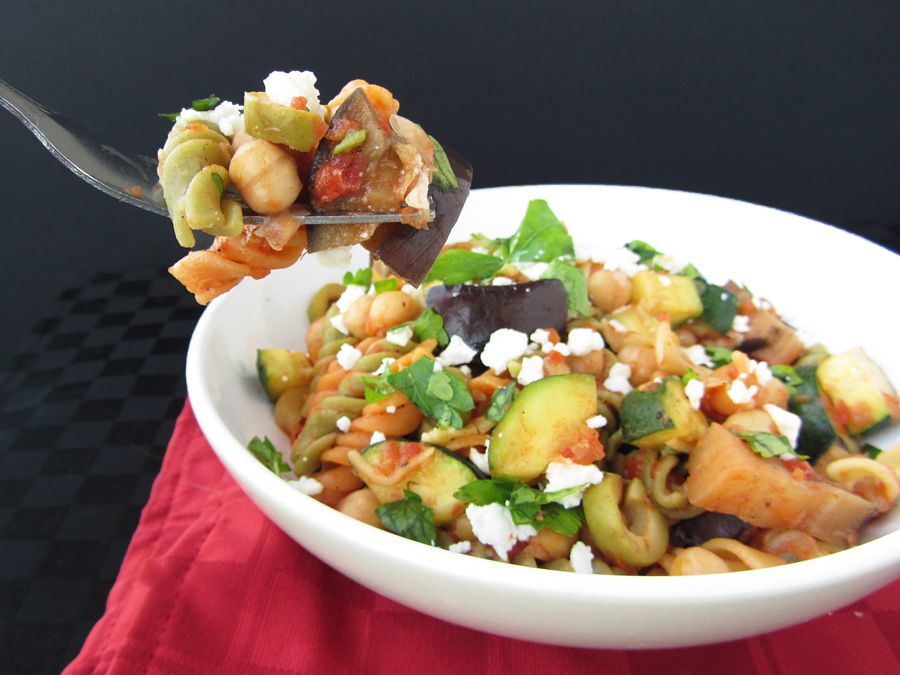
If you just want to hear about this pasta, here's what you need to know: This is a fresh and healthy vegetarian dish that you may think is just an ordinary pasta, but a few unusual ingredients like chickpeas, olives, and feta, make this unique and flavourful.  It might look like a few more steps than a regular pasta, but it's worth it (especially for the amount of leftovers, if you're cooking for one like me!), and it's a great way to use up some of that end-of-summer zucchini and eggplant you might still have in your garden!

Has anyone else been celebrity stalking at TIFF (or elsewhere)?  I'd love to hear your stories!

Eggplant & Zucchini Pasta with Chickpeas, Olives and Feta

Eggplant & Zucchini Pasta with Chickpeas, Olives, and Feta

Adapted from Clean Eating magazine, April/May 2012

Serves 4-6

Ingredients:

2 medium zucchinis
1 small eggplant
2 tablespoons olive oil
Salt & Pepper
1 pound tri-colour vegetable rotini pasta (or whole wheat rotini)
1 (398mL) can fire-roasted diced tomatoes
1 (340mL) jar roasted red peppers (or 2 roasted red peppers), drained and rinsed, chopped
1/2 teaspoon dried basil
Pinch red pepper flakes (optional)
1 (540mL) can chickpeas, drained and rinsed
1/2 cup sliced green olives
4-5 oz low-fat feta cheese, crumbled
1/4 cup chopped parsley

Directions:

Preheat oven to Broil.  Quarter zucchinis lengthwise, then cut into 1/4-inch thick slices.  Cut eggplant into ½-inch rounds, then slice into bite-sized pieces.  Toss chopped zucchini and eggplant with olive oil, and season with salt and pepper.  Spread into one layer on a foil-lined baking sheet and broil in the top-third of the oven for 10-15 minutes, tossing halfway through, until golden brown and soft.

Bring a large pot of salted water to a boil, and cook pasta according to package directions.  Drain and rinse, reserving a bit of pasta water.

Meanwhile, add diced tomatoes, roasted red peppers, basil, and red pepper flakes to a medium saucepan, bring to a simmer, and cook over medium-low heat while the pasta is cooking, about 10 minutes.  Season to taste with salt and pepper.  Transfer to a blender, remove plastic stopper from lid, cover loosely with a kitchen towel, and puree briefly into a slightly chunky sauce.  Add a bit of the pasta water to thin out the sauce, if necessary.

Combine cooked pasta, roasted vegetables, tomato sauce, chickpeas, and olives in a large saucepan and cook over low heat 1-2 minutes to heat through.  Serve and top each portion with 1 oz crumbled feta and 1 tablespoon chopped parsley.  Season with additional pepper, if desired.

August 20, 2012

Healthy Summertime Chickpea Chopped Salad

Healthy Summertime Chickpea Chopped Salad

Remember when I told you about the stay-cation I took a couple weeks ago where I ate at restaurants every night and drank lots of beer and then swore I'd only eat salad for the next week?  Well I stayed true to my word and this is what I ate for pretty much the whole week.  I would have loved this even if I hadn't overeaten the previous week, and I would have kept eating it forever if I hadn't needed to try other recipes - it was so good!

I don't think I've ever actually had a chopped salad before, but I'd seen them on a couple of blogs lately - like this chicken chickpea version from Ambitious Kitchen and this chicken and blueberry version from How Sweet It Is - and started craving one so bad!  I actually had to research what exactly a chopped salad is before I went ahead and made my own version, and apparently it just means that all the ingredients are chopped to about the same size.  You'd think I'd have figured that out by the name 'chopped salad', but I had to be sure!

Healthy Summertime Chickpea Chopped Salad

So I decided to go ahead and make a healthy vegetarian version with chickpeas as my main protein; lots of summery ingredients like corn, tomatoes, avocado, cucumber, and red pepper; some olives and fat-free feta thrown in for added flavour; and I tossed it all in a light vinaigrette.

I loved how with the lettuce being the same size as the other ingredients, you don't end up with huge pieces of lettuce and nothing else.  Every bite was full of ingredients and every bite was different - I loved the bites with creamy avocado, I loved the bites with sweet corn, I loved the bites with salty olives, I loved the bites with nutty chickpeas ... you get the idea - I loved every bite!

Healthy Summertime Chickpea Chopped Salad

You can easily change this up to include any ingredients you like, or change the dressing to give it a completely different look and taste.  If you prefer creamier dressings, it would probably be great with a ranch dressing, or try a bbq dressing like Monique from Ambitious Kitchen used in her version.  The possibilities are endless - I think I could eat this for every meal over these last few weeks of summer and not get sick of it!

Healthy Summertime Chickpea Chopped Salad

Healthy Summertime Chickpea Chopped Salad

Recipe inspired by Ambitious Kitchen

Serving size will vary, but I’d guess this serves around 6 as a side dish or 3 as a main dish

Ingredients:

For the Salad:
1 head of romaine lettuce
1 can chickpeas, drained and rinsed
1 cup halved grape tomatoes
1 red bell pepper, chopped (about 1 cup)
1/2 a large cucumber, chopped (about 1.5 cups)
2 ears of corn, cooked and kernels removed (about 1 to 1.5 cups)
1 ripe avocado, diced
1/4 to 1/3 cup pitted sliced kalamata olives, if desired
1/3 to 1/2 cup light feta cheese (I used fat-free)
Desired amount of your favourite salad dressing.  I used the following:

For the Dressing:
1 lime, juice and zest
3 tablespoons olive oil
1 clove garlic, minced
1 tablespoon honey
Salt and pepper to taste

*Please note that all amounts are approximate and can be adjusted to your liking!

Directions:

Wash the lettuce and dry well.  Stack a few leaves of lettuce on top of each other, cut into about 5 pieces lengthwise, then chop into small pieces across the width.  Repeat with remaining lettuce so you have small, 1/2-inch sized pieces of lettuce. 

Transfer lettuce to a large bowl.  Top with chickpeas, grape tomatoes, red pepper, cucumber, corn, avocado, olives, and feta.  Keep ingredients separate if desired for serving, or you can toss them all together if you prefer.

Whisk together all dressing ingredients in a small bowl.  Toss with salad to combine or leave separate to mix into individual servings.

August 07, 2012

Watermelon Feta Panzanella

Watermelon Feta Panzanella

I just "returned" from a weeklong stay-cation with Ryan, hosting some wonderful guests.  It was a relaxing and fun week that involved a lot of eating out and a lot of beer drinking! And though I had a lot of delicious food and we tried a lot of amazing new beers, now that it's over I'm eager to start cooking for myself again, and am feeling like that needs to only involve fruits, vegetables, and water for at least the next week!  So meals like this light and refreshing watermelon panzanella are going to hit the spot perfectly!

Watermelon Feta Panzanella

When I originally made this, I’d envisioned a caprese-style panzanella (bread salad) with bocconcini, basil, a balsamic reduction, and watermelon instead of tomato.  It was good, but didn’t “wow” me – the mozzarella didn’t provide any flavour and the balsamic reduction made the overall dish a little too sweet.  So I tried again using feta instead of bocconcini for a more pronounced flavour that would pair well with the watermelon, adding cucumber to balance out the sweetness but keep the salad crisp and cool, and changing the balsamic reduction to a balsamic vinaigrette so it wasn’t as overpowering.

The second version was so much better and is perfect for summer!  I ate it as a main course but it would be great as a side dish, as long as it’s not going to be sitting around for a long time, as the bread can start to get soggy.  And if you’re not a watermelon fan, try this roasted summer panzanella – it's one of my sister's favourite summertime dishes and it’s what first made me love panzanellas!

Watermelon Feta Panzanella

Watermelon Feta Panzanella

Recipe created by Once Upon a Cutting Board

Serves 1 as a main course, or 3-4 as a side dish

Ingredients:

2 slices crusty bread (such as ciabatta), cut into small cubes (about 2 cups)
1 cup cubed seedless watermelon
1/2 cup chopped peeled cucumber
3 tablespoons chopped fresh basil
2-3 ounces diced feta cheese
1 tablespoon extra virgin olive oil
1 teaspoon balsamic vinegar
Salt & Pepper

Directions:

Preheat oven to 400°F.  Spray cubed bread with cooking oil (or toss with a drizzle of olive oil), spread on a baking sheet, and bake in preheated oven for about 5 minutes, until crispy (but not hard all the way through).

Combine bread with watermelon, cucumber, basil, and feta in a medium bowl.

Whisk the olive oil and balsamic vinegar in a small bowl, and season with salt and pepper.  Drizzle dressing over the salad and toss to evenly coat the ingredients.  Note that this amount of dressing won’t be too noticeable in flavour, so you can use a bit more if you like, but your bread could get soggy if there is too much dressing, so I liked only a small amount.

Serve immediately so the bread does not get soggy!

July 06, 2012

Smashed Pea, Dill, and Feta Crostini

Smashed Pea, Dill, and Feta Crostini

Don't you hate when a book (or cookbook) you've heard great things about and decide to shell out the money for ends up being a disappointment?  I don't often purchase books to own because I'm always worried I'll waste my money on something I don't like.  Instead, I usually borrow books or end up taking risks picking up books in clearance sections, figuring that if I don't end up loving them, it won't be such a big disappointment.  Sometimes, these books are in the clearance section for a reason, but other times the risk pays off with a big reward, as was the case when I picked up The Modern Vegetarian.  It's a vegetarian cookbook that has some of the most unique and creative recipes I've ever seen, like watermelon curry with black beans and paneer, or lemongrass, ginger, and lime leaf chocolate tart.  It's definitely a great example of how vegetarian food doesn't have to be boring!

I started off with one of the easier recipes in the book, this smashed pea, dill, and feta crostini, because fresh peas are in season in Ontario right now (June-July), and I'd been wanting to make a pea crostini for a while!

Smashed Pea, Dill, and Feta Crostini

This turned out wonderfully.  Fresh sweet green peas are combined with tangy lemon and dill and salty feta on a piece of toasted bread for a light and fresh summer appetizer that's bursting with bright flavour. 

The original recipe didn't call for cooking the peas first, but if you've ever tried to smash a fresh pea, it's not easy!  Every time I pinned a little pea under my pestle and tried to press down, it would invariably end up escaping and flying across the kitchen.  So I decided to give the peas a quick blanch followed by a dunk in ice water so they'd maintain their bright green colour, and this made them much easier to smash! (sorry little peas, you can't escape me!)   I also left out the parmesan from the recipe because I didn't want to overwhelm the peas' flavour too much, and made a few minor adjustments to some of the ingredient amounts.

Smashed Pea, Dill, and Feta Crostini

This would make a great elegant appetizer to impress guests, even though it's so easy to make.  Or you could just eat it all yourself for lunch like I did! 

With the weekend coming up, and with peas in season (at least where I live), this is a perfect snack to eat while sitting outside on the patio - if you can handle the crazy heat outside!  I'm loving the hot weather but hoping the suffocating humidity tones itself down a bit for the weekend!

 Hope you all have a great weekend :)

Smashed Pea, Dill, and Feta Crostini

Smashed Pea, Dill, and Feta Crostini

Adapted from The Modern Vegetarian cookbook

Serves 4-6 as an appetizer

Ingredients:

1 ciabatta baguette, sliced into thin (~1/2 inch) pieces (you probably won’t use the whole loaf)
5 oz fresh shelled green peas (around 3/4 cup peas, from around 40 pea pods)
1 small garlic clove
2 tablespoons fresh dill, minced
Sea salt
1-2 tablespoons olive oil
2/3 cup crumbled feta cheese
1 tablespoons fresh lemon juice
Pepper

Directions:

Preheat oven to 350°F.  Brush ciabatta slices with olive oil or spray with cooking spray, place on a baking sheet, and bake for 5-10 minutes until toasted.

Bring a medium pot of water to a boil and blanch peas for 2-3 minutes.  Drain into a colander or sieve, then place the colander/sieve in a large bowl of ice water to immediately stop the cooking.

Place garlic, dill, and a pinch of salt in a mortar and smash with a pestle until crushed.  Transfer to a small bowl.

Add peas to mortar in a few batches (depending how big your mortar is), adding a small pinch of salt and drizzle of olive oil to each batch and smashing with a pestle.

Transfer smashed peas to a medium bowl and add the dill-garlic mixture, feta, and lemon juice.  Mix with a fork and season with additional salt and pepper to taste, if desired.  Top ciabatta slices with the smashed pea mixture and serve.

Ingredient Index

Related Posts Plugin for WordPress, Blogger...