Showing posts with label chickpeas. Show all posts

October 02, 2014

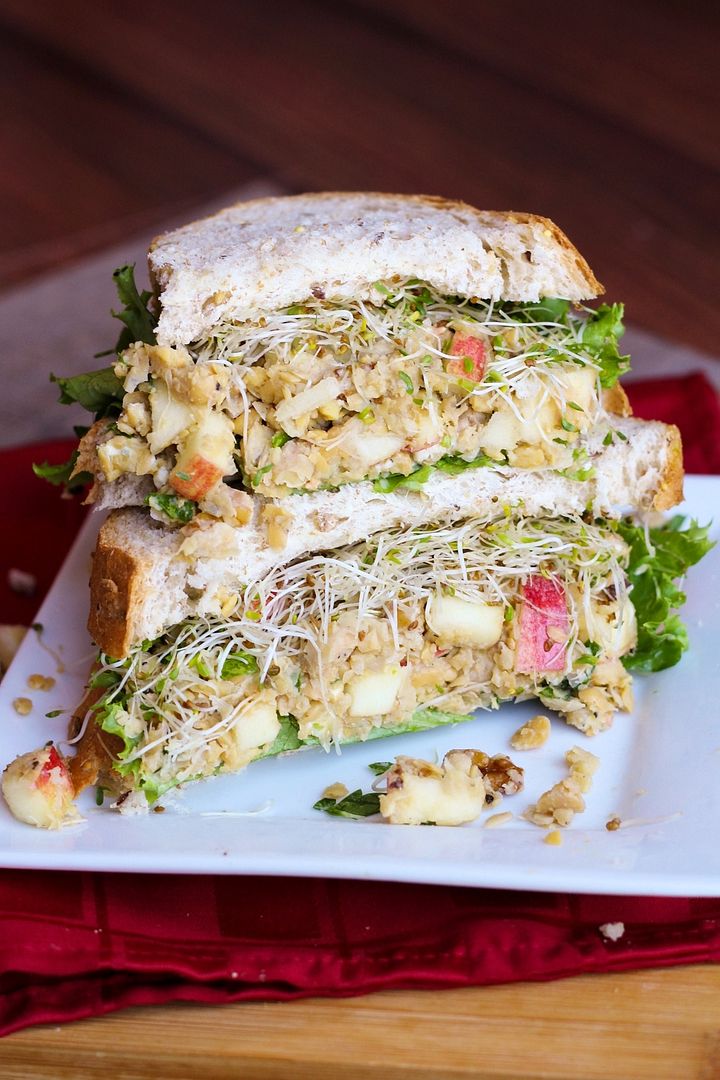
Smashed Chickpea, Blue Cheese, & Apple Sandwich

Smashed Chickpea, Blue Cheese, Apple, and Walnut Sandwich - a healthy and hearty vegetarian lunch idea!

With fall well underway, I’ve been craving heartier meals that incorporate seasonal ingredients like pumpkin and apples. I’ve seen a lot of smashed chickpea or “chickpea salad” sandwiches around the web before and have wanted to try my own version for a while now. I knew I wanted the crunch of apples in there, and because I can’t get enough of the apples-blue cheese combination, I mixed my apples and chickpeas with blue cheese, throwing in some walnuts for more texture, and a quick mustard and apple cider vinaigrette for added flavour. Combined with thick slices of fresh 7 grain whole wheat bread, lettuce, sprouts, and a little extra mustard, this made for a really satisfying sandwich (when my dad saw my lunch one day he asked if I was Dagwood) that I loved!
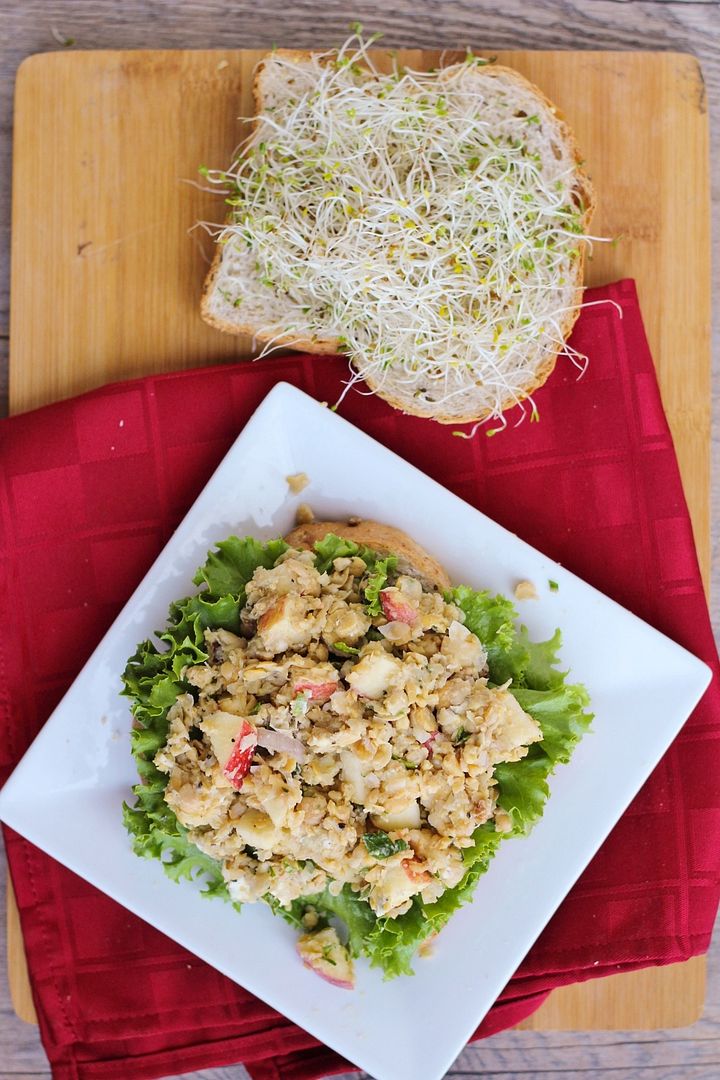
Smashed Chickpea, Blue Cheese, Apple, and Walnut Sandwich - a healthy and hearty vegetarian lunch idea!

If I’d wanted it to be more of a chickpea salad sandwich, I could have added mayo, but I don’t ever have mayo around and I liked the flavour of the mixture on its own so I left it out. Without something like mayo to get everything to stick together, the filling is a bit messy in a sandwich, but that’s all part of the fun! You could try adding some if you prefer though, or even use a mixture of mayo and plain Greek yogurt to keep this on the lighter side.

And if blue cheese isn’t your thing, here are a few other chickpea sandwiches you could try!

Smashed chickpea salad from Smitten Kitchen
Smashed chickpea and avocado salad sandwich from Two Peas & Their Pod
Curried chickpea salad sandwich from The Simple Veganista
Cranberry walnut chickpea salad sandwich from The Simple Veganista
Herbed chickpea sandwich (with feta and dill) from Martha Stewart
Smashed chickpea & pesto sandwich from Bake Your Day
Pink chickpea smash salad from Happy Healthy Life
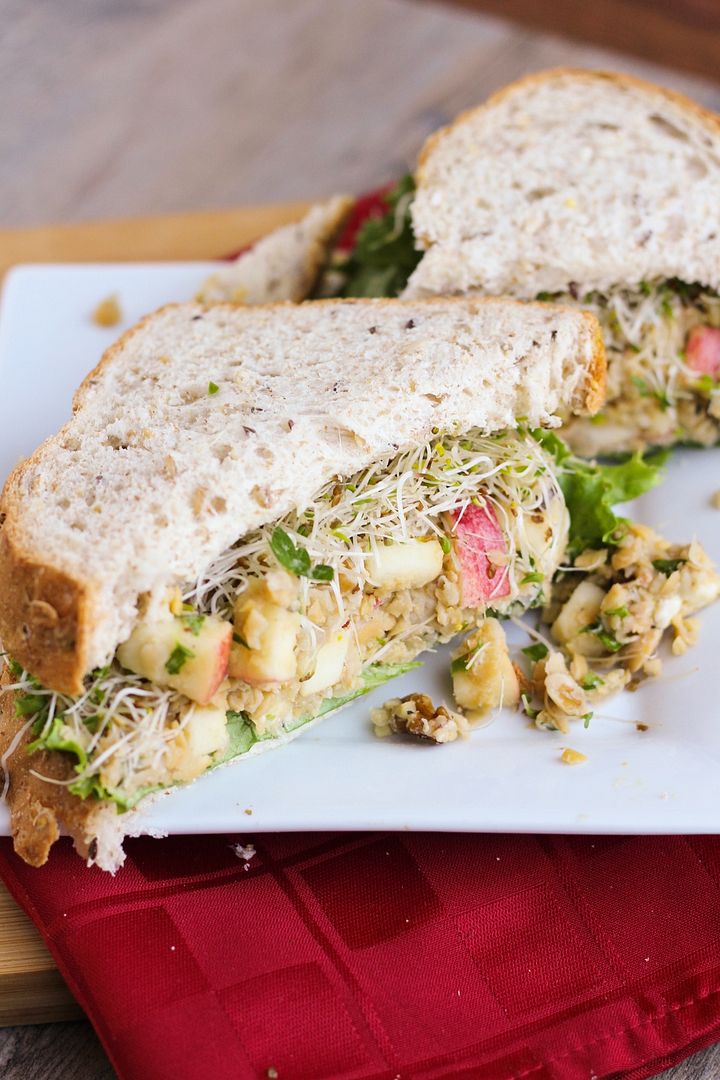
Smashed Chickpea, Blue Cheese, Apple, and Walnut Sandwich - a healthy and hearty vegetarian lunch idea!

Smashed Chickpea, Blue Cheese, & Apple Sandwich

Recipe my own but inspired by many other versions of smashed chickpeas that others have created!

Makes 4 sandwiches

Ingredients:

For the Chickpea Mixture:
1 (540mL) can of no-salt added chickpeas, drained and rinsed
1 large apple, cored and diced – any crunchy and sweet variety that you like will work
1/4 cup chopped walnuts
2 oz crumbled blue cheese
2 tablespoons chopped parsley
1 tablespoon extra-virgin olive oil
2 teaspoons apple cider vinegar
1 teaspoon Dijon mustard
1 shallot, minced
Salt and pepper

For the Sandwiches:
8 slices whole grain bread
Lettuce, and sprouts if desired
Extra mustard if desired (such as Dijon, honey mustard, or deli style mustard)

Directions:

In a small bowl, whisk together the olive oil, vinegar, Dijon, and shallot.  Let sit for at least 5 minutes (I find this takes some of the bite out of the shallots).

Smash chickpeas with a potato masher or large fork; they don’t have to be completely smashed, just partially.  I found it difficult to do with a fork so I pulsed mine several times in a food processor; this is quicker if you don’t mind washing an extra dish!  Mix the apples, walnuts, blue cheese, and parsley into the chickpea mixture.  Mix in the olive oil dressing and season mixture generously with salt and pepper.

Divide chickpea mixture evenly among 4 sandwiches, along with lettuce, sprouts, and extra mustard if desired (I liked these best with added mustard!).  Try to flatten or “smush” the chickpea mixture onto each sandwich so it sticks together.  Even still, these might be messy and I learned that it’s best to hold on to both ends of your sandwich as you’re eating to prevent the filling from falling out!

June 03, 2014

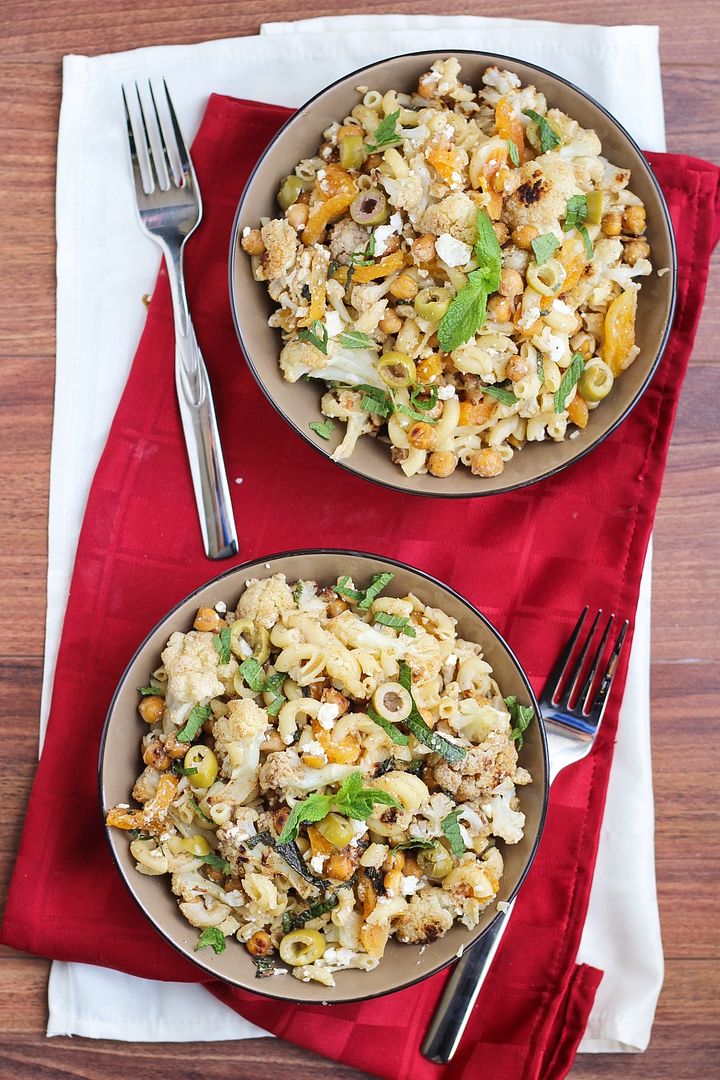
Gluten-Free Moroccan Macaroni Bowl (+ a giveaway!)

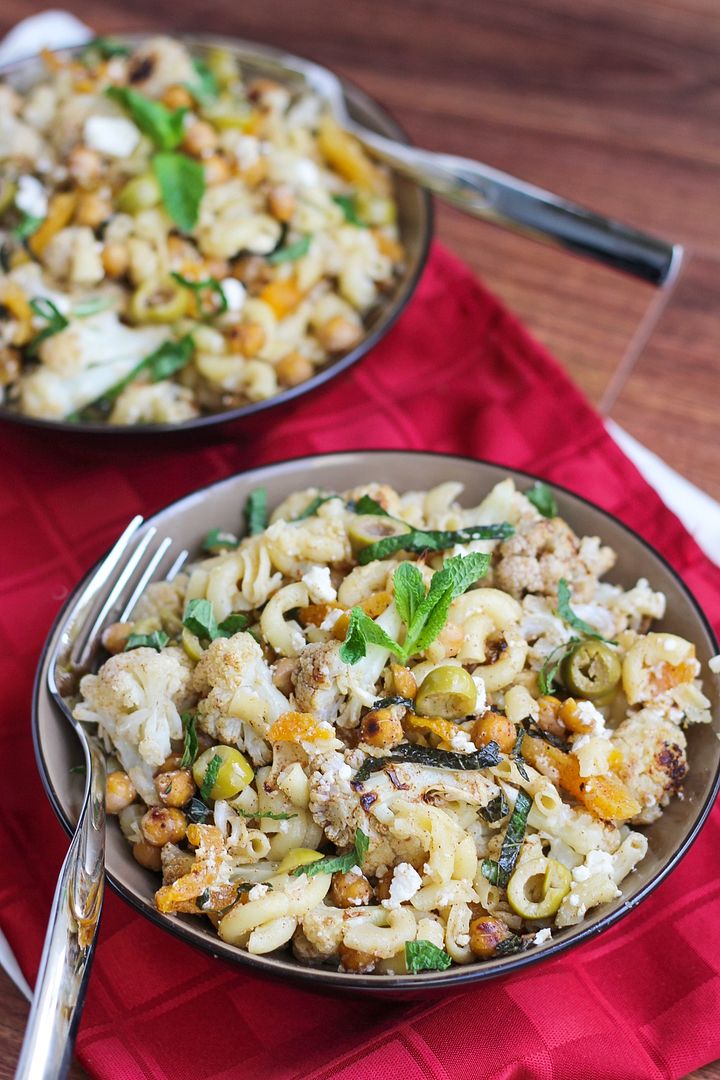
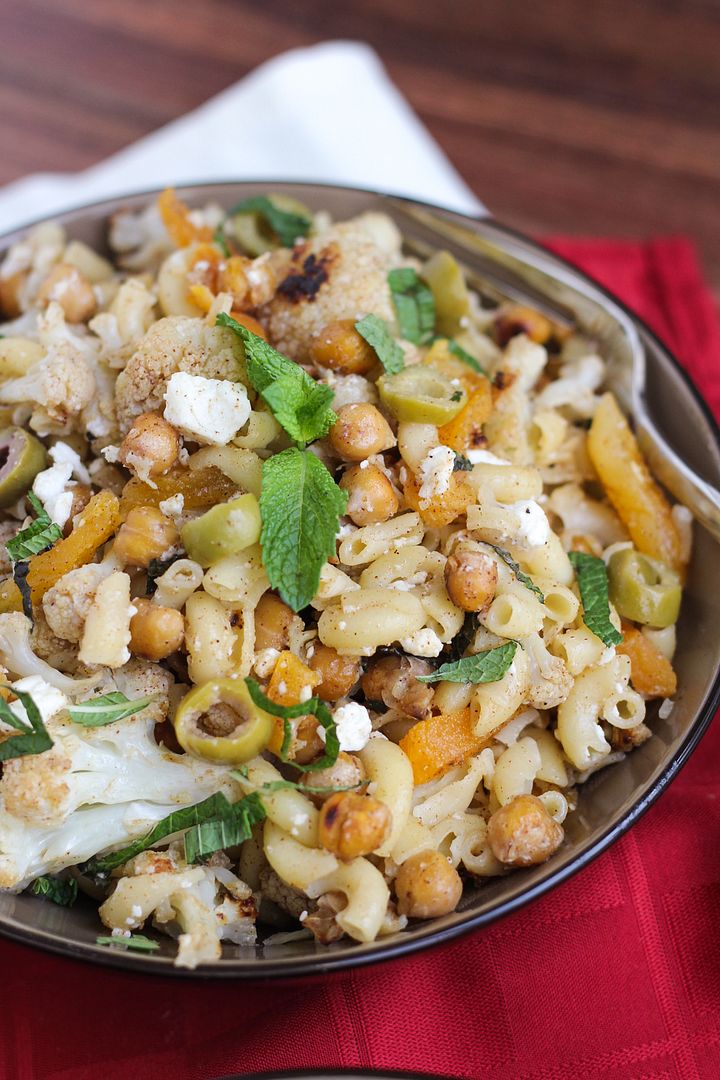
Gluten-Free Moroccon Macaroni Bowl with Roasted Cauliflower & Chickpeas

I don't follow a gluten-free diet or think of gluten as an evil thing to avoid, but I know there are a lot of people out there who have to avoid it for health reasons, and for their sake I'm happy that there now seem to be so many gluten-free alternatives out there.  People should not have to go without food like pasta!

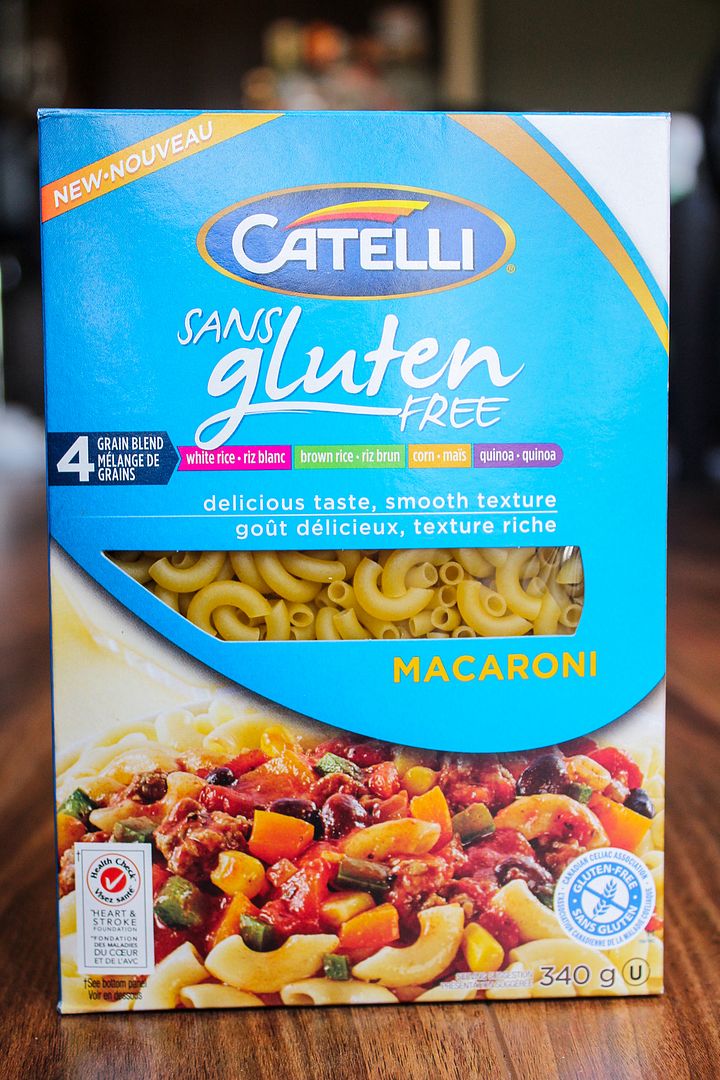
Catelli pasta is one of my favourite brands here in Canada because they offer so many alternatives to regular white pasta.  I love their line with vegetables in the pasta, but I usually buy the whole grain pasta.  Last year they launched a line of gluten-free pasta including penne, fusilli, and spaghetti, and recently they added macaroni to the line-up and asked if I wanted to give it a try. 

Turns out it tastes just like regular pasta, even though it's made from white and brown rice, corn, and quinoa.  I still prefer using whole grain pasta whenever I can, but it's nice to know there's a tasty alternative out there for those with gluten sensitivities or intolerance, or for me to use in dishes where whole wheat doesn't really work as well, like in this pasta bowl.

Gluten-Free Moroccon Macaroni Bowl with Roasted Cauliflower & Chickpeas

Catelli has lots of awesome pasta recipes on their site, and I decided to go with a Moroccan version to test out this pasta, and I'm so glad I did!  Everything about this pasta is so different from your typical tomato sauce pasta, and even though it looks like there are a lot of strange ingredients in this, they all work together so well!

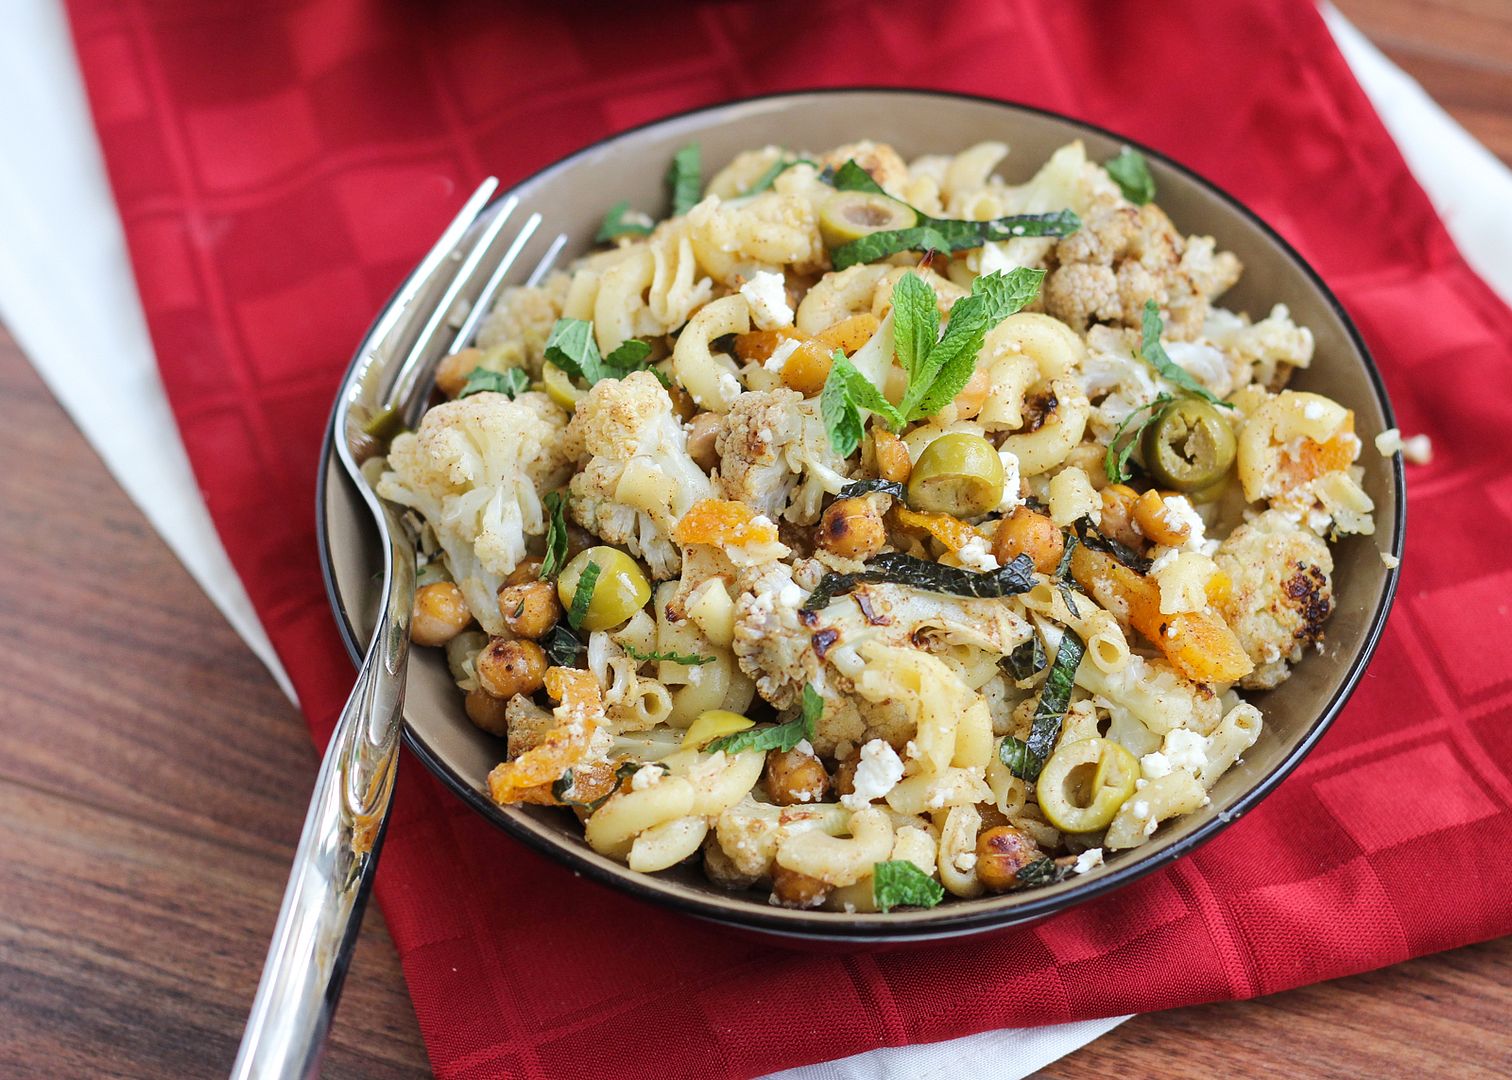
Instead of a sauce, this pasta is tossed with a light dressing full of fresh lemon flavour and lots of spices.  You also use some of this dressing to roast some cauliflower and chickpeas, giving them awesome flavour and texture.  I never roast chickpeas for pasta, usually tossing them in raw, but now I always want to eat them this way - I love that they get a little crispy!  Also mixed in there are some green olives, sliced dried apricot, feta cheese, and mint leaves.  I know it sounds a little weird, but trust me that it all the ingredients are balanced and together make an amazing flavour, so don't leave anything out!  I couldn't stop eating this right after I made it and already look forward to making it again.
Gluten-Free Moroccon Macaroni Bowl with Roasted Cauliflower & Chickpeas

If you want to try out this gluten-free pasta yourself, you can get a coupon for $1.00 off here.  And if you're lucky (and live in Canada), you have a chance to win a whole year's supply of Catelli's gluten-free macaroni!

To enter to win this awesome prize (with a retail value of approximately $180), please follow the instructions in the Rafflecopter widget below - there are three ways to enter: leaving a comment on this blog, following me on Facebook, or on Twitter - pick one or all three for more entries!

Catelli Gluten Free Macaroni

Please be sure to enter with a valid e-mail address or Facebook account so I can contact you if you're randomly selected as the winner.  The contest will close at midnight EST on Sunday, June 8th, 2014.  Please note that as this is a Canadian product, this contest is open to Canadians only (sorry, American friends!)

a Rafflecopter giveaway

And don't forget to check out the recipe below!

Disclosure: This is not a sponsored post.  I received one box of pasta to make this recipe but was not compensated in any other way for my time, ingredients, or thoughts, which are all my own :) I just thought this was a great giveaway opportunity for my readers!

Gluten-Free Moroccon Macaroni Bowl with Roasted Cauliflower & Chickpeas

Gluten-Free Moroccan Macaroni Bowl with Roasted Cauliflower & Chickpeas

Slightly adapted from Catelli Pasta

Makes 4-6 servings

Ingredients:

1 (540mL) can of no-salt added chickpeas, drained and rinsed
4 cups cauliflower florets (about 1 small head or 3/4 of a larger head)
1/3 cup fresh lemon juice
1/4 cup olive oil
2 tablespoons honey
1 tablespoon minced or grated fresh ginger
2 cloves garlic, minced
1 tablespoon ground cumin
1 teaspoon cinnamon
1/2 teaspoon each salt and pepper
1 box (340g) Catelli® Gluten Free Macaroni
3/4 cup slivered dried apricots
1/3 cup sliced green olives
1 cup crumbled feta
3/4 cup loosely packed chopped fresh mint leaves

Directions:

Preheat oven to 400°F and line a large baking sheet (I used two) with parchment paper or foil.  Add cauliflower and chickpeas to a large bowl.  Whisk lemon juice, oil, honey, ginger, garlic, cumin, cinnamon, salt, and pepper in a small bowl until combined.  Drizzle 3 tablespoons of the dressing over the cauliflower and chickpeas and toss to combine.  Spread cauliflower and chickpeas onto prepared baking sheets in an even layer.  Roast in preheated oven for 30 minutes or until browned, tossing halfway through.

Meanwhile, cook pasta according to package directions.  Reserve 1/2 cup of the cooking water before draining.  Toss cooked pasta with roasted cauliflower and chickpeas, apricots, olives, feta, mint, reserved pasta water, and reserved lemon dressing.  Stir until combined and serve warm.

April 10, 2014

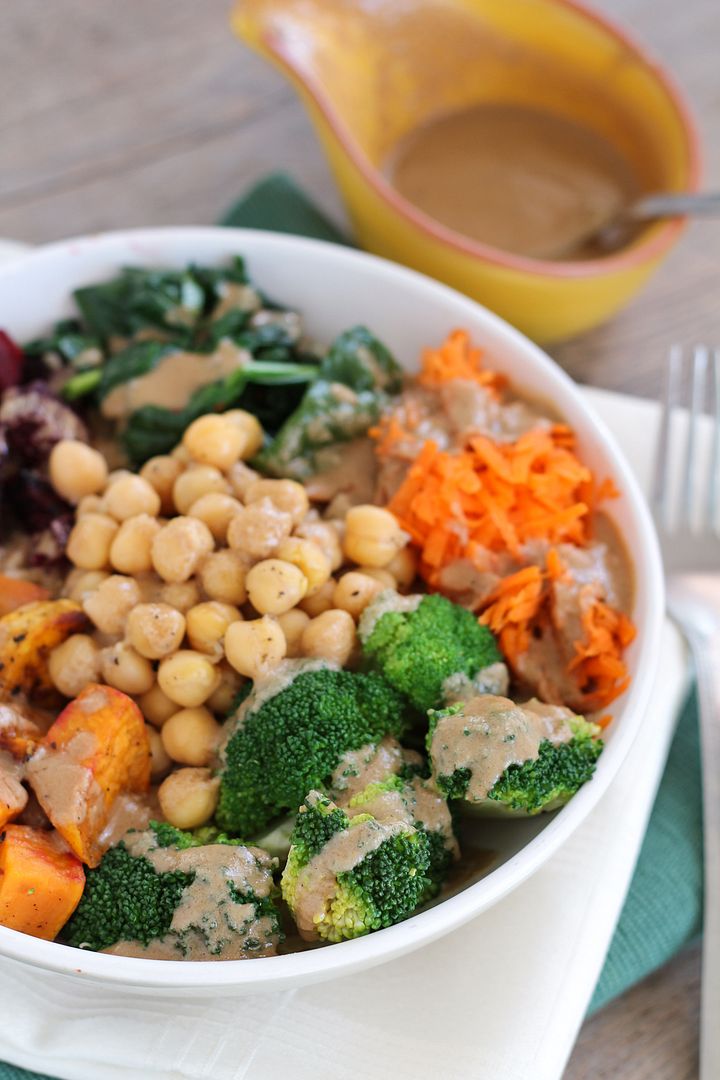
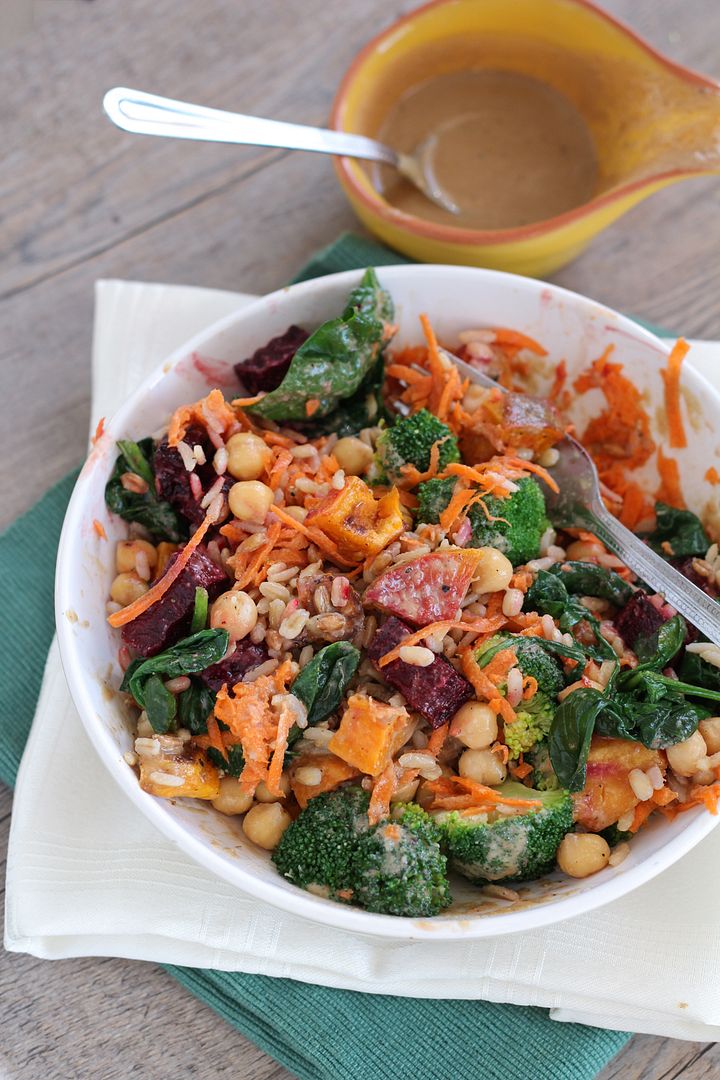
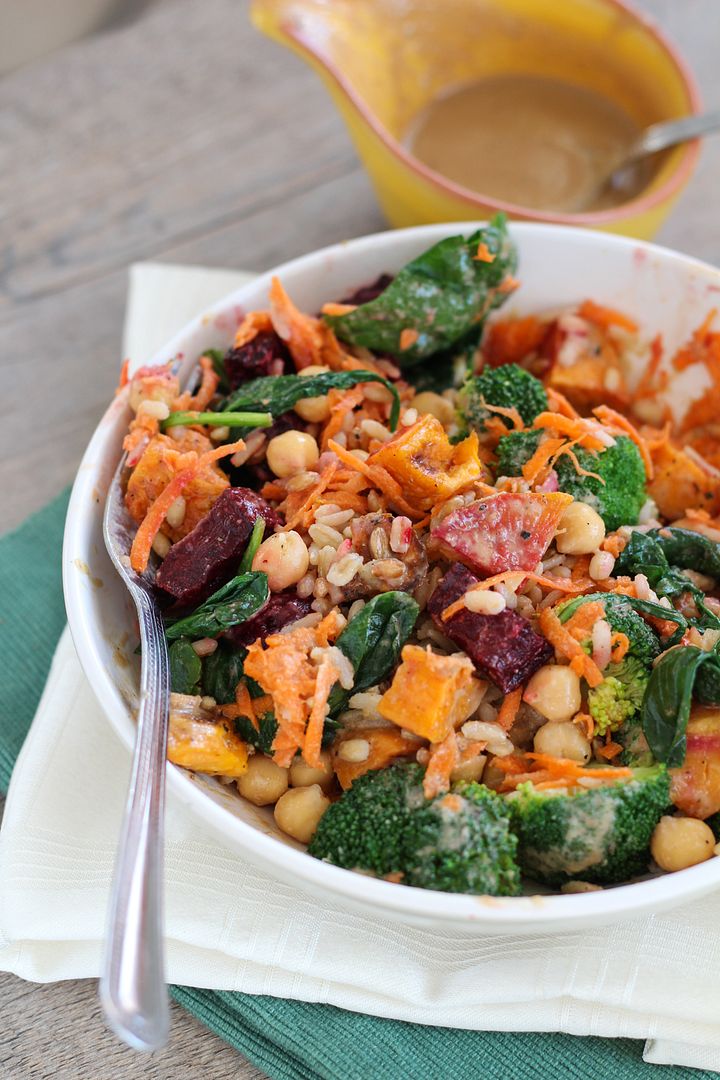
Chickpea & Veggie Brown Rice Barley Bowl with Tahini Dressing

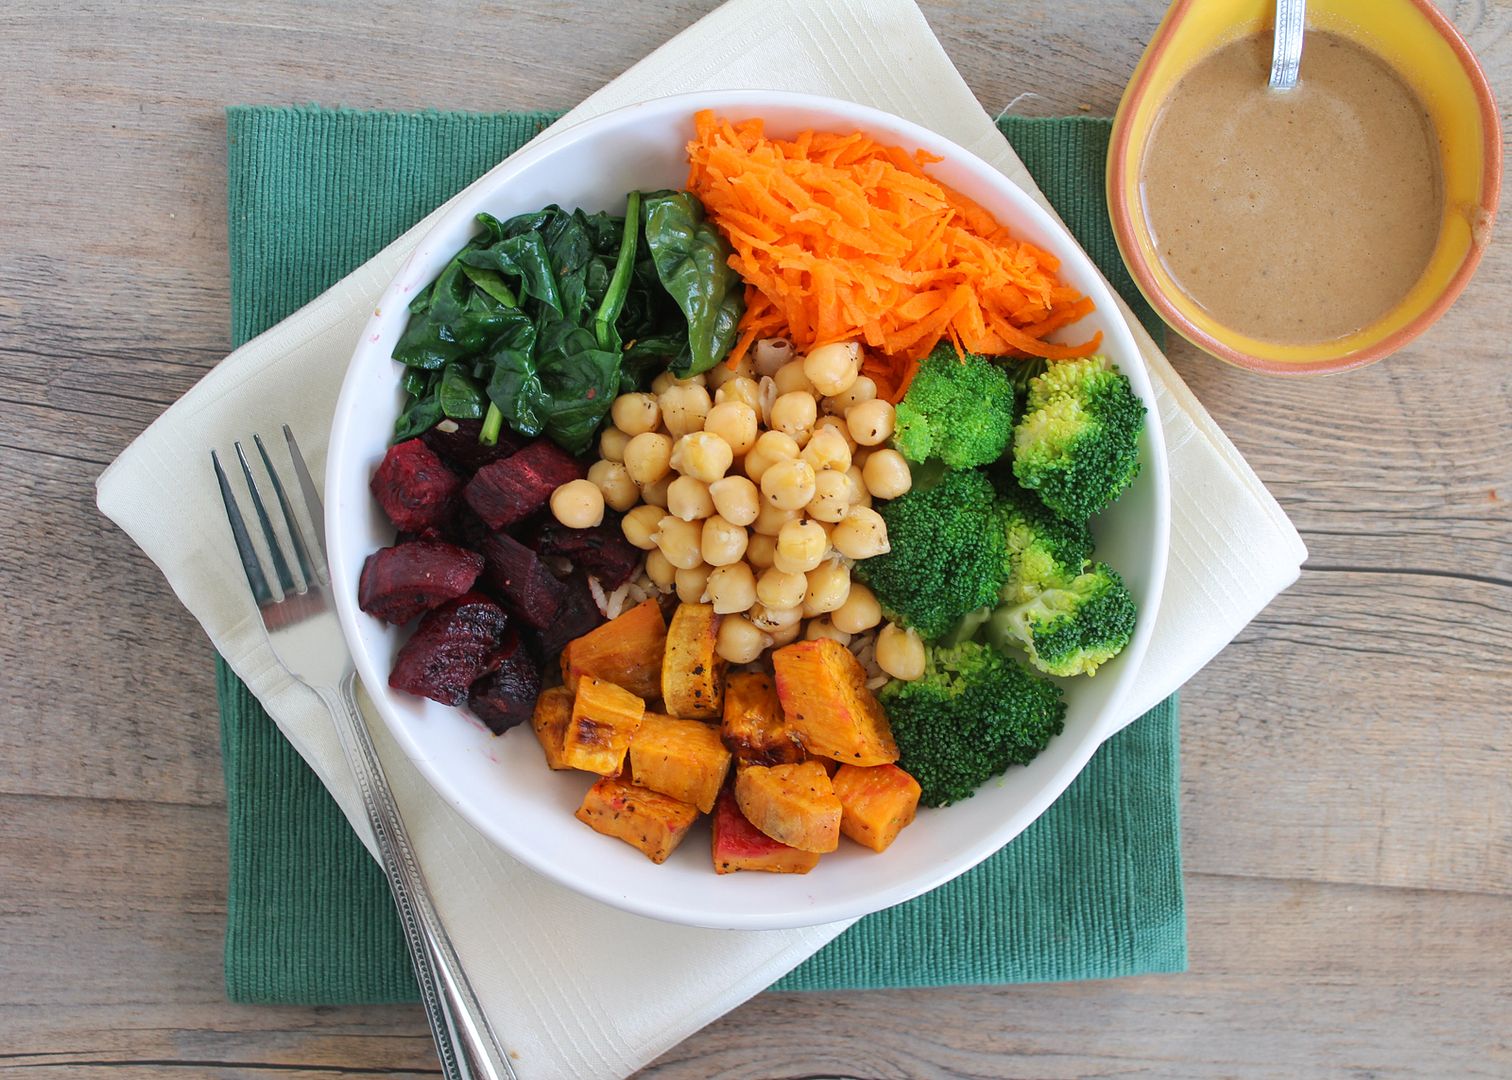
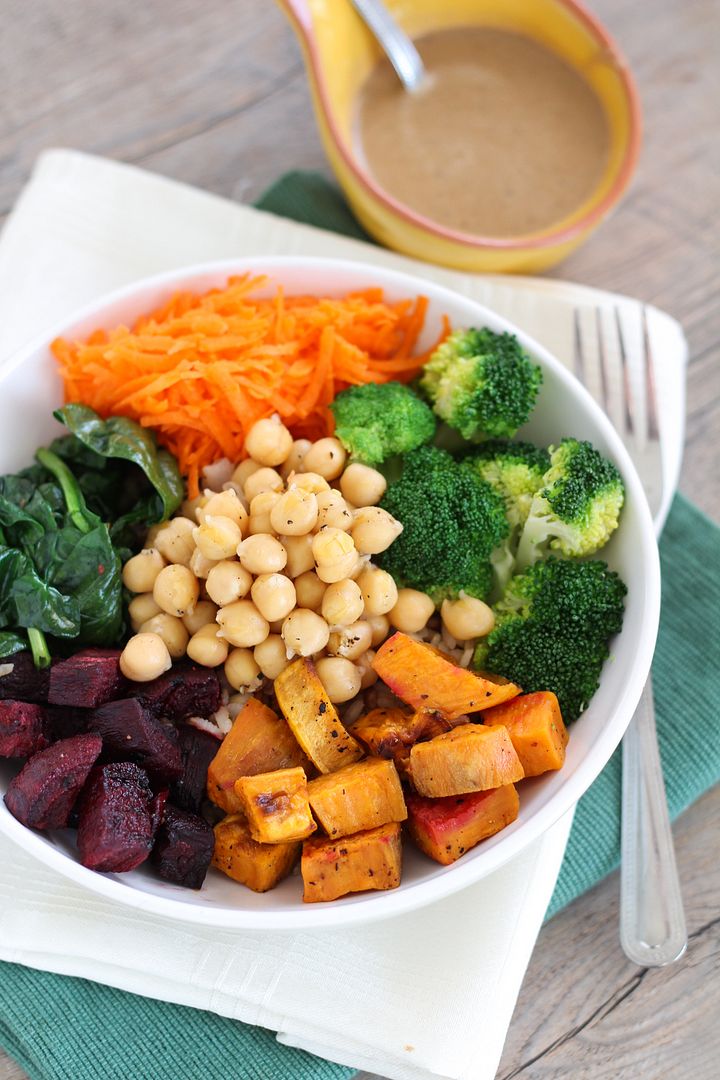
Chickpea & Roasted Veggie Brown Rice Barley Bowl with Tahini Dressing

Healthy "bowls" seem to becoming more and more popular these days both across the internet and in cafes and restaurants.  They have many names and variations, but the basic concept is that you combine a base of grains (like rice, quinoa, barley, etc), several different vegetables (raw or cooked), a protein or two (chicken, tofu, beans, nuts, or cheese), and a delicious sauce to tie it all together, thus giving you a complete meal in a bowl.

I find myself drawn to any healthy meal that ends in "bowl" because I love a meal with different textures, flavours, and colours that all fit together in one dish, and these bowls are easy to make super nutritious.

Chickpea & Roasted Veggie Brown Rice Barley Bowl with Tahini Dressing

The problem with ordering them in a restaurant is that they're usually pretty expensive, and while making them at home can require a bit of effort, it's cheaper and you can make a lot so that you have delicious healthy bowls for lunches through the week!

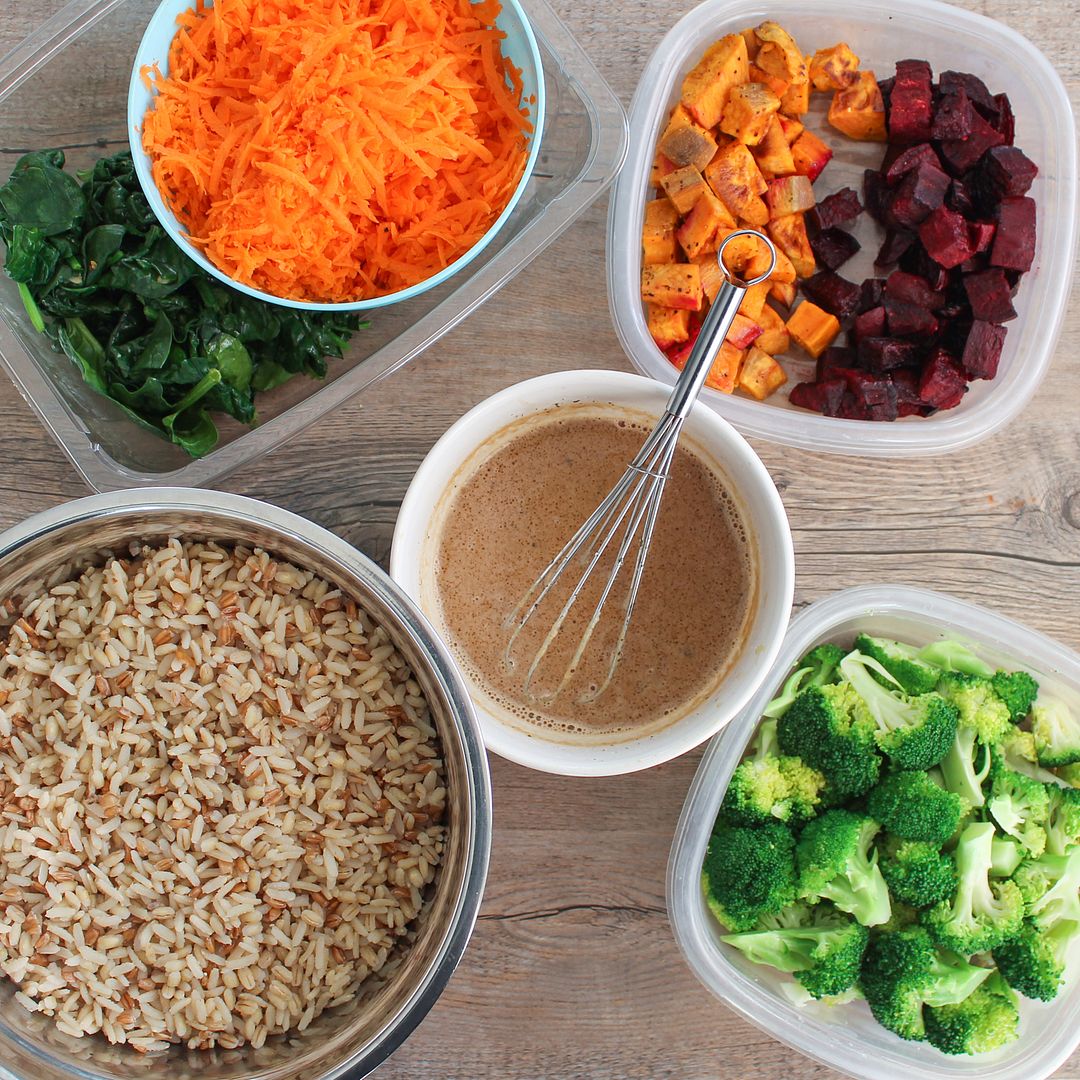
For my version, I combined the following:

Chickpea & Roasted Veggie Brown Rice Barley Bowl with Tahini Dressing

Base - a mix of brown rice, barley, and spelt (I used a PC blend of the three for convenience!)
Veggies - steamed broccoli, roasted beets and sweet potatoes, sauteed spinach with garlic, and grated raw carrots
Protein - I forgot to include this in the picture above, but I used chickpeas
Sauce - tahini dressing with soy sauce and sesame oil for flavour!

Chickpea & Veggie Brown Rice Barley Bowl with Tahini Dressing

Another nice thing about these is that they're highly adaptable, so if you don't like the ingredients that I used, you can make whatever substitutions you like, as long as you maintain a variety of colour and textures!

Try using quinoa as a base if you don't like rice; substitute the chickpeas for chicken or tofu if you like; grate raw beets instead of roasting them; sautee brussels sprouts or kale instead of spinach; roast squash instead of sweet potato ... you get the idea!

Chickpea & Veggie Brown Rice Barley Bowl with Tahini Dressing

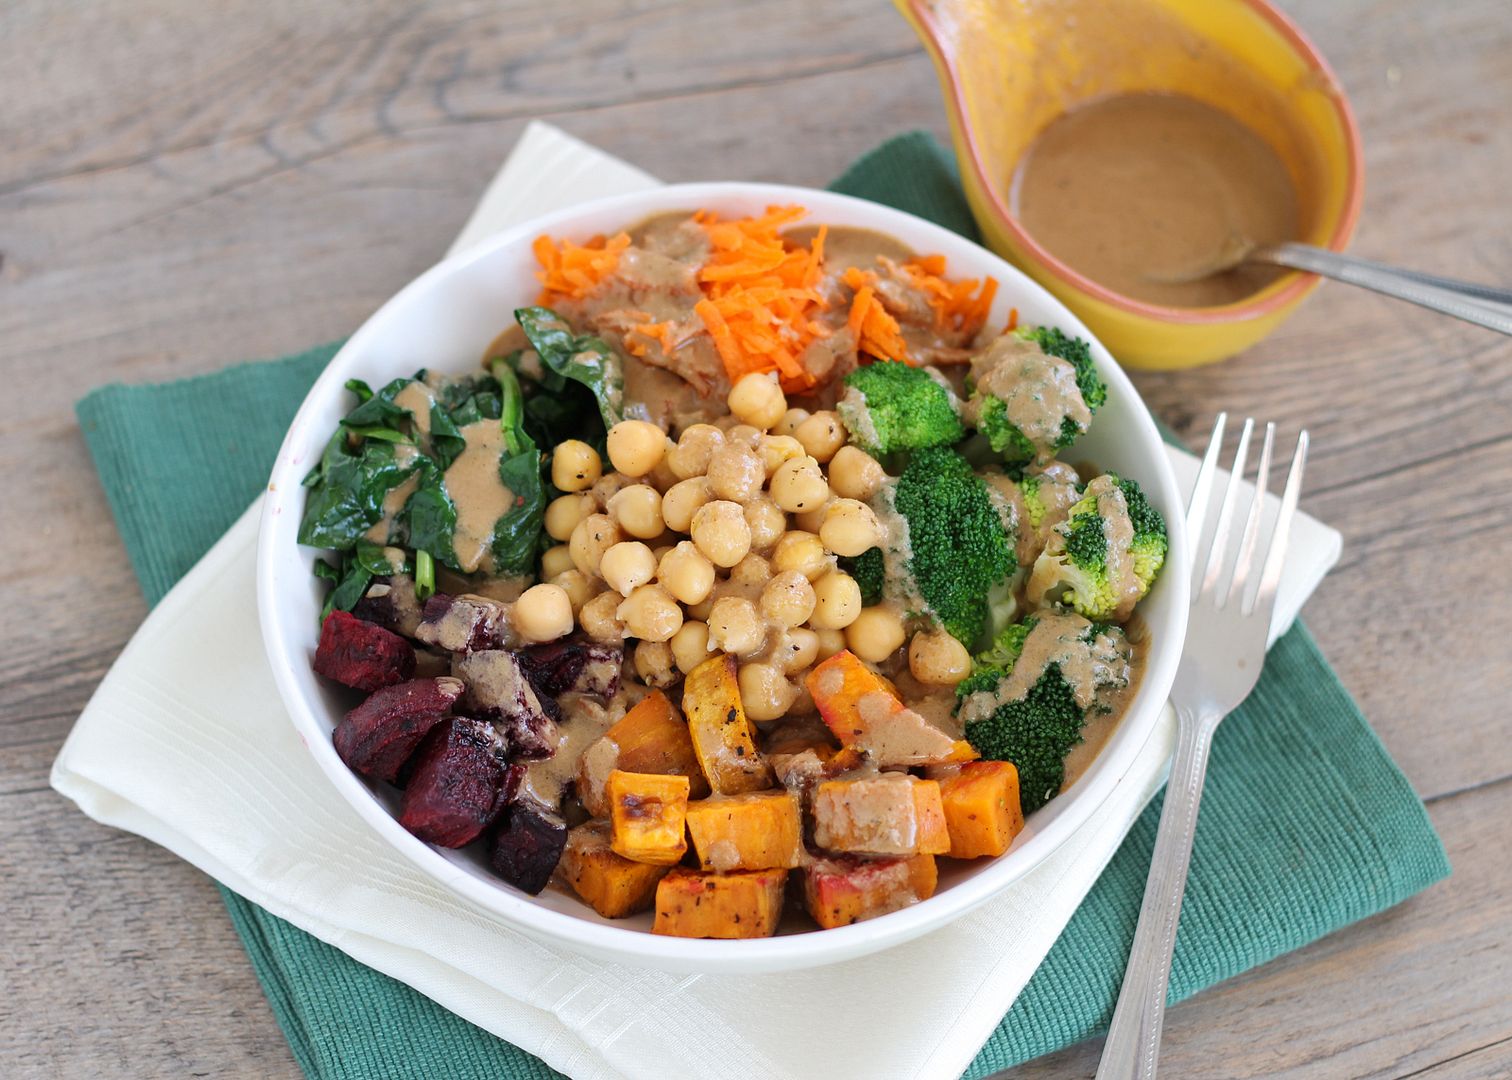
This makes a filling lunch or dinner that will leave you feeling great.  If you're making enough to have leftovers (which I recommend you do!), just be sure to store the sauce separately or else it will get absorbed and leave the dish feeling sauceless, which won't be as good as sauce is the most important part!
Chickpea & Veggie Brown Rice Barley Bowl with Tahini Dressing

Chickpea & Veggie Brown Rice Barley Bowl with Tahini Dressing

Inspired by several recipes, such as ones seen on Paint + Tofu, Dishing Up The Dirt, and Grace Bezanson

Makes 3-6 servings, depending on serving size

Ingredients:

For the Toppings:
~1 tablespoon olive oil
1 large sweet potato, chopped into bite-sized pieces
2 large beets, chopped into bite-sized pieces
1 head of broccoli, chopped into small florets
1 teaspoon sesame oil
1 clove garlic, minced
1 bunch of baby spinach (however much you like; I used a small container)
2 large carrots, grated (a food processor with the grater attachment works well for this!)
1 can of chickpeas, drained and rinsed

For the Base:
3-4 cups cooked brown rice and/or barley (I used a bag of mixed brown rice, barley, and spelt) or your favourite grain, such as quinoa (about 1 to 1-1/2 cups uncooked)

For the Sauce:
1/2 cup tahini
1/2 cup water
1/4 cup fresh lemon juice
1/4 cup soy sauce
2 teaspoons sesame oil
1 tablespoon + 1 teaspoon honey or agave
1/4 teaspoon each salt and pepper

Directions:

Preheat oven to 400°F.  Toss sweet potatoes and beets with olive oil, season with salt and pepper, and spread in an even layer on a foil-lined baking sheet. Roast in preheated oven for 25-35 minutes, until tender.  The sweet potatoes will likely be done sooner than the beets; just transfer them to a bowl and put the beets back in the oven.  I prefer roasting beets whole but this takes longer; if you have time, just roast the whole beet for 1 hour, drizzled with oil and wrapped in foil, then peel and chop it after.

Meanwhile, you can cook the broccoli, spinach, and your grains.  Steam the broccoli in a steamer basket over boiling water, covered, for about 2-3 minutes until bright green and tender.  Rinse with cold water and drain.  For the spinach, heat sesame oil in a large skillet over medium heat.  Add garlic and cook for 30 seconds (this is optional; you could also use a different oil if you like), then add spinach and cook just until wilted.  Remove from heat.  Cook your grains according to package directions; I cooked mine uncovered in simmering water for around 18 minutes, then seasoned with salt and pepper.

Prepare the dressing by whisking all ingredients in a small bowl until smooth.  Taste and adjust any amounts to your liking.  Note that this makes a lot of dressing and likely more than you’ll need; just save any extras for another use!
Prepare bowls by adding grains to the bottom, topping with vegetables (beets, sweet potatoes, broccoli, carrots, spinach) and chickpeas, and drizzling tahini dressing on top.  Toss to coat and season with salt and pepper, if desired.  You can eat this warm or at room temperature.

If you have leftovers, you can portion out everything together into containers except the sauce - that should  be kept separate and drizzled on right before eating so it doesn't get absorbed.

Chickpea & Veggie Brown Rice Barley Bowl with Tahini Dressing

January 13, 2014

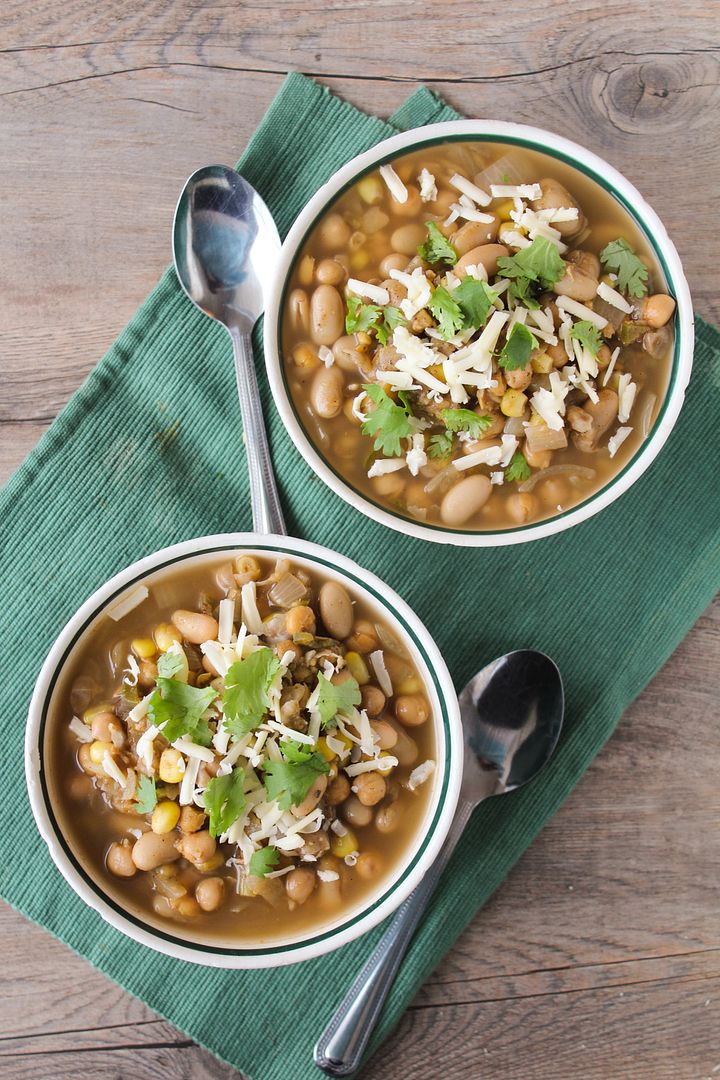
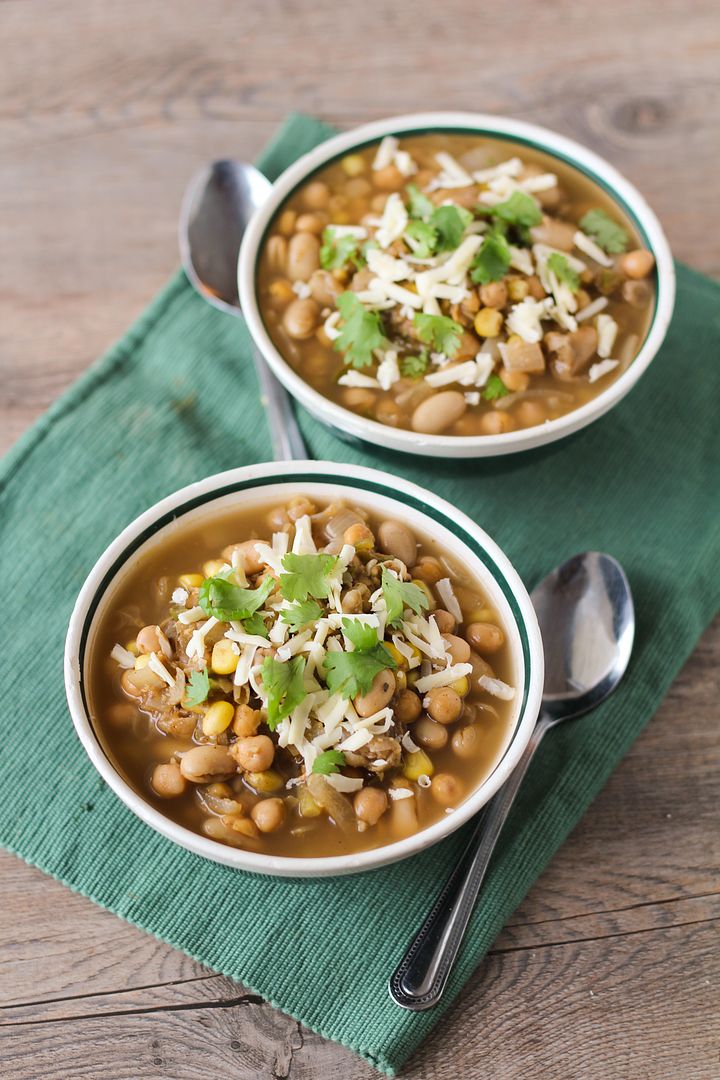
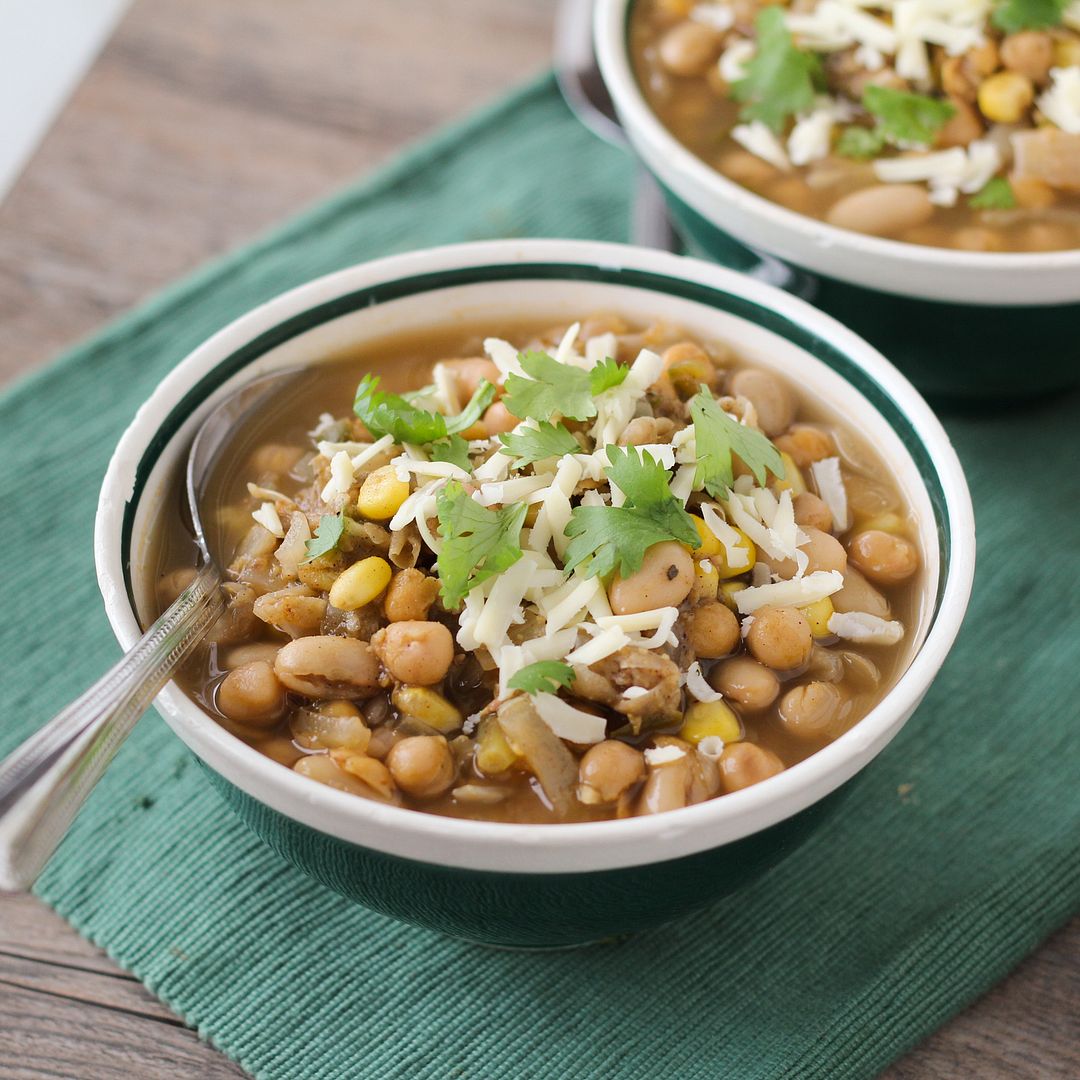
White Chickpea Chili

White Chickpea Chili - a healthy and easy vegetarian twist on white chicken chili

With the cold weather a lot of us experienced last week (except those lucky people in California!), I’m sure we’ve all been eating lots of warm comfort food lately.  When it gets that cold out all I want for dinner is soup, stew, or chili, but as these can often involve a lot of cooking time to develop enough flavour, during the week I need something that’s a little more quick and easy to prepare.  

Enter white chickpea chili!

White Chickpea Chili - a healthy and easy vegetarian twist on white chicken chili

I love white chicken chili as a refreshing change from tomato-based versions, but I decided to make it a little easier and cheaper to make by using all beans and no chicken.  This vegetarian white chili includes mashed chickpeas throughout for thickness, whole chickpeas and white beans for texture (and tons of protein, so you won’t miss the meat!), some corn for a little sweetness, jalapeno for spice, and then vegetable broth, garlic, onions, and seasonings for plenty of flavour.

You end up with a healthy vegetarian chili that’s inexpensive, easy and fairly quick to make, and full of flavour.  Perfect for these cold winter nights, and also Sunday playoffs if you usually associate football with chili (and if you're still watching - my team's still in it so I'm all about the football food!)

Hope you all had a good weekend and are dethawing a bit now!

White Chickpea Chili - a healthy and easy vegetarian twist on white chicken chili

White Chickpea Chili

Adapted from The Neely’s white chicken chili recipe

Serves about 4

Ingredients:

1 teaspoon olive or canola oil
1 large or 2 small yellow onions, chopped
2 cloves garlic, minced
1 jalapeno, minced (use more if you want it to be spicier)
2 (540mL) cans chickpeas, drained and rinsed, divided
1 (540mL) can white kidney beans, drained and rinsed
2 teaspoons ground cumin
1 teaspoon chili powder
1 teaspoon dried oregano
4 cups low sodium vegetable broth
1 tablespoon fresh lime juice
1 cup frozen corn kernels
Salt and pepper to taste

Toppings:
Shredded white cheddar cheese
Chopped fresh cilantro
Light sour cream
Chopped ripe avocado (not pictured in my version but it would be a nice addition!)

Directions:

Heat oil in a large saucepan or Dutch oven over medium-high heat. Add onions, garlic, and jalapeno, stir to coat with oil, and sauté until soft and fragrant, stirring occasionally, about 5 minutes.

Meanwhile, rinse and drain your cans of beans, keeping one can of chickpeas separate. Transfer those chickpeas (1 can) to a medium bowl and mash with a potato masher until most beans have been smashed. Set aside.

Add cumin, chili powder, and oregano to the onion mixture in the pan. Stir to coat and let cook for about 1 minute. Add vegetable broth, lime juice, corn kernels, mashed beans, and remaining beans. Bring to a boil, then reduce heat to simmer and let cook about 10-15 minutes.

Season with salt and pepper to taste. Serve warm in bowls topped with shredded cheese, cilantro, a dollop of sour cream, avocado, and additional lime wedges, if desired.

November 26, 2013

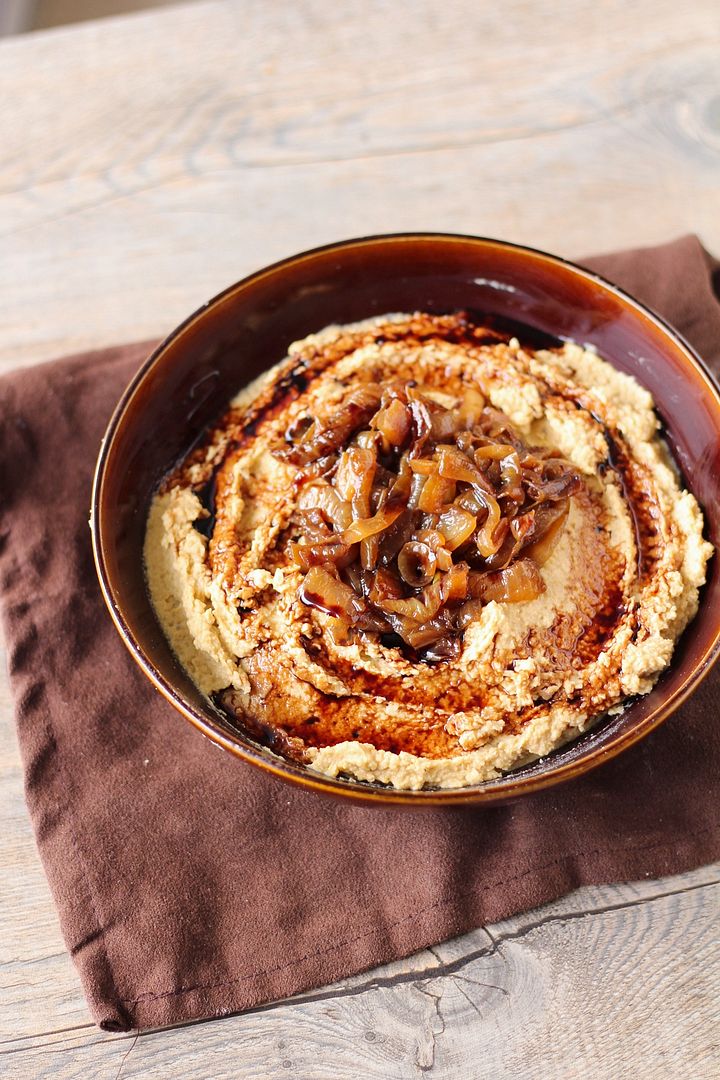
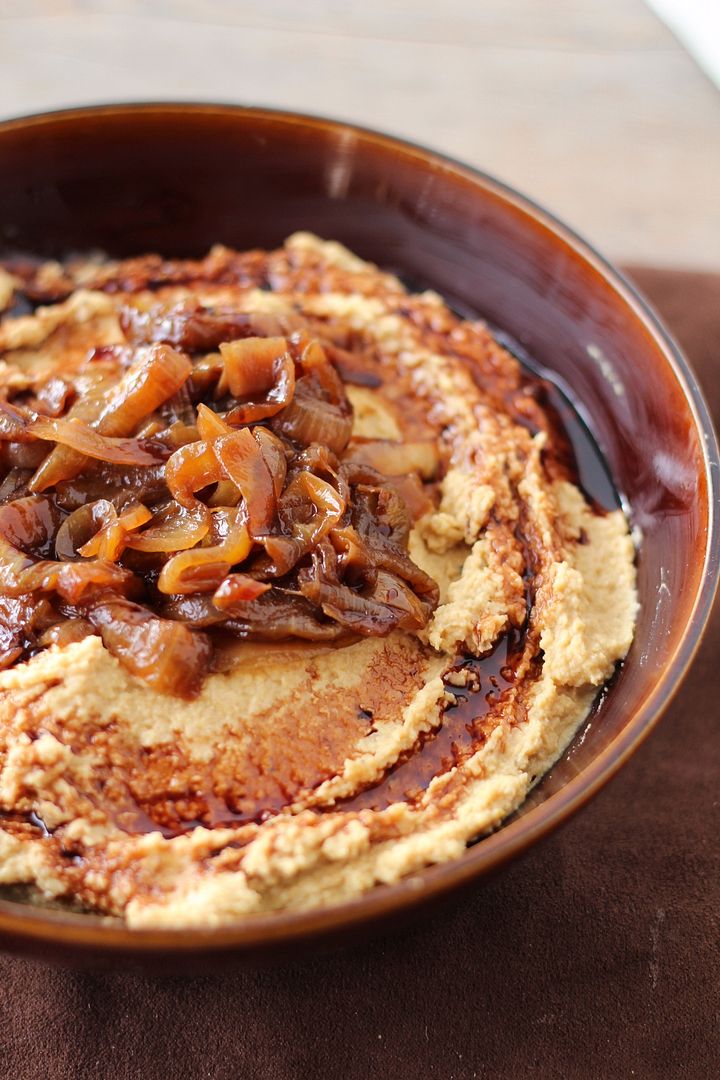
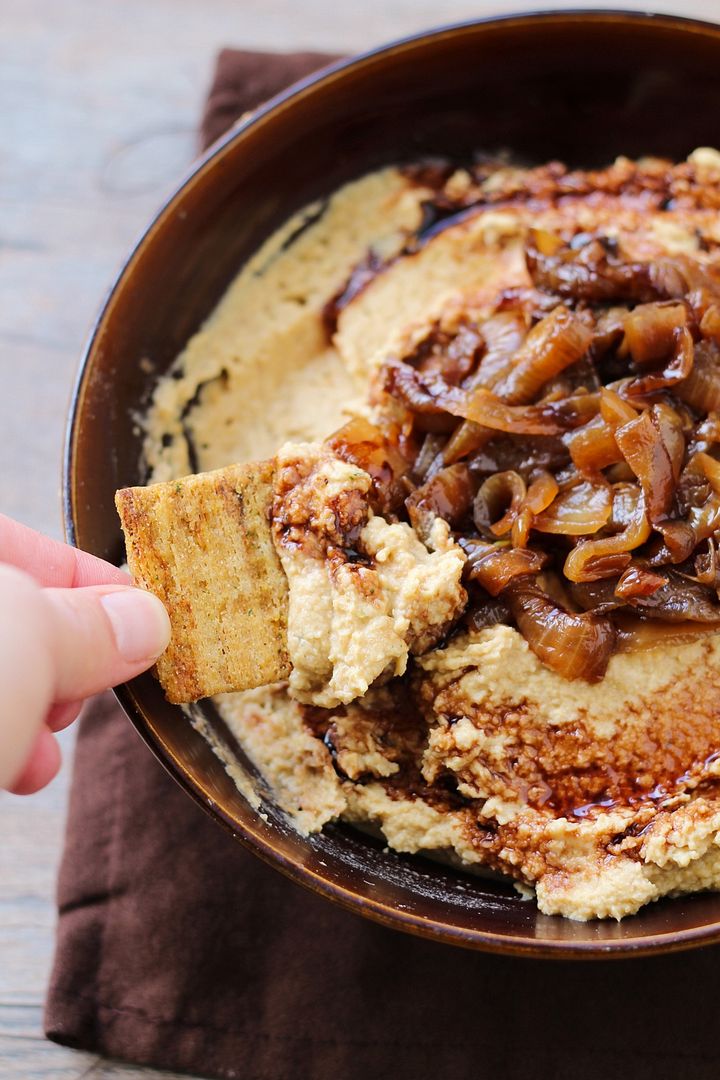
Balsamic Caramelized Onion Hummus

Balsamic Caramelized Onion Hummus

Sorry I haven't posted very much lately!  I had wanted to share a few Thanksgiving-y recipes before American Thanksgiving this week (even though we already had our Thanksgiving over a month ago, I always love an excuse to make comfort food!) but I just didn't have time.   I did, however, make this amazing balsamic caramelized onion hummus last weekend so I'm selling it as a last-minute Thanksgiving appetizer idea for my American friends, but you can and should make it any other time you want!

Balsamic Caramelized Onion Hummus

If you've read my blog for some time you know I love hummus, and especially trying new flavours of hummus.  I try to make it myself when I can because it's usually cheaper and healthier (plus you get a much bigger batch than the tiny containers from the store!), but I often buy it too, especially when a new flavour catches my eye at the grocery store.  The latest one to do so was Summer Fresh's caramelized onion hummus, which I completely devoured and then vowed to make my own version.

Balsamic Caramelized Onion Hummus

So I drew inspiration from the ingredient list on the container as well as a few recipes I easily found online to make my own recipe, and at the last minute decided to drizzle in a balsamic reduction to make it extra special!

Balsamic Caramelized Onion Hummus

I know I say this after every hummus I make, but I think this is my new favourite hummus!  Caramelized onions are already one of my favourite things to add to any dish, but they work especially well blended into a creamy dip and complemented with the sweetness of the balsamic reduction.  I left some caramelized onions whole too which gave the dip a nice added texture.

Balsamic Caramelized Onion Hummus

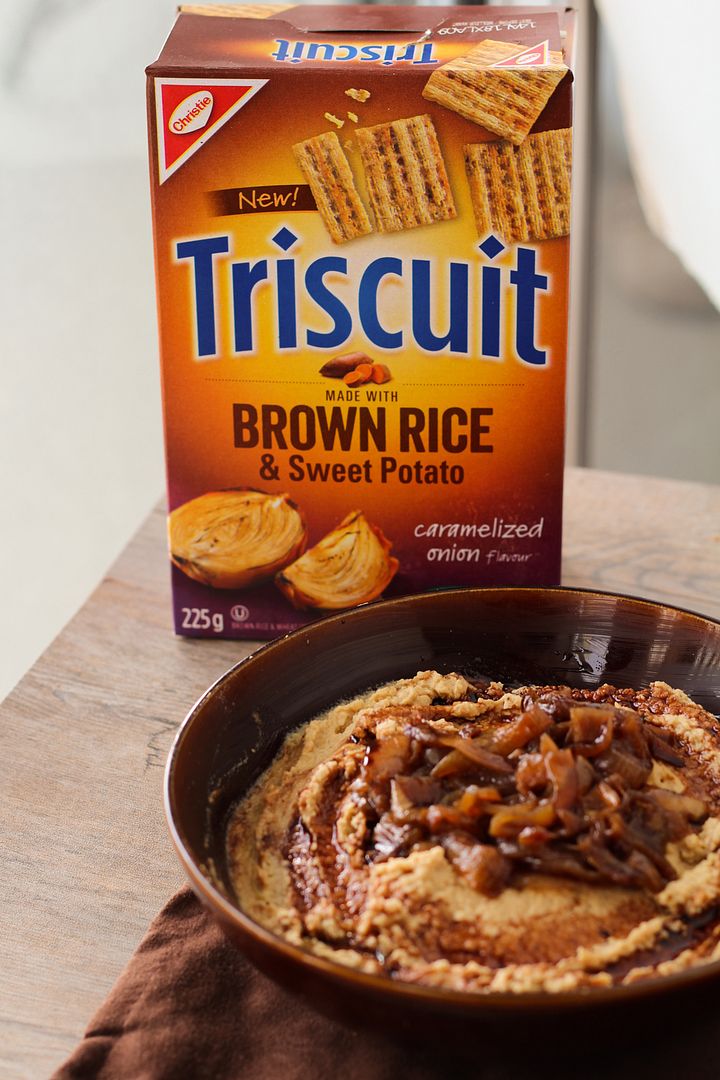
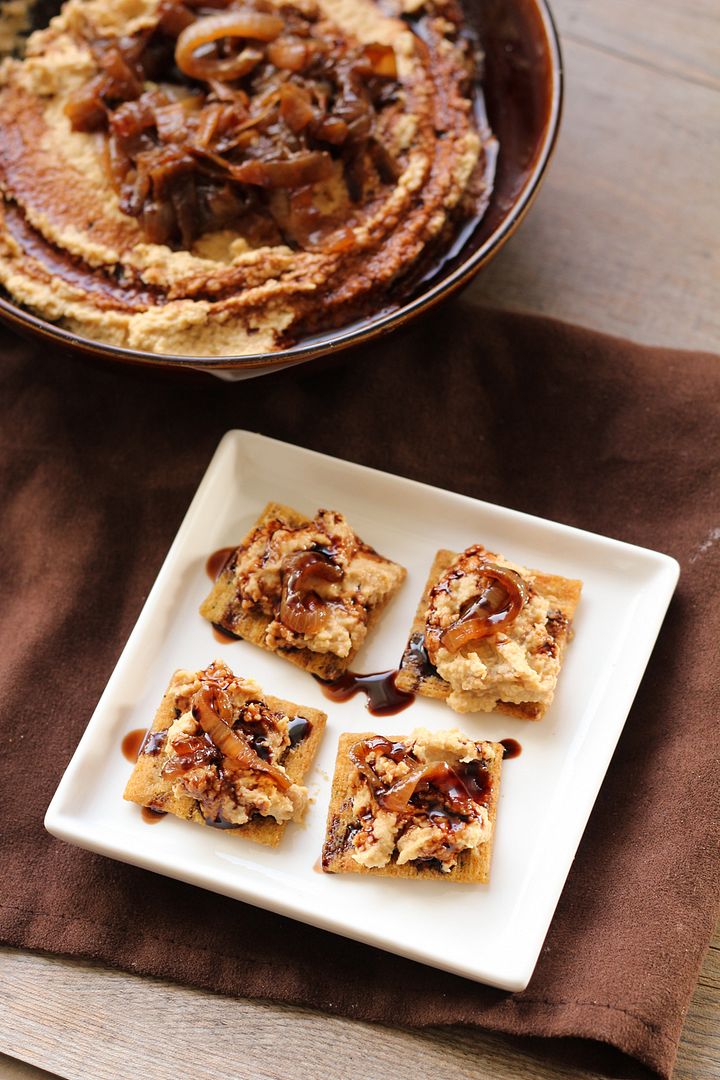
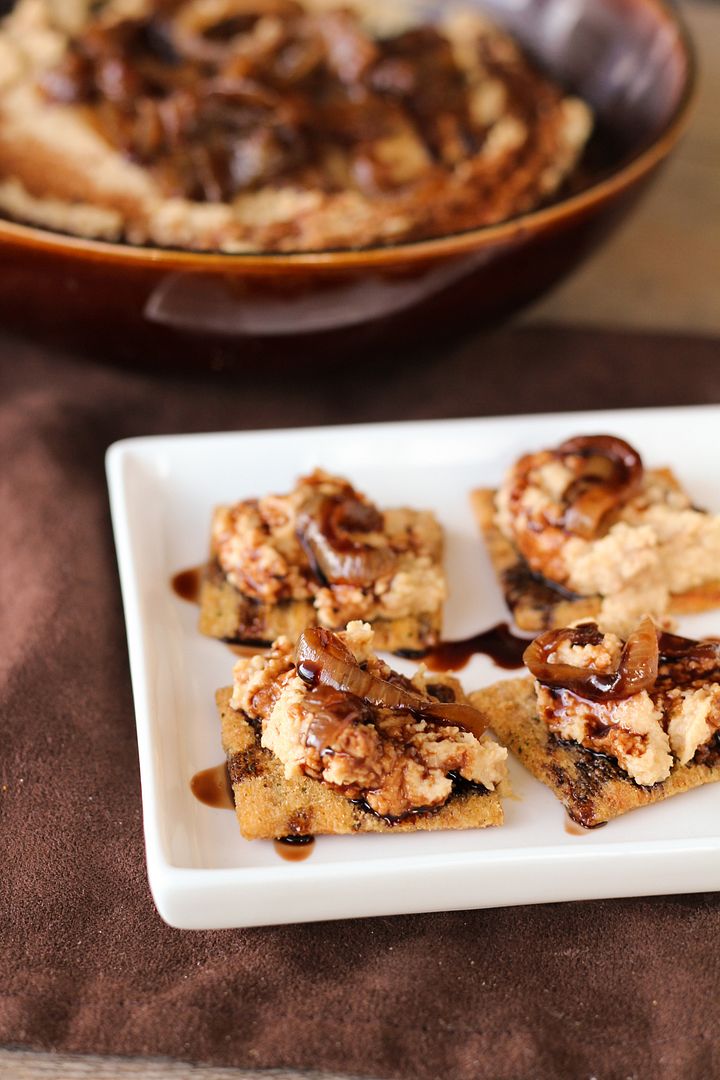
I ate mine with caramelized onion triscuits which obviously went perfectly well with the hummus.  They made great dippers, but if you want to make this a bit of a fancier appetizer, you can spread some hummus on the crackers and top them with a little caramelized onions and balsamic drizzle.
 A little more work but also a little prettier!

If you're celebrating Thanksgiving this week, I hope you have a wonderful time with family, friends, and food! 

Balsamic Caramelized Onion Hummus


Balsamic Caramelized Onion Hummus

Recipe inspired by Summer Fresh Caramelized Onion Hummus with additional inspiration from several sources including The Real Housewife, An Edible Mosaic, The Sweets Life

Ingredients:

2 teaspoons olive oil
2 medium yellow or sweet onions, thinly sliced
1-1/2 teaspoons brown sugar, divided
1/4 cup + 1 tablespoon balsamic vinegar, divided
1 (540mL) can chickpeas
3 tablespoons reserved liquid from can of chickpeas
3 tablespoons tahini
1 clove garlic, minced
1-1/2 to 2 tablespoons fresh lemon juice
1/2 teaspoon salt
1/4 teaspoon pepper

Directions:

Heat oil in a large non-stick skillet over medium heat.  Add onions and stir to coat with oil.  After about 5 minutes, season with a bit of salt.  Spread onions out evenly across the pan and let cook, stirring about every 3-4 minutes, until softened, about 20-30 minutes total.  In the last 5 minutes of cooking, add 1 teaspoon brown sugar and 1 tablespoon balsamic vinegar, and stir to coat.  Once they are caramelized to your liking, remove from pan.  Save a small amount of onions to top the hummus later, if desired.  Add the rest to the large bowl of a food processor. 

Meanwhile, reserve about 3 tablespoons of liquid from the chickpea can and drain and rinse the rest of the chickpeas.  Add 1/4 cup balsamic vinegar to a small saucepan, bring to a boil, and let simmer until reduced to a thick, syrupy liquid, about 1-2 tablespoons worth.  Remove from heat and set aside.

Add to the food processor the chickpeas, liquid from the chickpea can, tahini, garlic, lemon juice, 1/2 teaspoon brown sugar, salt, and pepper.  Process until smooth.  Adjust any ingredient amounts to your liking, if necessary.

Serve hummus topped with reserved caramelized onions and drizzle with the balsamic reduction.

July 23, 2013

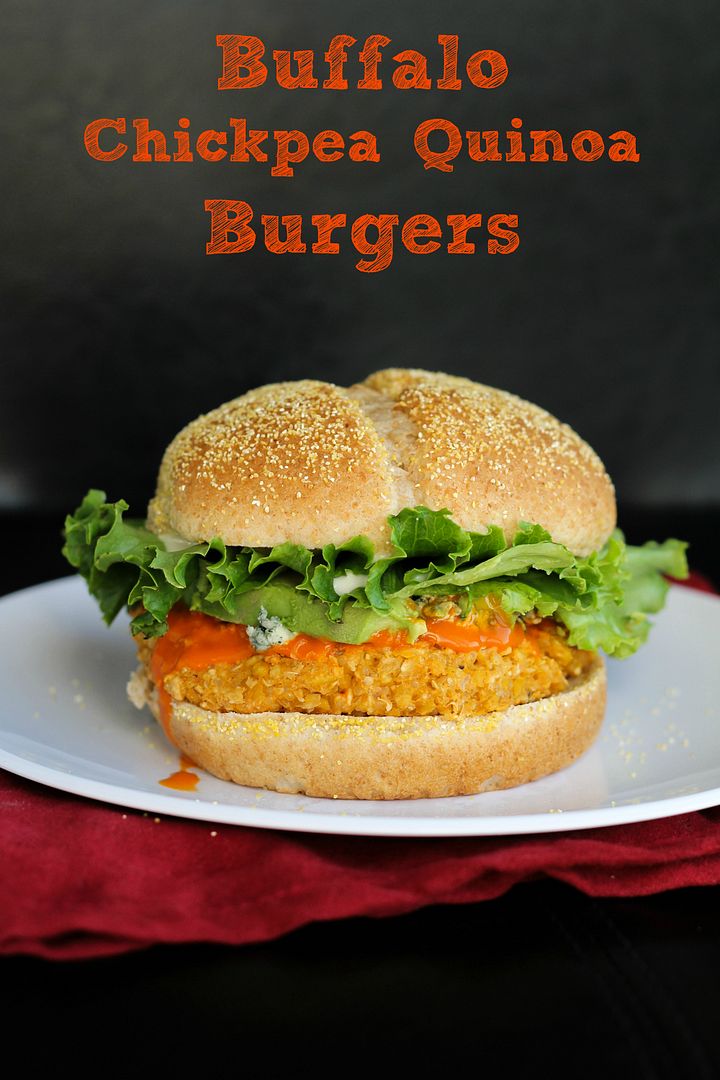
Buffalo Chickpea Quinoa Burgers

Buffalo chickpea quinoa burgers

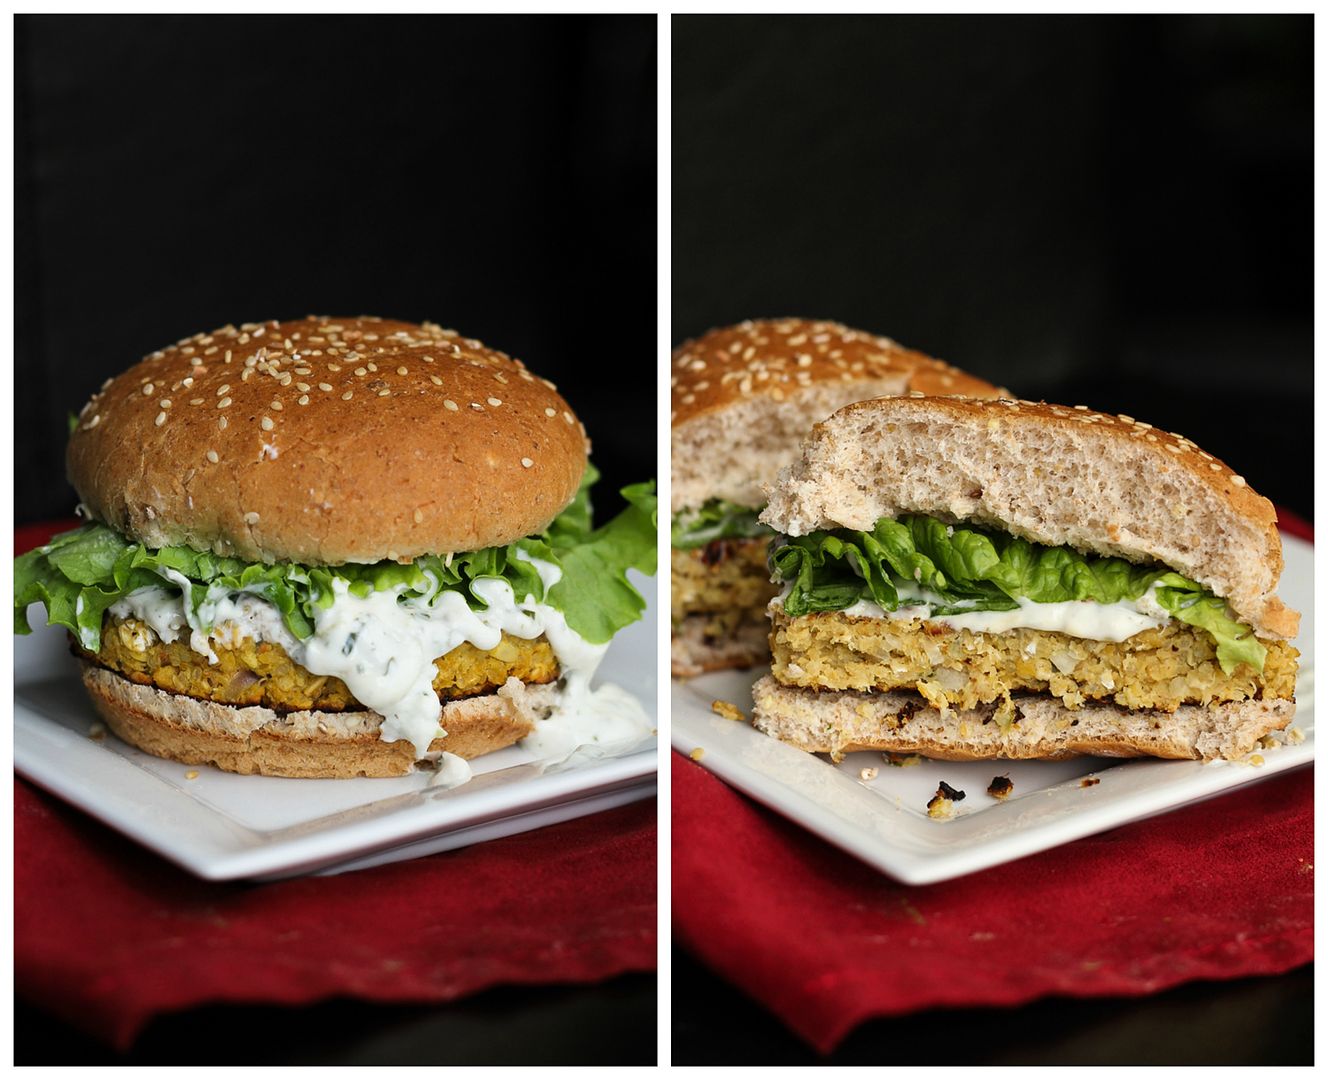
When I made these lemon & feta chickpea quinoa burgers for my boyfriend Ryan and I last month, I was worried that he wouldn’t even be willing to try them because he doesn’t eat a lot of veggie burgers and isn’t the biggest lemon fan.  Fortunately, he not only tried them, but actually quite liked them!   Of course, he commented that they’d be much better if I’d made them with buffalo or chipotle sauce instead of lemon though.

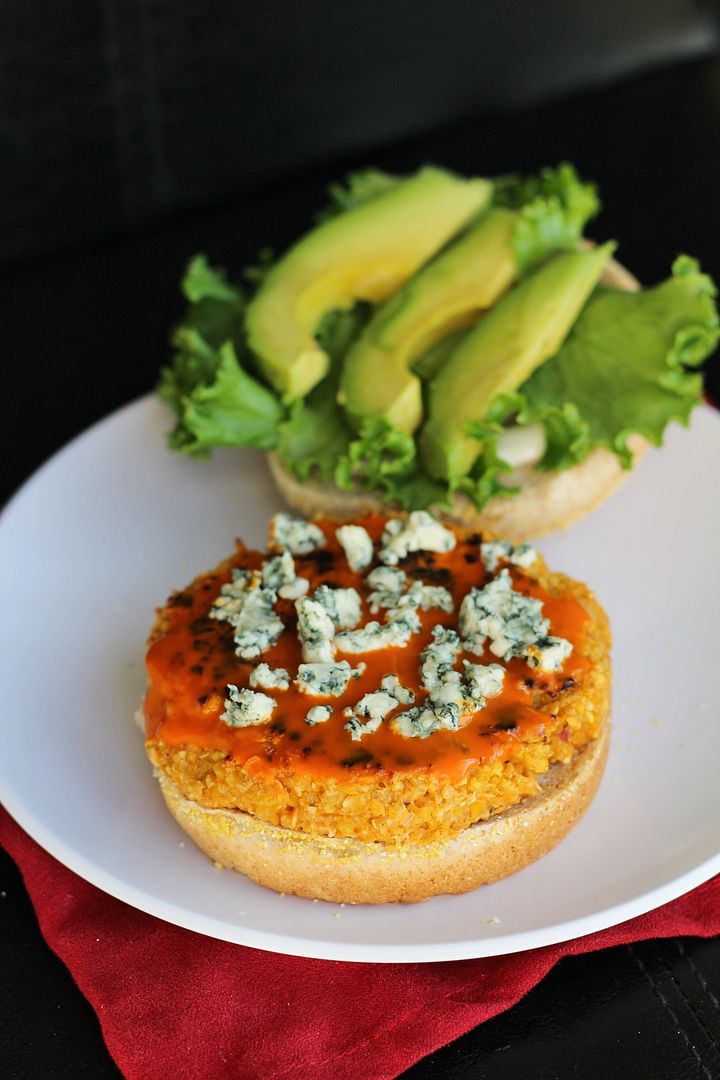
Buffalo chickpea quinoa burgers

I love all things lemon but I’m also a big buffalo sauce fan, so I decided to give Ryan’s “manlier” version a try.  We love these buffalo chicken burgers, but finding a protein-packed vegetarian substitute to replace them with once in a while was a pretty good idea.

Turns out he knew what he was talking about, because I think I liked these even better than the lemon version!

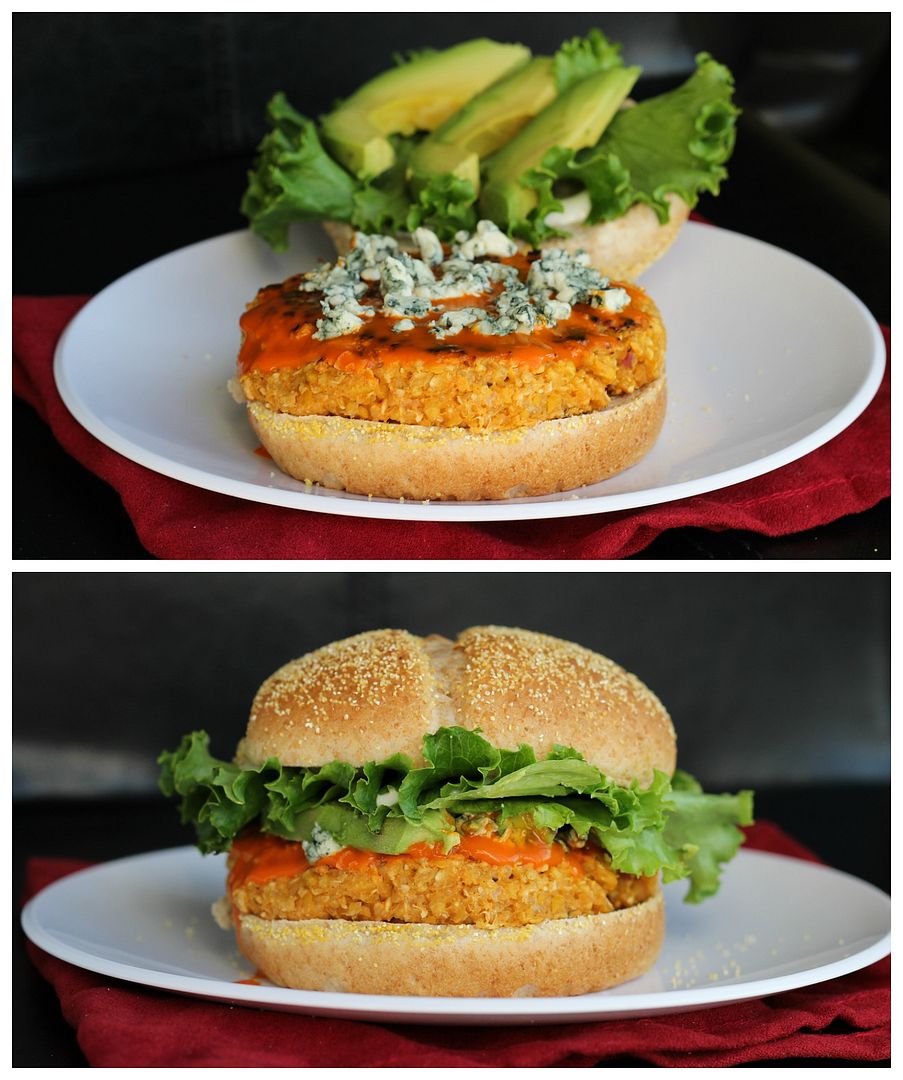
Buffalo chickpea quinoa burgers

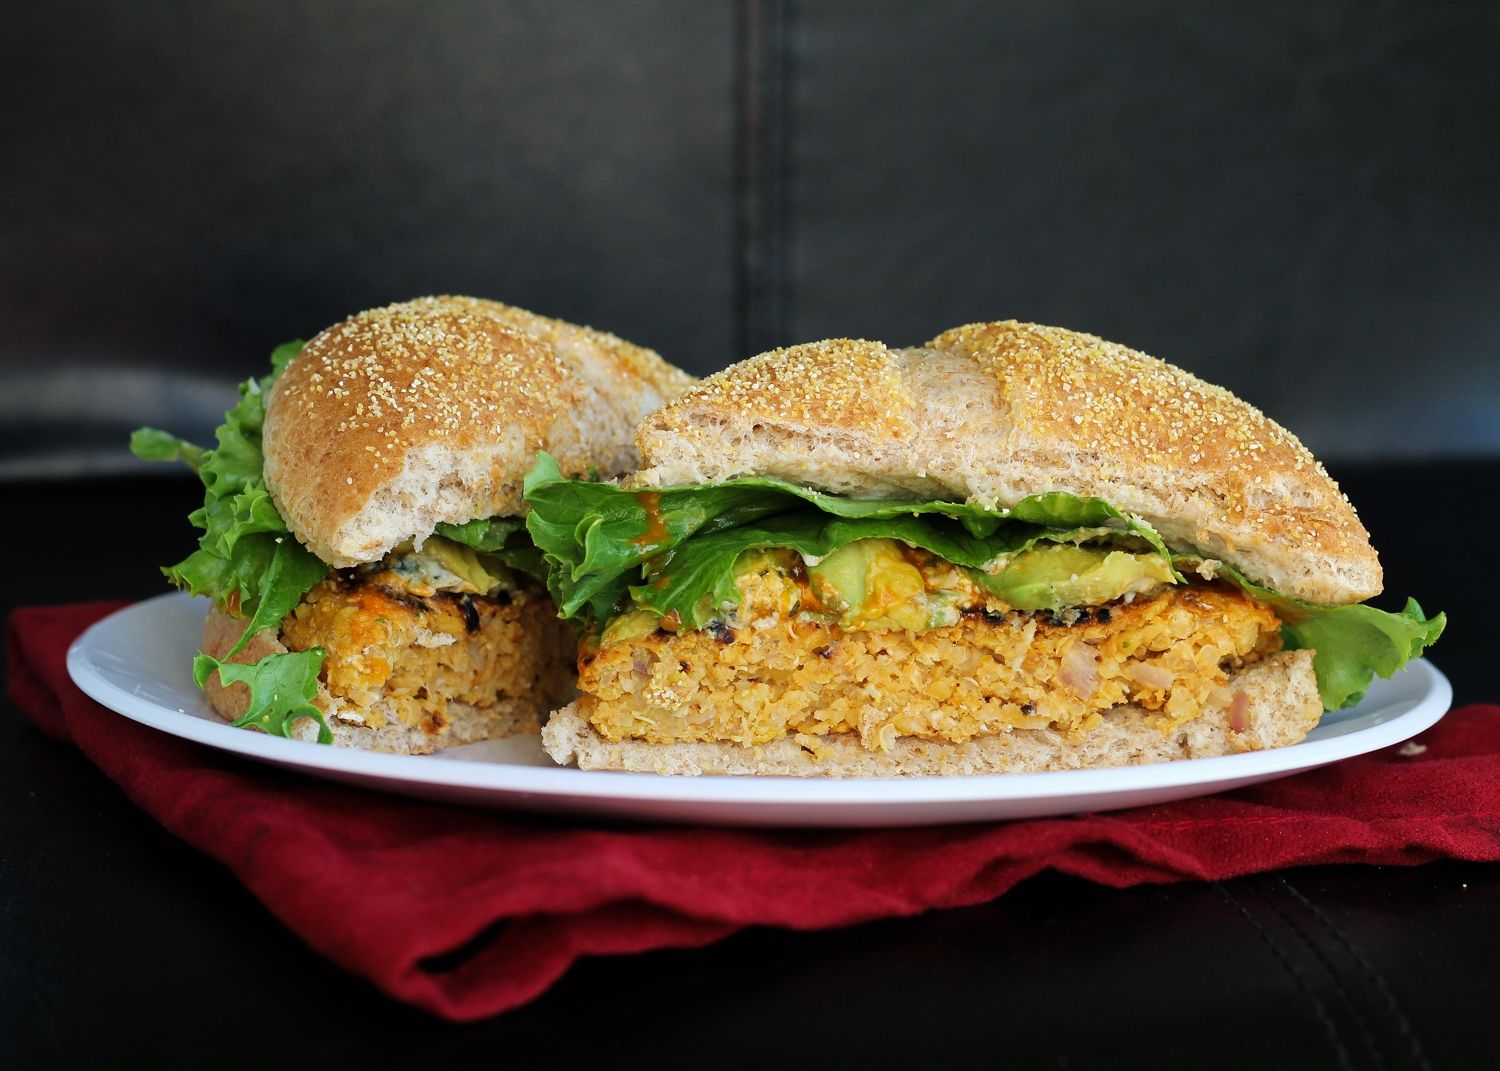
I used the same combination of chickpeas and quinoa as the base of the burger; with shallots and garlic added in for flavour and crunch; oats, breadcrumbs, and an egg to bind them; and buffalo sauce mixed into the patty and served on top for maximum buffalo flavour.  Combined with some blue cheese, lettuce, and avocado as toppings, these were hearty and full of flavour, and we both loved them!  Lesson learned: I should perhaps start listening to my boyfriend’s ideas more often.  Just don’t tell him I admitted that :)

Buffalo chickpea quinoa burgers


Buffalo Chickpea Quinoa Burgers


Makes 5 burgers

Ingredients:

For the Burgers:
1/4 cup uncooked quinoa
1 (540mL) can of chickpeas, drained and rinsed
1/2 cup rolled oats
1/4 cup minced shallot
2 garlic cloves, minced
1/4 cup buffalo sauce (your favourite brand, such as Frank's Red Hot Buffalo Wing Sauce or PC Buffalo Wing Sauce)
1 large egg, lightly beaten
1/2 teaspoon salt
1/4 teaspoon pepper
1/4 cup breadcrumbs

For Assembly:
5 whole grain hamburger buns
Crumbled blue cheese
Additional buffalo sauce
Lettuce
Ripe sliced avocado (optional)

Directions:

Bring 1/2 cup water to a boil.  Add quinoa, cover, reduce heat and let simmer 15 minutes.  Remove from heat and keep covered for 5 minutes.  Fluff with a fork and let cool slightly.

Meanwhile, add chickpeas to the bowl of a food processor or mini chopper and pulse until they are broken down into crumb-sized pieces.  Transfer to a large bowl.  Add oats to same food processor and pulse a few times to break them down into fine crumbs (but not a powder).  Add to chickpeas in large bowl.  Add to the bowl the shallots, garlic, buffalo sauce, egg, salt, and pepper.  Add the cooked quinoa.  Mix everything together with a large fork until well combined.  If mixture is still too wet to form patties, add the 1/4 cup of breadcrumbs (or enough to hold the mixture together).  Divide and shape into 5 patties.

Heat a non-stick skillet over medium-high heat and cook patties for about 4-5 minutes per side.

Assemble burgers by placing patty on bun, topping with additional buffalo sauce, a bit of blue cheese (be careful not to add too much so it’s not overpowering – I though the amount I used (in the pictures) was too much), lettuce, and avocado or tomato if desired.

July 09, 2013

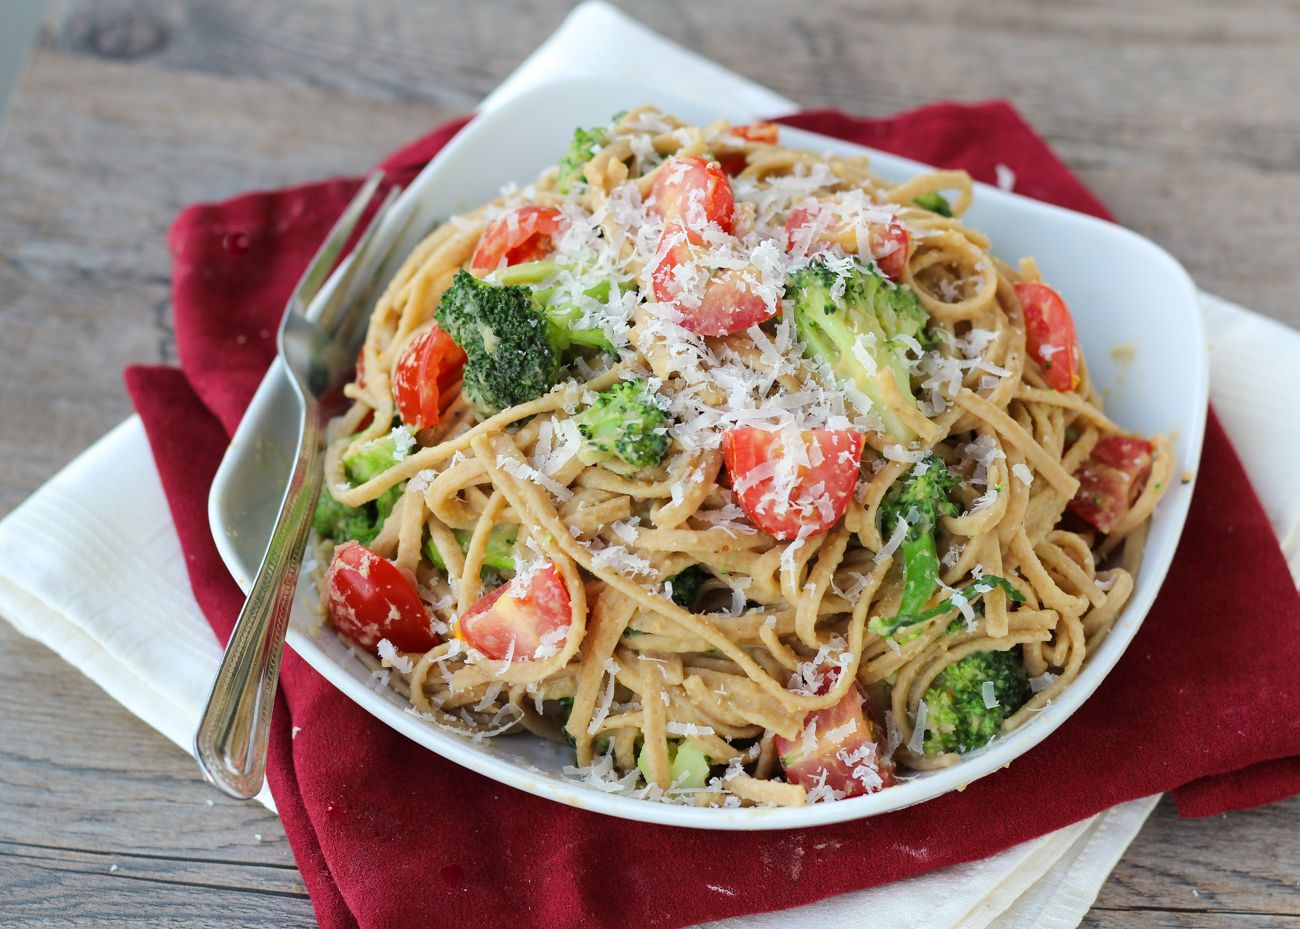
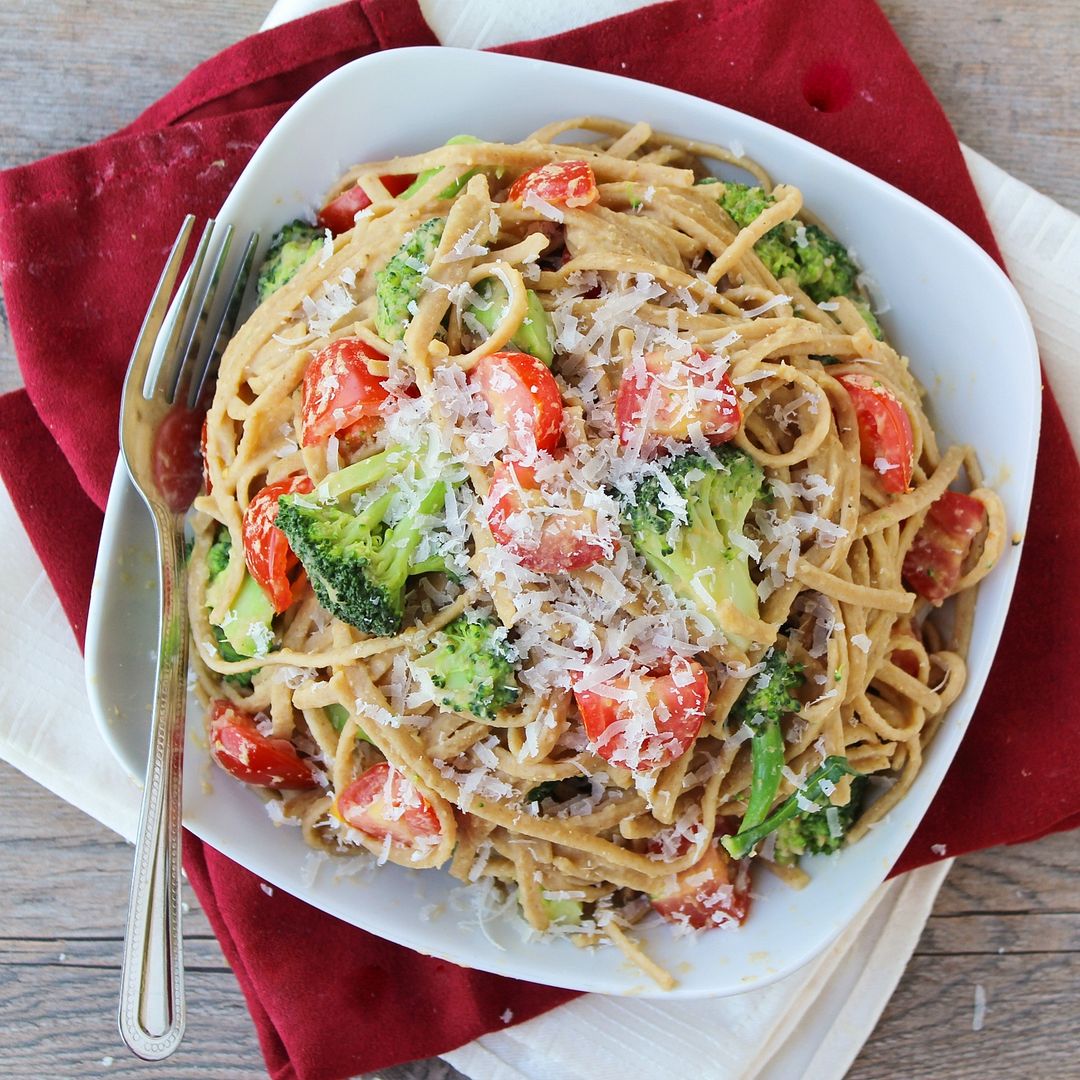
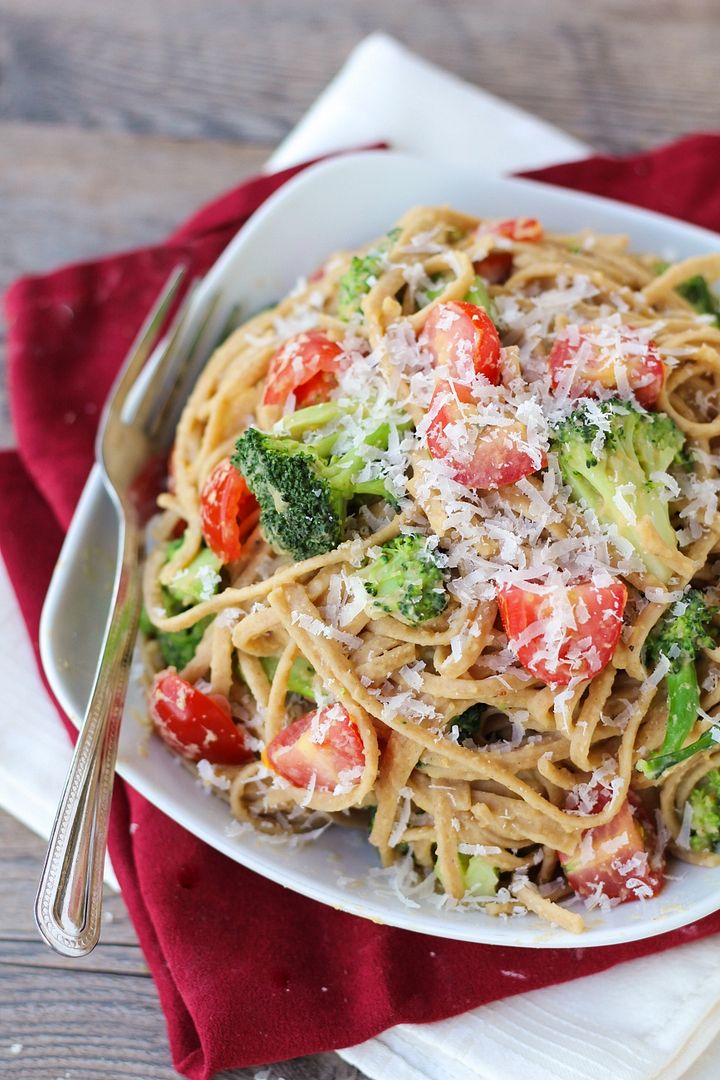
Whole Wheat Pasta with Chickpea Sauce, Broccoli, & Tomato

Healthy vegetarian whole wheat pasta with broccoli, tomatoes, and chickpea sauce!

I got back from my little vacation up north almost a week ago now and somehow I still haven’t cooked a meal for myself yet.  Usually I’m dying to get back to cooking my own meals when I return from a trip, but this time I’ve been too busy to go grocery shopping or plan a meal and have therefore been eating a lot of peanut butter and jam sandwiches (thankfully I froze some fresh blueberry chia jam before I left) over the last week!  But seeing as I used up the last of my frozen bread today, I think tonight I’ll finally force myself to go shopping and make some food to get me through the rest of the week!

One of my go-to meals when I need an inexpensive and healthy meal that will give me leftovers for lunches through the week is this chickpea pasta.  A sauce that’s made out of chickpeas may sound a little weird, but it tastes so good!  I want to say it tastes like a white wine cream sauce but I’m sure someone who regularly eats cream sauces will disagree, so I’ll just say that it’s hard to guess it’s a chickpea sauce (unless you’re looking closely at the texture, which is of course a little chunkier than a cream sauce).  

Healthy vegetarian whole wheat pasta with broccoli, tomatoes, and chickpea sauce!

I’ve adapted this Cooking Light recipe over several meals to my own liking, so that in my version I eliminate the raw garlic as I don’t think it’s needed, add cooked onion to the sauce for more flavour, use vegetable broth instead of chicken (not just to make it vegetarian but because I think it tastes better in this dish), and I add broccoli and increase the amount of veggies.  I also like to use whole wheat pasta and have tried shells, rotini, and linguine – they all work.  Feel free to use whatever vegetables you want too – mushrooms, zucchini, peppers, leafy greens – they’d all be great if you want to boost the nutrients even more.  

With the protein in the chickpea sauce, this makes a great vegetarian meal that will fill you up to power you through the rest of the work day, which, along with coffee, I will definitely be needing this week!

Healthy vegetarian whole wheat pasta with broccoli, tomatoes, and chickpea sauce!

Whole Wheat Pasta with Broccoli, Tomato, & Chickpea Sauce

Adapted from Cooking Light

Serves 4-6

Ingredients:

1 tablespoon olive oil
1 small onion, chopped
3 cloves garlic, minced
3/4 teaspoon kosher salt
1/4 teaspoon red pepper flakes
1 (540mL) can chickpeas, drained and rinsed
1-3/4 cups vegetable broth
375g (one box) uncooked whole wheat pasta (any type works)
1 head of broccoli, chopped into florets
1 pint grape tomatoes, halved
1-1/2 tablespoons fresh lemon juice
Grated parmesan cheese for topping
Salt and pepper for extra seasoning

Directions:

Heat oil in a large saucepan over medium heat. Add onion and sauté until softened, about 4 minutes, stirring often. Add garlic and stir for another minute. Add salt, red pepper flakes, chickpeas, and vegetable stock. Bring to a boil, cover, reduce heat, and simmer 15 minutes.

Meanwhile, cook pasta in salted boiling water according to package directions. During the last few minutes of cooking, place broccoli in a steamer and set covered over the boiling water until bright green. Drain broccoli and pasta, reserving 1/4 cup of the pasta water.

Place chickpea mixture in a food processor. Add lemon juice and reserved pasta water and blend until smooth. Season with additional salt and pepper if desired.

Combine chickpea sauce, pasta, broccoli, and tomatoes in a saucepan or large bowl and toss to combine. Serve warm, topped with grated parmesan cheese.  Season again with salt and pepper if needed.

June 11, 2013

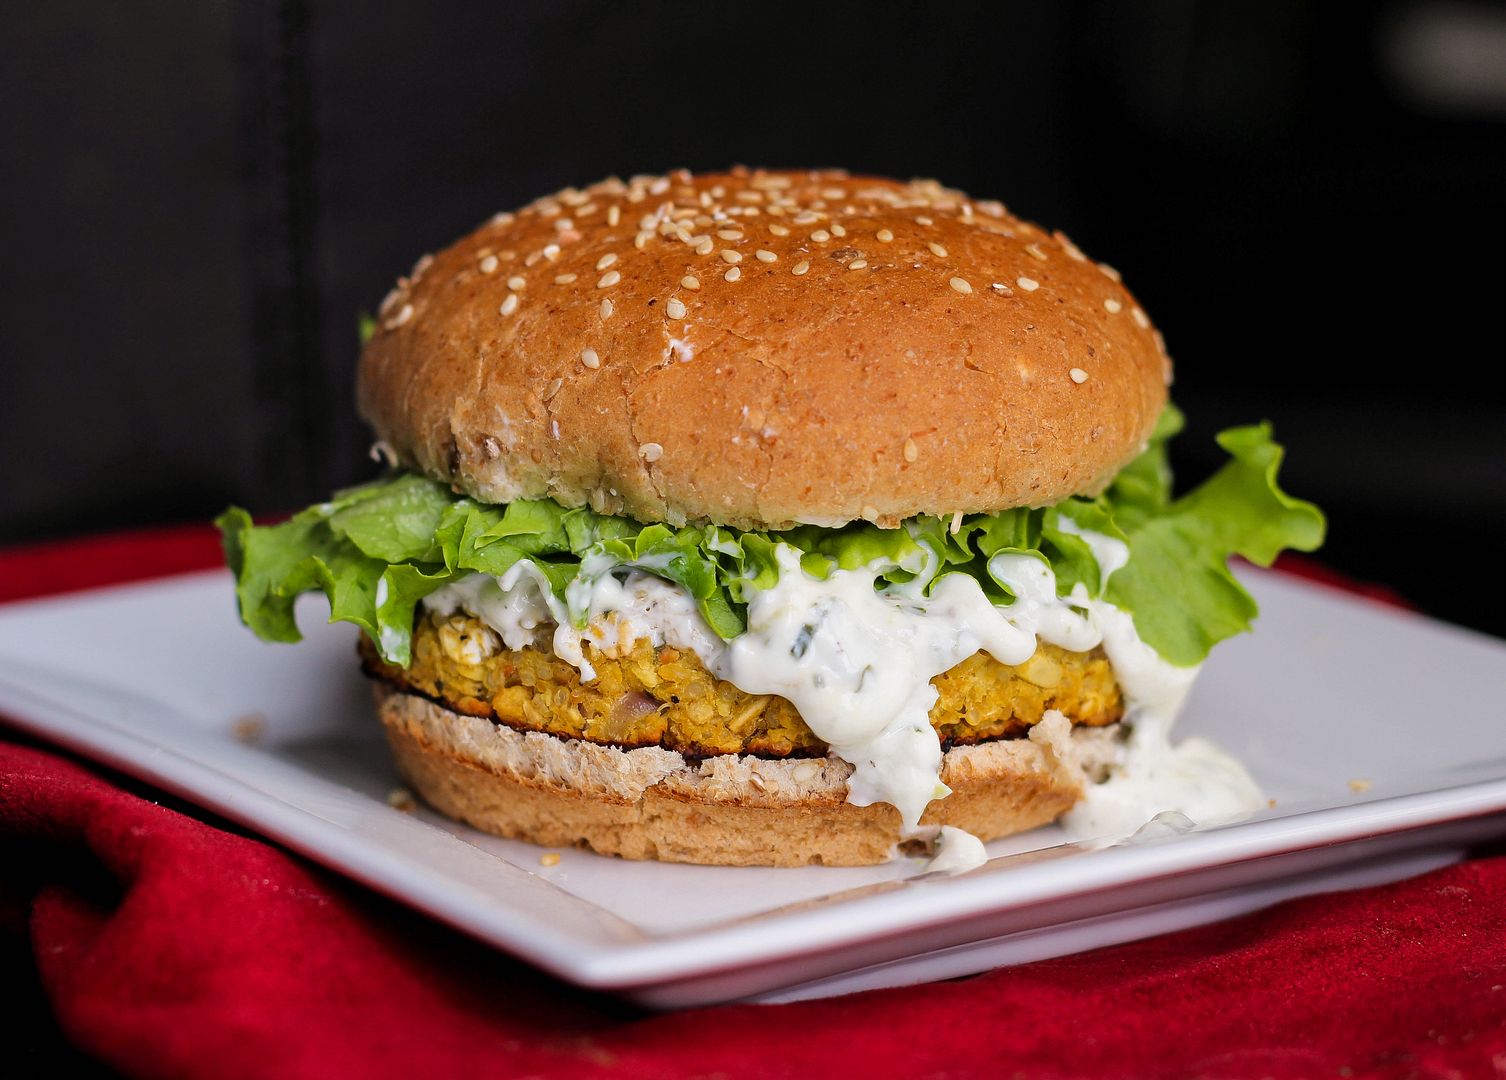
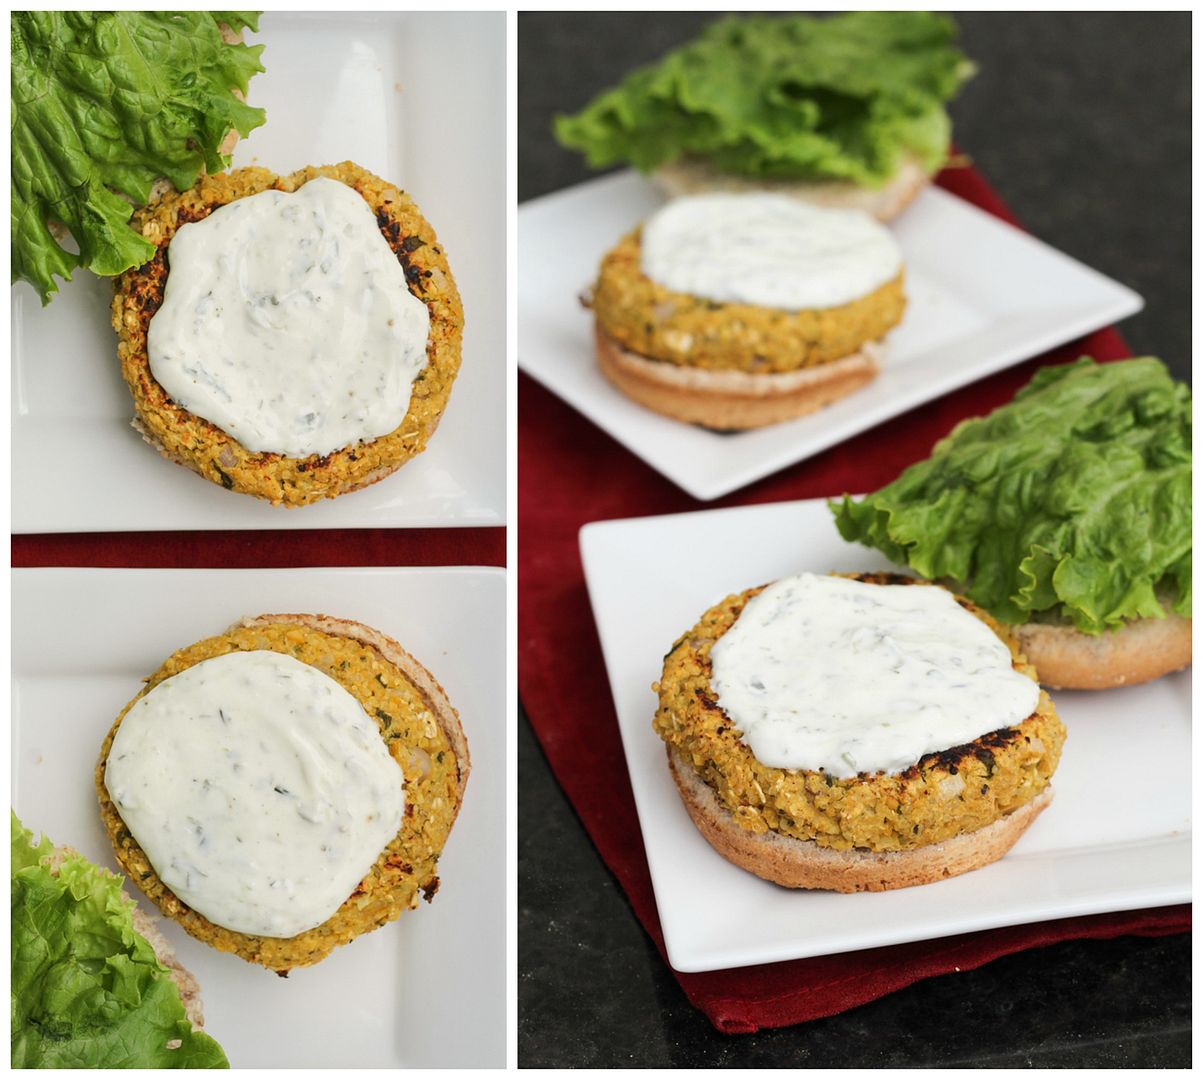
Lemon Chickpea Quinoa Burgers

Lemon Chickpea Quinoa Burgers

I love those free little newspaper/magazines that grocery stores put out to advertise their new products every season, mostly because I love anything that’s free, but also because I’m always looking for new sources of inspiration for ingredients and recipes.  It’s not often that I find a recipe I actually like in there, but when I saw these lemon chickpea quinoa burgers in the latest issue of Inspired (by Sobeys), I was intrigued because I’ve never seen anything quite like it.

So, I got right to work making my own version, with shallots instead of red onion, basil instead of parsley, more oats to firm the mixture up a bit, and a lemon yogurt sauce to serve with them.  I also refrained from processing the whole mixture to keep some texture in them, and I pan-fried my burgers instead of barbequing them (because I don’t have a bbq), but I think they’d be firm enough to bbq if you want to give it a try!

Lemon Chickpea Quinoa Burgers

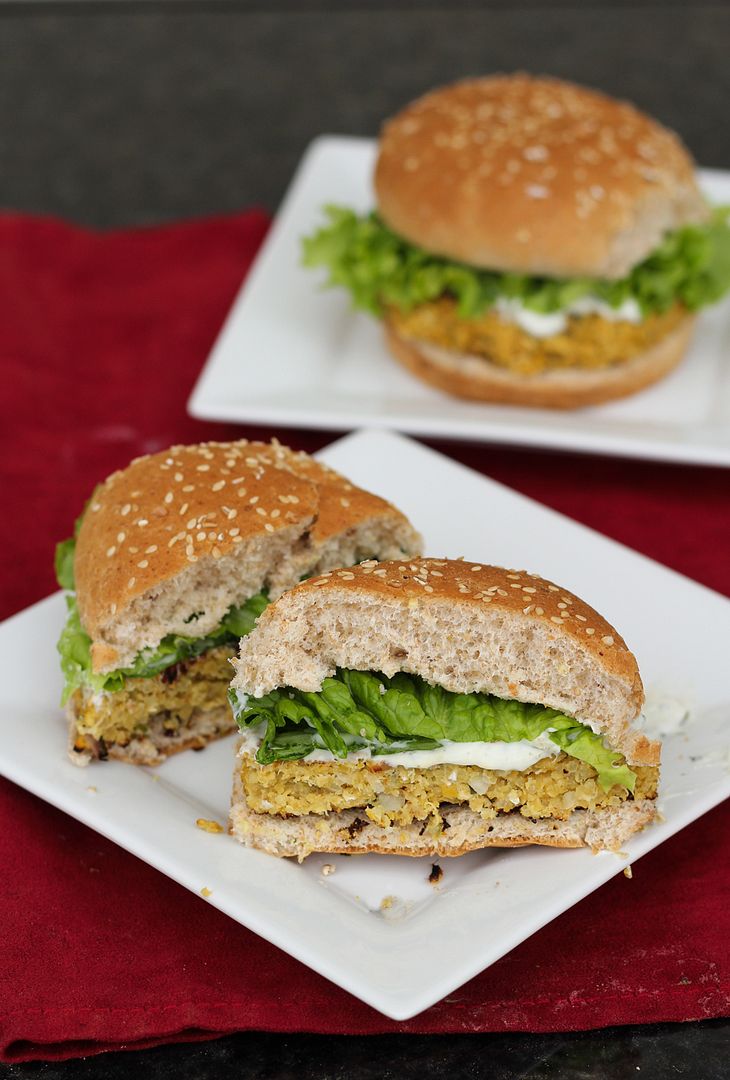
I loved the texture of the burgers, which held their shape and had a bit of crunch from the quinoa, and I loved the bright lemon flavour that really shone through in both the burgers and yogurt sauce.  I also think they would work really well as cute little vegetarian sliders at a bbq!

And as far as burgers go, these are pretty darn healthy!  They’re full of protein from the addition of chickpeas, quinoa, and Greek yogurt, as well as fiber from the oats and whole grain buns, and vitamins from the veggies and lemon.  

Lemon Chickpea Quinoa Burgers

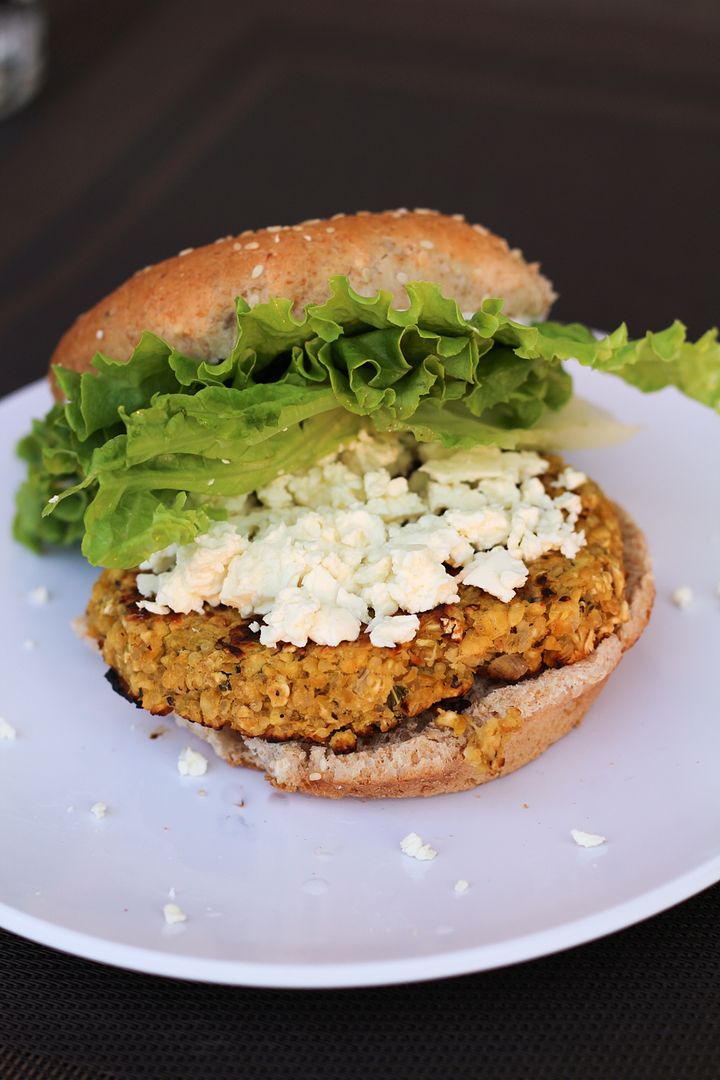
After tasting them, I did think they needed a little something extra to balance out all the lemony-ness, so the next night I added feta cheese on top of the burger, and the saltiness of the feta was the perfect thing to balance out the sour lemon.  So don’t leave out the feta!

(I had to take a quick shot the next night to document the feta since it wasn’t in any of the other pictures.  I went a little heavy with the feta, but a lot of it falls out anyway!  The sauce is still there, on top of the lettuce):

Lemon Chickpea Quinoa Burgers

Of course, the boyfriend said that these were good, but that next time I should maybe make them with buffalo or chipotle sauce instead of lemon (he’s not much of a lemon person, except for lemon poppy seed bread). 

But while these may not be much of a manly burger, I think the fact that he was willing to eat them for dinner three nights in a row shows that they’re still pretty tasty!

Lemon Chickpea Quinoa Burgers

Lemon Chickpea Quinoa Burgers

Adapted from Inspired

Makes 5 burgers

Ingredients:

For the Burgers:
1/4 cup uncooked quinoa
1 (540mL) can of chickpeas, drained and rinsed
1/2 cup rolled oats
1/4 cup minced shallot
2 garlic cloves, minced
1 tablespoon lemon zest
2 tablespoons fresh lemon juice
1 large egg, lightly beaten
1 teaspoon cumin
1/2 teaspoon salt
1/2 teaspoon pepper
2-3 tablespoons packed minced basil (or parsley if you like)

For the Sauce:
1/2 cup plain Greek yogurt
1 tablespoon fresh lemon juice
1 tablespoon minced basil
Salt and pepper

For Assembly:
5 whole grain hamburger buns
Lettuce
Feta cheese (low-fat, if desired)

Directions:

Bring 1/2 cup water to a boil.  Add quinoa, cover, reduce heat and let simmer 15 minutes.  Remove from heat and keep covered for 5 minutes.  Fluff with a fork and let cool slightly.

Meanwhile, add chickpeas to the bowl of a food processor or mini chopper and pulse until they are finely ground.  Transfer to a large bowl.  Add oats to same food processor and pulse a few times to break them down into fine crumbs (but not a powder).  Add to chickpeas in large bowl.  Add to the bowl the shallots, garlic, lemon zest, lemon juice, egg, cumin, salt, pepper, and basil.  Add quinoa.  Mix everything together with a large fork until well combined.  (note: leave the egg to mix in last if you want to be able to taste the mixture first and adjust seasonings or lemon juice to your liking). Divide and shape into 5 patties.

Heat a non-stick skillet over medium-high heat and cook patties for about 4-5 minutes per side.

Meanwhile, prepare yogurt sauce by mixing yogurt, lemon juice, and basil, and seasoning with salt and pepper to taste.

Assemble burgers with yogurt sauce, lettuce, and feta on whole grain buns.

June 03, 2013

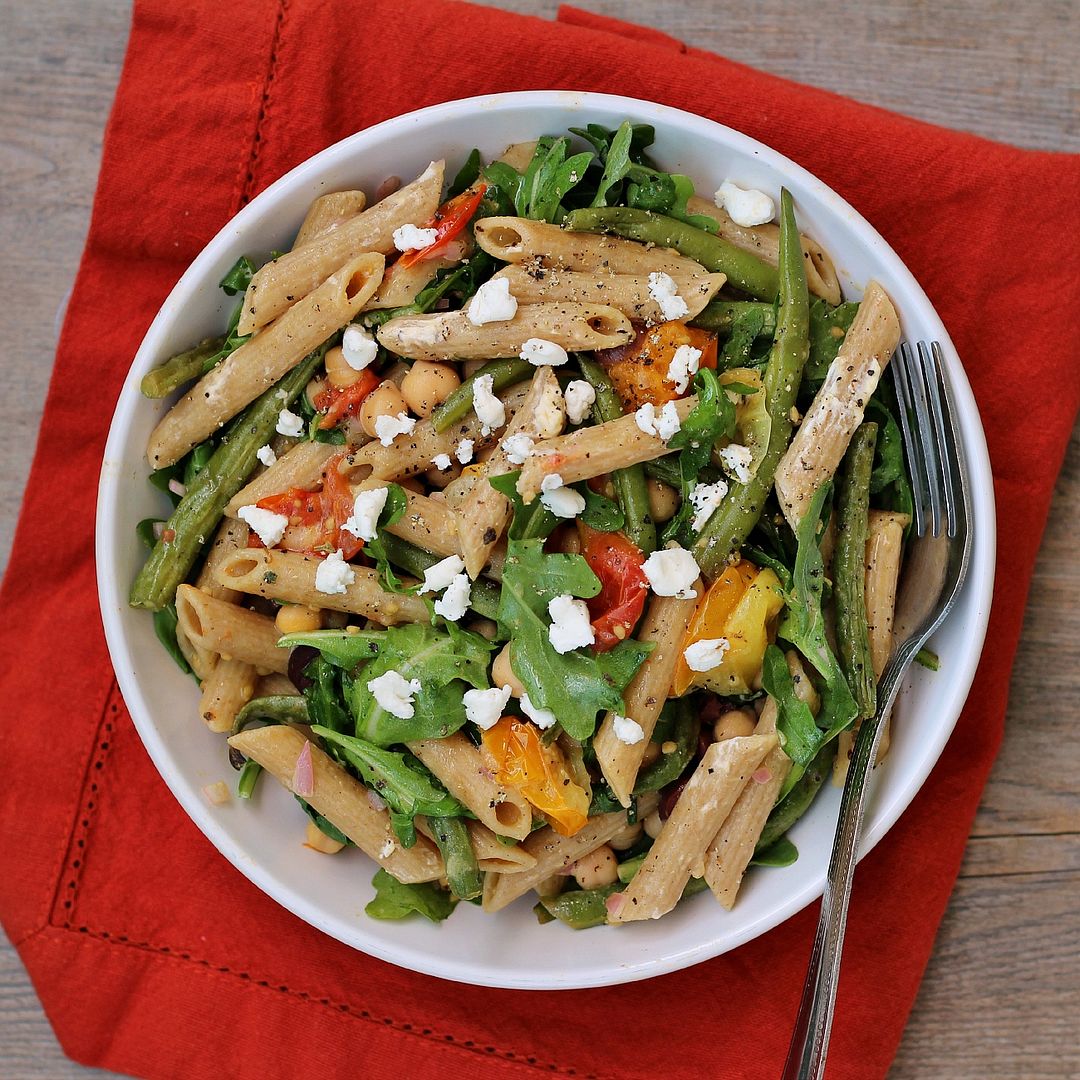
Arugula Pasta Salad with Chickpeas, Veggies, and Goat Cheese

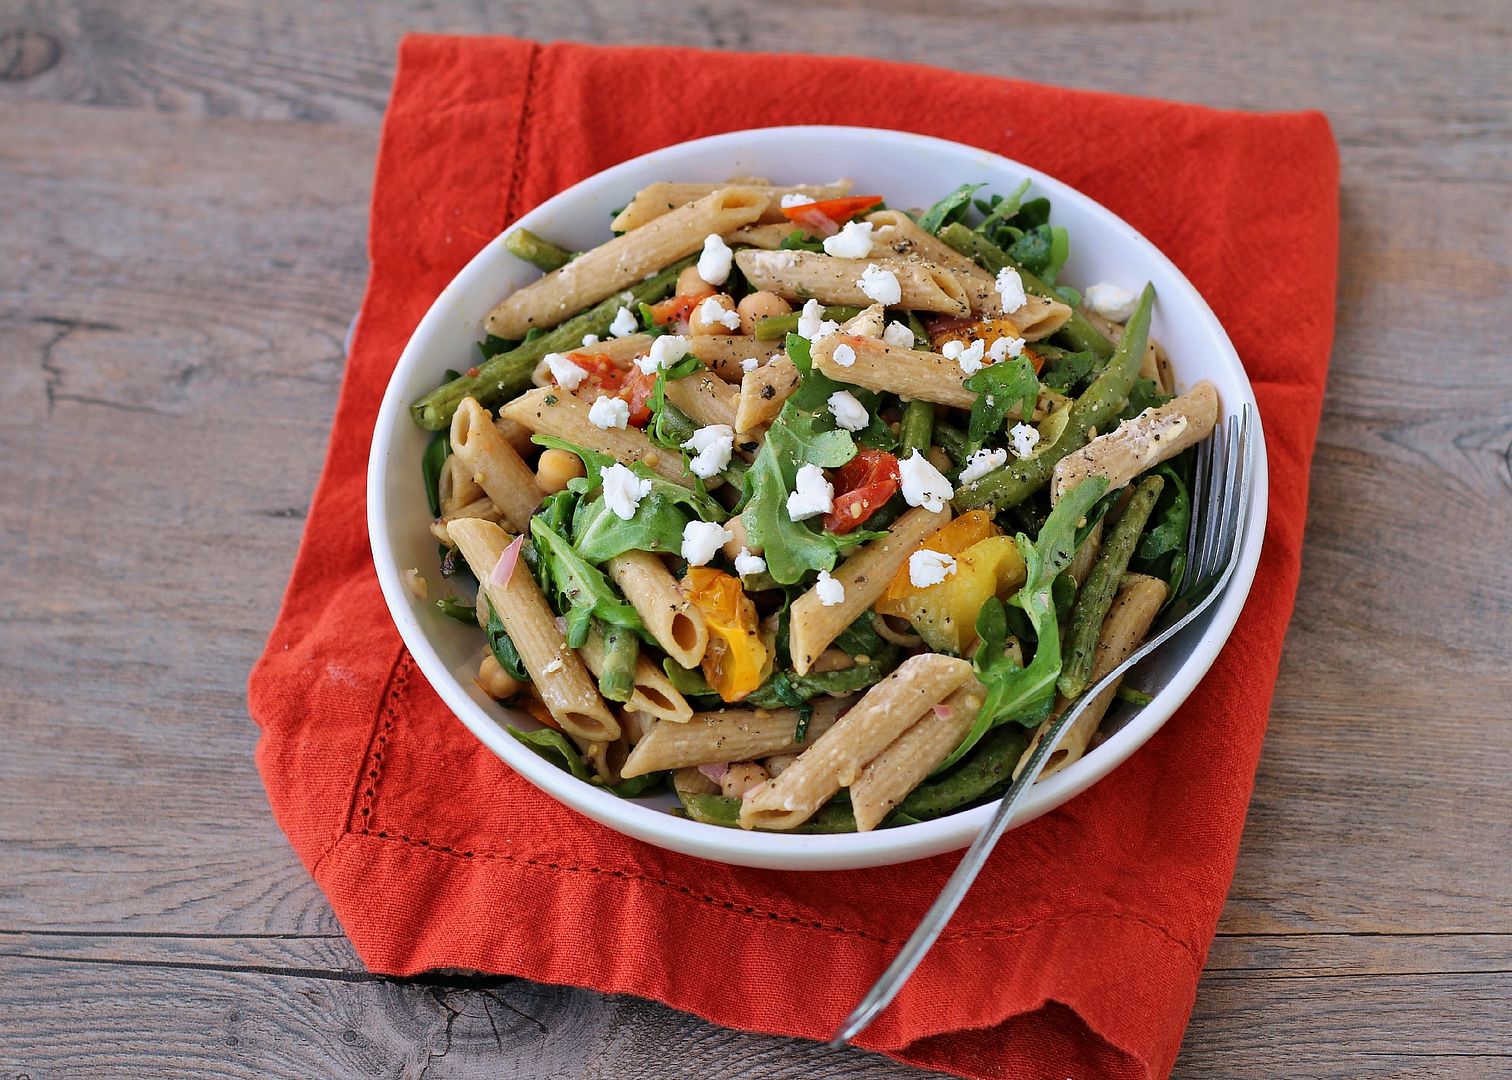
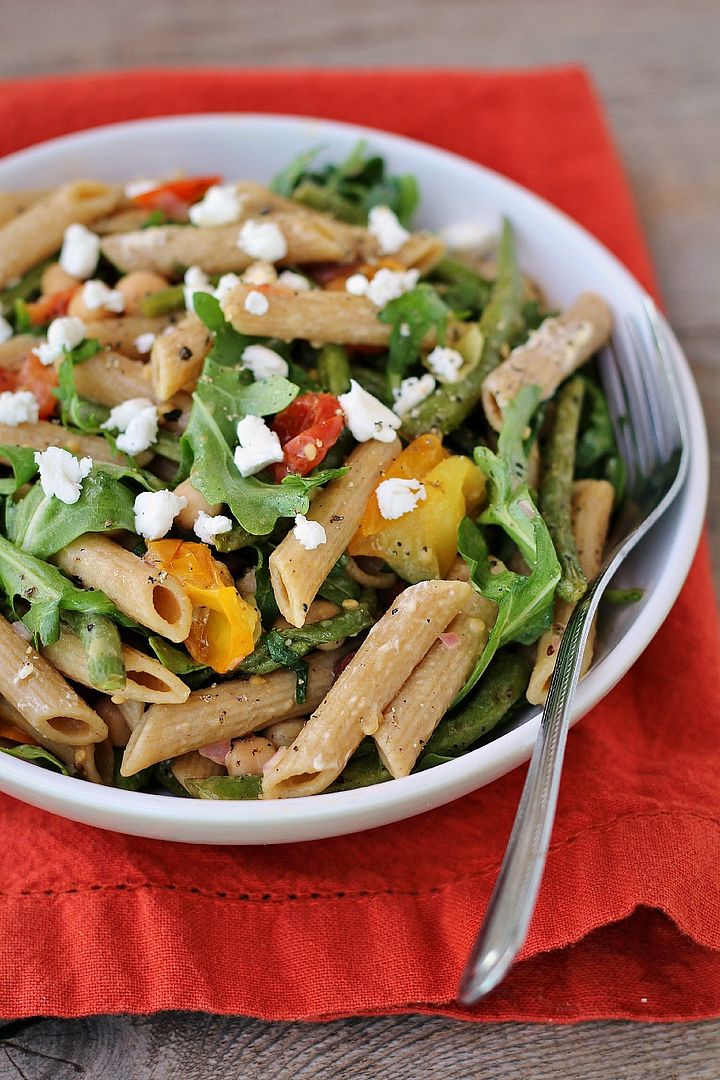
Arugula Pasta Salad with Goat Cheese, Olives, Chickpeas, and Roasted Veggies

As I mentioned in my last post for this mandarin quinoa salad (which is already my most popular recipe this year – note to self: keep posting quinoa recipes!), I’ve been trying out lots of different exercise classes this term in an effort to stay active.  Last Wednesday I tried my first AquaZumba class, which was the first time I’ve taken a class in the water since my swimming lessons days as a kid.  It was kind of what I expected in that our beautiful instructor looked unfairly cool doing all her dance moves at the side of the pool while I likely looked like a floundering sea monster attempting to keep up in the water, but it was also better than I expected in that I actually had a lot of fun (and loved the fact that I could exercise without sweating)!

The success of AquaZumba has now given me the courage to try out Aqua Fit, which I’m guessing won’t be nearly as much fun.  I’m slightly dreading the idea that it might involve treading water, which I haven’t done since swimming lessons because I hated it so much.  I could never seem to keep my head above water, and the swimming instructor would always tell us our homework while we were treading water at the end of class and I would panic because my ears would be underwater so I couldn’t hear what they were saying.  But now that I'm older (and already have failing joints), I'm hoping my body will be a little more appreciative that I'm letting it work out in the water and won't fail me when it comes to the treading water part!

Arugula Pasta Salad with Goat Cheese, Olives, Chickpeas, and Roasted Veggies

One of the nice things about water classes is that they make you super tired at the end of the night, giving you a good night’s sleep.  They also make you super hungry, which is where having a big batch of this pasta salad in the fridge comes in handy!

This is just an easy vegetarian dish that’s kind of like a salad, kind of like pasta, kind of like pasta salad, and kind of like pasta with salad.  With whole wheat pasta for fibre, lots of veggies for nutrients, chickpeas for protein, and some goat cheese for richness, it’s a well-balanced dish that makes for great lunches (or post water workout meals) throughout the week! 

Arugula Pasta Salad with Goat Cheese, Olives, Chickpeas, and Roasted Veggies

Arugula Pasta Salad with Chickpeas, Veggies, Olives, and Goat Cheese

Loosely based on a recipe from Cooking Light

Serves 4-6

Ingredients:

375g box of whole wheat penne
8 oz green beans, ends trimmed
1 pound halved cherry tomatoes, divided
4 tablespoon extra-virgin olive oil, divided
Salt & pepper
2 tablespoons minced shallots
2 tablespoons fresh lemon juice
1 tablespoon Dijon mustard
1 teaspoon dried basil
1 tablespoon honey
1/2 cup pitted sliced kalamata olives
1/2 cup (2 ounces) crumbled goat cheese
1 (540mL) can chickpeas, drained and rinsed
3 cups packed arugula

Directions:

Preheat oven to 400°F. 

Cook pasta according to package directions.  Drain and set aside.

Meanwhile, toss green beans and half the cherry tomatoes with 1 tablespoon oil and season with salt and pepper.  Spread in an even layer on a foil-lined baking sheet and roast in preheated oven for 15-20 minutes.

Prepare the dressing by whisking the remaining 3 tablespoons oil with the shallots, lemon juice, Dijon mustard, basil, and honey in a small bowl.  Add salt and pepper to taste.

Combine cooked pasta, roasted vegetables, remaining fresh cherry tomatoes, olives, goat cheese, and chickpeas in a large bowl.  Mix in the arugula.  Add dressing and toss to coat.  Serve warm or chill for a cold pasta salad (though I preferred it warm).  Season with additional salt and pepper and top with additional goat cheese if desired.

*Note – the pictures are missing the additional fresh cherry tomatoes; I forgot to add them until after

April 23, 2013

Cheezy Ranch Hummus

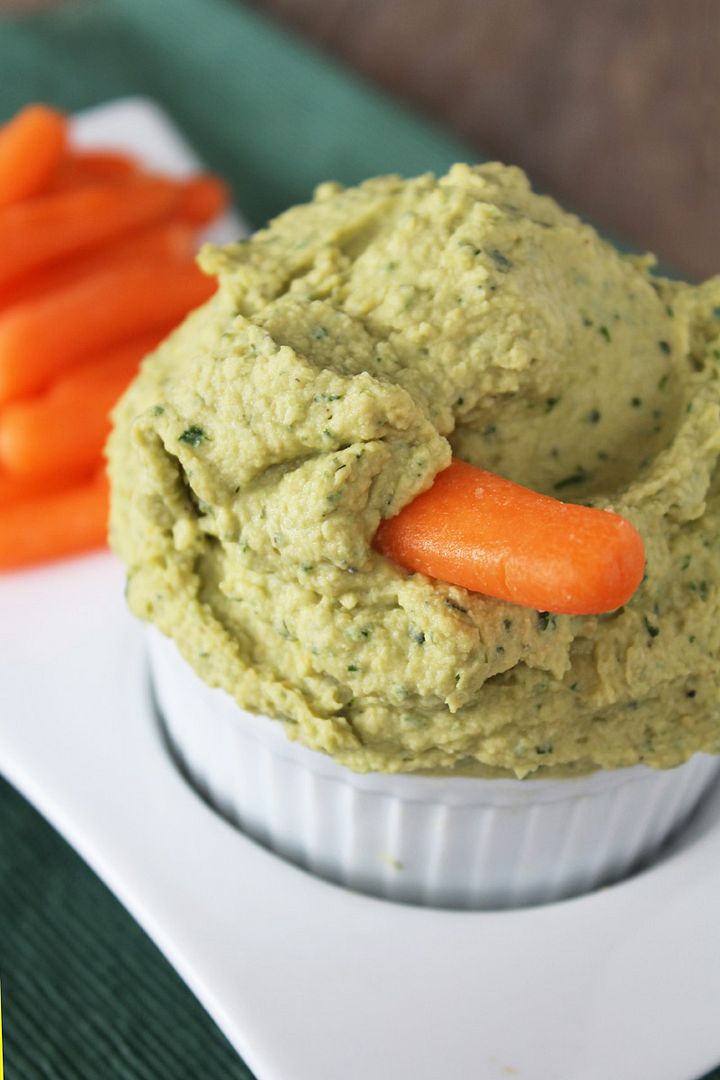
Cheezy Ranch Hummus

Before I get into this post, I feel the need to first clarify that I did not spell "cheesy" wrong in the title.  I'm guessing that the majority of people reading this already knew that, but for those who might not have heard the term "cheezy" before, it's used to describe something that tastes cheesy but doesn't actually use dairy cheese.  I'm not vegan and there is no way I could ever give up real cheese, but there are some dishes where cheese just doesn't really work, like in hummus.  Fortunately, there is a magical little ingredient called nutritional yeast that can blend right in to not only add cheesy flavour but also lots of nutrients.  Again, I'm sure a lot of you have heard of it before, but in case nutritional yeast is new to you (I had no idea what it was a couple of years ago), I described it more in this post for broiled pesto tomatoes, and I also used it in this pizza hummus to get the same cheesy flavour I was going for in this ranch version.

Cheezy Ranch Hummus

This hummus was inspired by Pickles & Honey's vegan cool ranch hummus I saw a while ago and loved.  I don't buy Doritos anymore because I know I'd eat the whole bag in one sitting, but Cool Ranch was always one of my favourite flavours.  I changed almost everything from the original recipe to make my own version, and I wouldn't say that mine is "cool ranch" flavoured, but rather combines elements of ranch dressing like fresh herbs and onion and garlic powder with nutritional yeast for a cheezy ranch hummus that makes a fantastic dip for veggies!

Cheezy Ranch Hummus

In other news, Spring has finally sprung in Southern Ontario and I couldn't be happier!  I love seeing flowers and robins and feeling the sun on my face again.  I hope those still stuck with the white stuff will see it all melt away soon!

Springtime

Cheezy Ranch Hummus

Inspired by Pickles & Honey

Ingredients:

1 (540mL or 19 fl oz) can chickpeas, drained and rinsed
3-4 tablespoons water
3 tablespoons tahini
2 tablespoons fresh lemon juice
3 tablespoons fresh chopped parsley
2 tablespoons chopped chives
1 tablespoon fresh chopped dill
1 teaspoon garlic powder
2 teaspoons onion powder
1/2 teaspoon salt
1/4 teaspoon pepper
2 tablespoons nutritional yeast
1/2 teaspoon dijon mustard
Dash Worcestershire sauce (optional, leave out to keep it vegetarian)
2 tablespoons extra virgin olive oil

Directions:

Add all ingredients except for the olive oil to the large bowl of a food processor.  Process until smooth.  Pour the olive oil into the feed tube of the food processor and let slowly drain into hummus as you continue to pulse.  Once everything is well combined, taste and adjust any amounts to your liking.  Store in the refrigerator and serve with veggies or as a sandwich spread.

January 25, 2013

Buffalo Hummus Mashed Potatoes

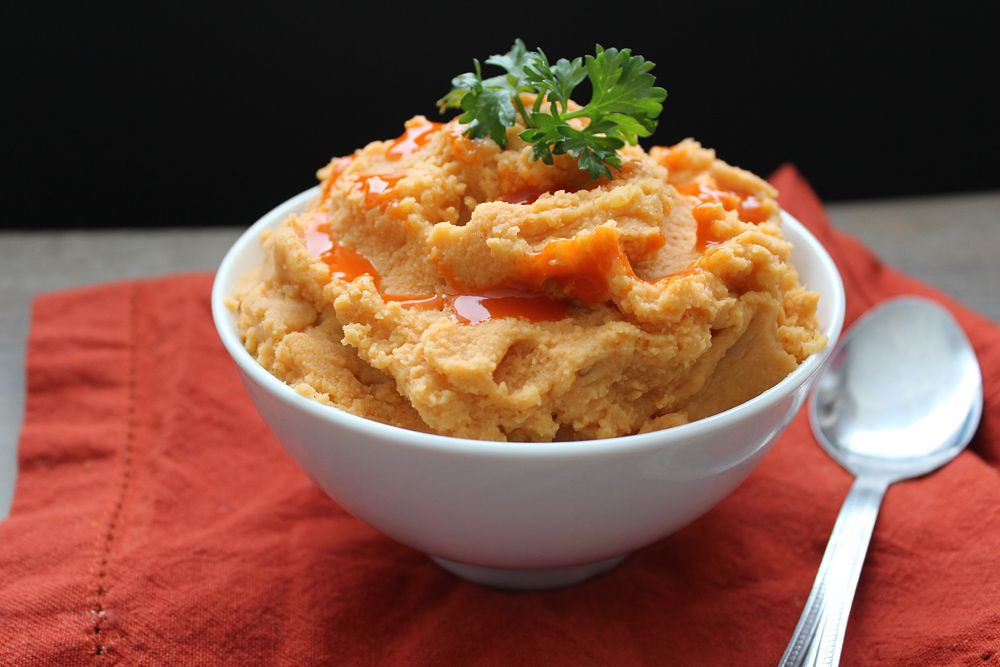
Buffalo Hummus Mashed Potatoes

When I first saw hummus mashed potatoes on one of my favourite blogs, Gimme Some Oven, I thought it was such a fantastic idea – I love hummus and love mashed potatoes, so combining the two would not only taste great but would be a great way to healthify potatoes!

Of course, my mind starting immediately whirring with all the flavours of hummus you could use to change things up, and my first choice was buffalo.  If you love buffalo flavour and haven’t tried this hummus yet, you need to do so asap; I eat a lot of hummus and this is definitely one of my favourites!

These mashed potatoes are super easy to make – first you have whip up a batch of buffalo hummus, but that takes only five to ten minutes max, and you can do it while you wait for your potatoes to  boil.  Then you simply mash the potatoes, stir in some hummus, season with salt and extra buffalo sauce for spice, and that’s it!  There’s no adding tons of butter and cream, and you still end up with smooth and fluffy mashed potatoes, but with the added benefit of protein and healthy fats from the chickpeas and tahini in the hummus.

If you’re a fan of the buffalo/blue cheese combination, feel free to add some blue cheese in there - I didn’t have any on hand but I think it would have made a great addition!  This would make a great side dish to some chicken and steamed broccoli for a complete meal, but I liked it so much I ate it all on its own before I had a chance to try it that way!

Update: I realized after writing this post that these mashed potatoes are also vegan (correct me if I'm wrong, but from what I've read online, Frank's buffalo sauce does not contain milk products), giving you all the more reason to like them!  :)

Buffalo Hummus Mashed Potatoes

Buffalo Hummus Mashed Potatoes

Inspired by Sabra Hummus and Gimme Some Oven

Serves 3-4 as a side dish (can easily be doubled to serve more)

Ingredients:

1 pound Yukon Gold (yellow-fleshed) potatoes (about 2.5 cups peeled and cubed)
1-2 tablespoons buffalo sauce
Salt to taste

Directions:

Prepare a batch of buffalo hummus up to a few days in advance. 

Peel potatoes and chop into about 1” pieces.  Immediately transfer to a large pot and cover with cold water until potatoes are covered.  Bring to a boil, then reduce heat to a simmer and let cook 20-30 minutes, until potatoes are easily pierced with a fork.

Drain, then place potatoes back in the dry pot and let heat over medium heat until they appear dry, about 2-3 minutes.  Remove from heat and mash potatoes in the pot or in a bowl.  Add 3/4 cup hummus and mix.  Add 1 tablespoon of buffalo sauce, mix in, and add up to 1 additional tablespoon if desired.  Season with salt to taste.

Ingredient Index

Related Posts Plugin for WordPress, Blogger...