Showing posts with label chocolate chips. Show all posts

December 11, 2012

Rudolph Gingerbread Cookies

Rudolph Gingerbread Cookies

Our department had our holiday cookie swap last Friday, and as usual, I made two types of cookies because I love experimenting with new holiday recipes!  Last year I brought these hidden candy cane kiss cookies and eggnog cake cookies, both of which I loved, but I wanted to try something different this year.  So I decided to make one cookie that was simple but tasted good (recipe to come later), and one that would stand out more for having a ‘cute factor’, like  the popular melting snowmen cookies from last year’s cookie swap (Google it, they’re adorable!).

Rudolph Gingerbread Cookies

When I saw these peanut butter reindeer cookies, I knew I’d found my cute factor!  But since I like to keep things nut-free when I’m bringing them somewhere for lots of people to share, I decided to make them into gingerbread cookies instead – not only are they nut-free but they’re also more festive and reindeer-coloured!

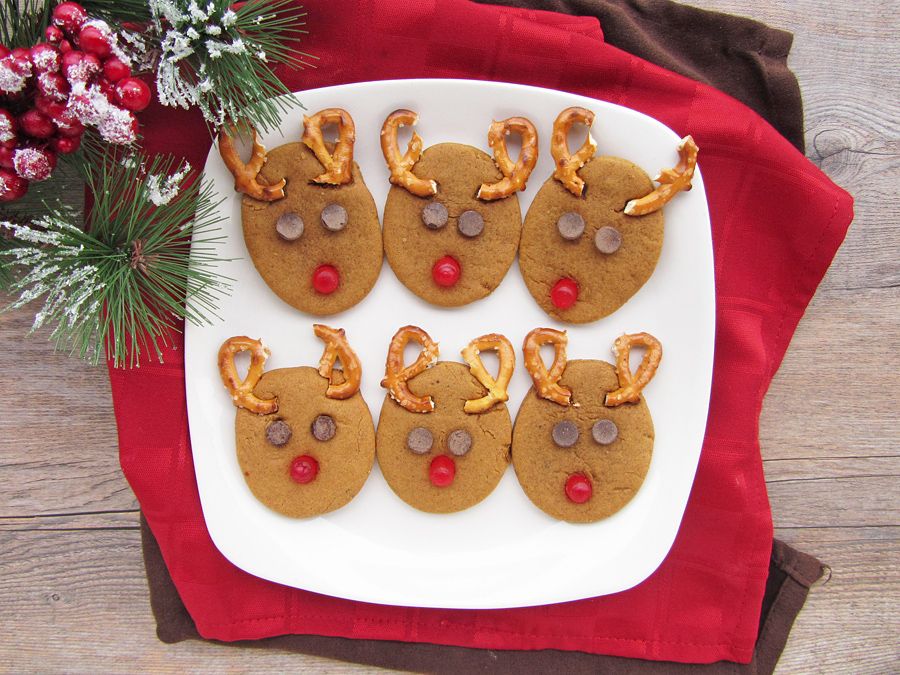
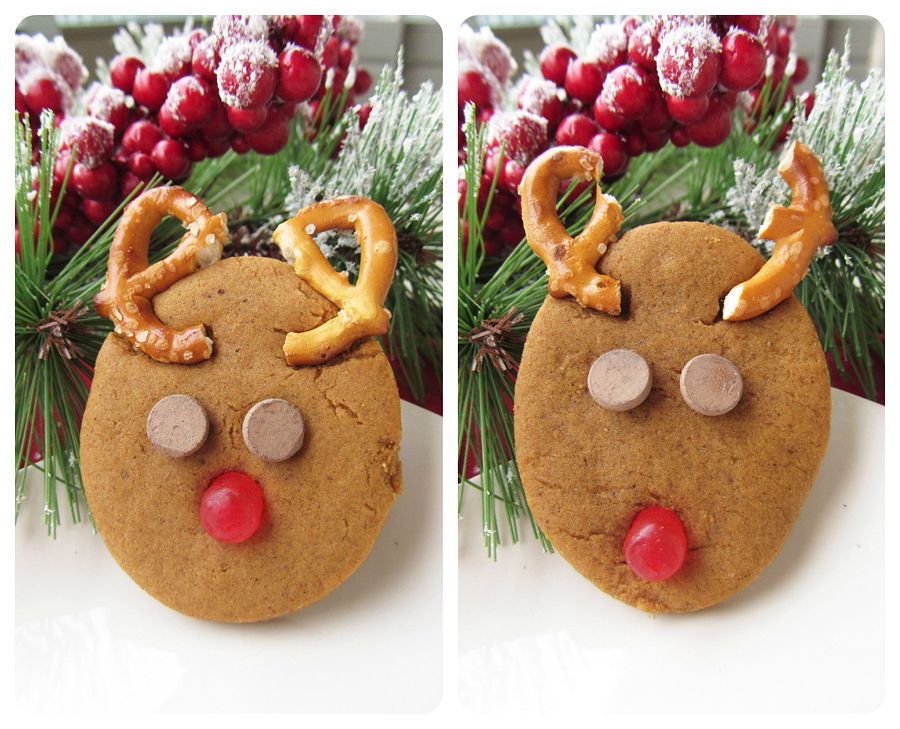
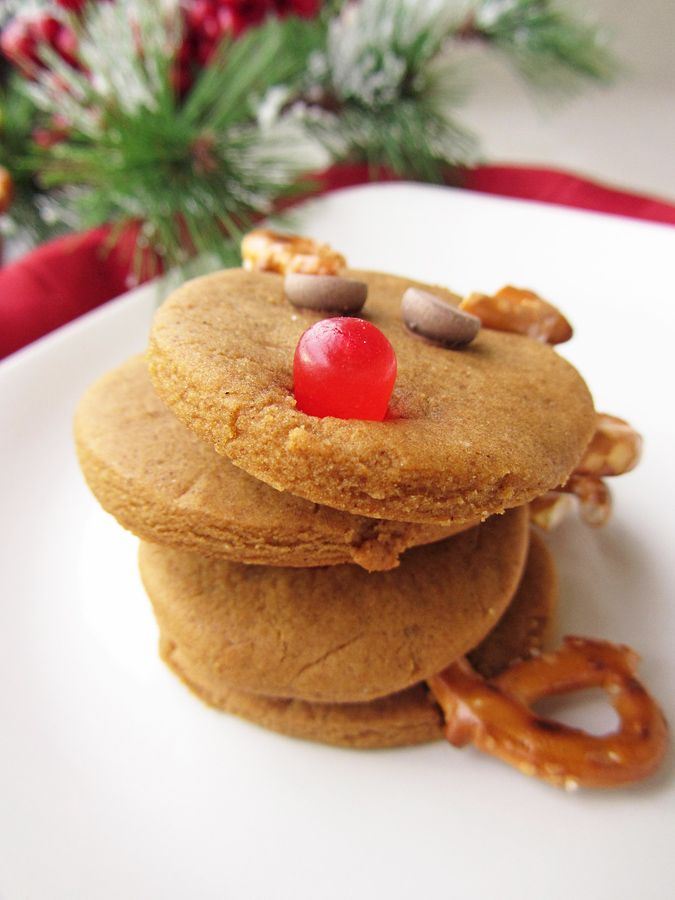
I used Bakergirl’s gingerbread cookie recipe, cut the dough into ovals for the reindeer heads, then stuck some pretzels on for antlers, chocolate chips for eyes, and red Mike & Ike’s for the nose (though I’ve heard that Mike and Ike have recently split up, so I’m not sure who the red colour is supposed to represent, if it even works that way – mine just came from a bulk bin where all the Mike & Ikes still live happily together).

Rudolph Gingerbread Cookies

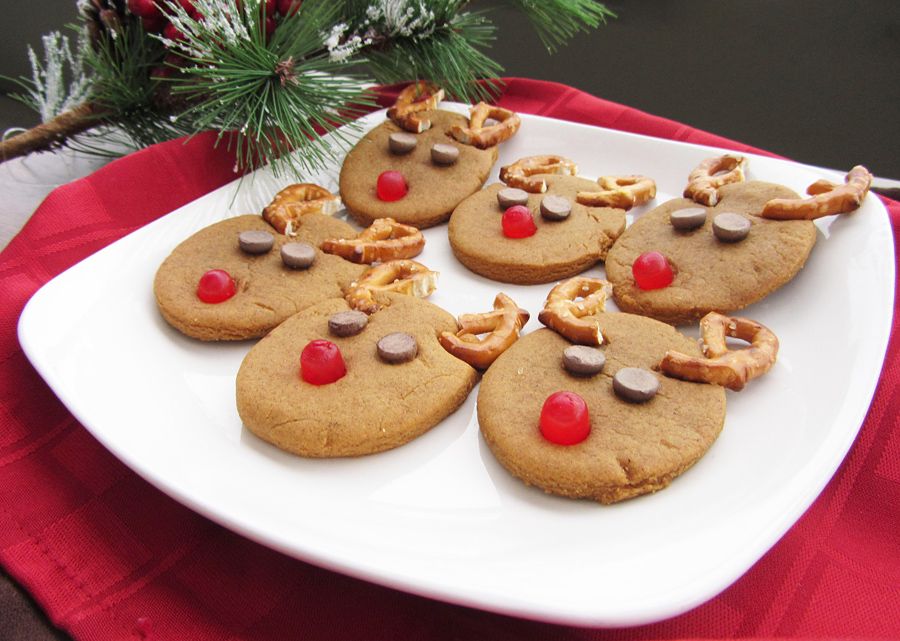
These turned out to be so adorable and got lots of compliments!  I also really liked the gingerbread recipe – while they were a bit hard coming out of the oven, they softened up and stayed soft for days in a container.  True that the pretzels and candy don’t exactly go with the taste of gingerbread, but you can pick them off and eat them separately if you like, and I don’t think kids would mind the mesh of flavours!  If you’re very concerned though, you could always replace the red nose with an m&m – I just liked the 3D effect of the candy! You could also try using chocolate-covered pretzels, they'll just be a little more expensive.

Rudolph Gingerbread Cookies

Rudolph Gingerbread Cookies

Adapted from Bakergirl (reindeer cookie idea here, gingerbread cookie recipe here)

Makes around 35 cookies

Ingredients:

1/4 cup + 2 tablespoons unsalted butter, at room temperature
1/2 cup packed dark brown sugar
1/2 a large egg (whisk one large egg in a bowl then use only half)
1/4 cup + 2 tablespoons molasses
2 cups all-purpose flour
3/4 teaspoon baking soda
1 teaspoon ground ginger
1/2 teaspoon cinnamon
1/4 teaspoon nutmeg
1/8 teaspoon ground cloves
1/8 teaspoon salt
Around 40 small pretzel twists (this is only a few handfuls from a bag)
Around 70 chocolate chips (again this is only about a handful from a bag)
Around 20 red Mike & Ike candies (I got these from a bulk bin)

Directions:

Cream together the butter and sugar in the bowl of an electric mixer, on medium speed, until light and fluffy.  Add the egg and molasses (tip: coat your measuring cup/spoon with non-stick oil spray before measuring the molasses so it pours out easier) and mix until combined.  In a separate bowl, whisk together the flour, baking soda, ginger, cinnamon, nutmeg, cloves, and salt.  Add the dry ingredients to the mixing bowl in small additions, mixing on low speed until incorporated.  Cover the dough and refrigerate for 2 hours.

Preheat oven to 325°F.

On a lightly floured surface, roll the dough into 1/8-inch thickness.  Don’t worry if the dough’s a little crumbly, you may need to work the dough with your hands for a bit first to get it to roll out smoothly.  Cut out 2-inch ovals with a cookie cutter (I just bent my circle cutter slightly to form an oval).  Place oval cookies two inches apart on a parchment-lined baking sheet.

Break pretzels in half to form antlers, and cut Mike & Ike’s in half so each candy makes two noses.  Press two antler halves onto the top of each cookie oval to form the antlers.  Press two chocolate chips pointy tip facing down into the cookies to form the eyes, and press one Mike & Ike ‘nose’ below the eyes. 

Bake cookies for 7-9 minutes or until edges are firm.  Let cool on baking sheet for a couple minutes then transfer to a wire rack to cool completely.

Reroll remaining scraps of dough and continue cutting out circles and baking cookies until the dough is used up.  I had to bake mine in 3 rounds.

Store cookies in an airtight container.  They may be hard after baking but they will soften up in the container. 
---------------------------------------------------------------------------------------------------------------------

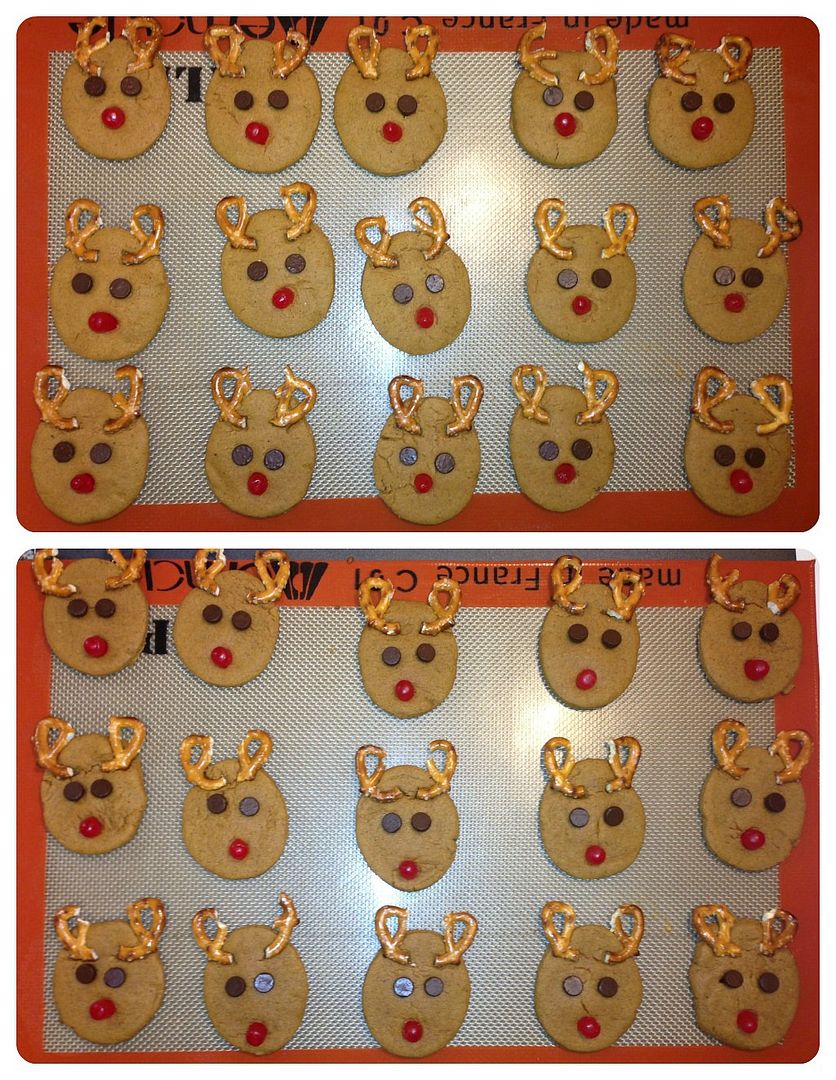
And just so you don't think I only chose the cutest cookies for the pictures (although I did try to do that), here are my phone pics of all the cookies right out of the oven (except for my last batch of 6) - they were all cute and each slightly different!

Rudolph Gingerbread Cookies

August 14, 2011

Peanut Butter Turtle Rolls

peanut butter turtle rolls

You know how most products you buy usually have a recipe idea printed on them, or at least a website to go to with many recipes that use the product? I don’t think I’ve ever bothered to even glance at one of these. I’m not sure why, after all, there’s an entire blog dedicated to making recipes printed on food packages. But the other day I bought a new packet of yeast and happened to notice the website on the back, so I decided to check it out. Lo and behold, it had about a million bread recipes, most of which were things I didn’t even think possible to make with yeast. I think I bookmarked about a million recipes to try, but the one that I had to make immediately was for peanut butter turtle rolls – they looked so adorable! The recipe was filed under the category “bake with kids” and I had no intention of baking these with or serving them to any children, but Ryan is like a big kid, and he loooves peanut butter, so I knew he would love these!

The directions sound somewhat complicated, but these were actually surprisingly easy to make, and much more fun than a regular old loaf of bread! I was a little hesitant about the idea of using peanut butter in a yeast bread, but Ryan and I both loved these. You can definitely taste the peanut butter but it’s still fairly subtle. They’re great eaten just on their own for breakfast or a snack, or warmed up with a little nutella in the middle! If you’re not a peanut butter fan though, you could still use the turtle shaping technique with your favourite bun recipe.

The only problem with these is that they’re almost too cute to eat! I felt horrible ripping off the poor little guys’ heads – I’d recommend you do this part first to get it over with, the other parts aren’t quite as guilt-inducing. I wanted to keep one as a pet and name it Leonard, but Ryan ate him. He can be so cruel sometimes!


I think all bread I make from now on is going to be in the shape of an animal. I think little mice or fish would work well, although maybe I should stick to only the mean animals like snakes or spiders so that I don’t have to feel as bad about eating them!

The recipe is below, followed by some step-by-step photos in case the directions aren’t clear. Please excuse the quality of those photos, I was in a dark kitchen and haven’t quite mastered shooting in low-light conditions yet!

By the way, don't worry if they don't all come out identical - that's what gives them each personality! The guy above ended up with an interesting scar across his eye, and the guy below had a frown that I thought was hilarious. Both of these were unintentional, but have fun thinking of ways to make them each different! I think if you were making these for kids they would enjoy having ways to tell them apart. If they want to play with their food before eating it (which I would highly recommend in this case), just warn them that the legs are a little fragile, I may have accidentally amputated a few of my turtles.

peanut butter turtle rolls
Peanut Butter Turtle Rolls

Slightly adapted from Bread World

Makes 8 Turtles

Ingredients:

4 to 4-1/2 cups all-purpose flour
1/2 cup sugar
2 envelopes instant yeast
1 teaspoon salt
1 cup milk
1/2 cup water
1/2 cup peanut butter
1 egg, lightly beaten
1 tablespoon water
a few chocolate chips

Directions:

In a large bowl, combine 2 cups flour, 1/2 cup sugar, undissolved yeast, and salt.

Heat milk and water until very warm (120o to 130oF) and stir into flour mixture. Stir in peanut butter and enough remaining flour to make a soft dough.

Knead the dough on a floured surface (or mix with dough hook) until smooth and elastic, about 6 to 8 minutes. Cover; let rest 10 minutes.

Grease 2 large baking sheets or line with parchment paper. Divide dough into 8 equal portions.

To make one turtle from each portion:
  1. Break off 1/4 of portion and reserve.
  2. Shape remaining (larger portion) dough into a smooth ball for the body. Place on greased baking sheet.
  3. Divide the reserved (smaller) portion into two pieces.
  4. With one of the pieces, divide it into two; roll one half into a small rope for the tail, and form the other half into an oval shape for the head. Attach the head and the tail to the body by placing underneath the body and pinching to seal.
  5. With the second piece, divide it into four; shape each piece into an oval for the legs and attach to the body, pinching to seal.
Repeat with remaining dough to make 8 turtles. (I found it easier to do these steps on all the turtles simultaneously, rather than one-by-one).

Cover turtles with a clean tea towel and let rise in a warm, draft-free place until doubled in size, about 30 to 60 minutes.

Preheat oven to 375oF.

Use scissors to make small snips in the shell of each turtle (1/8 inch deep), pulling up with the scissors as you snip to make bumps in the shell.

Make 2 small cuts at the end of each foot to make webbed feet.

Combine egg and 1 tablespoon water to make an egg wash; brush over the shell of each turtle.
Bake at 375oF for 15 to 20 minutes. Remove turtles from baking sheets.

While turtles are warm, use chocolate chips to rub small chocolate dots onto the head for eyes (the chocolate should melt as it touches the bread).

Let cool on wire racks.

Step-By-Step Photos for Shaping the Turtles

*Note: I halved the recipe, so there are only 4 turtles in the pictures

In a large bowl, combine 2 cups flour, 1/2 cup sugar, undissolved yeast, and salt. Heat milk and water until very warm (120o to 130oF) and stir into flour mixture. Stir in peanut butter and enough remaining flour to make a soft dough. Knead the dough on a floured surface (or mix with dough hook) until smooth and elastic, about 6 to 8 minutes. Cover; let rest 10 minutes. Grease 2 large baking sheets or line with parchment paper.

Divide the dough into 8 equal portions (I divided into 4 because I halved the recipe)

To make one turtle from each portion:

Break off 1/4 of each portion and reserve.

Shape remaining (larger portion) dough into a smooth ball for the body. Place on greased baking sheet. Divide the reserved (smaller) portion into two pieces.

With one of the pieces, divide it into two; roll one half into a small rope for the tail, and form the other half into an oval shape for the head. Attach the head and the tail to the body by placing underneath the body and pinching to seal.

With the second piece, divide it into four; shape each piece into an oval for the legs and attach to the body, pinching to seal.

Repeat with remaining dough to make 8 turtles. (I found it easier to do these steps on all the turtles simultaneously, rather than one-by-one).
Cover turtles with a clean tea towel and let rise in a warm, draft-free place until doubled in size, about 30 to 60 minutes.
Preheat oven to 375oF.
Use scissors to make small snips in the shell of each turtle (1/8 inch deep), pulling up with the scissors as you snip to make bumps in the shell. Make 2 small cuts at the end of each foot to make webbed feet.
Combine egg and 1 tablespoon water to make an egg wash; brush over the shell of each turtle.
Bake at 375oF for 15 to 20 minutes. Remove from sheets.
While turtles are warm, use chocolate chips to rub small chocolate dots onto the head for eyes (the chocolate should melt as it touches the bread).
Let cool on wire racks. Enjoy!

peanut butter turtle rolls

Ingredient Index

Related Posts Plugin for WordPress, Blogger...