Showing posts with label cocoa powder. Show all posts

June 19, 2014

(Healthy) Strawberry & Chocolate Chia Pudding

Healthy Strawberry and Chocolate Chia Pudding

I've been wanting to try chia pudding for so long now - I think I've had this mango coconut chia pudding bookmarked for two years - but for some reason I've never gotten around to it.  Lately I've been craving dessert much more, likely because the days feel longer, I've been staying up later, and thus need more food to sustain me, so I've been trying to find healthy desserts that still satisfy a craving.  So when I saw Dietitian Debbie's beautiful layered chocolate and strawberry chia pudding recently I decided to give it a try!

Healthy Strawberry and Chocolate Chia Pudding

I feel like chia seeds are everywhere lately, but if you haven't heard of this little superfood before, it's basically a tiny seed that's packed with nutrition, including lots of fiber, omega-3 fatty acids, calcium, other vitamins, minerals, and antioxidantst, and even protein!

And because they can absorb somewhere around 10-12 times their weight (I've seen various numbers floating around) and take on a sort of gel-like consistency when they do so, they're great for making healthy pudding (though of course, you can use them in many other ways, too)!

Healthy Strawberry and Chocolate Chia Pudding

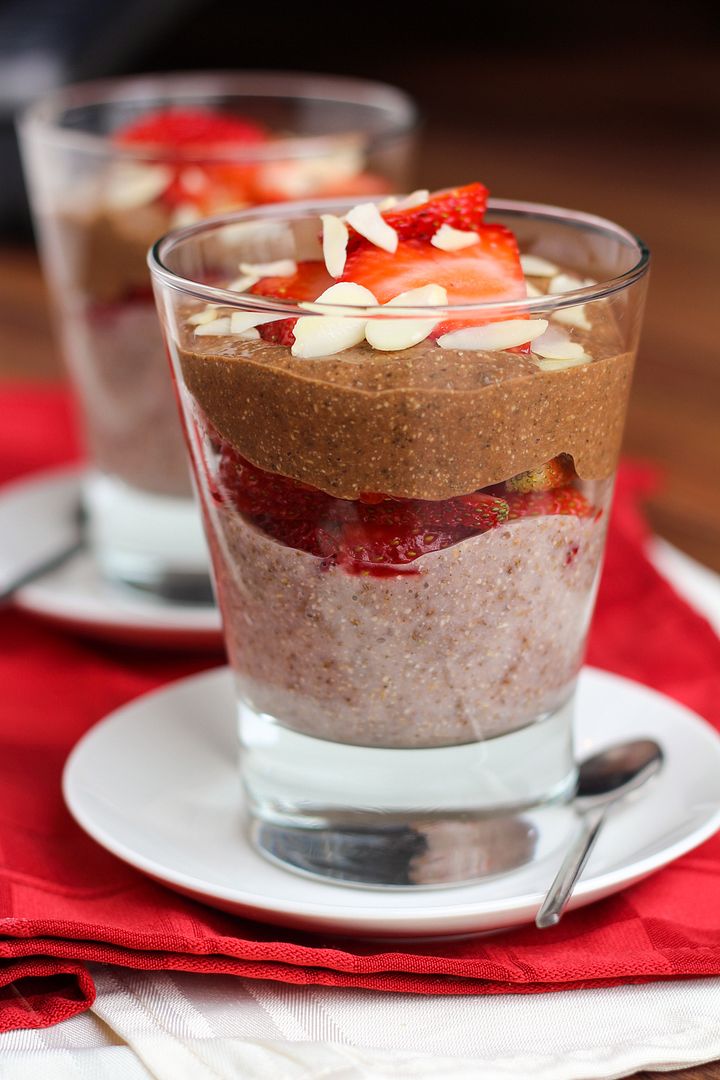
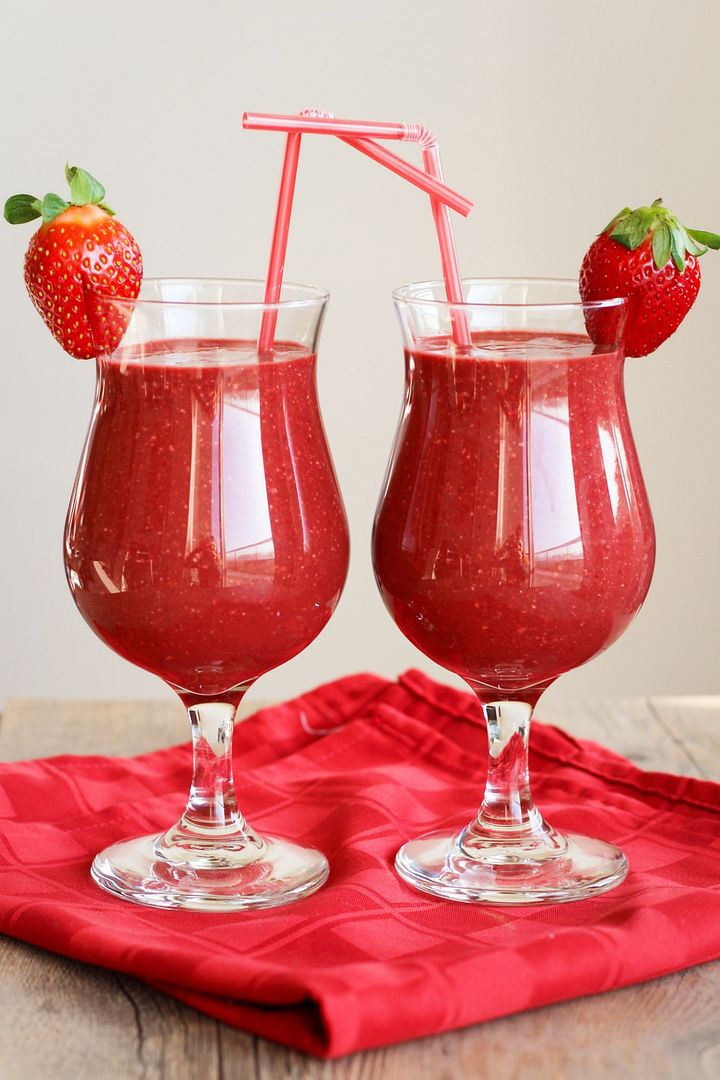
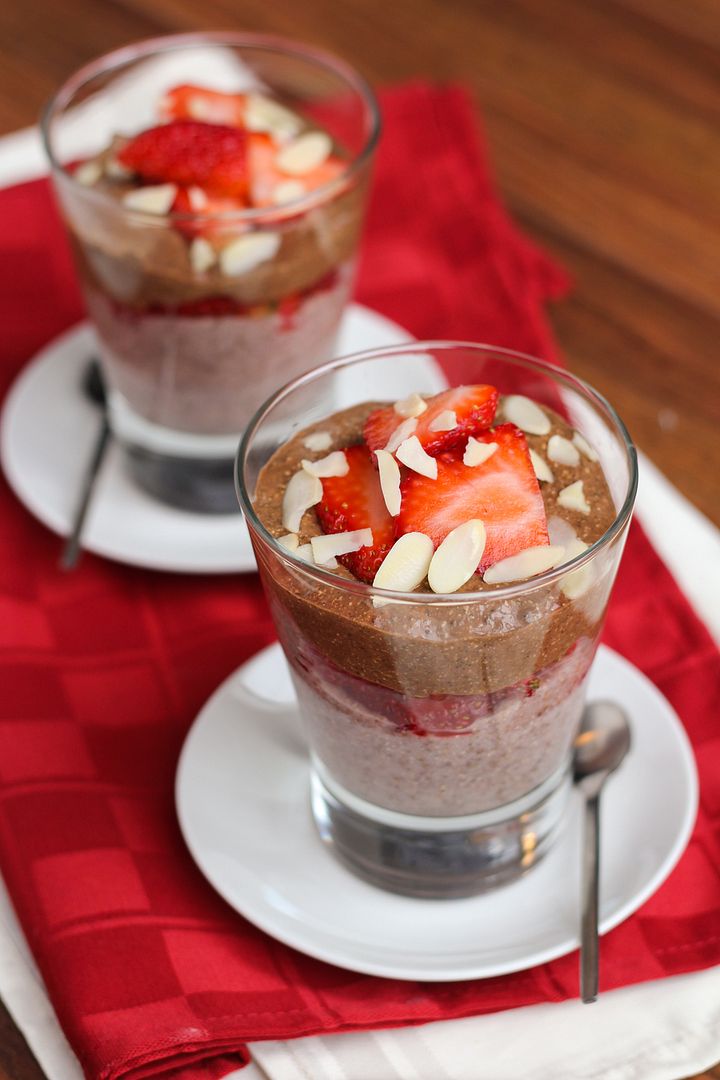
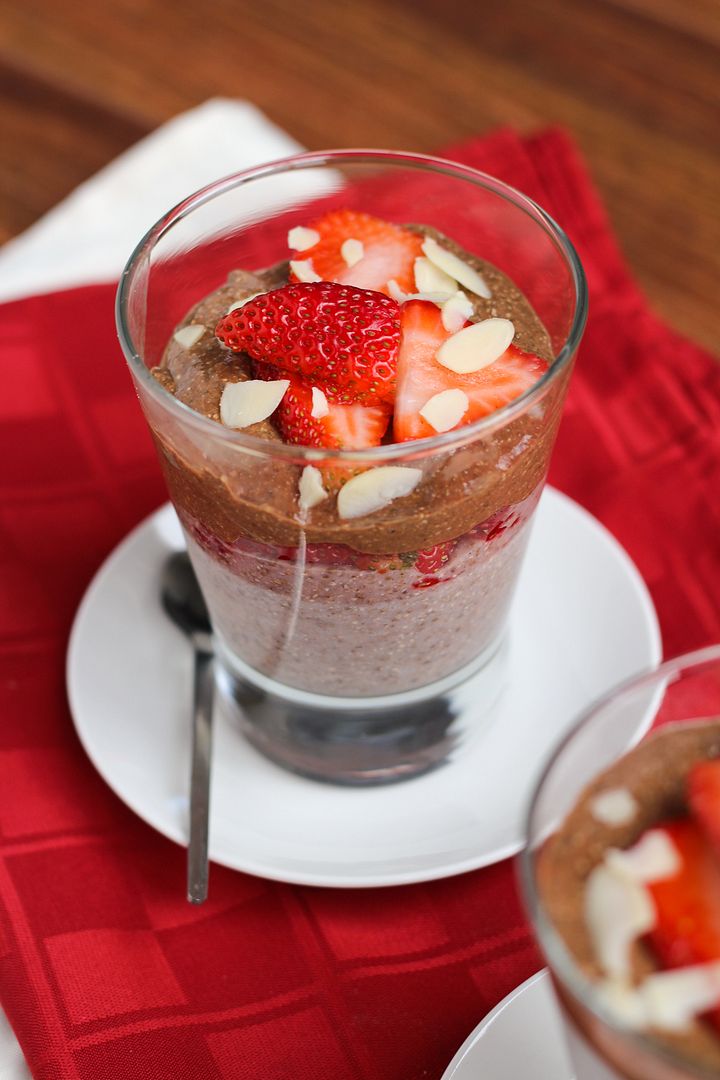
The version I came up with is different than the original idea, but this pudding is still really easy to make.  Both the chocolate and strawberry portions contain unsweetened vanilla almond milk, chia seeds, and pure maple syrup for sweetener, then the chocolate version has added cocoa powder while the strawberry version contains fresh strawberries and a little vanilla extract.

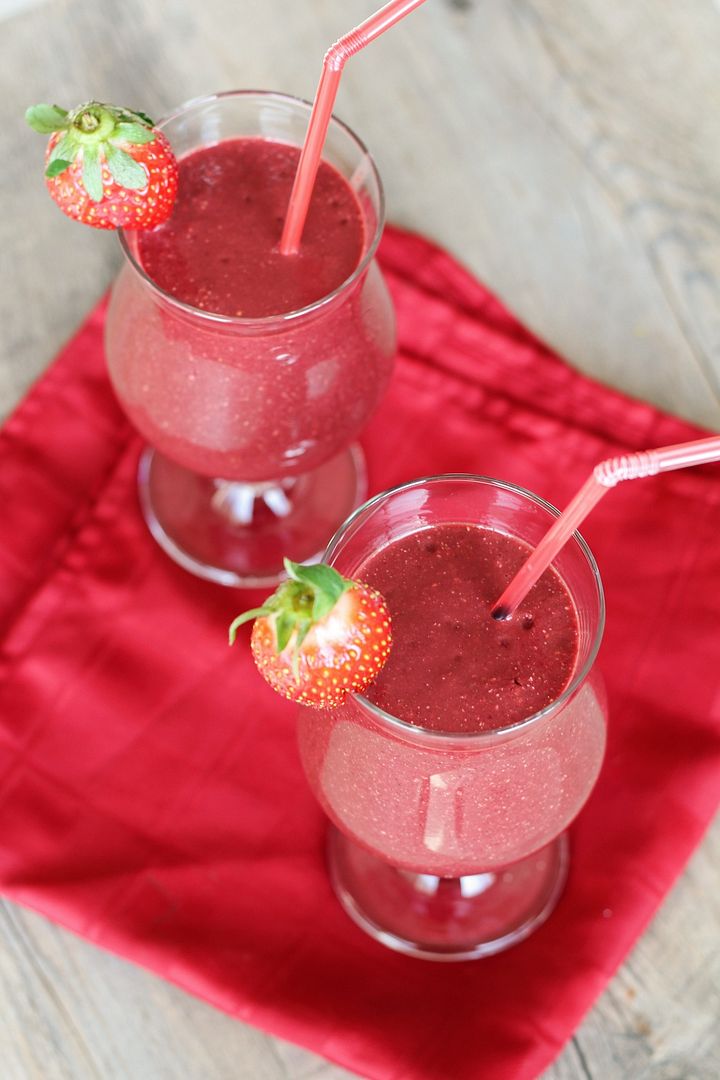
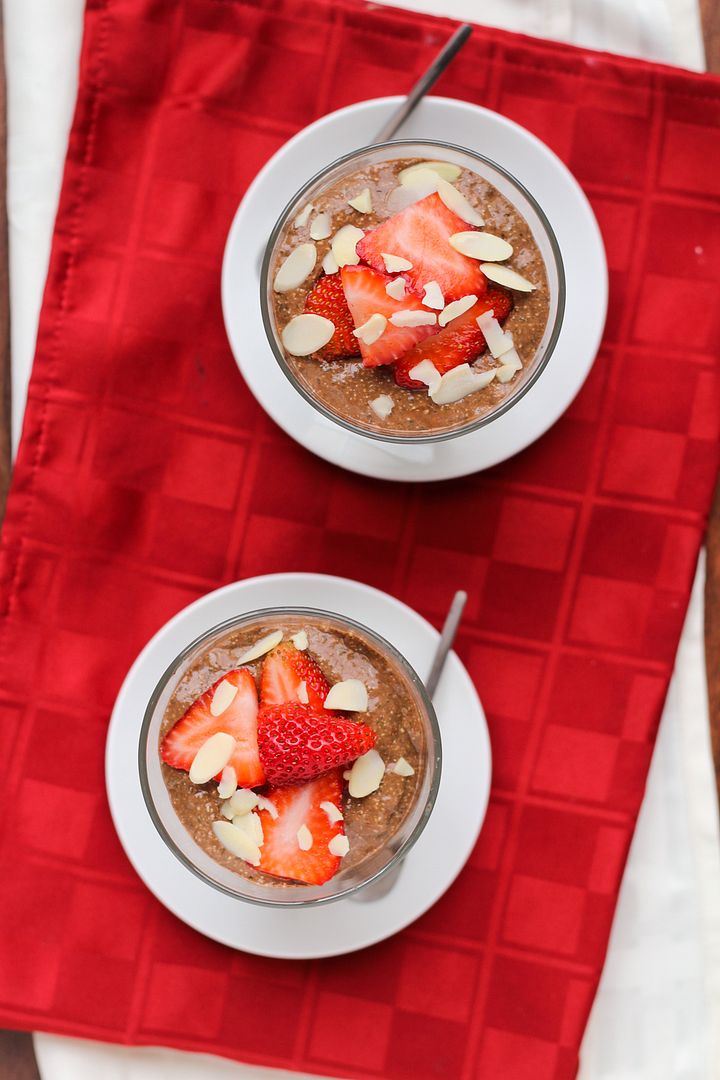
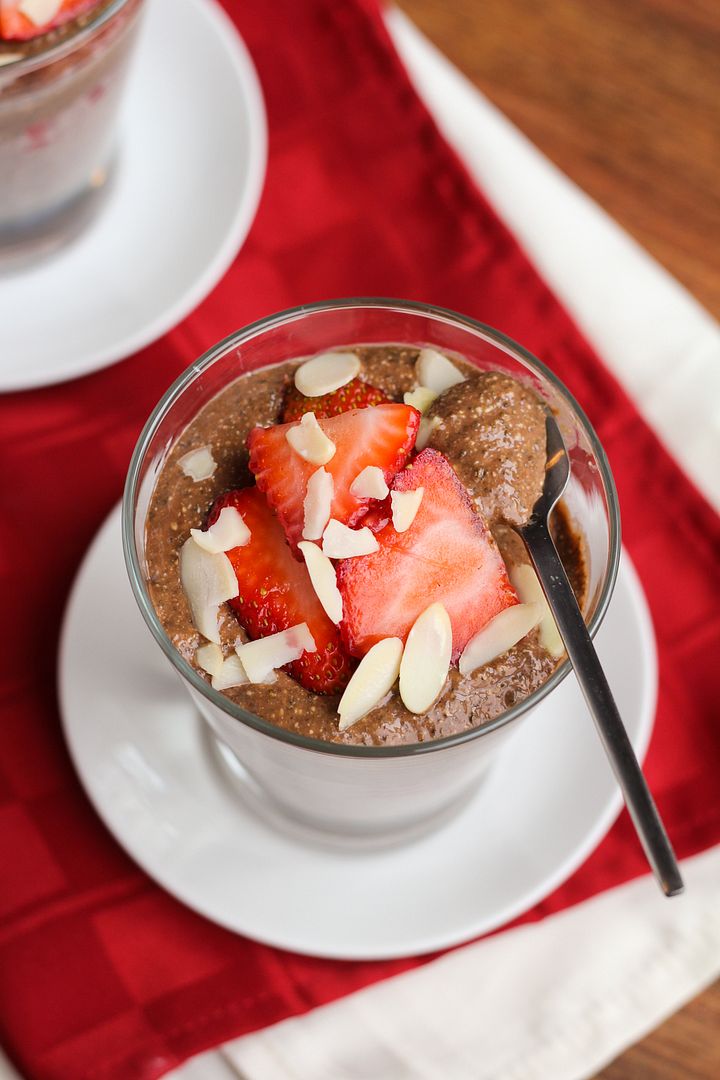
I also used Oh My Veggies' idea to blend the chia pudding after to give it a smoother texture, but you can leave out this step if you like.  I topped mine with more strawberries and sliced almonds for crunch, but you could use chocolate chips, coconut flakes, or anything else you like!

Healthy Strawberry and Chocolate Chia Pudding

The only difficult part about this recipe is waiting for the pudding to set.  It's best to leave it overnight, but otherwise plan for at least 4-6 hours to let the chia seeds work their magic and turn this into pudding!

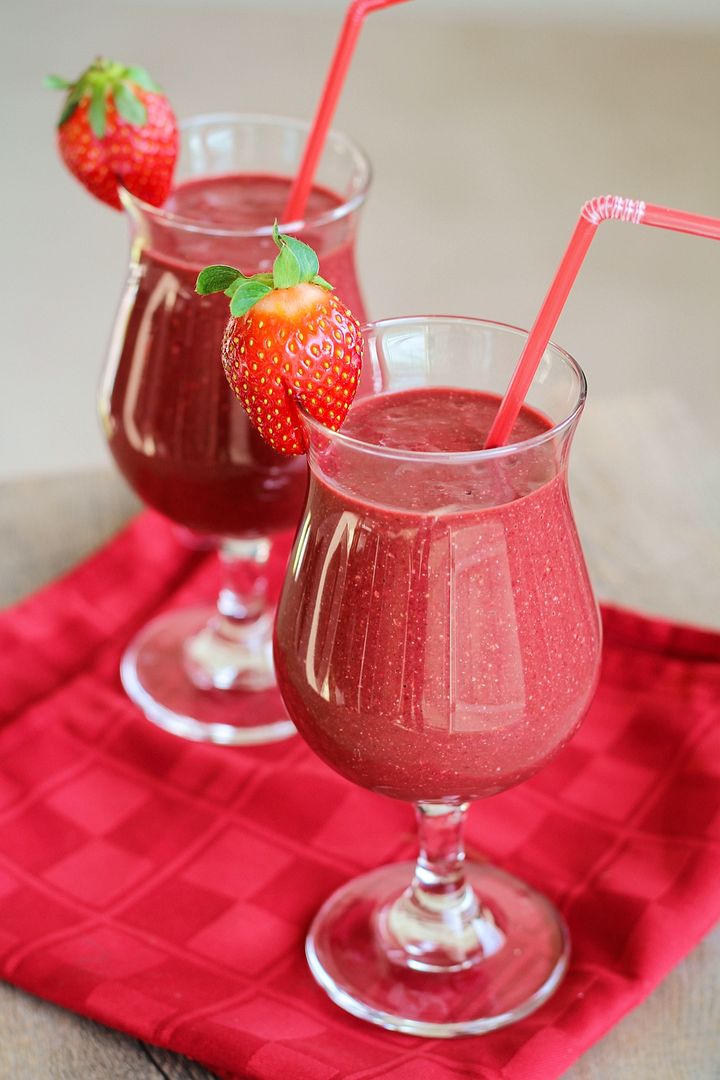
This makes a perfect light summer treat that satisfies a dessert craving but leaves you feeling good, and it would also totally be appropriate for breakfast!  Ryan was skeptical about the whole idea but after trying it, he said he could eat it every day, so I'd say it was a big success!

Healthy Strawberry and Chocolate Chia Pudding

Strawberry & Chocolate Chia Pudding

Note: The idea for this recipe was inspired by Dietitian Debbie; ingredient amounts were adapted from All Recipes

Serves 4 (servings are on the smaller side)

Ingredients:

For the Strawberry Layer:
1 cup unsweetened vanilla almond milk (or your choice of milk)
8oz (half a package) fresh strawberries, chopped
1/4 cup chia seeds
2 tablespoons pure maple syrup
1/2 teaspoon vanilla extract

For the Chocolate Layer:
1-1/4 cups unsweetened vanilla almond milk (or your choice of milk)
1/4 cup chia seeds
2 tablespoons pure maple syrup
2 tablespoons cocoa powder

For Topping:
8oz sliced strawberries
Optional: Slivered almonds, chocolate chips, coconut flakes (I used almonds)

Directions:

To prepare strawberry pudding, blend almond milk and strawberries in a blender until smooth.  Transfer to a bowl or container and stir in chia seeds, maple syrup, and vanilla until well combined.  Cover and keep in refrigerator overnight or until set, at least 4 hours.

To prepare chocolate pudding, stir together the almond milk, chia seeds, maple syrup, and cocoa powder, and also store in the fridge along with the strawberry pudding.

When ready, the mixtures should have a more gel-like consistency.  If you like you can serve the pudding as is, but if you want a smoother consistency where you won’t notice the chia seeds as much, transfer each mixture to the blender separately (cleaning in between) and puree until smooth.

To prepare pudding, layer chocolate and strawberry puddings in glasses or bowls with sliced strawberries and almonds in between each layer and on top.  If you like you could also top with chocolate chips and/or coconut flakes and an extra drizzle of maple syrup or honey of it’s not sweet enough for your tastes.

March 04, 2014

Chocolate Peanut Butter Swirl Pancakes

Chocolate Peanut Butter Swirl Pancakes

Today  is one of my favourite days of the year, Pancake Tuesday!  Better known as Fat Tuesday, it's a day traditionally meant for eating richer, fatty foods before Lent, which somehow led to eating pancakes (though I don't really agree that they're a rich or fatty food!)  To my family and I, it just means it's a day to eat pancakes for dinner!

Chocolate Peanut Butter Swirl Pancakes

As a kid I always loved the traditional blueberry and chocolate chip pancakes for pancake dinner, but now I love using the day to try new flavours of pancakes I've never had before.  Last year I made these delicious earl grey vanilla tea pancakes with honey tea syrup, and the year before that was these caramel latte pancakes, which I also loved.

Chocolate Peanut Butter Swirl Pancakes

But it's getting harder and harder to think of pancake flavours that haven't been done before, so this year I decided to combine two flavours into one!  And what better combination than the best of friends, chocolate and peanut butter.

Chocolate Peanut Butter Swirl Pancakes

These really are no harder than regular pancakes because the chocolate and peanut butter batters are basically the same, the only difference being the addition of cocoa for the chocolate batter versus peanut butter for the peanut butter batter (duh, I know).  Because the peanut butter batter is thicker, you'll pour the chocolate into your pan first in a pancake shape, then swirl the peanut butter batter on top just using a simple ziplock bag.

The browning of the pancakes hides the swirl a little, but I still love the contrast in colours you see, and the balance of peanut butter and chocolate in the taste is absolutely perfect - I love that you can taste both equally!

Chocolate Peanut Butter Swirl Pancakes

These may just be my new favourite pancakes, and with a certain peanut butter loving fiance's birthday coming up this weekend, I think I have the perfect excuse to make them again soon!

Chocolate Peanut Butter Swirl Pancakes

Chocolate Peanut Butter Swirl Pancakes

Recipe by Once Upon a Cutting Board but peanut butter pancake batter adapted from Food.com

Makes around 10 pancakes

Ingredients:
For the Chocolate Batter:
1/4 cup all-purpose flour
1/4 cup whole wheat flour*
1 teaspoon baking powder
1/4 teaspoon salt
1 tablespoon sugar
1 tablespoon cocoa powder
1/2 large egg, lightly beaten
1/2 cup milk (I used almond milk)
1 tablespoon vegetable oil
1/2 teaspoon vanilla extract

For the Peanut Butter Batter:
1/4 cup all-purpose flour
1/4 cup whole wheat flour*
1 teaspoon baking powder
1/4 teaspoon salt
1 tablespoon sugar
1/2 large egg, lightly beaten
1/2 cup milk (I used almond milk)
1 tablespoon vegetable oil
1/2 teaspoon vanilla extract
1/4 cup smooth peanut butter

*note: feel free to replace the whole wheat flour with all-purpose flour if you don’t have whole wheat

Directions:

Prepare the chocolate and peanut butter batters separately, but notice that the batters contain almost identical ingredients (the chocolate batter has cocoa and the peanut butter batter has peanut butter), so you can prepare them side by side, making it easy. Add all your dry ingredients to two separate bowls for the separate batters and whisk the mixture together, then add the wet ingredients to each bowl and gently whisk or fold just until the wet and dry ingredients are combined. Note that for the egg, you can lightly beat one egg then divide it in two for the two batters. Transfer the peanut butter batter to a squeeze bottle or a Ziplock bag with a small corner cut off.

Heat two large non-stick skillets over low-medium heat and spray with non-stick cooking spray if needed. To make the pancakes, you’ll pour the chocolate batter into a pancake then swirl the peanut butter on top because it’s a thicker batter. Pour chocolate batter by about 1/4 cup full onto the pan, then immediately swirl peanut butter batter on top. It will look something like this:

chocolate peanut butter swirl pancakes

Cook for a couple minutes until bubbles form on top, then cook for one to two minutes on the other side, until cooked through. If you let the pancakes brown too much, it will hide the swirl, so you want to try to cook these over low heat, which may require a bit more time than usual. Repeat with remaining pancake batter; you will end up with more peanut butter batter leftover so just use that to make a few plain peanut butter pancakes. You can serve those in the middle of your stacks to help balance out the chocolate flavour.

Serve pancakes warm, with pure maple syrup if desired. 

February 14, 2014

Strawberry Beet Chocolate Chia Smoothie

Strawberry Beet Chocolate Chia Smoothie

Happy Valentine’s Day!

Whether you celebrate the occasion or not, today is a great time to remember to show yourself some love in addition to the love you give out to others either today or any/every other day of the year! 

And what better way to treat yourself on Valentine’s Day than with this festive red chocolate flavoured smoothie that will feed your body with some of the good things it craves, especially during a time of year when many of us (definitely myself included) are indulging in a few more desserts than usual!

Strawberry Beet Chocolate Chia Smoothie

This smoothie gets its red colour from fresh strawberries and a roasted beet, darkened a bit by the cocoa powder which gives the smoothie a noticeable chocolate flavour that almost makes this feel more like dessert!  With the addition of chia seeds (aka little nutritional powerhouses), banana, almond milk, and oats, this is a great way to start your morning, or pick yourself up anytime of the day! 

If you’re worried about the beets, you could leave them out, but I gave one of these smoothies to Ryan when he woke up and he loved the strawberry and chocolate flavour, with absolutely no clue there were beets in it (which he claims not to like) until I told him after he drank the whole thing.  I love tricking him with vegetables!  I will make up for it tonight though by cooking a nice Valentine’s dinner (which I still need to figure out!). 

Hope you all have a great day!

Strawberry Beet Chocolate Chia Smoothie


Strawberry Beet Chocolate Chia Smoothie

Makes 2-3 smoothies

Ingredients:

1 medium beet, roasted* and chopped
2 cups milk of your choice – I used an almond/coconut milk blend
2 tablespoons chia seeds
1-1/2 cups chopped fresh strawberries
1 frozen banana, chopped
3 tablespoons cocoa powder
1/4 cup rolled oats

Directions:

*Before making this smoothie you will need to have a roasted or otherwise cooked beet on hand.  I roasted mine the night before: wrap the beet in foil, place on a baking sheet and roast in a 400°F oven for one hour or until tender.  Let cool then peel, chop, and transfer to refrigerator.   If you have a very powerful blender, you might be able to use the beet raw, but I haven’t been able to try this with my blender.

If you don’t keep frozen ripe bananas in the freezer (and you should, they are great for throwing in smoothies!), then be sure to put one in the freezer the night before too!

To make the smoothie, add all ingredients to a blender and puree until smooth.  Taste and adjust any amounts to your liking; you may wish to add a sweetener such as honey or agave depending on your tastes.  Pour into 2-3 glasses, garnish with a strawberry, and serve!

December 24, 2013

Gingerbread Chocolate Chip Cookies

Gingerbread Chocolate Chip Cookies

I'll have to make this post short as I'm not feeling well but still have to do all my Christmas wrapping and last minute preparations before the big day tomorrow (which hopefully I'll be feeling better for)!  I just wanted to squeeze in one last Christmas recipe though as these cookies were probably my favourite thing I've made this season!

Gingerbread Chocolate Chip Cookies

These cookies are inspired by a recipe I saw on Baked By Rachel, which I then went and changed almost everything about so I'm sure they're nothing like the original, but I absolutely loved my own version!  They're puffy but chewy, with a nice strong gingerbread flavour and just the right amount of sweetness from the chocolate chips.  I think these will be a new holiday favourite of mine!

Gingerbread Chocolate Chip Cookies

I'd also like to take this time to wish everyone the very best of the holiday season, with lots of rest and relaxation, cheer and good times spent with family and friends, and of course, delicious food!

Gingerbread Chocolate Chip Cookies

Gingerbread Chocolate Chip Cookies

Inspired by Baked By Rachel

Makes about 2 dozen cookies

Ingredients:

1/2 cup + 2 tablespoons unsalted butter, softened
1/4 cup sugar
1/4 cup dark brown sugar
1 large egg
1/4 cup molasses
1 teaspoon vanilla extract
2 cups all-purpose flour
1/2 teaspoon salt
1 teaspoon cinnamon
1/2 teaspoon nutmeg
1-1/2 teaspoons ground ginger
1/2 teaspoon cloves
1 tablespoon cocoa powder
3/4 teaspoon baking powder
1/2 teaspoon baking soda
3/4 cup semi-sweet chocolate chips

Directions:

In a large bowl, use a hand mixer or electric mixer to cream the butter and sugars until light and fluffy, about 2-3 minutes.  Add the egg and mix until combined.  Add molasses and vanilla and mix until combined.

In a separate bowl, whisk together the flour, salt, cinnamon, nutmeg, ginger, cloves, cocoa powder, baking powder, and baking soda.  Add the dry ingredients to the wet ingredients in 3-4 additions, mixing on low speed until each addition is just combined.  Stir in chocolate chips.  Cover dough and refrigerate for several hours until chilled through – this is important if you want the cookies to stay thick and puffy.  I chilled mine for about 3 hours.

Preheat oven to 350°F.  Scoop dough by about 1.5 tablespoons full and drop onto a parchment-lined baking sheet about 1 inch apart.  Because the dough will still be quite firm, I pressed the cookies slightly at the top to flatten them slightly.  Bake for 11-12 minutes.  Allow to rest on cookie sheet for 1-3 minutes, then transfer to a wire cooling rack to cool completely.  Store covered in a container.

September 13, 2013

Frosted Mocha Brownies

Frosted Mocha Brownies

I love baking and used to bake treats all the time, but I can't even remember the last time I made a dessert before last weekend.  I actually don't eat dessert myself that often, but I like trying new recipes and sharing treats with others; the problem is that everyone I know seems to be on diets or trying to eat healthier lately (which is a good thing!), and there aren't really any big dessert-worthy celebrations in the summer, so I haven't had an excuse to bake in a long time!

This past weekend though, I had a sudden urge to bake something so I decided to stop waiting for an excuse and just make something to give away to the boyfriend's coworkers (after trying one myself, of course!).  I was in the mood for a warm and comforting dessert but wasn't quite ready to break out the apples and pumpkin yet (though now that it's cooled off, that will be up next!), so I decided to go with brownies.  Everyone loves brownies, and I had all the ingredients for these latte bars I'd had bookmarked for a while, so I went right to work!

Frosted Mocha Brownies

The original recipe for these bars was called 'latte bars', but since they're made up of coffee and chocolate, and mine turned out much more like brownies than bars, I'm calling them mocha brownies.  They're chewy and dense and everything you'd want a brownie to be (i.e. not too fudgey and not too cakey - just in between), with coffee in both the brownie, frosting, and the chocolate coffee beans on top, giving them the perfect amount of subtle coffee flavour.  I topped mine with a cream cheese frosting instead of buttercream because I think everything is better with cream cheese!

I'm not a huge chocolate lover but I do love coffee and I loved these bars, and so did the coworkers who were kind enough to help me eat them all!  I know the pictures are terrible (it was pretty dark out when I got time to take a few pics), but trust me that these are way better than I've made them look!

Hope you all have a great weekend!

Frosted Mocha Brownies

Frosted Mocha Brownies

Adapted from Land O Lakes

Makes one 8x8-inch pan; can be sliced into 16-20 brownies

Ingredients:

For the Brownies:
1 tablespoon instant coffee (+ 2 teaspoons hot water)
1 cup sugar
3/4 cup all-purpose flour
1/3 cup cocoa powder
1/4 teaspoon salt
1/2 cup unsalted butter, melted
2 large eggs
1 teaspoon vanilla extract

For the Frosting:
8 oz (one brick) cream cheese, softened (I used light cream cheese)
3/4 – 1 cup icing sugar
1/2 tablespoon instant coffee
1 teaspoon vanilla extract

For Topping:
16-20 chocolate covered coffee/espresso beans (or more, if desired)

Directions:

Preheat oven to 350°F.  Spray an 8x8 baking pan with non-stick cooking spray (I lined mine with parchment paper instead for easy removal after – use whatever method you like for brownies).

Prepare the brownies:  Combine instant coffee with hot water and mix until dissolved in a small bowl.  In a separate bowl, add the sugar, flour, cocoa powder, and salt, and whisk to combine.  In another separate bowl, whisk together the butter, eggs, vanilla extract, and coffee mixture until combined.  Add the wet ingredients to the dry ingredients and fold together with a spatula until just combined.  Spread the batter in the prepared pan and bake in preheated oven for 23-27 minutes, until a toothpick inserted in the middle comes out clean.

Prepare the frosting: Combine instant coffee with vanilla extract and mix to combine in a small bowl.  Beat cream cheese with an electric mixer in a large bowl or the bowl of a stand mixer, until smooth and creamy, 2-3 minutes.  Add icing sugar and mix until combined.  Add coffee-vanilla mixture and mix until combined.  Taste and add more sugar if needed (I don’t like it to be too sweet).  Keep frosting in fridge until bars have completely cooled.

Once bars have cooled, spread frosting over them (you might not need all the frosting), and slice into bars.  Top each bar with a chocolate coffee bean, or chop multiple coffee beans and sprinkle overtop.

February 22, 2013

Chocolate Biscoff Cupcakes with Biscoff Cream Cheese Frosting

Chocolate Biscoff Cupcakes with Biscoff Cream Cheese Frosting

So this is the first Biscoff recipe on my blog, and I’m sure most of you are probably thinking that I’m the last one to the Biscoff party, which started almost two years ago. The thing is, Biscoff hasn’t really become as popular here in Canada as it has in the United States (or Europe, I assume, as that’s where it originated). In fact, when I sent these cupcakes to work with my boyfriend, he had to call me to ask me again what they were called because he had never heard of Biscoff, and apparently nobody at his work had either. And when I wrote about these cupcakes on Facebook, the first comment I got was asking me what Biscoff is.

So even though I feel like my fellow bloggers are probably already sick of Biscoff because it’s been popular on blogs for a while, in real life I don’t know anyone who’s even heard of the stuff, so I feel obligated to explain what it is!  But if you’ve already seen a thousand Biscoff recipes and have gone through fifty jars of the stuff at home, feel free to skip past these next paragraphs :)

Chocolate Biscoff Cupcakes with Biscoff Cream Cheese Frosting

Biscoff cookies (“Europe’s favourite cookie with coffee”, according to their website), also known as Speculoos, are a crisp little Belgian cookie with a cinnamon/caramel/gingersnap-like flavour.  They originated in Europe but grew in popularity around the world when airlines like Delta started handing them out on flights.  A few years ago, the cookies were turned into a creamy spread with a consistency of peanut butter and taste of Biscoff/speculoos cookies.  The main ingredient in the spread is cookies, which is why it’s also referred to as cookie butter.  I think a lot of people eat the spread as they would peanut butter, such as on toast or as a dip for apples, but it’s also become really popular for use in baking.  There’s a nice little slideshow on Huffington Post of some of the ways you can use Biscoff spread!

cookie butter spreads

While it’s now available in many grocery stores in the United States, including Trader Joe’s, which has its own version called Speculoos Cookie Butter (pictured above), it hasn’t really appeared much in Canada yet, which is why most of my friends haven’t heard of it. I buy it when I go on trips to the US, but if you don’t live anywhere near the States (or Europe), I’d recommend looking in European grocery stores – I’ve actually spotted Biscoff at an Italian supermarket in Waterloo, Ontario, so it is out there!

 Chocolate Biscoff Cupcakes with Biscoff Cream Cheese Frosting

I had a hard time choosing what to make for my first experiment with Biscoff.  I’ve never really been a big fan of cupcakes, but I made some red velvet cupcakes on Valentine’s Day (which I posted about on Facebook, if you’re interested) and they turned out so well that they changed my mind about cupcakes.  Plus they are so fun to decorate!  

So I decided to make Biscoff cupcakes. My first thought was to make both the cupcake batter and frosting with Biscoff, but I thought that might be a bit too much, so I decided to go with a chocolate base instead.   I used Beantown Baker’s idea of stuffing a little Biscoff inside the cupcake for a fun surprise, which was super easy – you just have to cut a hole in the top of the cupcake after they’re done, fill it with a spoonful of Biscoff, and cover it back up.  Don’t try putting Biscoff in the center of the cupcake before you bake them – it will just sink to the bottom, trust me!  Here’s a little visual of how to fill the cupcakes:

 Filling Biscoff Chocolate Cupcakes

I was so happy with how these turned out! The Biscoff cream cheese frosting was my favourite part and the chocolate cupcake was the perfect complement to it, plus I loved the little surprise of Biscoff in the center! I ate two right after I made them then had to send the rest away to be shared before I got carried away, and I’m told they were very well received at work, even though most people probably didn’t know what they were eating!

 Chocolate Biscoff Cupcakes with Biscoff Cream Cheese Frosting

I still have a jar and a half of Biscoff to use up, so now that I’ve introduced you guys to it, expect to see a few more recipes here in the near future!

And if you have a favourite Biscoff recipe or way to use it, please feel free to share in the comments, I’d love to hear your ideas!

 Chocolate Biscoff Cupcakes with Biscoff Cream Cheese Frosting

Chocolate Biscoff Cupcakes with Biscoff Cream Cheese Frosting

Inspired by Beantown Baker, Chocolate cake recipe adapted from Hershey’s Kitchens, Biscoff frosting adapted from Biscoff

Makes about 12 cupcakes

Ingredients:

For the Cupcakes:
3/4 cup + 2 tablespoons all-purpose flour
1 cup sugar
1/4 cup + 2 tablespoons unsweetened cocoa powder
3/4 teaspoon baking soda
3/4 teaspoon baking powder
1/2 teaspoon salt
1/2 teaspoon cinnamon
1 large egg
1/2 cup milk
1/4 cup canola oil
1 teaspoon vanilla extract
1/2 cup brewed coffee
~1/4 cup Biscoff spread for filling

For the Frosting:
8 oz brick of cream cheese
1/2 cup Biscoff spread
1/2 cup icing sugar
1/4 teaspoon salt
1 teaspoon vanilla extract

Directions:

Preheat oven to 350°F.  Line a muffin tin with paper liners and spray with non-stick spray.

In a large bowl, whisk together the flour, sugar, cocoa powder, baking soda, baking powder, salt, and cinnamon until well combined.  In a separate bowl, whisk the egg, milk, oil, and vanilla extract until smooth.  Add the wet ingredients to the dry ingredients and mix well until smooth.  Stir in the coffee; batter will be thin.   Use a measuring cup to pour batter into liners, filling them only 2/3 full.  Bake in preheated oven for 22-25 minutes, until a toothpick inserted in the middle comes out clean.  Transfer to a wire rack and let cool completely.

Meanwhile, prepare frosting.  Beat the cream cheese and Biscoff together with an electric mixer until smooth, about 2 minutes.  Slowly add the icing sugar and mix on low speed until combined.  Mix in the salt and vanilla. 

Once cupcakes have cooled, use a sharp knife to cut a small cone out of the top of the cupcake.  Remove the top and fill with about 1 teaspoon of Biscoff spread.  Replace the top and push down to hide the biscoff inside the cupcake and create a flat surface on the top of the cupcake. (see here for pictures of the cone filling method).

Transfer cream cheese frosting to a piping bag (I fitted mine with a Wilton 1M tip) and frost cupcakes.  I decorated mine with Biscoff/Speculoos cookies and a dusting of cinnamon.

 Chocolate Biscoff Cupcakes with Biscoff Cream Cheese Frosting

December 19, 2012

Mini Baked Peppermint Mocha Doughnuts

Mini Baked Peppermint Mocha Doughnuts

First I made cheesecake bars, then there were shortbread cookies, and now here I am with another peppermint holiday dessert, this time doughnuts! For those of you who hate peppermint, I promise this is the last one (at least for a little while)!

These go a step further than basic peppermint by adding chocolate and coffee flavours to resemble one of my favourite Starbucks’ holiday drinks, the peppermint mocha. (Although I’ve since discovered white peppermint mocha frappucinos and that is now my new favourite drink – try it!)

Mini Baked Peppermint Mocha Doughnuts

Though I don’t often make doughnuts because they’re better eaten fresh and I don’t usually have a big group of people to feed fresh doughnuts to, I do love them because they’re so cute and easy to eat, plus they’re a little better for you than their full-sized, fried counterpart.

These little guys have a coffee chocolate base covered in a peppermint white chocolate glaze with a sprinkle of crushed candy canes on top. They’re so festive looking and reminded me a lot of a peppermint mocha!

These had just the right amount of subtle coffee flavour for me, but you could add more coffee or espresso powder if you want a strong coffee taste. Or you could eliminate it and just go with a chocolate base if you don’t like coffee. Similarly, you could eliminate the peppermint extract from the icing if you’re not into minty things – I know some people who tried these weren’t really a fan and I assume it’s because they either don’t like coffee baked goods or minty baked goods or the combination of the two. If you’re not sure if you do, just leave out the coffee and peppermint and you’ll have a chocolate doughnut with a little crunch of candy cane that will be just as good!

Mini Baked Peppermint Mocha Doughnuts

In other news, my holiday preparations are in a lot better shape than the last time I wrote – all but one of my gifts I ordered online have now arrived and I’ve finished my shopping for all but two people. I’m sure people who finished their shopping in November would scoff at that, but it’s pretty good for me! I’m also done with school for the semester (though I’ll still have work to do from home over the holidays) and am looking forward to spending lots of time with my family and boyfriend and doing lots of Christmassy activities over the next week!

Mini Baked Peppermint Mocha Doughnuts

Mini Baked Peppermint Mocha Doughnuts

Idea inspired by Starbucks’ peppermint mocha; glaze recipe my own; chocolate doughnut recipe adapted from Buns in My Oven

Makes 24 mini doughnuts

Ingredients:

For the Chocolate Coffee Doughnuts:
1 cup all purpose flour
1/4 cup + 2 tablespoons sugar
1 teaspoons baking powder
1/4 cup cocoa powder
1/4 teaspoon salt
1 tablespoon instant coffee
1 large egg
1/2 cup buttermilk (or regular milk with a teaspoon of white vinegar added)
1/2 teaspoon vanilla extract
1 tablespoon vegetable oil

For the White Chocolate Peppermint Glaze:
1/4 cup white chocolate chips
1/2 cup powdered sugar
1/2 teaspoon peppermint extract - optional for peppermint flavour, but you could leave out and just use the candy canes if you like
1-2 tablespoons milk
Crushed candy canes (about 1/4 cup total)

Directions:

Preheat oven to 325°F.  Lightly spray a mini doughnut pan with non-stick cooking spray.

In a large bowl, whisk together the flour, sugar, baking powder, cocoa, salt, and instant coffee.  In a medium bowl, whisk the egg, then whisk in the buttermilk, vanilla, and vegetable oil.  Add the wet ingredients to the dry ingredients and stir with a wooden spoon or spatula until just incorporated.  Transfer mixture to a ziplock bag, snip off the corner, and squeeze the batter into the doughnut pan, only filling each mold halfway full (they will puff up when baking).  It's a lot easier to fill the molds by squeezing it out of a bag, trust me.

Bake in preheated oven for 6-8 minutes, until cooked through and the top springs back when touched.  Remove from pan and let cool on a wire rack.

Prepare icing by melting the chocolate chips in a small bowl in the microwave, then stirring in the icing sugar and peppermint extract (if using).  Add 1 tablespoon of milk, stir, and add up to 1 additional tablespoon of milk until desired consistency is reached (I used the full 2 tablespoons, which makes a thin glaze).

Once doughnuts have cooled, dip the top of each doughnut in the icing, then set back on the wire rack, which should be placed over a baking sheet or sheet or parchment paper to catch drippings.  I like to coat each doughnut twice to ensure there is enough glaze.  Only coat a few doughnuts at a time the second time, then sprinkle crushed candy cane over the top while the icing is still wet so it sticks.

These are best served immediately and eaten on the same day, but note that after about half a day, the candy canes may start to melt into the icing.

December 16, 2011

Gingerbread Oatmeal

gingerbread oatmeal
Before I get to this post, I wanted to make a quick announcement: I’m finally on Facebook! Be sure to ‘like’ this page if you want to get new posts, updates, and other fun links on your Facebook newsfeed :) I still have yet to enter the Twitter world, but I’m hoping I’ll work up the courage to learn how to do that soon!

Moving on to the oatmeal, this is a wonderfully warm and spicy breakfast to help you wake up on a festive note. It doesn’t take long at all to make, it’s healthy, and is quite filling, so it’s the perfect way to start off a busy day full of last-minute holiday shopping! Not that I ever leave my shopping to the last minute, of course….

I’ve made this oatmeal several times now, adjusting the spices each time until I reached a taste that I liked. But I want to emphasize that everyone’s tastes differ and you should adjust any of the amounts to your own liking (for example, you might want to add more sugar if you like sweeter oatmeal, and less spice if you’re not a big fan of gingerbread spices). The amount of spice you’ll want to add will also depend on how fresh your spices are, so it’s probably a good idea to start with less, then add more until you reach the level that’s right for you!

And if you're looking for a slightly more decadent gingerbread-flavoured breakfast, be sure to try out these gingerbread crepes, they're my favourite! They're being featured on EatinEatOut's facebook page right now along with lots of other holiday treats, so be sure to go like their page too!

gingerbread oatmeal
Gingerbread Oatmeal

Serves 1

Ingredients:

1/2 cup water
1/2 cup milk
Dash of salt
1/2 cup quick cooking oats
2 teaspoons molasses
1/2 teaspoon cinnamon
1/4 teaspoon ginger
1/8 teaspoon cloves
1/2 tablespoon brown sugar
1 teaspoon cocoa powder

Directions:

Bring water, milk, and salt to a simmer in a small saucepan. Add oats, stir, and lower temperature to a gentle simmer.

Cook 3-5 minutes or according to package directions and type of oats used. As oats are cooking, add all remaining ingredients, stirring thoroughly after each addition (it’s especially important to quickly distribute the spices evenly by stirring after each addition so that you don’t end up with any unpleasant clumps of spices afterwards).

Taste and adjust seasoning if necessary. Sprinkle with chopped pecans or walnuts for added crunch, if desired. Serve warm.

Ingredient Index

Related Posts Plugin for WordPress, Blogger...