Showing posts with label garlic. Show all posts

May 04, 2015

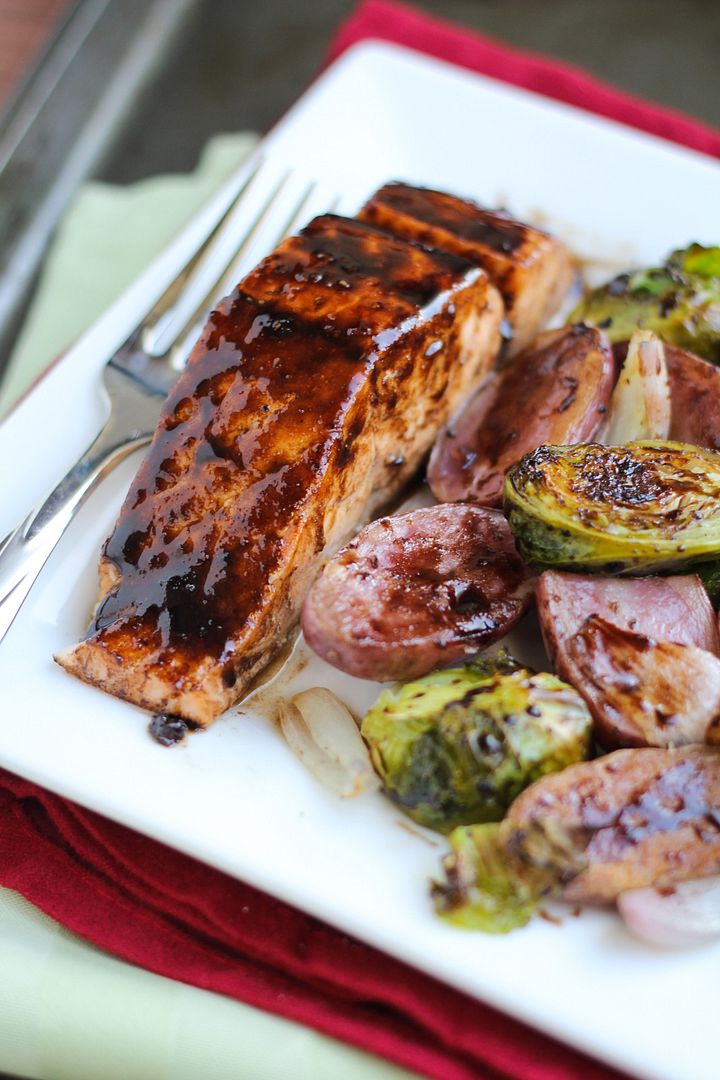
Maple Balsamic Roasted Salmon, Brussels Sprouts, & Potatoes

Maple Balsamic Roasted Salmon, Brussels Sprouts, and Potatoes

I know it's a little late for brussels sprouts season and most of you are probably too focused on asparagus right now to think about wintry vegetables, but I'm happy to eat brussels any time of year (and we don't have local asparagus here yet last time I checked)!

I can also enjoy a meal like this any time of year - roasted salmon, vegetables, and potatoes all tossed in an easy homemade glaze. There's nothing revolutionary about this dish and you've likely seen or made a version of it once or several times before, but it's a great recipe to have in your collection because it's simple, healthful, flavourful, and satisfying!
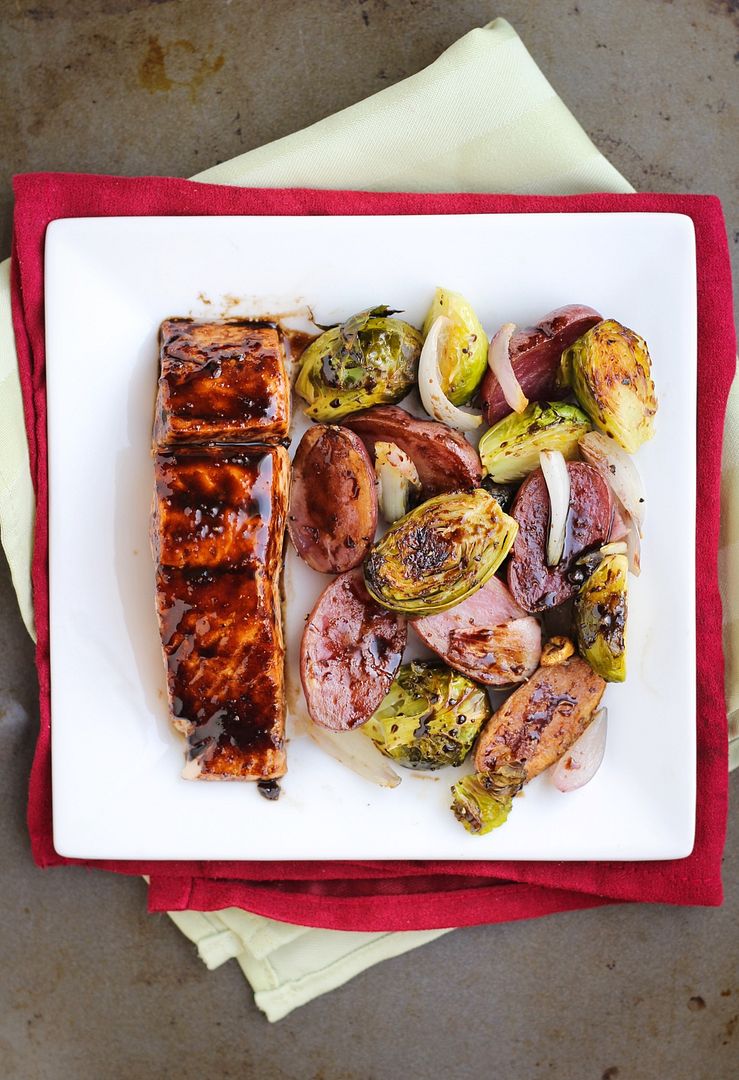
Maple Balsamic Roasted Salmon, Brussels Sprouts, and Potatoes

I love adding a glaze to salmon because that little extra step makes such a difference in flavour; I usually use whatever ingredients I have on hand but that often includes maple syrup. I also love tossing roasted brussels sprouts and potatoes in balsamic vinegar and eating them just like that. So I decided to combine those flavours together with a maple balsamic glaze that I brushed heavily on the salmon and lightly on some roasted brussels sprouts, potatoes, and shallots on the side.

I don't often like coordinating main dishes with side dishes because it involves too much work but everything about this dish flows easily together, doesn't take long or dirty too many dishes, and most importantly tastes so good you'll want to add it into your meal rotation no matter the time of year!
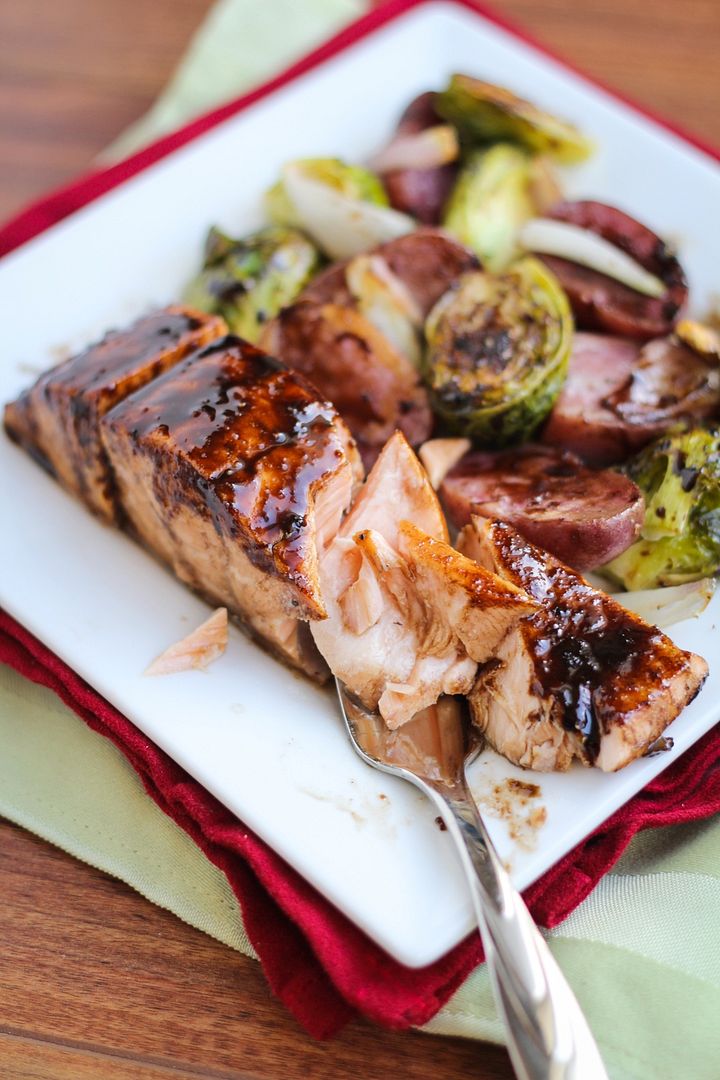
Maple Balsamic Roasted Salmon, Brussels Sprouts, and Potatoes

Maple Balsamic Roasted Salmon, Brussels Sprouts, & Potatoes

Serves 4

Inspired by Real Simple but recipe is my own

Ingredients:

For the roasted veggies:
1 lb brussels sprouts, stems trimmed and outer leaves removed, halved
1 lb baby potatoes or fingerling potatoes, halved
3-4 shallots, peeled and chopped
3-4 cloves of garlic, chopped
1-2 tablespoons olive oil

For the glaze:
1 teaspoon olive oil
1 clove garlic, minced
1/4 cup balsamic vinegar
2 tablespoons pure maple syrup
1 tablespoon Dijon mustard
~1/4 teaspoon each salt and pepper

1 lb or 4 fillets of salmon

Directions:

Preheat oven to 425°F.

Toss brussels sprouts, potatoes, shallots, and garlic with olive oil. Season with salt and pepper and spread in a single layer on a foil-lined baking sheet.  Roast in preheated oven for 20-25 minutes.

Meanwhile, prepare glaze by heating 1 teaspoon olive oil or a light drizzle in a small saucepan over medium heat. Add garlic and cook for about 30 seconds. Add balsamic vinegar, maple syrup, Dijon, salt, and pepper. Let simmer, stirring often, and watching closely, until slightly thickened. This could take around 5 minutes. I don’t reduce the glaze until it’s completely thick; I remove it from the heat when it’s thickened but still pourable.

Remove vegetables from oven and toss.  Brush glaze over salmon fillets (you won’t use all the glaze) and place on the same or a separate foil-lined pan, skin side down.  Return salmon and vegetables to oven and roast for another 10-12 minutes or until salmon and vegetables are cooked through.  Brush remaining glaze over salmon and roasted veggies.  Season with salt and pepper if desired.

April 02, 2015

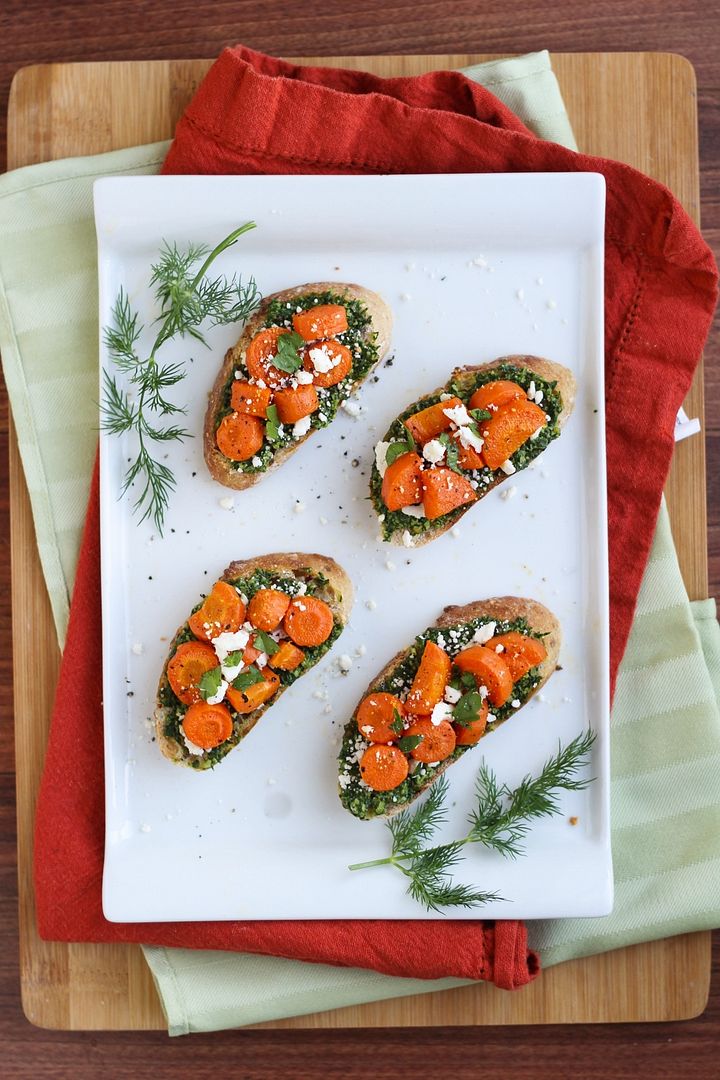
Roasted Carrot Crostini with Dill Pesto & Feta

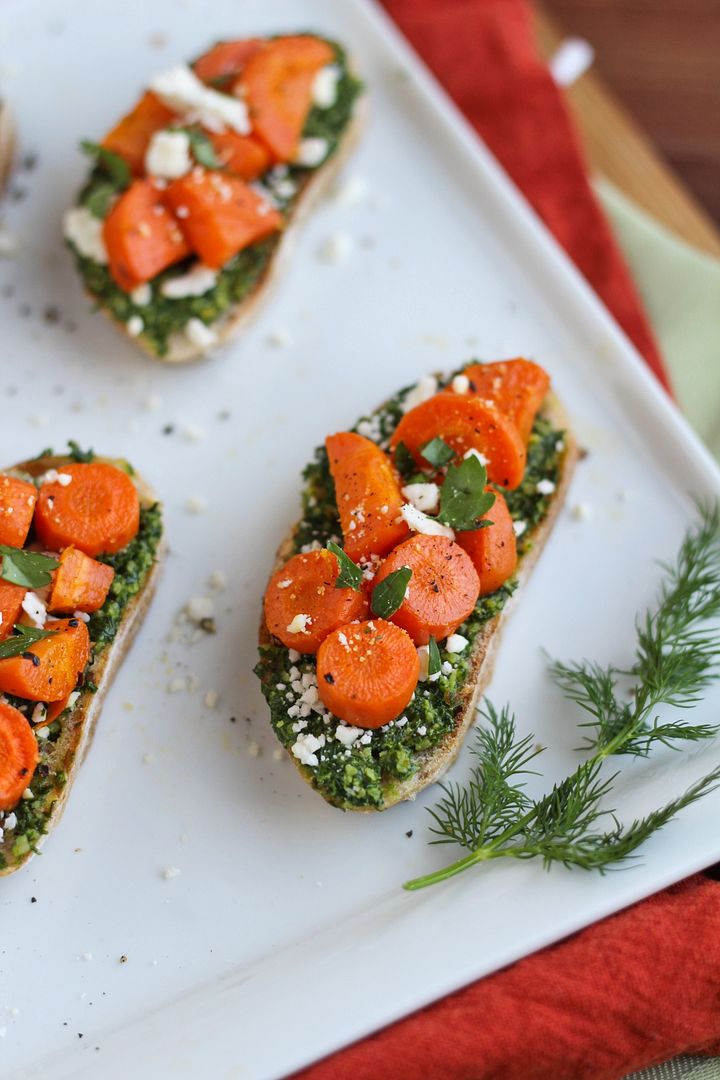
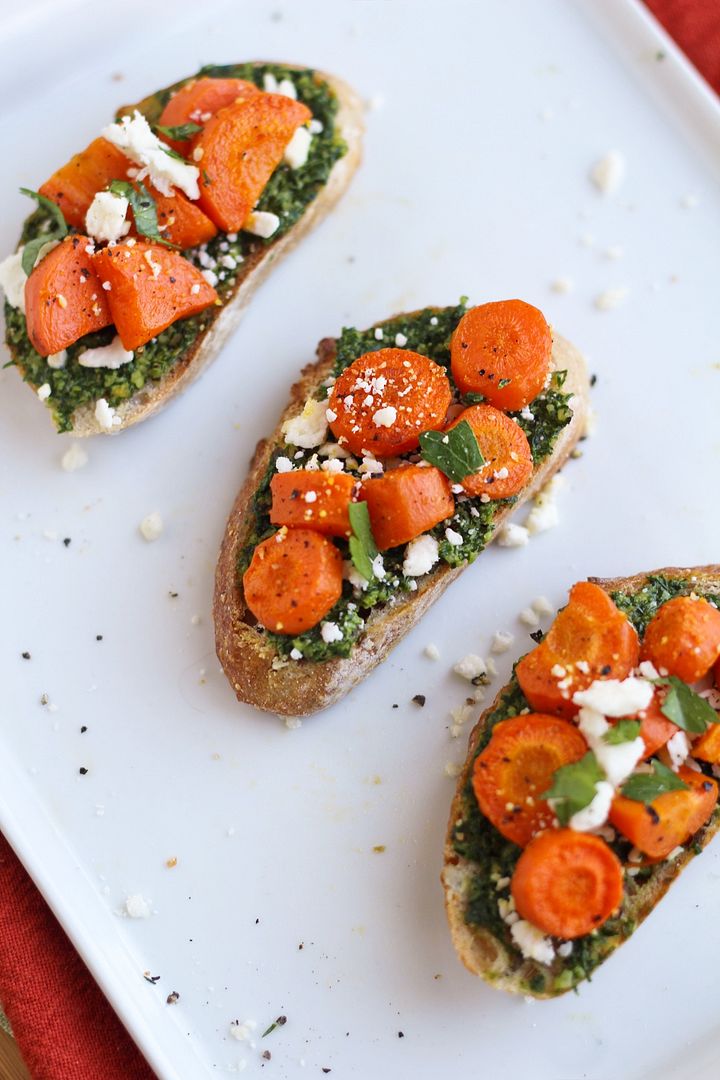
Roasted Carrot Crostini with Lemon Dill Pesto and Feta - an appetizer with bright Spring flavors that's perfect for Easter or anytime!

I'm happy I decided to try to start posting recipes again just in time for Easter.  I love all food-related holidays but Easter is especially nice because after the heavier meals at Thanksgiving and Christmas, we now get to celebrate bright and fresh flavours that go along with the start of springtime.

Roasted Carrot Crostini with Lemon Dill Pesto and Feta - an appetizer with bright Spring flavors that's perfect for Easter or anytime!

Whenever I try to think of Easter recipes my mind always goes straight to carrots.  As part of our Easter dinner last year, my sister made roasted carrots and radishes with a lemon dill pesto (inspired by With Food + Love) and the flavours worked really well together.  So I decided to turn that concept into an appetizer, with the addition of feta because feta makes everything better!

Roasted Carrot Crostini with Lemon Dill Pesto and Feta - an appetizer with bright Spring flavors that's perfect for Easter or anytime!

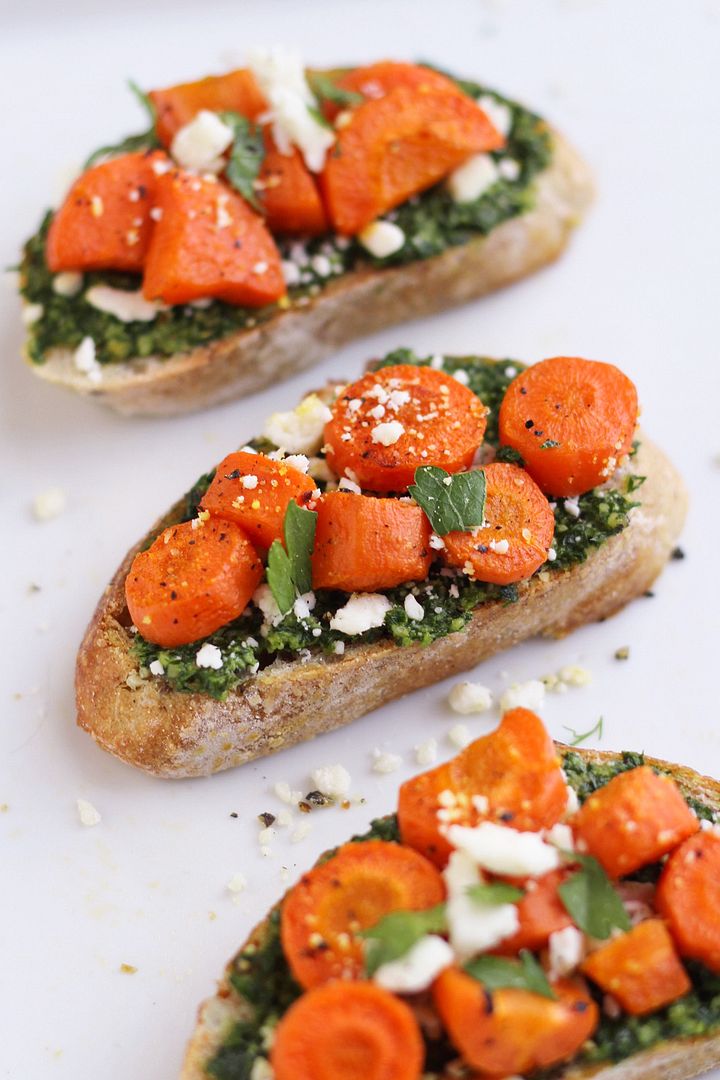
This dish looks a little fancy but is really easy to prepare. I just chopped and roasted some carrots in the oven, then whipped together a lemony dill pesto in the food processor.  I toasted some whole wheat baguette slices, spread some of the pesto on top, then topped them with the carrots and feta. I loved how the bright flavours of the pesto balanced out the earthy carrots and salty feta.

I'm in charge of apps for our family's Easter dinner this year so I think I'll be making these again!  I hope you all enjoy the long weekend and have a happy Easter if you're celebrating it!

Roasted Carrot Crostini with Lemon Dill Pesto and Feta - an appetizer with bright Spring flavors that's perfect for Easter or anytime!

Roasted Carrot Crostini with Lemon Dill Pesto & Feta

Serves 10-15

Ingredients:

For the carrots:
1-1/2 lbs carrots, peeled and chopped into small, about ¼-½” pieces
1-2 teaspoons olive oil
Salt and pepper

For the lemon dill pesto:
1-1/2 cups packed fresh dill
1/2 cup packed fresh parsley leaves
2 cloves garlic, minced
1/4 cup chopped walnuts
2 tablespoons fresh lemon juice
2 tablespoons extra virgin olive oil
1/4 teaspoon each salt and pepper

Other:
1/4 to 1/3 cup crumbled feta
1 large baguette, sliced diagonally into thin slices (I used a whole wheat ciabatta loaf)

Directions:

Preheat oven to 400°F. Toss carrots with olive oil, season with salt and pepper, and spread on a foil-lined baking sheet.  Roast in preheated oven for about 30 minutes, tossing halfway through.

Meanwhile, prepare dill pesto.  Place all ingredients (dill, parsley, garlic, walnuts, lemon juice, oil, salt, and pepper) in the bowl of a food processor (I used the smaller bowl) and process until the pesto is as smooth as you can get it.  Taste and adjust any seasoning or amounts to your liking if necessary.

When carrots are done, leave oven on, and spray baguette slices with cooking spray.  Set on baking sheet and let toast in oven for about 3-5 minutes, until toasted.

Prepare crostini by spreading pesto on baguette slices, top with crumbled feta and roasted carrots, and garnish with chopped parsley if desired.  Serve while carrots are still warm.

October 28, 2014

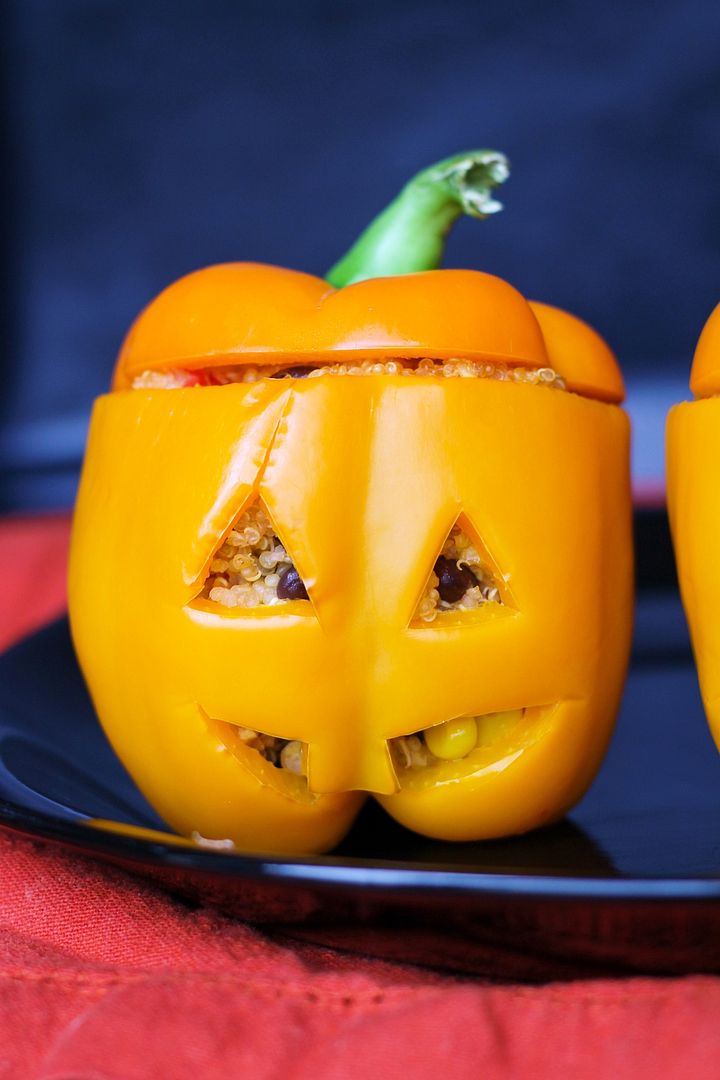
Southwestern Quinoa Stuffed Pepper Jack O' Lanterns

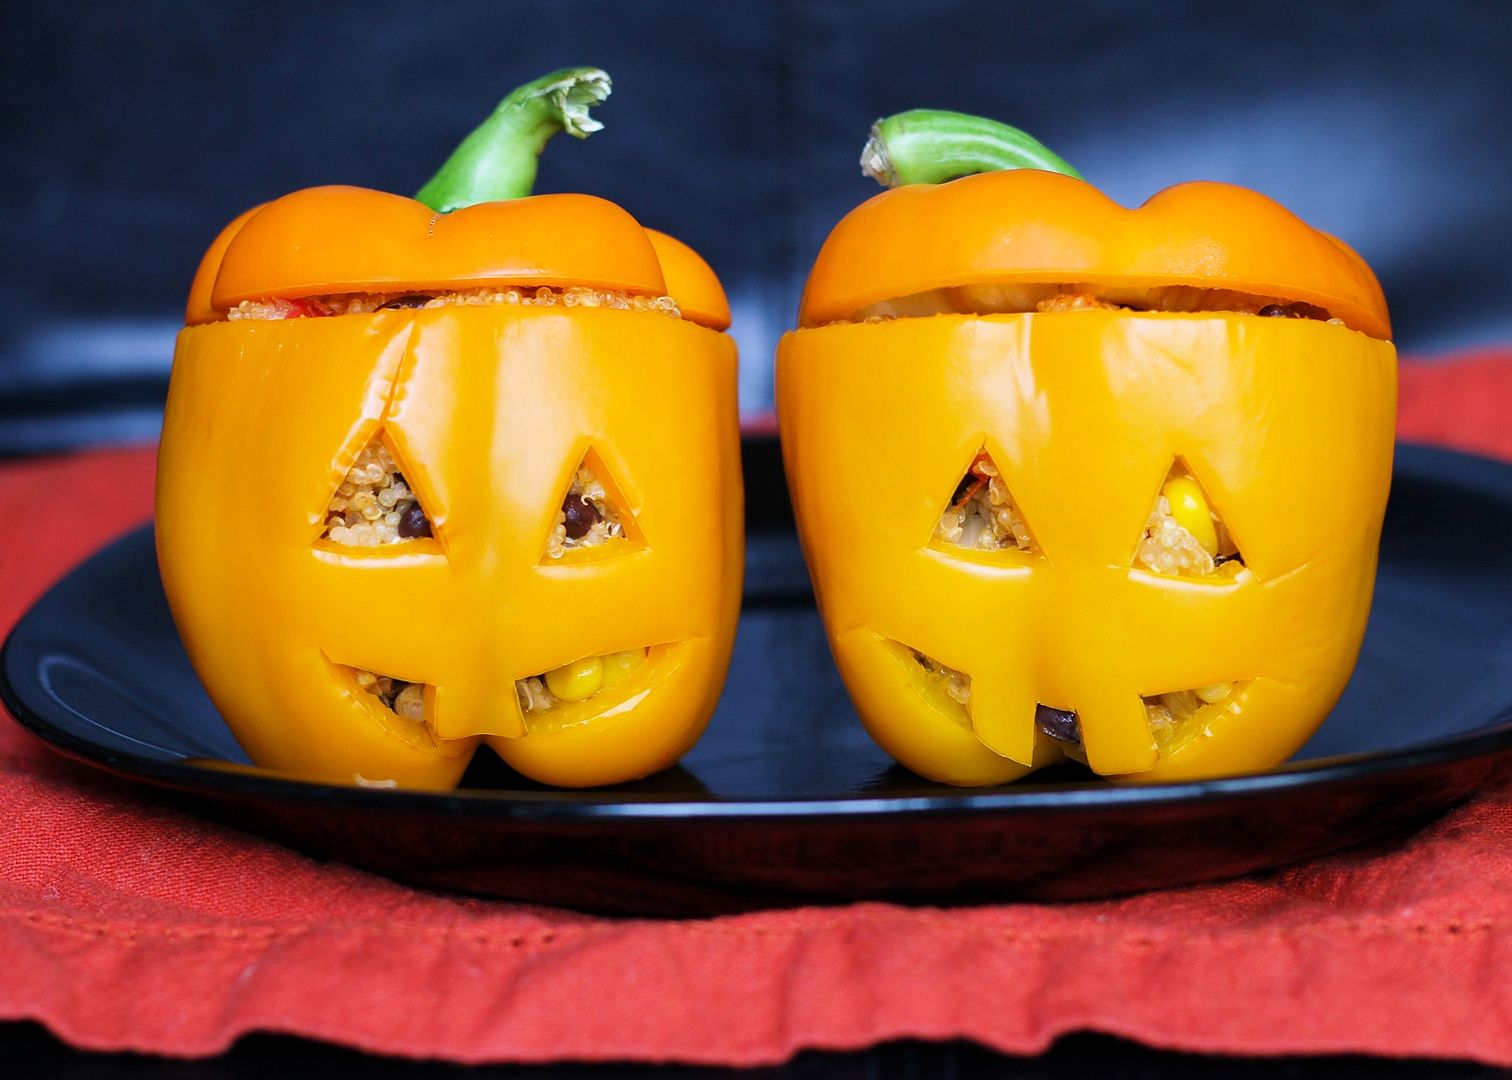
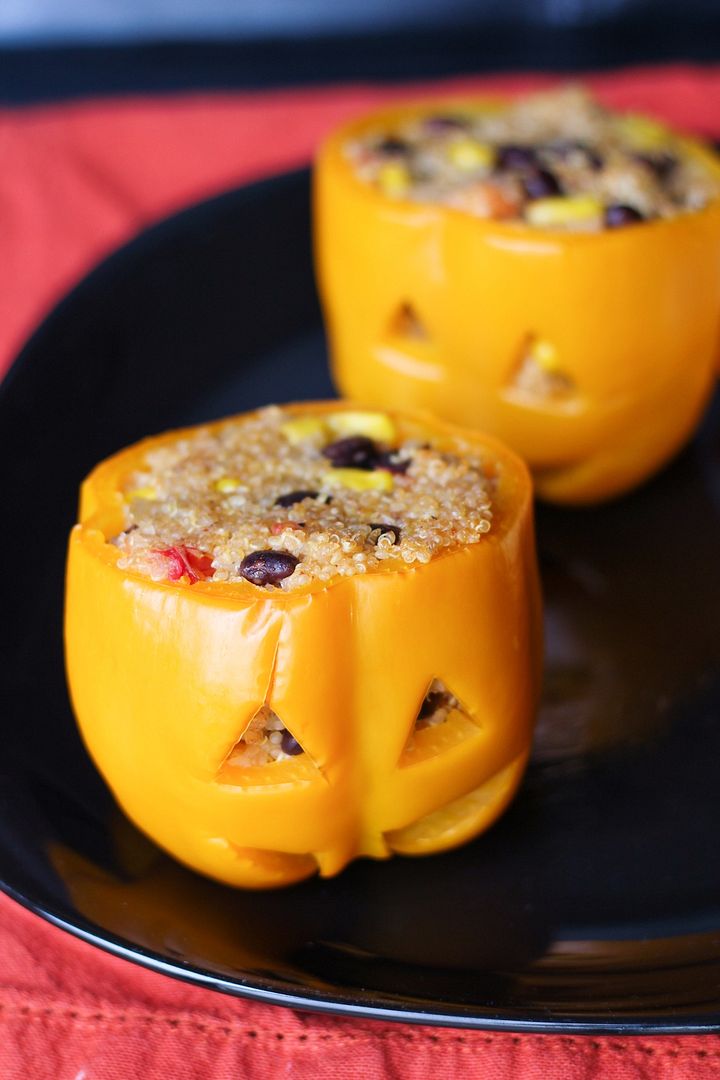
Southwestern Quinoa Stuffed Pepper Jack O' Lanterns - easy and fun dinner idea for Halloween!

I love making cute Halloween themed treats, and dinner ideas are even better since there are already so many sweets around this time of year.  I've seen the idea of carving stuffed peppers like jack o' lanterns on several blogs before and wanted to try it for myself this year.  Even though I'm certainly not the first to try these, they turned out so cute and tasty that I had to share them with you guys!

Southwestern Quinoa Stuffed Pepper Jack O' Lanterns - easy and fun dinner idea for Halloween!

These are also really easy to make and completely customizable!  Just find some orange peppers, cut the tops off and scrape out any seeds or ribs inside, then carve your jack o lantern face with a small knife.  You don't want to cut out too big of holes so that the filling could escape, but even though these are a lot smaller to work with than pumpkins, I found them much easier to "carve"!

After prepping your little pumpkin lookalikes, you make your filling, stuff the insides of the peppers, and bake them to soften the peppers.  I also like to parboil the peppers first to reduce the amount of time needed to soften the peppers in the oven later, which will also help save time if you're trying to make these on Halloween evening before trick or treating starts!

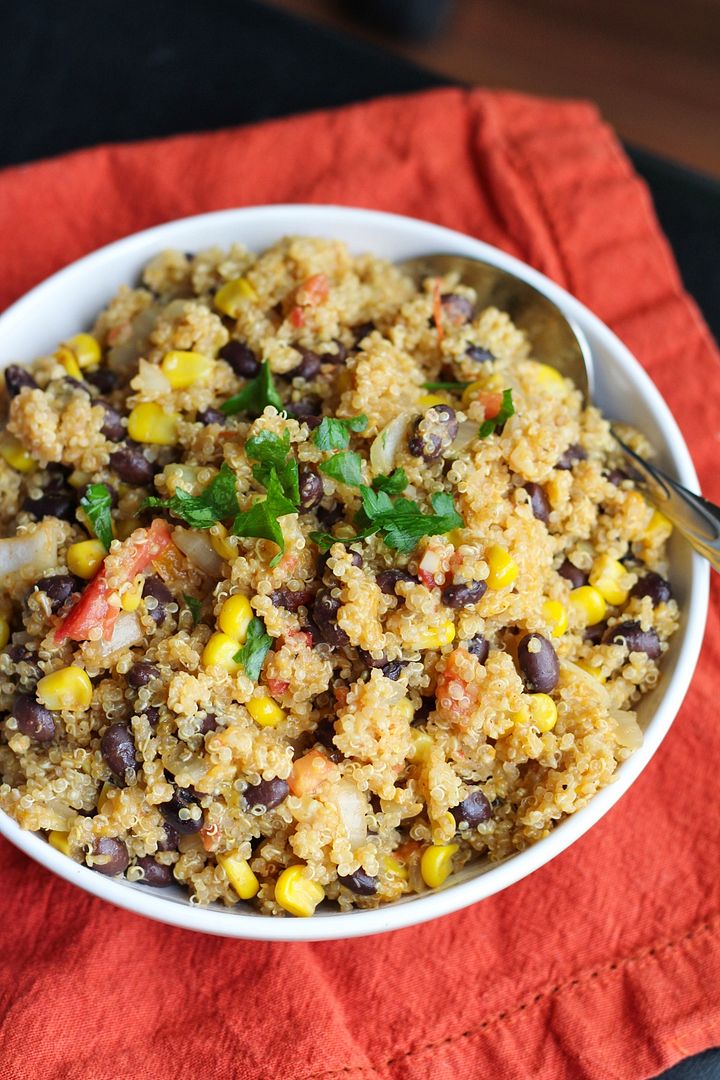
southwestern quinoa

I filled mine with one of my favourite southwestern-flavoured quinoa mixtures, which is vegetarian and pretty healthy too.  I cook the quinoa in vegetable broth which is important for giving it more flavour, then mix in some sauteed onion and garlic, tomatoes, black beans, corn, spices, and cheese.  You could add in more vegetables like spinach or mushrooms if you like, or leave out the spices if your kids won't like them.

I'm going to a Halloween potluck tomorrow and plan on making some scary cookies so if those turn out well I'll have another treat to share later this week!  Happy week of Halloween!

Southwestern Quinoa Stuffed Pepper Jack O' Lanterns - easy and fun dinner idea for Halloween!

Southwestern Quinoa Stuffed Pepper Jack O’ Lanterns

Serves 4-6

Ingredients:

2 cups vegetable broth
1 cup dry quinoa
4-6 orange bell peppers
1 teaspoon olive oil
1 yellow onion, diced
1 clove garlic, minced
2 small tomatoes, diced
1 (540mL) can black beans, drained and rinsed
1 cup corn kernels (thawed if frozen)
1 teaspoon cumin
1/2 teaspoon chili powder
Salt and pepper
1 cup shredded cheddar cheese (or Mexican or taco blend)

Directions:

Bring 2 cups of vegetable broth to a boil in a medium saucepan.  Add quinoa, cover, reduce heat to simmer and let simmer for 15 minutes.  Remove from heat and let sit, covered, for 5 minutes.  Remove lid and fluff with a fork.

Meanwhile, cut the tops off the bell peppers and use a knife to scrape out the remaining seeds and ribs of the pepper, leaving the pepper in tact (as seen in pictures).  Leave the tops aside if you wish to include them for presentation later.  Bring a large pot of water to a boil, with enough water to cover the peppers.  Add peppers and let simmer for about 4 minutes, until slightly softened.  Carefully remove and set aside.

Preheat oven to 350°F.

In a medium pan, heat oil over medium-high heat.  Add onion and saute for about 5 minutes, stirring often, until softened.  Add garlic and saute for 30 seconds, stirring. Add tomatoes, black beans, corn, cumin, and chili powder, and season with salt and pepper.  Stir and saute for a few minutes.  Remove from heat, stir in quinoa and cheddar cheese and mix until incorporated.

Spoon quinoa mixture into the peppers.  There should be enough to fill 6 peppers or you can really fill 4 peppers quite full, and might still have some quinoa leftover.  You could also just stop now and eat the quinoa on its own!  Leave tops off the peppers, spray a 9x13 glass baking dish with non-stick cooking spray, and place filled peppers standing up in the dish.  Cover with aluminum foil and bake in preheated oven for 25-35 minutes, until peppers are softened to your liking (I did 25 minutes as I was impatient but would have preferred 30).  Remove and serve with tops on the peppers if desired.  Eat by slicing everything up with a knife and fork and eating the quinoa and pepper together.


--------------------------------------------------------------------------------------------------
For more Halloween dinner ideas, try these:

Halloween mummy potatoes with turkey meatballs

Halloween Mummy Potatoes with Meatballs

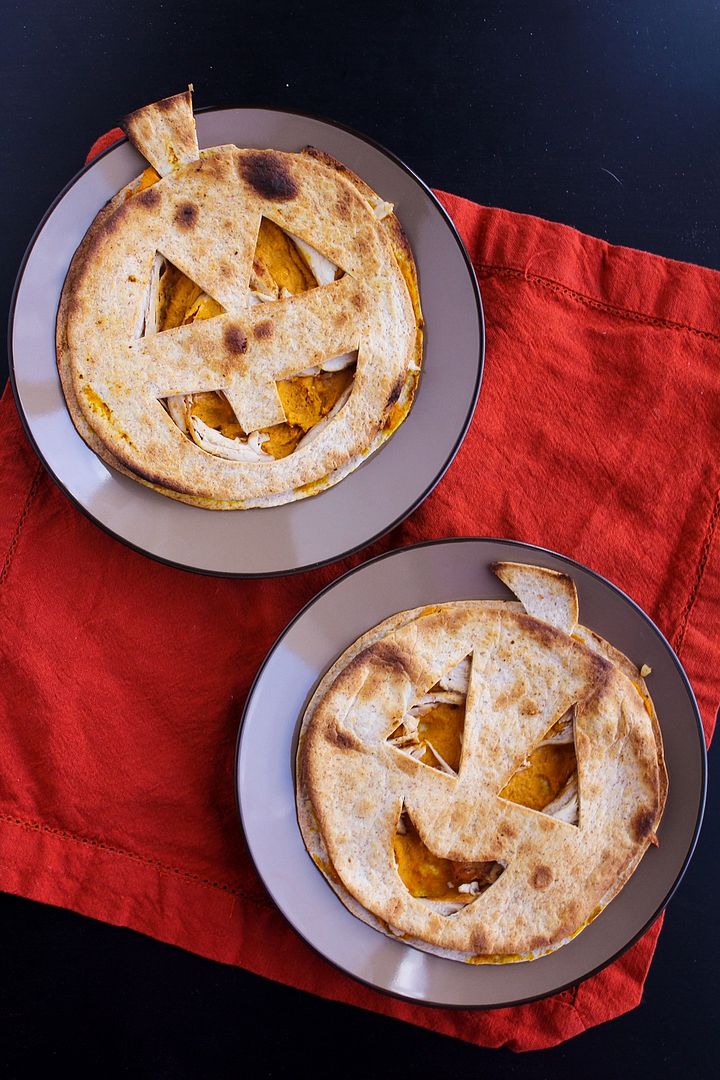
Pumpkin, chicken, & goat cheese quesadillas

Pumpkin, Chicken, & Goat Cheese Quesadillas(for Halloween!)

September 19, 2014

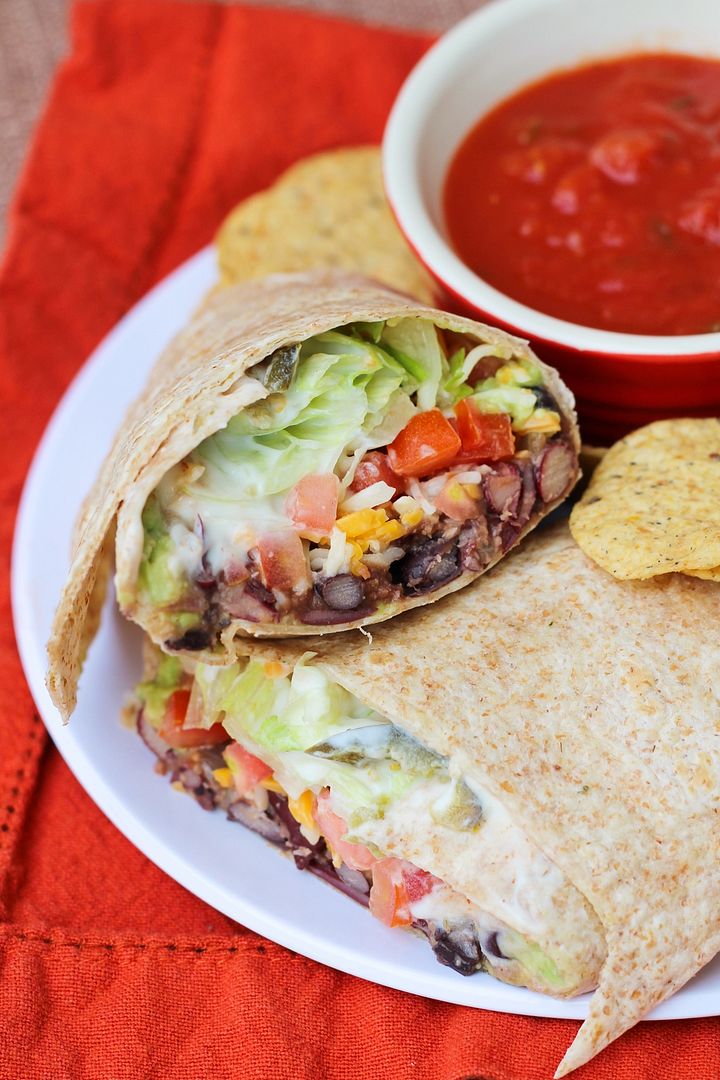
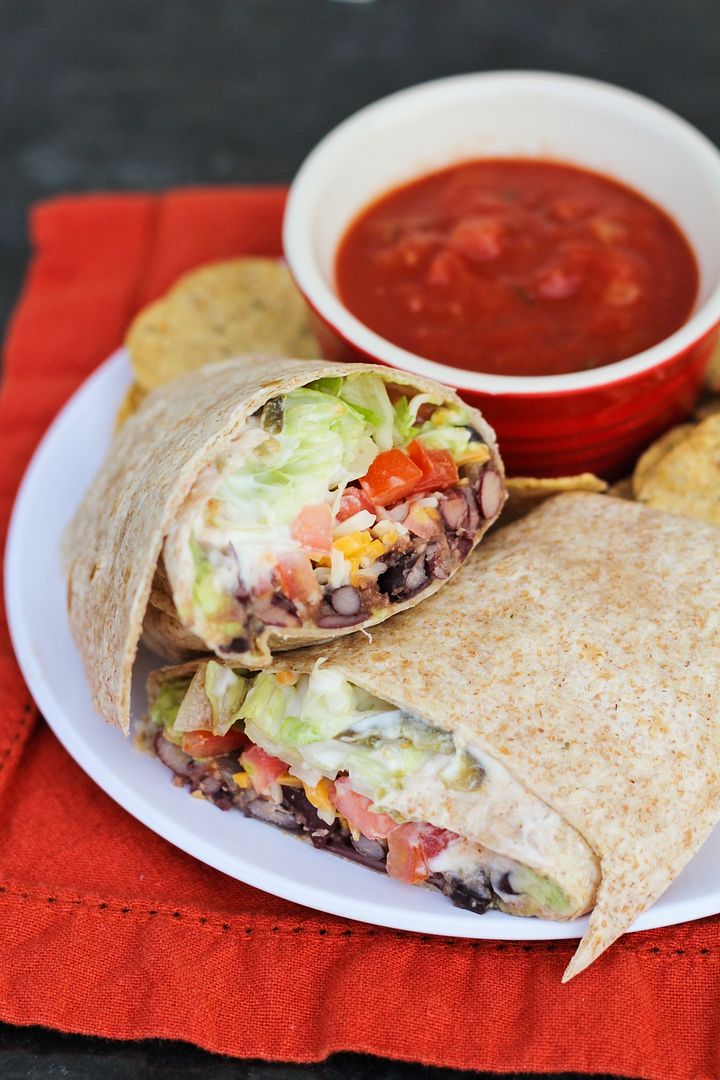
Chipotle Bean Burritos

Chipotle Bean Burritos

As much as I love cooking, I don’t like having to coordinate a bunch of dishes at once or cook multiple nights in a row, so meals that consist of one dish and make lots of leftovers are a favourite around here. And these burritos fit the bill perfectly!

I consider these a fairly healthy version of a burrito with beans instead of meat, some veggies, low-fat sour cream, not too much cheese, and whole wheat tortillas (which taste just as good as regular tortillas in my opinion!).

Chipotle Bean Burritos

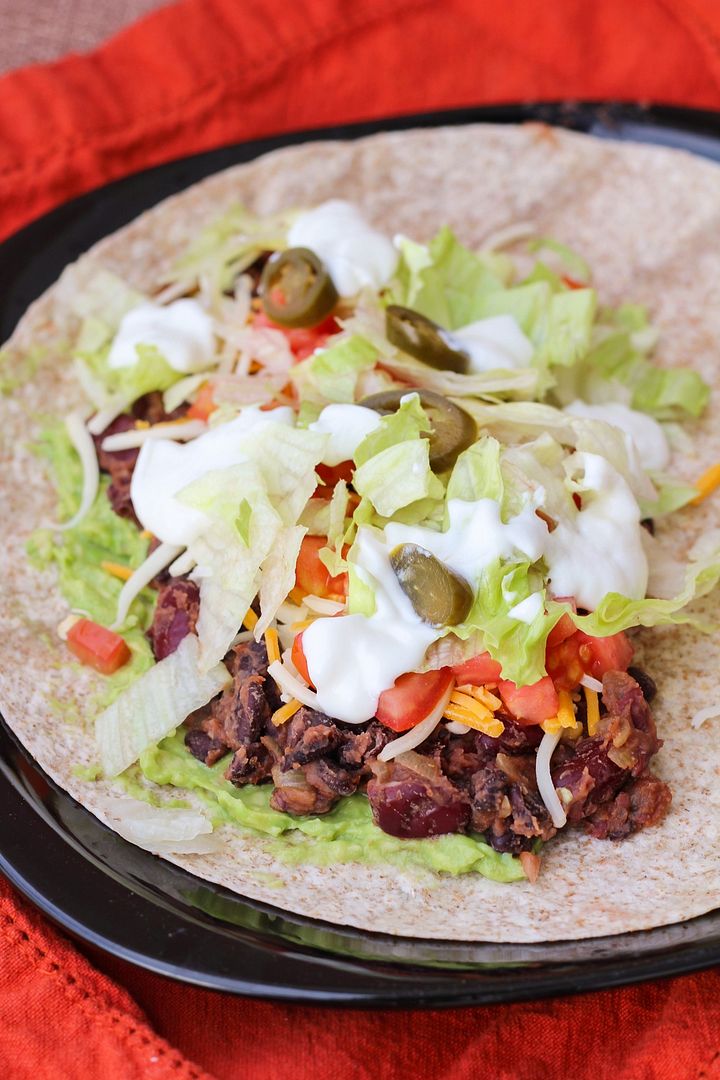
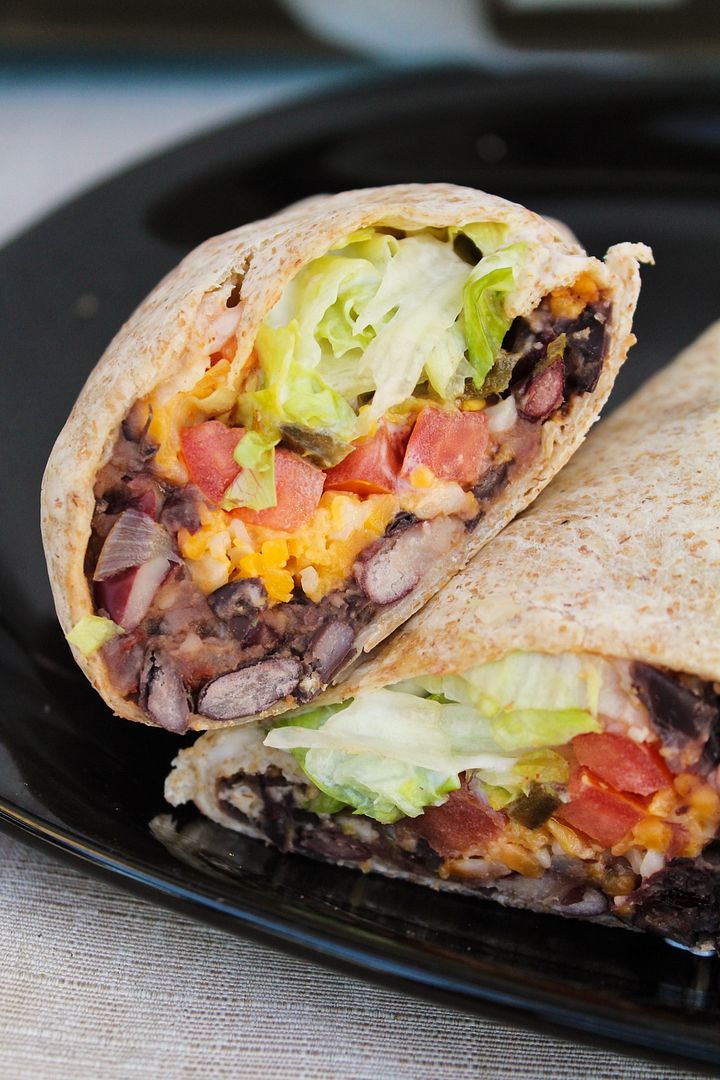
These also involve fairly minimal effort to make, and make six servings, which meant lots of leftovers for us!  To prepare them, a mixture of black beans and kidney beans gets cooked with some onion, garlic, vegetable broth, spices, chipotle sauce, and salsa to give it lots of flavour. It’s then rolled up with lettuce, tomatoes, mashed avocado, cheese, sour cream, a few pickled jalapenos, and some chipotle hot sauce for a packed and flavour-filled meal-in-one.

Chipotle Bean Burritos

We ate these three nights in a row this week and liked them more each time. That may have to do with my getting much better at rolling them with more practice (the last picture was the third night’s burrito which I thought looked much better than the first!)

Ryan commented on how good these are each time too and said they’re way better than beef burritos, and I’d have to agree! (though I don’t like beef anyway, so I’m a little biased)

Chipotle Bean Burritos


Chipotle Bean Burritos

Adapted from Cooking Light

Serves 6

Ingredients:

For the bean mixture:
1 teaspoon canola or olive oil
2 cloves of garlic, minced
1 small yellow onion, diced
1/2 teaspoon chipotle chile powder*
1/4 teaspoon salt
1/2 cup vegetable broth
1 (540mL) can black beans, drained and rinsed
1 (540mL) can kidney beans, drained and rinsed
1/2 cup chunky salsa – Mild or medium depending on your preference.  You could also use a chipotle salsa for more chipotle flavour!
2 teaspoons chipotle chile in adobo

Remaining burrito ingredients:
6 large (10-inch) whole wheat tortillas
2 large or 3 small ripe avocados
~1 cup shredded cheddar or monterey jack cheese (or a blend of cheese)
3 plum tomatoes, diced
1-1/2 to 2 cups shredded iceberg lettuce
~1/4 cup pickled jalapenos, optional
~6 tablespoons low-fat sour cream
Chipotle or regular hot sauce, optional

*I get chipotle chile powder at the bulk store.  If you can't find it, you can use a combination of regular chile powder and some cumin for spice.

Directions:

Heat oil in a large non-stick saucepan over medium heat.  Add onion and saute about 5 minutes, stirring often, until translucent and starting to turn golden brown.  Add garlic and saute for 30 seconds.  Add chile powder and salt and stir to coat for another 30 seconds.  Stir in vegetable broth and beans and bring to a boil.  Let simmer about 7-10 minutes, or until no liquid remains. Remove from heat and stir in salsa and chipotle sauce.  Partially mash mixture.

Warm tortillas up for about 30 seconds in the microwave, wrapped in damp paper towel, so they are easier to roll.  To form burritos, spread 1/6 of the bean mixture (so it divides evenly among 6 burritos) onto one half of the tortilla, leaving about a 1-inch border.  Top with avocado, cheese, tomatoes, lettuce, pickled jalapenos, sour cream, and hot sauce (again dividing evenly among 6 burritos).  Roll up the side closest to the filling, then fold in each end, and roll the burrito toward the empty side of the tortilla, wrapping the filling completely.  Others prefer to fold in the sides of the burrito first, then roll up from the bottom.  I've also seen starting with the filling in the middle.  Use whatever method works for you but make sure to roll tightly and keep the filling in!
Serve while filling is still slightly warm.  I like to warm my completed burrito up in the toaster oven for a couple minutes before eating to make sure it's warm throughout.

If you have leftovers, keep everything separate.  Warm bean mixture up in the microwave and then prepare burrito as before.
July 11, 2014

Sundried Tomato Pesto Pasta with Chicken, Spinach, & Tomatoes

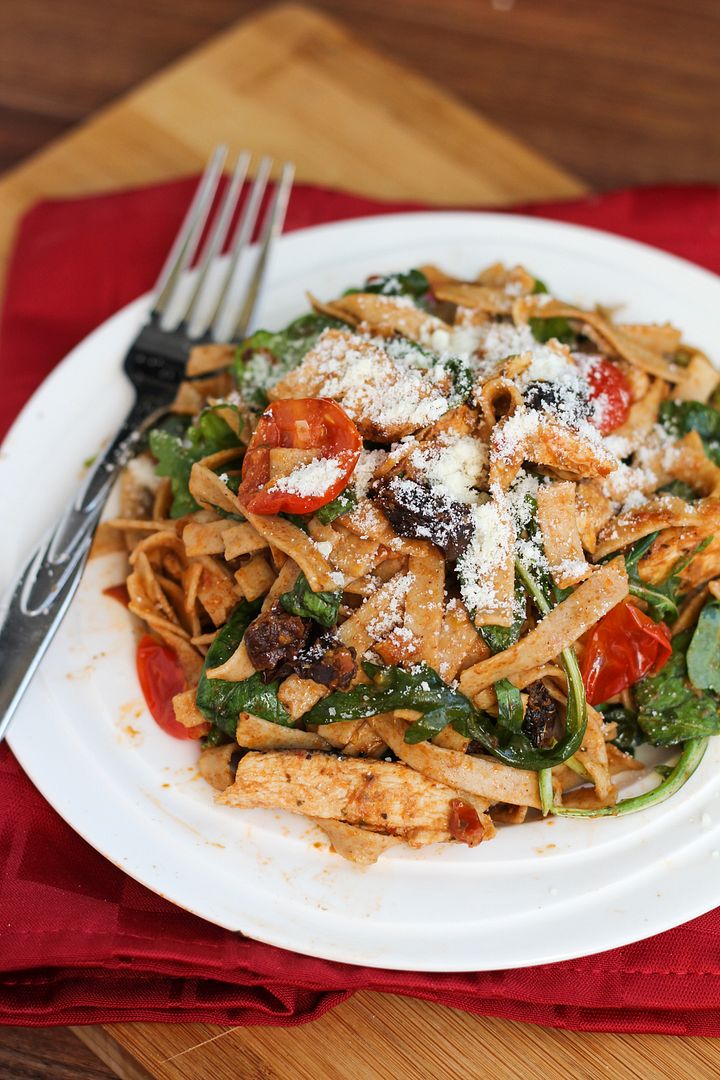
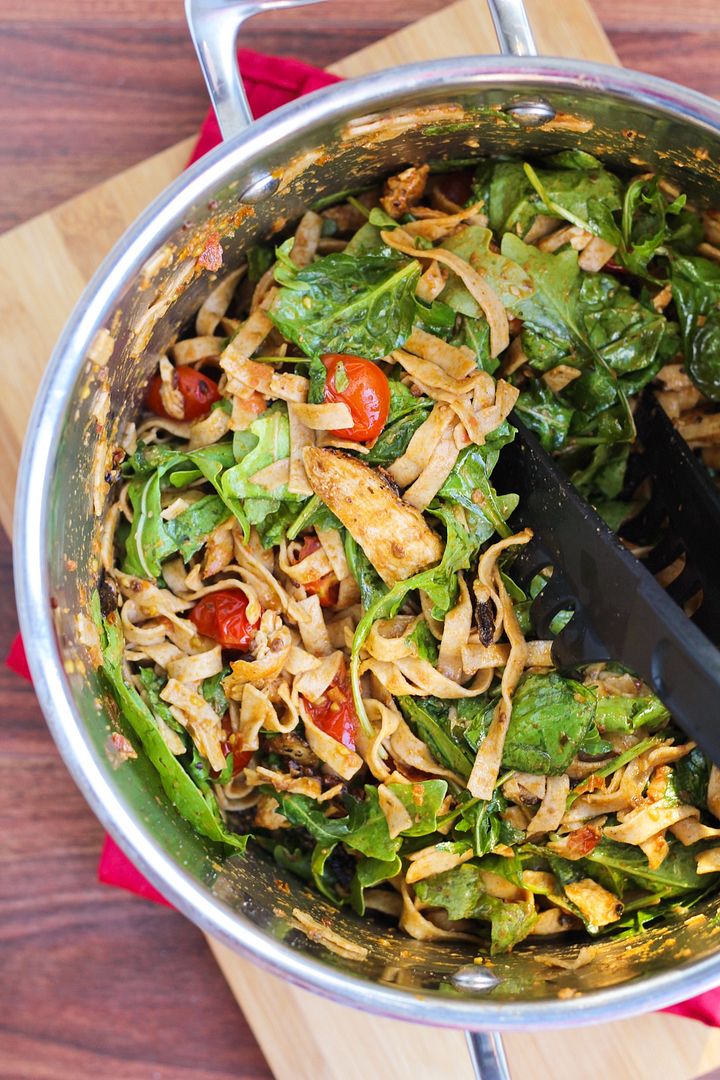
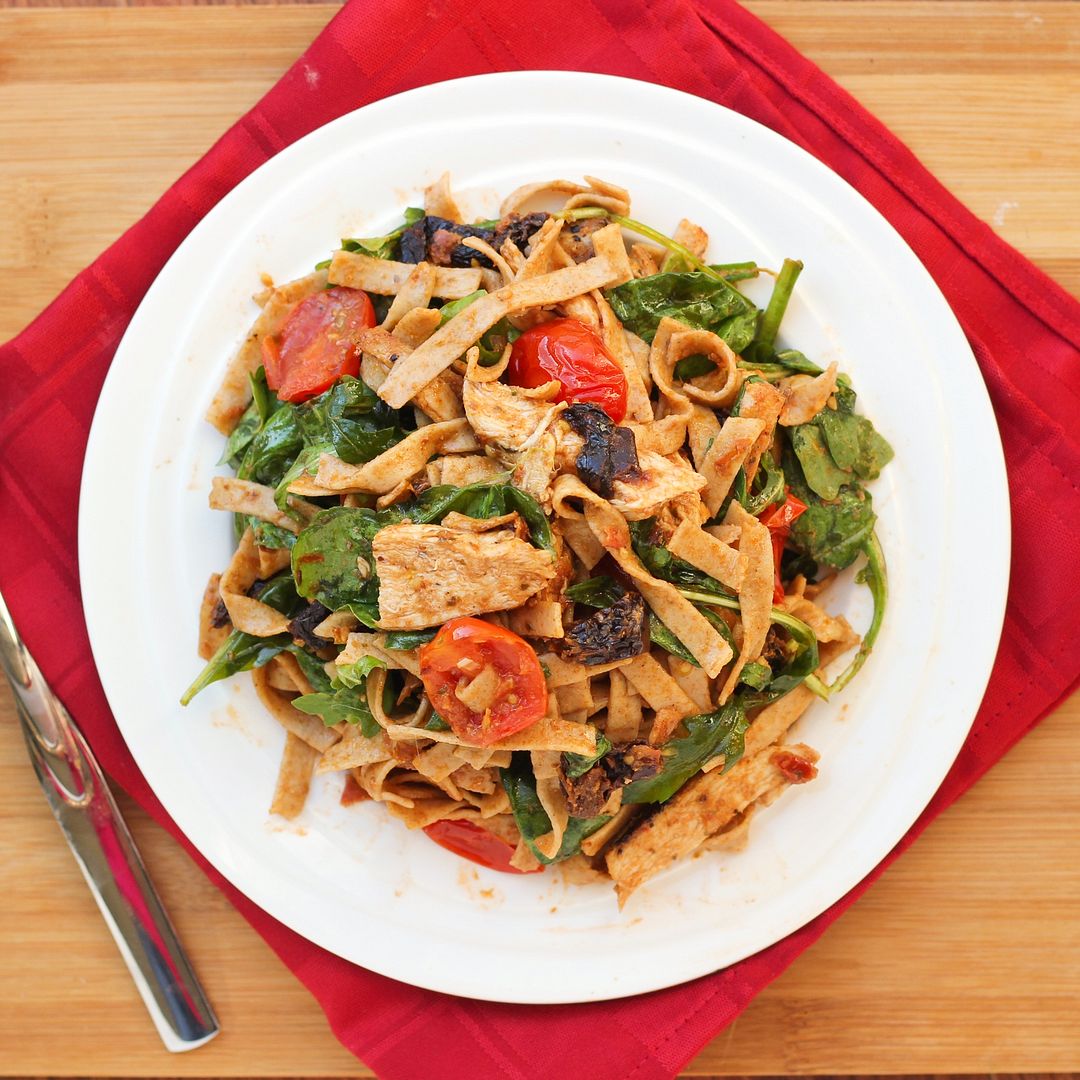
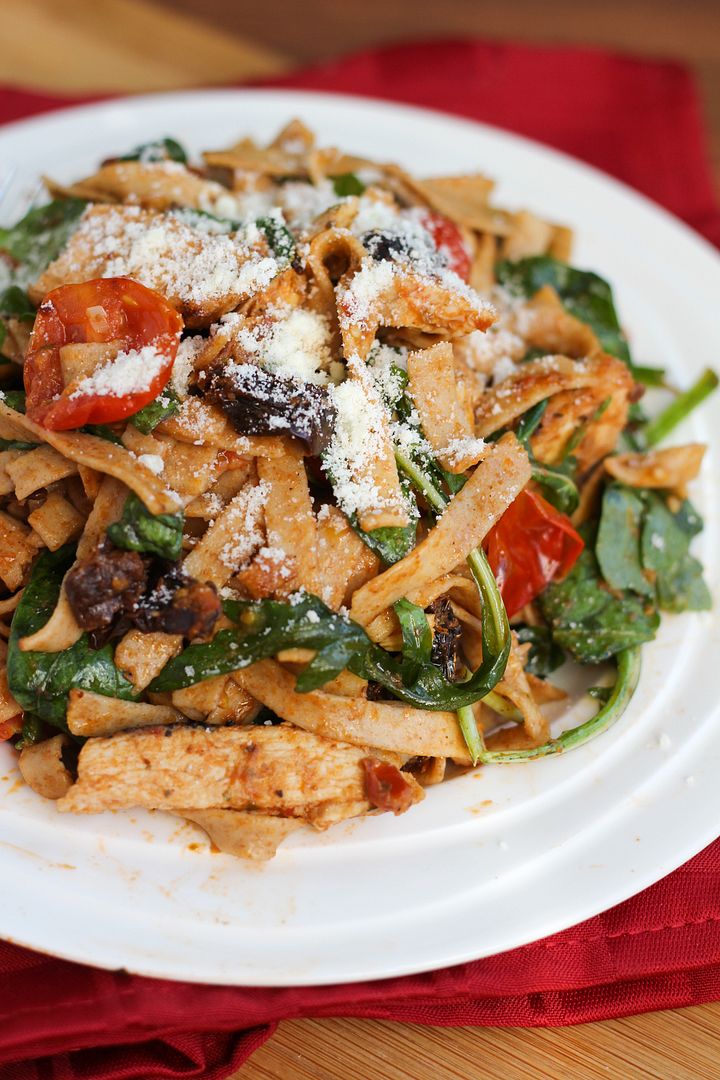
Whole Wheat Pasta with Sundried Tomato Pesto, Chicken, Tomatoes, and Spinach

I don’t buy chicken that often anymore because it’s so expensive (and the cheaper stuff scares me a little) and now that I know I like tofu, I’m more likely to buy it for much cheaper.   When I saw some of the “good” chicken on sale the other day I impulsively threw it in my basket, then got home and had a hard time actually thinking of something to make with it!

Whole Wheat Pasta with Sundried Tomato Pesto, Chicken, Tomatoes, and Spinach

In the end I decided to go with pasta because I've been thinking about this sundried tomato pesto dish from Oh She Glows that I made last summer and really loved, and chicken and sundried tomatoes go together much better than any other proteins I could think of.

But since I did my grocery shopping at a small market instead of a grocery store, they didn't have any of the ingredients I needed to make my own pesto.  They did, however, sell prepared sundried tomato pesto, so I went with that instead, which made this dish even easier!

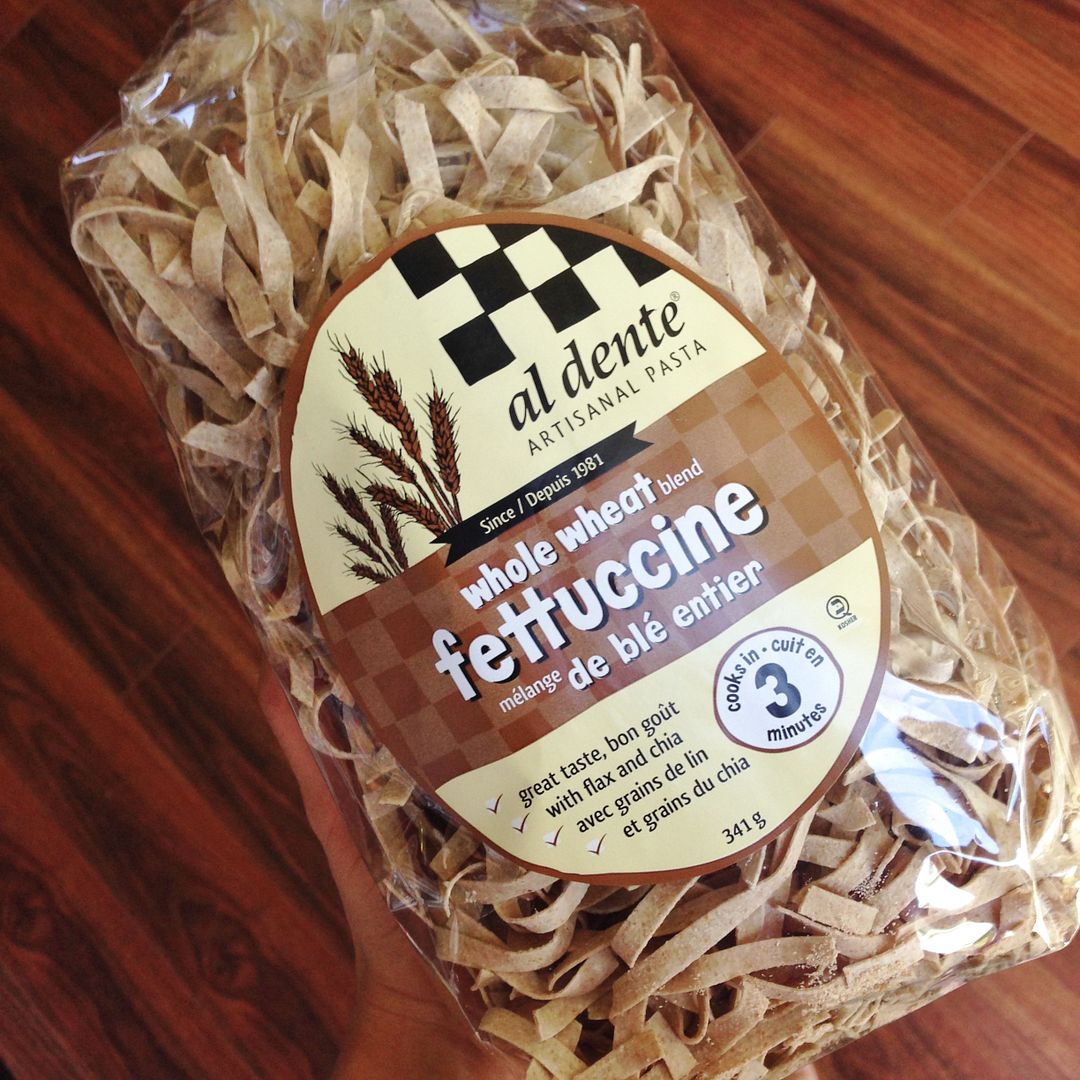
whole wheat pasta with flax and chia

They also sold this whole wheat fettucine with flax and chia, which cooked in only 3 minutes and was delicious. In the past I used Catelli's sundried tomato and basil spaghettini, which also goes great with sundried tomato pesto!

In addition to the pesto and chicken, I decided to add more sundried tomatoes, some sauteed grape tomatoes (cherry tomatoes would have also worked), and a bunch of spinach for added nutrition, though you could easily leave the spinach out if you're not fond of it.

Whole Wheat Pasta with Sundried Tomato Pesto, Chicken, Tomatoes, and Spinach

All the flavours came together perfectly in a nice light-feeling summer meal.  If you have the time to make your own sundried tomato pesto (and/or you want a lighter version than the storebought heavy-on-the-oil type), I still recommend Oh She Glows' version, though I was happy that the few minutes I saved not making my own pesto meant a few more minutes to sit outside and relax after dinner before going back to schoolwork!

Whole Wheat Pasta with Sundried Tomato Pesto, Chicken, Tomatoes, and Spinach

Whole Wheat Pasta with Sundried Tomato Pesto, Chicken, Tomatoes, & Spinach

Serves 4-6

Ingredients:

2 boneless skinless chicken breasts
85g (3oz) sundried tomatoes – dry in a bag (not oil packed)*
1 (341g or 12oz) package of whole wheat pasta – I used fettucine
2 teaspoons olive oil
2-3 cloves of garlic, minced
1 pint grape tomatoes, halved
1/2 cup sundried tomato pesto**
5 oz baby spinach (I used a spinach/arugula mixture)
Salt and pepper
Parmesan cheese for topping

Directions:

Season chicken breasts, if desired (I used salt, pepper, and dried basil) and cook however you prefer.  I saute mine in a skillet over medium-high heat for about 5 minutes per side, let rest, then slice.

Meanwhile, bring a large pot of water to a boil.  Add sundried tomatoes and blanch for 2 minutes.  Remove with a slotted spoon, let dry, and thinly slice.  Use the same boiling water to add your pasta and cook according to package directions.  Reserve 1 cup cooking water then drain pasta.

While pasta is cooking, heat oil in a large skillet over medium-high heat.  Add garlic and grape tomatoes and sautee until softened, about 5 minutes.

Toss together the pasta, reserved cooking water, pesto, chicken slices, garlic & tomatoes, and sundried tomatoes.  Stir in the spinach so it gets slightly wilted.  Season the dish with salt and pepper if desired.

Serve hot, topped with parmesan cheese.

Notes:
*I used dried sundried tomatoes to add to the pasta because there was already so much oil in the pesto I used, but you can use oil-packed sundried tomatoes if you prefer.
**I used storebought pesto, but you could easily make your own, lighter version, in which case you might want to use more than 1/2 cup.  Use your own judgment and preferences to determine how much pesto to add.

June 03, 2014

Gluten-Free Moroccan Macaroni Bowl (+ a giveaway!)

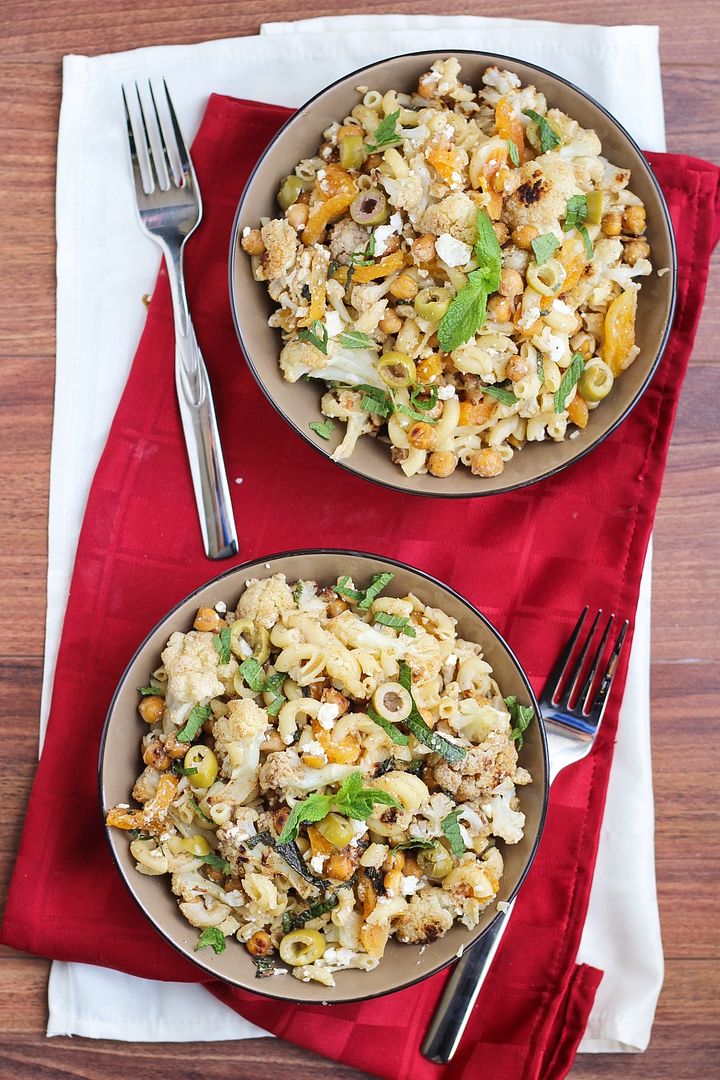
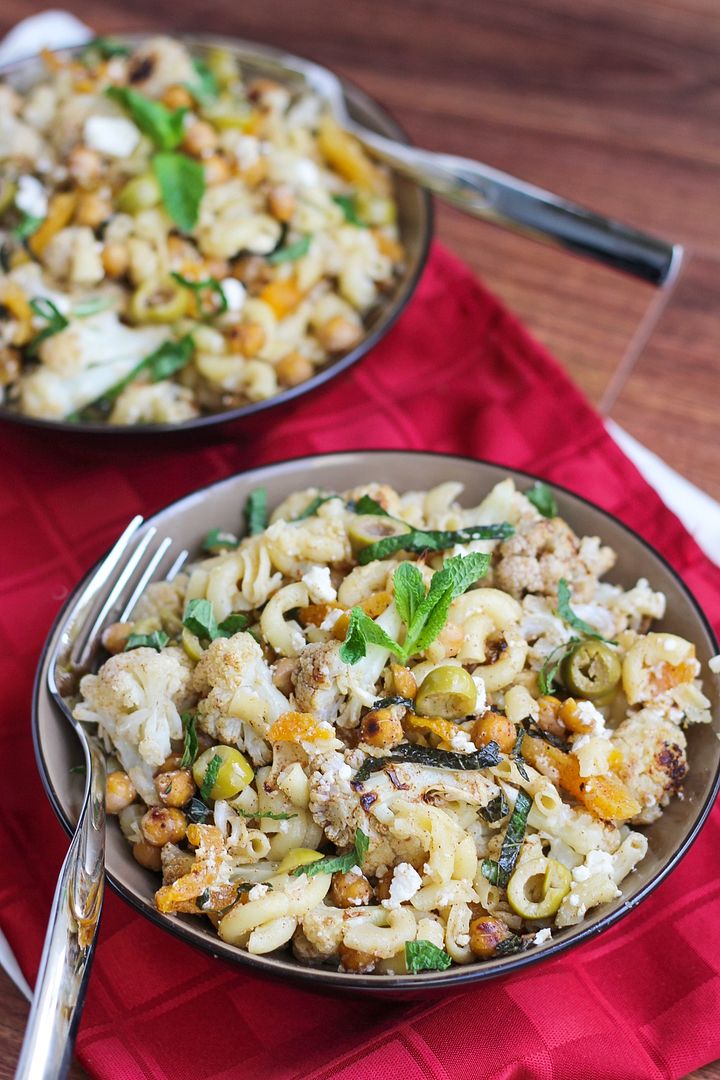
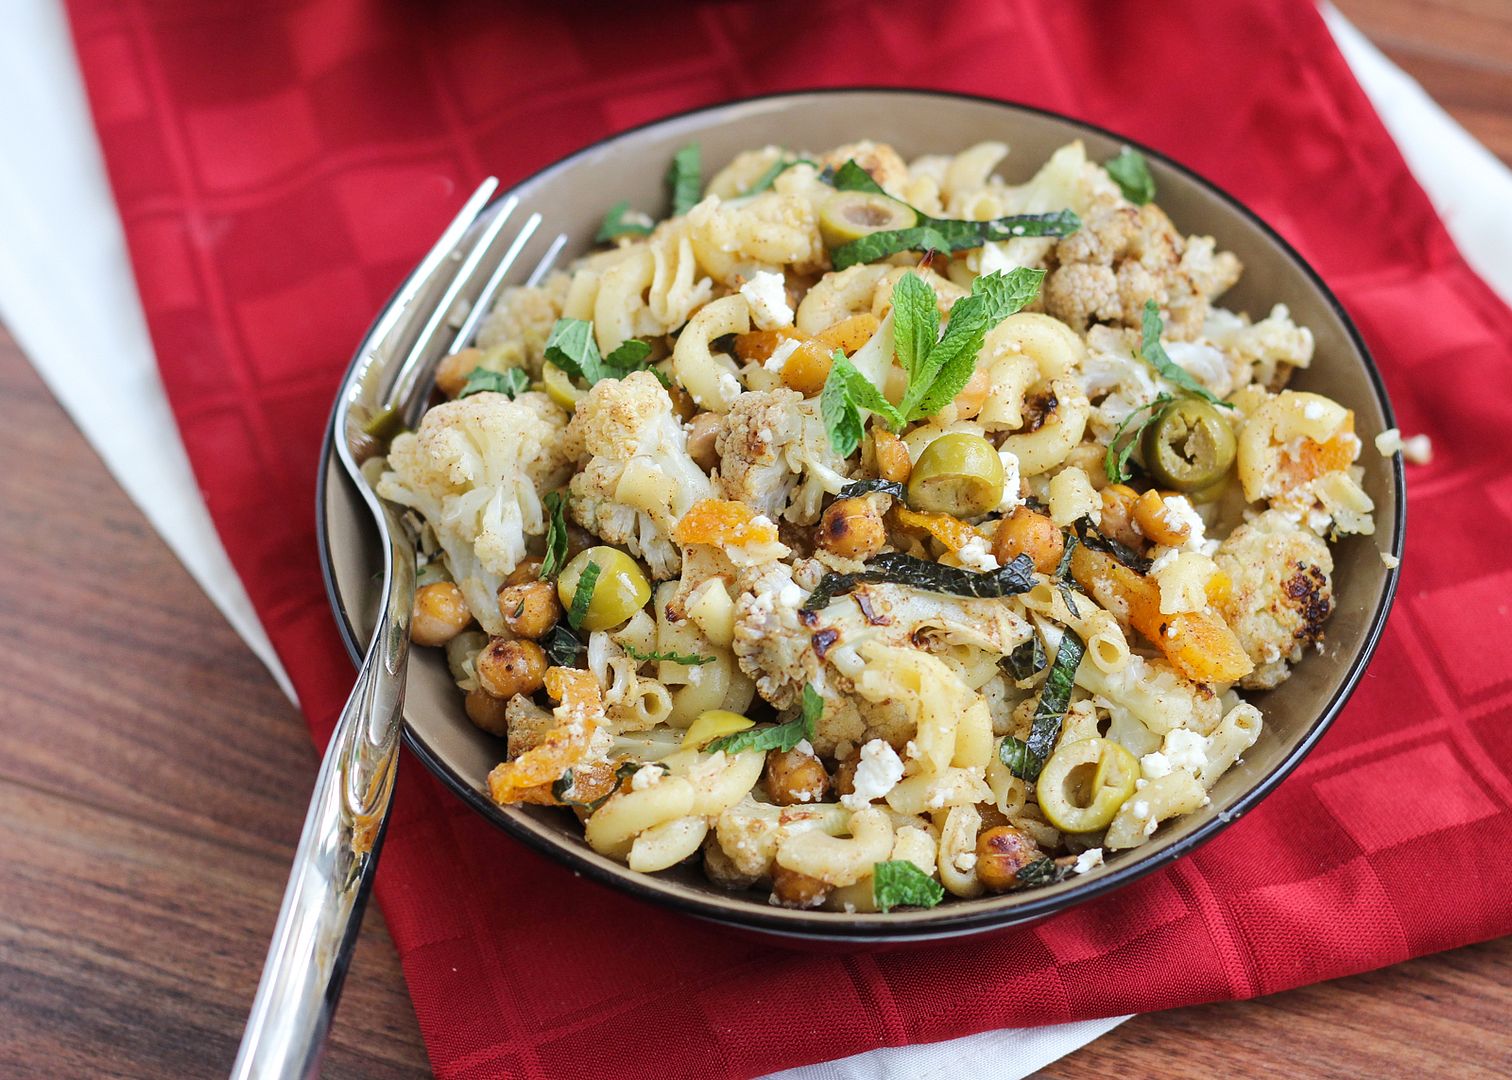
Gluten-Free Moroccon Macaroni Bowl with Roasted Cauliflower & Chickpeas

I don't follow a gluten-free diet or think of gluten as an evil thing to avoid, but I know there are a lot of people out there who have to avoid it for health reasons, and for their sake I'm happy that there now seem to be so many gluten-free alternatives out there.  People should not have to go without food like pasta!

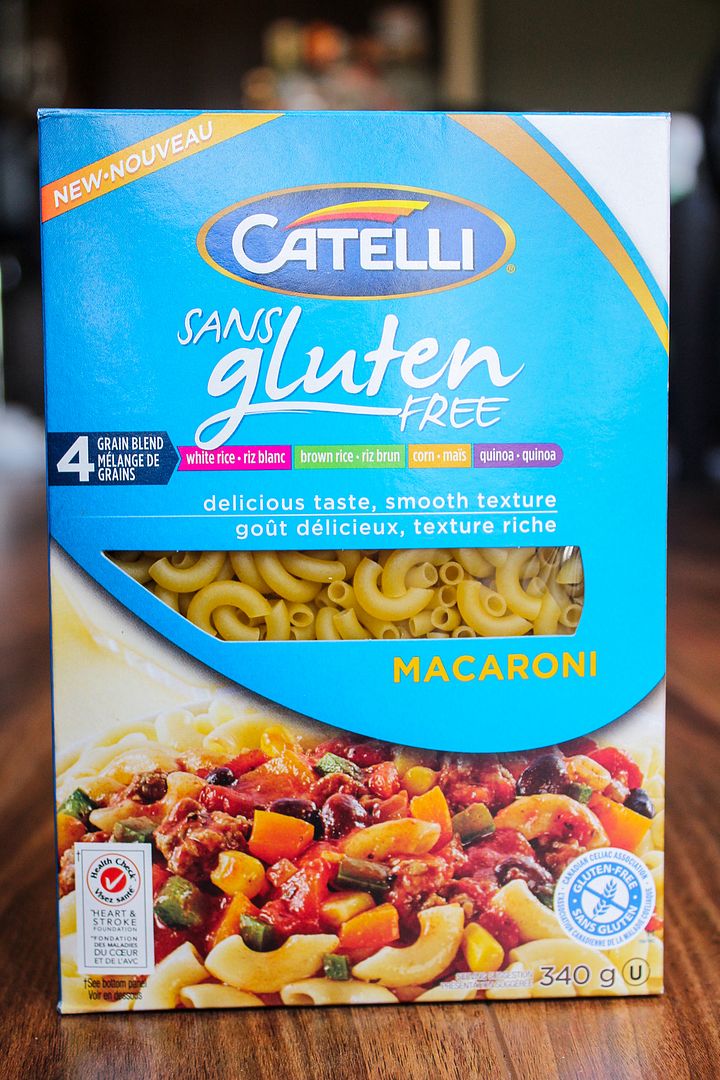
Catelli pasta is one of my favourite brands here in Canada because they offer so many alternatives to regular white pasta.  I love their line with vegetables in the pasta, but I usually buy the whole grain pasta.  Last year they launched a line of gluten-free pasta including penne, fusilli, and spaghetti, and recently they added macaroni to the line-up and asked if I wanted to give it a try. 

Turns out it tastes just like regular pasta, even though it's made from white and brown rice, corn, and quinoa.  I still prefer using whole grain pasta whenever I can, but it's nice to know there's a tasty alternative out there for those with gluten sensitivities or intolerance, or for me to use in dishes where whole wheat doesn't really work as well, like in this pasta bowl.

Gluten-Free Moroccon Macaroni Bowl with Roasted Cauliflower & Chickpeas

Catelli has lots of awesome pasta recipes on their site, and I decided to go with a Moroccan version to test out this pasta, and I'm so glad I did!  Everything about this pasta is so different from your typical tomato sauce pasta, and even though it looks like there are a lot of strange ingredients in this, they all work together so well!

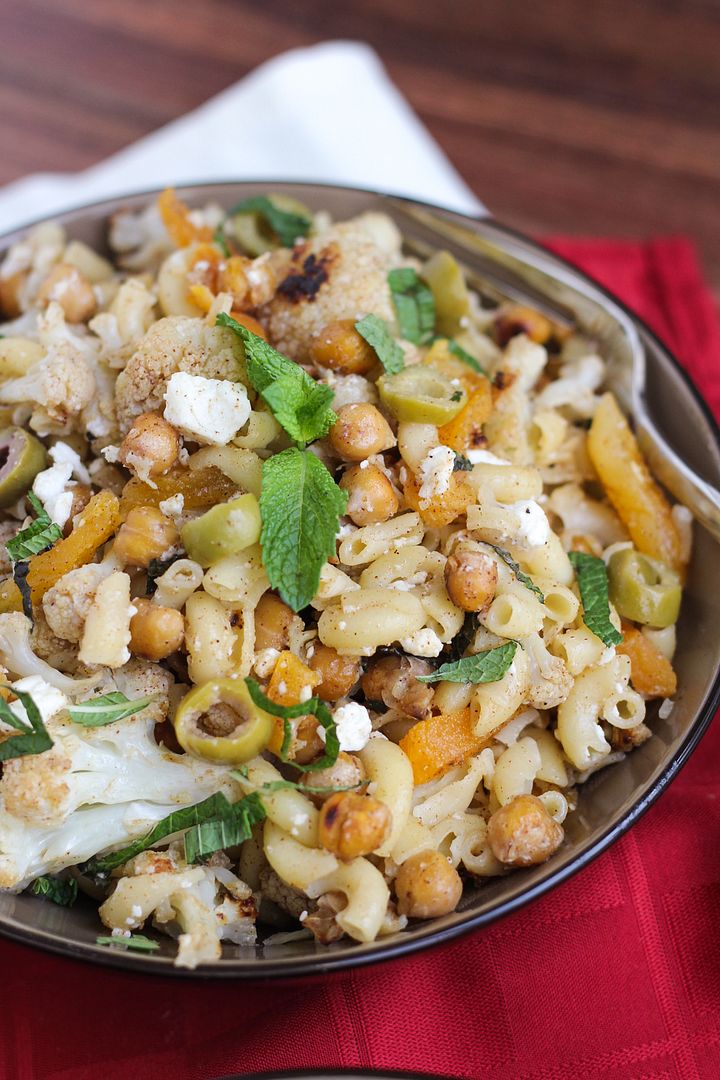
Instead of a sauce, this pasta is tossed with a light dressing full of fresh lemon flavour and lots of spices.  You also use some of this dressing to roast some cauliflower and chickpeas, giving them awesome flavour and texture.  I never roast chickpeas for pasta, usually tossing them in raw, but now I always want to eat them this way - I love that they get a little crispy!  Also mixed in there are some green olives, sliced dried apricot, feta cheese, and mint leaves.  I know it sounds a little weird, but trust me that it all the ingredients are balanced and together make an amazing flavour, so don't leave anything out!  I couldn't stop eating this right after I made it and already look forward to making it again.

Gluten-Free Moroccon Macaroni Bowl with Roasted Cauliflower & Chickpeas

If you want to try out this gluten-free pasta yourself, you can get a coupon for $1.00 off here.  And if you're lucky (and live in Canada), you have a chance to win a whole year's supply of Catelli's gluten-free macaroni!

To enter to win this awesome prize (with a retail value of approximately $180), please follow the instructions in the Rafflecopter widget below - there are three ways to enter: leaving a comment on this blog, following me on Facebook, or on Twitter - pick one or all three for more entries!

Catelli Gluten Free Macaroni

Please be sure to enter with a valid e-mail address or Facebook account so I can contact you if you're randomly selected as the winner.  The contest will close at midnight EST on Sunday, June 8th, 2014.  Please note that as this is a Canadian product, this contest is open to Canadians only (sorry, American friends!)

a Rafflecopter giveaway

And don't forget to check out the recipe below!

Disclosure: This is not a sponsored post.  I received one box of pasta to make this recipe but was not compensated in any other way for my time, ingredients, or thoughts, which are all my own :) I just thought this was a great giveaway opportunity for my readers!

Gluten-Free Moroccon Macaroni Bowl with Roasted Cauliflower & Chickpeas

Gluten-Free Moroccan Macaroni Bowl with Roasted Cauliflower & Chickpeas

Slightly adapted from Catelli Pasta

Makes 4-6 servings

Ingredients:

1 (540mL) can of no-salt added chickpeas, drained and rinsed
4 cups cauliflower florets (about 1 small head or 3/4 of a larger head)
1/3 cup fresh lemon juice
1/4 cup olive oil
2 tablespoons honey
1 tablespoon minced or grated fresh ginger
2 cloves garlic, minced
1 tablespoon ground cumin
1 teaspoon cinnamon
1/2 teaspoon each salt and pepper
1 box (340g) Catelli® Gluten Free Macaroni
3/4 cup slivered dried apricots
1/3 cup sliced green olives
1 cup crumbled feta
3/4 cup loosely packed chopped fresh mint leaves

Directions:

Preheat oven to 400°F and line a large baking sheet (I used two) with parchment paper or foil.  Add cauliflower and chickpeas to a large bowl.  Whisk lemon juice, oil, honey, ginger, garlic, cumin, cinnamon, salt, and pepper in a small bowl until combined.  Drizzle 3 tablespoons of the dressing over the cauliflower and chickpeas and toss to combine.  Spread cauliflower and chickpeas onto prepared baking sheets in an even layer.  Roast in preheated oven for 30 minutes or until browned, tossing halfway through.

Meanwhile, cook pasta according to package directions.  Reserve 1/2 cup of the cooking water before draining.  Toss cooked pasta with roasted cauliflower and chickpeas, apricots, olives, feta, mint, reserved pasta water, and reserved lemon dressing.  Stir until combined and serve warm.

May 29, 2014

Buffalo Lentil Loaf

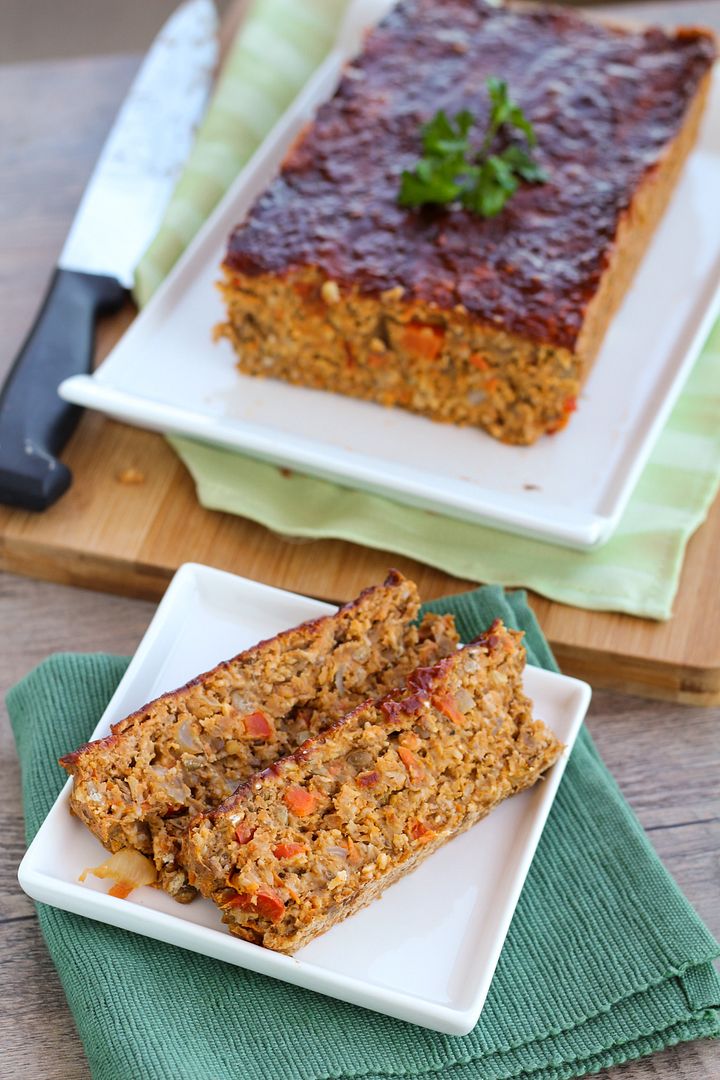
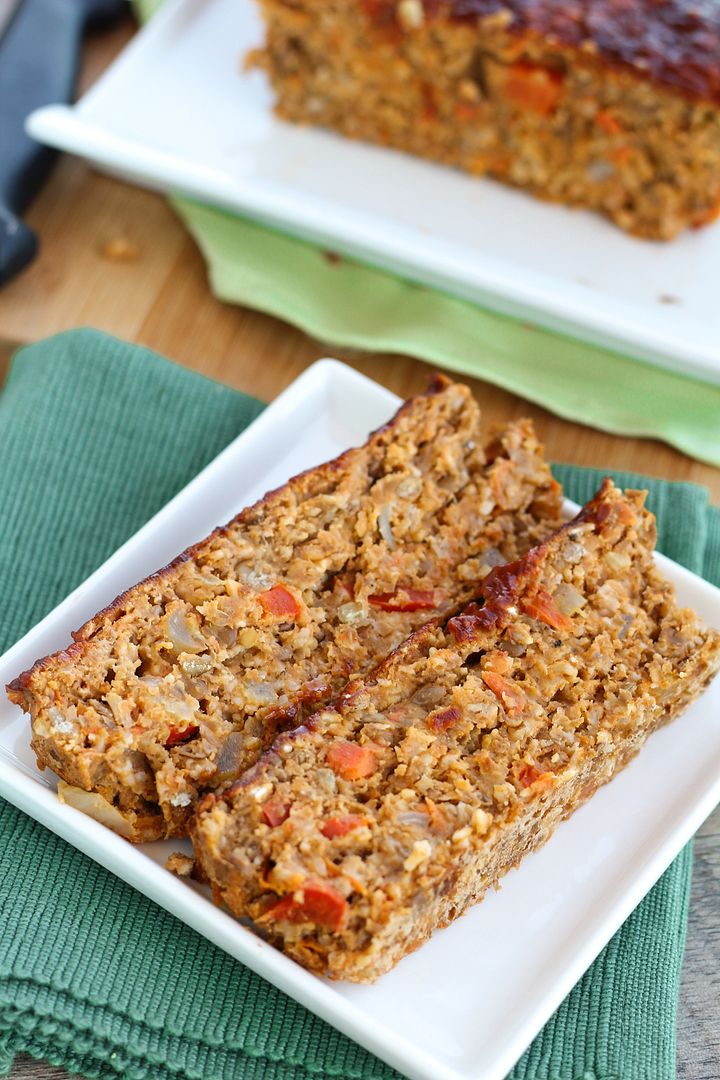
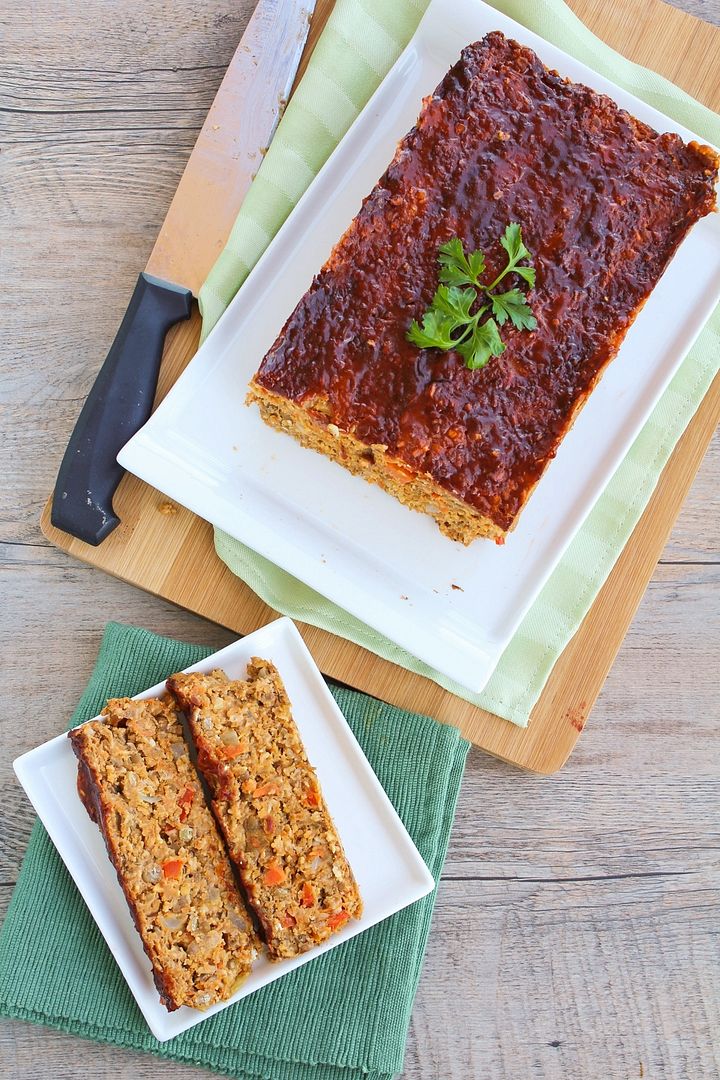
Buffalo Lentil Loaf - a healthy & tasty vegetarian meatloaf alternative!

I always hated meatloaf as a kid, and I still do.  I can’t even say the word meatloaf without adding ‘shmeatloaf’ after it.  It’s funny that when I was young, it was more the vegetables, onions and little crunchy bits in the meatloaf that I hated, and now it’s the idea of a tray full of packed meat that turns me off.  A lentil loaf full of vegetables though?  Much more up my alley!

I know some people will have the same reaction I have to meatloaf when they hear the word ‘lentil loaf’.  Indeed, my fiancé in particular was extremely skeptical at the idea.  But even he ended up admitting that this was really good, so if you’re hesitant, I encourage you to give it a chance!

Buffalo Lentil Loaf - a healthy & tasty vegetarian meatloaf alternative!

Why should you give this a chance over regular meatloaf?  Because lentils are full of fiber and protein to fill you up and give you energy, along with other important minerals like potassium, folate, and iron.  There’s also oats and a little egg for even more fiber and protein in this, along with vegetables like onions, carrots, and peppers for added nutrition.  Of course, I had to add a little extra appeal to convince the fiancé to try this, so I included buffalo sauce to give it extra flavour and kick, which I loved!  You could substitute bbq sauce though if you’re not into spicy food.

Buffalo Lentil Loaf - a healthy & tasty vegetarian meatloaf alternative!

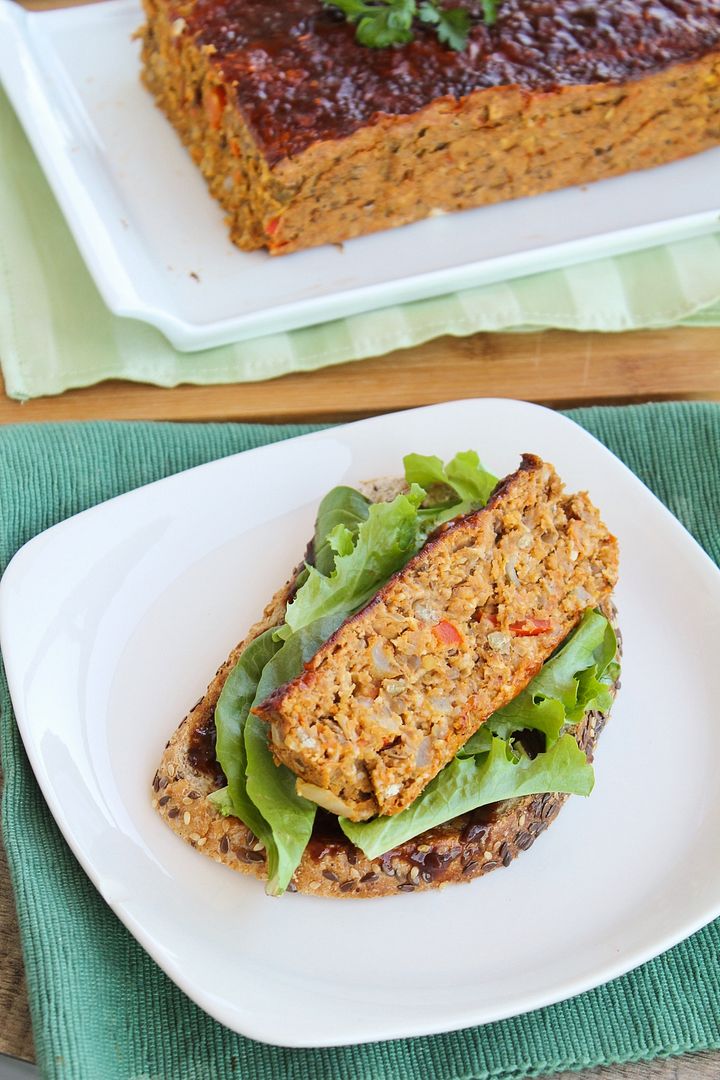
Though it takes a little time to cook, the result is worth it!  I love this lentil loaf on its own with a side of vegetables (mashed potatoes would be great too!), but I ate most of it in sandwiches for lunch.  Toast some whole grain bread, add some lettuce, barbeque or buffalo sauce, tomato, and a couple slices of lentil loaf and you’ve got a hearty, filling, and tasty meal!

Buffalo Lentil Loaf - a healthy & tasty vegetarian meatloaf alternative!

Buffalo Lentil Loaf

Lentil loaf recipe adapted from In Sonnet's Kitchen and The Simple Veganista

Makes one 9x5 loaf, serves about 4-6 (or more depending on how you serve the loaf)

Ingredients:

1 cup dry brown lentils
2-1/2 cups water
1 tablespoon olive oil
1 small or medium yellow onion, diced
3 garlic cloves, minced
1/2 a large red bell pepper, diced
1 large carrot, peeled and grated
1/2 teaspoon ground cumin
1/2 teaspoon garlic powder
1/2 teaspoon onion powder
1/4 teaspoon cayenne pepper (optional)
Pinch each of salt and pepper
1 cup rolled oats, pulsed in a blender or food processor a few times to more of a coarse crumb
2 large eggs, lightly beaten
1/2 cup buffalo sauce (your favourite brand, such as Frank's Red Hot Buffalo Wing Sauce or PC Buffalo Wing Sauce)

Glaze:
2 tablespoons bbq sauce (plus more for after baking, if desired)
2 tablespoons buffalo sauce

Directions:

Add lentils and water to a medium saucepan and bring to a boil.  Cover, reduce heat, and let simmer 25-30 minutes, until lentils are soft and water is mostly evaporated.  Remove from heat, drain any excess water, and puree about three-quarters of the lentils in a blender or food processor (or with an immersion blender).  Set aside to let cool slightly.  Preheat oven to 350°F.

Meanwhile, heat oil in a large saucepan over medium-high heat.  Add onion, garlic, red pepper, and carrot and sauté, stirring often, for about 5-7 minutes or until softened.  Stir in the spices (cumin, garlic powder, onion powder, cayenne, salt, and pepper), then remove from heat. 

Fold together the lentils, sautéed vegetables and spices, oats, eggs, and buffalo sauce in a large bowl or in the saucepan until combined.  Line a 9x5 loaf pan with parchment paper, spray lightly with cooking spray, and spread lentil mixture evenly in prepared pan.  Mix the 2 tablespoons each of bbq sauce and buffalo sauce for the glaze, and brush in an even layer on top of the loaf. 

Bake loaf in preheated oven for 45-50 minutes until the top of the loaf is dry, firm, and golden brown.  Let cool in pan for at least 10 minutes, run a knife around the edges, then use parchment paper to lift out of pan.  Top with a bit of additional bbq sauce if you like. Slice into 10-12 slices and serve however you desire – either on its own, in a sandwich, on top of a salad, etc.

May 22, 2014

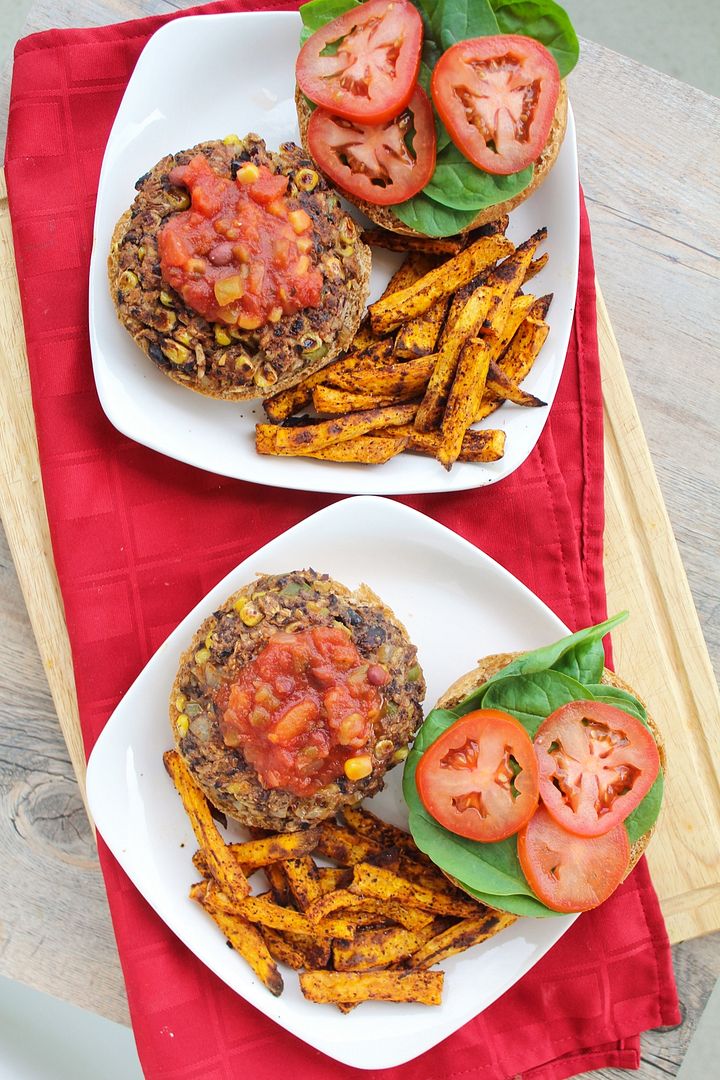
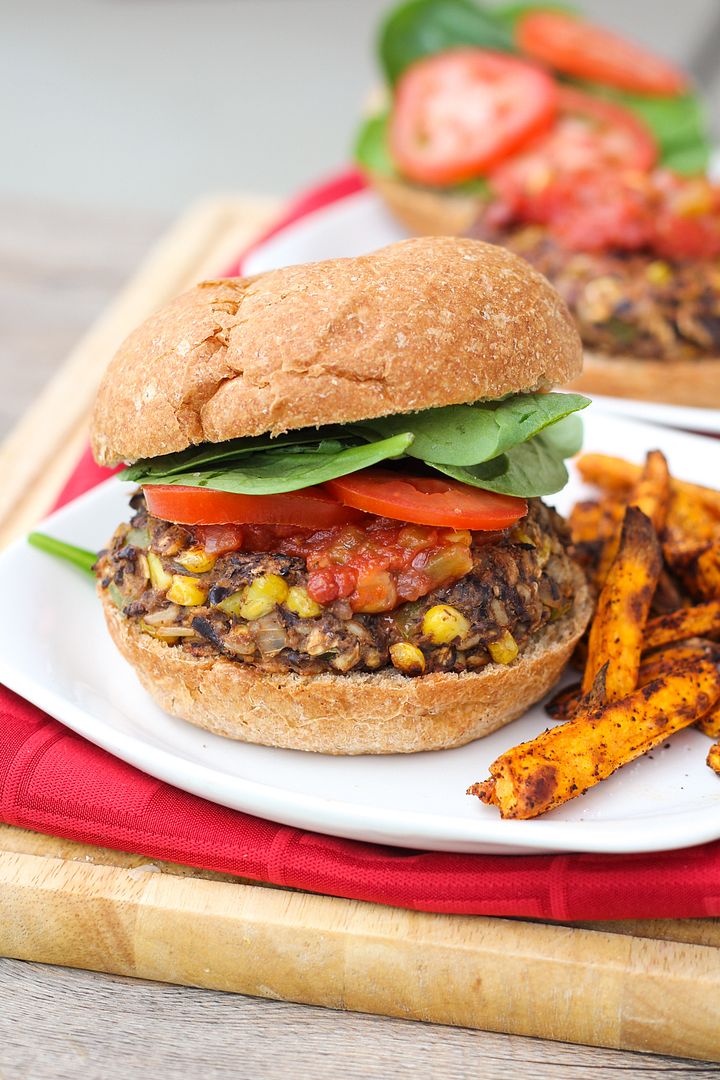
Southwestern Black Bean & Brown Rice Veggie Burgers

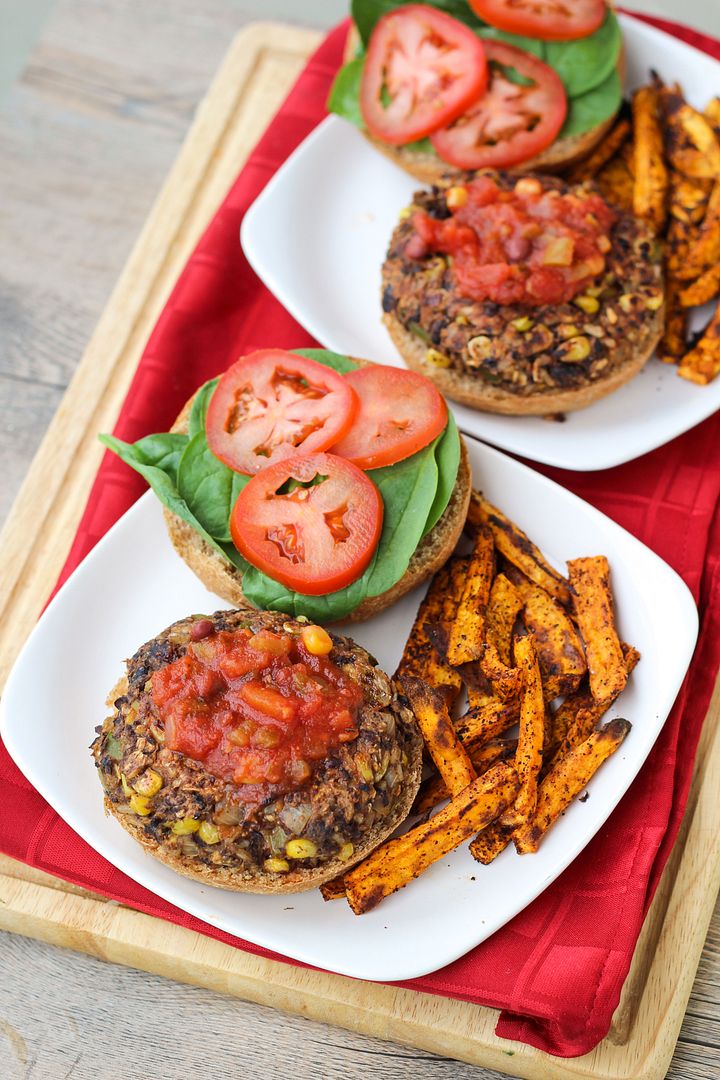
Southwestern Black Bean & Brown Rice Veggie Burgers

The (almost) return of summer means the return of burger season - one of my favourite foods!  I still make them in the winter on the stovetop (and even in the summer I use the stovetop because I'm scared of bbqs), but there's something about summer that makes me crave burgers all the time.

I've never liked beef burgers though, and a regular beef patty with the standard toppings doesn't appeal to me much.  Instead, I love experimenting with different chicken and turkey burgers - like buffalo chicken and cheddar burgers or apple turkey burgers with caramelized onions and brie - and veggie burgers, which are so customizable, like lemon chickpea quinoa burgers or portabello mushroom burgers with roasted red peppers and provolone!

Southwestern Black Bean & Brown Rice Veggie Burgers

I love trying out new flavours and for my first veggie burgers of the post-winter season (it's hard to call this summer yet), I went with a Southwestern theme!

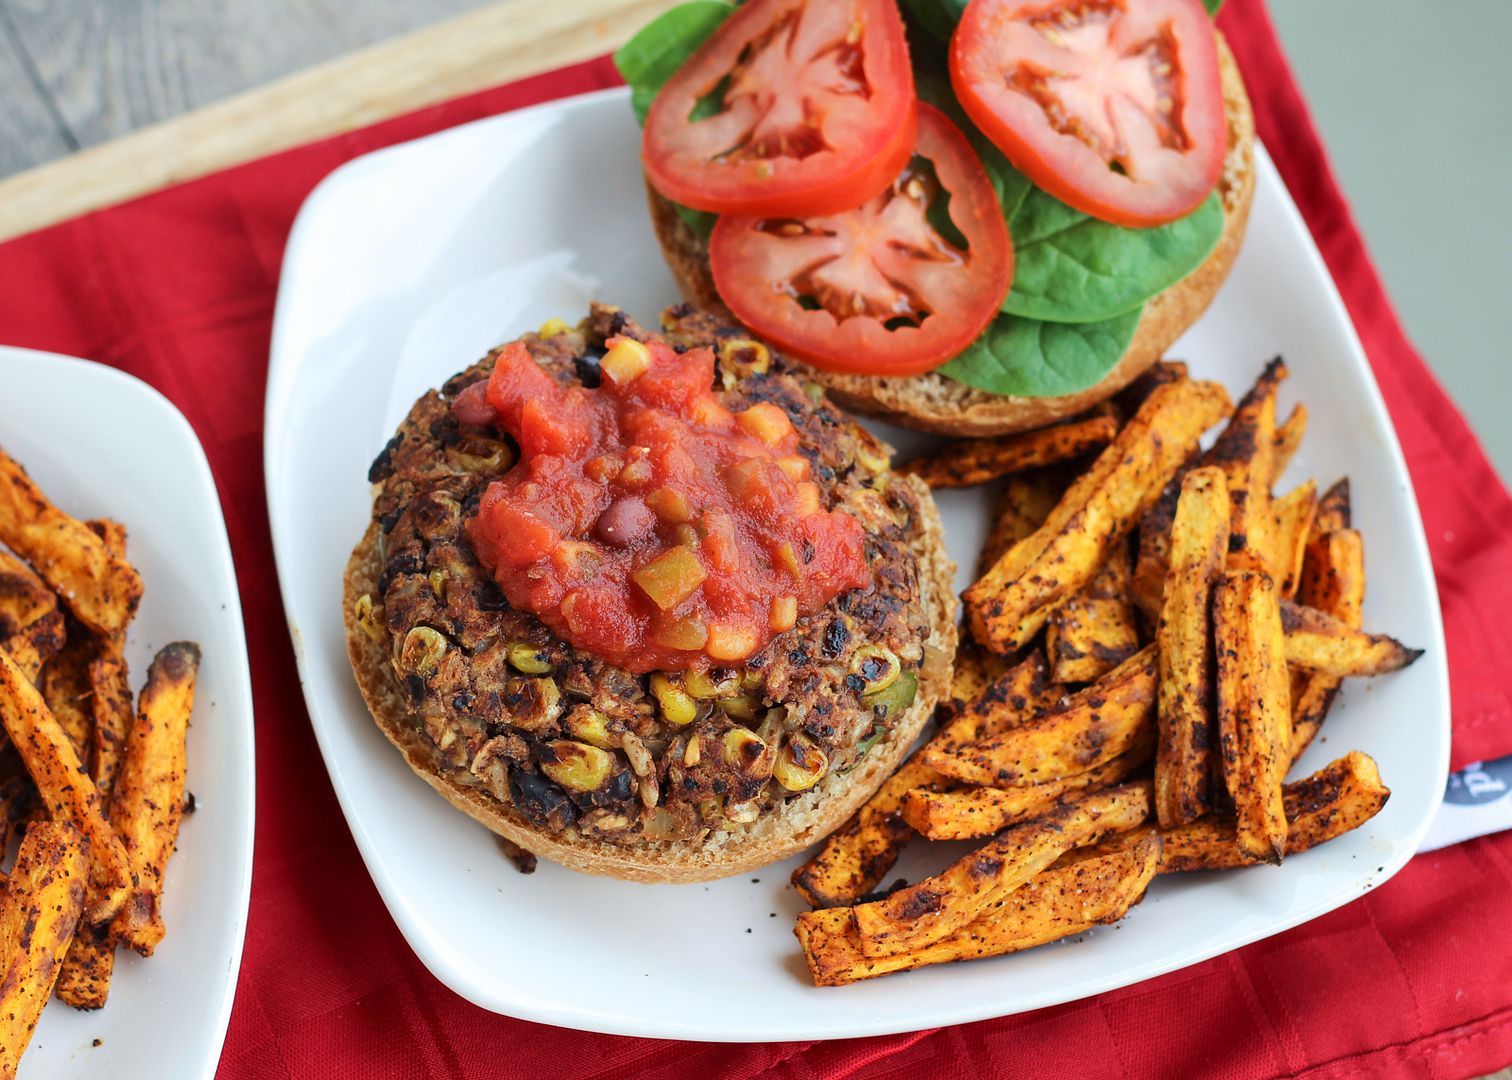
The veggie patties for these burgers are hearty and full of real veggies, just how I like them!  The base is a mixture of brown rice, oats, and black beans for plenty of protein and fiber, and mixed in are some onions, garlic, peppers, corn, and plenty of spices for added nutrition and flavour.


Southwestern Black Bean & Brown Rice Veggie Burgers

Ryan and I ate these for dinner three nights in a row (another great thing about veggie burgers is getting a lot of food for a pretty low cost!) and ate them differently each night.

The first time I topped mine with salsa and served them with chipotle sweet potato fries as pictured, which made for a pretty spicy meal though I still loved it!  The second night I added cheese on top, skipped the salsa, and used a light ranch dressing instead which was also awesome.  And the third night I crumbled my patty up and served it over a big spinach salad which was a refreshing change! 
If I had avocado I would have definitely added it to all three meals but avocados are so expensive these days I have to sadly try to limit my use of them.

You can eat these however you like and with whatever toppings you think sound good - hope you enjoy them as much as we did!

Southwestern Black Bean & Brown Rice Veggie Burgers

Southwestern Black Bean & Brown Rice Veggie Burgers

Inspired by and adapted from similar recipes seen on Simply Scratch, Veggie Belly, and Katherine Martinelli

Makes 6 burgers

Ingredients:

For the Burgers:
1/2 cup uncooked whole grain brown rice – I used pre-cooked instant rice
1/2 cup rolled oats, divided
1 (540mL) can of no-salt added black beans, rinsed and drained
1 medium yellow onion, diced
1/2 cup diced bell peppers – I used half a green pepper but you could use a mixture of green and red
3 cloves garlic, minced
3/4 cup thawed frozen corn kernels
1 teaspoon ground cumin
1 teaspoon chili powder
1/4 teaspoon salt
1 teaspoon chipotle chili powder for added spice (or substitute paprika)
1 large egg, lightly beaten

For Topping:
6 whole wheat hamburger buns
Lettuce or spinach
Sliced tomatoes
Sliced ripe avocado
Salsa (optional)
Cheddar or Monterey jack cheese (optional)

Directions:

Cook the rice according to package directions.  Let drain well.

Pulse 1/4 cup oats in a food processor to form crumbs.  Keep remaining 1/4 cup of oats whole.  Transfer all oats to a large bowl.  Reserve 1/4 cup black beans and transfer remaining beans to the food processor.  Pulse until most of the beans are mashed (but not completely mushy).  Add to the large bowl with the oats.

Heat oil in a large skillet over medium-high heat.  Add onions and peppers and sauté until softened, 7-10 minutes, stirring occasionally.  Add garlic and sauté for another minute.  Add corn and reserved 1/4 cup of black beans and stir.  Add all spices and sauté for another minute, stirring.  Remove from heat and let cool slightly.

Add vegetable mixture and rice to the bowl with the oats and black beans.  Add whisked egg and stir mixture until combined.  Form into 6 large patties or 8 smaller ones, if desired (I made 6 patties).

Heat two large skillets over medium heat.  Spray with non-stick cooking spray or use a light amount of oil.  Add 3 patties per pan and cook about 5-6 minutes per side, turning carefully in between, until browned and cooked through.  If using cheese, add slices to the tops of the patties about a minute or two before they’re done cooking to melt the cheese.  Remove from heat.

Add patties to buns and top with lettuce, tomatoes, avocado, salsa, or desired other toppings.  You could also crumble the patties and serve them on salad!

May 16, 2014

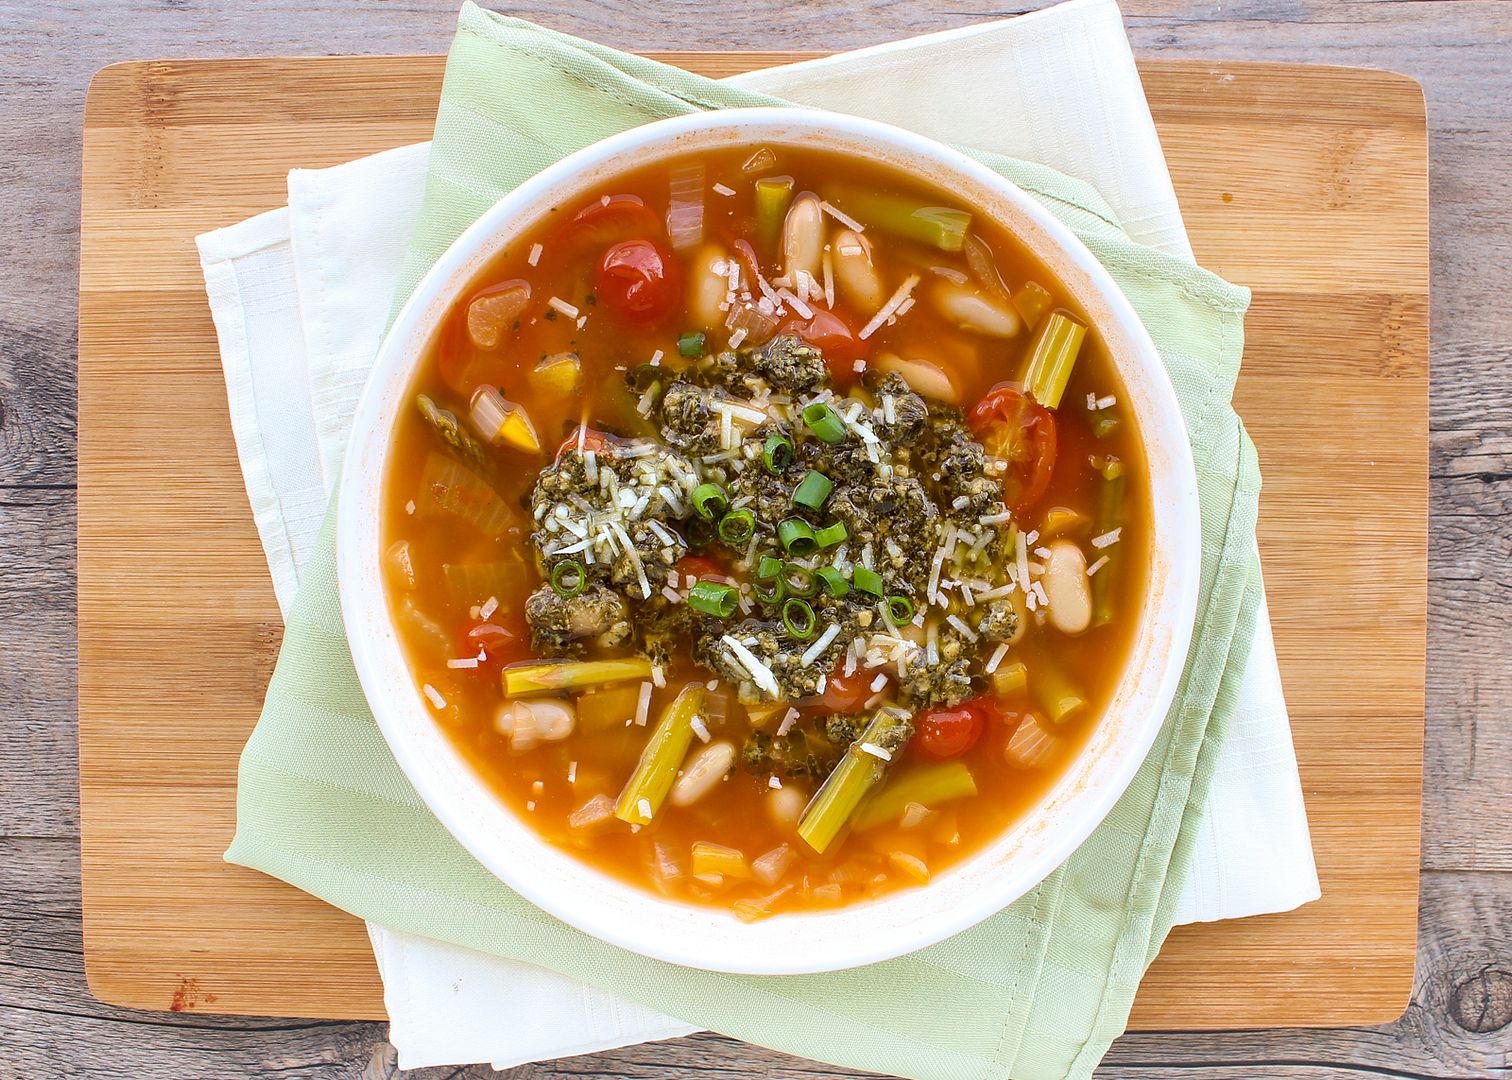
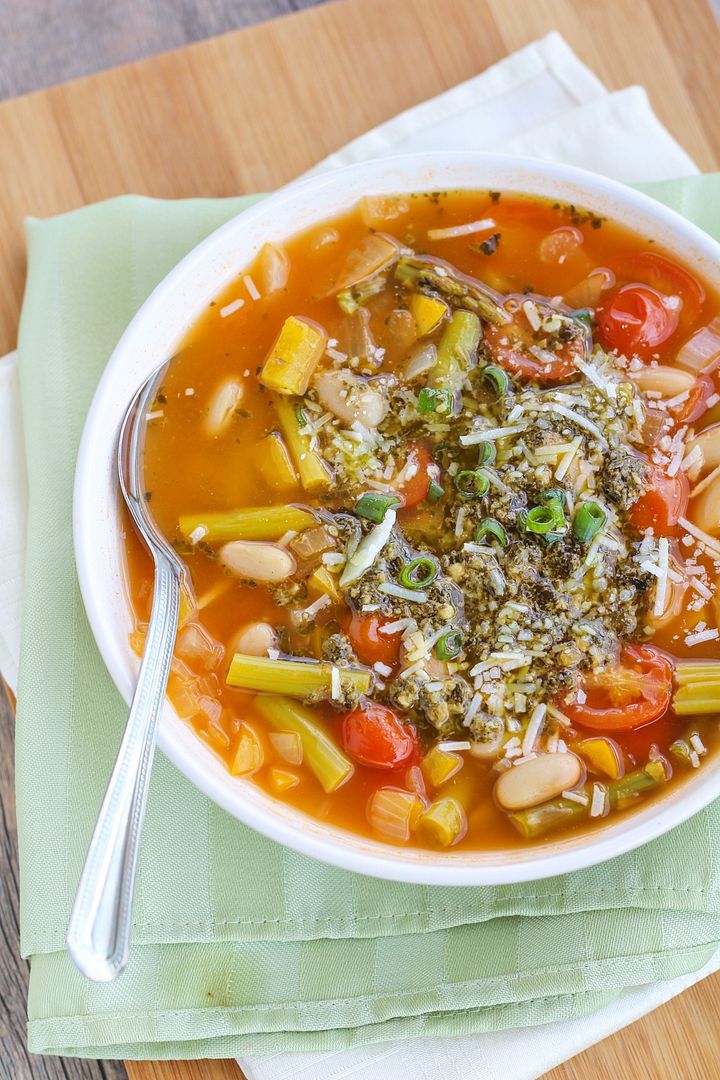
Spring Vegetable Minestrone with White Beans & Pesto

Spring Vegetable Minestrone with White Beans & Pesto

After a tease of summer-like weather last weekend, we've been making up for it all week here with rain, rain, and more rain.  Just in time for the long weekend!

For us Canadians, this May long weekend is sort of the unofficial kickoff to summer, but almost invariably ends up being cold and rainy.  So while soup isn't the type of recipe you would normally kick off a late May long weekend with, it's pretty appropriate for this wet and rainy spring weather we've been experiencing!

Spring Vegetable Minestrone with White Beans & Pesto

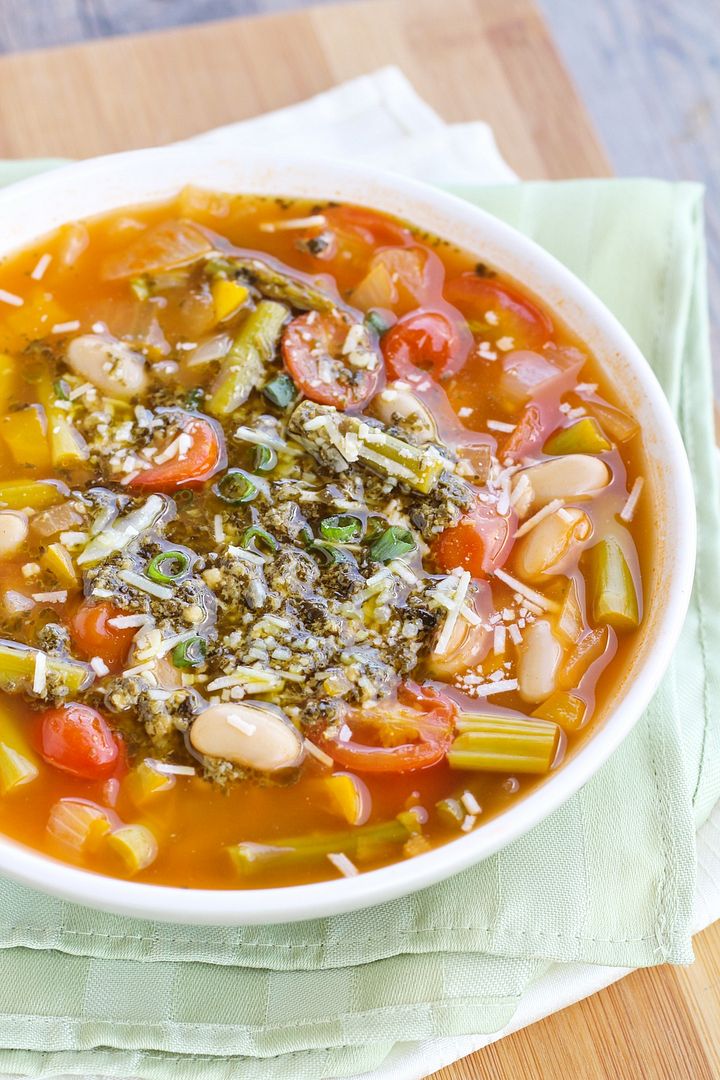
This is not a traditional minestrone soup, using asparagus and yellow peppers for some bright spring flavour along with the tomatoes, white beans for protein, no pasta, and with pesto and parmesan added in at the end for a boost of richness and flavour.

I realize now that my pictures don't really do this soup justice with the way I slightly overcooked my asparagus and then pretty much covered the whole bowl in pesto, but I do love pesto!  This was the perfect type of comfort spring food that's needed this time of year as we patiently wait for summer to kick in for good - hopefully not that long now!

Spring Vegetable Minestrone with White Beans & Pesto

Spring Vegetable Minestrone Soup with White Beans and Pesto

Adapted from Food & Drink Magazine

Serves 4-6

Ingredients:

1 tablespoon olive oil
3 cloves garlic, minced
2 small yellow onions, peeled and diced
2 cups finely chopped yellow bell peppers, (about 1-1/2 peppers; red or orange would also work)
1 tablespoon tomato paste
1 cup halved grape tomatoes
1 (540mL) can cannellini or white kidney beans, rinsed and drained
6 cups vegetable broth (I use low-sodium broth)
1-1/2 cups chopped asparagus (half inch pieces; woody ends of asparagus removed)
Salt and pepper

For Topping:
~1 tablespoon prepared pesto per serving
Grated parmesan cheese
Chopped fresh basil, parsley, or green onion (optional)

Directions:

In a large saucepan, heat oil over medium heat.  Add garlic and sauté for 30 seconds.  Add onions and peppers and sauté for another 10 minutes, stirring often.

Add tomato paste and sauté for 30 seconds, stirring often.  Add grape tomatoes and sauté for another minute.  Add white beans and vegetable stock, bring to a boil, cover, and let simmer 10 minutes.  Add asparagus and simmer for another 5-10 minutes, or until all vegetables are tender (I did 10 minutes and my asparagus was a little overdone).  Season to taste with salt and pepper.

Divide among bowls and serve warm, topped with pesto, parmesan cheese, and herbs, if desired.  Season with additional salt and pepper if needed.

April 24, 2014

Sweet Potatoes with Ricotta & Kale

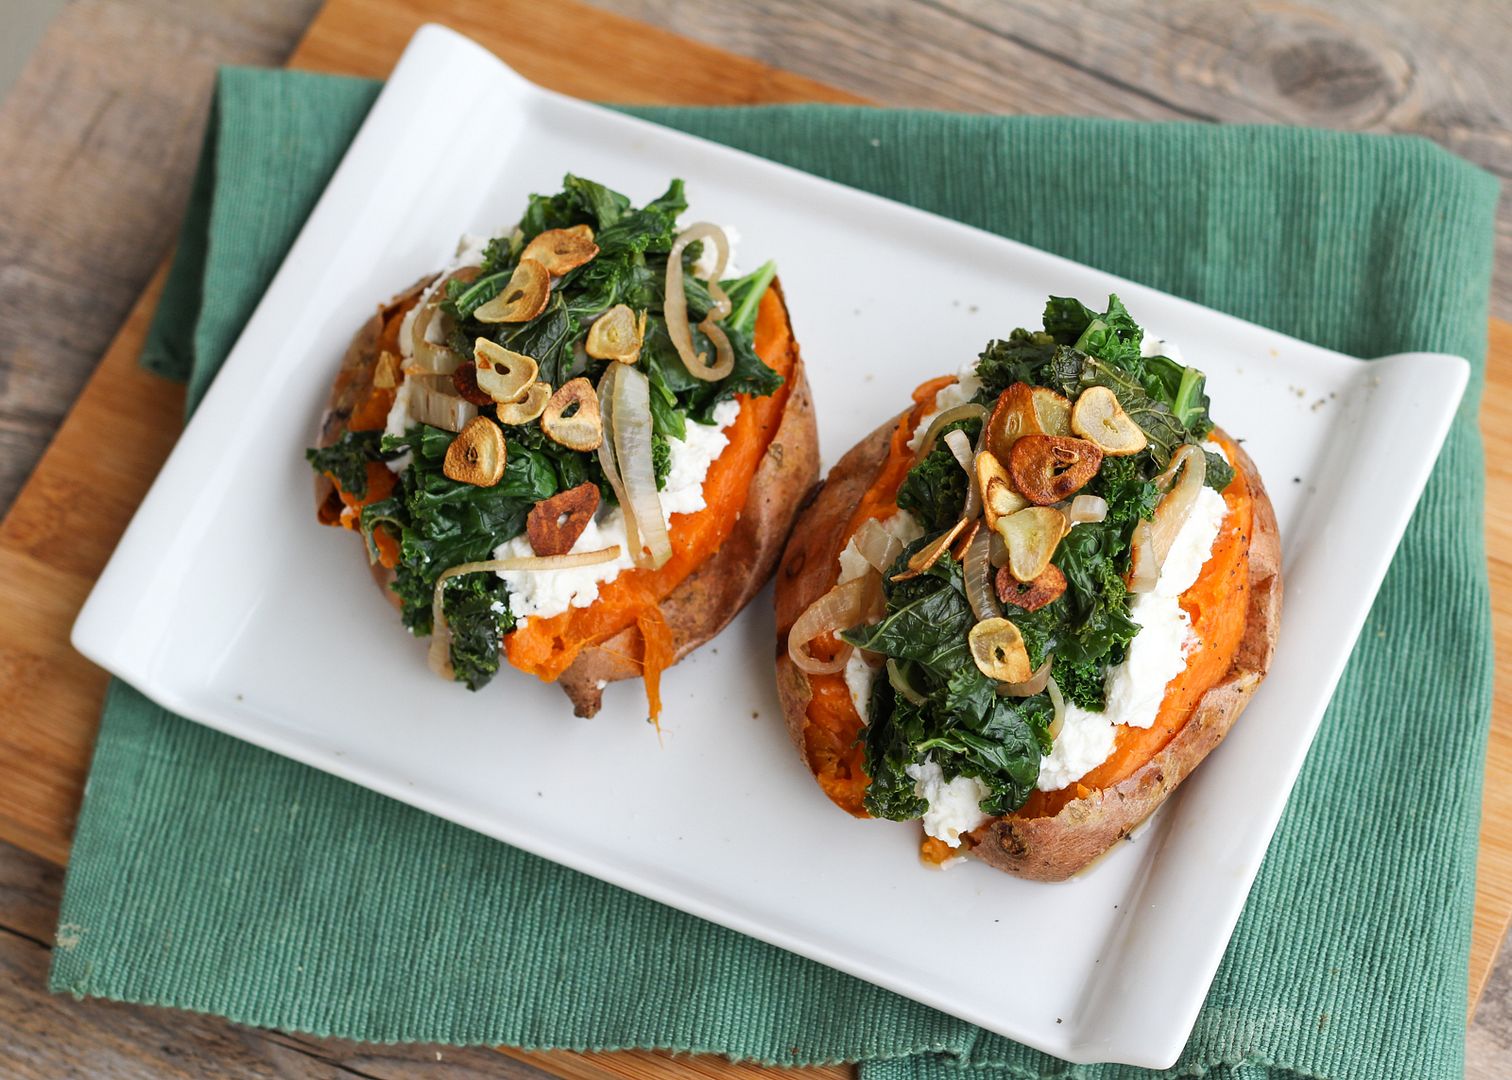
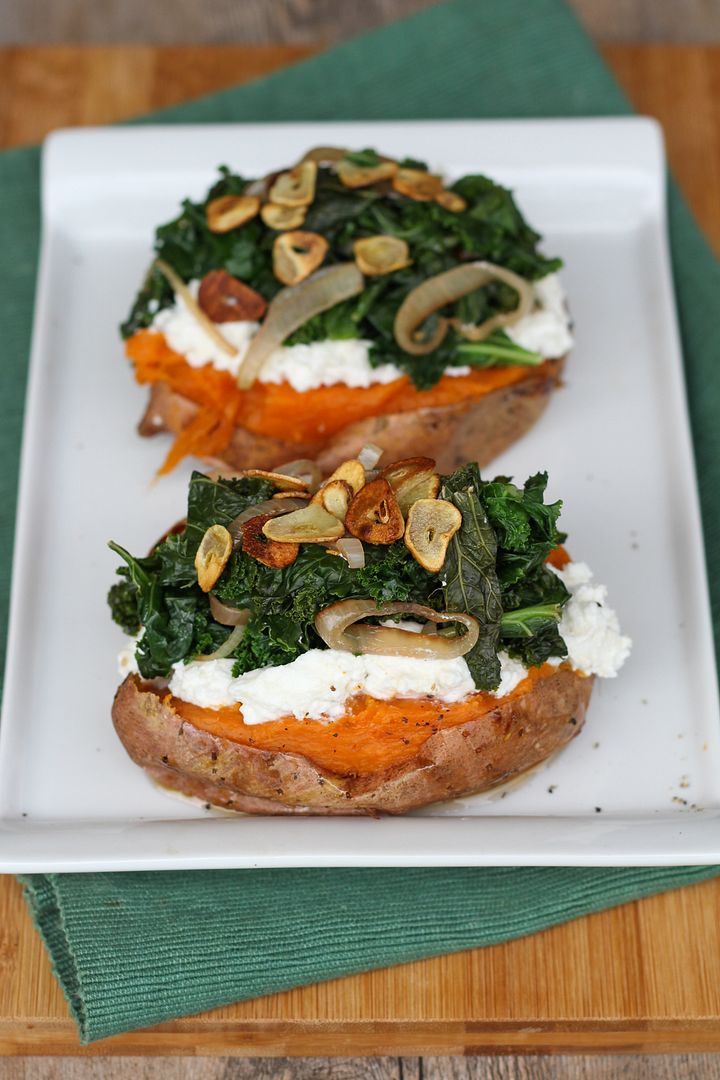
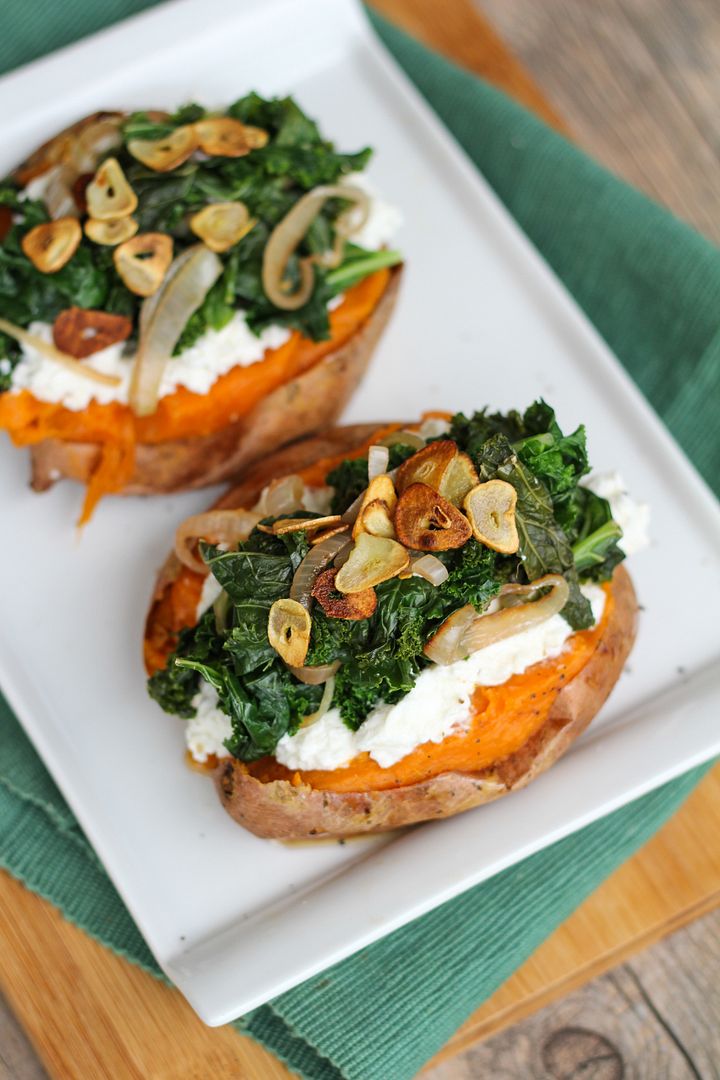
Baked Sweet Potatoes Topped with Ricotta, Goat Cheese, Kale, and Garlic Chips

Today's my birthday and while I should be posting a picture of a decadent layer cake, instead I'm sharing sweet potatoes and kale.  And while some may think this is blasphemous, I would probably take a baked sweet potato smothered in goat cheese over a piece of frosted cake any day!  Which is mostly because I'm not a huge cake person (though I will still make one this weekend!), but also because this meal was so delicious!

Baked Sweet Potatoes Topped with Ricotta, Goat Cheese, Kale, and Garlic Chips

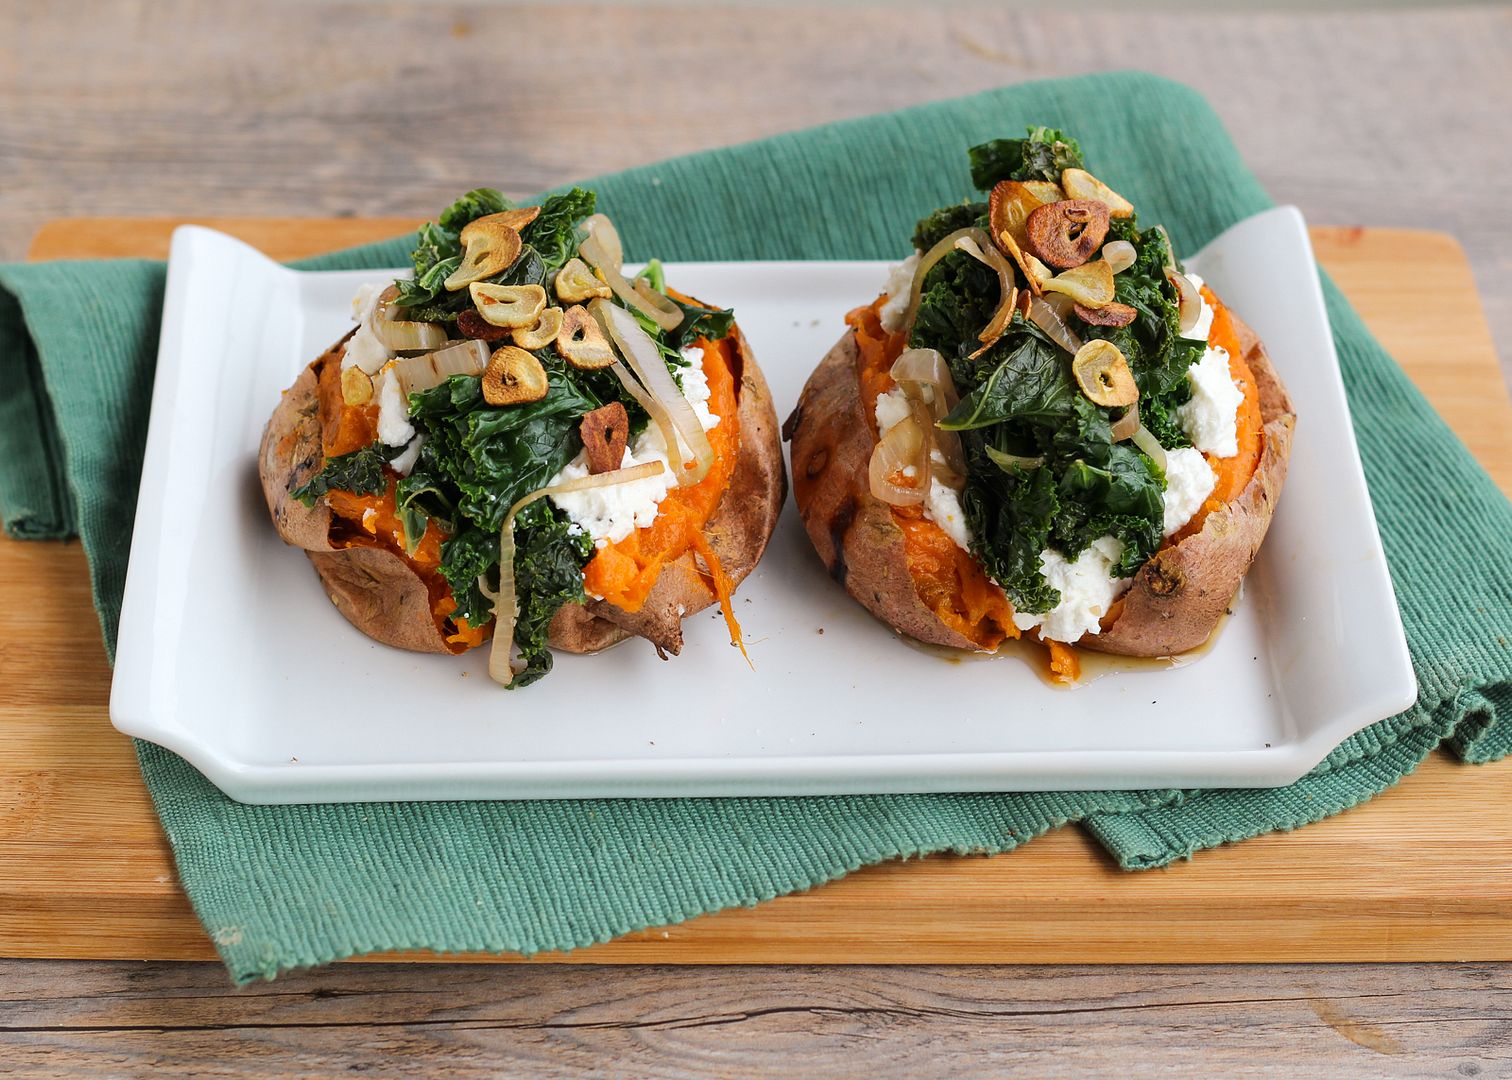
It's also simple to make - roast some sweet potatoes, top them with a mixture of light ricotta and goat cheese, some sauteed kale and shallots, and finally some crispy garlic chips on top.  The original recipe only called for ricotta, but I added in some goat cheese because I find ricotta too plain on its own and because goat cheese goes well with sweet potatoes.  It added more fat to the otherwise fairly light cheese mixture, but because there's not much fat elsewhere in the meal I thought it was perfectly acceptable!  I also added shallots to the kale mixture for more flavour, but you can easily leave them out if you prefer.  Just don't skip the garlic chips on top - they're so good and super easy to make!

Baked Sweet Potatoes Topped with Ricotta, Goat Cheese, Kale, and Garlic Chips

I loved how the sweetness of the potatoes was balanced out by the creamy cheese and slightly bitter kale, and because of the protein in the ricotta I considered this to be a complete meal in its own, and was actually pretty full afterwards!

I'm thinking of making a cheesecake this weekend to celebrate my birthday with my family so if it turns out I'll be sure to share it soon to balance out the kale from today :)  While I may not be a huge fan of regular cake, I always welcome a slice of cheesecake, probably because cheese makes everything better!  

Hope you all have a great weekend!

Baked Sweet Potatoes Topped with Ricotta, Goat Cheese, Kale, and Garlic Chips

Baked Sweet Potatoes with Ricotta & Kale

Adapted from Body + Soul

Serves 4

Ingredients:

4 medium sweet potatoes, about 8-10 oz each
2 tablespoons olive oil
4 cloves garlic, thinly sliced crosswise
1 large shallot, thinly sliced
1 bunch kale, thick stems removed, leaves torn into large pieces
Salt and pepper
1 tablespoon balsamic vinegar
Pinch red pepper flakes (optional)
3/4 cup low-fat ricotta cheese
1/4 cup (about 2.5 oz) plain goat cheese

Directions:

Preheat oven to 450°F.  Scrub sweet potatoes, pierce all over with a fork, and rub skins with 1 tablespoon olive oil (total for all sweet potatoes).  Place on a foil-lined baking sheet and bake in preheated oven until easily pierced with a knife, 45 minutes to 1 hour.

Meanwhile, heat 1 tablespoon oil in a large skillet over medium-high heat.  Add garlic and cook  until golden, stirring often, about 1 to 2 minutes.  Remove with a slotted spoon and set on a paper towel to drain.  They should be crispy like garlic chips.

Add shallot to the pan and sautee for a couple of minutes until softened.  Add kale, cover with a lid, and let cook for 1-2 minutes.  Remove lid, stir, and cook for another minute or two until just wilted and tender.  Season generously with salt and pepper, stir in vinegar and red pepper flakes, and remove from heat.

Mix goat cheese and ricotta in a small bowl until smooth.  Season lightly with salt and pepper.

Cut each potato in half lengthwise, and top with the cheese mixture, kale mixture, and garlic chips (evenly divided across the 4 potatoes).  Serve warm.

April 10, 2014

Chickpea & Veggie Brown Rice Barley Bowl with Tahini Dressing

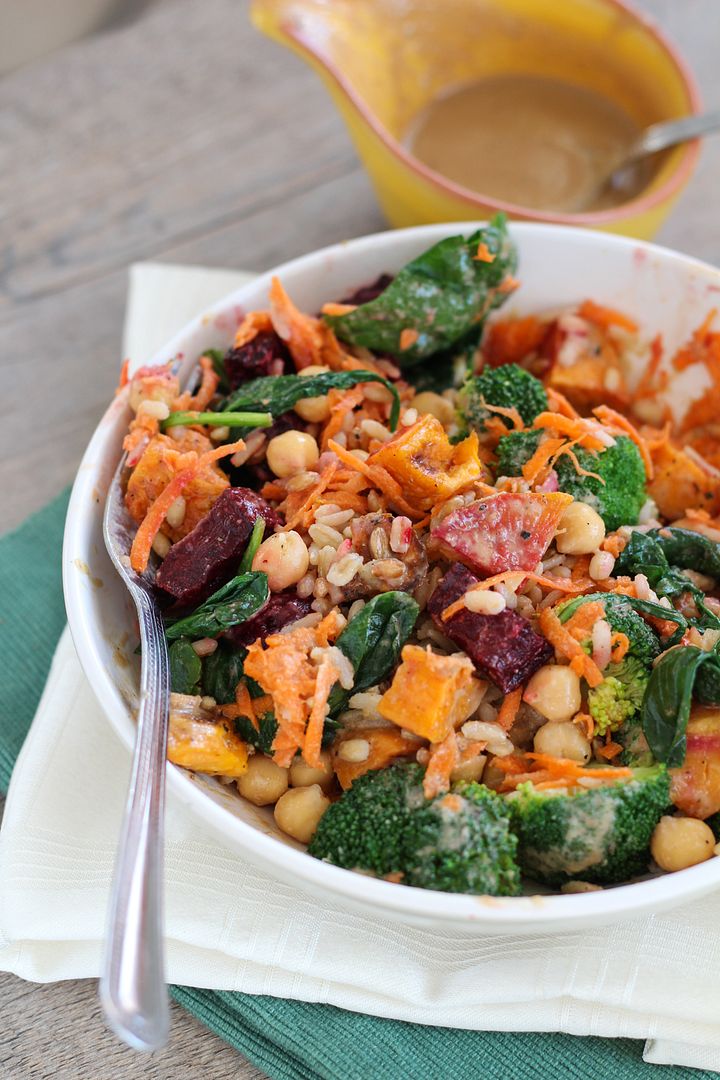
Chickpea & Roasted Veggie Brown Rice Barley Bowl with Tahini Dressing

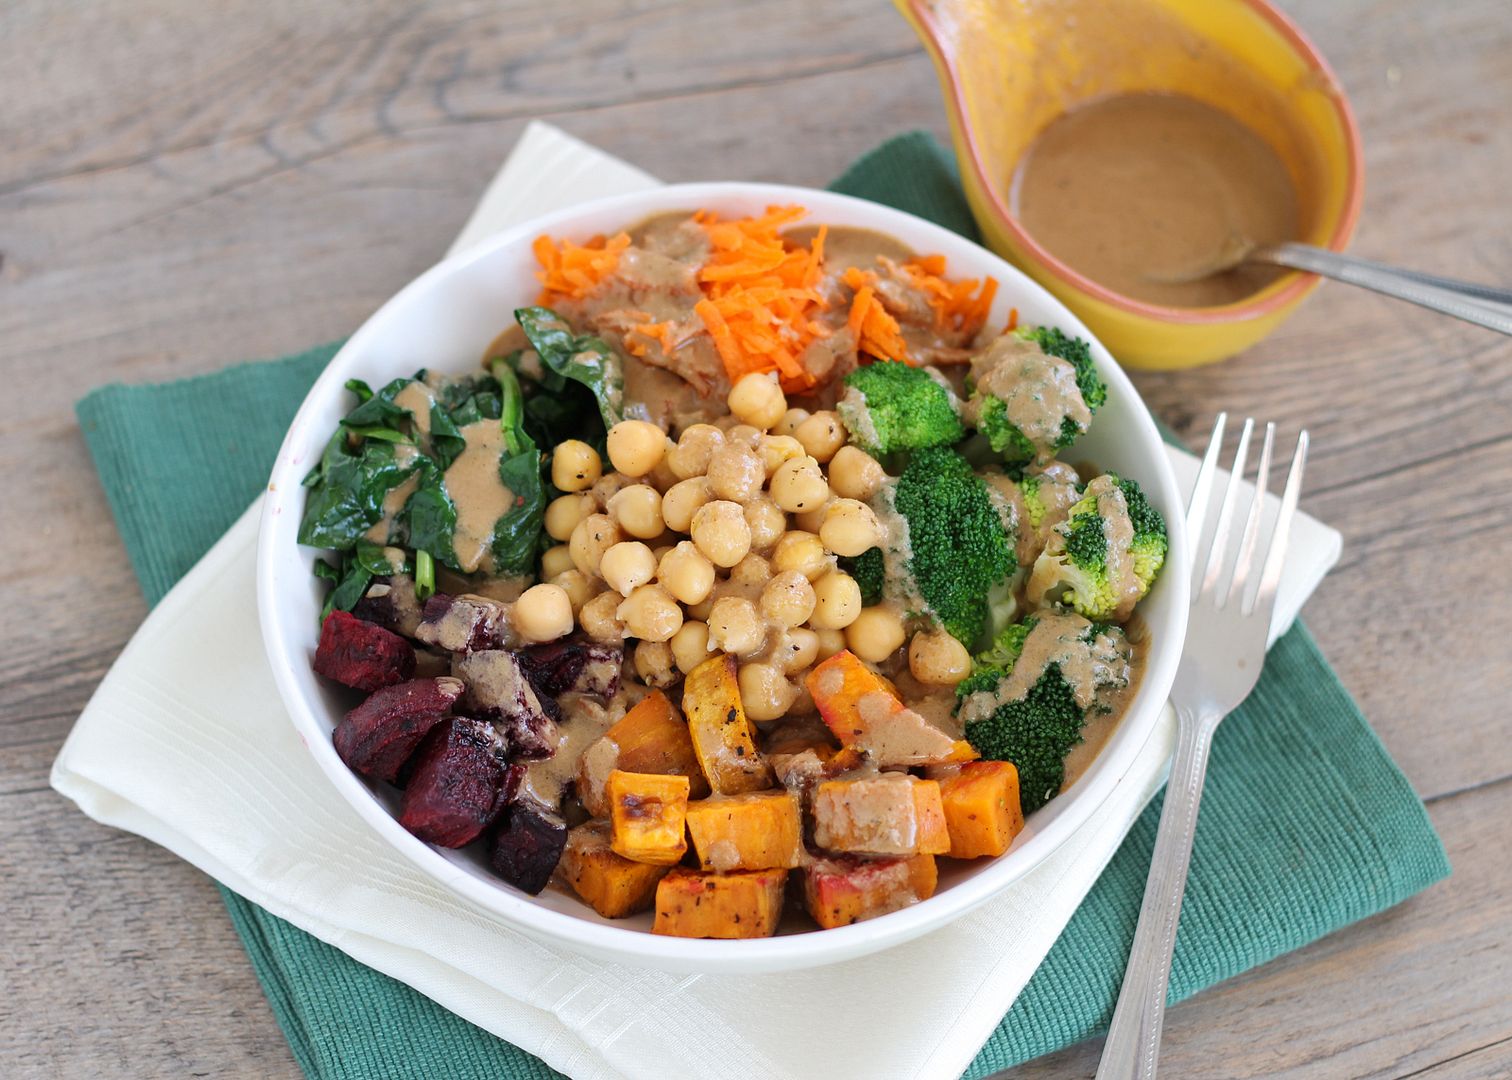
Healthy "bowls" seem to becoming more and more popular these days both across the internet and in cafes and restaurants.  They have many names and variations, but the basic concept is that you combine a base of grains (like rice, quinoa, barley, etc), several different vegetables (raw or cooked), a protein or two (chicken, tofu, beans, nuts, or cheese), and a delicious sauce to tie it all together, thus giving you a complete meal in a bowl.

I find myself drawn to any healthy meal that ends in "bowl" because I love a meal with different textures, flavours, and colours that all fit together in one dish, and these bowls are easy to make super nutritious.

Chickpea & Roasted Veggie Brown Rice Barley Bowl with Tahini Dressing

The problem with ordering them in a restaurant is that they're usually pretty expensive, and while making them at home can require a bit of effort, it's cheaper and you can make a lot so that you have delicious healthy bowls for lunches through the week!

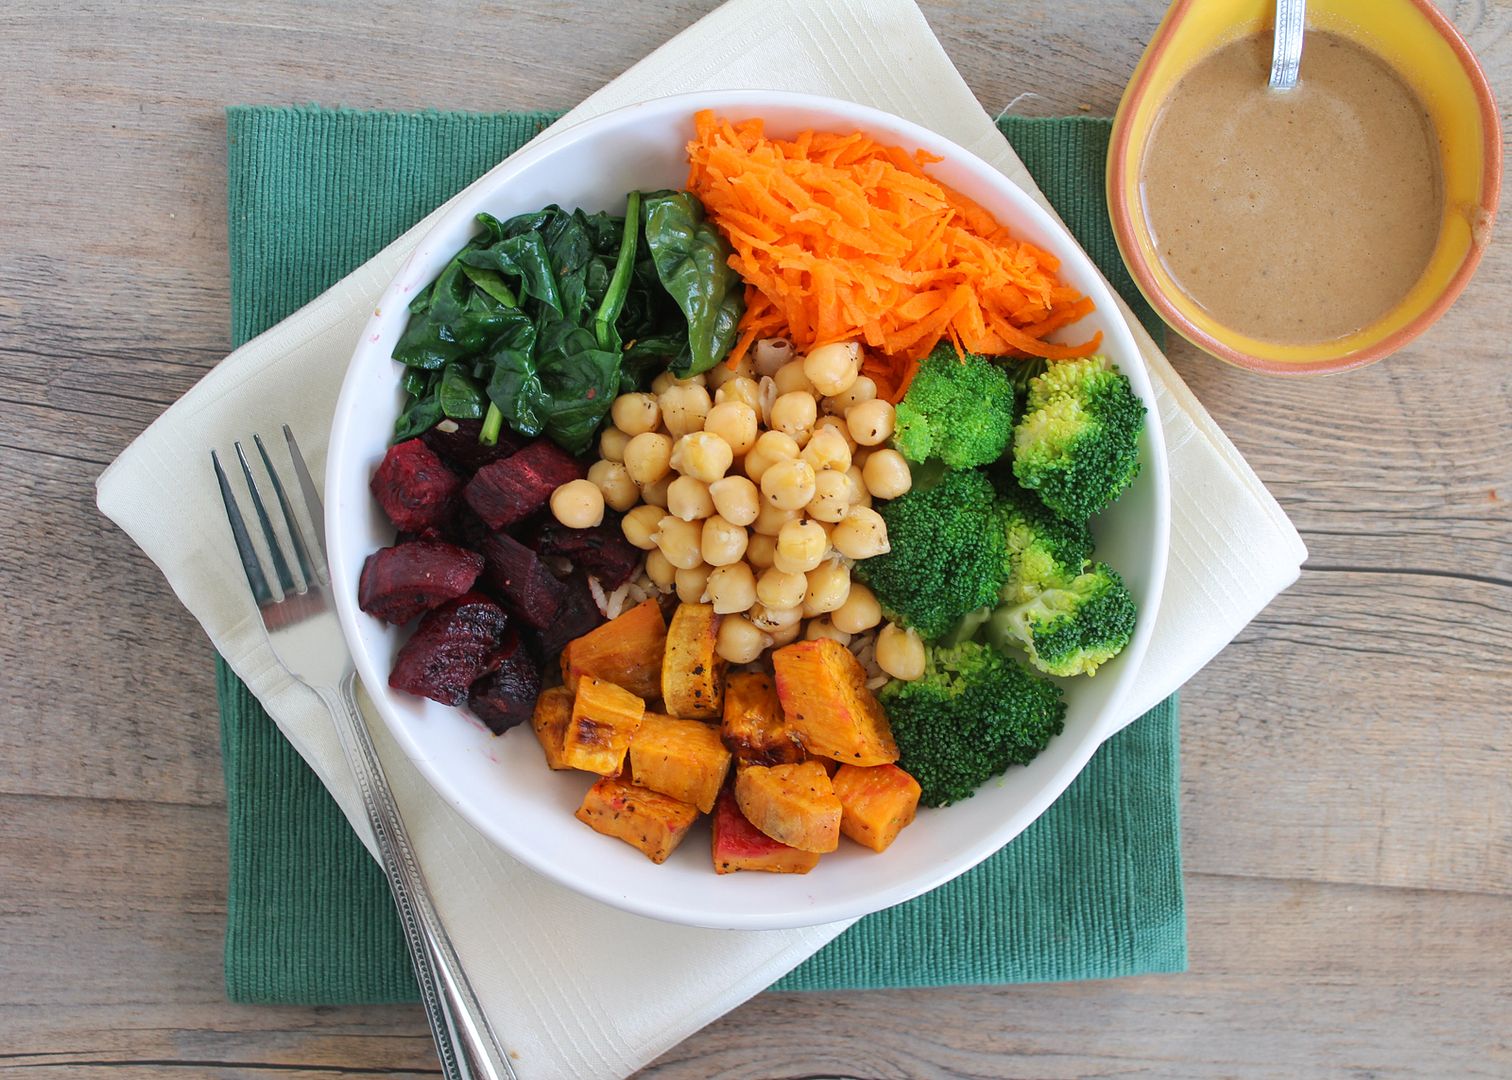
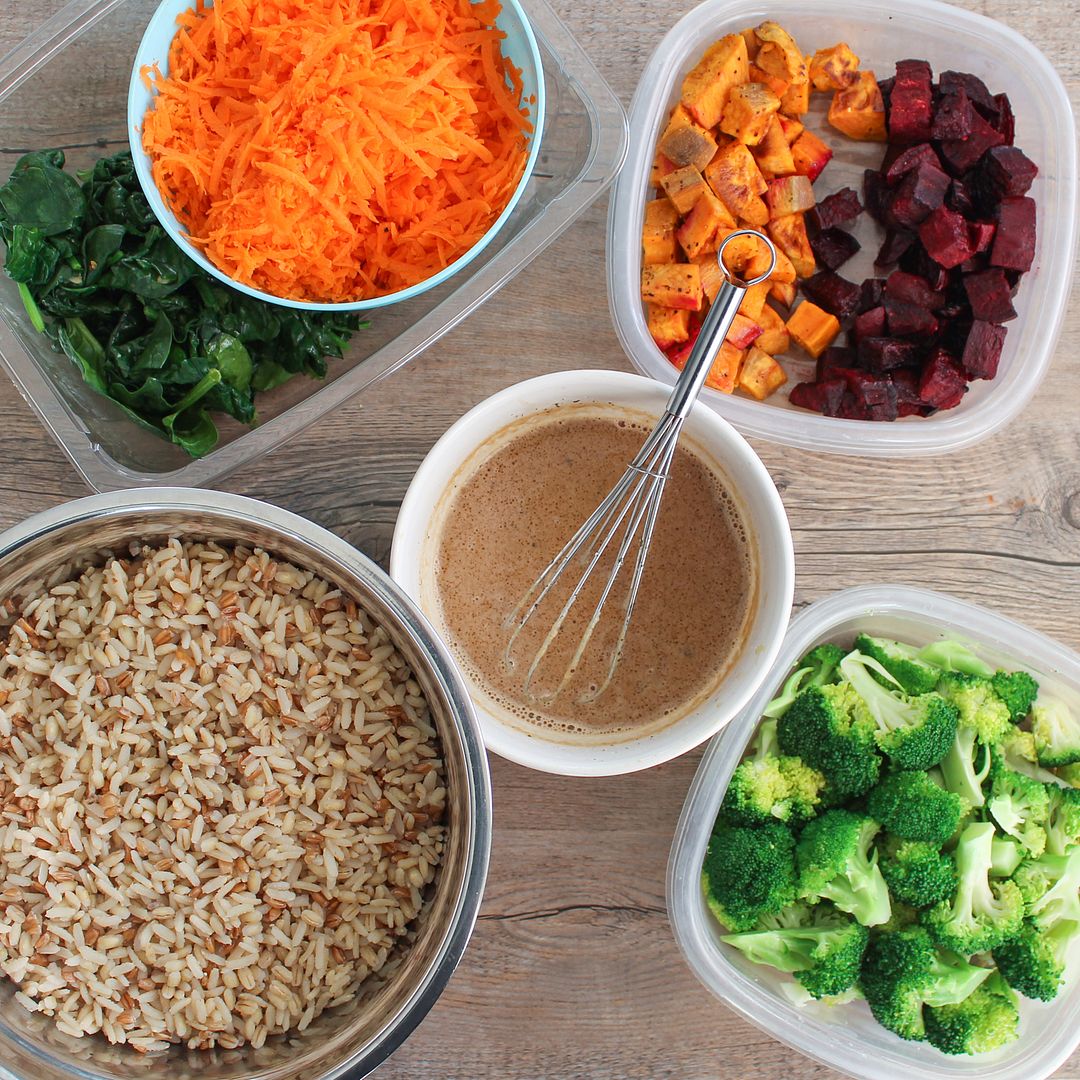
For my version, I combined the following:

Chickpea & Roasted Veggie Brown Rice Barley Bowl with Tahini Dressing

Base - a mix of brown rice, barley, and spelt (I used a PC blend of the three for convenience!)
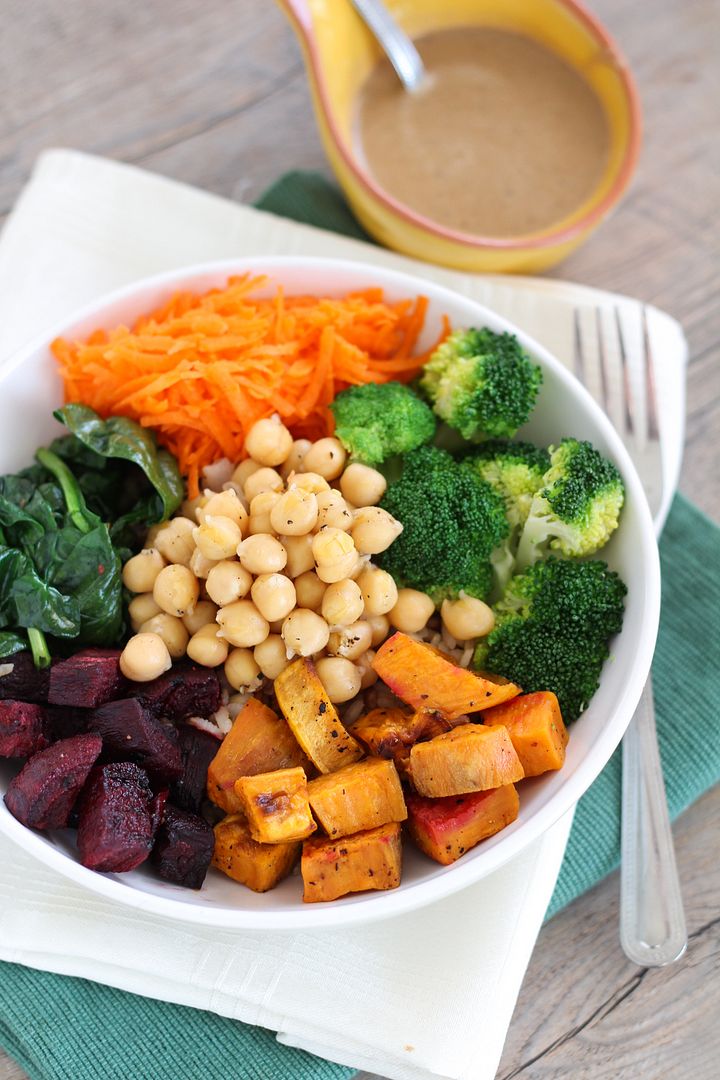
Veggies - steamed broccoli, roasted beets and sweet potatoes, sauteed spinach with garlic, and grated raw carrots
Protein - I forgot to include this in the picture above, but I used chickpeas
Sauce - tahini dressing with soy sauce and sesame oil for flavour!

Chickpea & Veggie Brown Rice Barley Bowl with Tahini Dressing

Another nice thing about these is that they're highly adaptable, so if you don't like the ingredients that I used, you can make whatever substitutions you like, as long as you maintain a variety of colour and textures!

Try using quinoa as a base if you don't like rice; substitute the chickpeas for chicken or tofu if you like; grate raw beets instead of roasting them; sautee brussels sprouts or kale instead of spinach; roast squash instead of sweet potato ... you get the idea!

Chickpea & Veggie Brown Rice Barley Bowl with Tahini Dressing

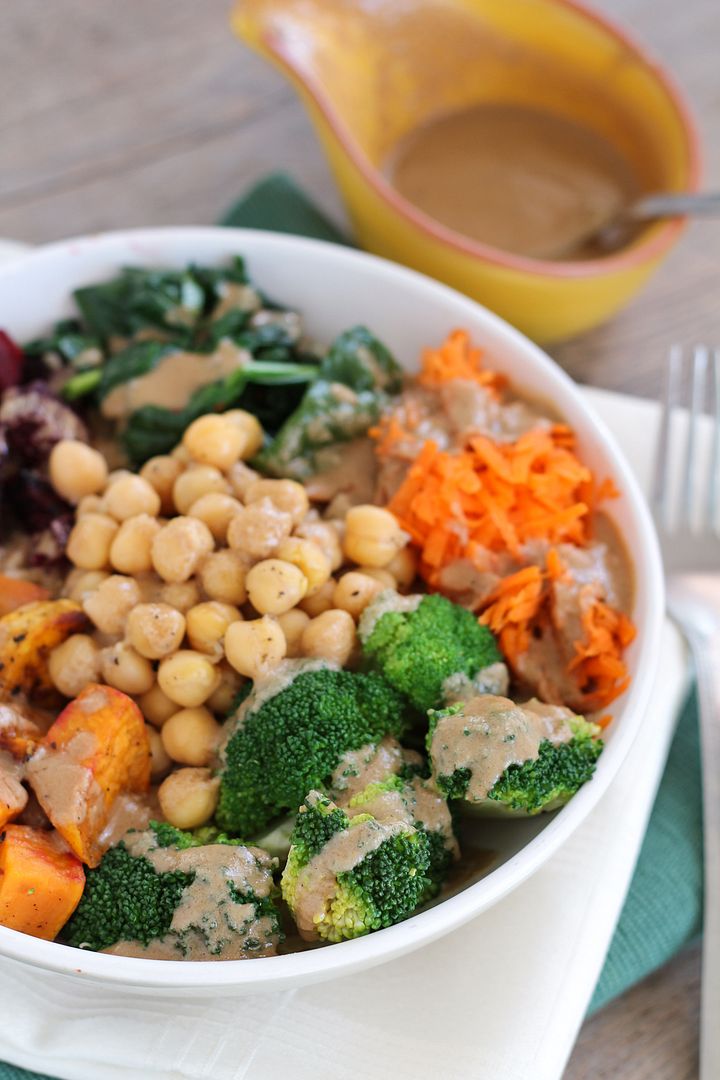
This makes a filling lunch or dinner that will leave you feeling great.  If you're making enough to have leftovers (which I recommend you do!), just be sure to store the sauce separately or else it will get absorbed and leave the dish feeling sauceless, which won't be as good as sauce is the most important part!

Chickpea & Veggie Brown Rice Barley Bowl with Tahini Dressing

Chickpea & Veggie Brown Rice Barley Bowl with Tahini Dressing

Inspired by several recipes, such as ones seen on Paint + Tofu, Dishing Up The Dirt, and Grace Bezanson

Makes 3-6 servings, depending on serving size

Ingredients:

For the Toppings:
~1 tablespoon olive oil
1 large sweet potato, chopped into bite-sized pieces
2 large beets, chopped into bite-sized pieces
1 head of broccoli, chopped into small florets
1 teaspoon sesame oil
1 clove garlic, minced
1 bunch of baby spinach (however much you like; I used a small container)
2 large carrots, grated (a food processor with the grater attachment works well for this!)
1 can of chickpeas, drained and rinsed

For the Base:
3-4 cups cooked brown rice and/or barley (I used a bag of mixed brown rice, barley, and spelt) or your favourite grain, such as quinoa (about 1 to 1-1/2 cups uncooked)

For the Sauce:
1/2 cup tahini
1/2 cup water
1/4 cup fresh lemon juice
1/4 cup soy sauce
2 teaspoons sesame oil
1 tablespoon + 1 teaspoon honey or agave
1/4 teaspoon each salt and pepper

Directions:

Preheat oven to 400°F.  Toss sweet potatoes and beets with olive oil, season with salt and pepper, and spread in an even layer on a foil-lined baking sheet. Roast in preheated oven for 25-35 minutes, until tender.  The sweet potatoes will likely be done sooner than the beets; just transfer them to a bowl and put the beets back in the oven.  I prefer roasting beets whole but this takes longer; if you have time, just roast the whole beet for 1 hour, drizzled with oil and wrapped in foil, then peel and chop it after.

Meanwhile, you can cook the broccoli, spinach, and your grains.  Steam the broccoli in a steamer basket over boiling water, covered, for about 2-3 minutes until bright green and tender.  Rinse with cold water and drain.  For the spinach, heat sesame oil in a large skillet over medium heat.  Add garlic and cook for 30 seconds (this is optional; you could also use a different oil if you like), then add spinach and cook just until wilted.  Remove from heat.  Cook your grains according to package directions; I cooked mine uncovered in simmering water for around 18 minutes, then seasoned with salt and pepper.

Prepare the dressing by whisking all ingredients in a small bowl until smooth.  Taste and adjust any amounts to your liking.  Note that this makes a lot of dressing and likely more than you’ll need; just save any extras for another use!

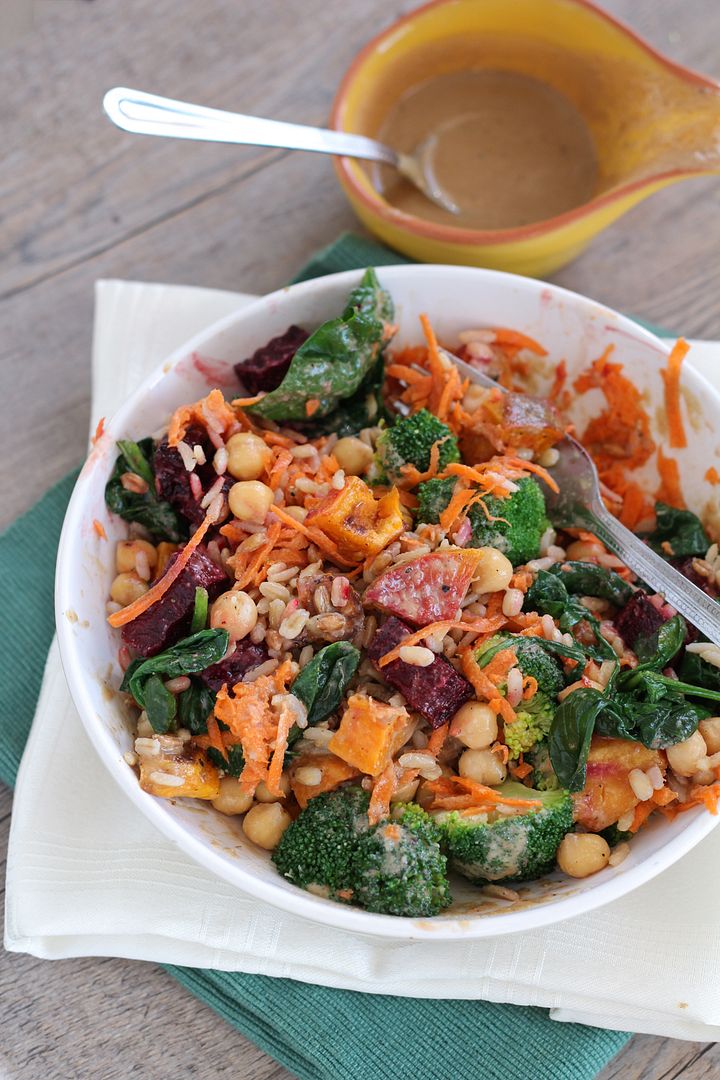
Prepare bowls by adding grains to the bottom, topping with vegetables (beets, sweet potatoes, broccoli, carrots, spinach) and chickpeas, and drizzling tahini dressing on top.  Toss to coat and season with salt and pepper, if desired.  You can eat this warm or at room temperature.

If you have leftovers, you can portion out everything together into containers except the sauce - that should  be kept separate and drizzled on right before eating so it doesn't get absorbed.

Chickpea & Veggie Brown Rice Barley Bowl with Tahini Dressing

March 25, 2014

Broccoli White Bean Soup

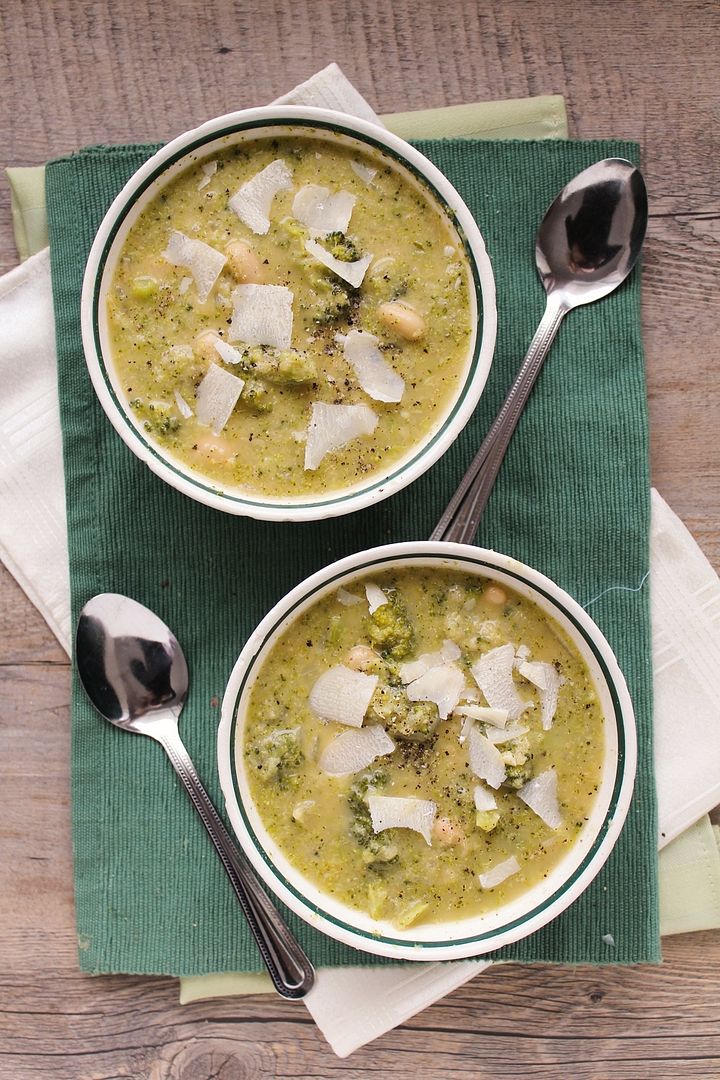
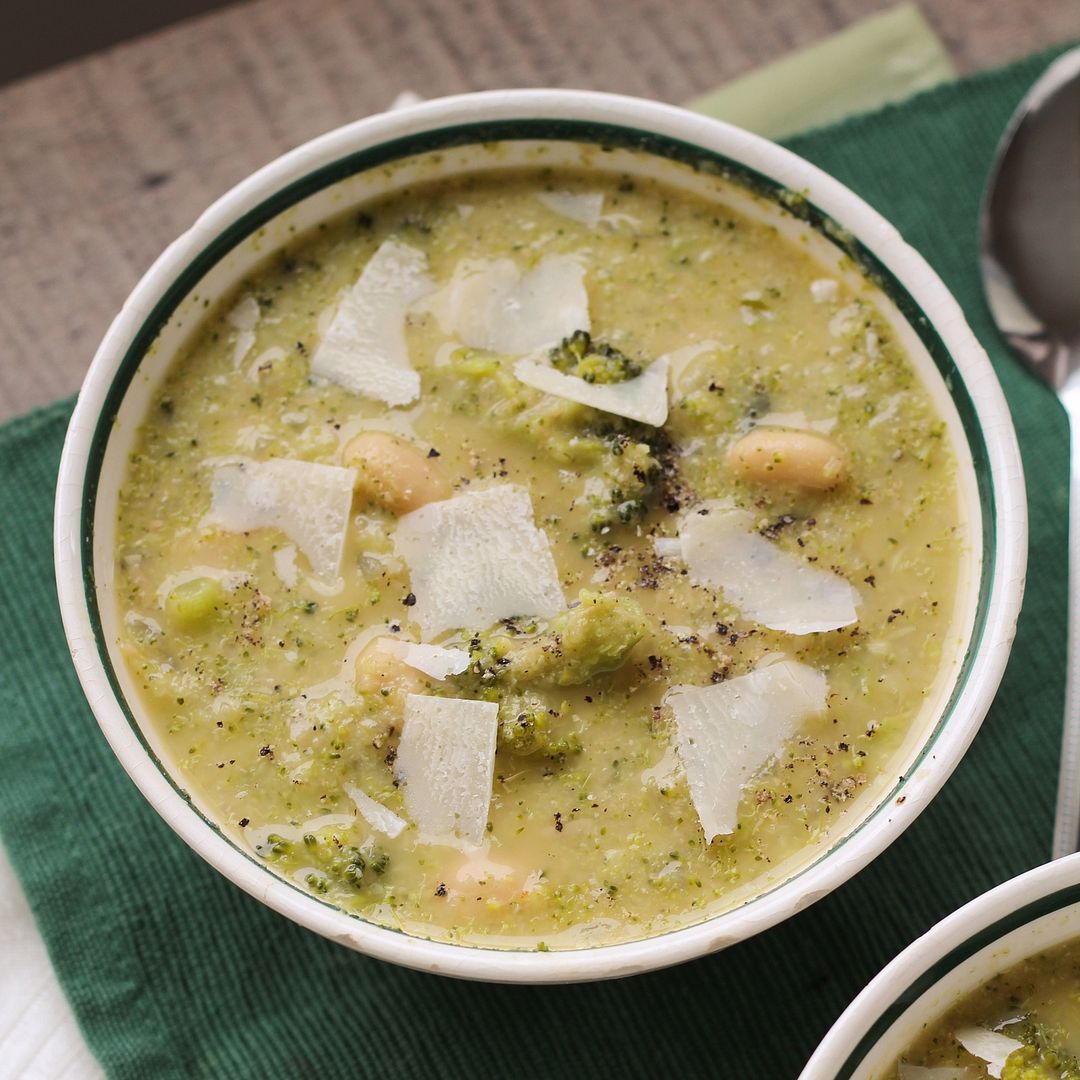
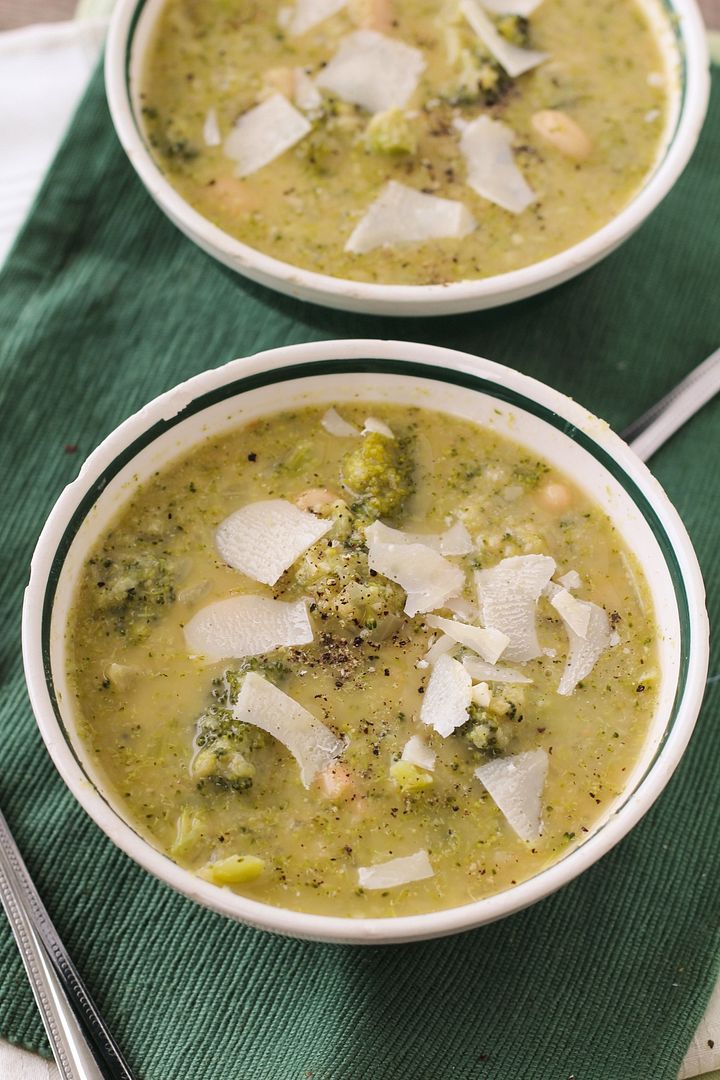
Broccoli White Bean Soup

Winter is still showing no signs of slowing down here in Ontario, so despite it technically being spring, I'm still eating comfort food like cozy warm soups.  Which I'm not complaining about, as soups (at least the versions I make) are one of the easiest and quickest meals to prepare and they make great leftovers to be welcomed home to after a cold bus ride home after school!

This broccoli white bean soup is not only quick and easy to prepare but is nutritious and filling too.  I've used beans as a soup thickener before (like in this curried chickpea and kale soup or this roasted tomato white bean soup) and though it doesn't give it the same silky smooth texture that full fat cream would, I actually prefer the slightly chunky texture and thickness that beans add, not to mention it's a great way to sneak in protein to a vegetable soup!

Broccoli White Bean Soup

In addition to the white beans, this simple soup mainly just consists of broccoli and vegetable broth along with some basic flavourings like onion, garlic, and lemon juice.  I added nutritional yeast to the soup to give it a bit of cheesy, nutty flavour (and added nutrition) without any cheese, but some shavings of good quality parmesan on top are also critical for flavour.  I decided to only halfway puree my soup to leave some texture in it, but you can definitely puree it all if you prefer a smooth soup.

While you won't trick anyone into thinking this is a traditional butter, cream, and cheese filled broccoli soup, it's a great alternative if you're looking for a more nutritious but still comforting version of broccoli soup!

Broccoli White Bean Soup

Broccoli White Bean Soup

Adapted from Whole Living

Serves around 3-4

Ingredients:

1 head of broccoli, chopped into florets
1 tablespoon olive oil
1 medium to large yellow onion, diced
2-3 cloves garlic, minced
1 (540mL) can of no-salt added white kidney beans or cannellini beans, drained and rinsed
2 1/2 cups low-sodium vegetable broth
1/4 teaspoon red pepper flakes
1/4 cup nutritional yeast (or grated parmesan if desired)
1 teaspoon lemon juice
Salt and pepper (I used around 1/2 teaspoon each)
Shaved parmesan for topping

Directions:

Steam broccoli in a steamer basket, covered over simmering water, for about 3-4 minutes, until bright green and tender.  Set aside.

In a large saucepan, heat oil over medium heat.  Add onion and garlic and sauté until softened and translucent, about 6-7 minutes.  Add the beans and broth and bring to a simmer.  Add broccoli and red pepper flakes and stir.  Remove from heat and puree about half to two-thirds of the soup either by transferring to a blender or using an immersion blender.  I wanted to leave some texture to the soup, but you can puree all of it if you prefer the soup to be smooth.  Return to saucepan and stir.  Stir in the nutritional yeast, lemon juice, and season with salt and pepper to taste.

Serve warm, topped with shaved parmesan.

Ingredient Index

Related Posts Plugin for WordPress, Blogger...