Showing posts with label ginger - ground. Show all posts

September 25, 2014

Vegan Pumpkin Pie

Healthy vegan pumpkin pie

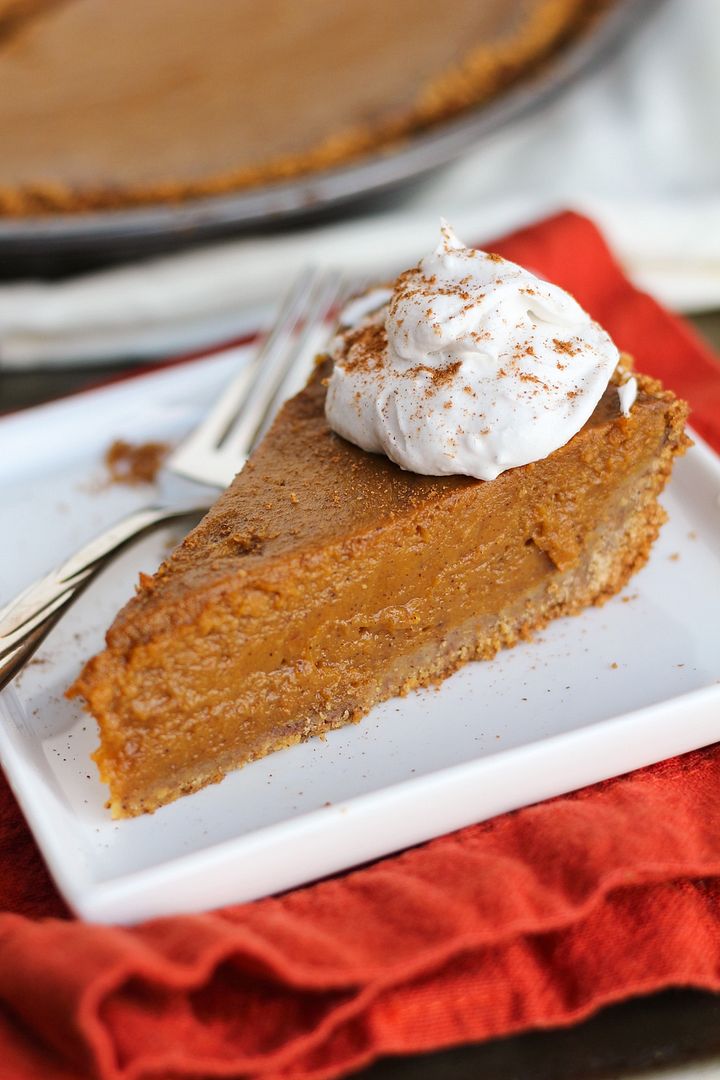
Pumpkin pie is my (and a lot of people's, I'm sure) favourite type of pie, and the type I have the least self-control around because it's so easy to just take a little slice from the fridge, and then one more little slice, and suddenly you've eaten a whole pie just like that.  Ryan has been wanting to buy a pumpkin pie for weeks now but I told him that since it would just be the two of us eating it (and I intend on eating much more pumpkin pie in the coming months!) I wanted to try making a healthy pie that we wouldn't feel guilty about eating!

Healthy vegan pumpkin pie

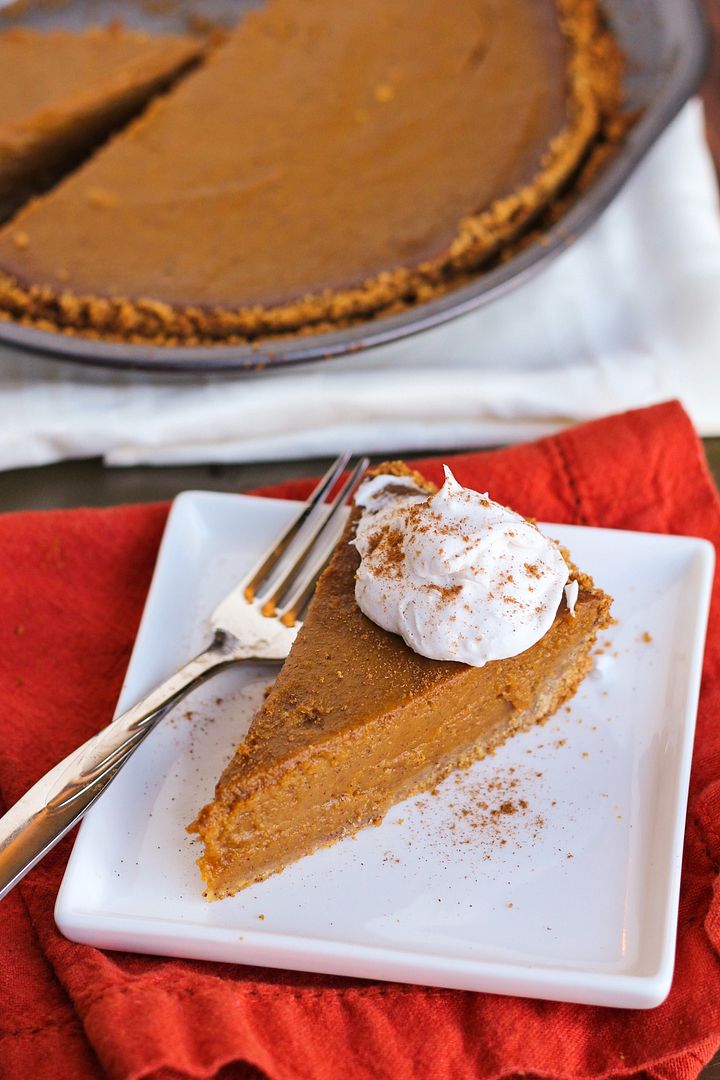
This pumpkin pie is pretty healthy and also happens to be vegan.  The crust is made from low-fat graham crackers mixed with a bit of coconut oil, so the crust alone has a lot less "bad" fats than a typical butter or shortening-packed pie crust.  (Not that I have anything wrong with eating the occasional piece of traditional pie, but like I said, I wanted to make a healthier version!)  I could have made a healthier crust with nuts and dates but I wanted to keep this as easy and inexpensive as possible since we wanted it to be more of an every day dessert pie.

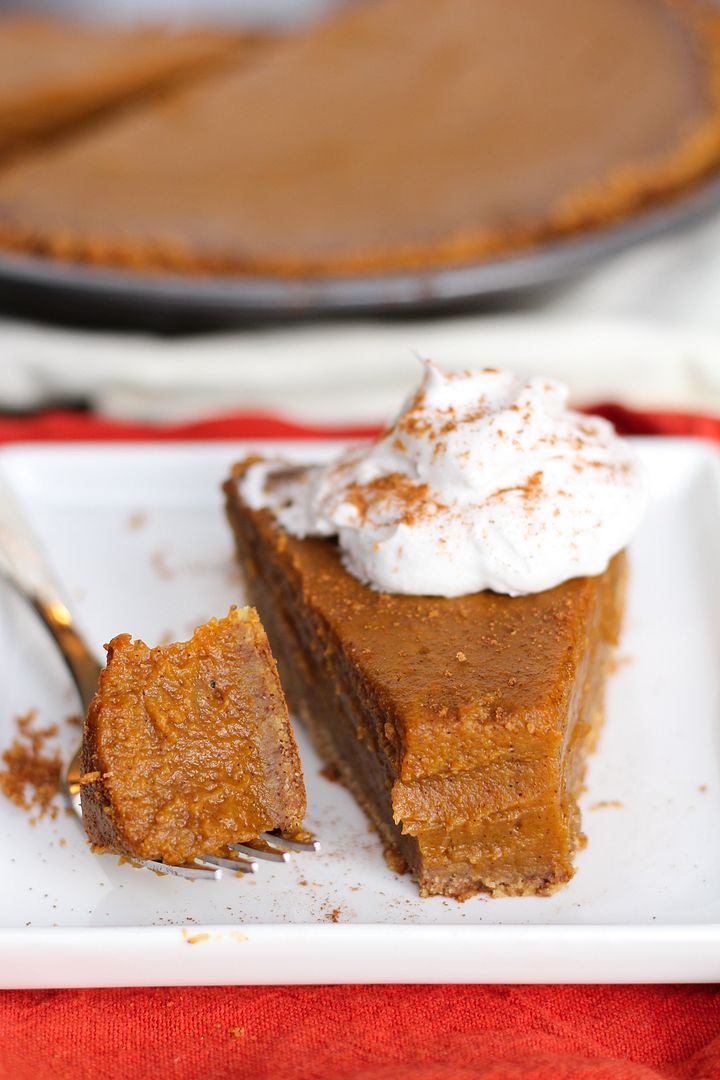
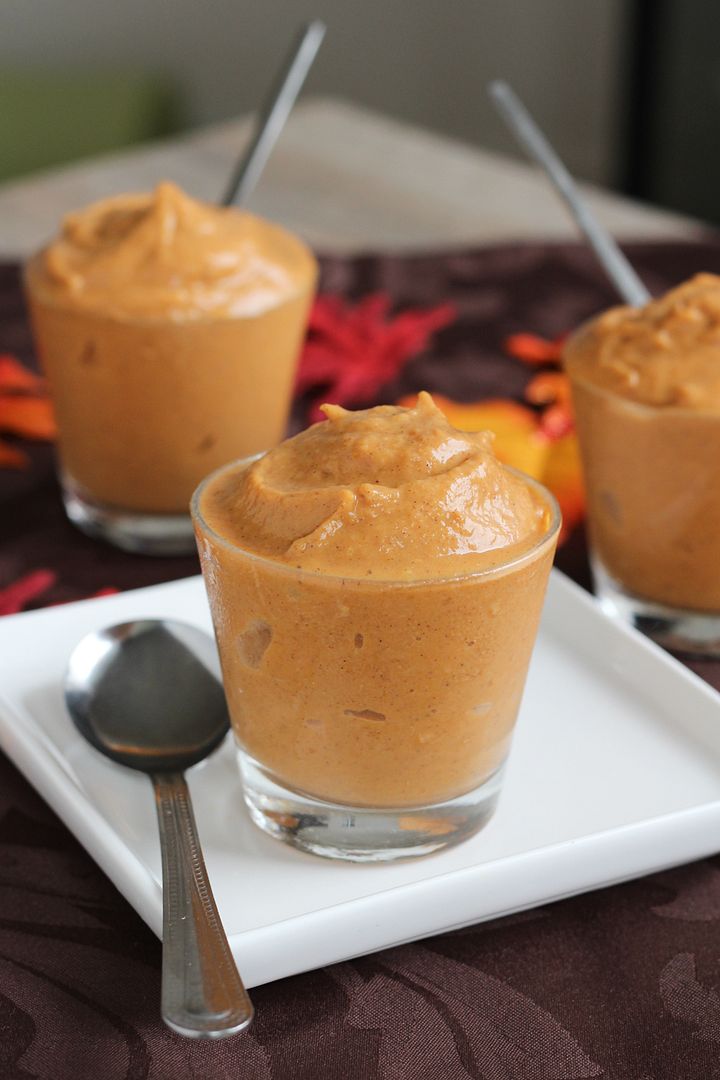
The filling is made up of pumpkin puree, unsweetened almond milk, no eggs, a reduced amount of brown sugar and some pure maple syrup for sweetening, cornstarch to help everything set, and of course the usual pumpkin spices.

Healthy vegan pumpkin pie

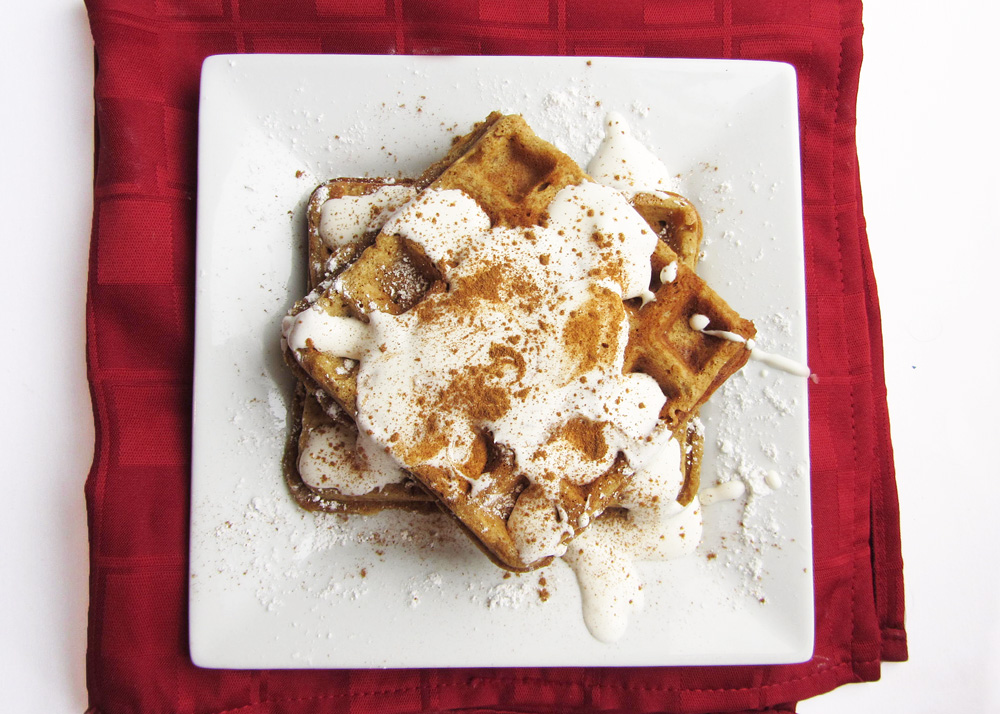
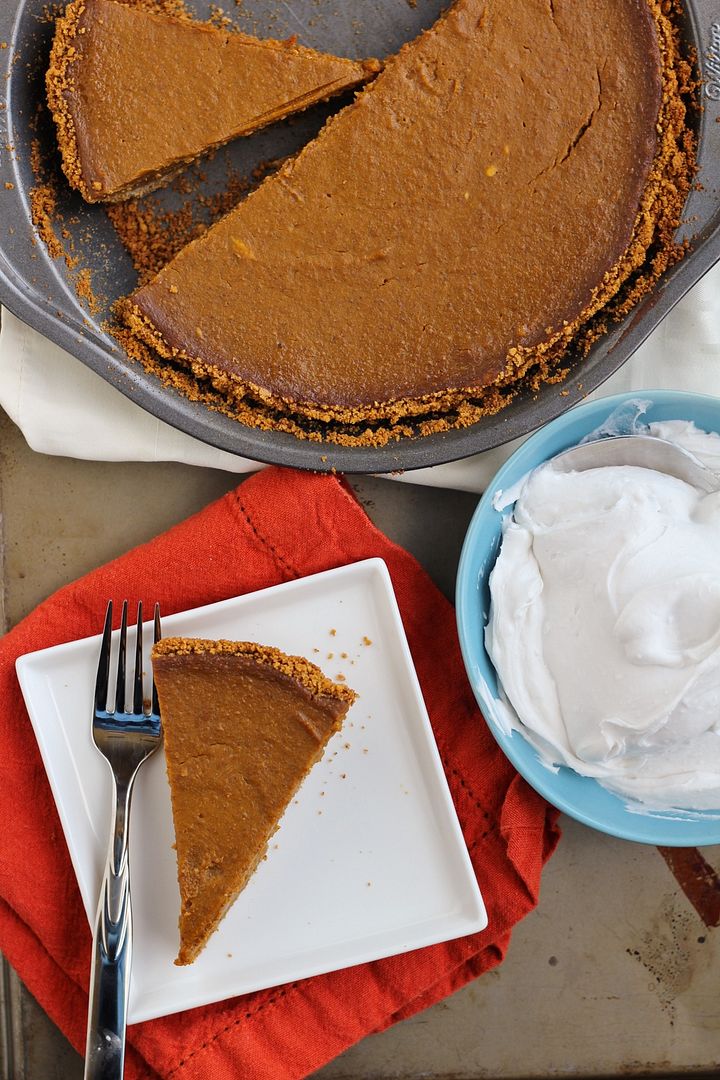
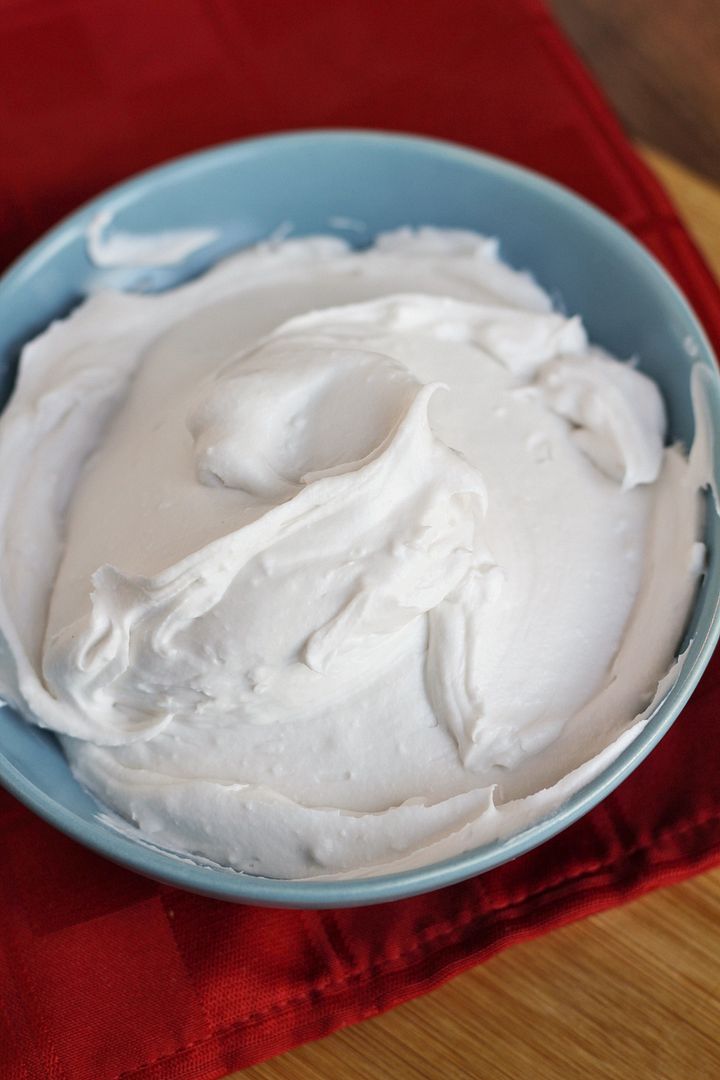
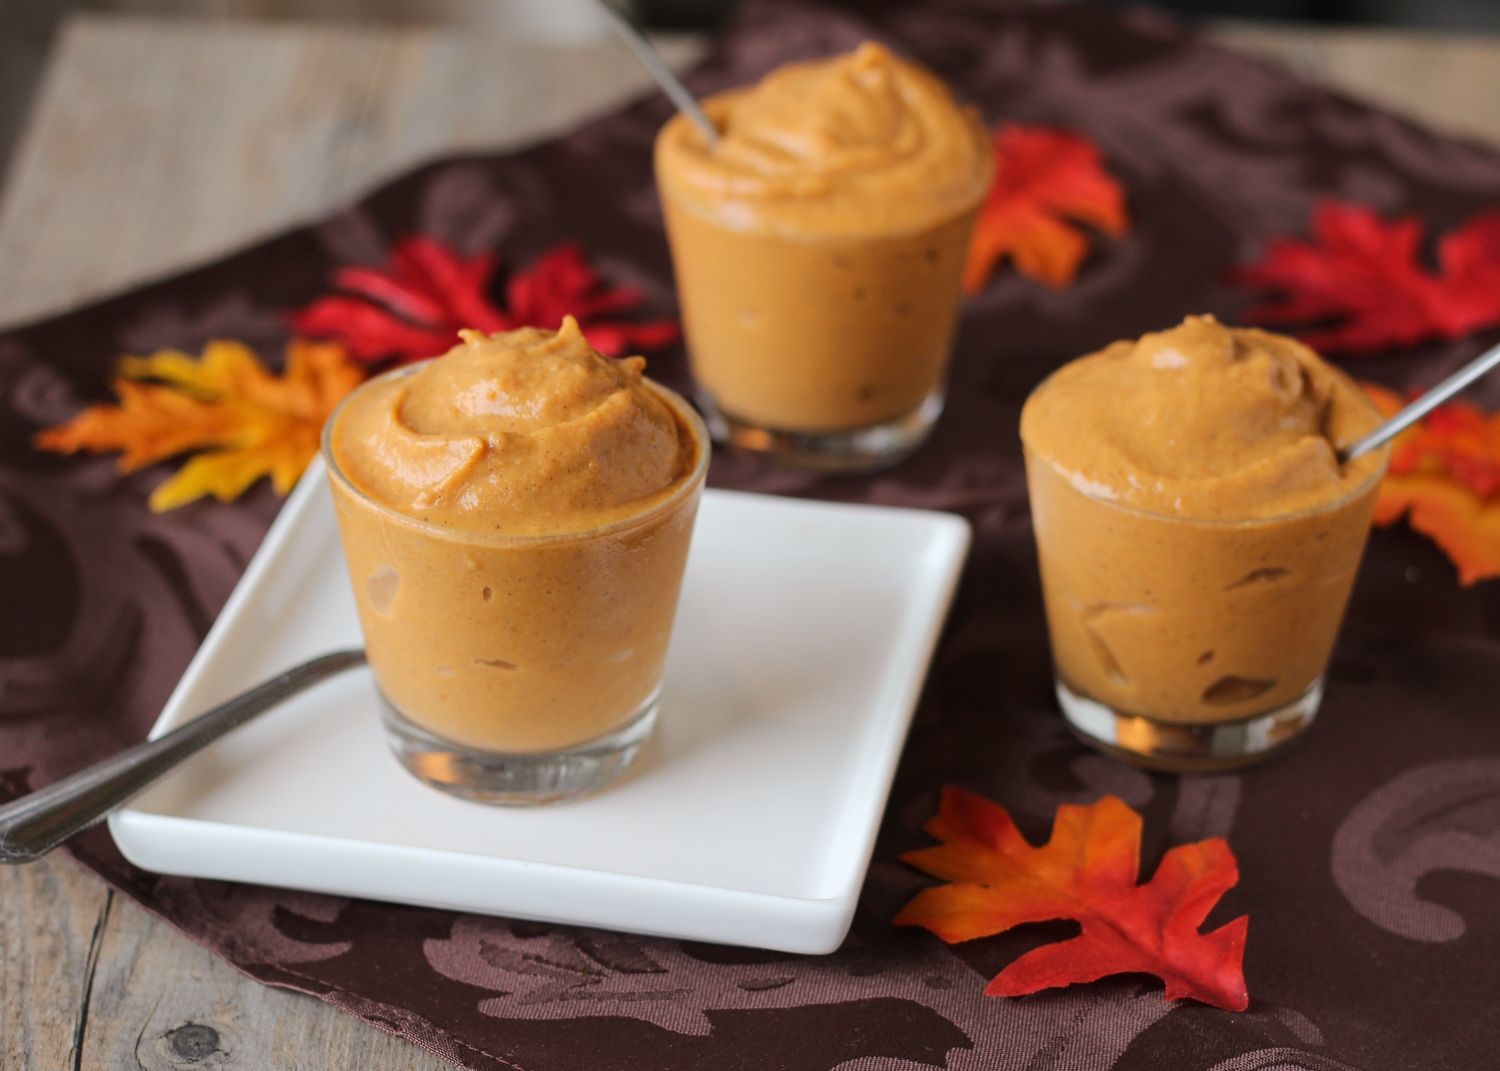
For a topping, I made a batch of coconut whipped cream, which is a great vegan alternative to traditional whipped cream!  To make it, you basically put a can of coconut milk in the fridge for a while so that the cream separates from the liquid, then you scoop out the coconut cream and whip it in a chilled bowl until it's fluffy.  It doesn't need much sweetener but I added a tiny bit of powdered sugar and vanilla extract to mine.  It tastes amazing and the slight coconut flavour really complements pumpkin pie!  Oh She Glows has a great tutorial for making whipped cream if you've never tried it before!

Coconut whipped cream

I was worried that either the taste or texture of this pie wouldn't turn out right but it turned out so much better than I'd even hoped!  It had a really nice bold pumpkin flavour from all the spices and addition of molasses (you can cut back if you don't like a lot of spice though!), the filling set perfectly and was smooth and creamy, and the crust sort of softened but stayed firm.  I won't say that it tastes exactly the same as a traditional pumpkin pie, but we both loved this and will likely be making it again soon!

With (Canadian) Thanksgiving quickly approaching, this would be a great dessert if you'll have any vegans at the table, or just want a lighter option after a big meal!

Healthy vegan pumpkin pie

Vegan Pumpkin Pie

Recipe inspired by and adapted from several sources, including Vegetarian Times, Minimalist Baker, and Oh She Glows

Makes one 9-inch pie

Ingredients:

For the Crust:
10 sheets of low-fat graham crackers (about 1.5 cups of crumbs)
1 teaspoon cinnamon
1/4 cup melted organic coconut oil

For the Filling:
2 cups canned pumpkin puree (not pumpkin pie filling)
1 cup unsweetened almond milk
3-1/2 tablespoons cornstarch
1/3 cup brown sugar
1/4 cup pure maple syrup
1 tablespoon molasses
1 teaspoon vanilla extract
1-1/2 teaspoons cinnamon
1/2 teaspoon ground ginger
1/4 teaspoon nutmeg
1/4 teaspoon sea salt

Directions:

Preheat oven to 350°F.  Lightly spray a 9” pie pan with non-stick cooking spray.

Pulse graham crackers in a food processor until they form fine crumbs. Transfer to a bowl and mix in the cinnamon with a whisk or a fork.  Add the melted coconut oil and mix together (I use a fork) until well combined.  Pour crumb mixture into the prepared pie pan and press evenly across the bottom and up the sides to form a pie crust.  Bake in preheated oven for about 7 minutes, then remove.  Leave oven on.

For the filling, mix all ingredients together in a large bowl, whisking together until just combined.  You could do the wet and dry ingredients separately if you like but I saved bowls and just mixed everything together in one.  Pour filling over the baked pie crust, return to oven, and bake for 55-60 minutes, until set. 

Remove from oven and let cool at room temperature for at least an hour, then transfer to refrigerator and let cool for 3-4 hours or overnight before slicing and serving.

Serve with coconut whipped cream, if desired.  Follow the link for instructions on making coconut whipped cream; note that your coconut milk will need to be in the fridge the day before so plan ahead!


April 15, 2014

Healthy No-Sugar Carrot Cake Date Balls

Healthy No-Sugar Carrot Cake Date Balls

With Easter rapidly approaching (how is it this weekend already?!), I spent some time this past weekend trying to come up with a new Easter recipe to share.  Last year I stuck with an Easter egg theme with egg-shaped breakfast naan pizzas and Easter egg cheesecake bars, but this year I wanted to do something with carrot cake, which I consider a pretty standard Easter dessert and which is one of my favourite types of cake!

It seems like a carrot cake version of everything already exists though, like carrot cake oatmeal, carrot cake banana bread, carrot cake pancakes, carrot cake cheesecake, carrot cake whoopie pies, carrot cake rice krispie treats, etc., all of which look absolutely amazing, of course.  I haven't seen too many carrot cake versions of healthy no-bake balls, though, and after recently trying these oatmeal cinnamon truffles which I loved, I decided to make a carrot cake version!

Healthy No-Sugar Carrot Cake Date Balls

These are super quick and easy to make, with oats, dates, and walnuts as the main ingredients, along with shredded carrots (obviously needed for carrot cake, and with a bonus of added nutrients!), and vanilla, cinnamon, nutmeg, ginger, and salt to bring out the carrot cake flavour.

The end result is a sweet treat with a taste that really reminded me of carrot cake, even though dates are the predominant flavour.  I couldn't really taste the carrots, but I realized carrot cake doesn't taste like carrots either; you could always add more and adjust the ratio of other ingredients if you like though.  These would be a great sugar-free snack to have around this coming weekend to help balance out all the chocolate!

Healthy No-Sugar Carrot Cake Date Balls

No-Bake Healthy Carrot Cake Date Balls

Makes about 18 balls

Ingredients:

1-1/2 cups large-flake rolled oats
1/2 cup chopped walnuts
1/4 teaspoon sea salt
1/2 teaspoon cinnamon
1/4 teaspoon nutmeg
1/4 teaspoon ground ginger
12 medjool dates, pits removed, chopped into pieces
1 cup grated carrot (about 2 large carrots)
1/2 teaspoon pure vanilla extract

Optional: raisins, unsweetened shredded coconut

Directions:

Add oats, walnuts, salt, cinnamon, nutmeg, and ginger to the large bowl of a food processor.  Process until the mixture resembles fine crumbs.  Remove from food processor and set aside in a bowl.

Add dates to the food processor and mix until smooth.  I added 1 tablespoon of water to help them blend.  Add the carrots, vanilla, and oat mixture back to the food processor and pulse everything until combined and sticking together.  Taste mixture and add more spices or carrots if desired.

Remove mixture from food processor and roll into balls about 1” in diameter.  Keep covered in refrigerator and let refrigerate for at least a couple hours before eating for better texture.

Options:  If desired, you can add raisins to the balls to resemble carrot cake more; the date taste is already strong and sweet though so I didn’t feel it necessary.  Another option is to roll the balls in shredded coconut if you like; I’m not a huge fan of shredded coconut so I didn’t do this with all of mine but it sticks easily to the balls if you wish to roll them in it.

December 30, 2013

Gingerbread Oreo Cheesecake Bars

Gingerbread Oreo Cheesecake Bars

I hope you all had a wonderful Christmas and happy holidays!

I've been having a very restful and quiet holiday break so far, except for the fact that I came down with the flu a couple of days before Christmas, and though the fever and aches are now gone, I've been left with a nagging cough that won't seem to go away.  The good news is that it has forced me to take it easy so I've been doing a lot of relaxing!  Being sick put a little bit of a damper on Christmas but I still had a fantastic day with my family, who spoiled me as usual, and I got out of any cooking duties so I just got to enjoy all the fabulous food made by everyone else!

Gingerbread Oreo Cheesecake Bars

Another good thing about being sick is that I haven't overindulged on food and drink like I usually do this time of year, mostly sticking to a ton of water and tea in the evenings.  The one thing I probably enjoyed more than my fair share of though was these delicious cheesecake bars that I luckily made a few days before I got sick.

These were inspired by the limited edition gingerbread flavoured Oreos that I couldn't resist picking up this year.  I immediately decided to use them in cheesecake bars similar to the candy cane ones I made last year, but with molasses and gingerbread spices instead of candy canes and peppermint extract for flavouring.

Gingerbread Oreo Cheesecake Bars

I wasn't originally going to share these because I ran out of time before Christmas to post them, but I got so many compliments and enjoyed them so much that I thought I should share them now anyways.  I'm sure most of you are already past the gingerbread stage and perhaps not wanting to go anywhere near dessert right now, so if that's the case just be sure to save this recipe for next year!  Or maybe you can find some gingerbread Oreos on clearance right now, in which case you should make a double batch of these!

Gingerbread Oreo Cheesecake Bars

Gingerbread Oreo Cheesecake Bars


Makes one 8x8 pan, about 16-20 bars

Ingredients:

For the Crust:
23 Gingerbread Oreos
1/2 teaspoon cinnamon
2 tablespoons unsalted butter, melted

For the Filling:
16 oz (2 bricks) cream cheese, softened
1/3 cup sugar
1 large egg + 1 egg yolk, lightly beaten
1/4 cup + 2 tablespoons sour cream, at room temperature
1 teaspoon vanilla extract
2 tablespoons molasses
1 teaspoon cinnamon
1/2 teaspoon ground ginger
1/4 teaspoon nutmeg
1/4 teaspoon cloves
12 Gingerbread Oreos, roughly chopped

*Note: You will need to buy two boxes of gingerbread Oreos to make this recipe, though you won't use the entire two boxes

Directions

Preheat oven to 325°F.  Line an 8x8-inch baking dish with aluminum foil, leaving an overhang around the edges to easily lift the bars out of the pan later.   Lightly spray the foil with non-stick cooking spray.

To make the crust, finely crush the Oreos in a food processor.  Add the cinnamon and melted butter and pulse until cookie crumbs are moistened.  Pour mixture into the prepared pan and press crumbs into an even layer over the bottom of the pan.  Bake in preheated oven for 10 minutes, then set aside.  Leave the oven on.

To make the filling, beat the cream cheese in the bowl of an electric mixer on medium-high until smooth, about 2 minutes.  Mix in the sugar until well combined. Add egg and egg yolk one at a time, mixing just until each is combined. Mix in the sour cream, vanilla extract, and molasses until just combined.  Mix in the spices until just combined.  Stir in the chopped Oreos.

Pour the cheesecake batter over the baked crust, smoothing the top with a spatula.  Bake for 40-45 minutes, until the cheesecake is set around the edges but slightly jiggles in the middle.  Sprinkle gingerbread quins on top for decoration, if desired.  Transfer to a wire rack to cool at room temperature for about one to two hours, then refrigerate until well chilled, at least 3 hours (I chilled mine overnight).

To cut the bars, pull the entire cheesecake out of the pan by lifting the foil edges, then peel away foil and slice into bars.  Keep refrigerated until ready to serve.

December 24, 2013

Gingerbread Chocolate Chip Cookies

Gingerbread Chocolate Chip Cookies

I'll have to make this post short as I'm not feeling well but still have to do all my Christmas wrapping and last minute preparations before the big day tomorrow (which hopefully I'll be feeling better for)!  I just wanted to squeeze in one last Christmas recipe though as these cookies were probably my favourite thing I've made this season!

Gingerbread Chocolate Chip Cookies

These cookies are inspired by a recipe I saw on Baked By Rachel, which I then went and changed almost everything about so I'm sure they're nothing like the original, but I absolutely loved my own version!  They're puffy but chewy, with a nice strong gingerbread flavour and just the right amount of sweetness from the chocolate chips.  I think these will be a new holiday favourite of mine!

Gingerbread Chocolate Chip Cookies

I'd also like to take this time to wish everyone the very best of the holiday season, with lots of rest and relaxation, cheer and good times spent with family and friends, and of course, delicious food!

Gingerbread Chocolate Chip Cookies

Gingerbread Chocolate Chip Cookies

Inspired by Baked By Rachel

Makes about 2 dozen cookies

Ingredients:

1/2 cup + 2 tablespoons unsalted butter, softened
1/4 cup sugar
1/4 cup dark brown sugar
1 large egg
1/4 cup molasses
1 teaspoon vanilla extract
2 cups all-purpose flour
1/2 teaspoon salt
1 teaspoon cinnamon
1/2 teaspoon nutmeg
1-1/2 teaspoons ground ginger
1/2 teaspoon cloves
1 tablespoon cocoa powder
3/4 teaspoon baking powder
1/2 teaspoon baking soda
3/4 cup semi-sweet chocolate chips

Directions:

In a large bowl, use a hand mixer or electric mixer to cream the butter and sugars until light and fluffy, about 2-3 minutes.  Add the egg and mix until combined.  Add molasses and vanilla and mix until combined.

In a separate bowl, whisk together the flour, salt, cinnamon, nutmeg, ginger, cloves, cocoa powder, baking powder, and baking soda.  Add the dry ingredients to the wet ingredients in 3-4 additions, mixing on low speed until each addition is just combined.  Stir in chocolate chips.  Cover dough and refrigerate for several hours until chilled through – this is important if you want the cookies to stay thick and puffy.  I chilled mine for about 3 hours.

Preheat oven to 350°F.  Scoop dough by about 1.5 tablespoons full and drop onto a parchment-lined baking sheet about 1 inch apart.  Because the dough will still be quite firm, I pressed the cookies slightly at the top to flatten them slightly.  Bake for 11-12 minutes.  Allow to rest on cookie sheet for 1-3 minutes, then transfer to a wire cooling rack to cool completely.  Store covered in a container.

November 08, 2013

Healthy Pumpkin Mousse

Healthy Pumpkin Tofu Mousse

It seems like everyone has already moved on from pumpkin flavoured everything to gingerbread everything, myself included – I love Starbucks gingerbread lattes even more than pumpkin spice lattes and now that they have a molasses drizzle on them I can’t resist getting one whenever I go near a Starbucks! 

And now that there’s starting to be a little snow in the air and on the ground, it’s hard to resist getting in the holiday spirit already. I thought it was a little early still but the Santa Claus parade in my hometown is tomorrow, so I guess not!

Healthy Pumpkin Tofu Mousse

I was just reading on Averie Cooks yesterday (in her post for these amazing looking gingerbread molasses chocolate chip bars) how bloggers so predictably go from pumpkin to gingerbread to peppermint every year, which is so true.  But part of what makes people go crazy for these flavours is how briefly we get to use them each year, so we have to make the most of them while we can!

Hopefully not everyone is ready to completely abandon pumpkin yet though, as I still have one more pumpkin recipe to share!

Healthy Pumpkin Tofu Mousse

Pumpkin tofu mousse is probably not anything new to a lot of you, but this was the first time I’d tried it and it was so much better than I’d expected that I’ve already made it a few times this year! It’s basically like pumpkin pie in mousse/pudding form with the added benefit of being pretty healthy!  It's actually not as fluffy as regular mousse, but it's lighter than pudding so I wasn't sure what to call it - feel free to call it whatever you like!

This mousse or pudding or whatever you want to call it is super easy to make – just blend together some pumpkin puree, silken tofu (you won’t taste it at all but it adds protein and makes everything light and fluffy!), a bit of pure maple syrup for sweetness, and some vanilla and pumpkin pie spices. I also added a little Greek yogurt to mine for a little extra flavour and thickness, but if you prefer to keep this vegan you could leave it out.

Hope you have room for a little more pumpkin in you, but if not, I will probably be moving on to holiday flavours pretty soon!

Healthy Pumpkin Tofu Mousse


Pumpkin Tofu "Mousse"

Adapted from several sources, including The Smart Kitchen and Baked In

Makes around 4 small servings (but serving size for something like this can vary)

Ingredients:

8oz silken tofu (usually about half a package), drained of all excess water (do your best to get as much water out as you can)
1 3/4 cup pumpkin puree (not pumpkin pie filling) – or one 15oz can
1/4 cup plain or vanilla low fat Greek yogurt
1/2 teaspoon vanilla extract
1/4 cup + 2 tablespoons pure maple syrup
1/2 teaspoon cinnamon
1/4 teaspoon ground ginger
1/4 teaspoon nutmeg
1/8 teaspoon cloves
1/8 teaspoon salt

Directions:

Add tofu and pumpkin to the large bowl of a food processor and process until smooth.  Add all remaining ingredients (leave the 2 tablespoons of maple syrup out for now), and process until well combined.  Taste and add as much of the remaining 2 tablespoons of maple syrup as desired to reach desired level of sweetness.  If desired, you could replace some of the maple syrup with brown sugar.  Adjust any other spices as needed and according to preference.

Refrigerate for at least 1-2 hours before serving.  Keep refrigerated.  Water from the tofu may separate after a couple of days, just drain it or stir it back in before serving.

December 11, 2012

Rudolph Gingerbread Cookies

Rudolph Gingerbread Cookies

Our department had our holiday cookie swap last Friday, and as usual, I made two types of cookies because I love experimenting with new holiday recipes!  Last year I brought these hidden candy cane kiss cookies and eggnog cake cookies, both of which I loved, but I wanted to try something different this year.  So I decided to make one cookie that was simple but tasted good (recipe to come later), and one that would stand out more for having a ‘cute factor’, like  the popular melting snowmen cookies from last year’s cookie swap (Google it, they’re adorable!).

Rudolph Gingerbread Cookies

When I saw these peanut butter reindeer cookies, I knew I’d found my cute factor!  But since I like to keep things nut-free when I’m bringing them somewhere for lots of people to share, I decided to make them into gingerbread cookies instead – not only are they nut-free but they’re also more festive and reindeer-coloured!

I used Bakergirl’s gingerbread cookie recipe, cut the dough into ovals for the reindeer heads, then stuck some pretzels on for antlers, chocolate chips for eyes, and red Mike & Ike’s for the nose (though I’ve heard that Mike and Ike have recently split up, so I’m not sure who the red colour is supposed to represent, if it even works that way – mine just came from a bulk bin where all the Mike & Ikes still live happily together).

Rudolph Gingerbread Cookies

These turned out to be so adorable and got lots of compliments!  I also really liked the gingerbread recipe – while they were a bit hard coming out of the oven, they softened up and stayed soft for days in a container.  True that the pretzels and candy don’t exactly go with the taste of gingerbread, but you can pick them off and eat them separately if you like, and I don’t think kids would mind the mesh of flavours!  If you’re very concerned though, you could always replace the red nose with an m&m – I just liked the 3D effect of the candy! You could also try using chocolate-covered pretzels, they'll just be a little more expensive.

Rudolph Gingerbread Cookies

Rudolph Gingerbread Cookies

Adapted from Bakergirl (reindeer cookie idea here, gingerbread cookie recipe here)

Makes around 35 cookies

Ingredients:

1/4 cup + 2 tablespoons unsalted butter, at room temperature
1/2 cup packed dark brown sugar
1/2 a large egg (whisk one large egg in a bowl then use only half)
1/4 cup + 2 tablespoons molasses
2 cups all-purpose flour
3/4 teaspoon baking soda
1 teaspoon ground ginger
1/2 teaspoon cinnamon
1/4 teaspoon nutmeg
1/8 teaspoon ground cloves
1/8 teaspoon salt
Around 40 small pretzel twists (this is only a few handfuls from a bag)
Around 70 chocolate chips (again this is only about a handful from a bag)
Around 20 red Mike & Ike candies (I got these from a bulk bin)

Directions:

Cream together the butter and sugar in the bowl of an electric mixer, on medium speed, until light and fluffy.  Add the egg and molasses (tip: coat your measuring cup/spoon with non-stick oil spray before measuring the molasses so it pours out easier) and mix until combined.  In a separate bowl, whisk together the flour, baking soda, ginger, cinnamon, nutmeg, cloves, and salt.  Add the dry ingredients to the mixing bowl in small additions, mixing on low speed until incorporated.  Cover the dough and refrigerate for 2 hours.

Preheat oven to 325°F.

On a lightly floured surface, roll the dough into 1/8-inch thickness.  Don’t worry if the dough’s a little crumbly, you may need to work the dough with your hands for a bit first to get it to roll out smoothly.  Cut out 2-inch ovals with a cookie cutter (I just bent my circle cutter slightly to form an oval).  Place oval cookies two inches apart on a parchment-lined baking sheet.

Break pretzels in half to form antlers, and cut Mike & Ike’s in half so each candy makes two noses.  Press two antler halves onto the top of each cookie oval to form the antlers.  Press two chocolate chips pointy tip facing down into the cookies to form the eyes, and press one Mike & Ike ‘nose’ below the eyes. 

Bake cookies for 7-9 minutes or until edges are firm.  Let cool on baking sheet for a couple minutes then transfer to a wire rack to cool completely.

Reroll remaining scraps of dough and continue cutting out circles and baking cookies until the dough is used up.  I had to bake mine in 3 rounds.

Store cookies in an airtight container.  They may be hard after baking but they will soften up in the container. 
---------------------------------------------------------------------------------------------------------------------

And just so you don't think I only chose the cutest cookies for the pictures (although I did try to do that), here are my phone pics of all the cookies right out of the oven (except for my last batch of 6) - they were all cute and each slightly different!

Rudolph Gingerbread Cookies

September 18, 2012

Autumn Fruit Ginger Crumble Pie

Autumn Fruit Ginger Crumble Pie

If given the choice between pie and cake, I’d choose pie every time.  Buttery pie dough wrapped around a creamy or fruity filling is just so much more appealing to me than cake and icing (not that I don’t love a good cake!).   Surprisingly though, there are very few pie recipes on my blog - apart from mini pies and a frozen peanut butter pie, both of which aren’t really the type of thing that comes to mind when you hear the word ‘pie’.  I guess it’s because I usually make cake when there’s a celebration, and if I’m making a dessert just for fun, I usually make cookies or bars because they’re easier to transport and share with others.  Pie just doesn’t seem to fit in anywhere!

But when I saw the autumn fruit pie with ginger crumble topping in this fall’s Food & Drink magazine (a wonderful magazine that’s free at the LCBO, which is where us Ontarians go to buy our alcohol), I knew I had to make it.  I love apple pie, but I also love unusual twists on classic desserts, so I loved that this version added pears and ginger!

Autumn Fruit Ginger Crumble Pie

I also liked that this pie was deep-dish, so I went out and bought a deep dish pie pan just for it.  But then on the day I wanted to make it, I already had a ton of stuff to do so I decided to use a storebought frozen pie crust instead.  I chose one that specifically said ‘deep dish pie crust’ on the box, but when I opened it up at home, it looked the exact same as a regular pie crust.  When I placed it in my deep dish pie pan to compare the size, it only went halfway up the sides of the pan.   Why do they call it deep dish if it’s not deep at all!?

Since at this point it was too late to make my own dough, I ended up cutting apart and piecing together two of the so-called deep dish pie crusts (thankfully there are two in a box) into one true deep-dish crust, and placing it in my pan.  At least the pan I bought came in handy!  So if you’re worried about the same thing happening to you, I’d recommend just making your own pie dough – it’s really not that hard and probably would have taken me less time than it did to piece together the two frozen ones!

Autumn Fruit Ginger Crumble Pie

Despite that little setback, this pie turned out wonderfully.  The pears and ginger add a nice little twist to an apple pie without taking it too far from the classic apple pie flavour we all love.  I was a little worried that the ginger would be overpowering, but it was actually quite subtle.  I almost would have preferred a stronger ginger flavour, but others thought that it was just right. 

Based on how quickly this pie disappeared (and everyone complained about only getting one piece, myself included), I think I need to start making pies more often!

Autumn Fruit Ginger Crumble Pie

Autumn Fruit Ginger Crumble Pie

Slightly adapted from Food & Drink, Autumn 2012 (issue not yet online)

Makes 1 deep dish pie

Ingredients:

1 deep dish 9-inch pie crust
3 cups peeled and sliced cooking apples (about 2-3 apples)
3 cups peeled and sliced just-ripe pears (about 3 pears)
3 tablespoons fresh lemon juice
1/3 cup packed brown sugar
1/4 cup all-purpose flour
1/2 teaspoon ground ginger
1/2 teaspoon cinnamon
1/4 teaspoon nutmeg

For the Crumble Topping:
3/4 cup rolled oats
1/4 cup all-purpose flour
3 tablespoons packed brown sugar
2 tablespoons finely chopped crystallized ginger
1/3 cup unsalted butter, cut into small pieces

Directions:

Preheat oven to 450°F.  If using a storebought deep dish frozen pie dough, allow to thaw 10-15 minutes before you’re ready to fill and bake the pie.*  Otherwise, you can prepare your favourite pie dough recipe, roll it into a deep-dish pie pan, and chill while preparing the filling.

Place apples, pears, and lemon juice in a large bowl.  Add the brown sugar, flour, ginger, cinnamon, and nutmeg, and toss everything together until fruit is well coated.  Transfer filling and any juices to the prepared pie shell, spreading it evenly and packing gently. 

Prepare the crumble by mixing oats, flour, brown sugar, and ginger in medium bowl, and cutting in the butter with a pastry cutter or fork until the mixture clumps together.  Sprinkle crumble over the fruit.

Place pie on a baking pan to catch any drippings and bake in lower third of oven for 15 minutes or until pastry edge looks cooked.  At this point, I wrapped a thin strip of aluminum foil around the edge of my pie to prevent the crust from burning.  Reduce oven heat to 375°F and bake for another 50 minutes or until juices are thick and bubbling and topping is brown.  Remove from oven and let cool completely before slicing.

This pie is great at room temperature, but I preferred it warmed up.

*Note: I bought a Tenderflake deep dish pie crust, but it was not as deep as a standard deep dish pie pan.  I ended up transferring the dough to a deep dish pie pan, then cutting dough from the second crust in the box and pinching it together with the other dough so that I had enough crust to fill the pan.

April 23, 2012

Broiled Asparagus and Spiced Mandarins

orange asparagus

I have been very patiently awaiting the start of asparagus season here in Ontario, as local asparagus is so much better than the often already wilted grocery store variety.  But when seemingly every other blogger I subscribe to has been posting asparagus recipes for almost a month now (apparently asparagus season begins much earlier down south), it's so hard to resist joining in!  I finally caved the other week and bought some imported asparagus to have for lunch, but since local asparagus should be ready this week (and since others may not even have their local asparagus for much longer), I thought now was a good time to share this recipe!

When I make asparagus as a side dish, I pretty much always just drizzle it with a little olive oil, generously season it with salt and pepper, then roast it in the oven - simple and delicious.  But a few weeks ago I saw a recipe for asparagus with broiled spiced tangerines in Sobey's Inspired magazine and just couldn't get it out of my head, so I decided to be a little more adventurous one day and give it a try with some mandarins I had leftover from this mandarin chicken salad.
 

The recipe is still quite simple - rub a mixture of cinnamon, nutmeg, ginger, and honey on some sliced mandarins, broil them with the asparagus, then serve them together along with a little extra orange zest.  You can then squeeze the orange juice over the asparagus so it sits in a delicious puddle of warm orange juice and spices (note that these pictures were taken before doing that).  Even though I didn't make this with fresh, local asparagus, it was still so tasty!

I tried eating one of the broiled mandarin slices on its own and then devoured almost all the rest of them the same way - they're so good!  I love how the warm spices complement the sweet mandarins in such an interesting way that actually reminded me a lot of Christmas flavours!  I supposed it's a strange combination to pair Christmas spices with spring asparagus, but it's actually perfect for a rainy Spring day when you want something comforting but fresh at the same time. 

Give this a try if you're looking for a different way to serve your asparagus.  If you're already sick of asparagus or are still waiting for local produce, then you should at least try the spiced mandarins as a snack to tide you over while you're waiting!


Broiled Asparagus and Spiced Mandarins

Adapted from Inspired magazine, Spring 2012

Serves about 4 as a side dish

Ingredients:

1 bunch asparagus, ends trimmed
2 mandarin oranges (or tangerines)
1/8 teaspoon cinnamon
1/8 teaspoon nutmeg
1/8 teaspoon ground ginger
1/8 teaspoon salt
1/8 teaspoon pepper
2 teaspoons honey
1/2 tablespoon olive oil
Salt & Pepper

Directions:

Preheat oven to broil.

Bring a large pot of salted water to a boil.  Blanch asparagus for 1 to 2 minutes, depending on thickness.  Transfer asparagus to a bowl of ice water to cool, then remove and pat dry.

Zest one mandarin and set zest aside (you won’t need the rest of the mandarin for this recipe so you can just eat it!).  Cut the second mandarin in half crosswise.  Mix cinnamon, nutmeg, ginger, salt, and pepper in a small bowl, then sprinkle it evenly on the two cut sides of the mandarin.  Spread 1 teaspoon honey on each half, then place them cut-side-up on a foil-lined baking sheet.

Toss asparagus with olive oil and sprinkle with salt and pepper.  Spread in an even layer on the baking sheet with the mandarins.  Broil in top third of oven until honey has caramelized and asparagus is lightly blistered, about 4-5 minutes.

Transfer asparagus to a platter and garnish with the reserved zest.  Slice mandarins into wedges to serve alongside asparagus – they can be squeezed over individual servings (but also taste great eaten on their own!)

December 27, 2011

Masala Hummus

masala hummusI know I post a lot of hummus recipes on here, but I think there's always room for more easy appetizers that can feed (and please!) a crowd, especially with New Year's parties coming up! I actually made this hummus to serve as an appetizer on Christmas and everyone loved it. There was still tons left over so I've been enjoying it over the last couple days as a quick snack or lunch to fuel me through all my Boxing Day shopping!

This was actually my first attempt at a "copycat" recipe, trying to replicate one of my favourite storebought hummuses (is that a word?): PC's masala hummus. I love the infusion of Indian spices into their hummus and the way they're balanced out by the hint of sweetness from the honey. But since hummus is so easy to make at home (provided you have a food processor), I can't justify buying small tubs of it when I can make a much larger batch for much less money myself.

To make my own masala hummus, I incorporated most the ingredients from the ingredient list in amounts that I thought would work, then I tasted, tasted, and tasted some more until I finally reached what I thought to be a close enough match (with agreement from my fellow taste-testers at home). While the final product wasn't a perfect match for the PC brand, I still loved the flavour and creaminess of my version and will happily eat it from now on instead of having to buy it from the store.

If you want to make/serve your own hummus but Indian flavours aren't your thing, try one of my two other favourites: beet hummus and buffalo wing hummus!

masala hummus
Masala Hummus

Recipe by Once Upon a Cutting Board, Inspired by PC's masala hummus

Makes about 2 cups

Ingredients:

1 (19oz) can of chickpeas, drained and rinsed
1/3 cup liquid from the can of chickpeas
3 tablespoons tahini
2 tablespoons fresh lemon juice
1 tablespoon honey
2 tablespoons finely chopped onion
1 clove garlic, minced
1 teaspoon garam masala
1/2 teaspoon turmeric
1/2 teaspoon cumin
1/2 teaspoon ginger powder
3/4 teaspoon salt
2 tablespoons extra virgin olive oil

Directions:

Add all ingredients except for the olive oil into the bowl of a food processor and process until smooth. Add the olive oil to the feed tube and let slowly pour into the bowl as the motor is running, until it's well incorporated. Taste and adjust any seasonings if necessary.

December 22, 2011

Gingerbread Waffles

gingerbread waffles
I guess I’ve been on a bit of a gingerbread breakfast kick lately, starting with the gingerbread crepes, then the gingerbread oatmeal, and now these gingerbread waffles. But I can’t think of a better way to start your day this time of year than filling your kitchen with the warm, spicy scent of gingerbread (and filling your belly with it too!)

I usually never think to make waffles for breakfast because it seems like such a hassle, but provided you have a waffle maker, they’re actually no more difficult than pancakes, and they cook pretty quickly too. These waffles did have quite a few ingredients, but I still had no problem making them on a busy morning, and was happy that they only dirtied a couple bowls. The waffle maker that overflowed on the second batch is another story, but I left that for someone else to clean up :)

gingerbread waffles
These waffles smelled amazing and tasted great too. I increased a couple of the spices a little and still found them to be pretty mild, which would make them great for kids, but if you like stronger gingerbread spices you might want to increase the amounts even more. Next time I think I'll add a little cocoa powder too, because I think a hint of chocolate really brings out gingerbread flavour even more.

These looked very pretty served with a light dusting of icing sugar (as in the picture above), but since waffle holes are meant for filling, feel free to serve them with maple syrup or your favourite sauce. I had some cool whip in the fridge (leftover from the white chocolate candy cane cheesecake I’m still dreaming about) so I mixed some eggnog into it to make a pourable eggnog sauce that was absolutely delicious with the waffles. But if you have more time, you could also try making eggnog whipped cream, or cinnamon syrup.

Hope everyone’s last minute shopping is going well – I finally finished all my Christmas shopping today and it feels fantastic!

gingerbread waffles
Gingerbread Waffles

Adapted from Martha Stewart

Makes 10 waffles

Ingredients:

2 cups all-purpose flour
1/4 cup granulated sugar
1 teaspoon baking powder
1 teaspoon baking soda
3/4 teaspoon salt
2 teaspoons ground cinnamon
1 teaspoon ground ginger
1/4 nutmeg
1/4 teaspoon ground cloves
4 large eggs
6 tablespoons unsalted butter, melted and cooled
1 cup milk
1/2 cup sour cream
1/4 cup molasses

Icing sugar, maple syrup, or eggnog + cool whip for serving, if desired

Directions:

Mix the dry ingredients together in a large bowl (flour, sugar, baking powder, baking soda, salt, cinnamon, ginger, nutmeg, cloves).

Mix the wet ingredients together in a medium bowl (eggs, melted butter, milk, sour cream, molasses).

Add the wet ingredients to the dry ingredients and mix until just incorporated (do not overmix).
Heat a waffle iron and cook batter according to manufacturer’s directions. Serve warm, topped with icing sugar, maple syrup, cinnamon, or other desired topping.

Note: To make the sauce pictured, I just scooped some cool whip into a bowl and poured a few tablespoons of eggnog in, then stirred until it formed a smooth sauce. I didn't measure anything, so just go with whatever amounts look and taste good to you!

gingerbread waffles

Ingredient Index

Related Posts Plugin for WordPress, Blogger...