Showing posts with label graham cracker crumbs. Show all posts

July 25, 2013

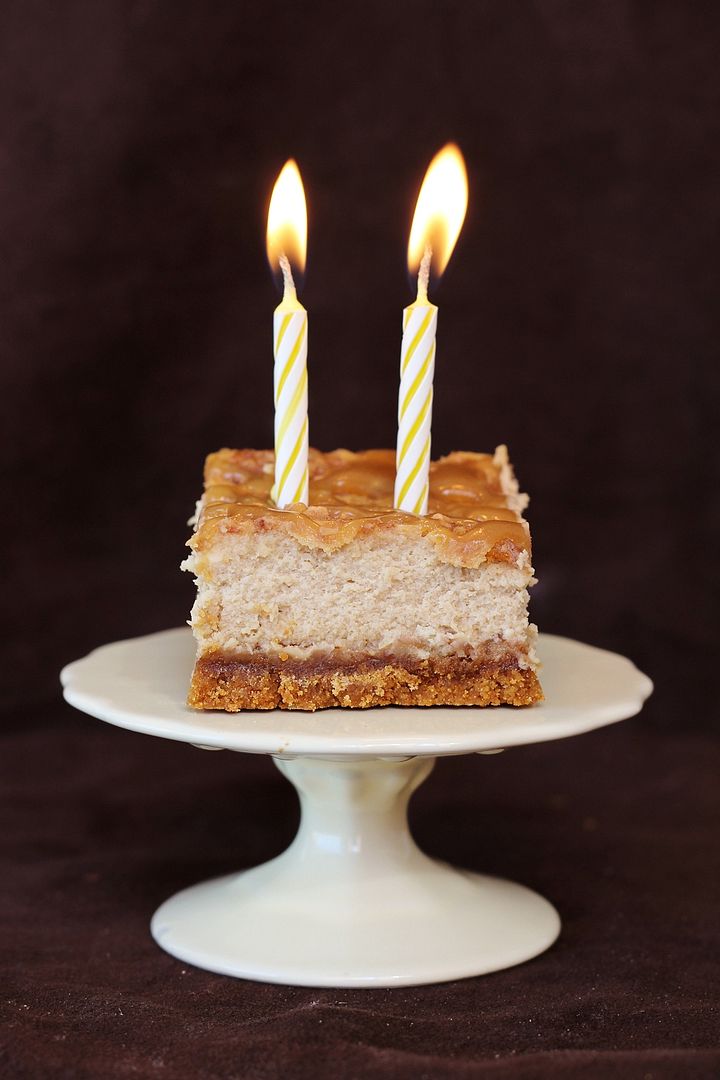
Caramel Latte Cheesecake Squares for my 2nd Blogiversary (+ a Giveaway!)

Caramel Latte Cheesecake Squares

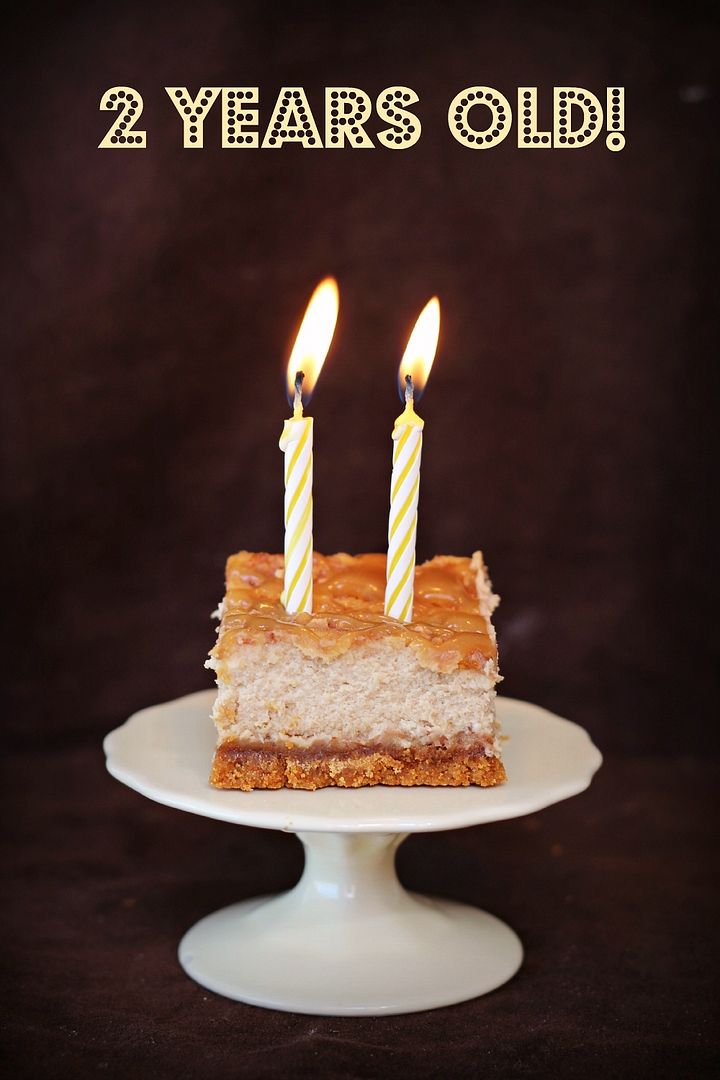
It’s my second blogiversary!  Well, technically it was yesterday, but due to a minor disaster with my planned dessert and my subsequent freak out, I’m celebrating a day late.

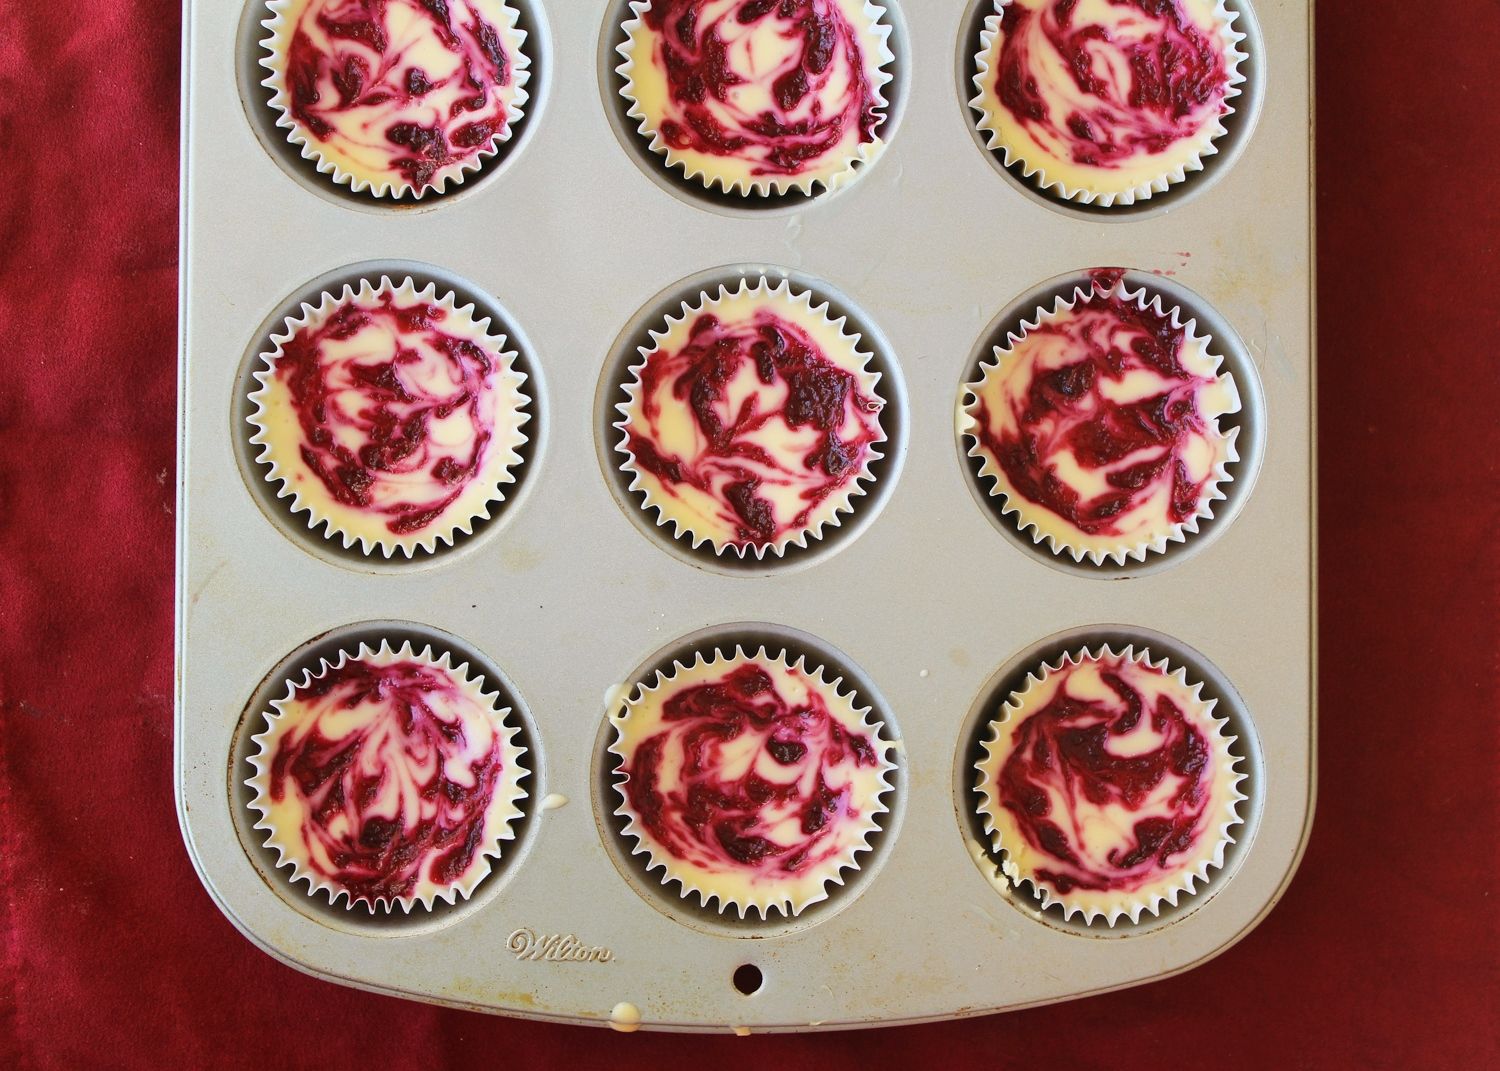
I spent a long time trying to choose the perfect dessert for a two year anniversary/birthday.  I wanted something cupcake-like because I feel like cupcakes are worthy of a celebration, but I had a hard time thinking of a recipe idea considering I’m actually not the biggest cupcake fan.  So when I remembered these raspberry swirl cheesecake cupcakes based on a Martha Stewart recipe I thought I’d found the perfect solution; mini cheesecakes baked in a cupcake pan – perfect!
cherry swirl cheesecakes

I decided to use a chocolate crust and a cherry swirl instead of raspberry, so I went out and spent a lot of money on cream cheese (cream cheese is expensive here – almost $4.50 each if you can’t get it on sale) and cherries, and went to work making my little cheesecakes Tuesday night.

They looked beautiful coming out of the oven, but when I took them out of the fridge Wednesday morning, I discovered that they were still mushy with an almost pudding-like texture (see picture below). I’m not quite sure what went wrong, but I suspect it may have had to do with the fact that I was making these late at night and somehow got it in my head that halving a recipe for 32 cheesecakes meant I should make 12. Don’t judge!
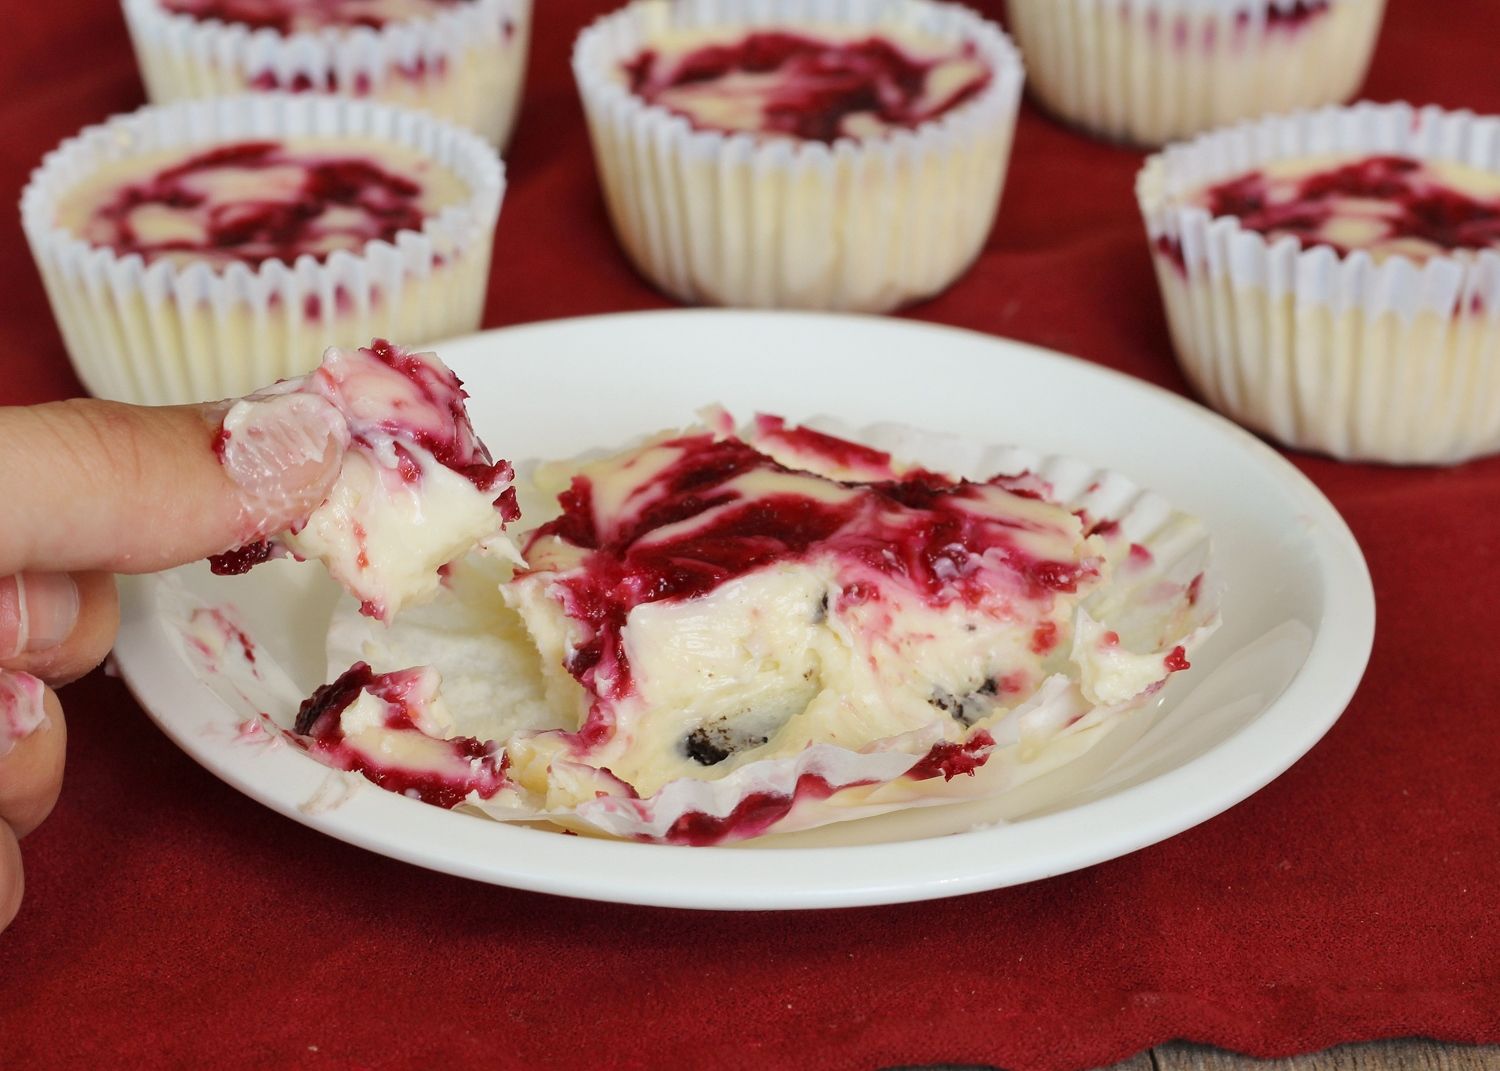
failed cheesecakes

I was so sad to not only have wasted my time and money, but that I wouldn’t have a dessert ready for my blogiversary. I considered just skipping the celebration because I’ve been super busy with school this week anyway, but I thought about it and realized that if there’s one thing that the last two years of blogging have taught me, it’s that things won’t always go as planned, but instead of giving up or getting upset, you just have to keep moving forward and things will often turn out just as well if not better (and you usually learn something along the way too).
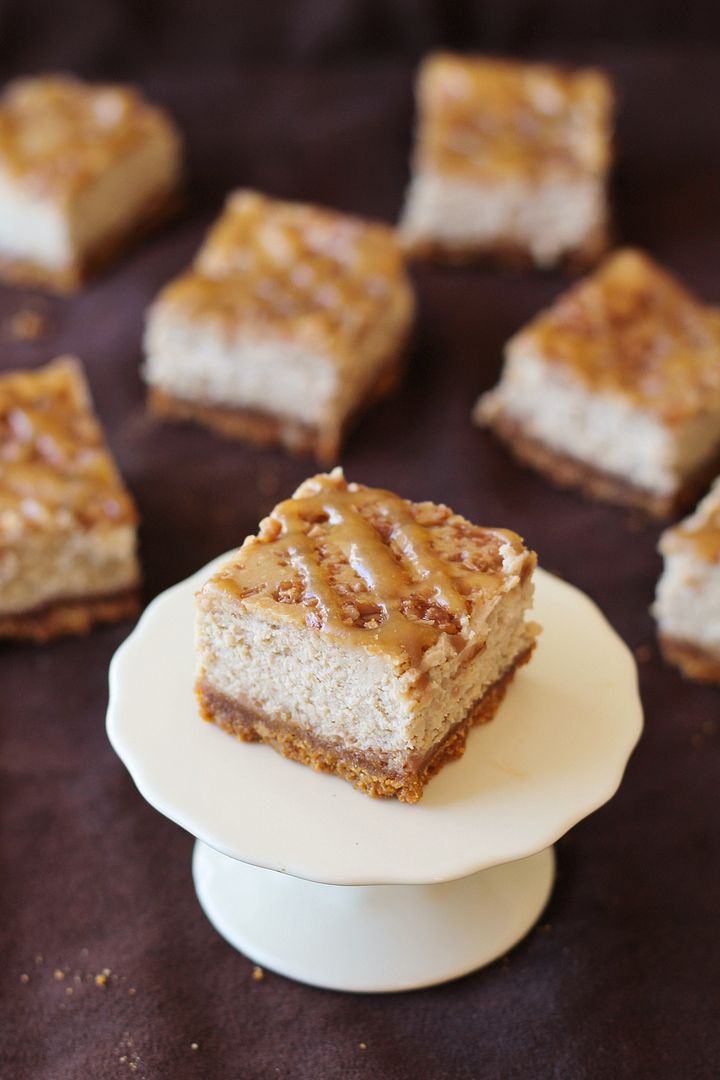
Caramel Latte Cheesecake Squares

If I gave up every time a recipe didn’t work out the first time; if I worried too much about losing readers every time I was too busy to share a post one week; if I cried every time an anonymous person left me a mean comment; if I criticized myself every time I compared myself to bigger and prettier blogs; then I would have quit a long time ago.

The truth is I love my little space I’ve built on the internet, I love having a motivation to try new things in the kitchen every week, I love the warm and friendly comments I receive from my amazing readers, and any of the failures and criticisms I’ve experienced along the way have all helped me to learn and grow.
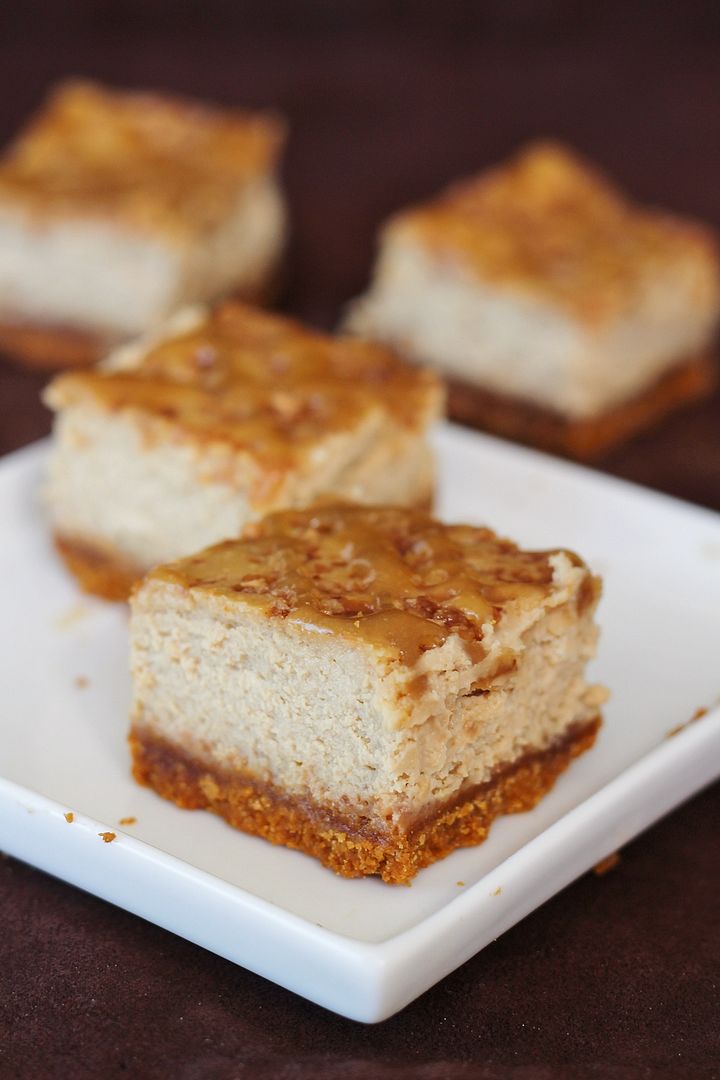
Caramel Latte Cheesecake Squares

So I picked myself up and went for a new dessert. Still cheesecake-themed, but using a recipe I know works as a base this time, and going with new flavours that I know I love - caramel and coffee!

These creamy cheesecake bars have a standard graham cracker crust, but with toffee bits melted over the crust and sprinkled on top of the cheesecake, espresso mixed into the cheesecake, and a drizzle of caramel sauce overtop, giving them a lovely caramel latte flavour.  I'm so, so glad I pushed forward and made these because they may be one of my new favourite cheesecake bars!
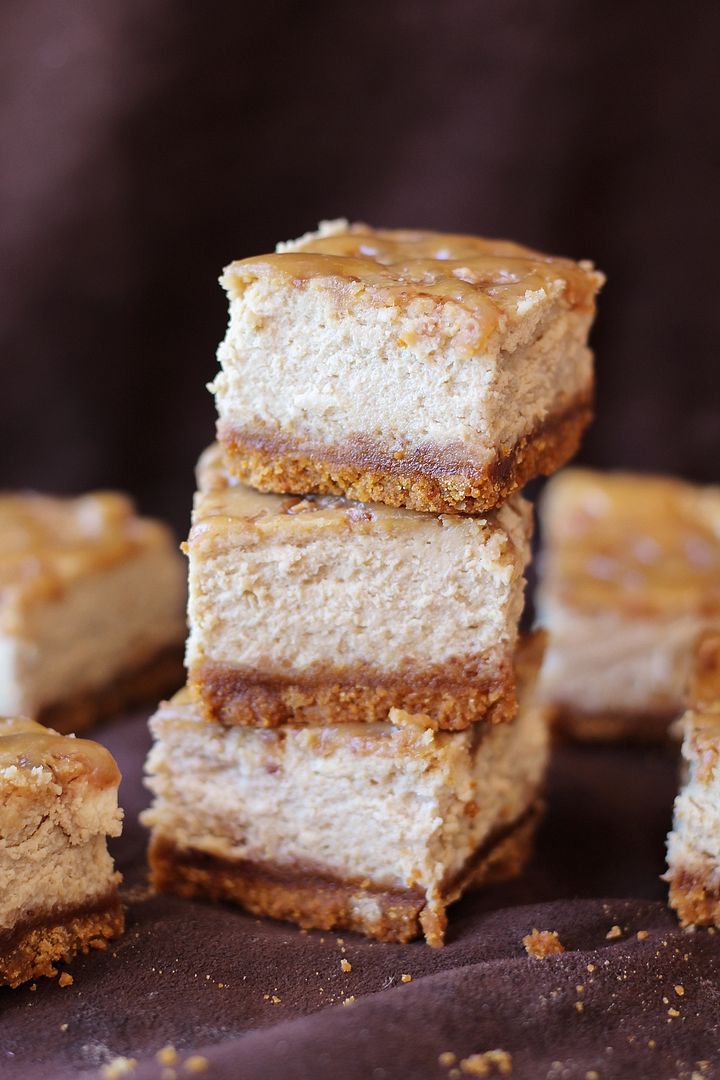
Caramel Latte Cheesecake Squares

And what goes better with caramel latte cheesecake than a caramel latte or frappuccino – or any of your other favourite Starbucks drinks! To celebrate my blogiversary and give back to my loyal readers in a small way, I’m giving away a $30 gift card to one of my favourite places in the world, Starbucks!

I’m trying something new with this giveaway and using Rafflecopter, which many of you are likely familiar with, in an attempt to make things easier on all of us. Just use the widget below to enter and let me know if you have any problems - Canada or US entries only please.  The giveaway will close Monday July 29th, 2013, at midnight EST and I'll contact the winner soon after that, so be sure to use a valid email address/Facebook account. The e-gift card will be sent by email, so please make sure you have a working email account and access to a printer if you win!
(the rafflecopter will load immediately below this sentence; if you have a slow internet connection like the ridiculously slow one at my office today, just wait for it to appear!)

a Rafflecopter giveaway


Thanks for celebrating with me and for reading this blog – I truly appreciate all of you!

Oh and by the way, it's also my twin sister Genevieve's blogiversary at Vanilla & Spice today!  If you haven't checked out her blog before (it's full of healthy vegetarian recipes), be sure to stop by and say hi!
Caramel Latte Cheesecake Squares

Caramel Latte Cheesecake Squares

Adapted from Food & Drink and these cheesecake bars

Makes one 8x8 pan; 16-20 squares depending on how you slice them

Ingredients:
For the Crust:
1-1/2 cups graham cracker crumbs
2 tablespoons light brown sugar
2 tablespoons all-purpose flour
1/8 teaspoon salt
1/4 cup unsalted butter, melted and cooled
1/2 cup toffee bits

For the Cheesecake:
16 oz (2 bricks) cream cheese, softened
1/3 cup brown sugar
1/4 cup granulated sugar
2 large eggs
1/4 cup sour cream
2 teaspoons vanilla
1 tablespoon instant espresso
1/4 cup toffee bits

For the Caramel Sauce:
1 tablespoon unsalted butter
1/4 cup brown sugar
1 tablespoon milk
1/4 teaspoon vanilla extract

Directions:

Preheat oven to 325°F.

Line an 8-inch square baking pan with aluminum foil, leaving a few inches of foil draping over the sides of the pan (which will help with removal later).

Make the crust: Whisk together the graham cracker crumbs, brown sugar, flour, and salt in a medium bowl.  Pour the melted butter over the mixture, and stir together with a fork until all crumbs are moistened.  Transfer the mixture into the prepared pan and press evenly to form the crust.  Bake in preheated oven for 12-15 minutes, until crust is beginning to brown.  Remove from oven then pour the 1/2 cup of toffee bits in an even layer over top, pressing down lightly. Transfer to a cooling rack to cool for about 20-30 minutes.

Meanwhile, prepare cheesecake filling.  In a large bowl or bowl of an electric mixer, beat the cream cheese until smooth, about 3 minutes.  Beat in the two sugars until well combined, about 1 minute.  Beat in eggs one at a time, fully incorporating each egg into the mixture. Beat in sour cream until just combined.  Mix the vanilla extract and instant espresso together in a small bowl, then add to cheesecake mixture and mix until combined.

Pour cheesecake mixture over cooled crust, then sprinkle 1/4 cup toffee bits evenly on top (I used a bit more to fill in some gaps).  Place in middle rack of the preheated oven and bake for 40-45 minutes, until edges are set but the middle jiggles slightly (as a whole) when you shake the pan.  Transfer to a cooling rack and let cool to room temperature, about 2 hours.  Transfer to a refrigerator (I don’t cover mine) to cool completely, for at least 4 hours or preferably overnight.

Meanwhile, prepare caramel sauce by adding the butter and brown sugar to a small saucepan. Bring to a boil over medium-high heat and cook 1 to 2 minutes, until slightly thickened. Slowly stir in the milk and continue to simmer until thickened slightly. Remove from heat and stir in the vanilla extract.  Transfer to a small container and set aside until cheesecake has cooled to room temperature.  Drizzle caramel sauce over the cheesecake (I transferred mine to a small ziplock bag and snipped off the corner to drizzle with more accuracy) before refrigerating it (you could also do this step the next day after it has  been refrigerated).  *If you already have storebought caramel sauce at home and wish to use it instead, that would work fine too - I didn't have any so it was easier for me to just make some, which only takes about 5 minutes.

Slice cheesecake into bars.  Keep refrigerated.

June 25, 2013

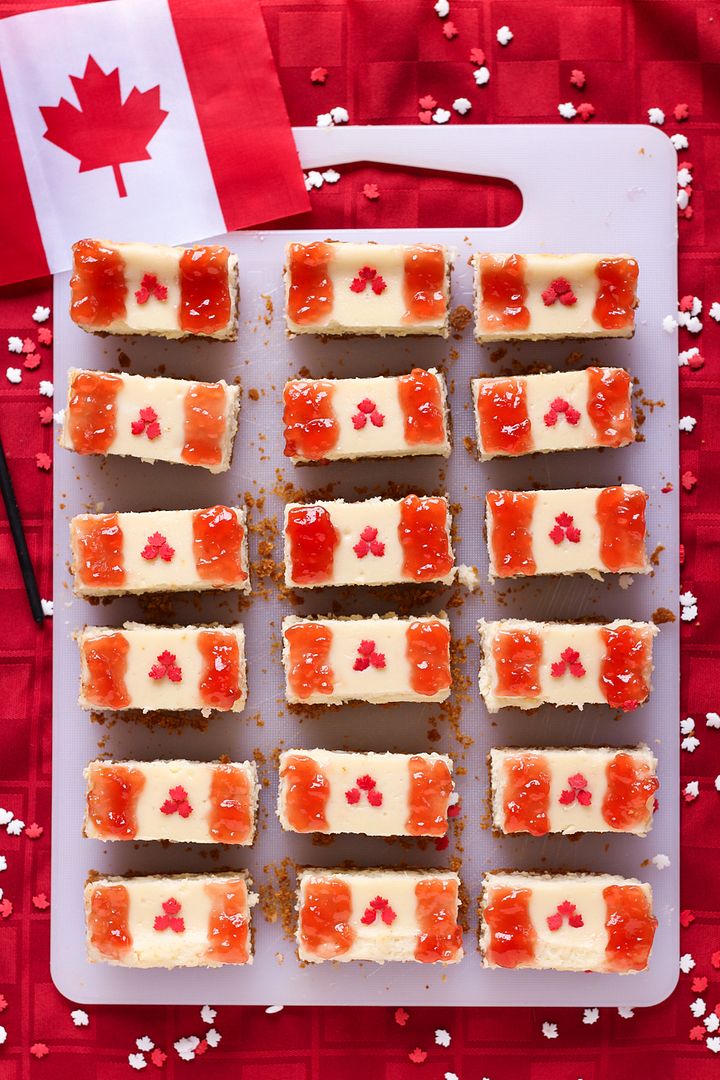
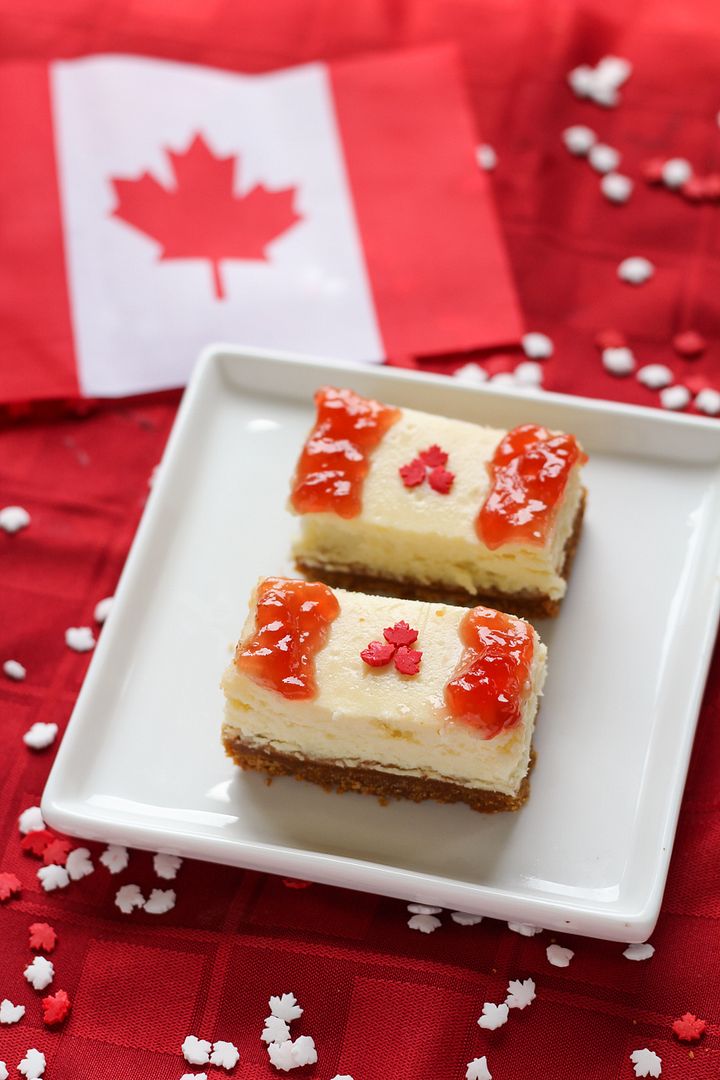
Canada Day Cheesecake Bars

Canada Day Cheesecake Bars

Canada Day (which will be our country’s 146th birthday this year) is coming up on July 1st – yay long weekend!  I love coming up with recipes for Canada Day because there aren’t really a lot of ideas out there (especially compared to the number of red, white, and blue recipes!) so it’s easy to be creative, plus we’re lucky that our flag is fairly simple to represent using food because it has only two colours - red and white.

Canada Day Cheesecake Bars

One idea I had last year but never had time to try was to make plain white cheesecake bars and top them with strawberry jam to create little Canada flags.  So I decided to give them a try this past weekend for a family get together, where I knew there would be lots of people to help me eat them all!  Plus my cousin is about to leave Canada for a few years, so Canadian flags were very appropriate!  

 I was a little behind in trying to finish and photograph these before I had to leave, so they were done in a bit of a rush, but I was so happy that they turned out just how I’d imagined in my head!

Canada Day Cheesecake Bars

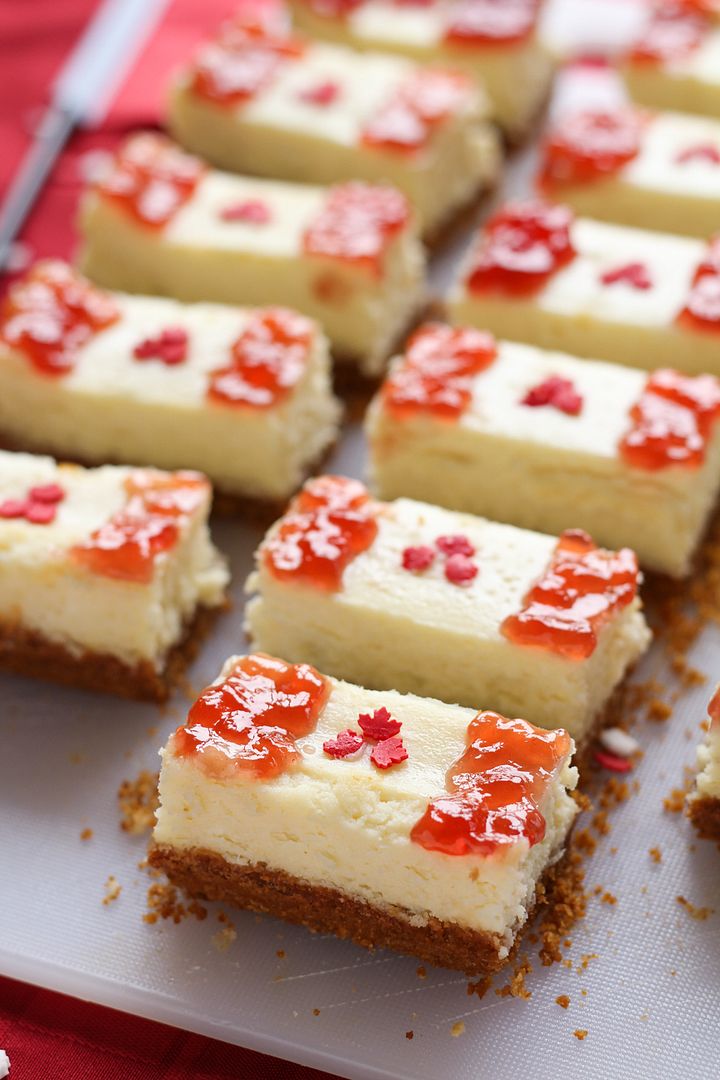
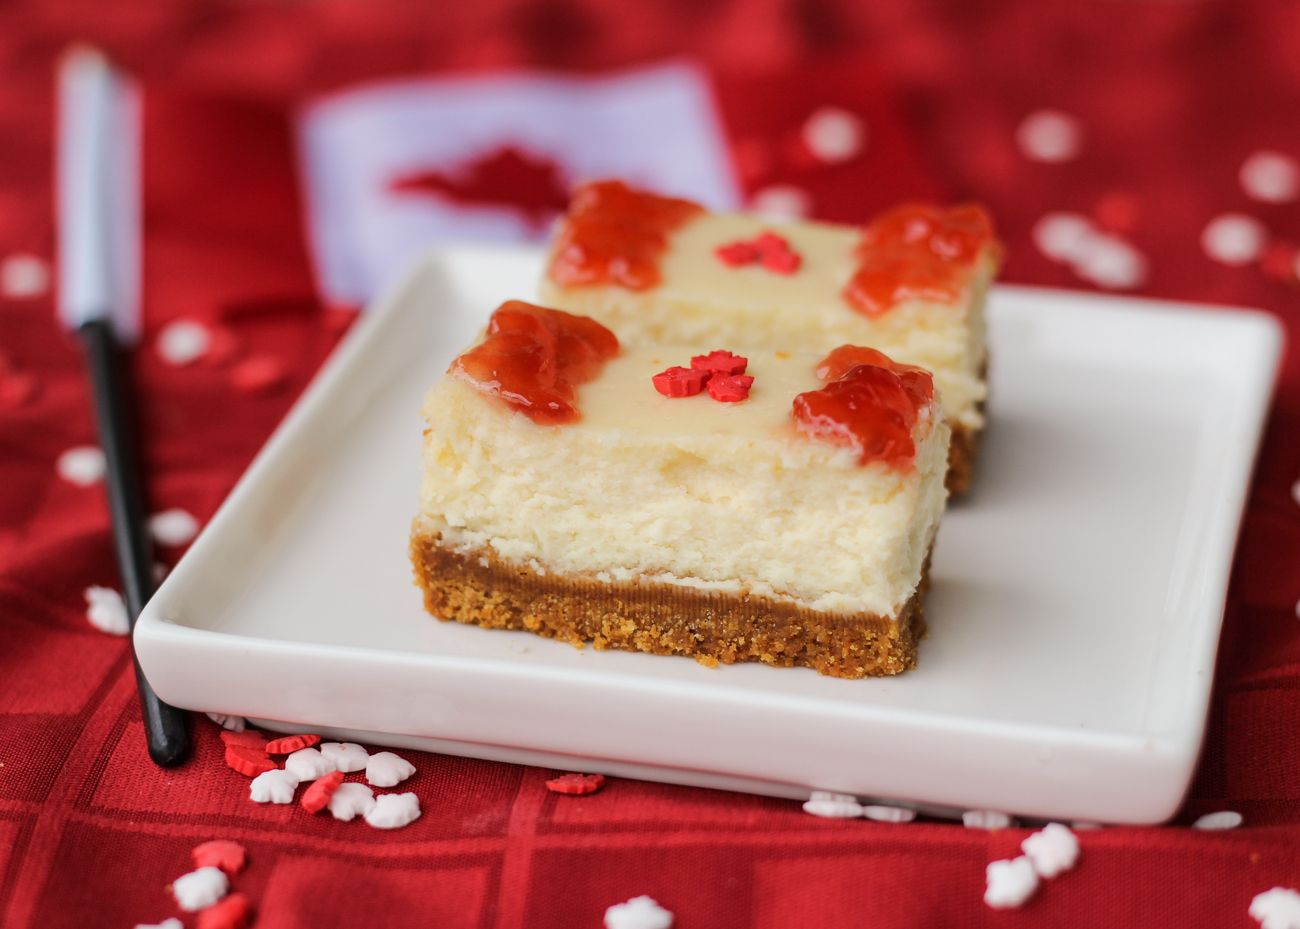
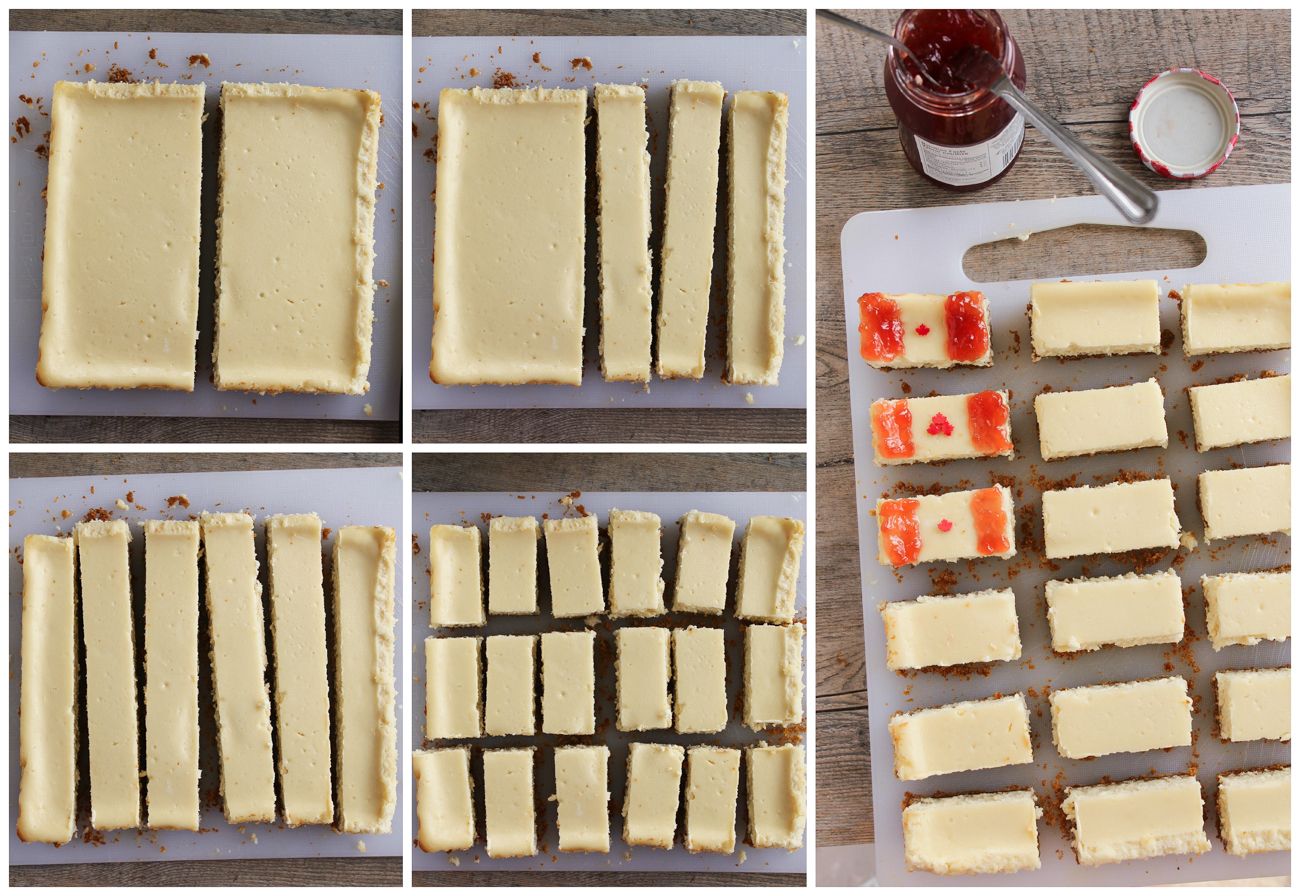
The filling for these bars is plain vanilla cheesecake that’s rich and creamy (and didn’t crack at all, which I was thrilled about!).  Once I sliced it into bars, I just spread strawberry jam on the edges and placed maple leaf quins in the center to resemble the flag.  The quins (like these) are available at Bulk Barn this time of year, but if you can’t find them anywhere, you could just use more jam or another type of red sprinkle arranged in the shape of a leaf.

I got lots of compliments from my family on these bars, and I think they would be the perfect treat to bring to a Canada Day gathering this weekend!

Canada Day Cheesecake Bars

Canada Flag Cheesecake Bars

Flag idea my own; Cheesecake recipe adapted from here, here, and here

Makes one 8x8 pan; cut into 18 bars

Ingredients:

For the Crust:
1-1/2 cups graham cracker crumbs
3 tablespoons light brown sugar
2 tablespoons all-purpose flour
1/8 teaspoon salt
1/4 cup unsalted butter, melted and cooled

For the Cheesecake:
16 oz (2 bricks) cream cheese, softened
2/3 cup sugar
2 large eggs
1/4 cup sour cream
1 teaspoon vanilla

For the Topping:
Seedless strawberry jam (~1/4 cup)
Canada Day maple leaf quins (available at Bulk Barn)

Directions:

Preheat oven to 325°F.

Line an 8-inch square baking pan with aluminum foil, leaving a few inches of foil draping over the sides of the pan (which will help with removal later).

Make the crust: Whisk the graham cracker crumbs, brown sugar, flour, and salt.  Pour the melted butter over the mixture, and stir together with a fork until all crumbs are moistened.  Transfer the mixture into the prepared pan and press evenly to form the crust.  Bake in preheated oven for 12-15 minutes, until crust is beginning to brown.  Transfer to a cooling rack to cool for about 30 minutes.
Meanwhile, prepare cheesecake filling.  In a large bowl or bowl of an electric mixer, beat the cream cheese until smooth, about 3 minutes.  Beat in the sugar until well combined, about 1 minute.  Beat in eggs one at a time, fully incorporating each egg into the mixture. Beat in sour cream and vanilla until fully combined, about 30 seconds.

Pour mixture over cooled crust and return to oven.  Bake for 35-40 minutes, until edges are set but the middle jiggles slightly (as a whole) when you shake the pan.  Transfer to a cooling rack and let cool to room temperature, about 2 hours.  Transfer to a refrigerator (I don’t cover mine because I find the cheesecake ‘sweats’) to cool completely, for at least 3 hours or preferably overnight.

On the day you will serve the cheesecake bars, use the aluminum foil to lift the cheesecake out of the pan, then slice them into 18 small rectangles (6 columns and 3 rows - see picture below).  Stir jam first, then use a small butter knife or spoon to spread strawberry jam on the edges of each rectangle to resemble the Canada flag.  Use enough jam so it shows up well but not too much that it will fall off – you’ll get a feel for what amount to use after a couple tries.  Place three Canada leaf quins in the center to complete the flag (or if you don’t have any, you could use a blob of jam or red sprinkles if you can shape it into something that resembles a maple leaf!).  Keep bars refrigerated until ready to serve.  Don’t decorate them more than a day ahead.

Canada Day Cheesecake Bars

May 24, 2013

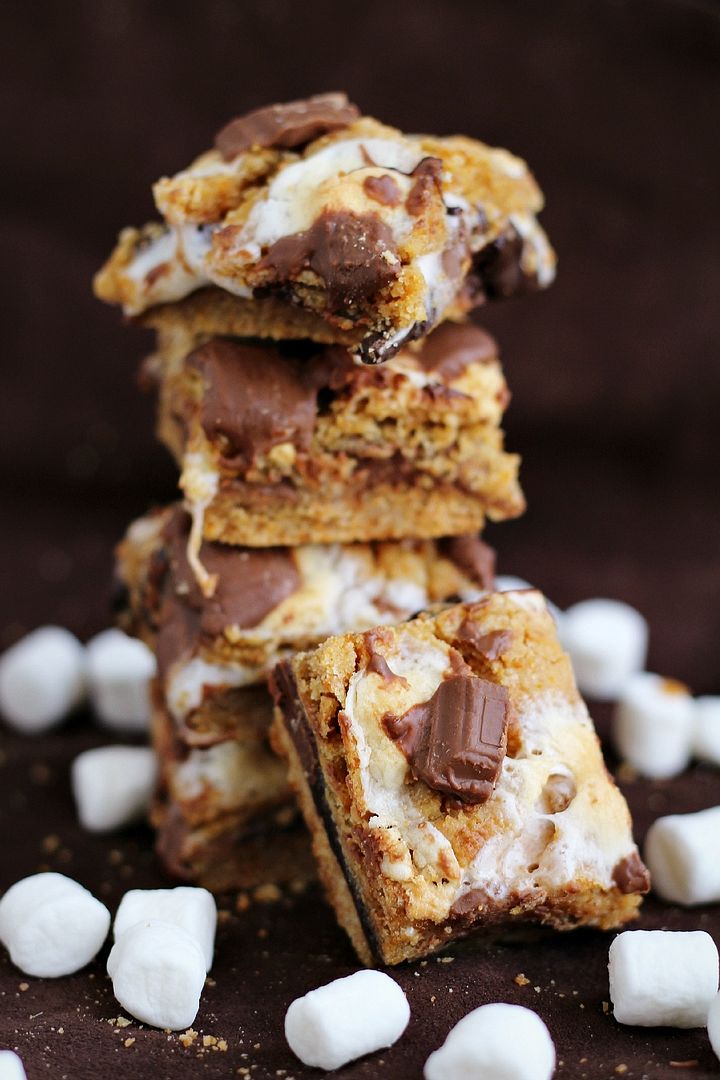
S'mores Bars

S'mores Bars

After spending the past holiday Monday laying on a beach drenched in sweat, it just seems wrong that today the temperature fell to below zero and there was snow in the air!   Every time I think summer is definitely here to stay this time, Mother Nature turns around and laughs in my face.  

I’m still very grateful that we had beautiful weather for our May long weekend though, and I’m hoping that my American friends are able to see some sun and get outside for your holiday Monday coming up! 

But whether you’re sitting outside around a bonfire or warming up inside by a fireplace this weekend, these s’mores bars will fit right in!

S'mores Bars

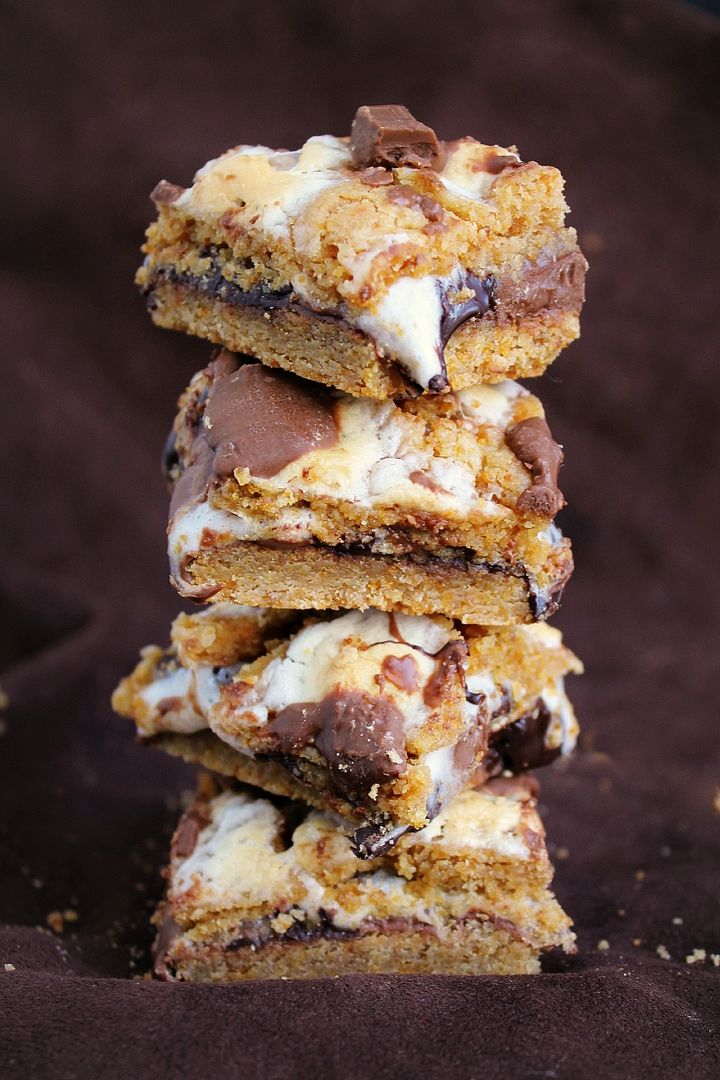
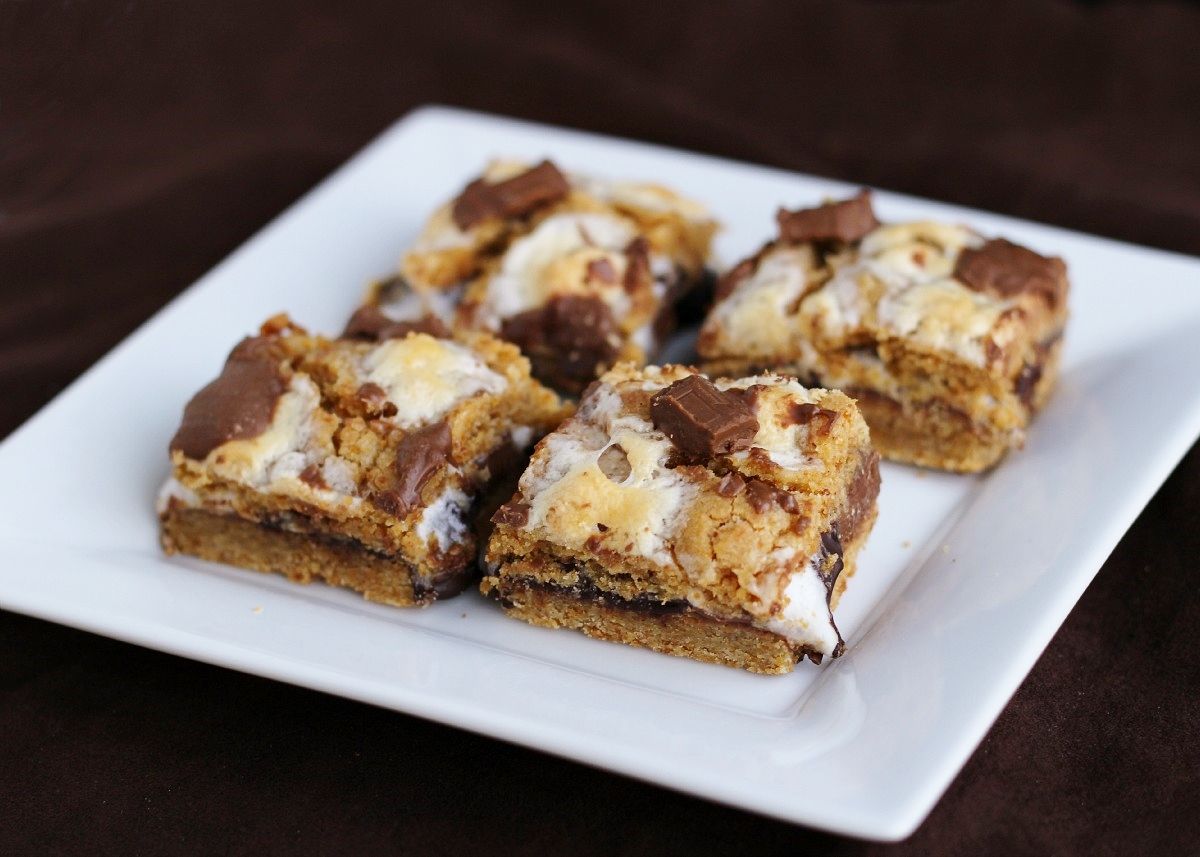
You’ve probably seen a recipe for s’mores bars before so these are nothing new; they’re made up of two layers of chewy graham cracker bars with layers of chocolate and marshmallows sandwiched in between.  I’ve made versions of them a couple of times in the past and absolutely loved them, but based on my experiences, I’ve made a few changes along the way to improve them a little.

I added cinnamon and brown sugar to add to the graham cracker flavour more, I replaced some of the milk chocolate with dark chocolate because I find that using all milk chocolate makes them just a bit too sweet and rich for my taste, and while I used to make a full sized recipe in a 9x13-inch pan, this time I used a much smaller pan because buying all that chocolate gets pretty expensive!  I also topped the bars with more marshmallows and chocolate so they look a little prettier on top and people can more easily tell what they are.


And while I’ve previously used marshmallow fluff as called for in other recipes, this time I couldn’t find it anywhere, so I used mini marshmallows instead - which also ended up being much cheaper!  When I bought them I was thinking that they would melt a little to become just like marshmallow fluff, but I apparently forgot my experiences with rice krispie squares which should have tipped me off that the marshmallows would melt a lot more!  

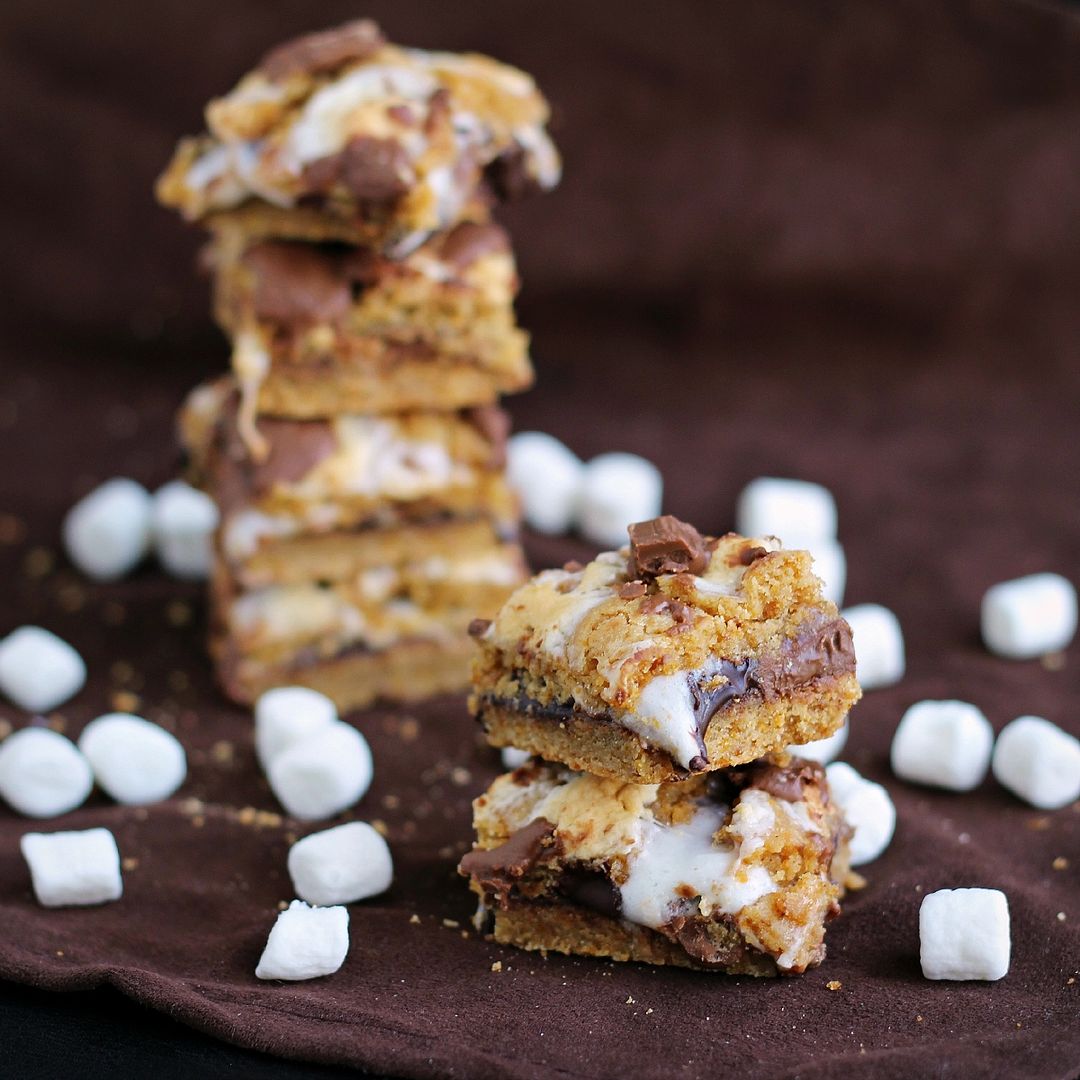
So I was a little disappointed when I took my bars out of the oven and didn’t see a pretty layer of thick melted marshmallows like I’ve had in the past using marshmallow fluff, but once I tasted them I realized that I liked these even better – the marshmallow flavour is still there and just gets infused throughout the bar, giving it a sticky gooey texture just like s’mores.  But if you can easily find marshmallow fluff and want that thick layer of fluff (see what I mean here), feel free to use it instead!

S'mores Bars

These are like a portable, less messy, and slightly more refined version of s’mores, so if you like s’mores, I think it’s safe to say you will love these.  They were a hit with Ryan’s coworkers (from what I hear) – I only ate one myself then had to give the rest away because I knew I would eat them all much too quickly! 

If you have Memorial Day get-together plans this weekend, these bars would fit right in!  Hope you have a great (and warm!) long weekend!

S'mores Bars

S’mores Bars


Makes one 8x8-inch pan; about 20 bars

Ingredients:

1-1/3 cups all-purpose flour
3/4 cup graham cracker crumbs
1 teaspoon baking powder
1/2 teaspoon cinnamon
1/8 teaspoon salt
1/2 cup unsalted butter, room temperature
1/2 cup sugar
1/4 cup brown sugar
1 large egg
1 teaspoon vanilla extract
2-1/2 to 3 cups mini marshmallows
300g (or 10-11oz) of chocolate bars – I used three 100g chocolate bars: 2 milk chocolate and 1 dark chocolate.  If you want the taste to be more like classic s’mores, use all milk chocolate.  If you prefer a more grown-up taste, use dark chocolate.  I used a mix of both because I find all milk chocolate to be a little too sweet for my tastes.

Directions:

Preheat oven to 350°F. Line an 8x8-inch baking pan with aluminum foil, leaving an overhang on the edges to lift the bars out later, and spray with non-stick cooking spray.

Whisk together the flour, graham cracker crumbs, baking powder, cinnamon, and salt in a medium bowl.  In a separate large bowl, cream the butter and sugars together with an electric or stand mixer on medium speed until light and fluffy, about 2-3 minutes.  Add the egg and vanilla and beat just until combined.  Slowly add the dry ingredients in three additions, mixing slowly after each addition until a dough forms.

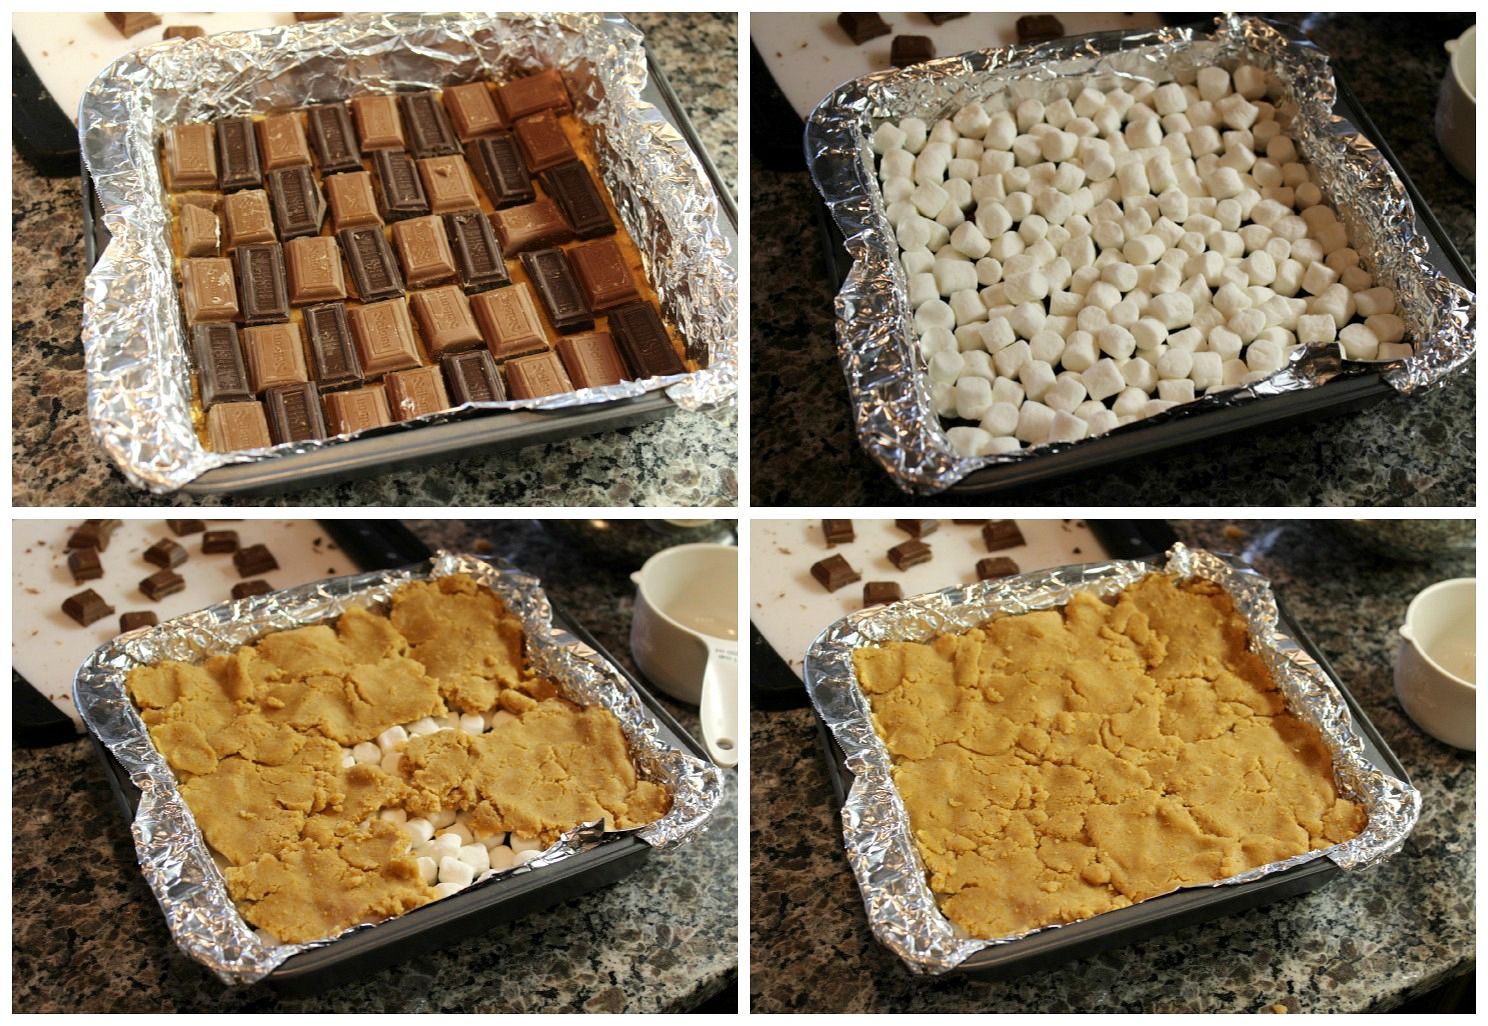
Divide the dough in half.  Press one half of the dough into the prepared pan in an even layer.  Divide your chocolate bars into individual squares, reserve at least 4 squares for later, and spread the remaining squares in an even layer on top of the dough.  Try to get them close together but don’t worry too much if there are little gaps.  I alternated the spacing of my milk and dark chocolate squares.  Cover with about 2 cups of mini marshmallows in a tight, even layer.  Top with the remaining half of the dough.  I grabbed pieces of dough, flattened them between my palms, and pieced them together to form one layer, but it would have been easier to roll the dough out in one piece and transfer that on top.  Do whatever works easiest for you.  Here’s a picture of what my process looked like:

making smores bars

Bake the bars in the preheated oven for 25 minutes.  Meanwhile, chop your leftover chocolate into smaller pieces and place in the freezer.  After 25 minutes, remove bars from oven, and sprinkle the top with about 1/2 cup of mini marshmallows along with the reserved chocolate.  Return to oven for an additional 5-8 minutes.

Let bars cool completely before cutting.  I sped mine along by placing them in the fridge, but it still took at least several hours to cool.  When ready, lift the bars from the pan using the foil, and cut into about 20 squares.  Serve at room temperature or warmed up slightly in the microwave.

March 29, 2013

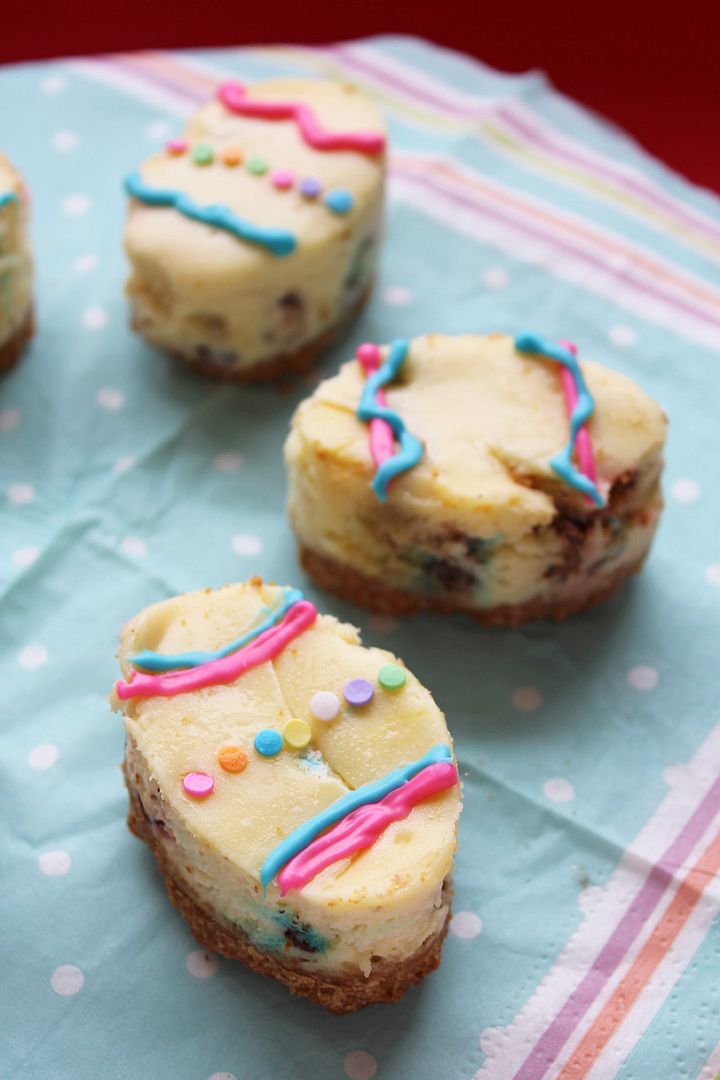
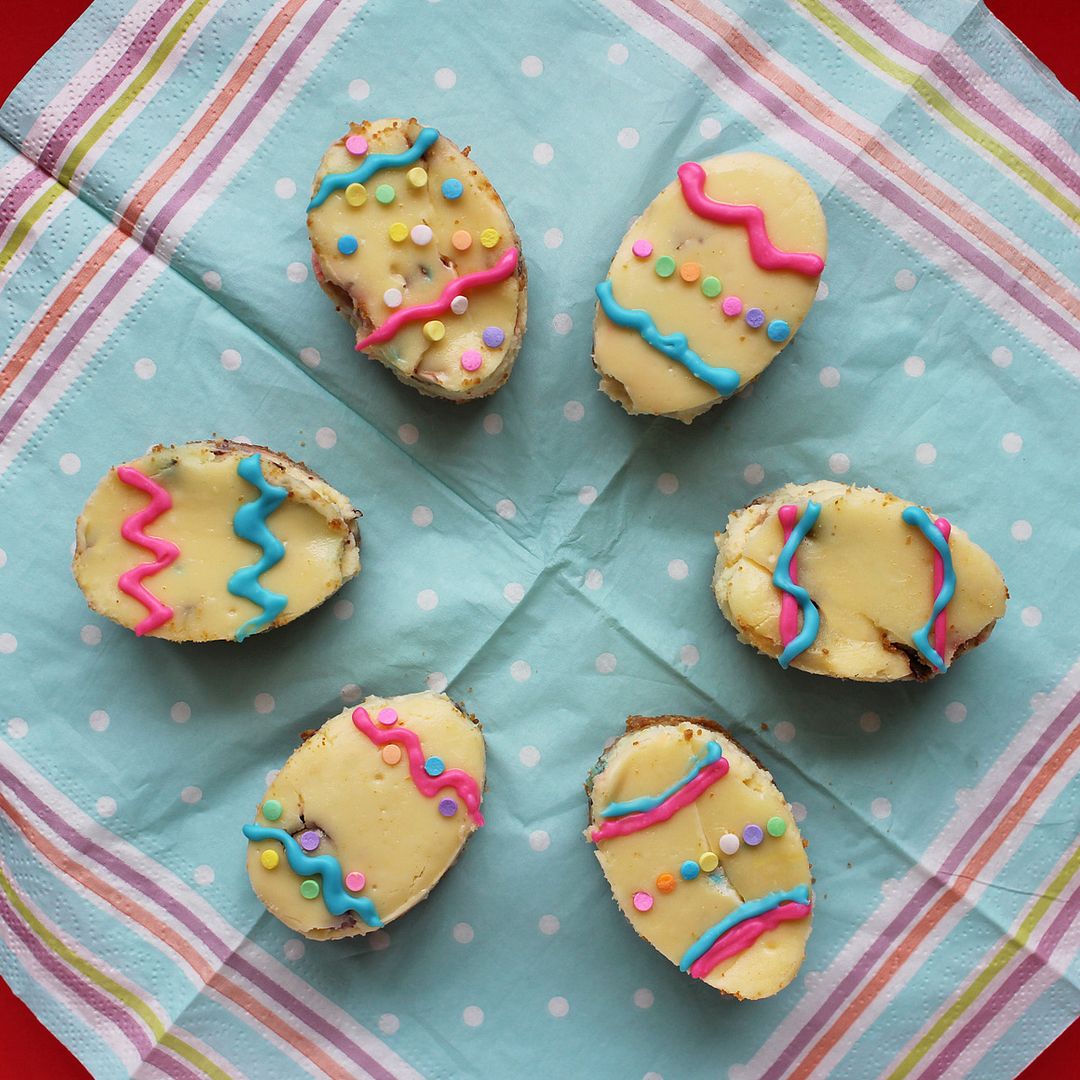
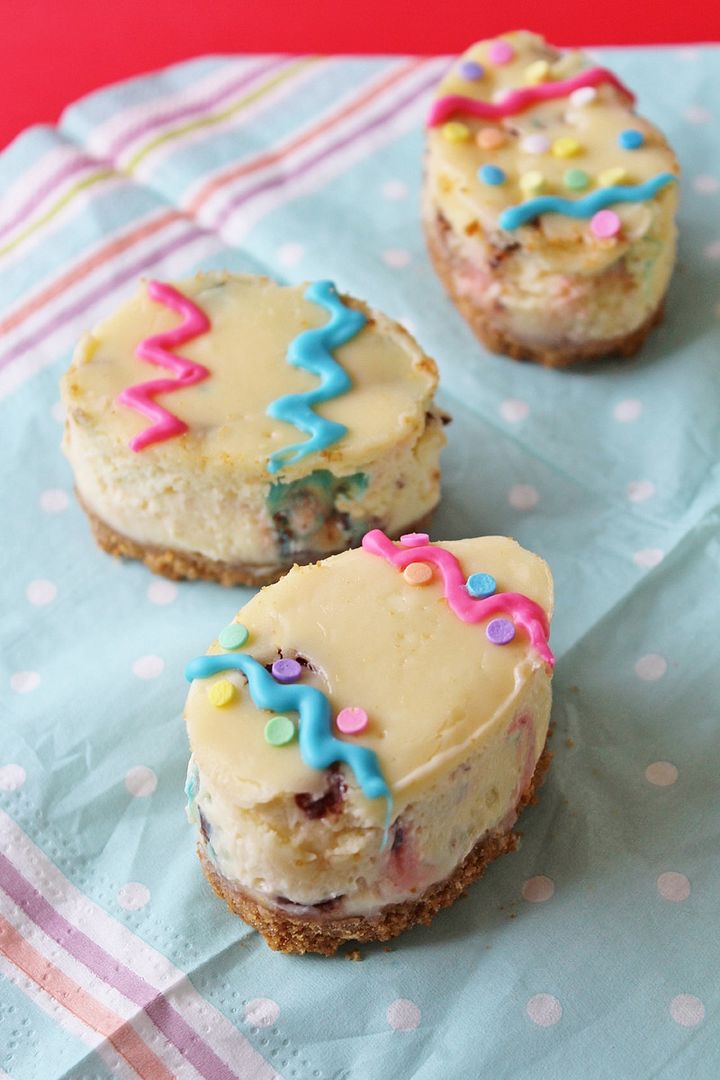
Easter Egg Cheesecake Bars

 Easter Egg Cheesecake Bars

Happy long weekend!  I’m headed home today to spend time with my family and boyfriend over the next few days, and after a stressful week and a while since my last visit, I’m so looking forward to it!  I also can’t wait for a delicious Easter dinner with all my family, especially since I won’t have to make any of the main dishes so I can enjoy everyone else’s amazing cooking!

Since I don’t have to make anything on the actual holiday, I made these egg-shaped cheesecakes a little early.  I came up with this idea last Easter but never got around to making them, so I was determined to try them this year before Easter quickly passed again!

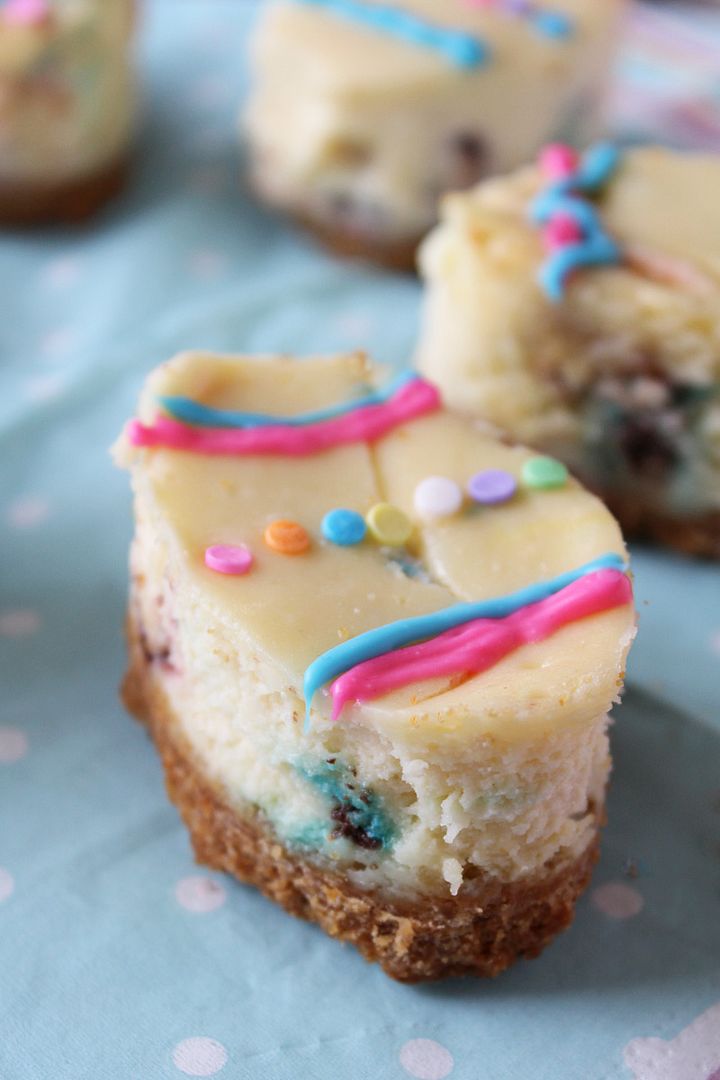
 Easter Egg Cheesecake Bars

Now the problem when you’ve been planning a recipe for over a year is that it becomes so perfect in your mind that it's going to be very hard to live up to the picture in your mind when you actually make it in real life.  These were not as easy to make as I’d envisioned, but they still turned out great in the end, and I can give you some tips to make your experience go easier than mine!
  1. Make these in a 9x9 inch pan instead of an 8x8 like I did (I corrected this in the recipe below). An 8x8 pan was a little too deep and made the egg shapes hard to cut out with a cookie cutter. There's still plenty of crust and filling to fit a 9x9 pan and you’ll have an easier time cutting out the eggs than I did.
  2. If you still have a hard time cutting the eggs, try cutting out rectangles first and then using your cookie cutter, that way you don’t ruin all the surrounding cheesecake trying to push down on the cutter (like I did once).
  3. Wait until the cheesecake is completely cooled before you try cutting it – even after a few hours, it still wasn’t quite ready, but it was so much easier in the morning. I ruined a piece trying to cut too early!
  4. Don’t use those malted Easter eggs as the chocolate inside! I chopped mine up and added them to the batter, but when it was done, I noticed little pockets of wetness throughout the cheesecake. It turns out that the malted filling of the chocolate eggs just melted during baking. It still all tasted great, but next time I’d just use mini eggs or something more sturdy like that.
  5. If you don’t have time to make all the cheesecake into eggs, just use about half the cheesecake to make eggs and cut the other half into squares – your display will still look as pretty with alternating eggs and simple squares!
 Easter Egg Cheesecake Bars

Despite some of the problems I had along the way, these still turned out just as pretty as I’d pictured them in my mind, and I probably don’t need to tell you that they tasted fantastic – it’s cheesecake, what’s not to love! I brought some to school to share with my coworkers yesterday and I got lots of feedback that people loved them, which made it all worth it!

Hope you all have a happy Easter, or just a great long weekend!

 Easter Egg Cheesecake Bars

Easter Egg Cheesecake Bars

Makes one 9x9-inch pan, about 10-15 eggs depending on size of cutter

Ingredients:

For the Crust:
1-1/2 cups graham cracker crumbs
1/8 teaspoon salt
1/4 cup unsalted butter, melted

For the Cheesecake:
2 bricks of cream cheese (250g each), softened
2/3 cup sugar
2 large eggs
1/4 cup sour cream
1 teaspoon vanilla extract
1 cup chopped Easter chocolate such as mini eggs

Sprinkles and coloured melting wafers for decorating

Directions:

Preheat oven to 325°F.  Line a 9x9-inch pan with aluminum foil and spray with non-stick cooking spray.  Mix graham cracker crumbs, salt and butter until thoroughly combined.  Pour into prepared pan and press firmly into an even layer.  Bake in preheated oven for 10 minutes, then set on a wire rack to cool.

In a large bowl or bowl of an electric mixer, beat the cream cheese until smooth, about 3 minutes.  Beat in the sugar and mix until well combined, about 1 minute.  Beat in eggs one at a time, followed by the sour cream and vanilla, and mix just until combined.  Stir in the chopped chocolate.  Pour mixture over cooled crust and spread evenly.  Bake in preheated oven for 35-40 minutes, until edges are set but middle jiggles slightly when you shake the pan.

Place pan on a cooling rack and let cool to room temperature for about 2 hours.  Refrigerate for at least 3 hours, or preferably overnight.  Use an egg shaped cookie cutter to cut shapes out of cooled cheesecake.  Depending on how deep your cutter is, you may not be able to press it all the way through the crust cleanly.  I found it easiest to cut rectangles (the size of my cutter) out first, then press the cutter through the piece of cheesecake and use a knife to cut through the crust using the cutter as a guide, then gently push the cheesecake out of the cutter.  You will end up with scraps of cheesecake leftover, but I had no problem eating those!  Decorate cheesecake like Easter eggs using melted chocolate wafers and sprinkles, if desired (you could just use melted chocolate chips too).  Keep refrigerated.
July 20, 2012

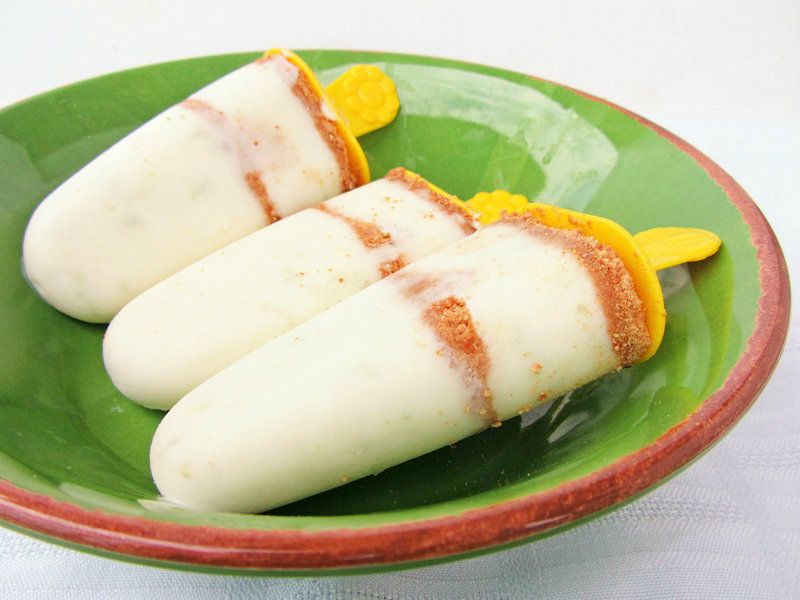
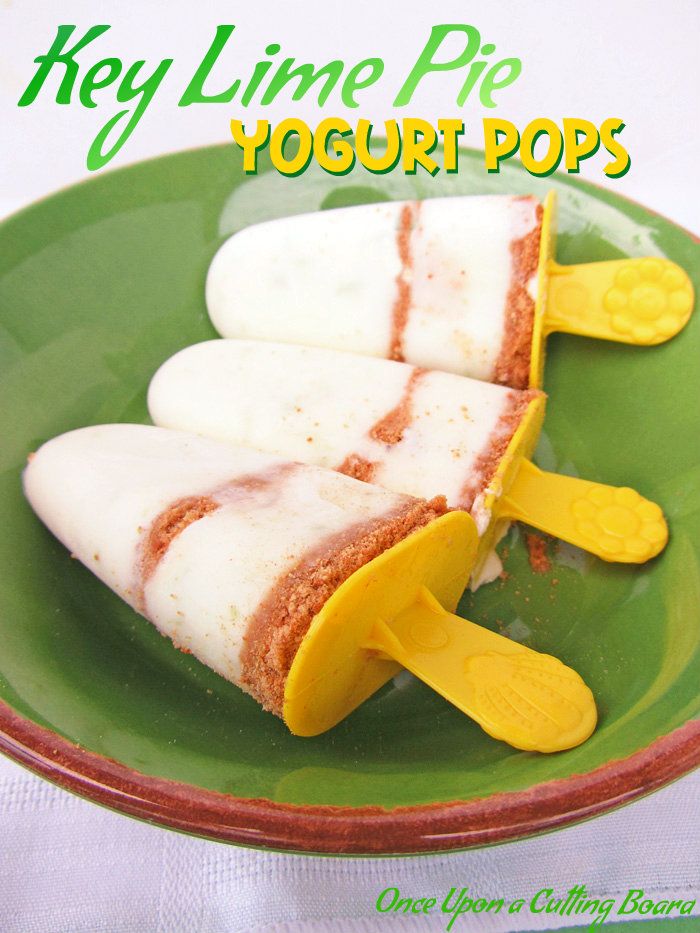
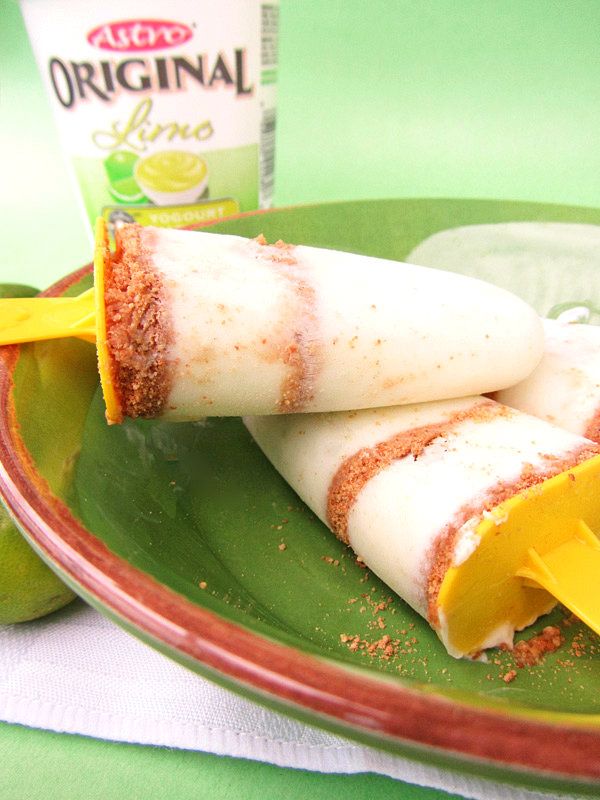
Key Lime Pie Yogurt Pops

Key Lime Pie Yogurt Pops

If I don't go to the grocery store or market with a shopping list in hand, I always end up with something in my cart that I have no idea what I'll do with, but it was either on sale or looked pretty or was something I've never seen before and was curious about.  The problem is that I always have so many recipes I plan on making, so by the time I get around to using the ingredient that I had no plans for, it has already gone bad (especially if it was fresh from the market).

When I saw key limes for sale at the grocery store a few weeks ago, I bought not one, but two bags.  I had no idea what I would do with them, but they were so cute and little that I couldn't resist!  My sister, who knows me well, thought I was crazy and that I would never use them, so I was determined to put them to use!

Key Lime Pie Yogurt Pops

First I made a batch of key lime pie bars that I had intended on sharing with my lab at school, but they were a miserable failure and I had to throw the whole batch out (I HATE when that happens!!) This just made me even more determined to make good use of the remaining key limes, and I started thinking more creatively beyond key lime pie. 


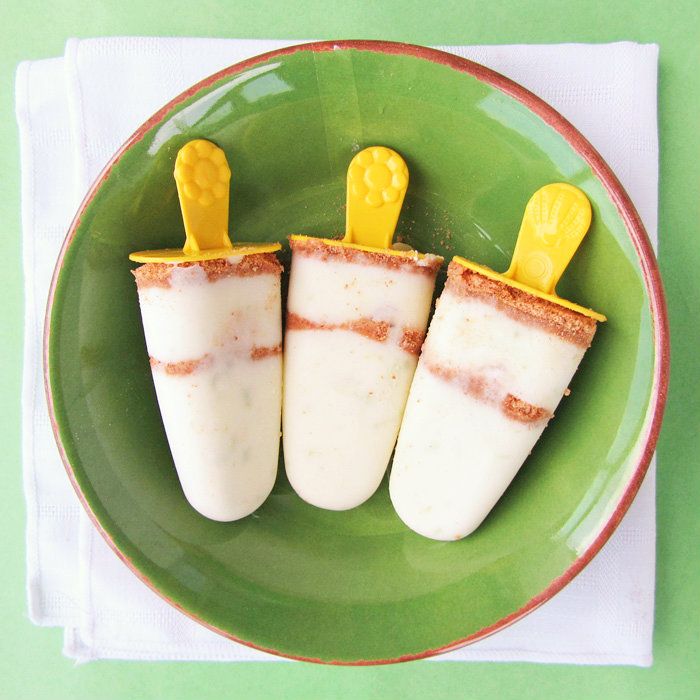
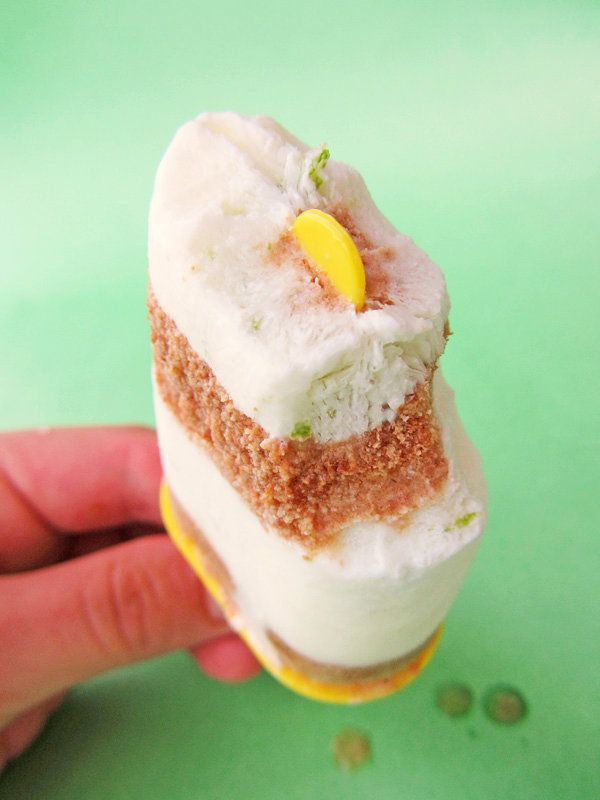
Because I've been loving making popsicles lately, I came up with the idea of recreating the flavours of key lime pie in a healthy popsicle!  I looked for some recipes online, but the only ones I came across used heavy cream or sweetened condensed milk as the base, which wasn't exactly what I had in mind.  So I decided to make a healthier version using yogurt as a base.  I started with lime yogurt, added some key lime juice and zest, then in order to make it a key lime pie popsicle and not just a key lime popsicle, I added a couple layers of graham cracker crumbs!

Key Lime Pie Yogurt Pops

I absolutely loved these!  They were smooth and creamy from the yogurt, with a strong key lime flavour and a taste of graham cracker in every lick, which really reminded me of key lime pie!  The graham cracker ribbons were actually my favourite part - I loved getting to the bottom of the popsicle and chewing the graham crumbs that were left!


At the time I made these, the only lime flavoured yogurt available in stores was Astro natural lime yogurt, which worked wonderfully.  However, I just noticed the other day that we now have key lime flavoured Greek yogurt available (I can't remember which brand it was, but I believe it was Oikos).  I haven't tested the recipe out with Greek yogurt, but I think it would work just as well!  I know there are plenty of key lime flavoured yogurts available in the United States too, so give these a try with your favourite brand, and just be sure to taste the mixture before freezing, as you may need to adjust the amounts of added lime juice and zest depending on how tart or sweet your yogurt is.

Key Lime Pie Yogurt Pops

I love that I'm getting so much use out of my popsicle mold this summer, first with these banana date popsicles, then the strawberry pineapple lime popsicles, and now these key lime pie pops, which may be my favourite yet!  I do have another recipe coming up soon though which is just as good, so it's getting difficult to choose a favourite!

If you haven't bought a popsicle mold yet this summer, I highly recommend it!  Have a great weekend! :) 

Key Lime Pie Yogurt Pops

Key Lime Pie Yogurt Pops

Recipe by Once Upon a Cutting Board

Makes about 4 popsicles (depending on size of popsicle mold)

Ingredients:

1 cup lime or key lime flavoured yogurt (I used Astro lime natural yogurt)
1 tablespoon + 1 teaspoon fresh key lime juice
1 teaspoon key lime zest
~1/4 cup graham cracker crumbs

Directions:

Mix yogurt, lime juice, and lime zest in a small bowl.  Taste and add more lime juice or yogurt if needed.

Fill each popsicle mold halfway with the yogurt mixture, then sprinkle a spoonful of graham cracker crumbs on top, and fill the rest of the way with the yogurt.  Finish with another thin layer of graham cracker crumbs, then insert popsicle sticks and freeze.

Ingredient Index

Related Posts Plugin for WordPress, Blogger...