Showing posts with label green pepper. Show all posts

June 12, 2014

Chicken (or Turkey) Fajita Burgers

Chicken (or Turkey) Fajita Burgers

We love turkey and chicken burgers around here, and have been eating them a lot more often now that it’s summertime and I seem to crave burgers all the time.  Not only are they inexpensive (around 5 dollars of meat gives us meals for two days), but they’re so easy to make, they provide a healthy lean source of protein, they fill me up, and there are infinite flavour combinations to experiment with!

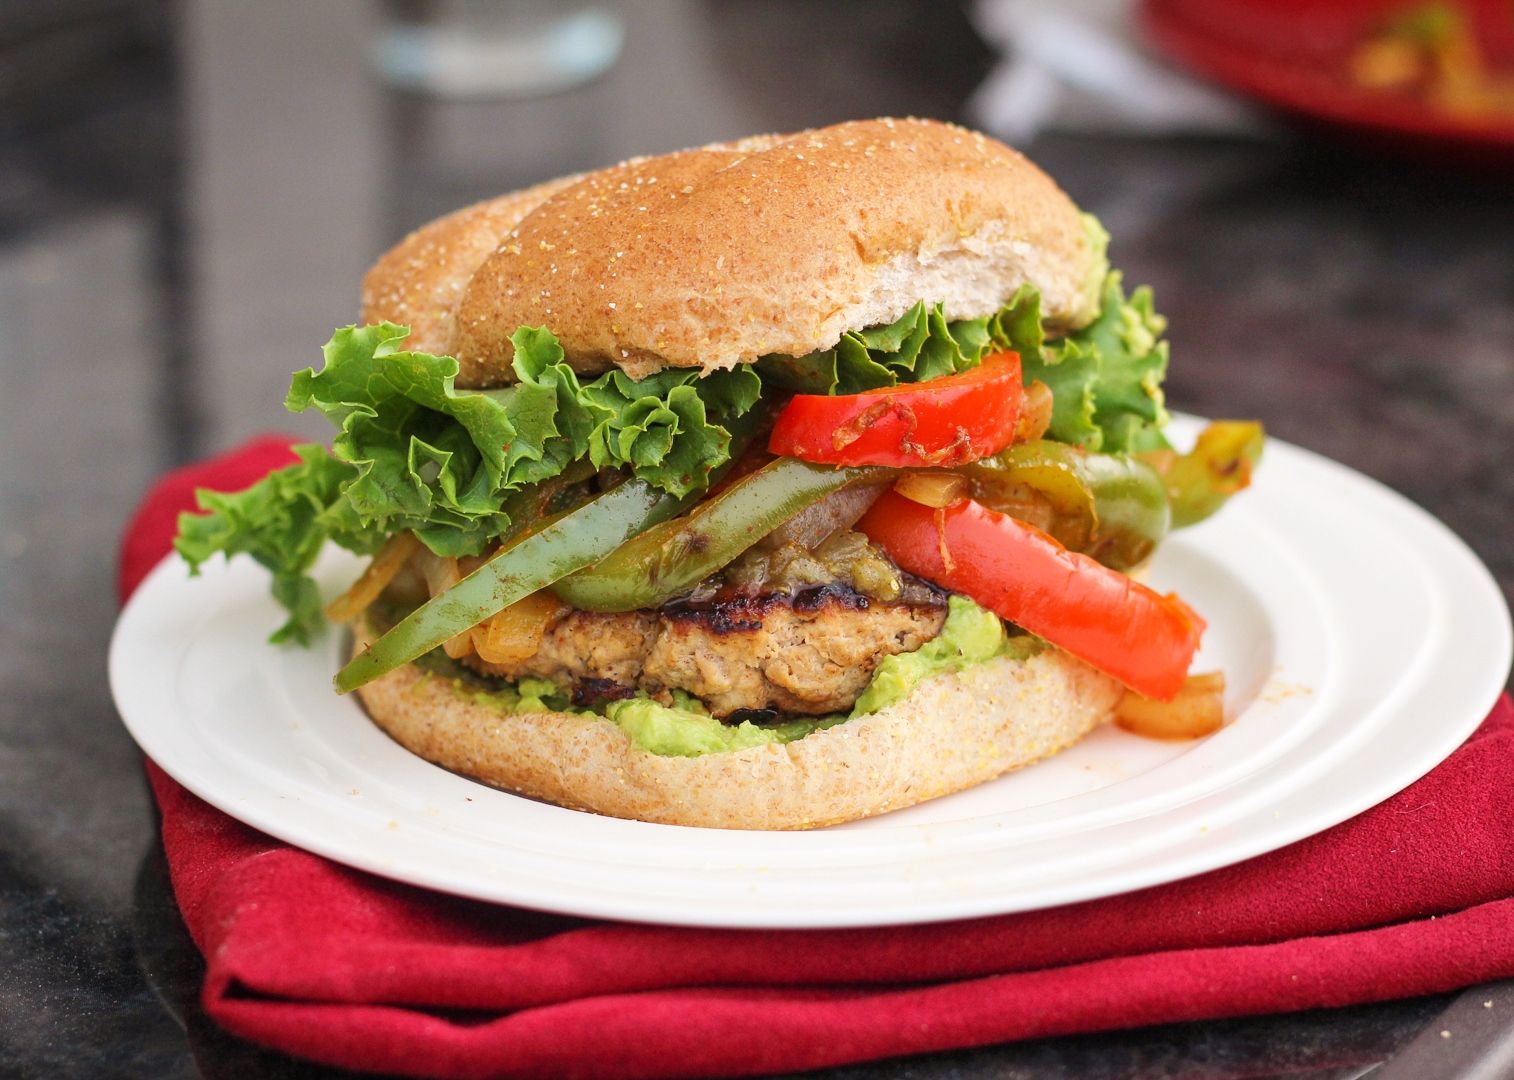
It’s hard to persuade Ryan away from our favourite buffalo chicken burgers, but I like trying new things, so recently I decided to make chicken fajita burgers.  I actually intended to use turkey but didn’t realize I’d grabbed chicken until I got home – either works though!
Chicken (or Turkey) Fajita Burgers

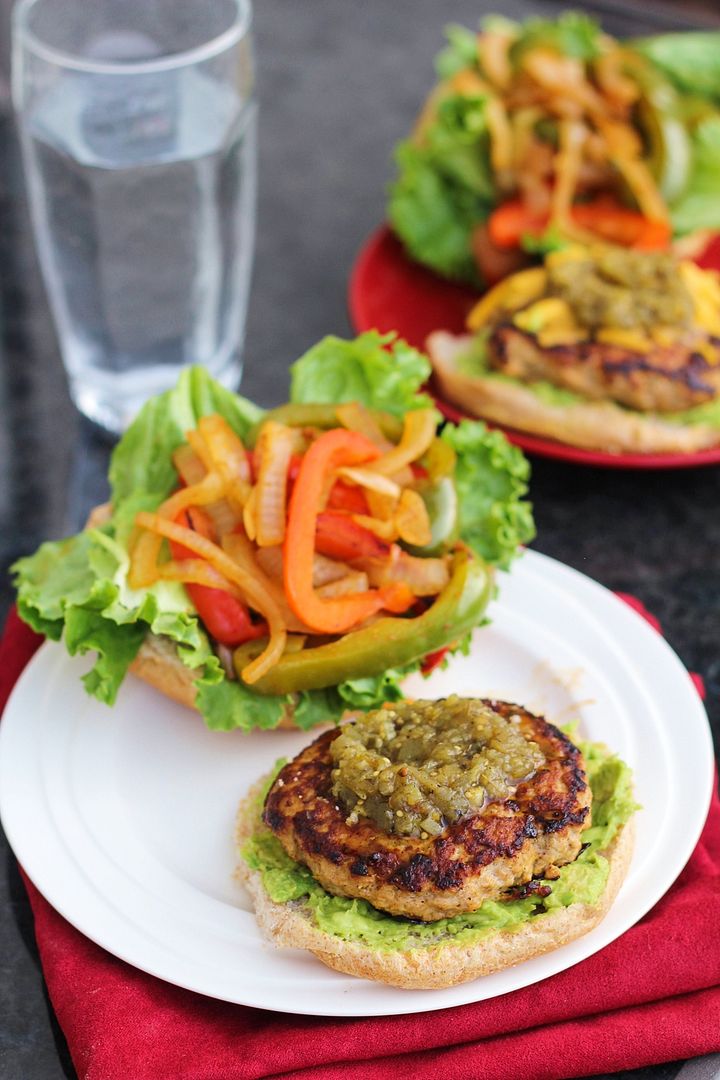
These basically taste like chicken fajitas but in burger format, thanks to the combination of fajita spices in both the burger and the veggies, the sautéed peppers and onions on top, and optional (but delicious) extras like mashed avocado, tomatilla salsa, and cheese!

The way I wrote out the recipe makes this look like a lot of ingredients and work, but it’s really not.  Most of the ingredient list is dedicated to the spices you’ll use to create your own fajita seasoning, but if you like, you can make this even easier with a premixed fajita spice!
Chicken (or Turkey) Fajita Burgers

I loved the flavour in these and all the added veggies to make them a complete meal for me!  When we ate our leftovers the next day, Ryan opted to leave off the veggies and instead top the patties with buffalo sauce, so I don’t think they’ve replaced buffalo burgers as his new favourite, but I’ll definitely keep making these as a fun alternative!

I’m off to vote (it’s Election Day in Ontario) and then join my lovely older sister for lunch for her birthday (Happy Birthday if you’re reading this!).  Hope you all have a great day and weekend!
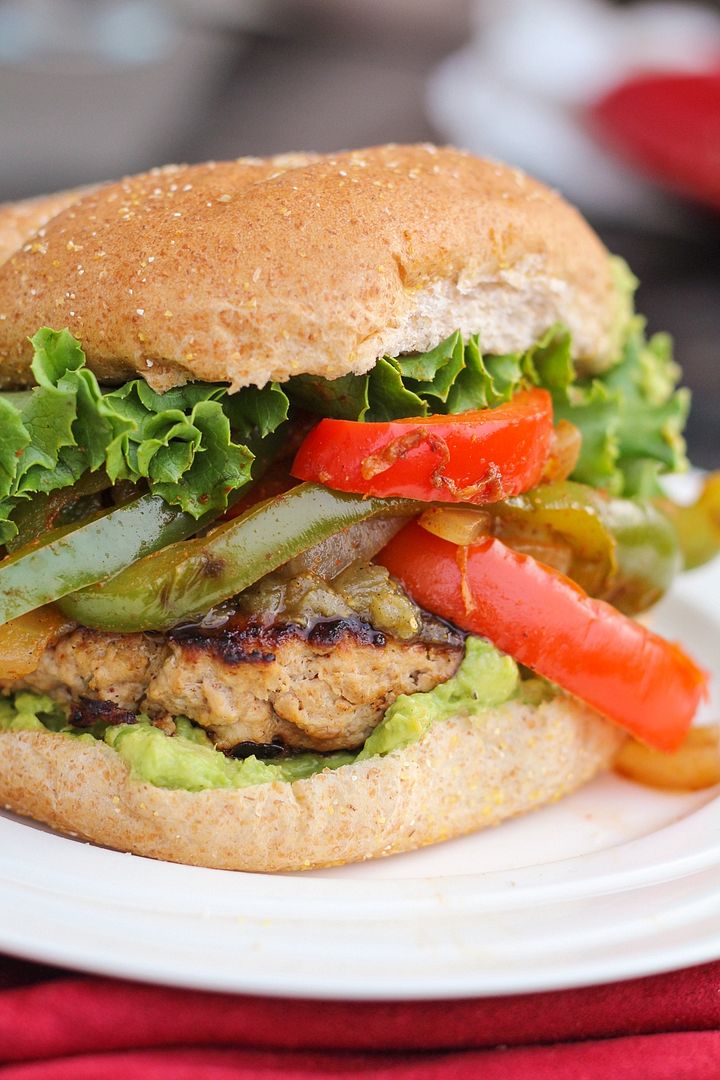
Chicken (or Turkey) Fajita Burgers

Chicken (or Turkey) Fajita Burgers

Recipe inspired by Cooking Light with many adaptations

Makes 4 burgers

Ingredients:

Fajita Seasoning:
1 teaspoon chili powder
1 teaspoon cumin
1/2 teaspoon paprika
1/2 teaspoon garlic powder
1/4 teaspoon onion powder
1/8 teaspoon cayenne
1/4 teaspoon salt

Burgers:
1 lb lean or extra-lean ground chicken or turkey
1/4 cup tomatillo salsa
1/4 cup breadcrumbs (I used panko)
2 teaspoons fajita seasoning (above)

Veggies:
2 teaspoons olive oil
1 sweet onion, sliced
1 red bell pepper, sliced
1 green bell pepper, sliced
2 teaspoons fajita seasoning (above)

Topping:
4 whole wheat hamburger buns
1 ripe avocado, mashed with some salt and pepper
Additional tomatillo salsa
Lettuce
Cheese such as Monterey jack or pepper jack, optional

Directions:

Combine spices for fajita mixture in a small bowl.  Mix well and set aside.

To prepare burgers, transfer ground chicken or turkey to a large bowl and add salsa, breadcrumbs, and 2 teaspoons fajita seasoning.  Stir with a fork until combined.  Use your hands to shape into 4 even patties, being very gentle and not pressing the meat so you don't make tough burgers. 

Depending on how big your skillets are, heat 2 or 3 skillets over medium-high heat.  I used one skillet for the veggies and 2 for the burgers because I could only fit 2 patties per pan.  Add a little olive oil to each pan.  Add the peppers and onion to one large pan and stir.  You will let these cook until slightly softened, about 10 minutes or until the burgers are done, stirring often.  In the last 3-5 minutes of cooking, season with remaining fajita seasoning (around 2 teaspoons) and stir to coat.  Transfer to a bowl when done.

Meanwhile, add burger patties to other skillets and let cook about 4-5 minutes, flip, then cook another 4-5 minutes on the other side or until done.  If you want to add cheese, add a few slices a couple  minutes before they’re done cooking so the cheese melts slightly.

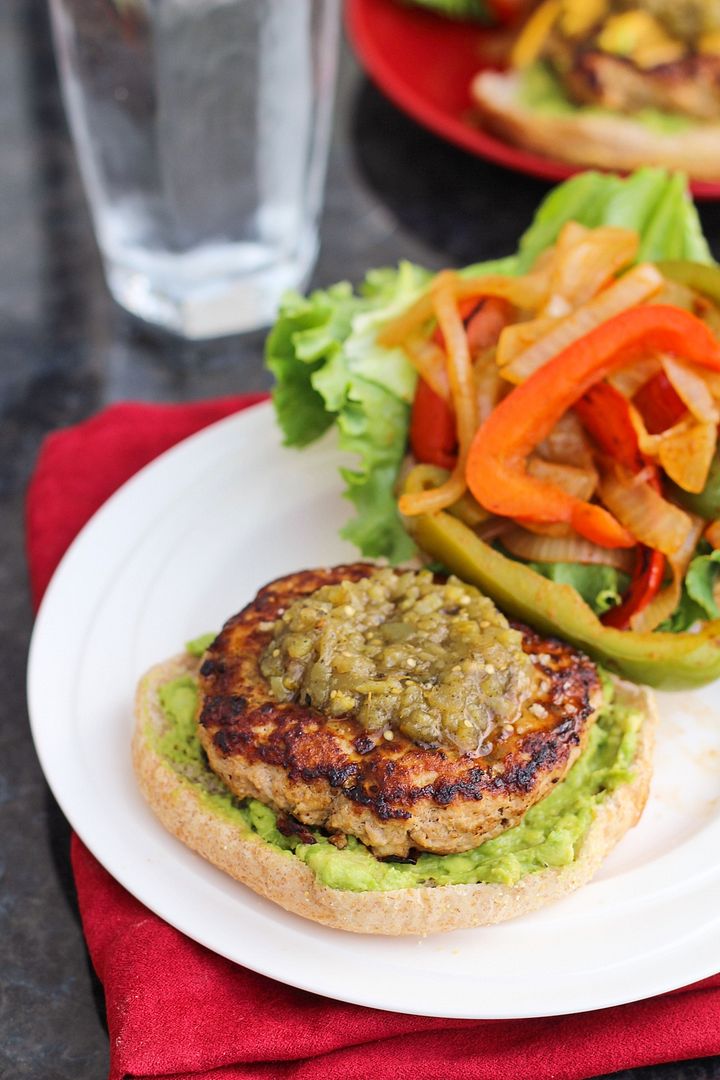
To prepare burgers, I spread the bottom bun with the mashed avocado, topped with a burger patty, which I then topped with a spoonful of tomatillo salsa.  On the top bun I added lettuce and a big pile of the sautéed veggies, then put them together.  You might end up with leftover veggies, depending on how much you put on each burger.

May 22, 2014

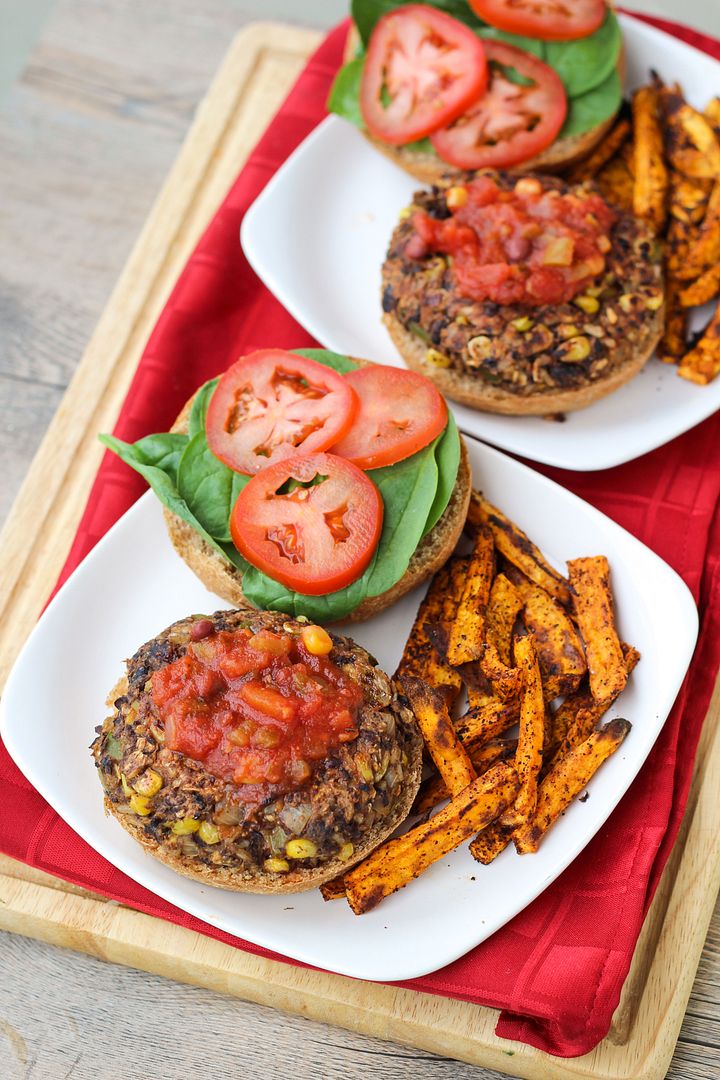
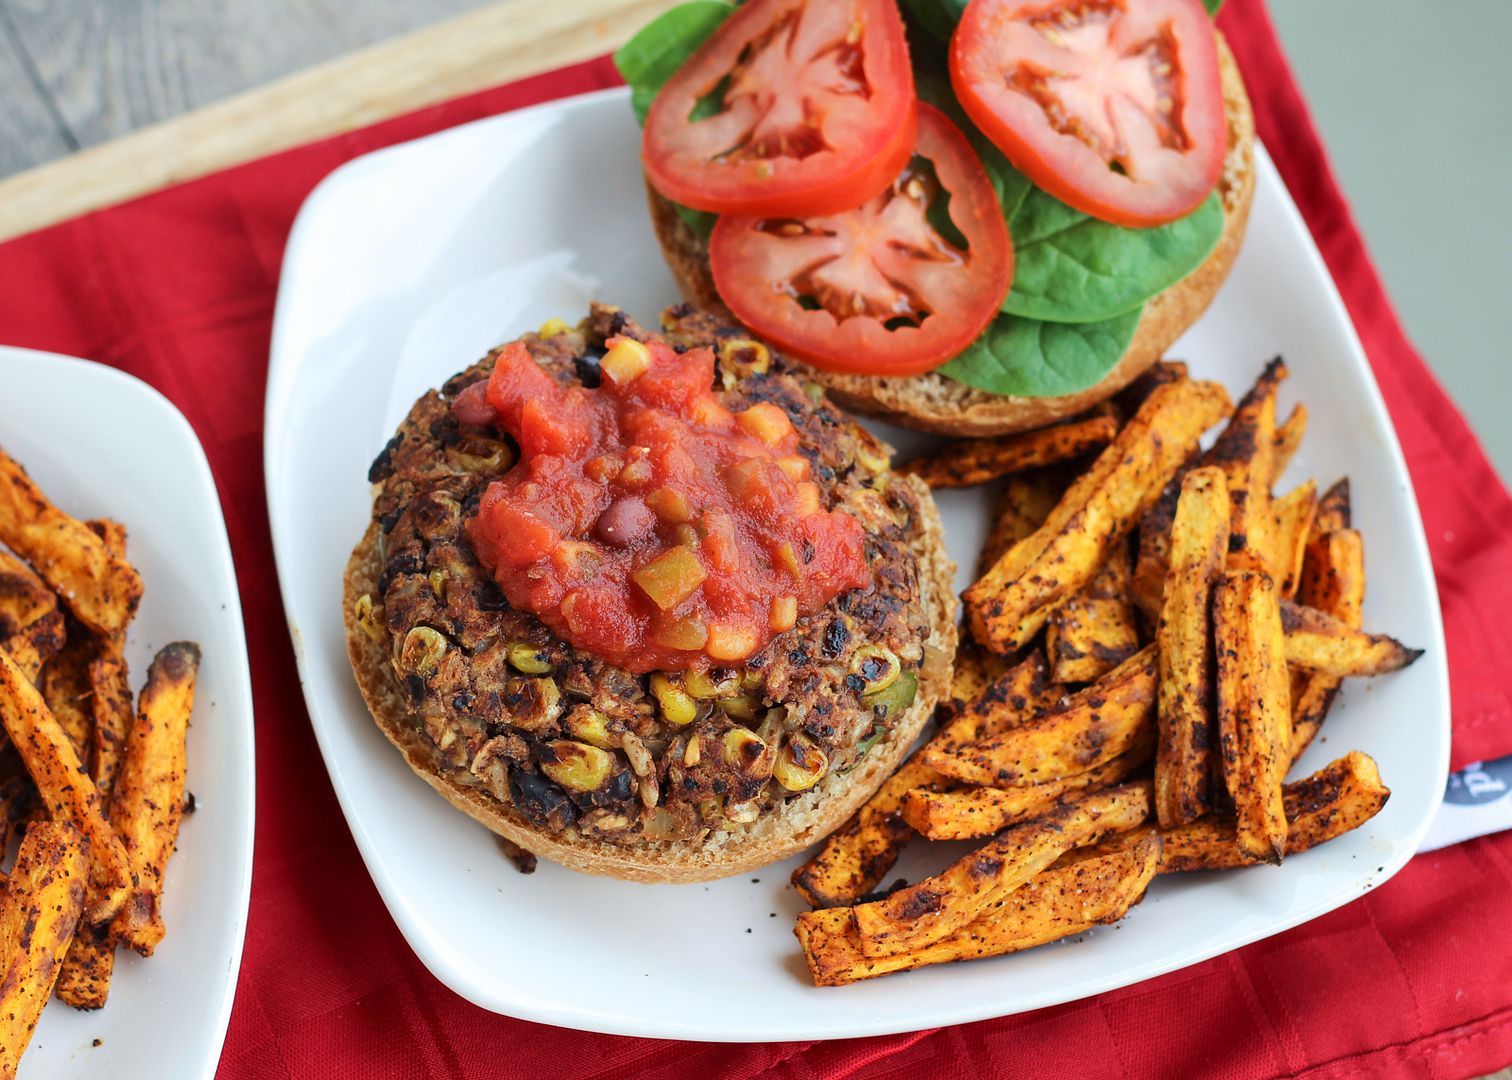
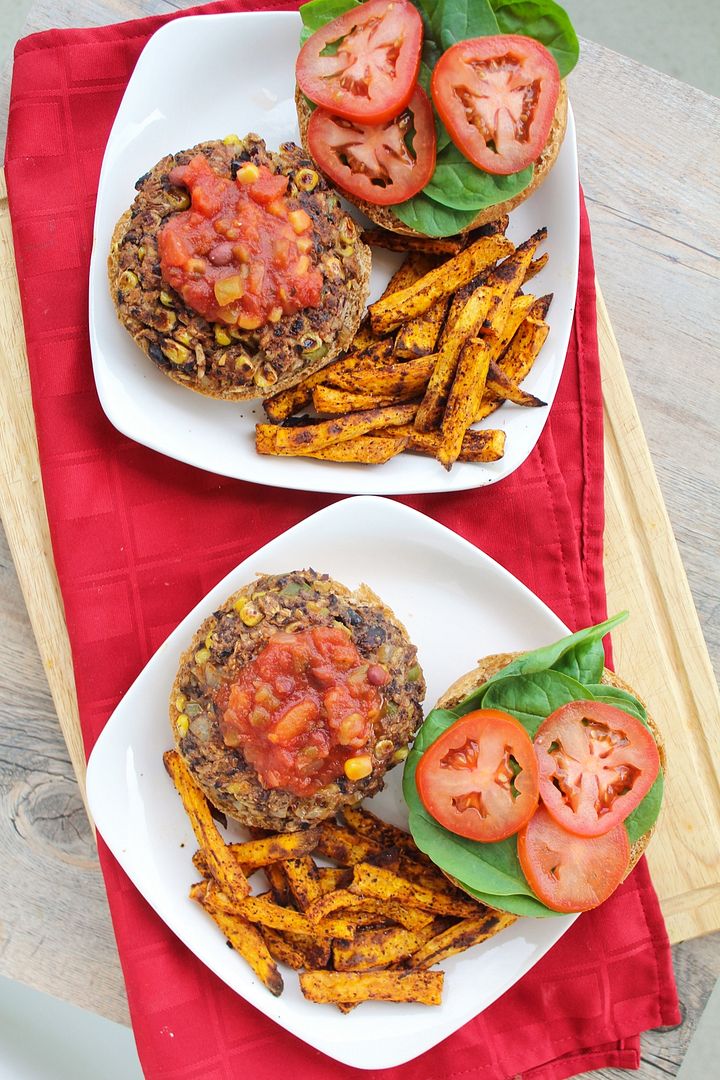
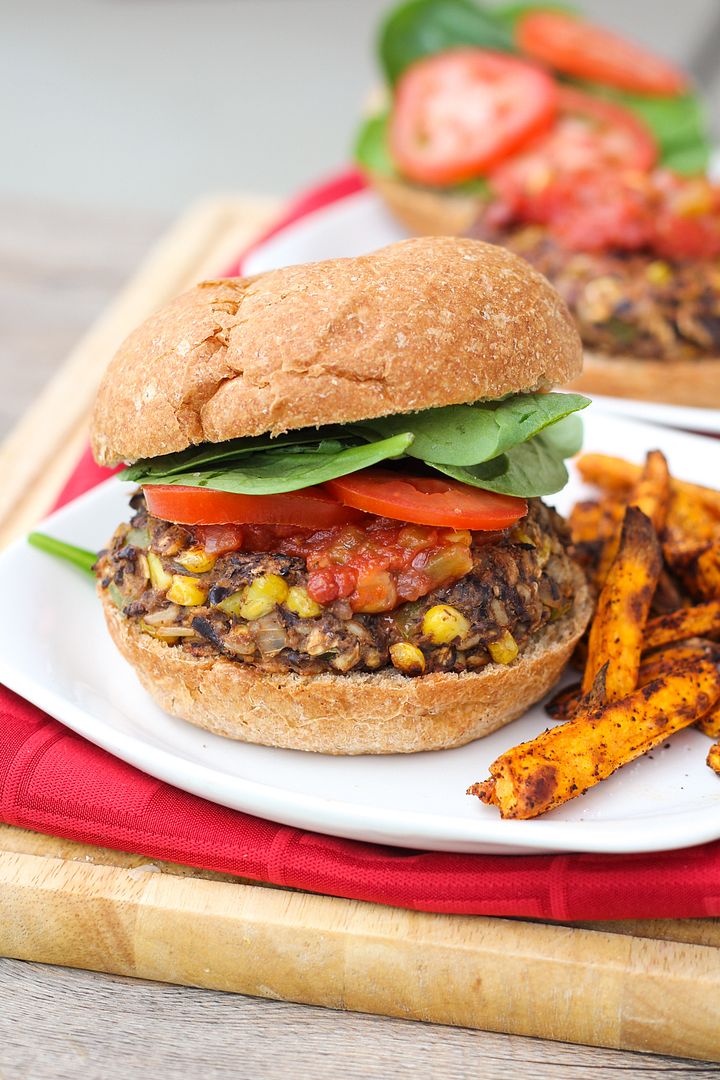
Southwestern Black Bean & Brown Rice Veggie Burgers

Southwestern Black Bean & Brown Rice Veggie Burgers

The (almost) return of summer means the return of burger season - one of my favourite foods!  I still make them in the winter on the stovetop (and even in the summer I use the stovetop because I'm scared of bbqs), but there's something about summer that makes me crave burgers all the time.

I've never liked beef burgers though, and a regular beef patty with the standard toppings doesn't appeal to me much.  Instead, I love experimenting with different chicken and turkey burgers - like buffalo chicken and cheddar burgers or apple turkey burgers with caramelized onions and brie - and veggie burgers, which are so customizable, like lemon chickpea quinoa burgers or portabello mushroom burgers with roasted red peppers and provolone!

Southwestern Black Bean & Brown Rice Veggie Burgers

I love trying out new flavours and for my first veggie burgers of the post-winter season (it's hard to call this summer yet), I went with a Southwestern theme!

The veggie patties for these burgers are hearty and full of real veggies, just how I like them!  The base is a mixture of brown rice, oats, and black beans for plenty of protein and fiber, and mixed in are some onions, garlic, peppers, corn, and plenty of spices for added nutrition and flavour.


Southwestern Black Bean & Brown Rice Veggie Burgers

Ryan and I ate these for dinner three nights in a row (another great thing about veggie burgers is getting a lot of food for a pretty low cost!) and ate them differently each night.

The first time I topped mine with salsa and served them with chipotle sweet potato fries as pictured, which made for a pretty spicy meal though I still loved it!  The second night I added cheese on top, skipped the salsa, and used a light ranch dressing instead which was also awesome.  And the third night I crumbled my patty up and served it over a big spinach salad which was a refreshing change! 
If I had avocado I would have definitely added it to all three meals but avocados are so expensive these days I have to sadly try to limit my use of them.

You can eat these however you like and with whatever toppings you think sound good - hope you enjoy them as much as we did!

Southwestern Black Bean & Brown Rice Veggie Burgers

Southwestern Black Bean & Brown Rice Veggie Burgers

Inspired by and adapted from similar recipes seen on Simply Scratch, Veggie Belly, and Katherine Martinelli

Makes 6 burgers

Ingredients:

For the Burgers:
1/2 cup uncooked whole grain brown rice – I used pre-cooked instant rice
1/2 cup rolled oats, divided
1 (540mL) can of no-salt added black beans, rinsed and drained
1 medium yellow onion, diced
1/2 cup diced bell peppers – I used half a green pepper but you could use a mixture of green and red
3 cloves garlic, minced
3/4 cup thawed frozen corn kernels
1 teaspoon ground cumin
1 teaspoon chili powder
1/4 teaspoon salt
1 teaspoon chipotle chili powder for added spice (or substitute paprika)
1 large egg, lightly beaten

For Topping:
6 whole wheat hamburger buns
Lettuce or spinach
Sliced tomatoes
Sliced ripe avocado
Salsa (optional)
Cheddar or Monterey jack cheese (optional)

Directions:

Cook the rice according to package directions.  Let drain well.

Pulse 1/4 cup oats in a food processor to form crumbs.  Keep remaining 1/4 cup of oats whole.  Transfer all oats to a large bowl.  Reserve 1/4 cup black beans and transfer remaining beans to the food processor.  Pulse until most of the beans are mashed (but not completely mushy).  Add to the large bowl with the oats.

Heat oil in a large skillet over medium-high heat.  Add onions and peppers and sauté until softened, 7-10 minutes, stirring occasionally.  Add garlic and sauté for another minute.  Add corn and reserved 1/4 cup of black beans and stir.  Add all spices and sauté for another minute, stirring.  Remove from heat and let cool slightly.

Add vegetable mixture and rice to the bowl with the oats and black beans.  Add whisked egg and stir mixture until combined.  Form into 6 large patties or 8 smaller ones, if desired (I made 6 patties).

Heat two large skillets over medium heat.  Spray with non-stick cooking spray or use a light amount of oil.  Add 3 patties per pan and cook about 5-6 minutes per side, turning carefully in between, until browned and cooked through.  If using cheese, add slices to the tops of the patties about a minute or two before they’re done cooking to melt the cheese.  Remove from heat.

Add patties to buns and top with lettuce, tomatoes, avocado, salsa, or desired other toppings.  You could also crumble the patties and serve them on salad!

March 07, 2013

Shamrock Personal Pizzas for St. Patrick's Day

Shamrock Personal Pizzas for St. Patrick's Day

Last year, I made these heart-shaped personal pizzas with heart-shaped toppings for Valentine's Day, and I loved them so much that I decided to try to do the same thing for St. Patrick's Day, but with shamrock pizzas and shamrock toppings!

These follow the same method as the heart-shaped pizzas - just divide a ball of pizza dough in four, shape each piece into a shamrock, then top each one with desired St. Paddy's themed toppings, depending on individual tastes!

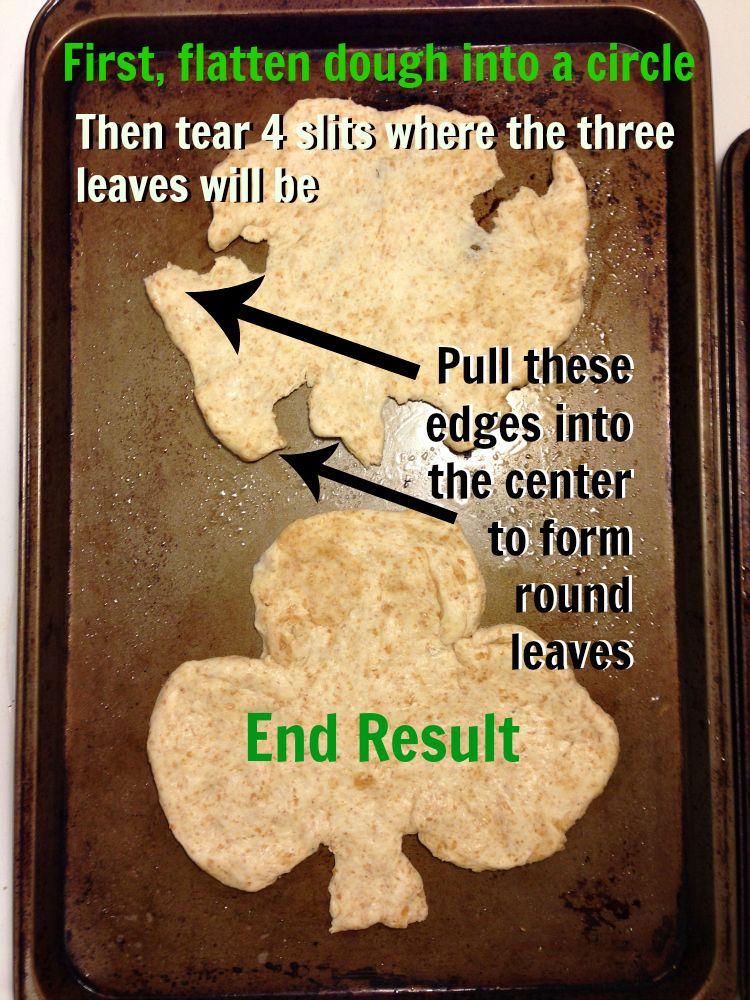
Let's start with the dough.  You can either buy a storebought ball of dough, which is what I did with the heart-shaped pizzas, or make your own.  For these ones, I made Martha Stewart's whole wheat pizza dough.  I cut the recipe in half, which made enough to form 4 personal pizzas.  I skipped the freezing step, and went ahead and baked them two at a time, for 15 minutes at 450°F.  Here's my attempt at showing how to form each ball of dough (after it had risen) into a shamrock shape - it's super easy!

 Making shamrock shaped pizzas

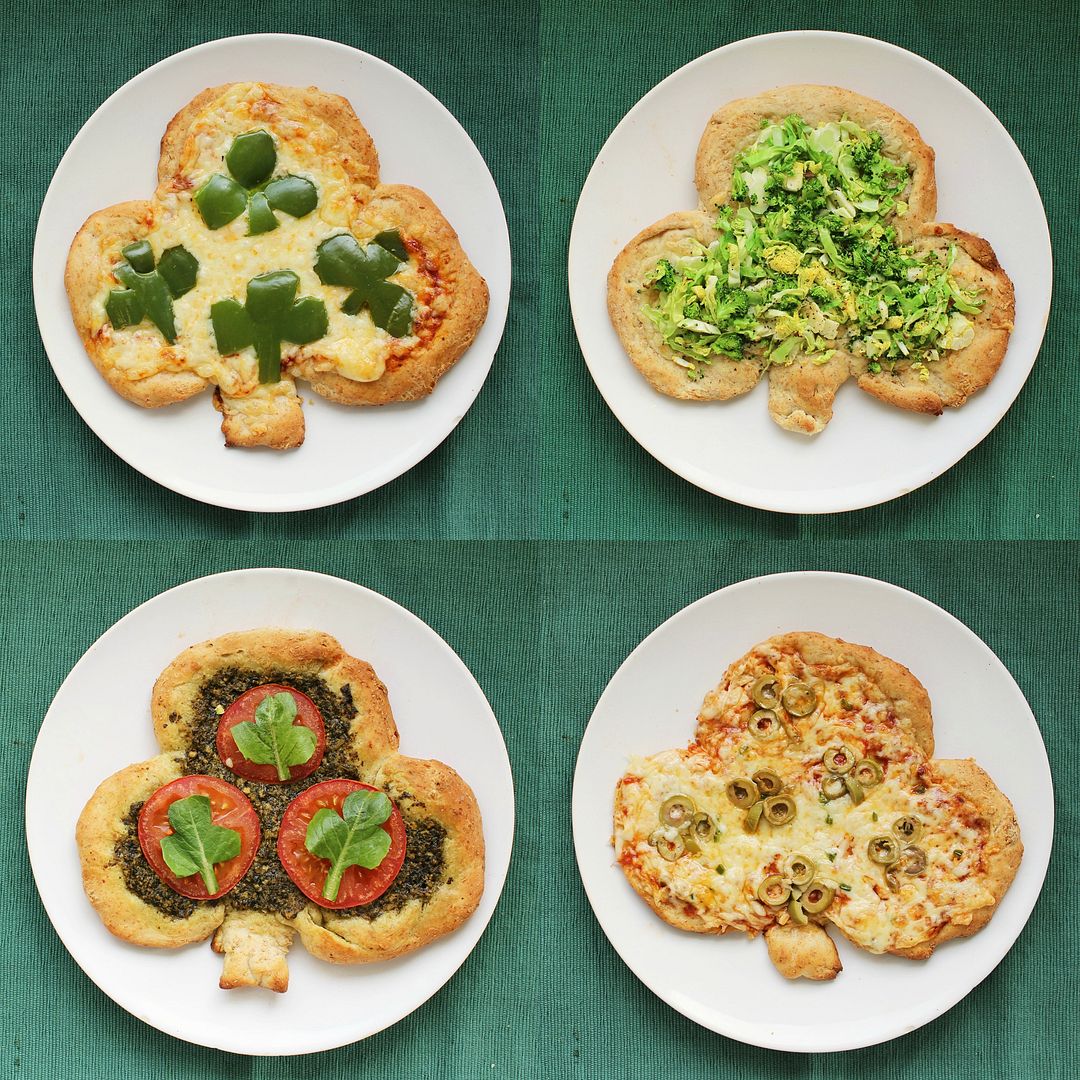
Let's move on to the toppings!  I tried four different topping ideas, which I'll describe below.  If the pictures are too small to read, just right click and 'view image' to see them larger.

Shamrock Personal Pizzas for St. Patrick's Day

The green pepper pizza was my favourite visually.  It was a little tricky to cut the green pepper into shamrock shapes, and mine certainly weren't perfect, but you can at least tell what they're supposed to be!  Just cut a green pepper in half, remove the seeds and membranes, cut each half in two, flatten your four pieces, and cut them into shamrock shapes.  You won't need the whole pepper, but this gives you a little space to work with in case you make a mistake!

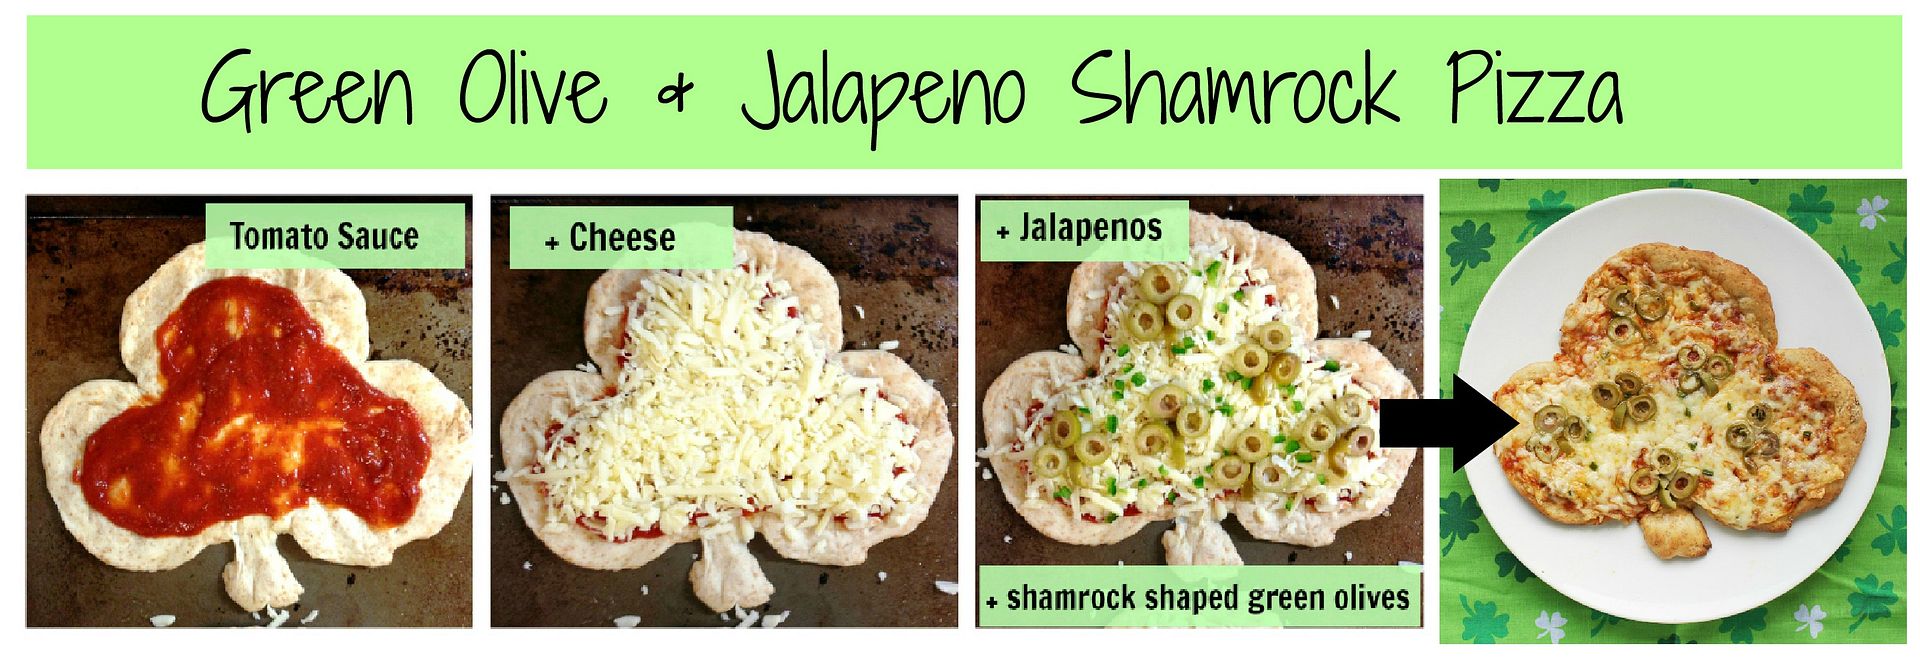
 Shamrock Personal Pizzas for St. Patrick's Day

I thought this was my most creative idea - combining green olive slices and stems to form shamrock shapes - but the finished product didn't look quite as nice as it did before it was baked.  The olives slid around a little during baking (probably because I used way too much cheese), so I had to try to put them back in place afterwards.  Next time, I might just wait to place the olives on the pizza after baking so they don't get covered up by cheese and you can tell what they're supposed to be!

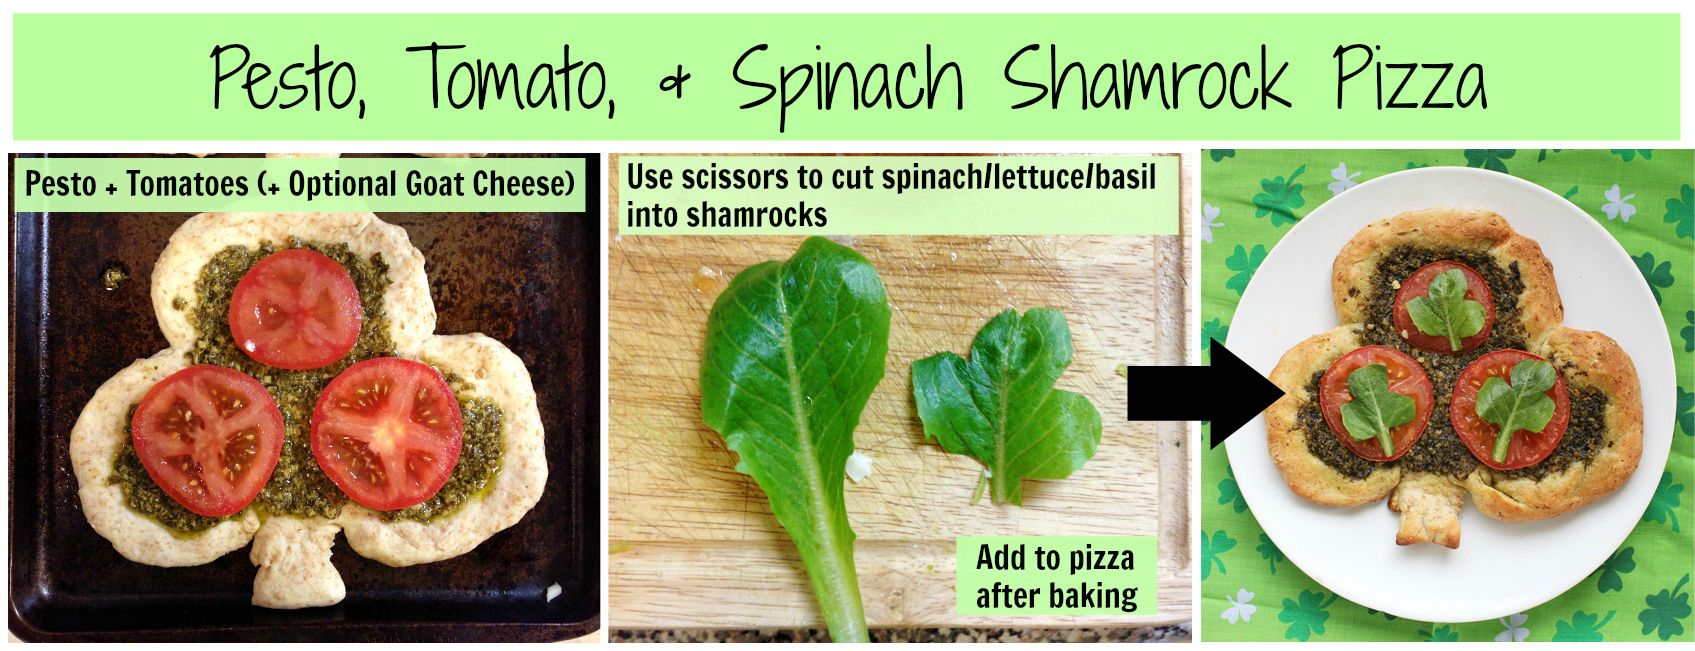
 Shamrock Personal Pizzas for St. Patrick's Day

This one's really easy because you can just use kitchen scissors to cut a leaf of lettuce, spinach, or basil into a shamrock shape!  I paired mine with a pesto spread (to keep it green) and tomatoes, and I had intended to add goat cheese but then realized I didn't have any, so just picture it on there!

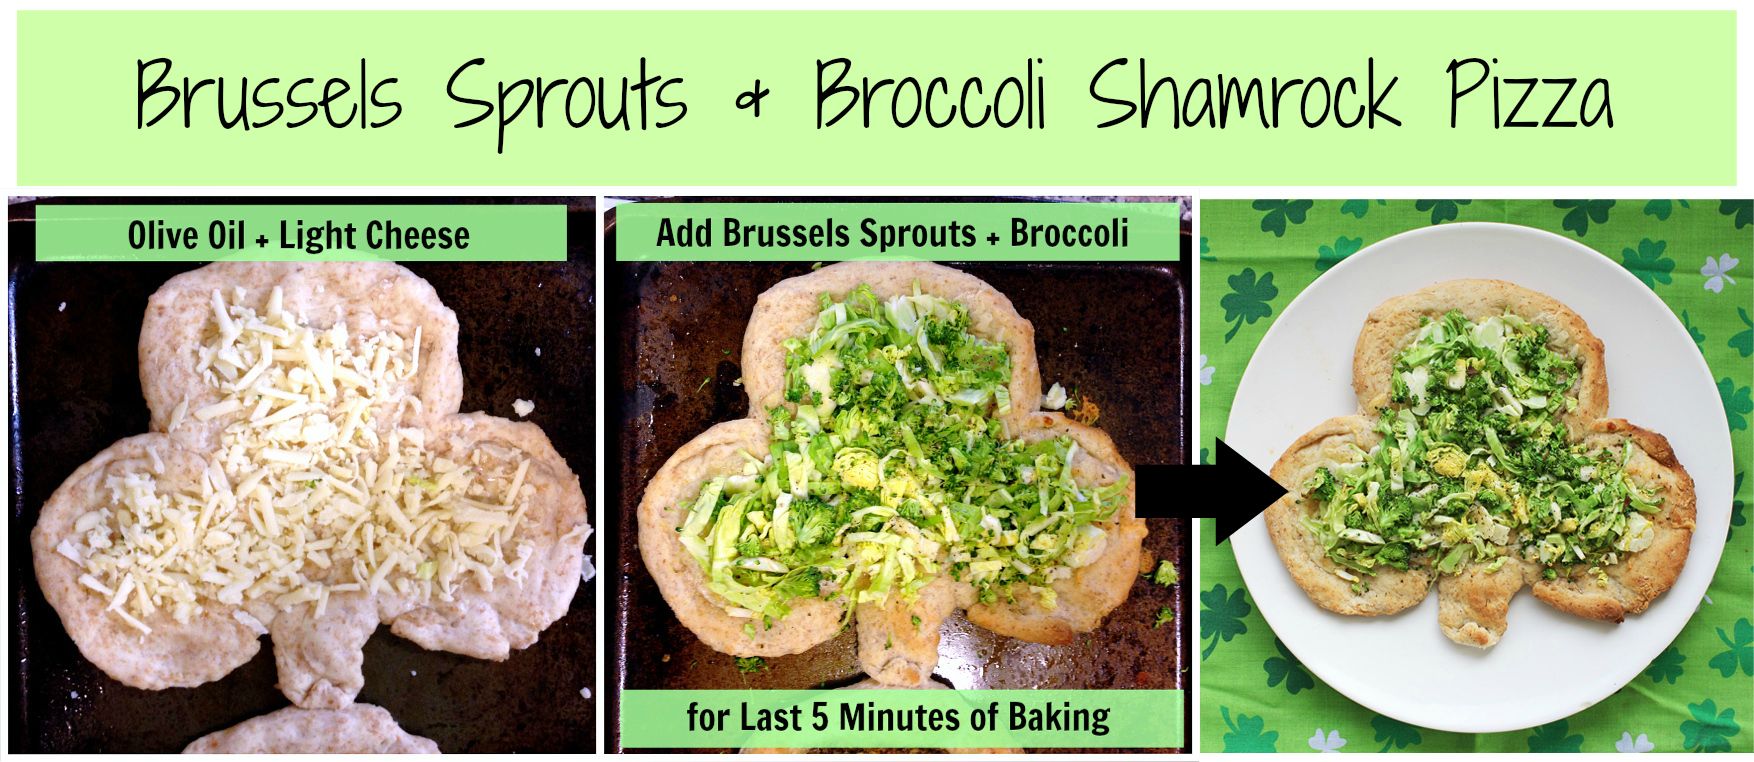
 Shamrock Personal Pizzas for St. Patrick's Day

This was my attempt at a healthier pizza, and instead of using shamrock shaped toppings, I covered the whole thing with green ingredients!  I spritzed the dough with olive oil, topped it with a bit of mozzarella (but gruyere would be good too), then put it in the oven for 10 minutes.  Next, I added a layer of chopped brussels sprouts and broccoli, seasoned it with salt and pepper, and popped it back in the oven for 5 minutes until the greens were just starting to brown on the edges.  The result was a crisp and light pizza that was actually my favourite!

Shamrock Personal Pizzas for St. Patrick's Day

These made the perfect individual sized pizzas and I loved having a different one to eat each day for leftovers!  The clover shape actually breaks perfectly into three "slices", which makes them easy to eat.  If you have other ideas for green toppings that would work on these, feel free to share them in the comments!

March 01, 2013

Kenyan Ugali with Peanut Stew

Kenyan Ugali with Peanut Stew

So it's been a fairly busy and stressful week here, with tons of school work I’m behind on, blog problems, knee problems, and icky weather, among other things.  And during weeks like that, it’s amazing what some comfort food (and a bottle of wine) can do to help you relax in the evening!

This dish probably isn’t what most people would think of as comfort food, but it’s definitely one of those hearty and cozy meals that fills your belly and warms your soul, and just so happens to be one of the tastiest meals I’ve had in a while.

 Kenyan Ugali with Peanut Stew

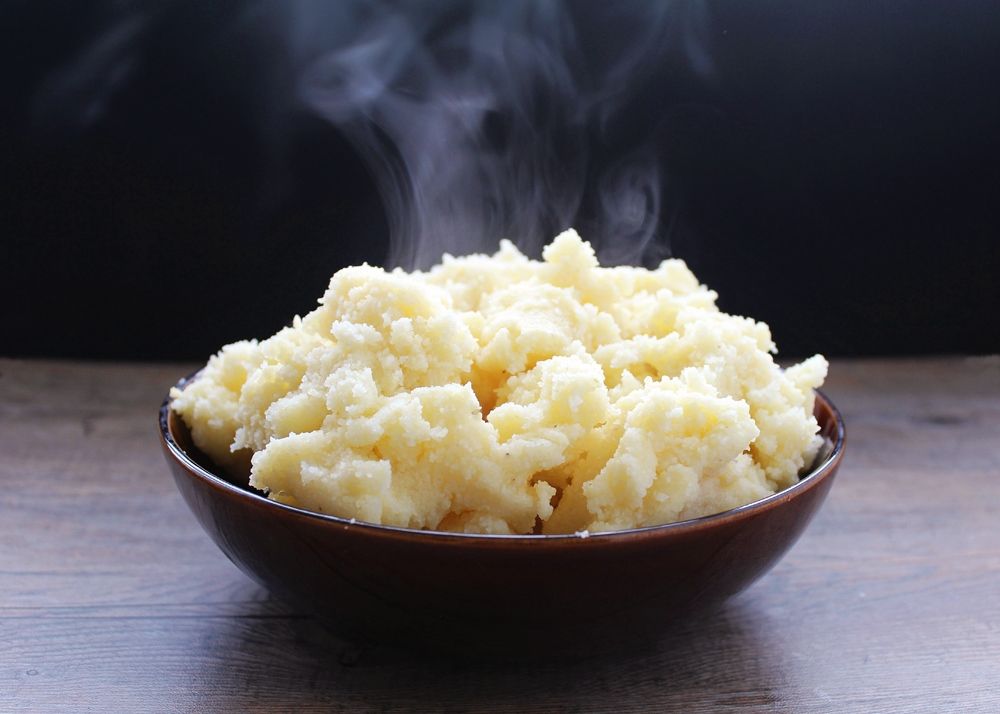
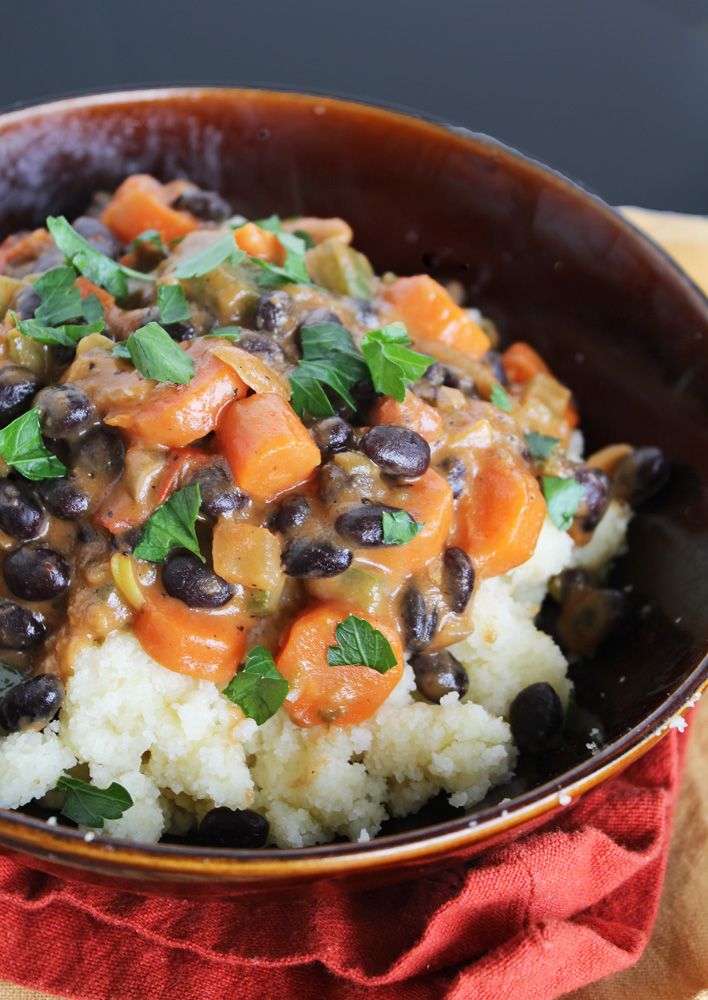
I’m sure some of you are waiting for me to explain what on earth “ugali” is, and to be honest, I’d never heard of it until I made this dish. From what I’ve learned, it’s a starchy staple dish in several African countries.  It’s very similar to polenta, and is made of just white corn meal that’s cooked with water to a thick, dough-like consistency (not creamy and smooth like polenta), and it's usually eaten with some sort of meat or vegetable stew. Fortunately my sister has been to Kenya and tried ugali a few times there, so she was able to give me some advice as I was making it and assure me that the thick texture was how it’s supposed to be!

Ugali is super easy to make and also really cheap – all you need is cornmeal! (I found white cornmeal in the Mexican section of my regular grocery store). And though it’s normally made with water, I used half vegetable broth to cook my cornmeal just to infuse some extra flavour into it. The consistency of the final product is so thick that you could grab a ball of it in your hand (and indeed you can use that to dip into other dishes or grab meats or veggies), and while I think it would normally be served in one big ball in the shape of a bowl, I broke mine up a bit so you could see the texture here:

Ugali

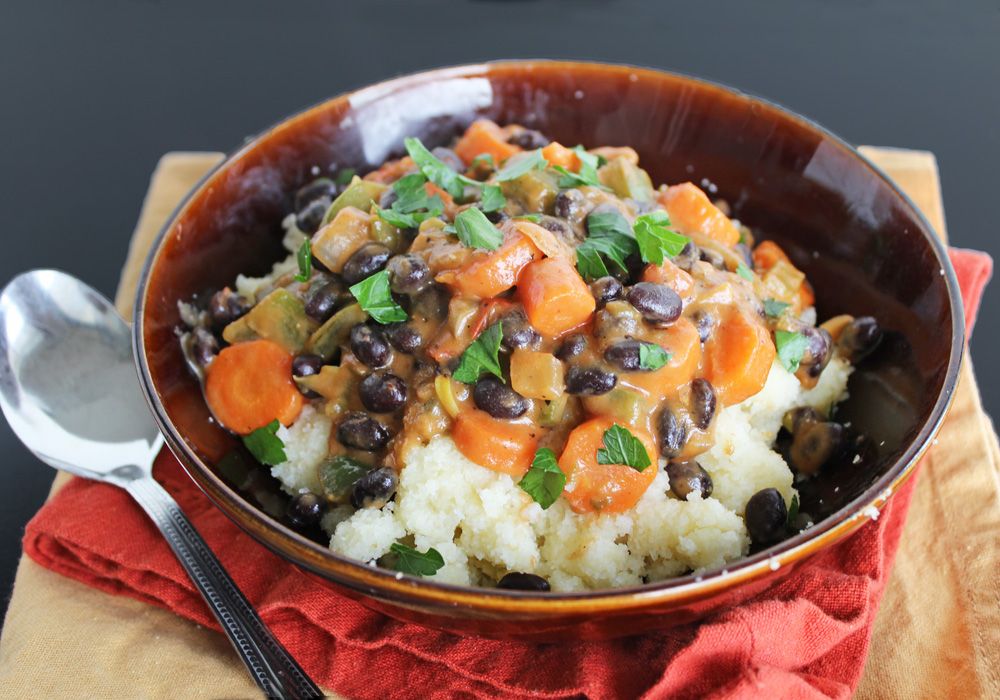
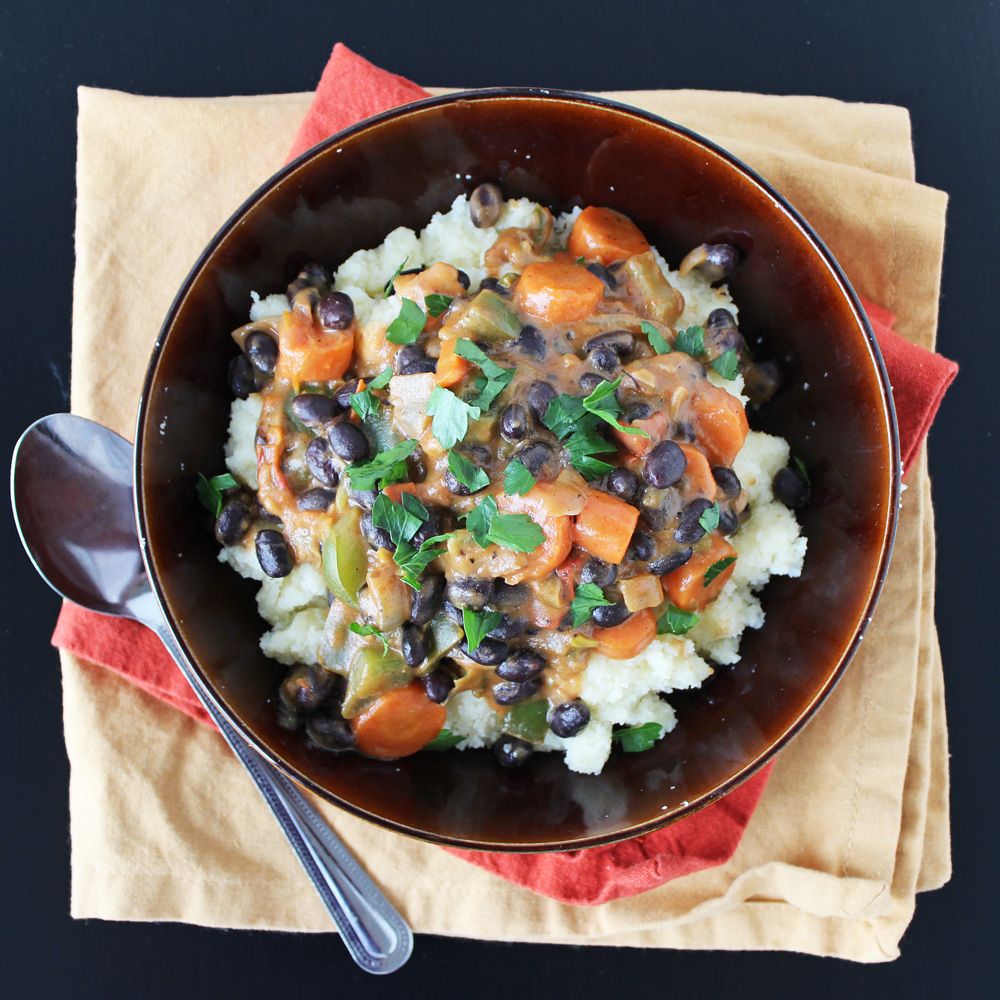
The ugali makes a great base for a stew, and I paired mine with a rich and creamy peanut vegetable stew.  I added carrots, black beans, and parsley to the original recipe, so I’m not sure how authentic my stew is or if it would ever be eaten with ugali, but it was so good that I didn’t care!  The finished dish was full of veggies and protein, was super filling, and just so hearty and comforting.  If you’re in need of a dish to warm your soul and are looking to try something new and a little different for dinner, I highly encourage you to give this a try! 

And if you like trying new cuisines, my friend Courtney just redesigned her site with a focus on ethnic vegetarian food, so go check it out at The Fig Tree!

 Kenyan Ugali with Peanut Stew

Kenyan Ugali with Peanut Stew

Adapted from The Ethnic Vegetarian

Serves 4-6

Ingredients:

For the peanut stew:
1 tablespoon olive oil
1 medium yellow onion, chopped
3 cloves garlic, minced
2 tomatoes, chopped
1 green bell pepper, chopped
2 carrots, peeled and diced
1/2 a jalapeno or chile, seeds and veins removed, minced
Dash of cayenne pepper
Salt and pepper
1 can black beans, drained and rinsed
1/2 cup smooth peanut butter
1/2 cup hot water

For the ugali:
2 cups vegetable broth
2 cups water
1/2 teaspoon salt (optional)
4 cups white cornmeal

Chopped parsley for serving (optional)

Directions:

Heat olive oil in a large nonstick skillet over medium high heat.  Add onion and saute until softened, about 5 minutes, stirring occasionally.  Add garlic, tomatoes, green pepper, carrots, jalapeno, cayenne, and salt and pepper to taste.  Let cook for 10-15 minutes, stirring often.  Mix together the peanut butter and hot water in a small bowl until smooth.  Add black beans and peanut butter mixture to the vegetables and let cook on low heat for about 10 minutes, until thickened slightly.

Meanwhile, bring the vegetable broth and water for the ugali to a boil in a medium saucepan.  Slowly and gradually add the white cornmeal, stirring constantly with a whisk to prevent lumps from forming.  Reduce heat to medium-low and continue to stir regularly until the mixture pulls away from the sides of the pot and becomes very thick, about 10 minutes (mine took less time).  Remove from heat.

Serve by dividing ugali among bowls and spooning peanut stew overtop.  Top with parsley and season with additional salt and pepper, if desired.

November 06, 2011

Pumpkin Chili in Pumpkin Bread Bowls

pumpkin chili in pumpkin bread bowlWhile everyone else started posting pumpkin recipes as soon as September rolled around, I waited until October because I was trying to stretch out the summer recipes as long as I could. Now I can't believe that a new season is already beginning, as stores have put up their Christmas displays, holiday ads are playing on tv, and recipes with candy cane and gingerbread are starting to pop up all over the blogosphere. And yet here I am, still posting pumpkin recipes! I do want to switch over to holiday recipes soon, but not before I share a few more delicious pumpkin recipes with you guys!

Fortunately, this recipe is something that can be enjoyed all winter long. Chili is one of my favourite things to make in the winter because it's easy, it's healthy and filling, it makes a ton, and it packs well for lunches. Ever since I saw a recipe for a pumpkin bread bowl on Breadworld I'd been dreaming about how good a pumpkin chili would taste inside a pumpkin bread bowl. The answer? Amazing!

The bread bowl has a subtle pumpkin flavour and is soft but sturdy enough to hold up to the chili. The dough was easy to make and form into buns, which you then tear out the center of to fill with the chili. You could probably save the inside of the buns for breadcrumbs or another purpose, but I couldn't stop myself from eating all the dough as I tore it out because I have no self control when it comes to fresh bread. I think if you have kids they would have a lot of fun preparing their chili bowls themselves, and getting to eat them after they finish their chili. Of course, there's nothing wrong with adults enjoying this just as much!

The chili I made had a very subtle pumpkin flavour, and not a lot of add-ins because I went grocery shopping for it very early in the morning when my brain wasn't fully turned on yet, so all I could think to buy was kidney beans. But feel free to add in whatever you like (as I've suggested in the recipe below), the recipe is really a base that you can customize to your own liking.

While the meal is a bit time consuming to make overall, there isn't a lot of hands on cooking time involved. Make it on a Sunday and have the leftovers for lunch the rest of the week - a bowl of this chili fills me up for the rest of the afternoon.

What about you guys, are you ready for the holiday recipes already or still hanging on to Fall a little while longer?

pumpkin bread bowl
Pumpkin Bread Bowls

Adapted from Breadworld

Makes 6 bread bowls

Ingredients:

1/2 cup milk
1/2 cup water
2 tablespoons butter
1/4 cup sugar
1 teaspoon kosher salt
1 envelope active dry yeast
1/4 cup warm water (100° to 110°F)
1 cup canned pumpkin puree
2-1/2 cups bread flour
2 to 2-1/2 cups whole wheat flour

Directions:

Heat milk, 1/2 cup water, butter, sugar and salt in a small saucepan just until butter is melted. Cool to between 100° to 110°F.

Dissolve yeast in 1/4 cup warm water in a large mixing bowl or bowl of an electric mixer. Stir in the milk mixture, pumpkin and 1 cup of each flour. Beat until smooth. Mix in remaining bread flour and enough whole wheat flour to make a soft dough.

Turn dough onto lightly floured surface and knead until smooth and elastic, about 6 to 8 minutes. If using an electric mixer, just leave the dough in the bowl and use the dough hook to knead the dough for 6 to 8 minutes. Transfer dough to a large greased bowl. Cover with heavy tea towels and let rise in a warm, draft-free place for about 1-1/2 hours.

Punch down dough. Divide into six portions and form each into a flattened ball. Place on a greased baking sheet, cover and let rise until doubled, about 30 minutes. Bake at 400°F for 15 minutes.

To serve: Cut off the top of each bowl and hollow out the center. Fill with your favourite soup or chili recipe, such as the pumpkin chili recipe below.

pumpkin chili in pumpkin bread bowl
Pumpkin Chili

Serves 6 with bread bowls

Ingredients:

1 tablespoon olive oil
1 large onion, diced
1 green pepper, diced
2 cloves garlic, minced
1 (14-oz) can crushed tomatoes
1 (14-oz) can fire roasted diced tomatoes
1 (24-oz) can kidney beans, drained and rinsed
2 cups canned pure pumpkin puree
1 tablespoon pumpkin pie spice
3 tablespoons chili powder
2 teaspoons cumin
1 teaspoon cayenne
1 tablespoon cocoa powder
2 teaspoons cinnamon
1 tablespoon sugar
1 teaspoon salt

Optional: add in black beans, extra kidney beans, or ground turkey/beef for more protein; corn or red peppers for extra vegetables; chicken, veggie, or beef broth for more liquid; or any other desired add-ins.

Directions:

Heat oil in a large saucepan over medium-high heat. Add onion, green pepper, and garlic and sauté until soft, about 5-8 minutes. Add crushed tomatoes, diced tomatoes, kidney beans, and pumpkin puree and stir. Add all spices and stir to mix. Reduce heat, cover, and simmer about 1 hour. Serve warm, spooned into pumpkin bread bowls. Top with shredded cheese if desired.

September 25, 2011

African Sweet Potato and Peanut Stew

african sweet potato and peanut stew

If you’re craving something hearty and comforting to warm you up on a fall day, this is the recipe for you! I made this many times to get me through last winter and plan to make it many times again this winter. This is my kind of comfort food, and unlike many traditional comfort foods, this one is really good for you too - while still managing to taste rich.

The recipe comes from Janet at the the taste space, a blog (by a fellow Canadian!) that’s full of really unique and healthy recipes that are so different from anything I see anywhere else, and I’ve loved everything I’ve tried from there.

I didn’t want to change much about the recipe because I knew it was perfect as is, but you could definitely mix things up with other ingredients if you want. Janet mentions that the peanut butter taste is not very dominant, so I doubled the peanut butter because I really wanted to be able to taste it. I wrote the recipe with the amount I used below, which I thought gave it a perfect hint of peanut butter, but if you’re not crazy about peanut butter then feel free to halve that amount back down to 2 tablespoons.

I’m also not a big fan of peppers in stews, so I decided to switch the pepper for carrots, which I thought would work well in this dish. I bought one of those ginormous bags of carrots at the grocery store, lugged it home on the bus along with all my other groceries, and when I finally went to take my first spoonful of the completed dish I realized I’d completely forgotten to put the carrots in. Urggh. Unless I write something down, I never remember it - does anyone else have that problem?

Anyways, if you have a better memory than me, you could try adding some chopped carrots in at the same time as the sweet potatoes. But even without any extra vegetables, this stew was still amazing. It also makes great leftovers for a filling lunch later in the week, so make lots!

african sweet potato and peanut stew

African Sweet Potato and Peanut Stew

Adapted from the taste space

Serves 4

Ingredients:

1 tablespoon olive oil
1 medium onion, chopped
1 bell pepper (green or red), deseeded and chopped (optional – I omitted)
2 garlic cloves, minced
1 teaspoon peeled and grated ginger
1/2 teaspoon ground cumin
1/2 teaspoon ground cinnamon
1/2 teaspoon red pepper flakes
1 1/2 pounds sweet potato (about 2 medium or 1 ½ large potatoes), peeled and cut into small chunks
1 (14-oz) can crushed tomatoes (I couldn’t find a can in this size so I just used half of a 28oz can)
1 cup vegetable stock
1 (19-oz) can red kidney beans
1/4 cup peanut butter

Directions:

Heat olive oil in a large saucepan over medium heat. Add onion (and pepper if using) and sauté until softened, about 5 minutes.

Add the garlic, ginger, and spices and briefly sauté until fragrant, about 30 seconds to one minute.

Add the crushed tomatoes and vegetable stock, followed by the sweet potatoes. Cover and let simmer gently on medium-low for 30 minutes, until sweet potatoes are soft.

Add kidney beans, stir and heat through. Add the peanut butter and stir until completely incorporated into the sauce. Serve warm.

Ingredient Index

Related Posts Plugin for WordPress, Blogger...