Showing posts with label jalapeno. Show all posts

January 13, 2014

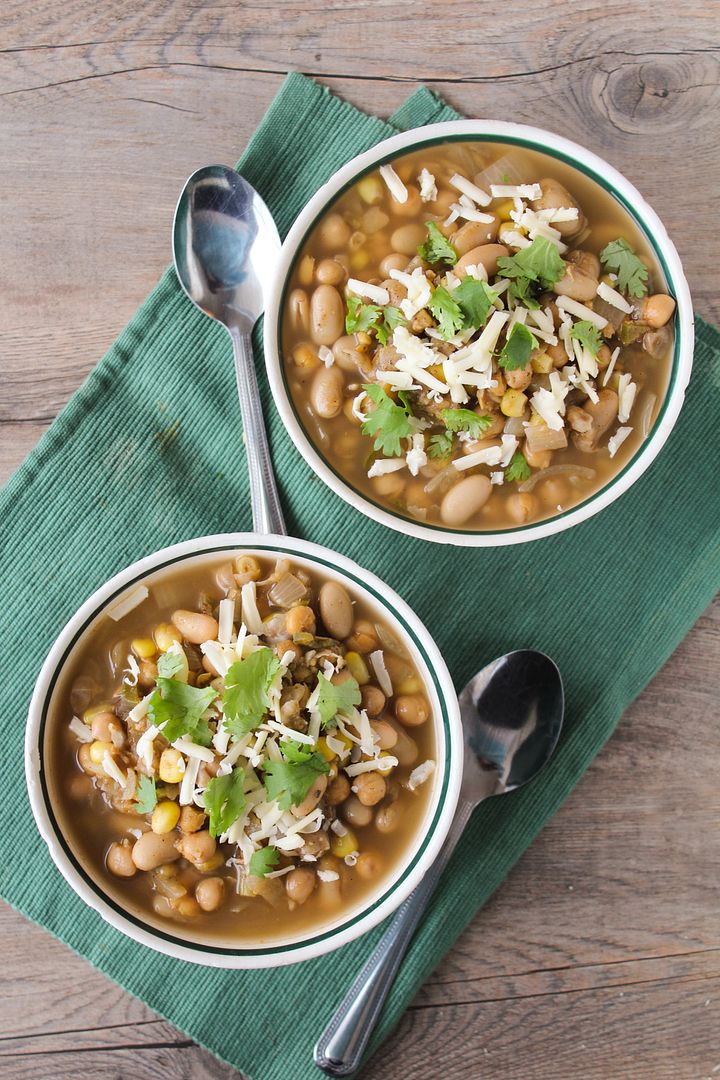
White Chickpea Chili

White Chickpea Chili - a healthy and easy vegetarian twist on white chicken chili

With the cold weather a lot of us experienced last week (except those lucky people in California!), I’m sure we’ve all been eating lots of warm comfort food lately.  When it gets that cold out all I want for dinner is soup, stew, or chili, but as these can often involve a lot of cooking time to develop enough flavour, during the week I need something that’s a little more quick and easy to prepare.  

Enter white chickpea chili!
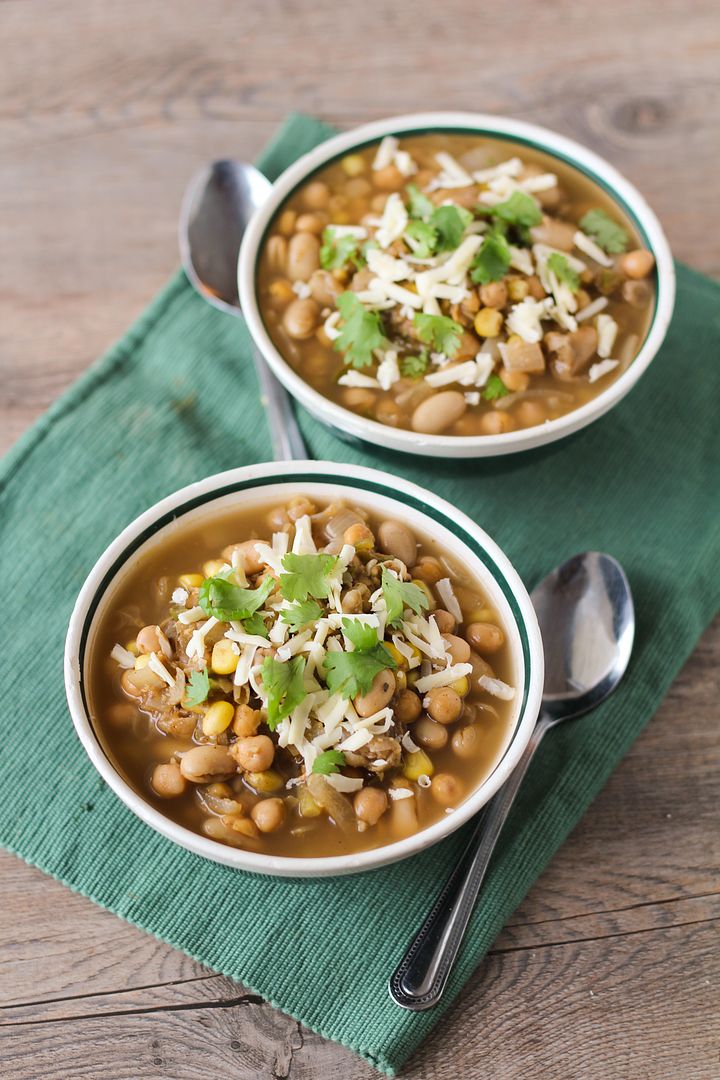
White Chickpea Chili - a healthy and easy vegetarian twist on white chicken chili

I love white chicken chili as a refreshing change from tomato-based versions, but I decided to make it a little easier and cheaper to make by using all beans and no chicken.  This vegetarian white chili includes mashed chickpeas throughout for thickness, whole chickpeas and white beans for texture (and tons of protein, so you won’t miss the meat!), some corn for a little sweetness, jalapeno for spice, and then vegetable broth, garlic, onions, and seasonings for plenty of flavour.

You end up with a healthy vegetarian chili that’s inexpensive, easy and fairly quick to make, and full of flavour.  Perfect for these cold winter nights, and also Sunday playoffs if you usually associate football with chili (and if you're still watching - my team's still in it so I'm all about the football food!)

Hope you all had a good weekend and are dethawing a bit now!
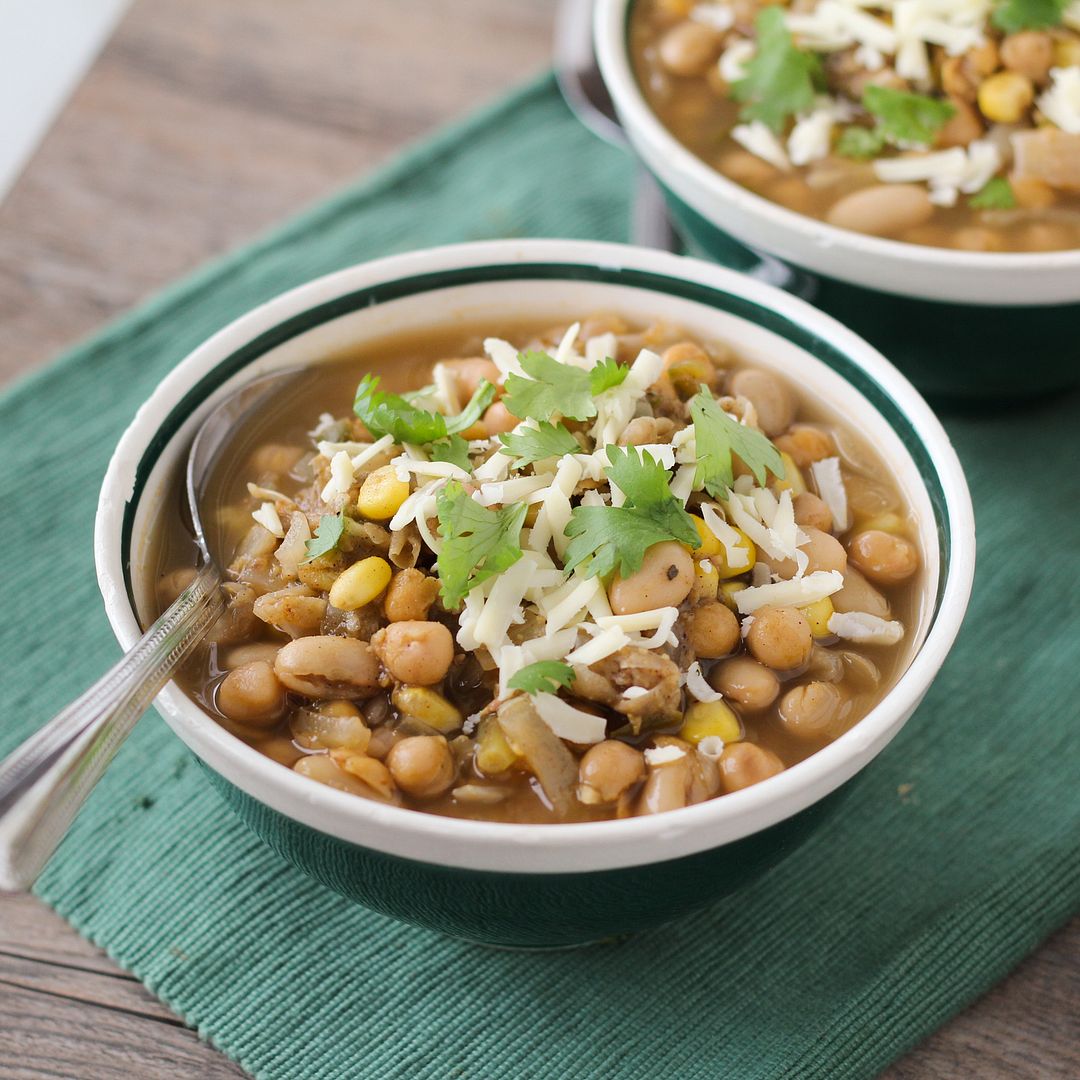
White Chickpea Chili - a healthy and easy vegetarian twist on white chicken chili

White Chickpea Chili

Adapted from The Neely’s white chicken chili recipe

Serves about 4

Ingredients:

1 teaspoon olive or canola oil
1 large or 2 small yellow onions, chopped
2 cloves garlic, minced
1 jalapeno, minced (use more if you want it to be spicier)
2 (540mL) cans chickpeas, drained and rinsed, divided
1 (540mL) can white kidney beans, drained and rinsed
2 teaspoons ground cumin
1 teaspoon chili powder
1 teaspoon dried oregano
4 cups low sodium vegetable broth
1 tablespoon fresh lime juice
1 cup frozen corn kernels
Salt and pepper to taste

Toppings:
Shredded white cheddar cheese
Chopped fresh cilantro
Light sour cream
Chopped ripe avocado (not pictured in my version but it would be a nice addition!)

Directions:

Heat oil in a large saucepan or Dutch oven over medium-high heat. Add onions, garlic, and jalapeno, stir to coat with oil, and sauté until soft and fragrant, stirring occasionally, about 5 minutes.

Meanwhile, rinse and drain your cans of beans, keeping one can of chickpeas separate. Transfer those chickpeas (1 can) to a medium bowl and mash with a potato masher until most beans have been smashed. Set aside.

Add cumin, chili powder, and oregano to the onion mixture in the pan. Stir to coat and let cook for about 1 minute. Add vegetable broth, lime juice, corn kernels, mashed beans, and remaining beans. Bring to a boil, then reduce heat to simmer and let cook about 10-15 minutes.

Season with salt and pepper to taste. Serve warm in bowls topped with shredded cheese, cilantro, a dollop of sour cream, avocado, and additional lime wedges, if desired.

August 29, 2013

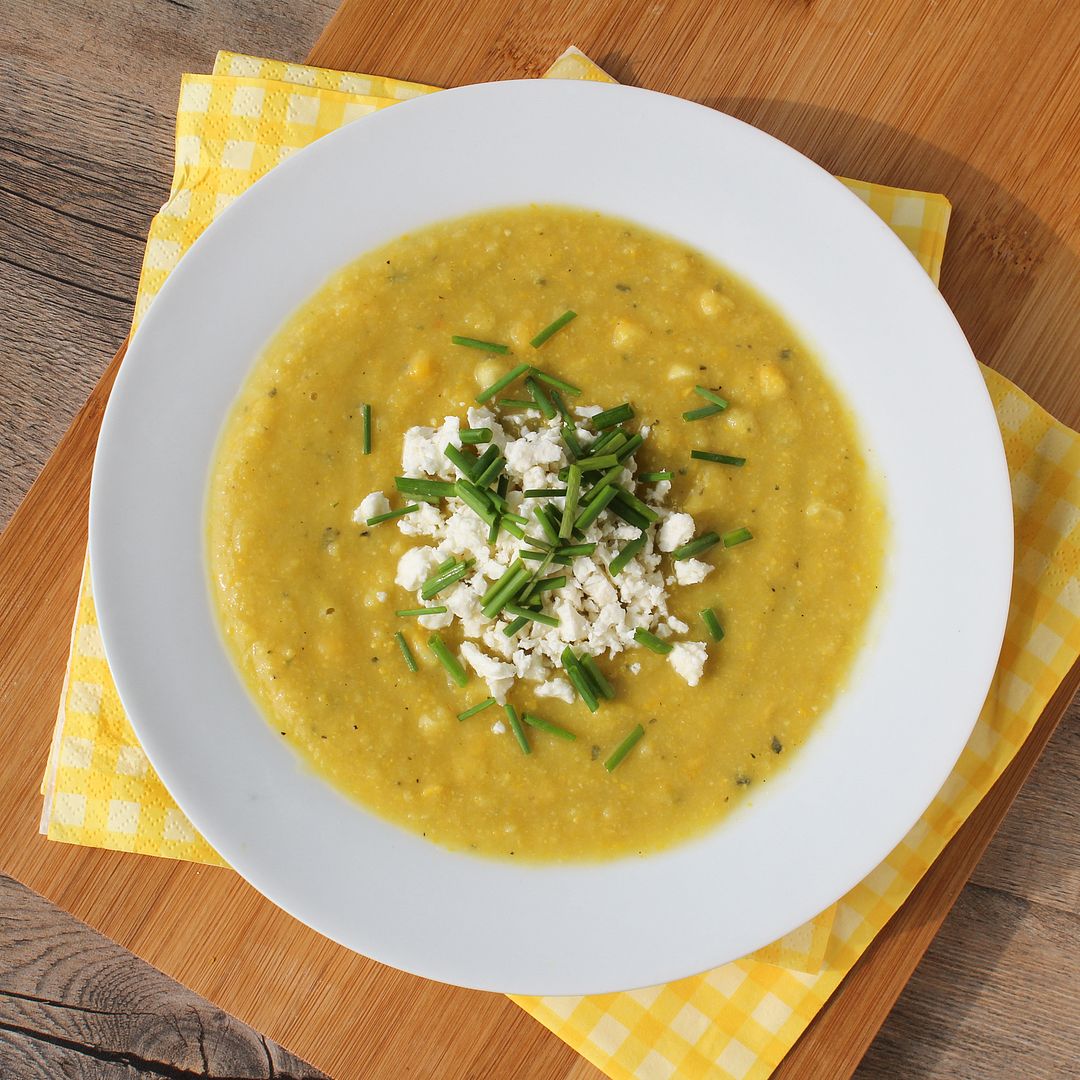
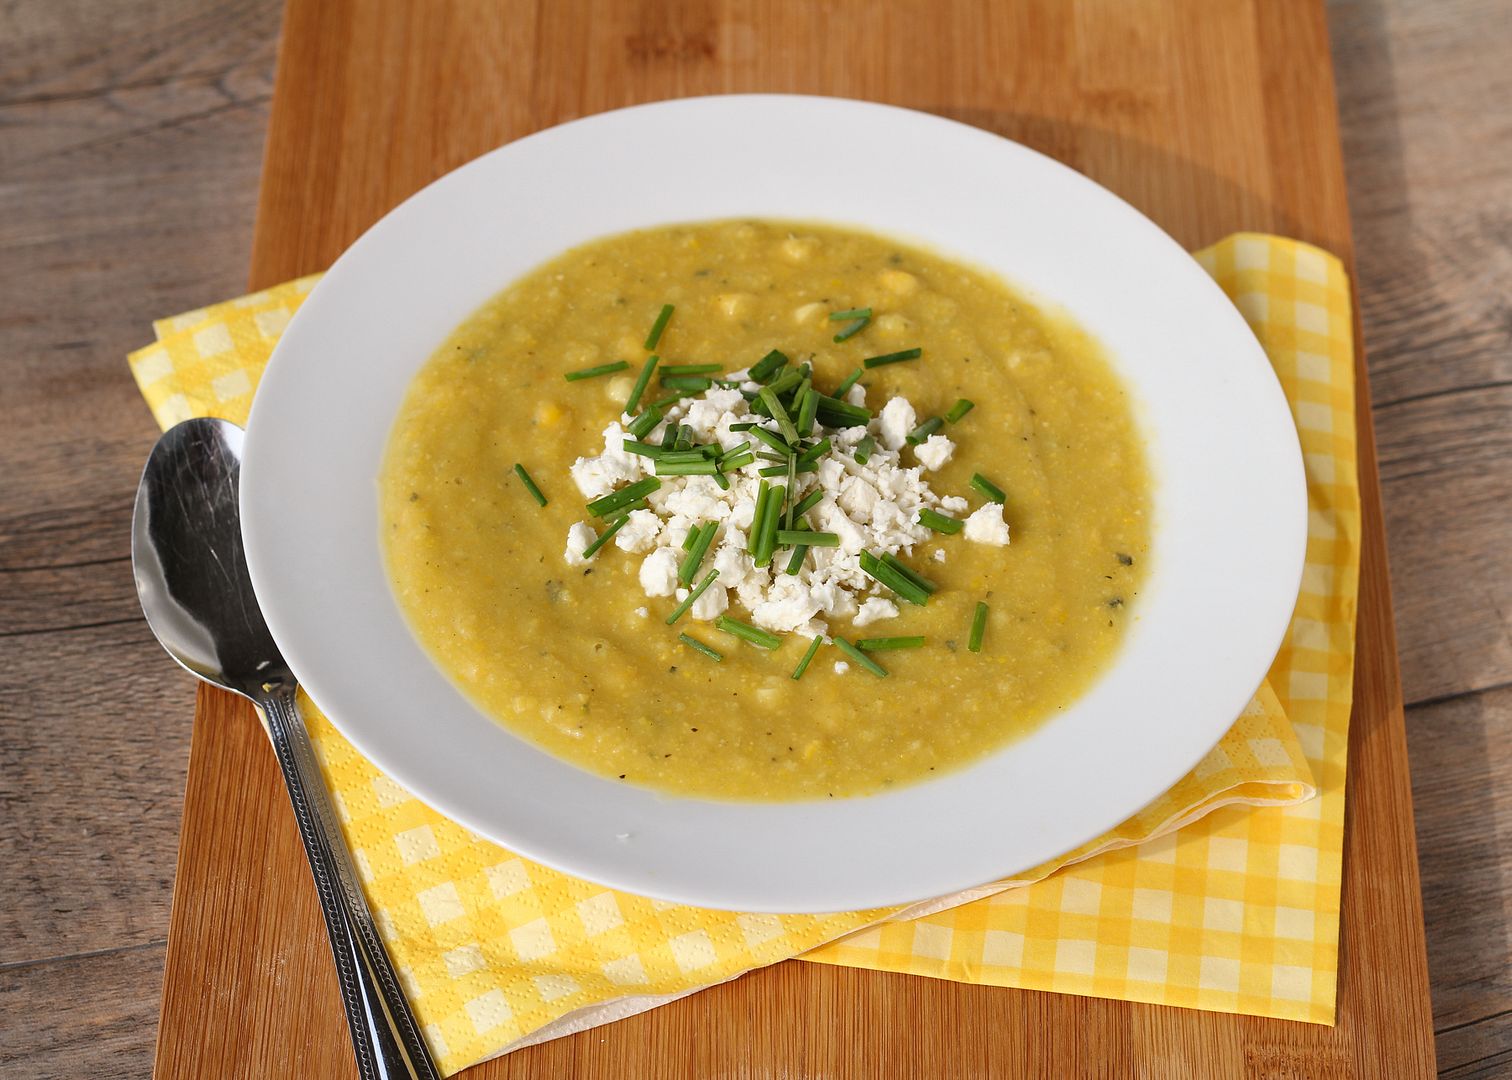
Golden Summer Squash & Corn Soup

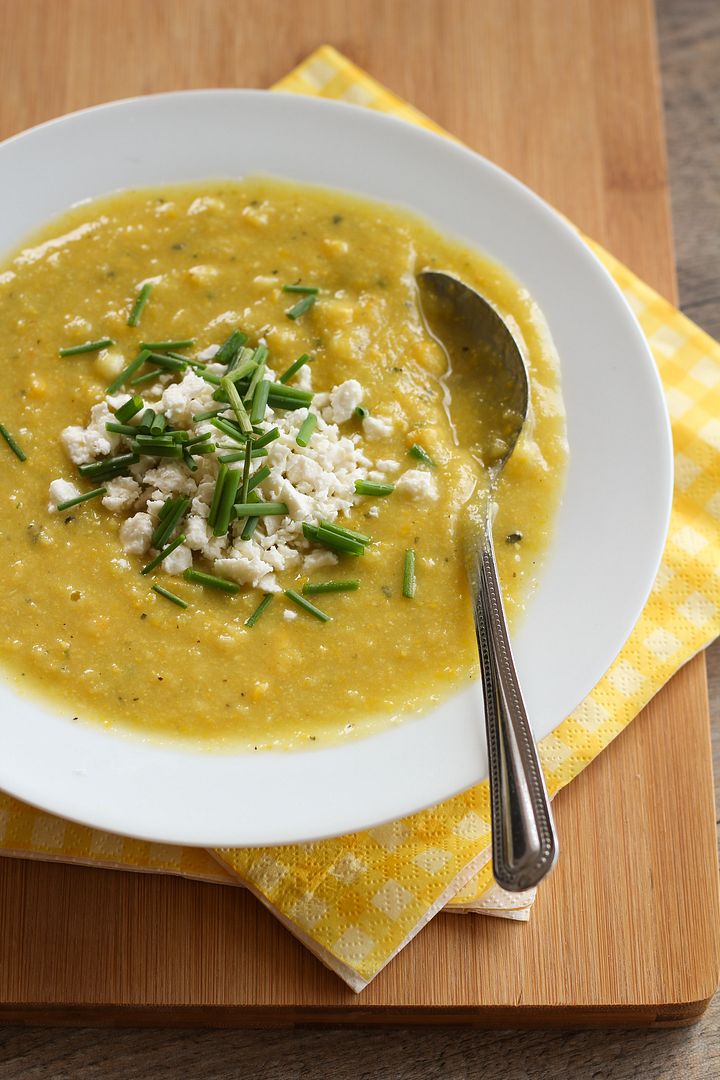
Golden Summer Squash and Corn Soup, topped with Feta & Chives

I apologize that I haven't been able to share a recipe post in a couple of weeks now!  I thought I would have plenty of downtime in Japan for blogging, but it turned out I barely even had time to email my family at night - not that I'm complaining, because it meant I was keeping busy there and seeing lots of sights!  Now that I'm home though, I'm so excited to be able to get back into a routine, including blogging and cooking for myself again!

I had a lot of great food in Japan, but considering I didn't know all the ingredients that went into my meals (or sometimes what my meal even was), it's nice to be able to make my own meals now where I can control exactly what goes into them.  And with summer flying by, all I've been wanting to throw into my meals lately is tons of summer veggies!  I also caught a pretty bad cold in Japan that I've been suffering through all week, so I knew as soon as I got back that I wanted to make a summer soup.

Golden Summer Squash and Corn Soup, topped with Feta & Chives

I'd bookmarked this golden summer squash and corn soup from Eating Well (one of my favourite recipe sources) a while ago, so I knew this was the perfect opportunity to finally make it.  The soup is pretty simple - basically you sauté some onions and summer squash, puree them with vegetable broth, add some fresh corn, and top with feta and chives.  I made a few changes to the original recipe, like using veggie broth instead of chicken, onion plus garlic instead of shallots (mostly because I didn't have any), adding some jalapeno for spice and an extra cob of corn to be pureed with the squash, and using dried basil and fresh chives as the herbs (but you can use whatever you like). 

This soup was bright and summery but warm and comforting at the same time.  I especially loved the chunks of feta, which sounded like a strange addition at first, but surprisingly worked pretty well.  While this hasn't exactly helped my cold this week, it definitely satisfied my craving for a fresh homemade summer meal!

Golden Summer Squash and Corn Soup, topped with Feta & Chives

Summer Squash and Corn Soup with Feta & Chives

Adapted from Eating Well

Makes 4-6 servings

Ingredients:

1 teaspoon olive oil
1 medium yellow onion, peeled and chopped
1-1/2 pounds yellow summer squash (the ones that look like zucchini) (about 3 medium squash), chopped
1 clove garlic, minced
2 ears of fresh corn, kernels removed (divided)
3 cups vegetable broth
1/2 teaspoon dried basil
1/2 teaspoon salt (or more, to taste)
1/4 teaspoon pepper
1/2 a jalapeno, minced (or a whole pepper for more spice)
2 teaspoons lemon juice
~1/4 cup chopped chives
~1/4 cup crumbled feta cheese

Directions:

Heat oil in a large saucepan over medium heat.  Add onion and cook until softened, 3-5 minutes, stirring often.  Add squash and cook until it starts to soften, about 5 minutes, stirring occasionally.  Add kernels from one ear of corn along with the garlic, stir, and cook another 3-5 minutes, stirring occasionally.  Add vegetable broth, basil, salt, and pepper, bring to a boil, reduce heat to a simmer and let simmer about 5 minutes. 

Transfer mixture to a blender in 3 batches, being careful not to fill the blender too high as the mixture will be hot.  Puree each batch until smooth, transferring the pureed portions to a separate large measuring cup or bowl as you go.  Once everything has been pureed, return it all to the saucepan over medium heat.  Add the remaining corn along with the jalapeno, and let simmer gently for another 5 minutes.

Remove from heat and stir in the lemon juice.  Add additional seasoning to taste at this point.  Serve warm and top each portion with about 1 tablespoon each of feta and chives (or more, if desired).

July 30, 2013

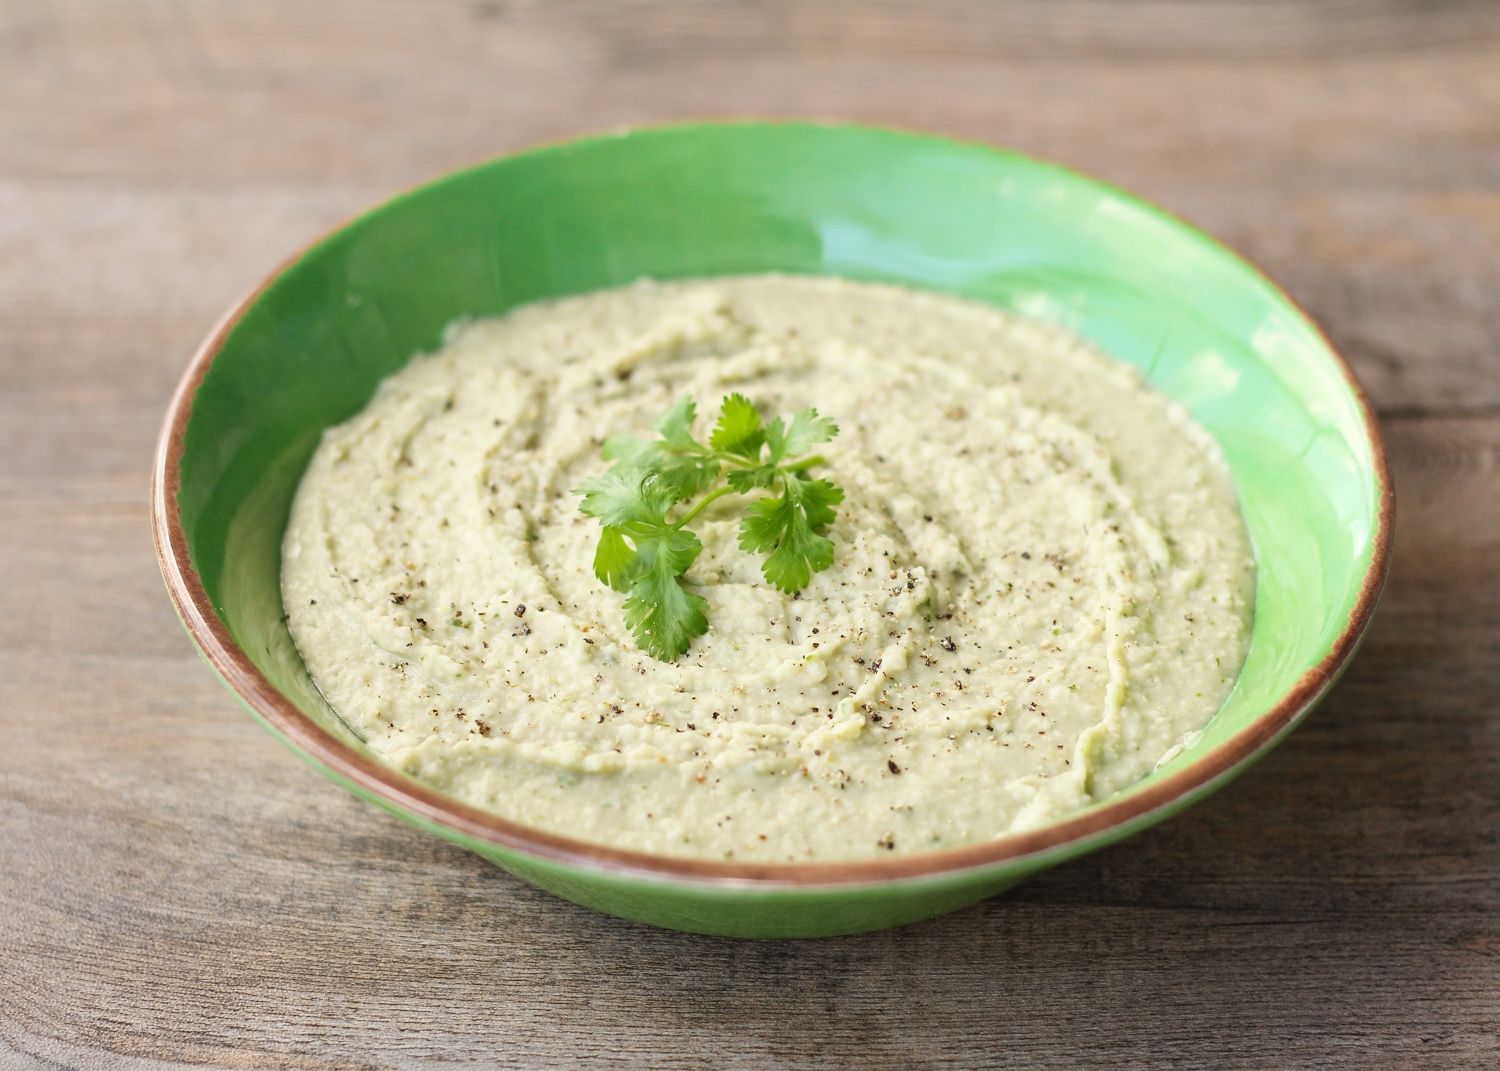
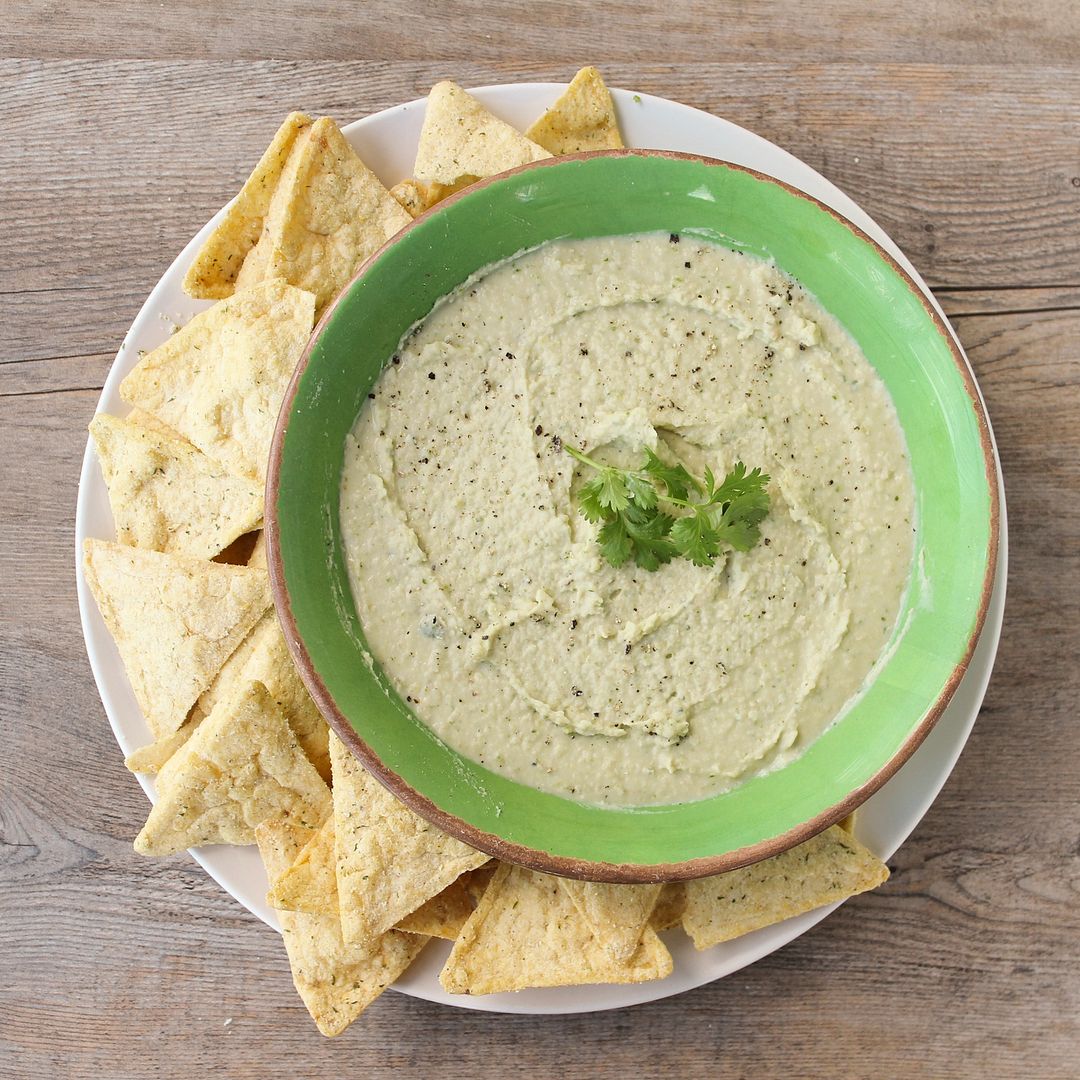
White Bean Dip with Roasted Jalapenos & Goat Cheese

White Bean Dip with Roasted Jalapenos & Goat Cheese

I feel like I’ve been spending a lot of long hours in my windowless cave office lately (as I struggle to learn a data analysis software program that makes absolutely no sense – why are you so confusing, SAS, why??), so I’ve been needing a lot of snacks to get me through the day. One of my go-to healthy snacks that I eat all the time is carrots with hummus – it’s so easy (and cheap!) to whip up a batch of hummus that I then throw in a container and bring to school along with a bag of baby carrots through the week.

I’ve tried a lot of different hummus recipes in the past and have loved them all, but this time I decided to do something a little different and use regular white beans instead of chickpeas and omit the tahini. So it’s just a regular bean dip instead of hummus, but it’s still just as smooth and creamy!

White Bean Dip with Roasted Jalapenos & Goat Cheese

Because white beans are pretty flavourless, I kicked things up by adding roasted jalapenos and cumin for spice, goat cheese for a bit of richness and tang, and some lime juice, cilantro, and honey for added flavour and balance. The first time I made this, I used two jalapenos and the dip was pretty spicy (but still good!), so the next time I only used one and then I could barely detect the spice at all. So I think one and a half would be the perfect amount for me, but you can definitely adjust the amount to your liking! I’d recommend roasting two jalapenos (they’re super cheap anyway), then start by adding one chopped pepper to the dip and keep throwing more in as you taste if it’s not spicy enough.

This goes great with pita chips (or ranch popped rice chips, shown here) or veggies, and while it may not make the jumble of numbers and words on your screen make any more sense, it will at least give you the energy to stay in your office and keep staring at them so it looks like you know what you’re doing!

White Bean Dip with Roasted Jalapenos & Goat Cheese

Before I go, I just wanted to thank everyone for their kind comments on my blogiversary post and for entering the Starbucks gift card giveaway!  A winner has been randomly selected and contacted - thanks again!

White Bean Dip with Roasted Jalapenos & Goat Cheese

White Bean Dip with Roasted Jalapenos & Goat Cheese

Ingredients:

1 (540mL) can white kidney beans
1-2 jalapenos (1 will make the dip quite mild and 2 might be fairly spicy, but it can depend on the pepper)
2 oz plain goat cheese
1.5 tablespoons fresh lime juice
1/4 cup chopped cilantro
1/2 teaspoon honey
1/2 teaspoon cumin
1/2 teaspoon salt
1/4 teaspoon pepper
2 tablespoons extra virgin olive oil

Directions:

Preheat oven to broil (500°F) and move oven rack to top third of oven, a few inches away from the top. Spray jalapeno(s) with cooking spray or rub with a bit of olive oil, and place on a baking sheet. Roast under the broiler until all sides begin to get black patches – time will vary but mine took around 5-10 minutes total. Keep an eye on them and turn a few times to brown them evenly. Remove from oven (use tongs or mitts) and place in a bowl covered in saran wrap to let them steam and loosen the skin for 10 minutes. Remove skins (they should peel off), slice lengthwise, remove seeds, and roughly chop.

Add all ingredients except the olive oil to the large bowl of a food processor. Cover with the lid and add the olive oil to the feed tube so it will slowly drain into the dip. Process until dip is smooth and oil is mixed in. Taste and adjust any amounts to your liking, if necessary. Store in the refrigerator but let warm up to room temperature before eating. Serve with carrots, other veggies, or pita chips.

July 04, 2013

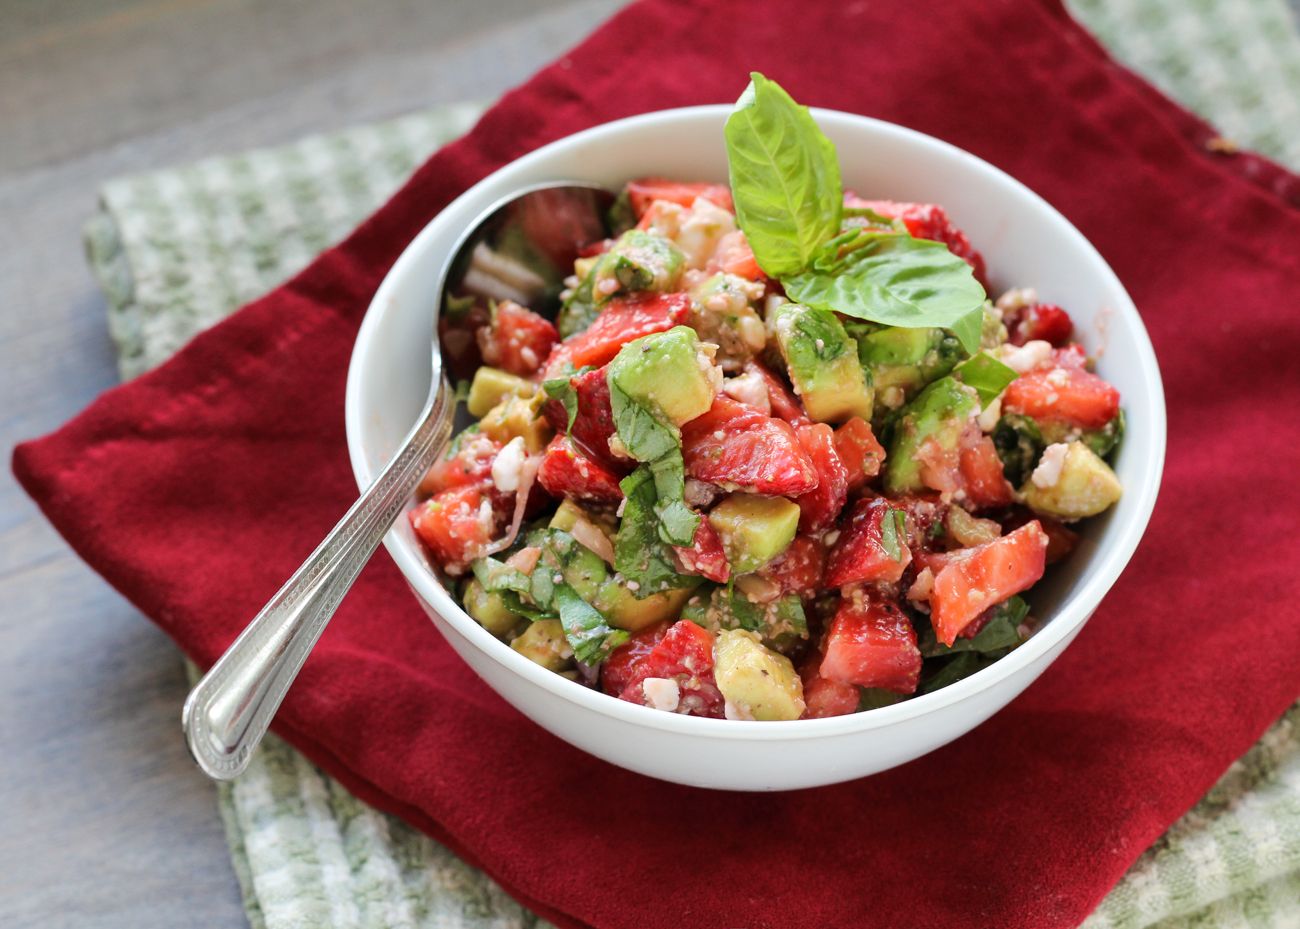
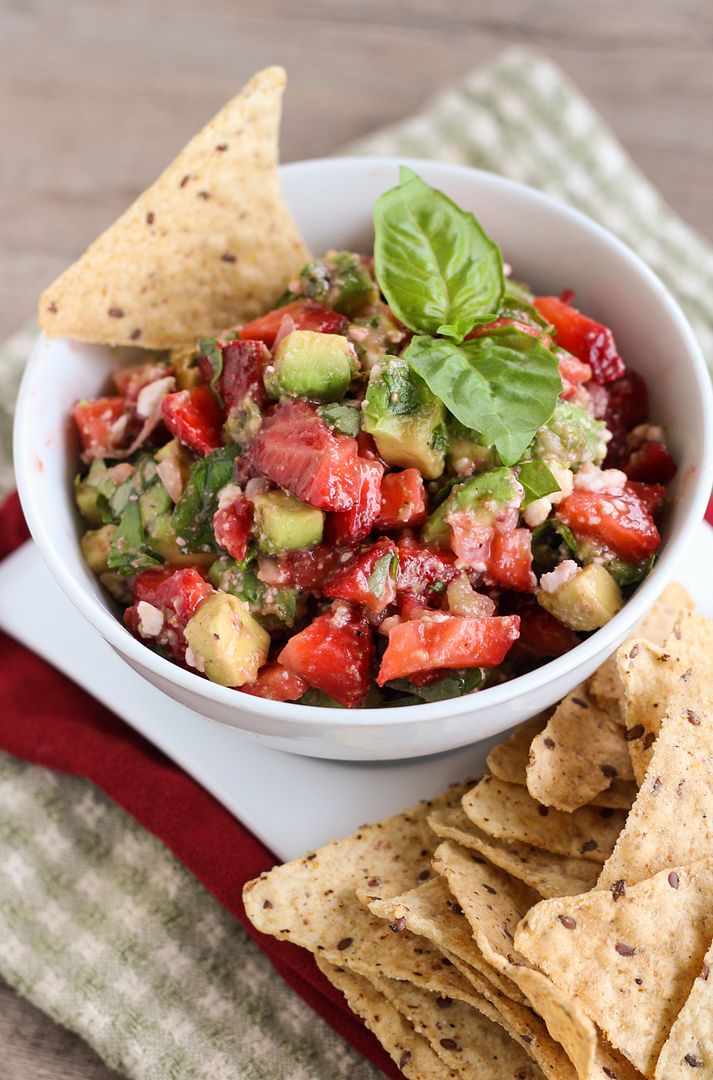
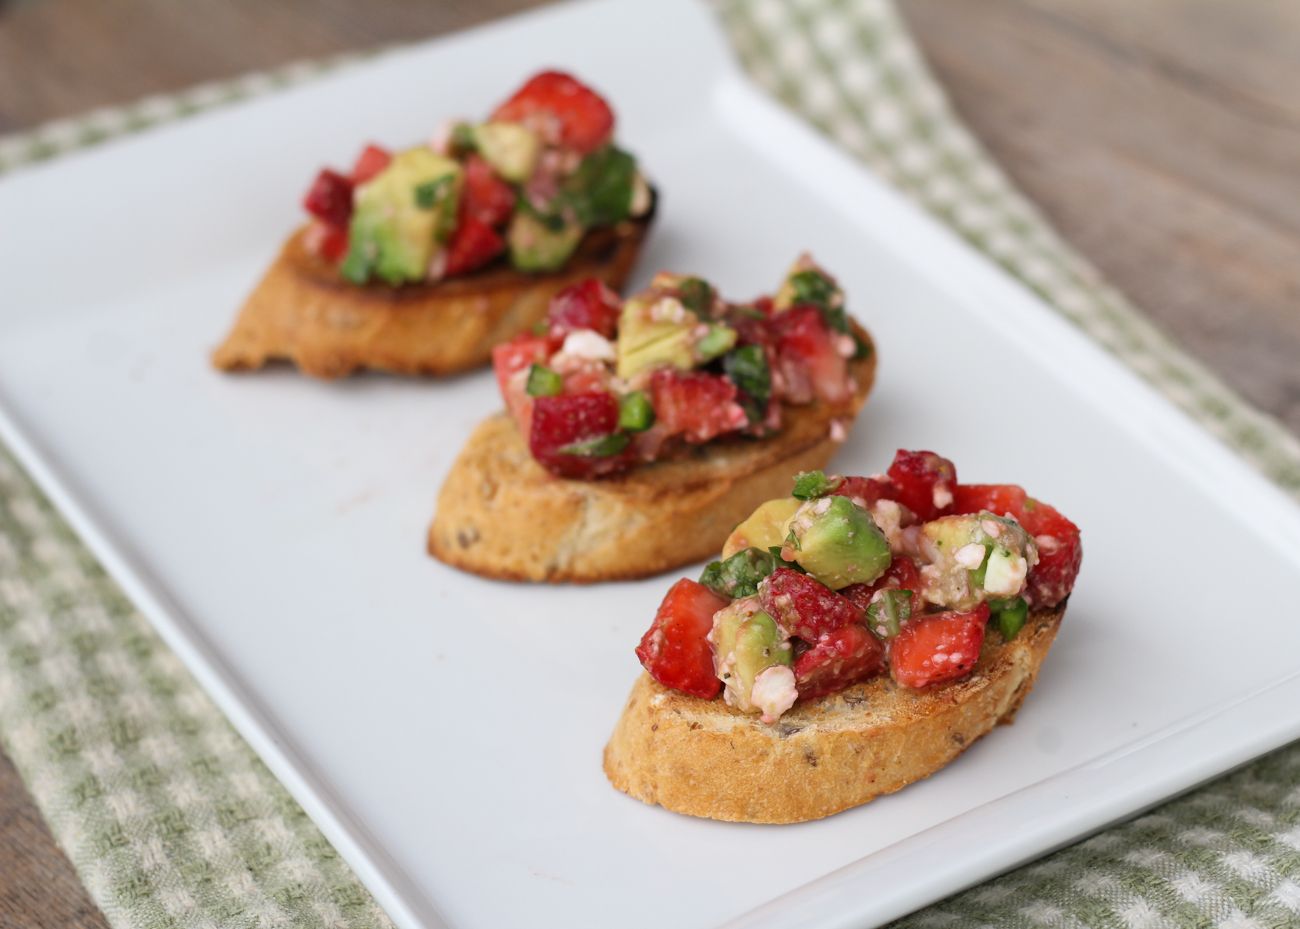
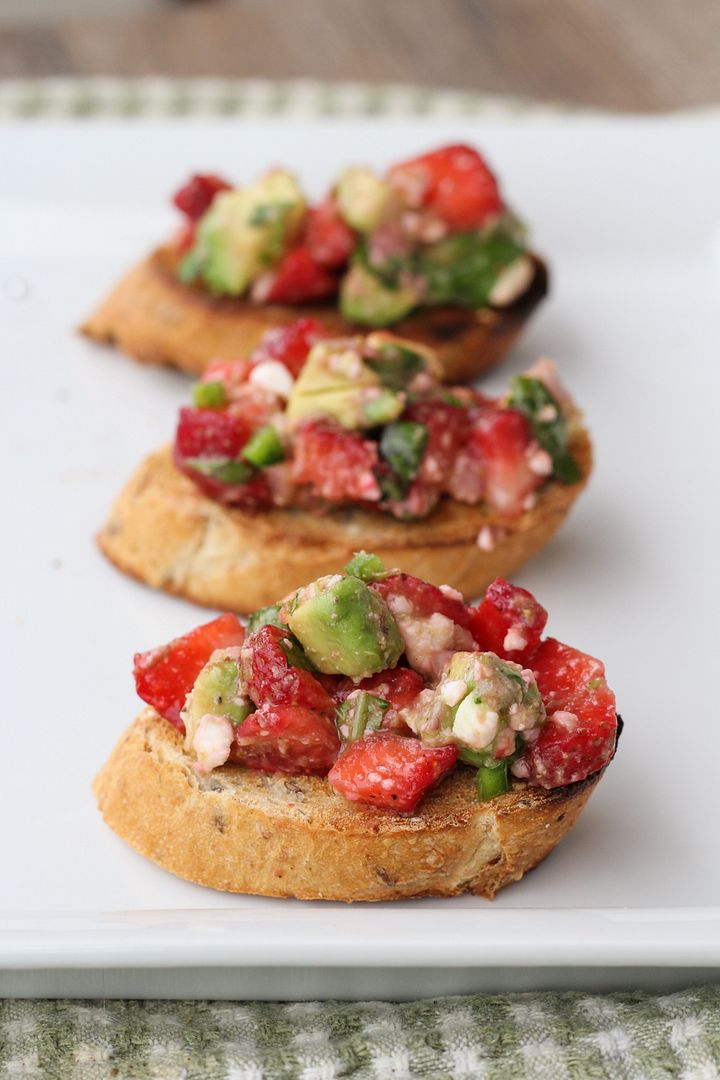
Strawberry, Avocado, & Feta Salsa

Strawberry, Avocado, & Feta Salsa

Sorry for the lack of activity around here lately, but I just returned from a wonderful week-long trip to visit family up in Northern Ontario.  I had fully intended to continue posting while I was away, but time went by way too quickly and to be honest, it felt pretty nice to keep my laptop closed for most of the week and spend my time visiting and just relaxing instead.  We also had beautiful weather so I spent a lot of time outside, with plenty of beach time, a few moments of attempting to brave the freezing cold lake water, going for walks, watching some great Canada Day fireworks, and getting eaten alive by bugs!

It was a great week, but now I'm busy trying to catch up on work and everything else I've missed, so today's post will be rather short!  And since the majority of my readers are American and hopefully spending some time outside or visiting with family themselves for July 4th, I'm assuming you won't want to read a long post today either!

Strawberry, Avocado, & Feta Salsa

This is a simple salsa to throw together that celebrates strawberry season by pairing fresh strawberries with diced avocado, feta cheese, basil, lime juice, and a bit of jalapeno for spice.  It might sound a little weird, but everything works together in a wonderful way!

Strawberry, Avocado, & Feta Salsa

This is fantastic eaten as a dip for tortilla chips but works equally well as a fresh summer crostini.  I have a feeling it would also pair well with chicken for a main course, and since I'll likely be making this plenty more this summer, I'll be sure to test it out!

I hope my Canadian friends had a great long weekend this past weekend and that my American friends enjoy their celebrations today!

Strawberry, Avocado, & Feta Salsa

Strawberry, Avocado, & Feta Salsa

Serves a small group as an appetizer; if you’re serving a larger group, double the ingredients

Ingredients:

1 cup diced strawberries
1/2 cup diced ripe avocado
1-1/2 tablespoons minced shallot
1/2 a jalapeno, minced (seeds removed for less spice)
1/3 cup crumbled feta cheese
1/2 teaspoon lime zest
1 tablespoon + 1 teaspoon fresh lime juice
1/4 cup chopped basil leaves
1 teaspoon sugar
Freshly ground pepper

Directions:

Add all ingredients to a bowl and mix to combine.  Taste and adjust any amounts to your liking if necessary.  Serve in a bowl as a dip for tortilla or pita chips, or spread on toasted baguette slices to serve as crostini.

March 07, 2013

Shamrock Personal Pizzas for St. Patrick's Day

Shamrock Personal Pizzas for St. Patrick's Day

Last year, I made these heart-shaped personal pizzas with heart-shaped toppings for Valentine's Day, and I loved them so much that I decided to try to do the same thing for St. Patrick's Day, but with shamrock pizzas and shamrock toppings!

These follow the same method as the heart-shaped pizzas - just divide a ball of pizza dough in four, shape each piece into a shamrock, then top each one with desired St. Paddy's themed toppings, depending on individual tastes!

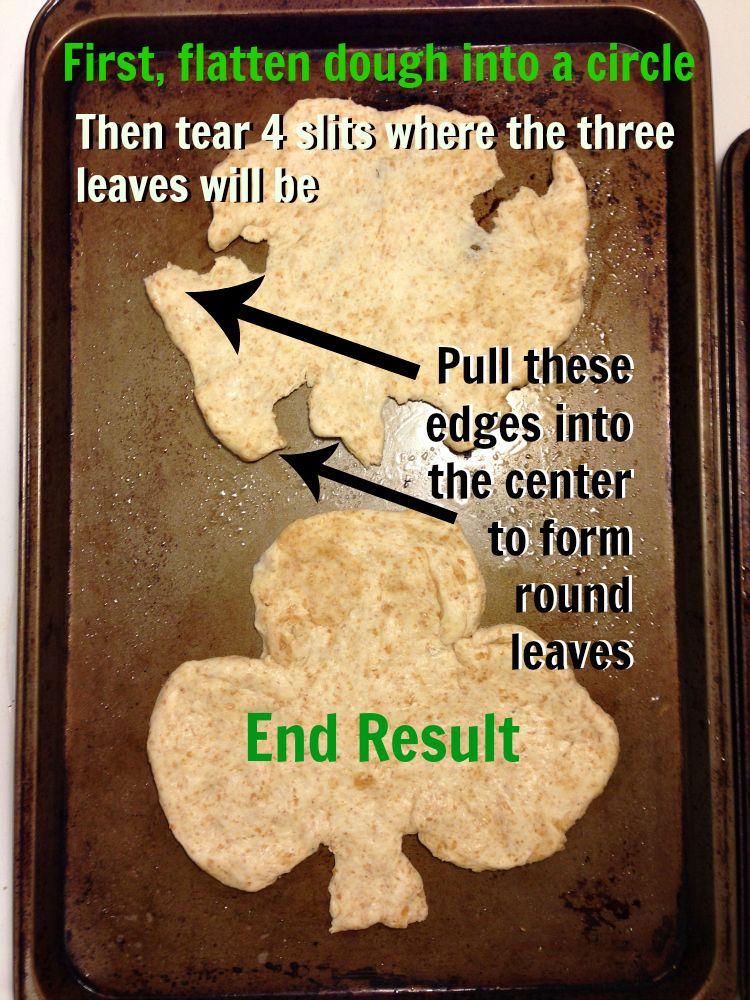
Let's start with the dough.  You can either buy a storebought ball of dough, which is what I did with the heart-shaped pizzas, or make your own.  For these ones, I made Martha Stewart's whole wheat pizza dough.  I cut the recipe in half, which made enough to form 4 personal pizzas.  I skipped the freezing step, and went ahead and baked them two at a time, for 15 minutes at 450°F.  Here's my attempt at showing how to form each ball of dough (after it had risen) into a shamrock shape - it's super easy!

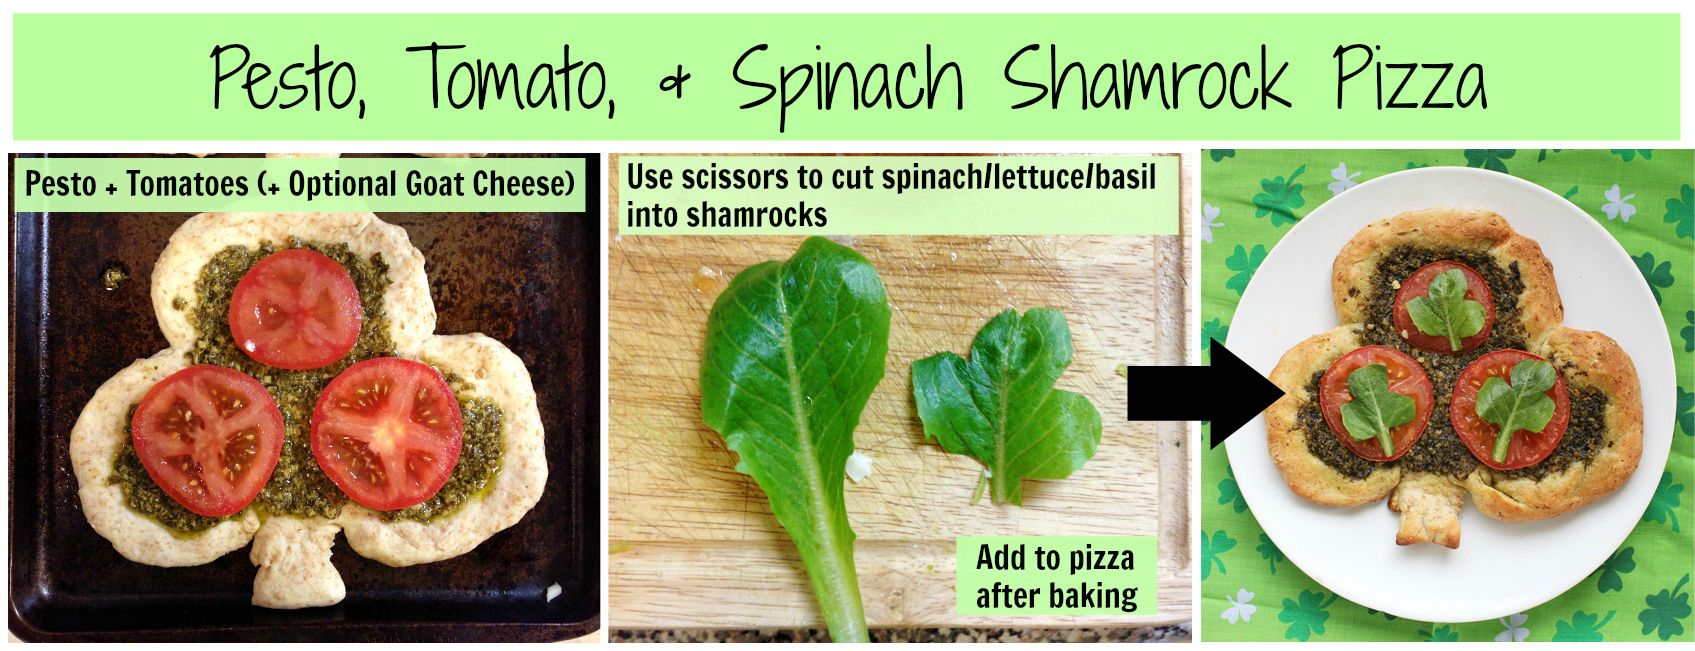
 Making shamrock shaped pizzas

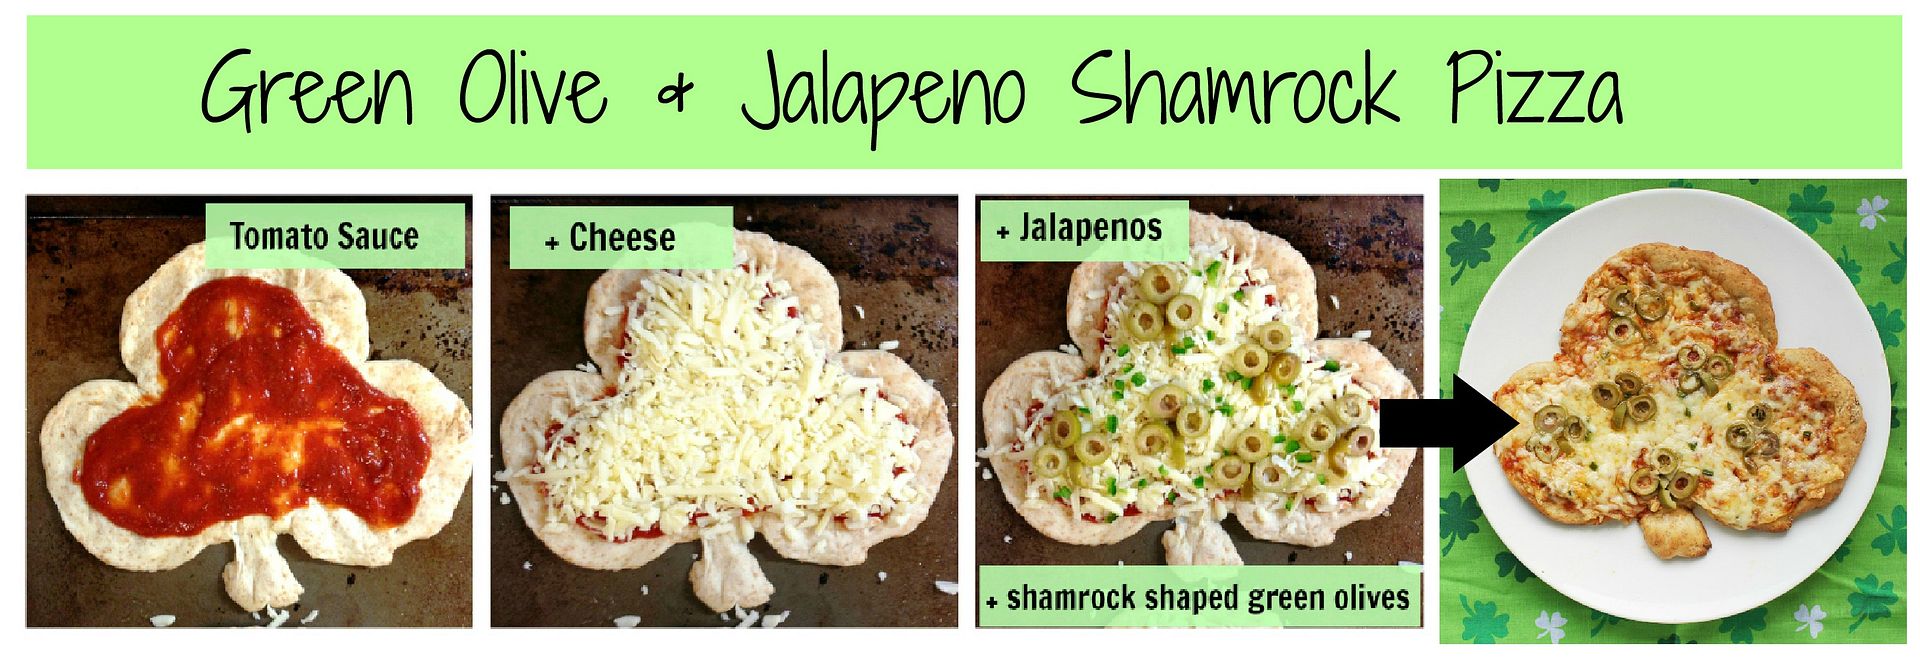
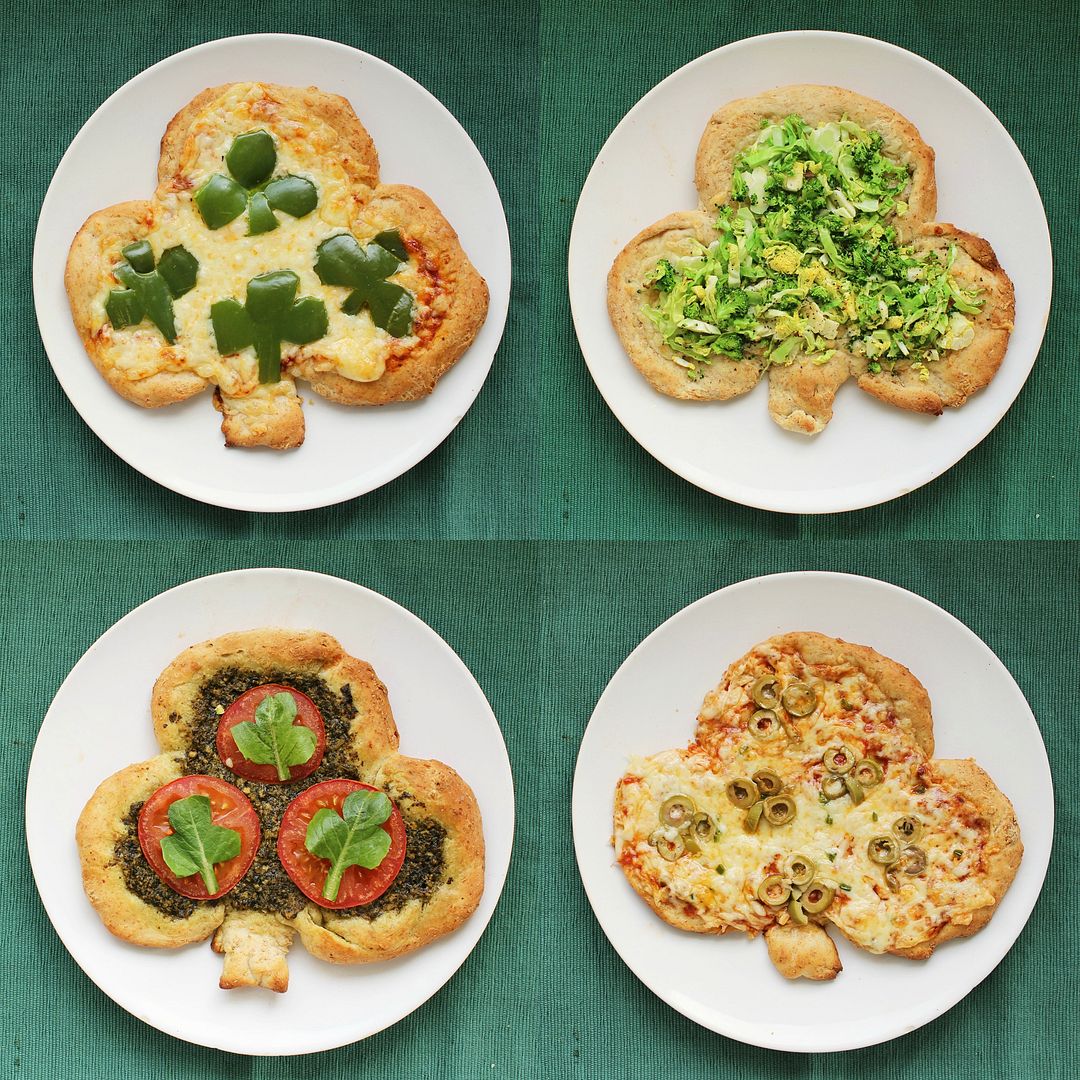
Let's move on to the toppings!  I tried four different topping ideas, which I'll describe below.  If the pictures are too small to read, just right click and 'view image' to see them larger.

Shamrock Personal Pizzas for St. Patrick's Day

The green pepper pizza was my favourite visually.  It was a little tricky to cut the green pepper into shamrock shapes, and mine certainly weren't perfect, but you can at least tell what they're supposed to be!  Just cut a green pepper in half, remove the seeds and membranes, cut each half in two, flatten your four pieces, and cut them into shamrock shapes.  You won't need the whole pepper, but this gives you a little space to work with in case you make a mistake!

 Shamrock Personal Pizzas for St. Patrick's Day

I thought this was my most creative idea - combining green olive slices and stems to form shamrock shapes - but the finished product didn't look quite as nice as it did before it was baked.  The olives slid around a little during baking (probably because I used way too much cheese), so I had to try to put them back in place afterwards.  Next time, I might just wait to place the olives on the pizza after baking so they don't get covered up by cheese and you can tell what they're supposed to be!

 Shamrock Personal Pizzas for St. Patrick's Day

This one's really easy because you can just use kitchen scissors to cut a leaf of lettuce, spinach, or basil into a shamrock shape!  I paired mine with a pesto spread (to keep it green) and tomatoes, and I had intended to add goat cheese but then realized I didn't have any, so just picture it on there!

 Shamrock Personal Pizzas for St. Patrick's Day

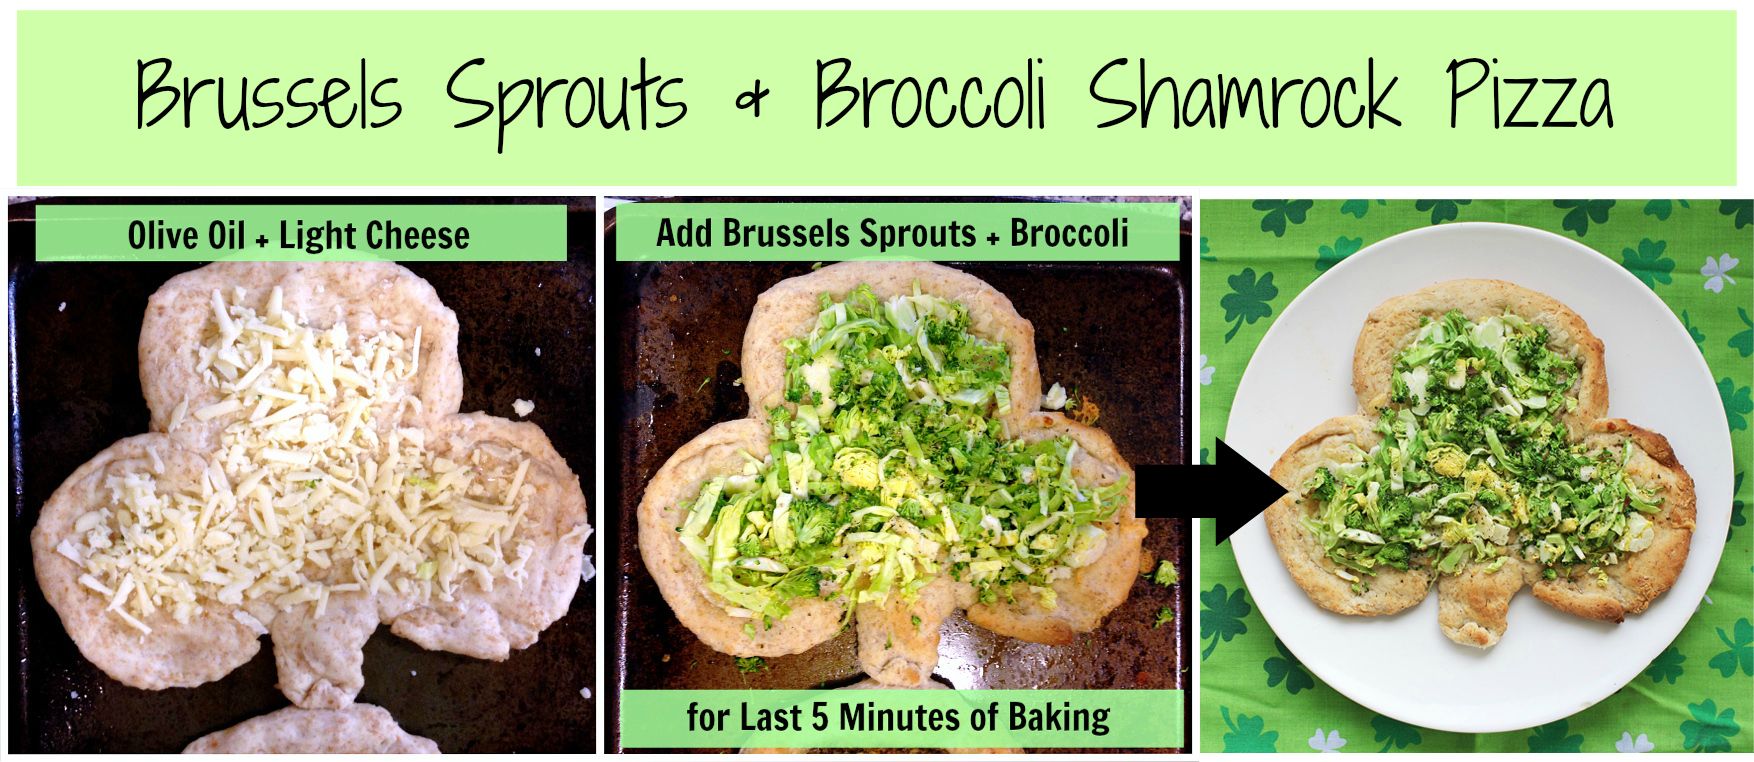
This was my attempt at a healthier pizza, and instead of using shamrock shaped toppings, I covered the whole thing with green ingredients!  I spritzed the dough with olive oil, topped it with a bit of mozzarella (but gruyere would be good too), then put it in the oven for 10 minutes.  Next, I added a layer of chopped brussels sprouts and broccoli, seasoned it with salt and pepper, and popped it back in the oven for 5 minutes until the greens were just starting to brown on the edges.  The result was a crisp and light pizza that was actually my favourite!

Shamrock Personal Pizzas for St. Patrick's Day

These made the perfect individual sized pizzas and I loved having a different one to eat each day for leftovers!  The clover shape actually breaks perfectly into three "slices", which makes them easy to eat.  If you have other ideas for green toppings that would work on these, feel free to share them in the comments!

March 01, 2013

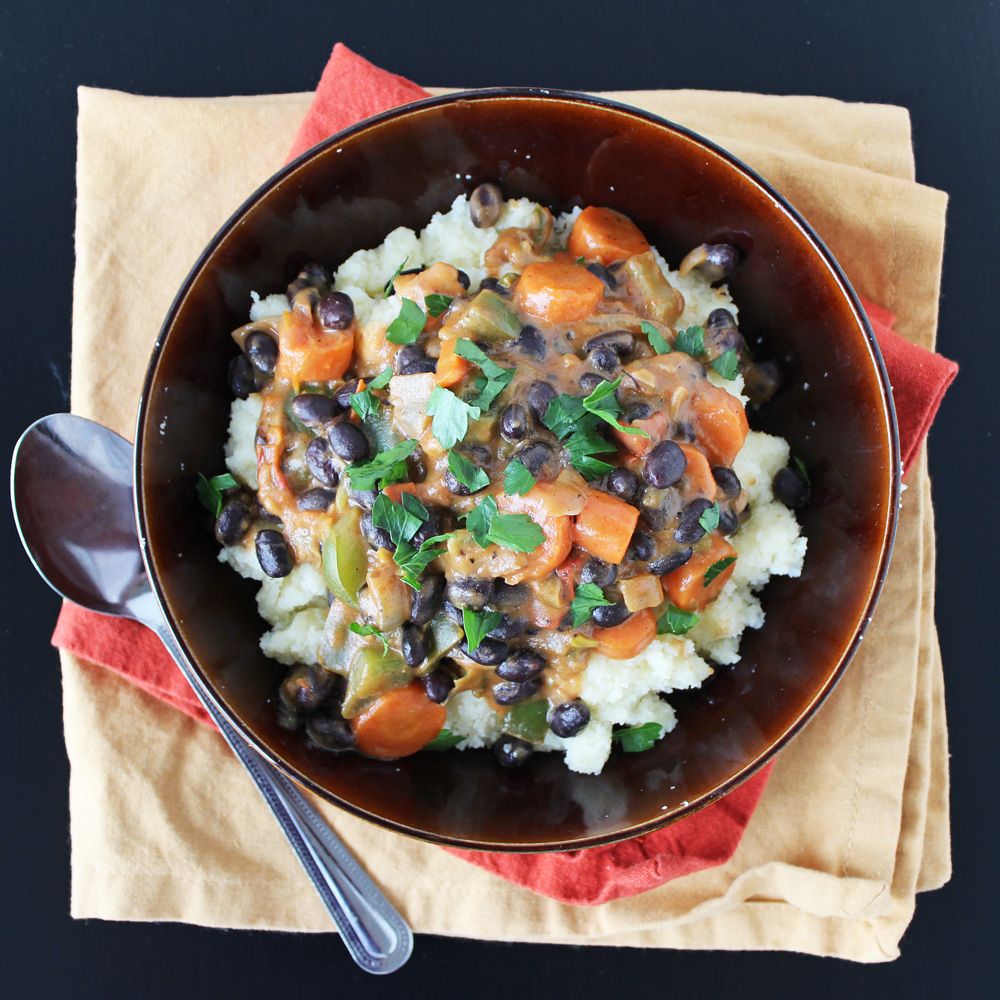
Kenyan Ugali with Peanut Stew

Kenyan Ugali with Peanut Stew

So it's been a fairly busy and stressful week here, with tons of school work I’m behind on, blog problems, knee problems, and icky weather, among other things.  And during weeks like that, it’s amazing what some comfort food (and a bottle of wine) can do to help you relax in the evening!

This dish probably isn’t what most people would think of as comfort food, but it’s definitely one of those hearty and cozy meals that fills your belly and warms your soul, and just so happens to be one of the tastiest meals I’ve had in a while.

 Kenyan Ugali with Peanut Stew

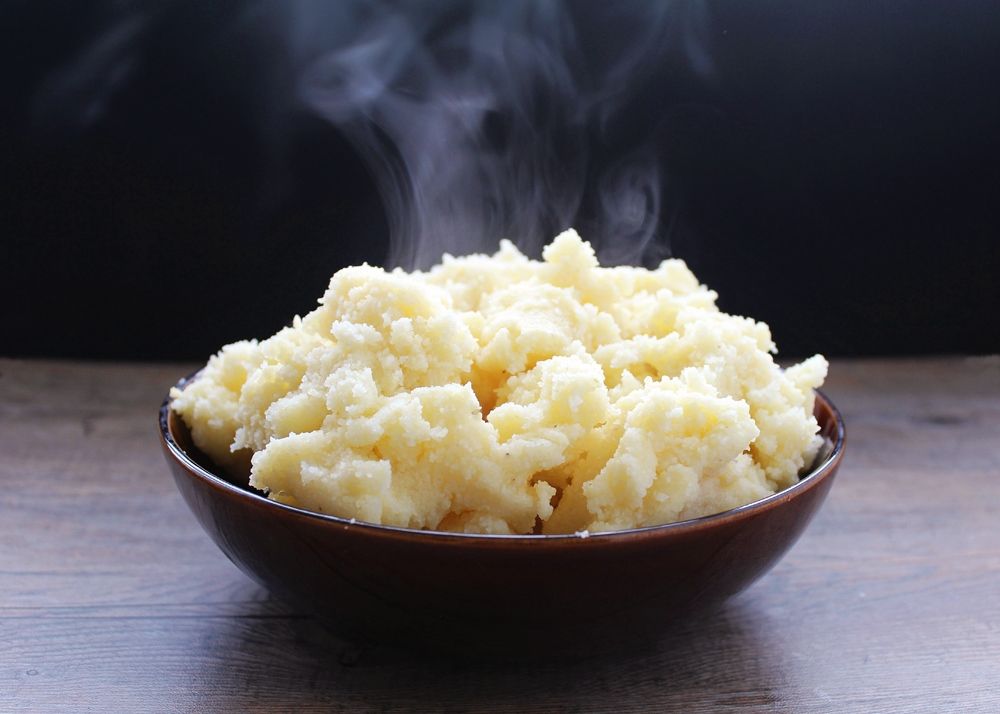
I’m sure some of you are waiting for me to explain what on earth “ugali” is, and to be honest, I’d never heard of it until I made this dish. From what I’ve learned, it’s a starchy staple dish in several African countries.  It’s very similar to polenta, and is made of just white corn meal that’s cooked with water to a thick, dough-like consistency (not creamy and smooth like polenta), and it's usually eaten with some sort of meat or vegetable stew. Fortunately my sister has been to Kenya and tried ugali a few times there, so she was able to give me some advice as I was making it and assure me that the thick texture was how it’s supposed to be!

Ugali is super easy to make and also really cheap – all you need is cornmeal! (I found white cornmeal in the Mexican section of my regular grocery store). And though it’s normally made with water, I used half vegetable broth to cook my cornmeal just to infuse some extra flavour into it. The consistency of the final product is so thick that you could grab a ball of it in your hand (and indeed you can use that to dip into other dishes or grab meats or veggies), and while I think it would normally be served in one big ball in the shape of a bowl, I broke mine up a bit so you could see the texture here:

Ugali

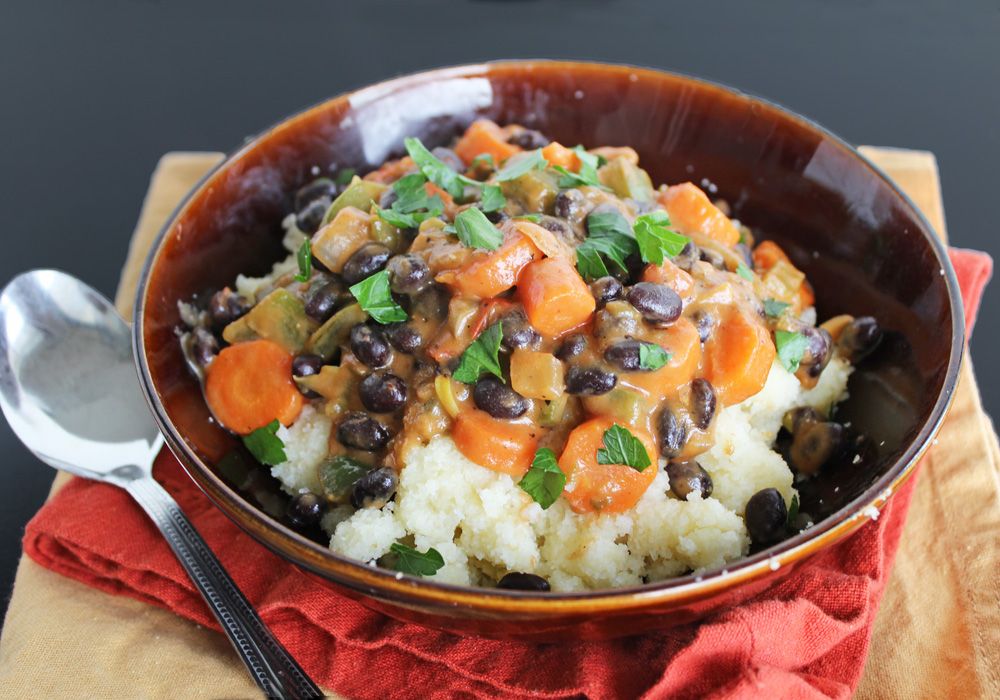
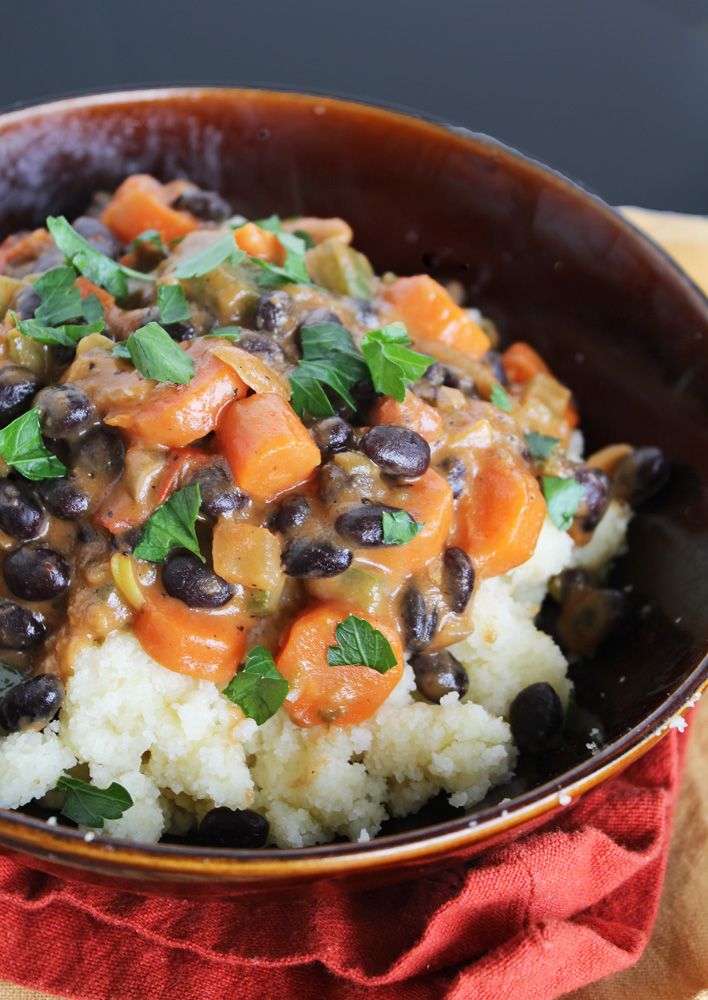
The ugali makes a great base for a stew, and I paired mine with a rich and creamy peanut vegetable stew.  I added carrots, black beans, and parsley to the original recipe, so I’m not sure how authentic my stew is or if it would ever be eaten with ugali, but it was so good that I didn’t care!  The finished dish was full of veggies and protein, was super filling, and just so hearty and comforting.  If you’re in need of a dish to warm your soul and are looking to try something new and a little different for dinner, I highly encourage you to give this a try! 

And if you like trying new cuisines, my friend Courtney just redesigned her site with a focus on ethnic vegetarian food, so go check it out at The Fig Tree!

 Kenyan Ugali with Peanut Stew

Kenyan Ugali with Peanut Stew

Adapted from The Ethnic Vegetarian

Serves 4-6

Ingredients:

For the peanut stew:
1 tablespoon olive oil
1 medium yellow onion, chopped
3 cloves garlic, minced
2 tomatoes, chopped
1 green bell pepper, chopped
2 carrots, peeled and diced
1/2 a jalapeno or chile, seeds and veins removed, minced
Dash of cayenne pepper
Salt and pepper
1 can black beans, drained and rinsed
1/2 cup smooth peanut butter
1/2 cup hot water

For the ugali:
2 cups vegetable broth
2 cups water
1/2 teaspoon salt (optional)
4 cups white cornmeal

Chopped parsley for serving (optional)

Directions:

Heat olive oil in a large nonstick skillet over medium high heat.  Add onion and saute until softened, about 5 minutes, stirring occasionally.  Add garlic, tomatoes, green pepper, carrots, jalapeno, cayenne, and salt and pepper to taste.  Let cook for 10-15 minutes, stirring often.  Mix together the peanut butter and hot water in a small bowl until smooth.  Add black beans and peanut butter mixture to the vegetables and let cook on low heat for about 10 minutes, until thickened slightly.

Meanwhile, bring the vegetable broth and water for the ugali to a boil in a medium saucepan.  Slowly and gradually add the white cornmeal, stirring constantly with a whisk to prevent lumps from forming.  Reduce heat to medium-low and continue to stir regularly until the mixture pulls away from the sides of the pot and becomes very thick, about 10 minutes (mine took less time).  Remove from heat.

Serve by dividing ugali among bowls and spooning peanut stew overtop.  Top with parsley and season with additional salt and pepper, if desired.

August 27, 2012

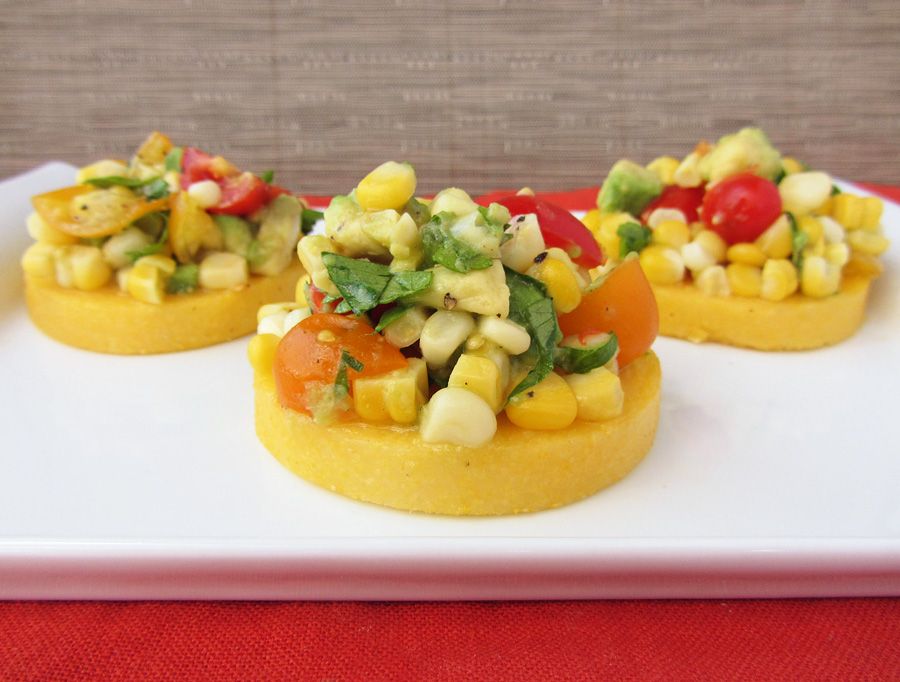
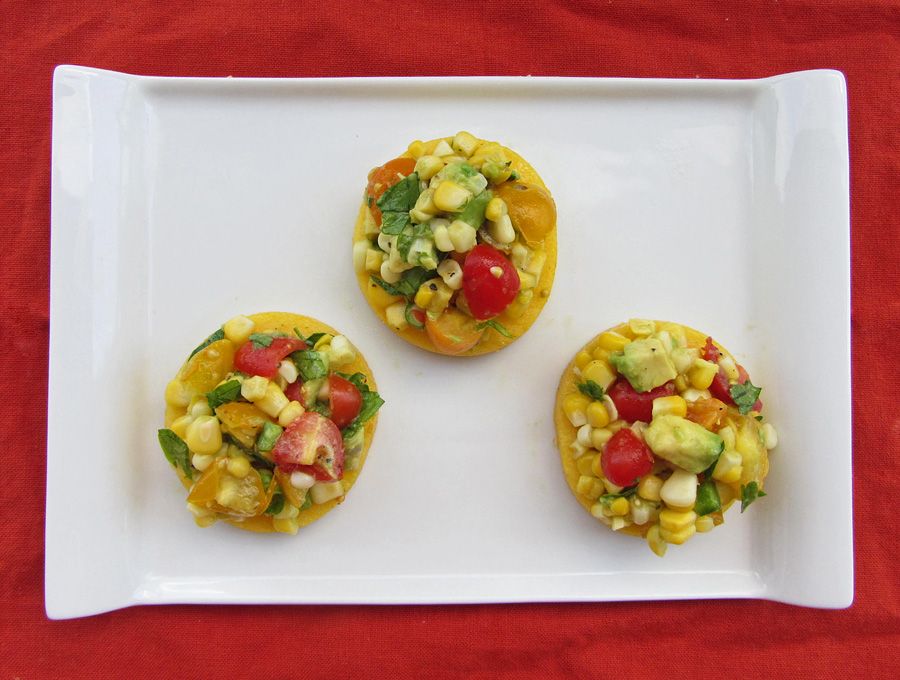
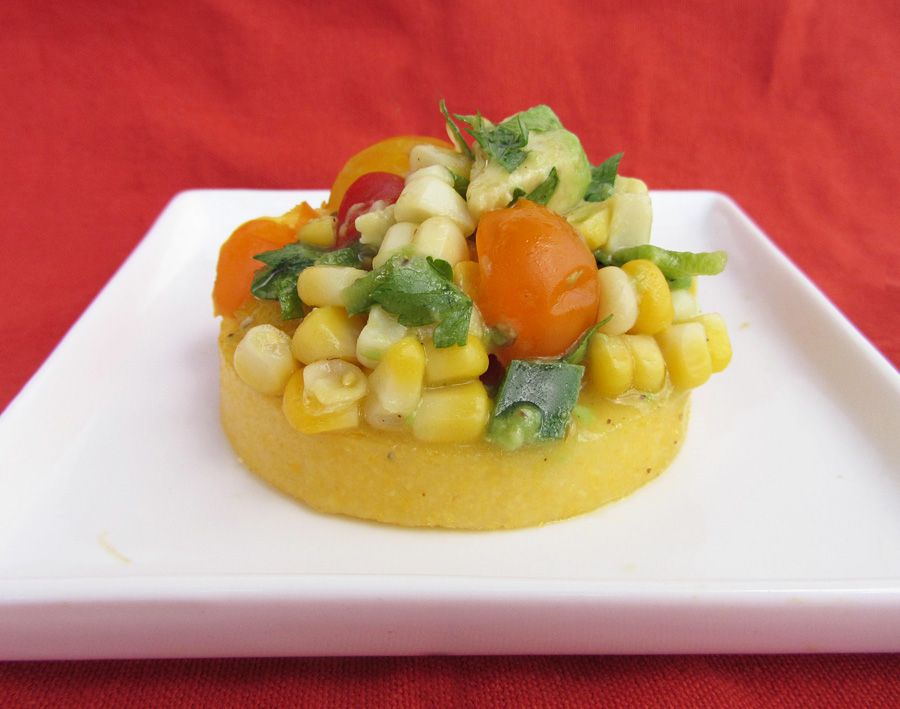
Polenta Rounds with Fresh Tomato, Corn & Avocado Salsa

Polenta Rounds with Fresh Tomato, Corn & Avocado Salsa

My sister found this Tumblr site called I'm Remembering last week and since then we haven't been able to stop looking through it.  It's full of nostalgia from the 80s and 90s (aka my childhood) and every time we come across a toy or game that we'd completely forgotten about, it brings back so many memories!  Remember snap bracelets, Lite Brite (they might still make this one but I remember the original), Soda Licious candy (they tasted just like soda flavours!), the game Girl Talk (how did you play this game?  All I remember is a phone), or view masters (again, I remember the toy but not what you actually looked at on those slides)?   And did anyone else have Alphie? We totally forgot about him but remember loving him so much!  Or the Babysitters Club chain letter book?  Pretty much the best book ever made.

They also have a Facebook page where people can share their own memories, making for hours more fun (and procrastination)!  Remember Scholastic book club newsletters that you ordered books from in elementary school?  I lived for those!  How about clackers?  I also found this gem that is definitely NOT something I remember but I wish I did!

Anyway if you grew up during this time (or have kids who grew up during this time), you have to check it out - just be warned that it's addictive!

Polenta Rounds with Fresh Tomato, Corn & Avocado Salsa

One thing I definitely do not remember ever having during my childhood was polenta.  I'm not sure why, it just didn't seem to ever make it into our meals.  I still hadn't tried polenta into my adulthood, but I kept seeing those cute little polenta rounds topped with delicious things and resolved to make a version myself.  I bought a log of pre-cooked polenta from the grocery store at the beginning of this summer, but soon forgot about it in the cupboard.  Last week, I realized that summer was quickly ending and I still hadn't used it, so I threw together a fresh salsa that tasted just like summer (with corn, tomatoes, avocado, herbs, and a bit of jalapeno), baked my polenta rounds (which I thought would be healthier than pan-frying them in oil, though they would probably taste better that way), and devoured them for dinner.

These were super easy to make and would be a great summer appetizer.  I would have enjoyed eating the salsa on its own, but the polenta provided a nice base to support it, and complemented it well tastewise too.  It was a great way to introduce myself to polenta, and next time I think I'll venture further and make my own polenta, like my sister did with these similar (but from-scratch) polenta squares with summer vegetable topping.  I also want to try the softer-style polenta like this corn and basil polenta from Pink Parsley.  What's your favourite way to eat polenta?

Polenta Rounds with Fresh Tomato, Corn & Avocado Salsa

Baked Polenta Rounds with Tomato, Corn & Avocado Salsa

Recipe by Once Upon a Cutting Board

Serves about 10 as an appetizer (1 polenta round each)

Ingredients:

1 (500g) log of pre-cooked polenta - plain or flavoured (such as this one)
2 ears of corn
1-1/2 cups chopped cherry tomatoes
1 ripe avocado, diced
1/2 a jalapeno, de-seeded and minced (use a whole jalapeno for more spice or keep the seeds)
3-4 tablespoons chopped parsley
1 tablespoon extra-virgin olive oil
1 tablespoon fresh lime juice
1/2 teaspoon salt
Freshly ground pepper

Directions:

Preheat oven to 400°F.  Slice polenta into ten 1/2-inch thick rounds, and place on a parchment paper-lined baking sheet.  Bake in the preheated oven for 15-20 minutes.

Meanwhile, cook corn (I cook mine by boiling the ears in a large pot of boiling water for about 5 minutes) and slice off the kernels into a large bowl.  Add the cherry tomatoes, avocado, jalapeno, and parsley to the corn and stir. 

In a small bowl, whisk together the oil, lime juice, salt, and desired amount of pepper, then add to the salsa and mix.  Remove polenta rounds from oven and top with the corn salsa.  Serve on plates with knives and forks (they're too messy to eat by hand).

January 06, 2012

Black Eyed Pea Patties with Fresh Salsa

black eyed pea patties with salsaThough eating black eyed peas on New Year's Day is supposed to bring prosperity and luck for the year, I've never eaten them on New Years, or on any other day of my life for that matter (that I can remember anyway). Ryan and I have our own tradition on New Year's Day of eating McDonald's - I don't know why, but it's one of those things that we keep doing just "because it's tradition". I only agree to it because it reminds me that I never even enjoy McDonald's when I get it, so I'm probably more likely to avoid it the rest of the year!
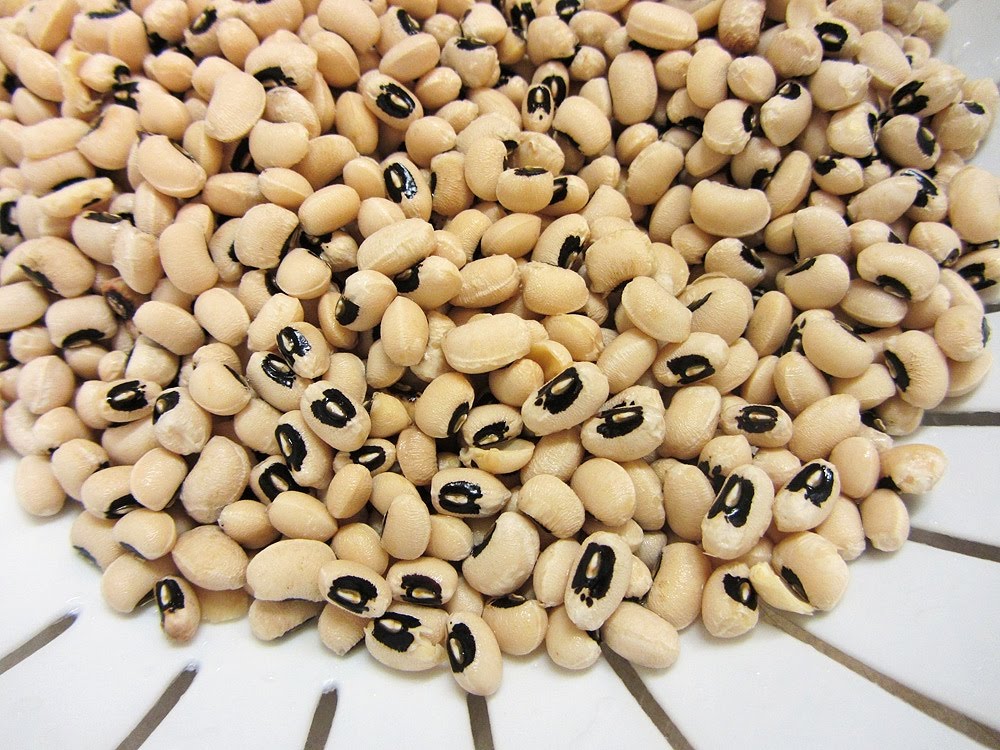
This year I also wanted to try my first black eyed peas, but the traditional dish of Hoppin' John doesn't appeal to me. Instead, I decided to try something a little different by using black eyed peas in a veggie burger. Even though I ate this a few days after New Year's Day, I'm hoping they'll still bring me some luck this year. And if not, at least I got a delicious meal (plus lots of leftovers) out of them!

The original recipe for these burgers called for canned black eyed peas, but I couldn't find them at my grocery store so I bought the dried kind. I was so fascinated by them when I poured them out of the bag; aren't they pretty?

black eyed peasThe dried kind obviously increase the prep time for this dish because they have to cook for an hour, but they don't require any work other than throwing them in a pot of water. And since they're getting mashed up after anyway, it doesn't matter if they get a little mushy or stick to the pot. If you want to use the canned beans though, I'm sure the final dish will turn out just as good!

Once the beans cooked, I mashed them up and mixed them with some red pepper, jalapeno, cilantro, and other spices to make a very flavourful burger patty (that actually looked a lot like a meat burger too). They held together really well after cooking, and I would have been quite happy to eat the patty on its own (or with a dollop of sour cream), but the addition of the salsa really made this dish burst with flavour. I changed a few things with the salsa and ended up with a mixture of tomato, red pepper, avocado, jalapeno, garlic, cilantro, and lime juice, which once again I would have been happy to eat alone with a spoon, but it complemented the burgers really well! I haven't tried eating them like a burger but I imagine they would be delicious on a bun with the salsa piled on top too.

I took really quick pictures of the leftovers before I left for school and I didn't have time to figure out a way to get good lighting or to make these patties look appealing, so you'll just have to trust me that they taste a lot better than they look here!

tomato, red pepper, avocado and lime salsaBlack Eyed Pea Patties with Fresh Salsa
 
Adapted from Cooking Light

Serves 4 (2 patties each)

Ingredients:

2 cups dried black eyed peas
1 large egg
1/4 cup breadcrumbs
1 ½ teaspoons cumin
1 teaspoon chili powder
3 garlic cloves, minced (divided)
1 jalapeno, minced (divided)
1 red bell pepper, finely chopped (divided)
7 tablespoons chopped cilantro (divided)
1/2 teaspoon salt (divided)
2 tomatoes, chopped
1 ripe avocado, peeled and chopped
Juice of half a lime

Directions:

Rinse the black eyed peas and pick out any debris. Bring to a boil in 6 cups of water, then cover and simmer about 1 hour, or until tender (or follow cooking instructions on the package). Mash in a large bowl.
Add the egg, breadcrumbs, cumin, and chili powder to the bowl with the black eyed peas.

Transfer 1 teaspoon minced jalapeno, 1/2 teaspoon minced garlic, half of the chopped red pepper, 3 tablespoons chopped cilantro, and 1/4 teaspoon salt to a small bowl for the salsa.

Add the remaining garlic, jalapeno, red pepper, cilantro, and salt to the bowl with the black eyed peas.

Heat two large non-stick skillets over medium-high heat and spray with cooking spray. Thoroughly mix the black eyed pea mixture together, then form into 8 patties (I just use my hands). Cook 4 patties in each skillet for about 4 minutes per side, or until browned.

Meanwhile, complete the salsa by adding the tomatoes, avocado, and juice of half a lime to the small bowl (with the jalapeno, garlic, red pepper, cilantro, and salt). Mix together with a spoon.

Serve patties warm, topped with salsa. You could also serve them on a bun with the salsa if desired.

black eyed pea patties with salsa

Ingredient Index

Related Posts Plugin for WordPress, Blogger...