Showing posts with label milk. Show all posts

April 04, 2014

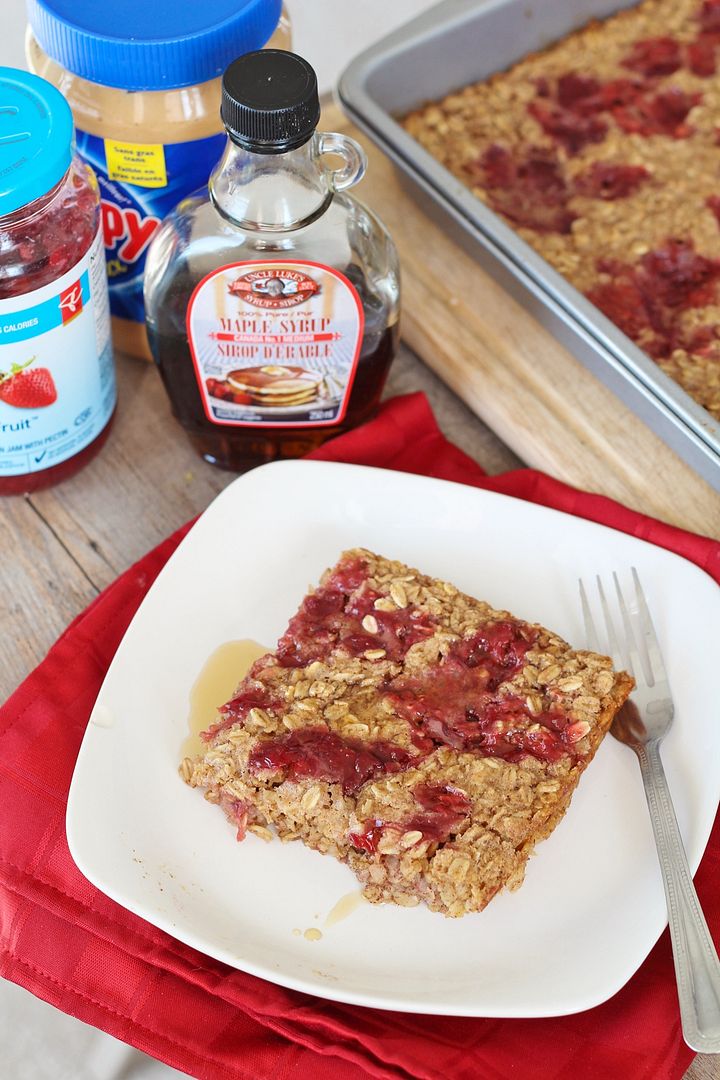
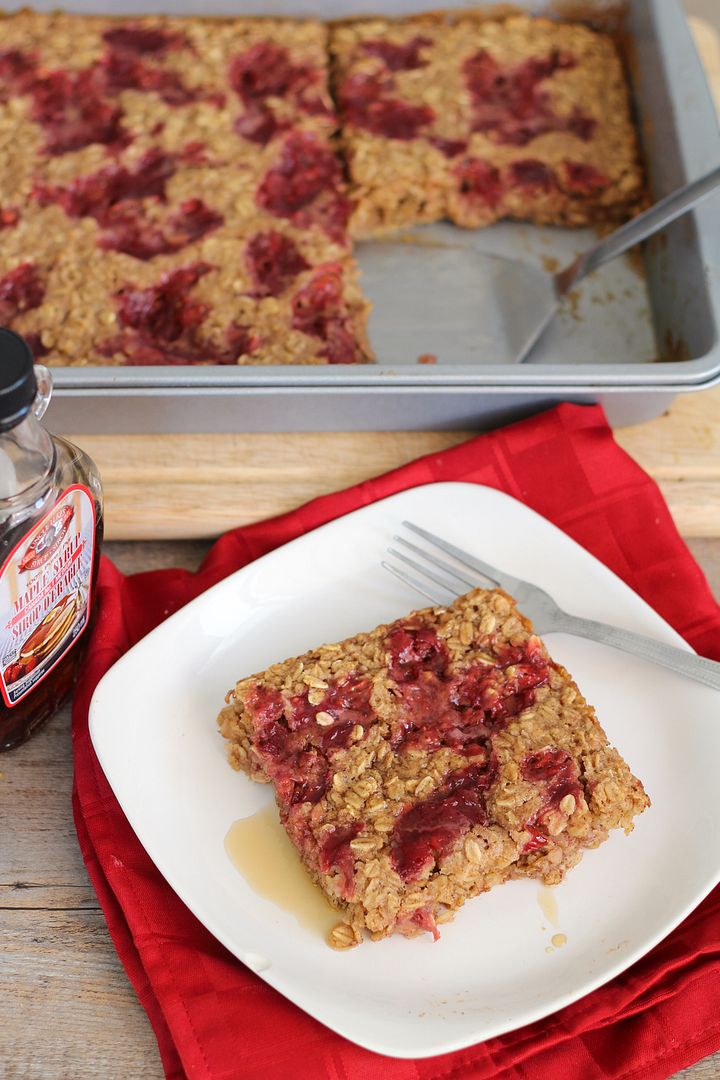
Peanut Butter & Jelly Baked Oatmeal

Peanut Butter & Jelly Baked Oatmeal

As a kid I used to love all the flavours of those little instant oatmeal packets that I'm sure are full of sugar and everything kids love.  Now the only instant oatmeal I'll occasionally buy comes from the organic aisle, but I need to eat at least two packages to sustain me for breakfast and even then I'll still be hungry a couple hours later.  I love making my own oatmeal on the stovetop, especially versions that are full of ooey gooey delicious things like bananas, peanut butter, or pumpkin.  Unfortunately, I don't do this often as I'm usually in too much of a hurry or too lazy in the mornings to make anything that requires effort.

Which is why I've become obsessed with baked oatmeal lately.  Sure it requires some effort to make, but you end up with a lot of leftovers that can be stored as individual servings in the fridge so all you have to do later on is reheat.  Perfect for busy mornings, and also for people who don't like the mushy texture of a bowl of stovetop oatmeal, as the baked version is a lot firmer.

Peanut Butter & Jelly Baked Oatmeal

This peanut butter and jelly version of baked oatmeal is Ryan and my current favourite.  It has a strong peanut butter flavour with the perfect amount of jam to sweeten it up, and it's nice and filling.  It's pretty easy to throw together too - just add your wet ingredients (egg, milk, vanilla, peanut butter) to your dry ingredients (oats, a tiny bit of brown sugar, baking powder, cinnamon, and salt), drop some jam on top, and throw it in the oven.  The hardest part is waiting for it to be ready! 

I've made this with both grape and strawberry jam before and we love it both ways; I always try to choose a low sugar jam as I usually find regular jam way too sweet.  I consider this a reasonably healthy breakfast so I don't mind eating it for several breakfasts in a row or that Ryan now asks for it all the time!

Peanut Butter & Jelly Baked Oatmeal


Peanut Butter and Jelly Baked Oatmeal

Makes 6 servings

Ingredients:

2-1/2 cups large flake rolled oats
2 tablespoons light brown sugar
1-1/2 teaspoon baking powder
1/2 teaspoon salt
1-1/2 teaspoons cinnamon
1 large egg, lightly beaten
2 cups skim milk or almond milk
1 teaspoon vanilla extract
1/2 cup peanut butter - I usually use regular smooth peanut butter but natural would work too if you want slightly less sugar and salt
1/2 to 3/4 cup low-sugar jam – strawberry, grape, or mixed berry all work

Directions:

Preheat oven to 350°F.  Spray a 9x13 baking pan with non-stick cooking spray.

In a large bowl, whisk together the oats, brown sugar, baking powder, salt, and cinnamon.  In a separate bowl, whisk together the egg, milk, vanilla, and peanut butter. You can warm up the peanut butter for about 20-30 seconds in the microwave first to make it more liquid so it will mix in better.  Add the wet ingredients to the dry ingredients and stir just until combined. 

Spread mixture into pan and spread evenly with a spatula.  It will look like oats floating in a lot of liquid – that’s normal; the liquid will all be absorbed during baking.  Drop spoonfuls of jam evenly on top of the oatmeal.  If you like, you can leave the jam in little pockets, or take a butter knife and try to swirl the jam around to cover more surface area (that’s what I like to do).  Bake in preheated oven for 35-40 minutes, until edges are golden brown and middle is cooked through.  Divide into at least 6 servings and serve warm, with maple syrup if desired.

Leftovers can be stored covered in the fridge for a few days and reheated.

March 04, 2014

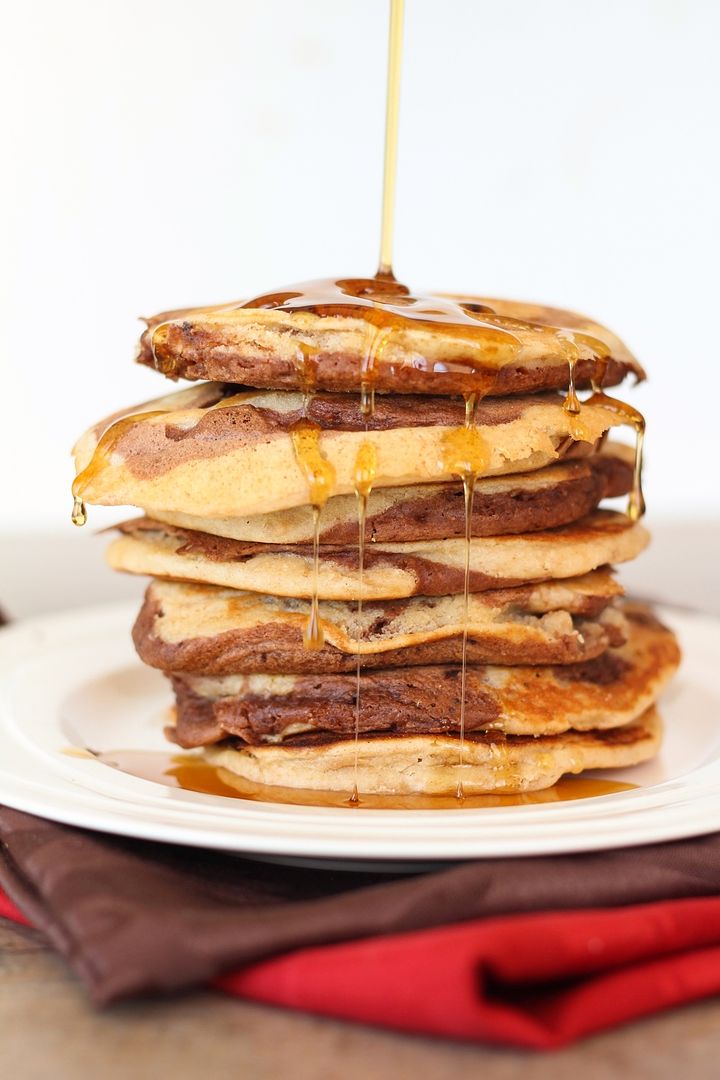
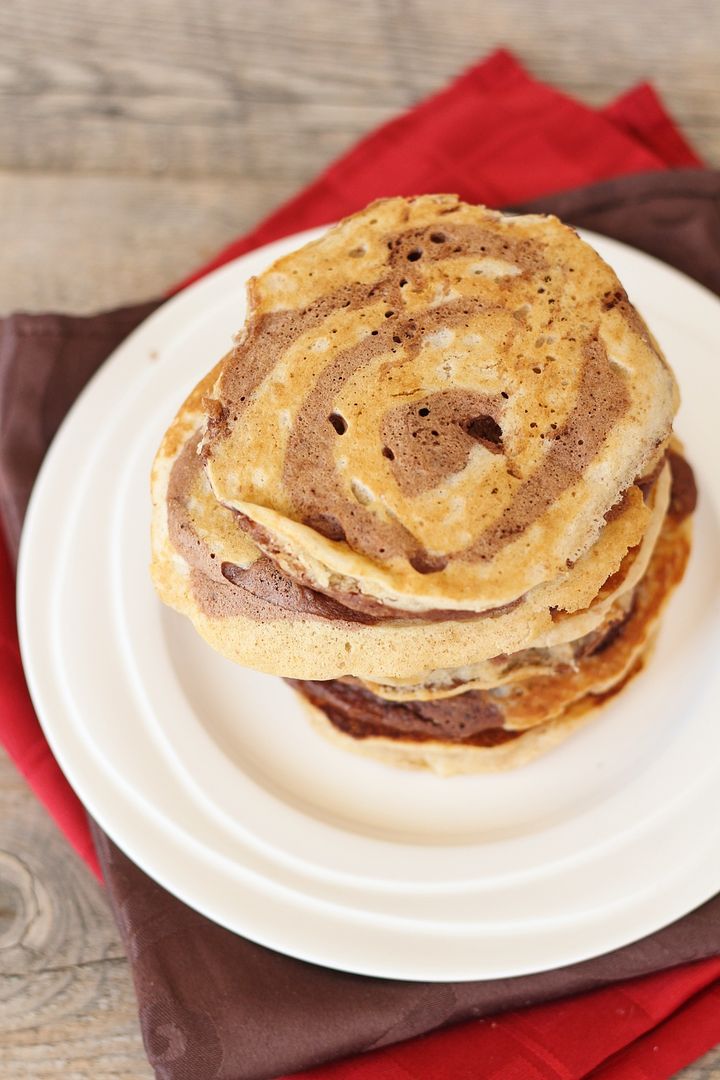
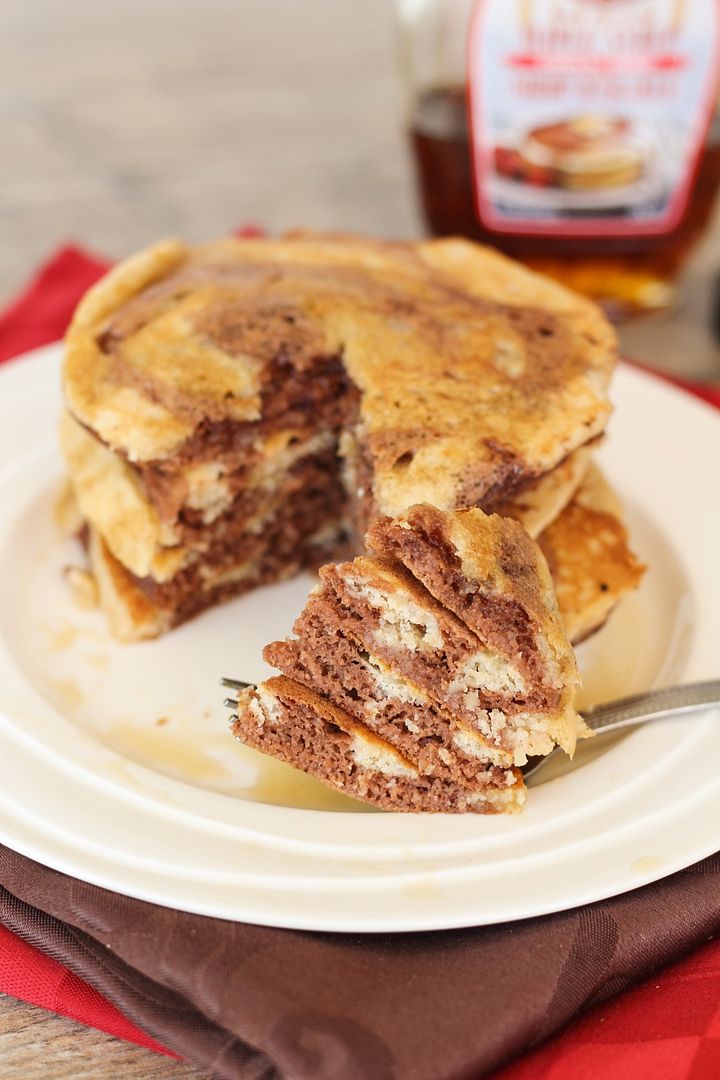
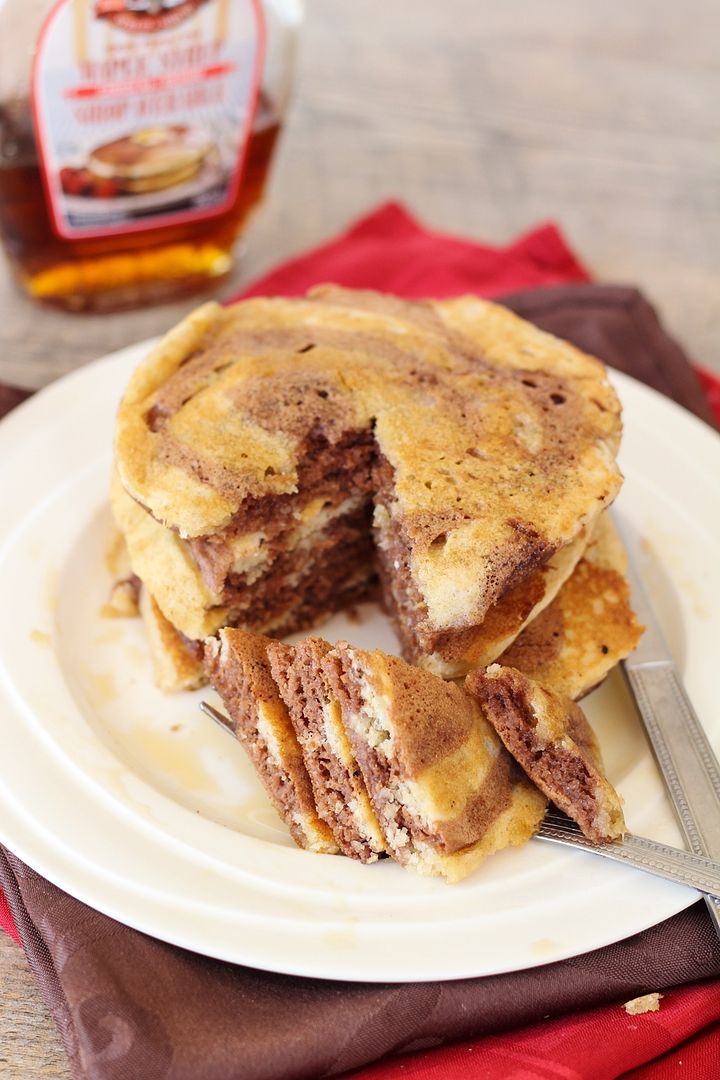
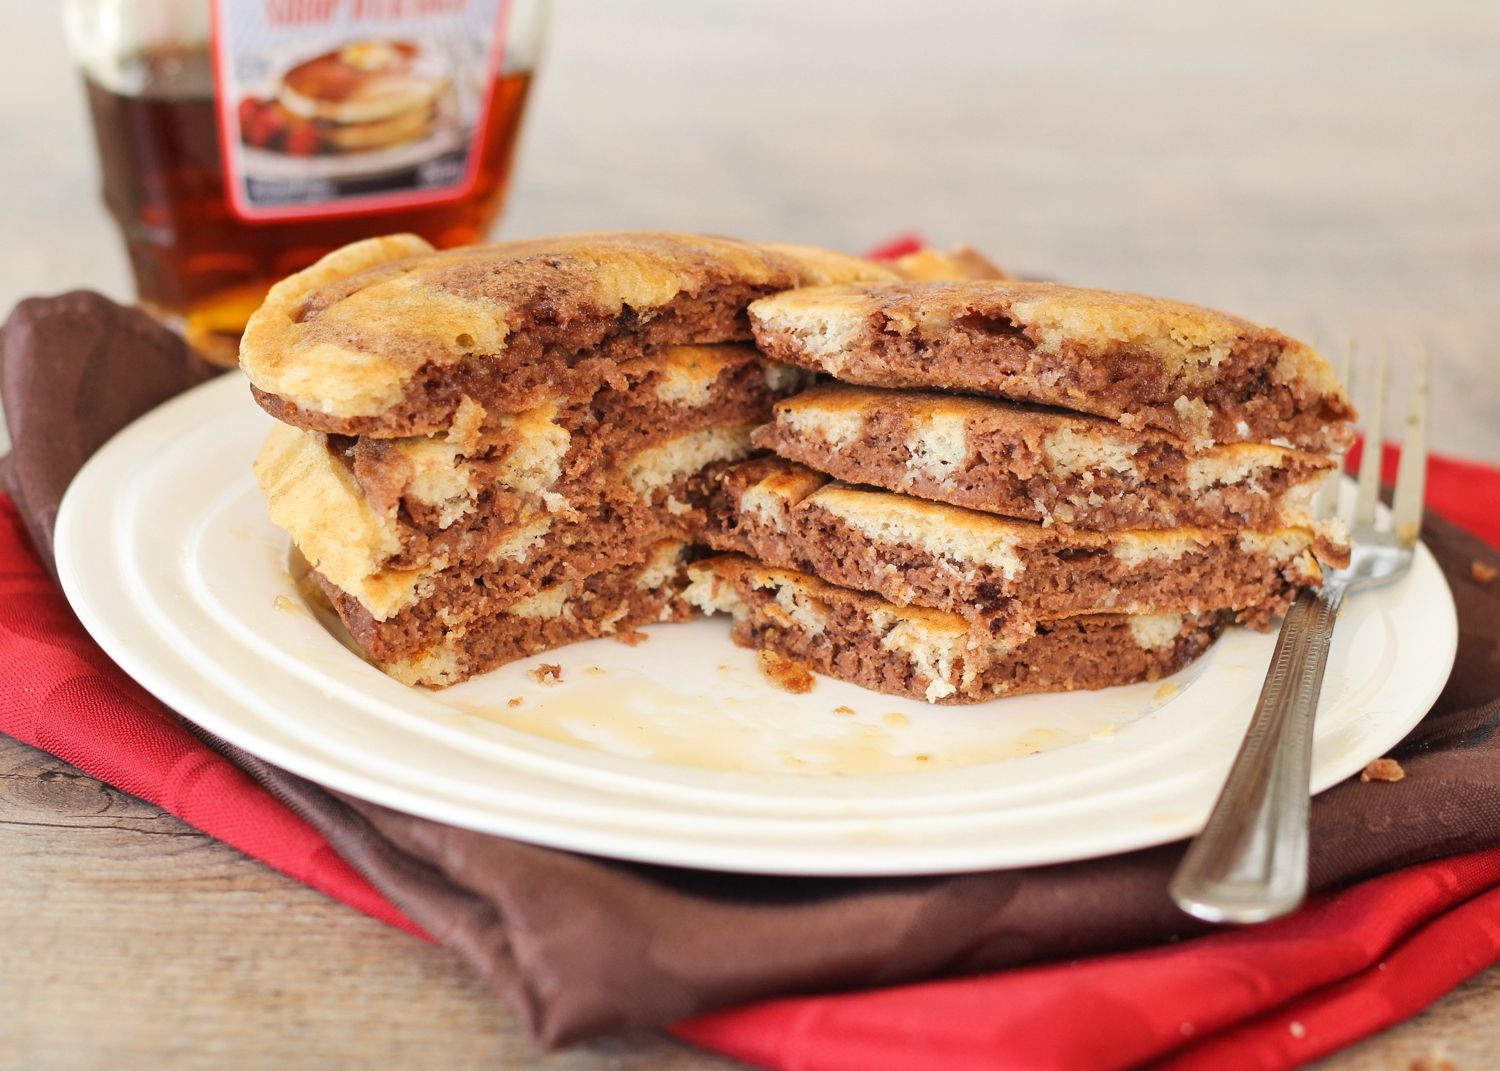
Chocolate Peanut Butter Swirl Pancakes

Chocolate Peanut Butter Swirl Pancakes

Today  is one of my favourite days of the year, Pancake Tuesday!  Better known as Fat Tuesday, it's a day traditionally meant for eating richer, fatty foods before Lent, which somehow led to eating pancakes (though I don't really agree that they're a rich or fatty food!)  To my family and I, it just means it's a day to eat pancakes for dinner!

Chocolate Peanut Butter Swirl Pancakes

As a kid I always loved the traditional blueberry and chocolate chip pancakes for pancake dinner, but now I love using the day to try new flavours of pancakes I've never had before.  Last year I made these delicious earl grey vanilla tea pancakes with honey tea syrup, and the year before that was these caramel latte pancakes, which I also loved.

Chocolate Peanut Butter Swirl Pancakes

But it's getting harder and harder to think of pancake flavours that haven't been done before, so this year I decided to combine two flavours into one!  And what better combination than the best of friends, chocolate and peanut butter.

Chocolate Peanut Butter Swirl Pancakes

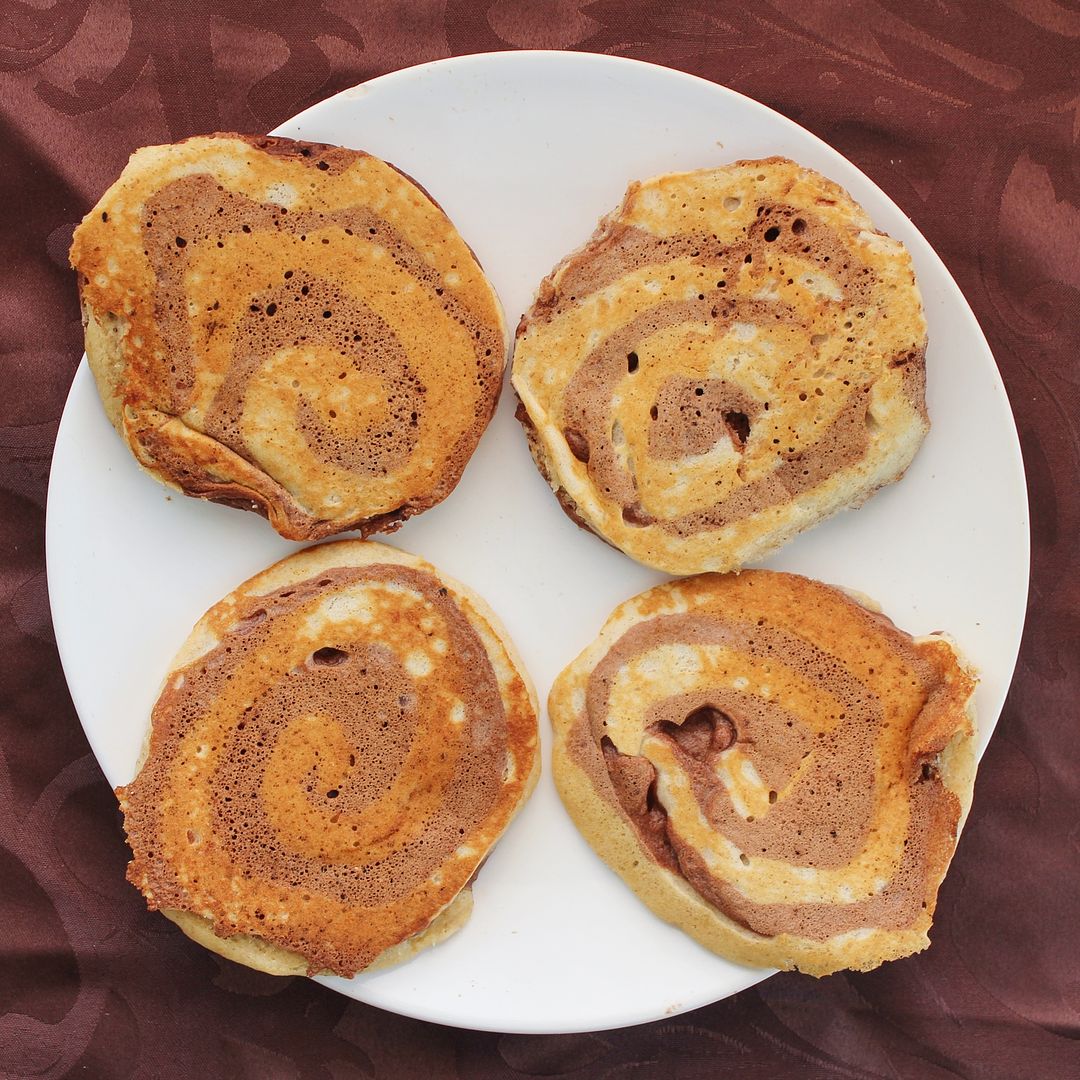
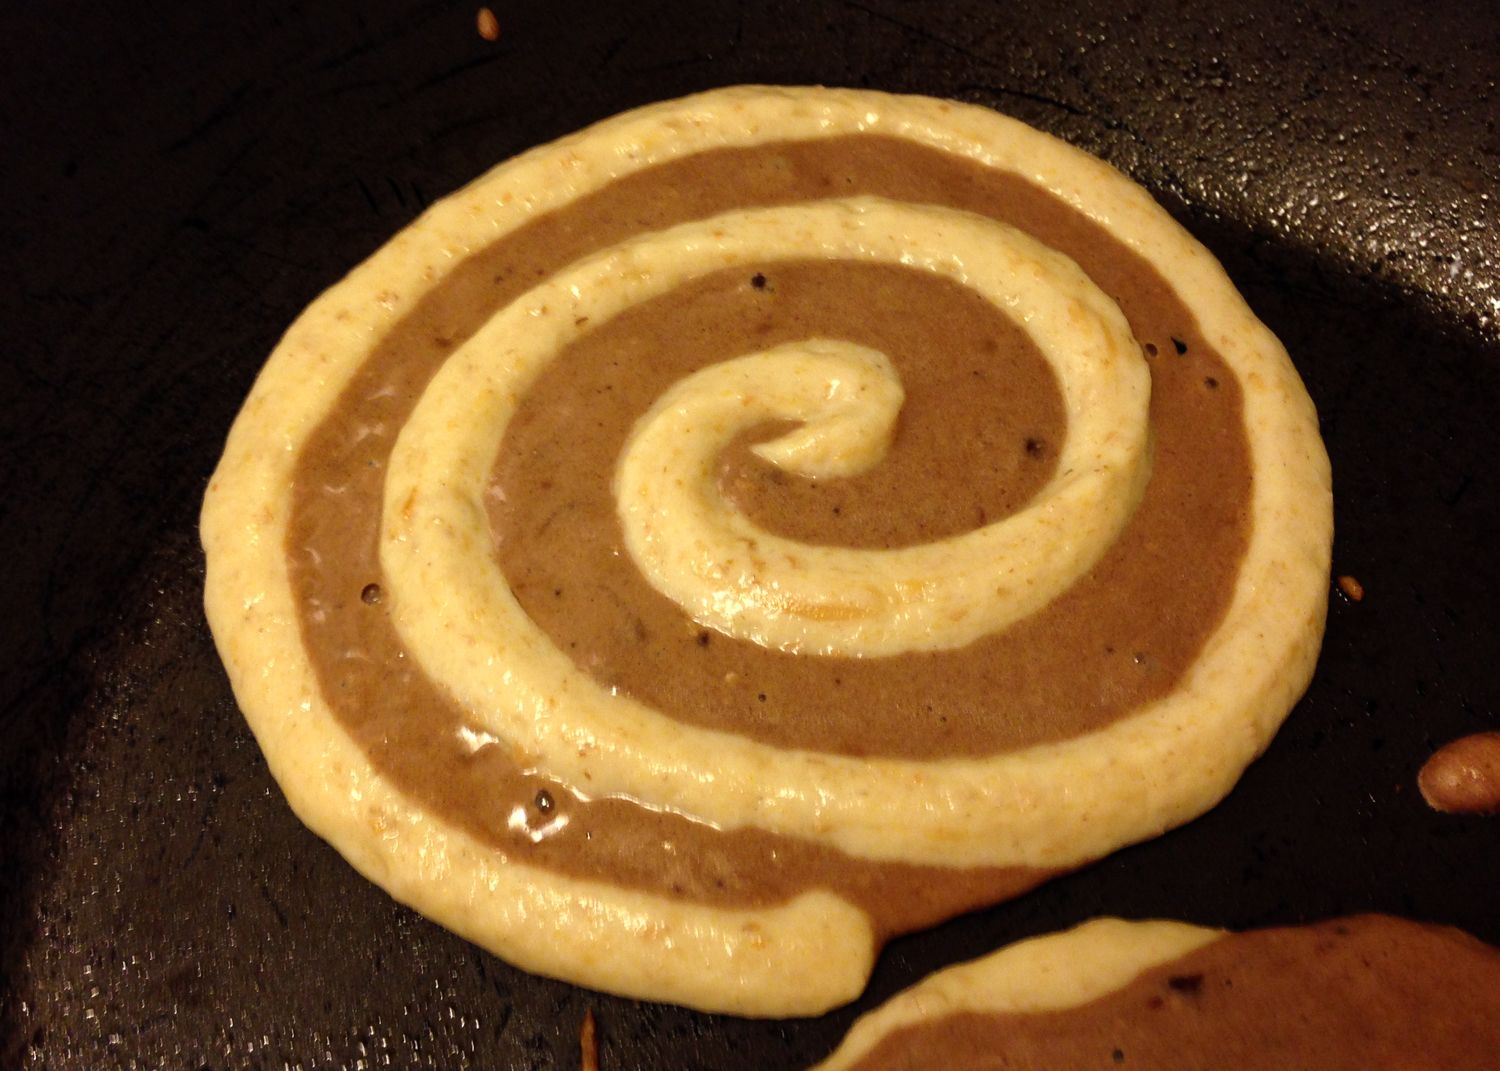
These really are no harder than regular pancakes because the chocolate and peanut butter batters are basically the same, the only difference being the addition of cocoa for the chocolate batter versus peanut butter for the peanut butter batter (duh, I know).  Because the peanut butter batter is thicker, you'll pour the chocolate into your pan first in a pancake shape, then swirl the peanut butter batter on top just using a simple ziplock bag.

The browning of the pancakes hides the swirl a little, but I still love the contrast in colours you see, and the balance of peanut butter and chocolate in the taste is absolutely perfect - I love that you can taste both equally!

Chocolate Peanut Butter Swirl Pancakes

These may just be my new favourite pancakes, and with a certain peanut butter loving fiance's birthday coming up this weekend, I think I have the perfect excuse to make them again soon!

Chocolate Peanut Butter Swirl Pancakes

Chocolate Peanut Butter Swirl Pancakes

Recipe by Once Upon a Cutting Board but peanut butter pancake batter adapted from Food.com

Makes around 10 pancakes

Ingredients:
For the Chocolate Batter:
1/4 cup all-purpose flour
1/4 cup whole wheat flour*
1 teaspoon baking powder
1/4 teaspoon salt
1 tablespoon sugar
1 tablespoon cocoa powder
1/2 large egg, lightly beaten
1/2 cup milk (I used almond milk)
1 tablespoon vegetable oil
1/2 teaspoon vanilla extract

For the Peanut Butter Batter:
1/4 cup all-purpose flour
1/4 cup whole wheat flour*
1 teaspoon baking powder
1/4 teaspoon salt
1 tablespoon sugar
1/2 large egg, lightly beaten
1/2 cup milk (I used almond milk)
1 tablespoon vegetable oil
1/2 teaspoon vanilla extract
1/4 cup smooth peanut butter

*note: feel free to replace the whole wheat flour with all-purpose flour if you don’t have whole wheat

Directions:

Prepare the chocolate and peanut butter batters separately, but notice that the batters contain almost identical ingredients (the chocolate batter has cocoa and the peanut butter batter has peanut butter), so you can prepare them side by side, making it easy. Add all your dry ingredients to two separate bowls for the separate batters and whisk the mixture together, then add the wet ingredients to each bowl and gently whisk or fold just until the wet and dry ingredients are combined. Note that for the egg, you can lightly beat one egg then divide it in two for the two batters. Transfer the peanut butter batter to a squeeze bottle or a Ziplock bag with a small corner cut off.

Heat two large non-stick skillets over low-medium heat and spray with non-stick cooking spray if needed. To make the pancakes, you’ll pour the chocolate batter into a pancake then swirl the peanut butter on top because it’s a thicker batter. Pour chocolate batter by about 1/4 cup full onto the pan, then immediately swirl peanut butter batter on top. It will look something like this:

chocolate peanut butter swirl pancakes

Cook for a couple minutes until bubbles form on top, then cook for one to two minutes on the other side, until cooked through. If you let the pancakes brown too much, it will hide the swirl, so you want to try to cook these over low heat, which may require a bit more time than usual. Repeat with remaining pancake batter; you will end up with more peanut butter batter leftover so just use that to make a few plain peanut butter pancakes. You can serve those in the middle of your stacks to help balance out the chocolate flavour.

Serve pancakes warm, with pure maple syrup if desired. 

July 25, 2013

Caramel Latte Cheesecake Squares for my 2nd Blogiversary (+ a Giveaway!)

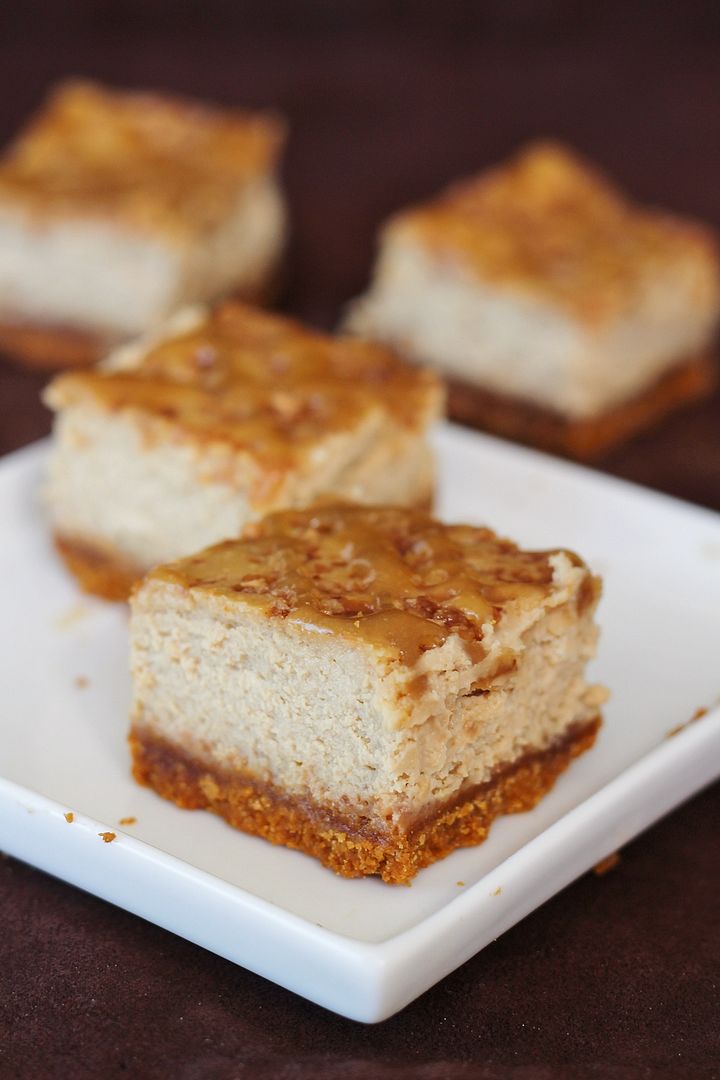
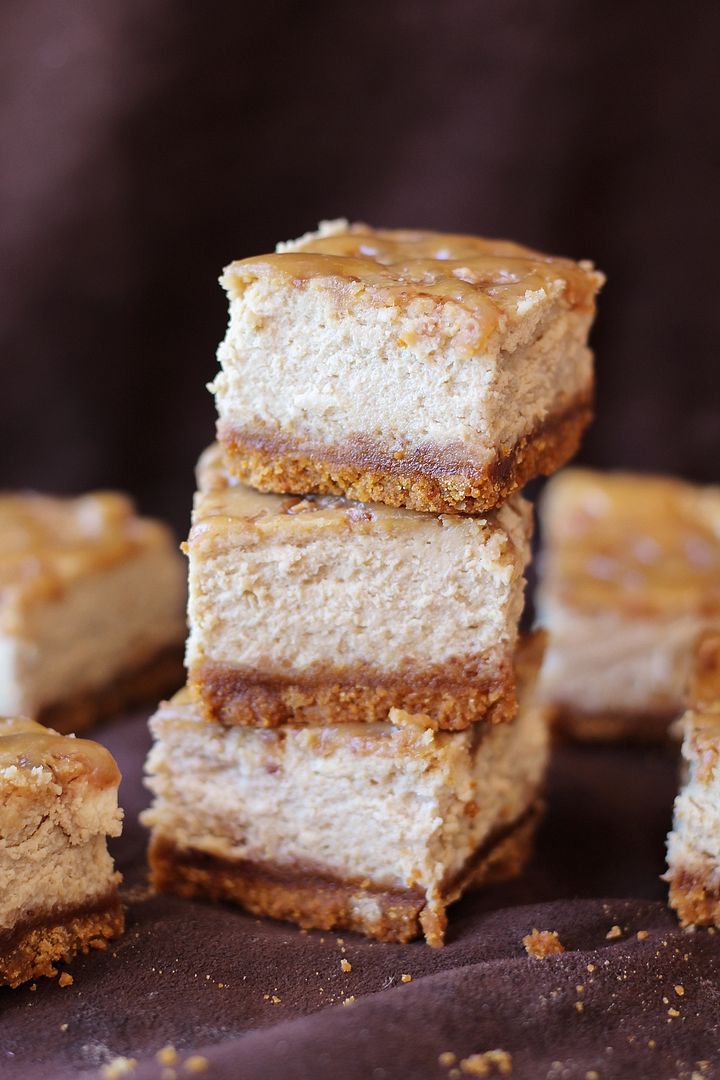
Caramel Latte Cheesecake Squares

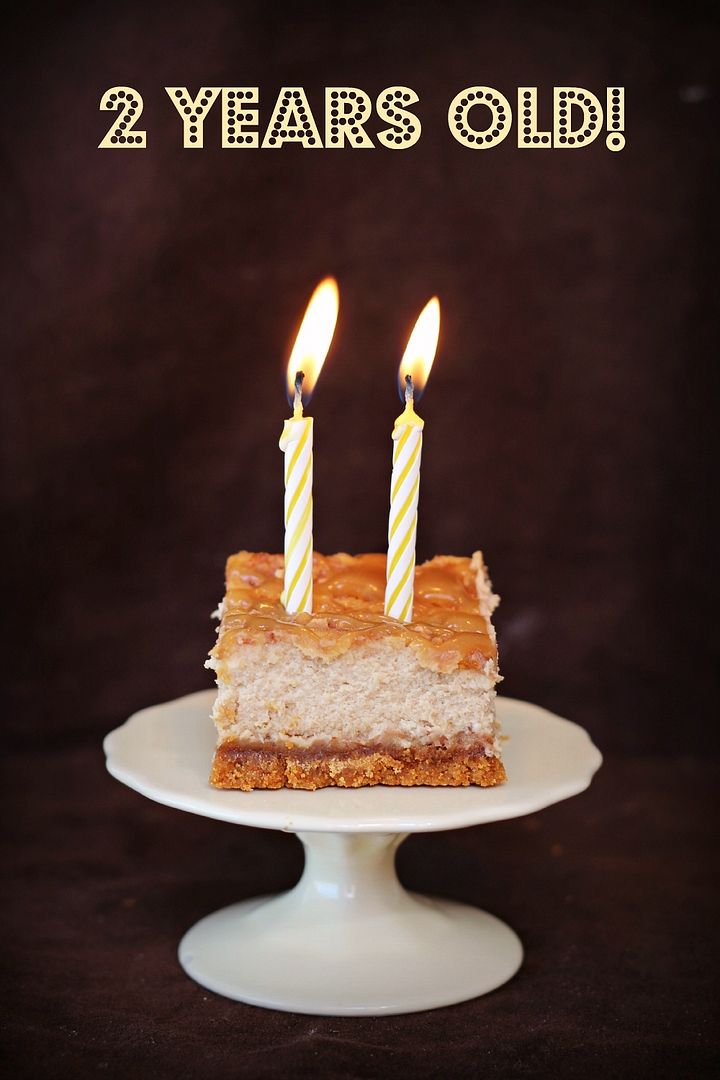
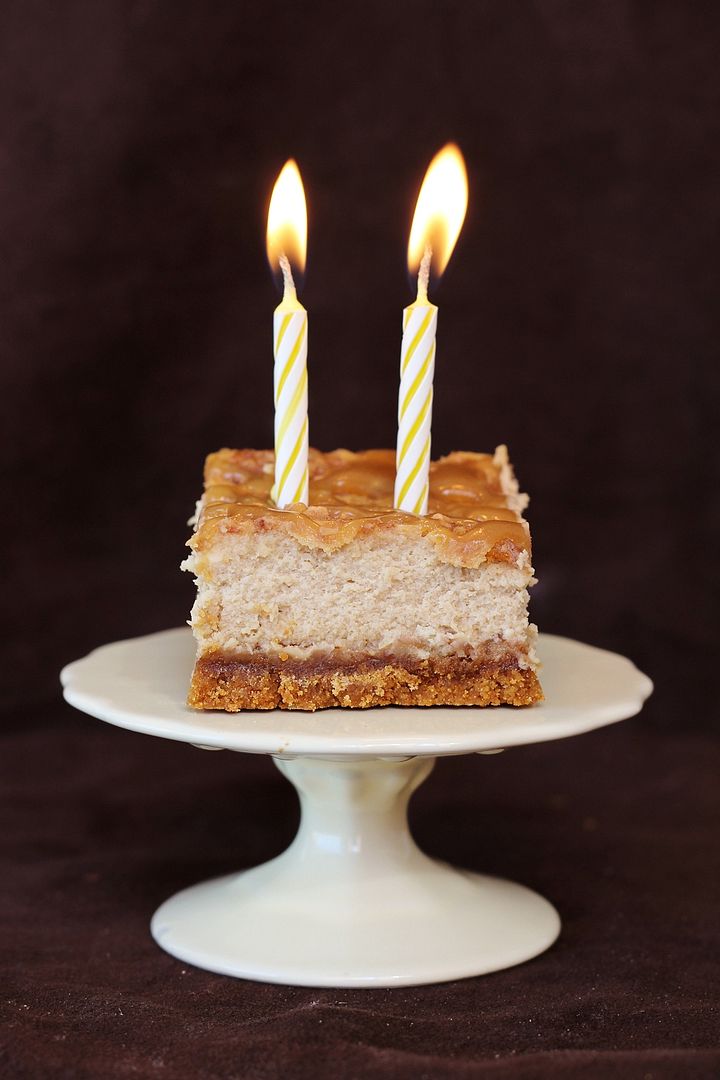
It’s my second blogiversary!  Well, technically it was yesterday, but due to a minor disaster with my planned dessert and my subsequent freak out, I’m celebrating a day late.

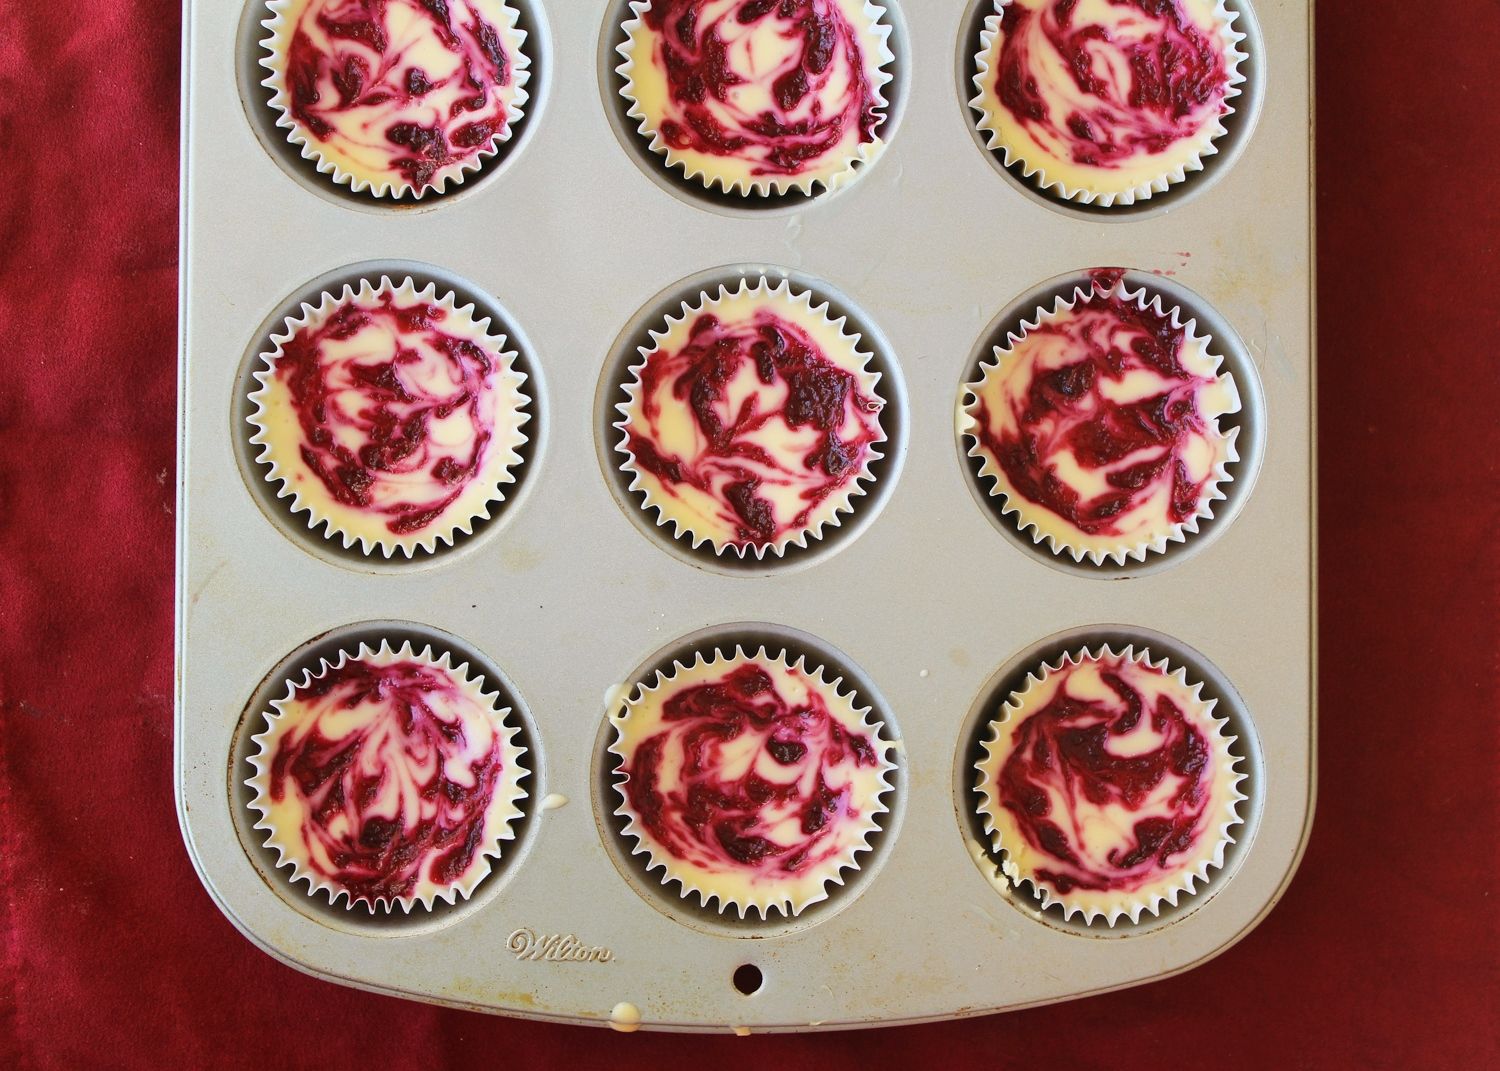
I spent a long time trying to choose the perfect dessert for a two year anniversary/birthday.  I wanted something cupcake-like because I feel like cupcakes are worthy of a celebration, but I had a hard time thinking of a recipe idea considering I’m actually not the biggest cupcake fan.  So when I remembered these raspberry swirl cheesecake cupcakes based on a Martha Stewart recipe I thought I’d found the perfect solution; mini cheesecakes baked in a cupcake pan – perfect!

cherry swirl cheesecakes

I decided to use a chocolate crust and a cherry swirl instead of raspberry, so I went out and spent a lot of money on cream cheese (cream cheese is expensive here – almost $4.50 each if you can’t get it on sale) and cherries, and went to work making my little cheesecakes Tuesday night.

They looked beautiful coming out of the oven, but when I took them out of the fridge Wednesday morning, I discovered that they were still mushy with an almost pudding-like texture (see picture below). I’m not quite sure what went wrong, but I suspect it may have had to do with the fact that I was making these late at night and somehow got it in my head that halving a recipe for 32 cheesecakes meant I should make 12. Don’t judge!
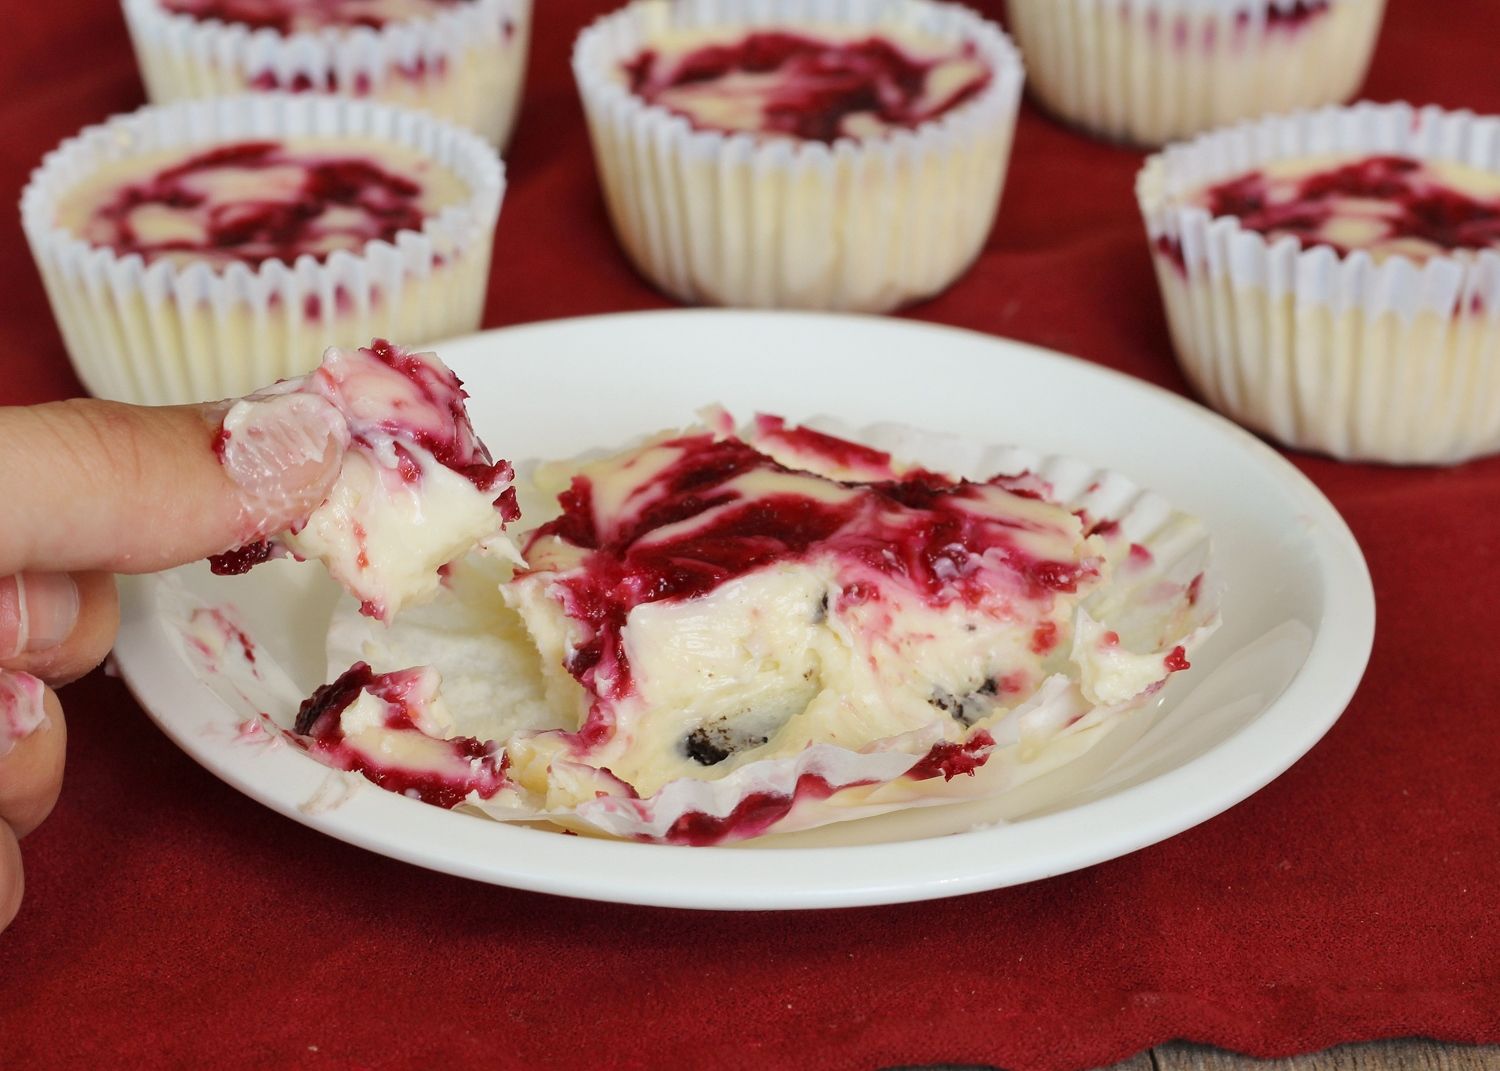
failed cheesecakes

I was so sad to not only have wasted my time and money, but that I wouldn’t have a dessert ready for my blogiversary. I considered just skipping the celebration because I’ve been super busy with school this week anyway, but I thought about it and realized that if there’s one thing that the last two years of blogging have taught me, it’s that things won’t always go as planned, but instead of giving up or getting upset, you just have to keep moving forward and things will often turn out just as well if not better (and you usually learn something along the way too).

Caramel Latte Cheesecake Squares

If I gave up every time a recipe didn’t work out the first time; if I worried too much about losing readers every time I was too busy to share a post one week; if I cried every time an anonymous person left me a mean comment; if I criticized myself every time I compared myself to bigger and prettier blogs; then I would have quit a long time ago.

The truth is I love my little space I’ve built on the internet, I love having a motivation to try new things in the kitchen every week, I love the warm and friendly comments I receive from my amazing readers, and any of the failures and criticisms I’ve experienced along the way have all helped me to learn and grow.

Caramel Latte Cheesecake Squares

So I picked myself up and went for a new dessert. Still cheesecake-themed, but using a recipe I know works as a base this time, and going with new flavours that I know I love - caramel and coffee!

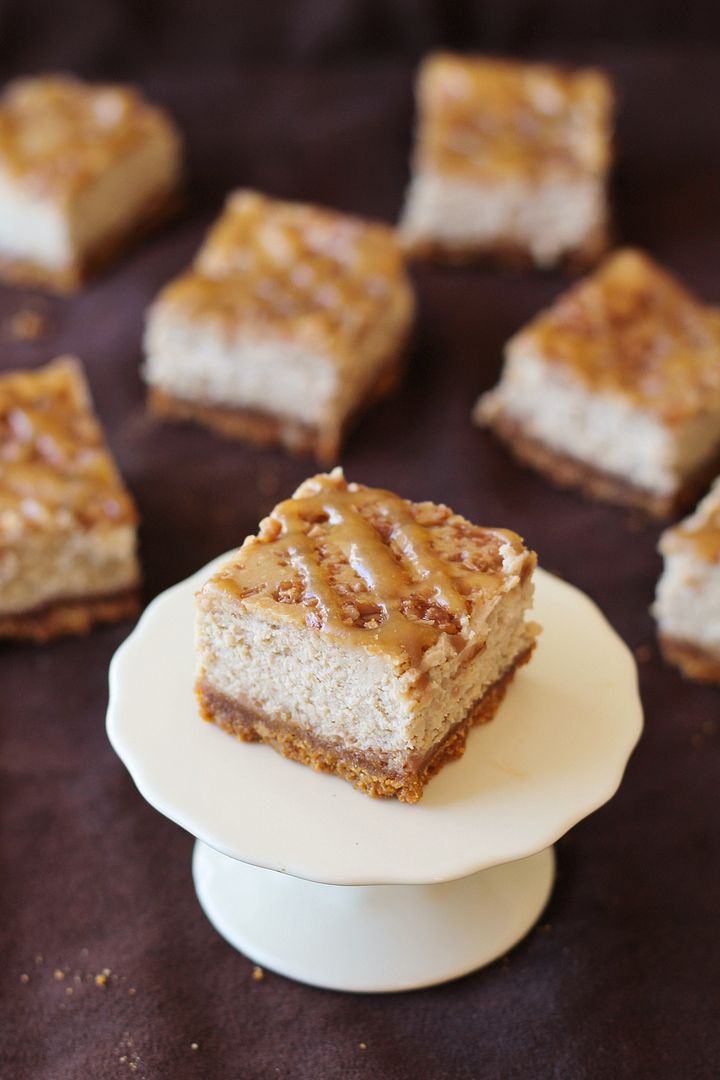
These creamy cheesecake bars have a standard graham cracker crust, but with toffee bits melted over the crust and sprinkled on top of the cheesecake, espresso mixed into the cheesecake, and a drizzle of caramel sauce overtop, giving them a lovely caramel latte flavour.  I'm so, so glad I pushed forward and made these because they may be one of my new favourite cheesecake bars!

Caramel Latte Cheesecake Squares

And what goes better with caramel latte cheesecake than a caramel latte or frappuccino – or any of your other favourite Starbucks drinks! To celebrate my blogiversary and give back to my loyal readers in a small way, I’m giving away a $30 gift card to one of my favourite places in the world, Starbucks!

I’m trying something new with this giveaway and using Rafflecopter, which many of you are likely familiar with, in an attempt to make things easier on all of us. Just use the widget below to enter and let me know if you have any problems - Canada or US entries only please.  The giveaway will close Monday July 29th, 2013, at midnight EST and I'll contact the winner soon after that, so be sure to use a valid email address/Facebook account. The e-gift card will be sent by email, so please make sure you have a working email account and access to a printer if you win!
(the rafflecopter will load immediately below this sentence; if you have a slow internet connection like the ridiculously slow one at my office today, just wait for it to appear!)

a Rafflecopter giveaway


Thanks for celebrating with me and for reading this blog – I truly appreciate all of you!

Oh and by the way, it's also my twin sister Genevieve's blogiversary at Vanilla & Spice today!  If you haven't checked out her blog before (it's full of healthy vegetarian recipes), be sure to stop by and say hi!

Caramel Latte Cheesecake Squares

Caramel Latte Cheesecake Squares

Adapted from Food & Drink and these cheesecake bars

Makes one 8x8 pan; 16-20 squares depending on how you slice them

Ingredients:
For the Crust:
1-1/2 cups graham cracker crumbs
2 tablespoons light brown sugar
2 tablespoons all-purpose flour
1/8 teaspoon salt
1/4 cup unsalted butter, melted and cooled
1/2 cup toffee bits

For the Cheesecake:
16 oz (2 bricks) cream cheese, softened
1/3 cup brown sugar
1/4 cup granulated sugar
2 large eggs
1/4 cup sour cream
2 teaspoons vanilla
1 tablespoon instant espresso
1/4 cup toffee bits

For the Caramel Sauce:
1 tablespoon unsalted butter
1/4 cup brown sugar
1 tablespoon milk
1/4 teaspoon vanilla extract

Directions:

Preheat oven to 325°F.

Line an 8-inch square baking pan with aluminum foil, leaving a few inches of foil draping over the sides of the pan (which will help with removal later).

Make the crust: Whisk together the graham cracker crumbs, brown sugar, flour, and salt in a medium bowl.  Pour the melted butter over the mixture, and stir together with a fork until all crumbs are moistened.  Transfer the mixture into the prepared pan and press evenly to form the crust.  Bake in preheated oven for 12-15 minutes, until crust is beginning to brown.  Remove from oven then pour the 1/2 cup of toffee bits in an even layer over top, pressing down lightly. Transfer to a cooling rack to cool for about 20-30 minutes.

Meanwhile, prepare cheesecake filling.  In a large bowl or bowl of an electric mixer, beat the cream cheese until smooth, about 3 minutes.  Beat in the two sugars until well combined, about 1 minute.  Beat in eggs one at a time, fully incorporating each egg into the mixture. Beat in sour cream until just combined.  Mix the vanilla extract and instant espresso together in a small bowl, then add to cheesecake mixture and mix until combined.

Pour cheesecake mixture over cooled crust, then sprinkle 1/4 cup toffee bits evenly on top (I used a bit more to fill in some gaps).  Place in middle rack of the preheated oven and bake for 40-45 minutes, until edges are set but the middle jiggles slightly (as a whole) when you shake the pan.  Transfer to a cooling rack and let cool to room temperature, about 2 hours.  Transfer to a refrigerator (I don’t cover mine) to cool completely, for at least 4 hours or preferably overnight.

Meanwhile, prepare caramel sauce by adding the butter and brown sugar to a small saucepan. Bring to a boil over medium-high heat and cook 1 to 2 minutes, until slightly thickened. Slowly stir in the milk and continue to simmer until thickened slightly. Remove from heat and stir in the vanilla extract.  Transfer to a small container and set aside until cheesecake has cooled to room temperature.  Drizzle caramel sauce over the cheesecake (I transferred mine to a small ziplock bag and snipped off the corner to drizzle with more accuracy) before refrigerating it (you could also do this step the next day after it has  been refrigerated).  *If you already have storebought caramel sauce at home and wish to use it instead, that would work fine too - I didn't have any so it was easier for me to just make some, which only takes about 5 minutes.

Slice cheesecake into bars.  Keep refrigerated.
June 14, 2013

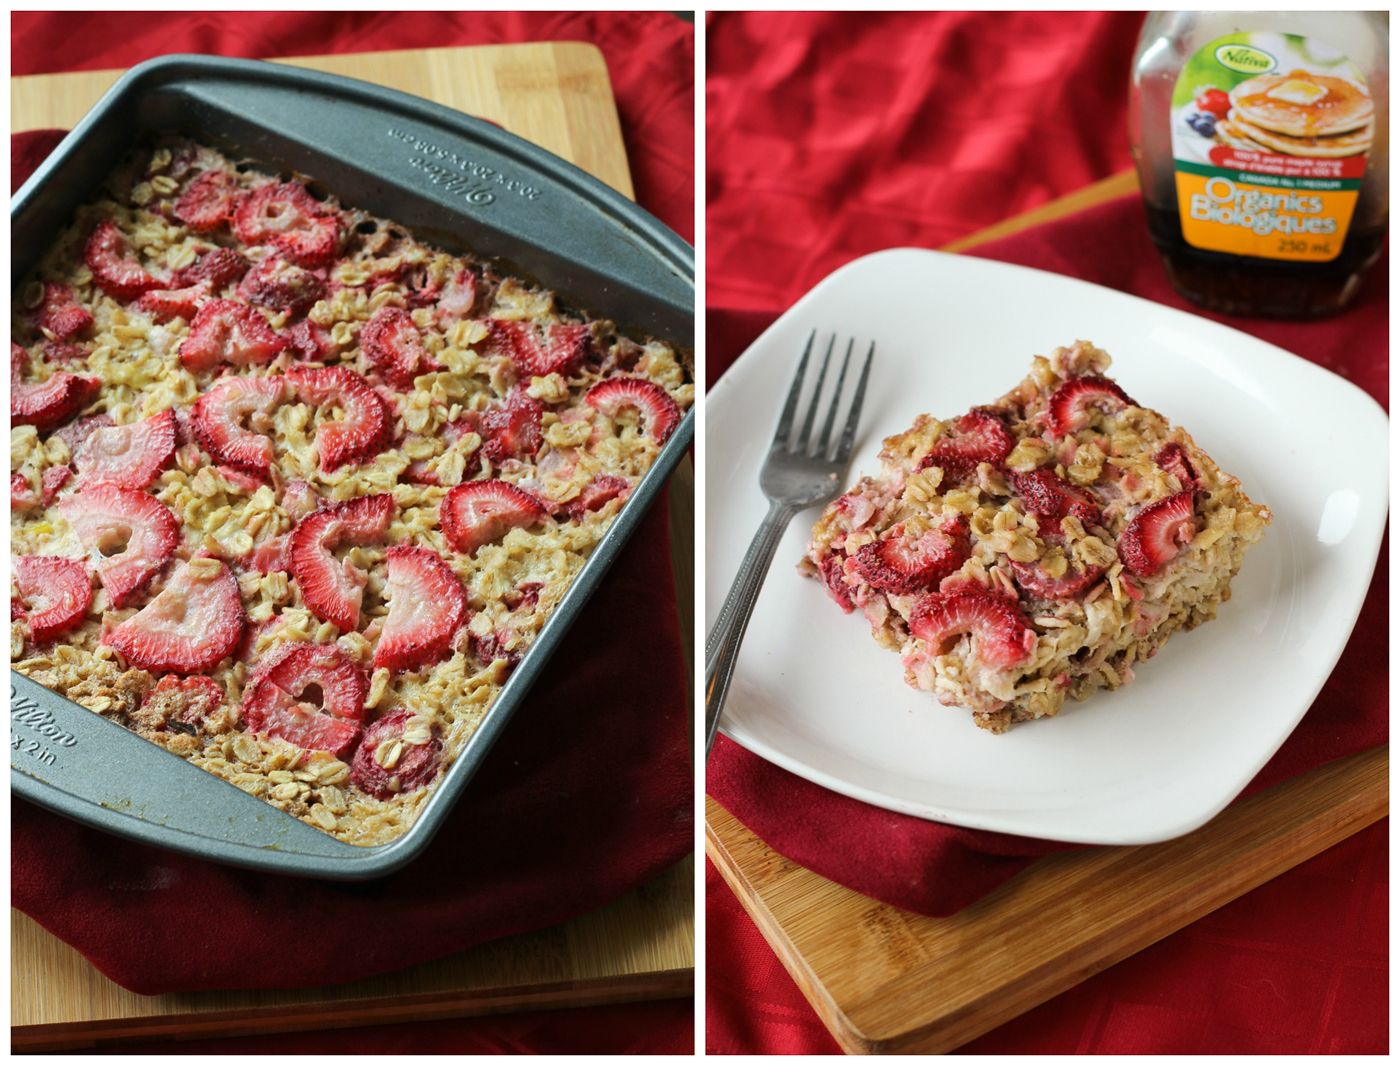
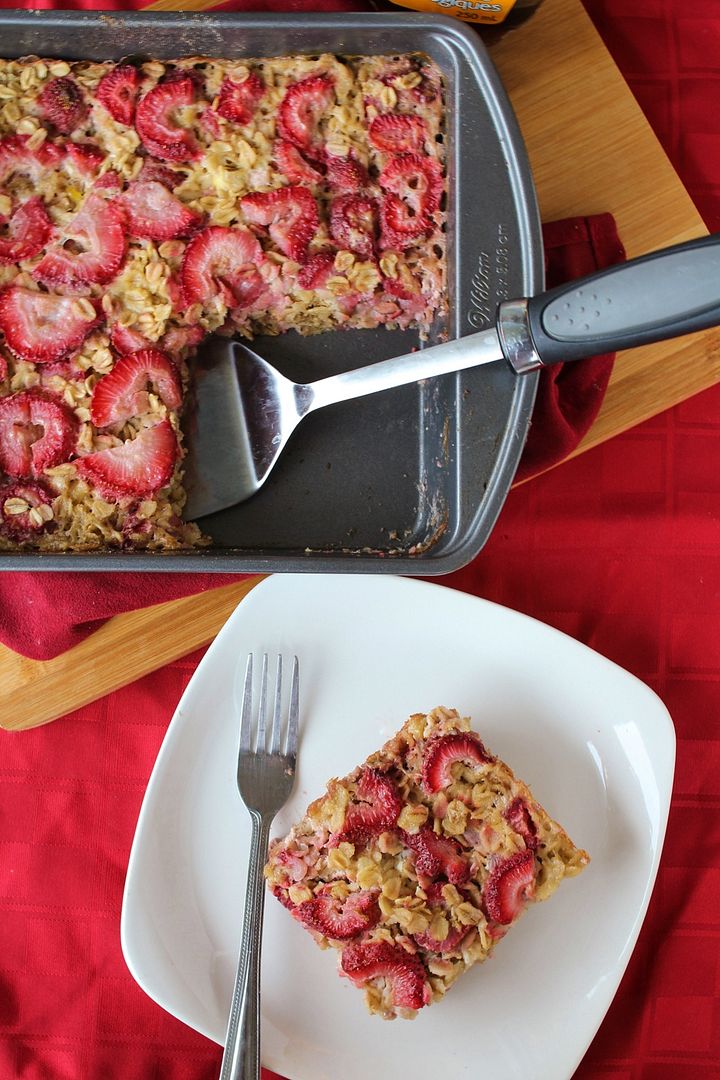
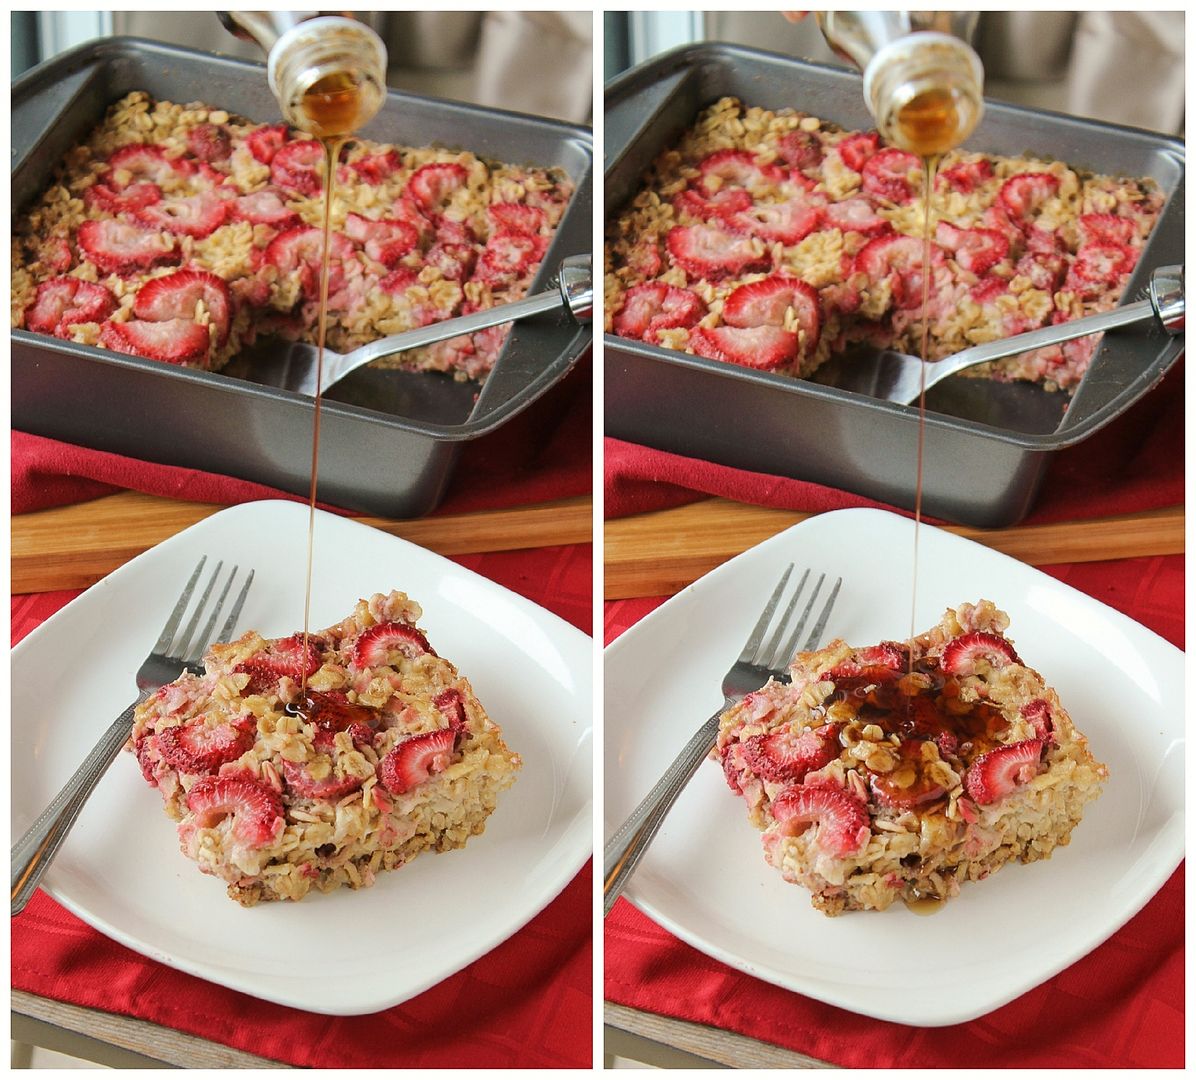
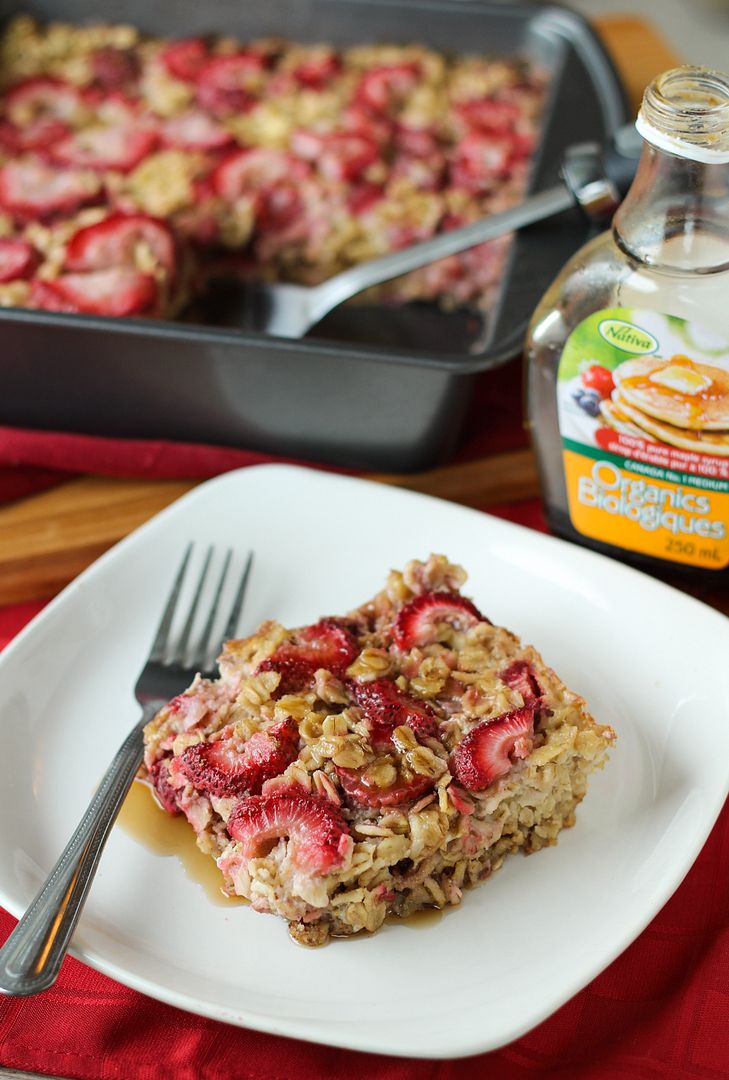
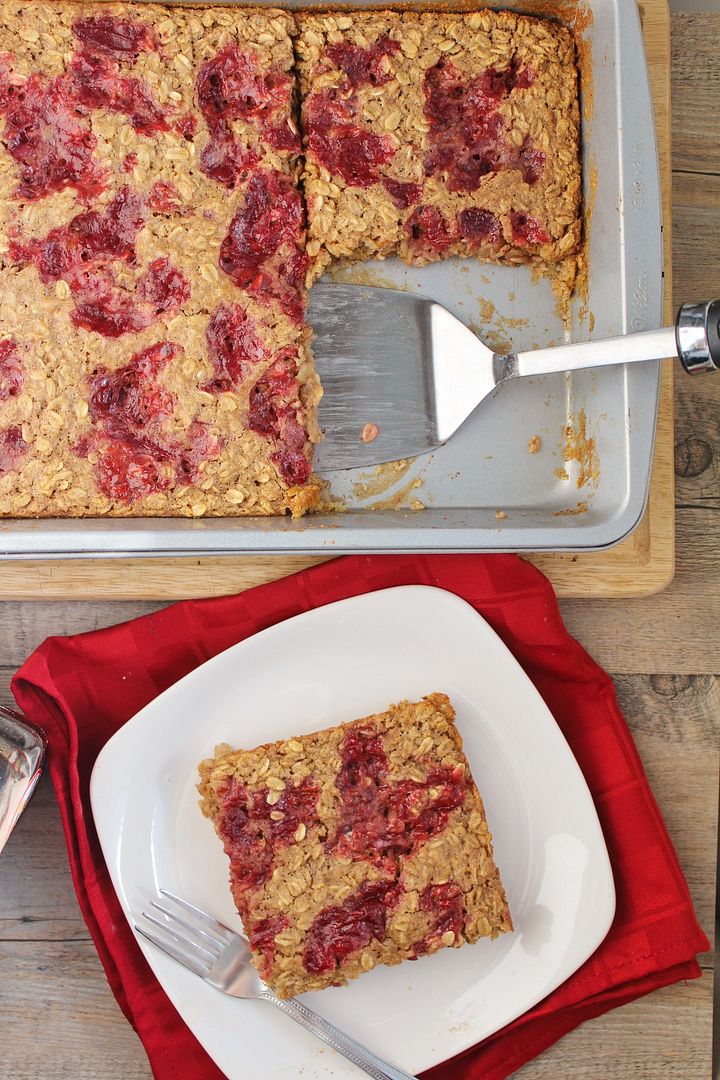
Strawberries & Cream Baked Protein Oatmeal

Strawberries & Cream Baked Protein Oatmeal

I was recently contacted by the nice folks at Visalus to see if I wanted to participate in their '90 for 90' series, where 90 bloggers will create 90 recipes using their Vi-Shape Shake Mix.  For those who haven’t heard of Vi-Shape or their Body by Vi 90 Day Challenge, the shake mix is a low-fat, low-calorie, gluten-free, lactose-free, high protein nutritional shake (like a protein powder but with more vitamins, from my understanding) that tastes and smells like cake mix!

I haven’t loved a lot of protein powders I’ve tried before, but this one actually smells just like cake mix, and I liked that it had more than just protein in it, so I was intrigued to try it in a recipe!

Strawberries & Cream Baked Protein Oatmeal

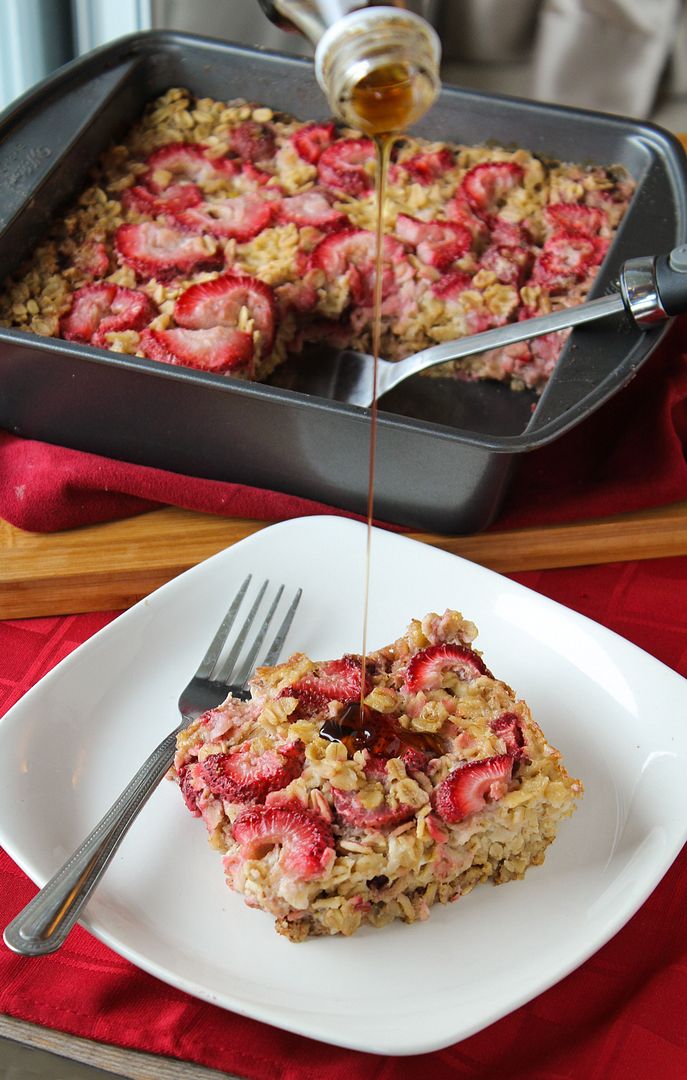
I came up with a few ideas before settling on my favourite one, this baked strawberries & cream oatmeal.  I love having oatmeal in the morning because it’s healthy and filling, but I’m usually too lazy to stand over a pot and wait for it to cook in the morning (and the instant stuff doesn’t usually cut it for me).  Baked oatmeal is so much better because you can mix together a batch, throw it in the oven to cook (hands-off), then have a bunch leftover for breakfasts through the week!

Strawberries & Cream Baked Protein Oatmeal

I looked at a lot of baked oatmeal recipes in developing this recipe, and most seemed to use a technique where they dump the oats and dry ingredients into the baking pan, then pour the wet on top and throw it in the oven, so the wet ingredients would slowly seep down through the oatmeal as it cooks.  The problem I had with this was that all the finer dry ingredients just fell right to the bottom, so you’d get super strong bites of cinnamon and salt when you got to the bottom, and the wet ingredients didn’t sink all the way down so I ended up with little bits of cooked egg on top, which wasn’t very appealing.

So the next time I just mixed all the wet and dry ingredients together before going in the pan, and it worked so much better, giving me firm, evenly mixed, and evenly baked delicious oatmeal.  The pictures I took were of the first version, but since they turned out well I didn’t bother redoing them because the next version looks almost the exact same.  Just picture this but a little more evenly cooked :)

Strawberries & Cream Baked Protein Oatmeal

Because the mix tastes like cake mix, it almost seems like you’re eating dessert for breakfast, and yet this is a healthy way to start the day, with only minimal sugar, no butter or oil, and lots of protein and vitamins from the Vi-Shape.  Some baked oatmeal recipes require lots of sugar and butter, and I tried this with more sugar and some olive oil instead of butter at first, but found I could reduce the sugar a lot and that the olive oil wasn’t even necessary.

I’m in love with this breakfast now, but I might have to use the rest of my Vi-Shape in some of the other amazing recipes I’ve been seeing, like individual vanilla cakes from Running to the Kitchen, yogurt covered blueberries from The Hungry Housewife, power waffles with cinnamon cream syrup from The Family Feed, or breakfast strawberry shortcake from A Nutritionist Eats - yum!

Strawberries & Cream Baked Protein Oatmeal

Strawberries & Cream Baked Protein Oatmeal

Makes 4-6 servings

Ingredients:

2 cups large-flake rolled oats (old fashioned oats)
1/4 cup light brown sugar
1 teaspoon baking powder
1/2 teaspoon salt
1 teaspoon cinnamon
1/2 cup Vi-Shape nutritional shake mix
1-1/2 cups sliced strawberries
2 cups low-fat milk (any type, as long as it's unsweetened - I’ve used almond milk and coconut-almond milk)
1 large egg
2 teaspoons vanilla extract

Directions:

Preheat oven to 375°F and spray an 8x8-inch square baking dish with non-stick cooking spray.

In a large bowl, whisk together the oats, sugar, baking powder, salt, cinnamon, and Vi-Shape.  In a separate medium bowl, whisk together the milk, egg, vanilla.  Add the wet ingredients to the dry ingredients and fold together with a flexible spatula until combined.  Stir in about 1 cup of the strawberries.  Pour mixture into prepared pan and spread out evenly as best as possible with your spatula.  Arrange remaining strawberries evenly on top (don’t press down on them so they stay on top).

Bake in preheated oven for 35-40 minutes until golden brown and set.  Let cool for a few minutes before slicing.  Serve warm, with maple syrup if desired.

------------------------------------------------------------------------------------------------------------------------
Disclosure: This post was sponsored by Visalus.  I'm happy to talk about their product, but they didn't tell me to - all thoughts and opinions I share on this blog are completely my own. :)  If you have any questions about Vi-Shape, please check out this page.

February 22, 2013

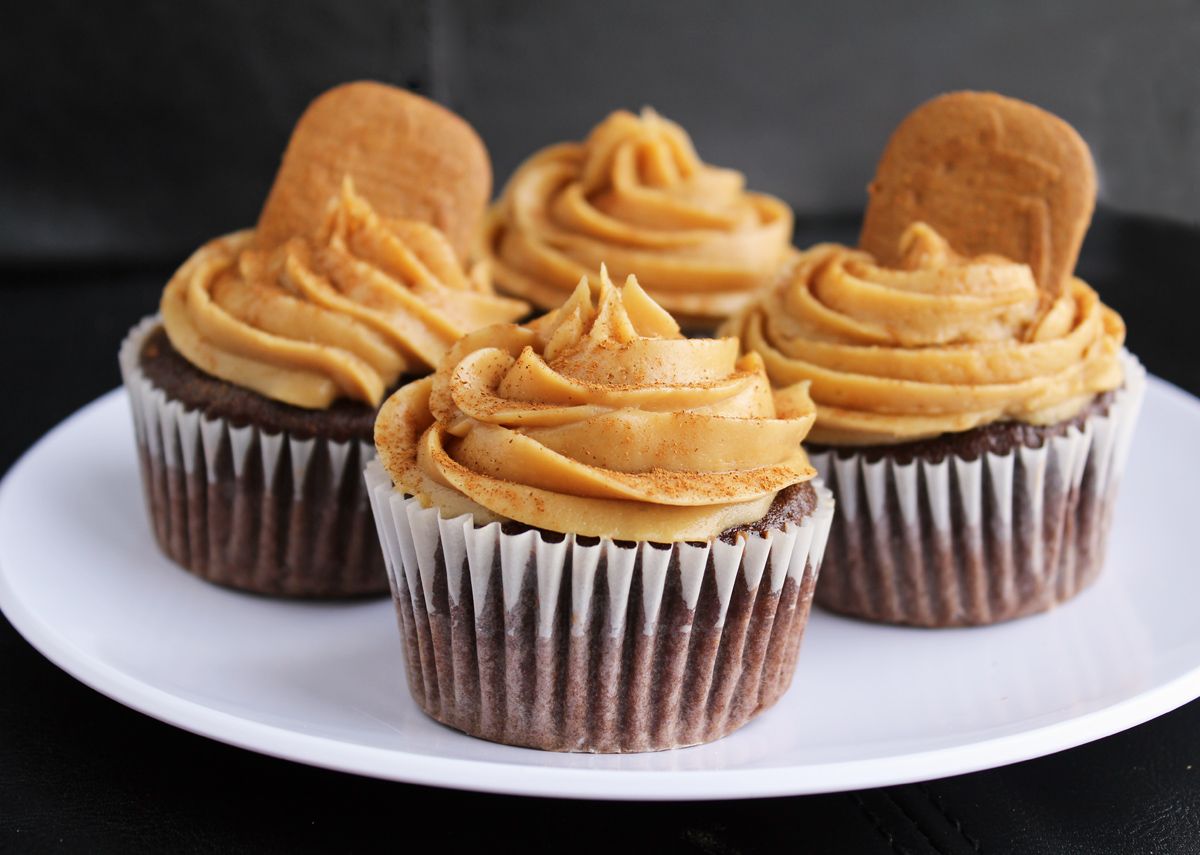
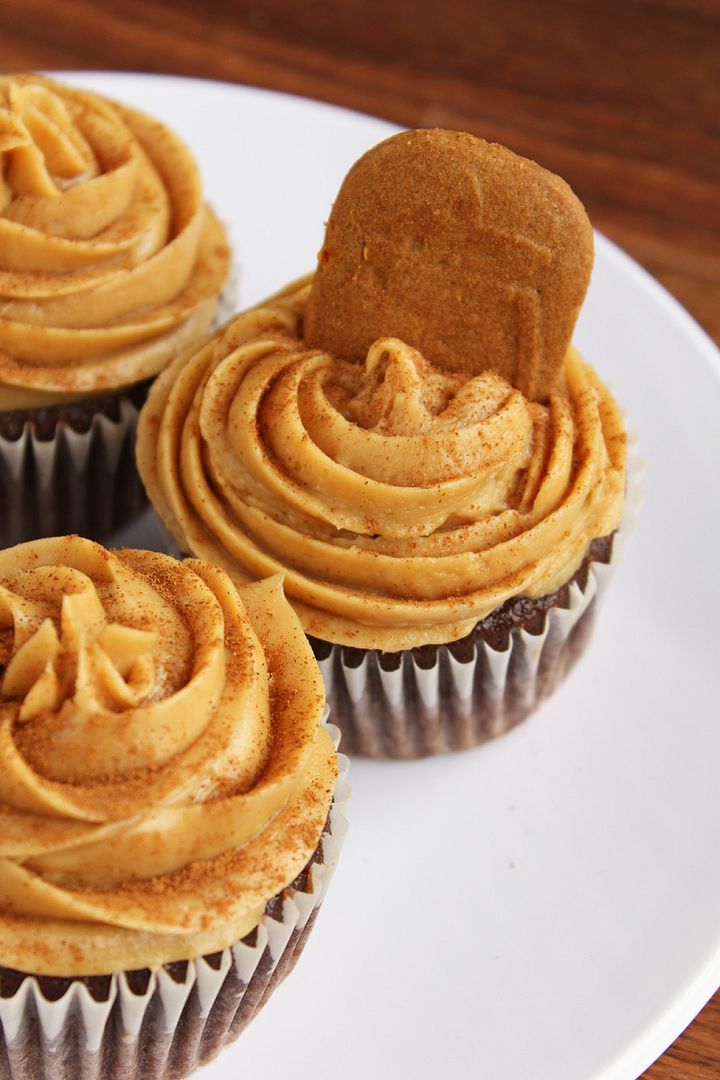
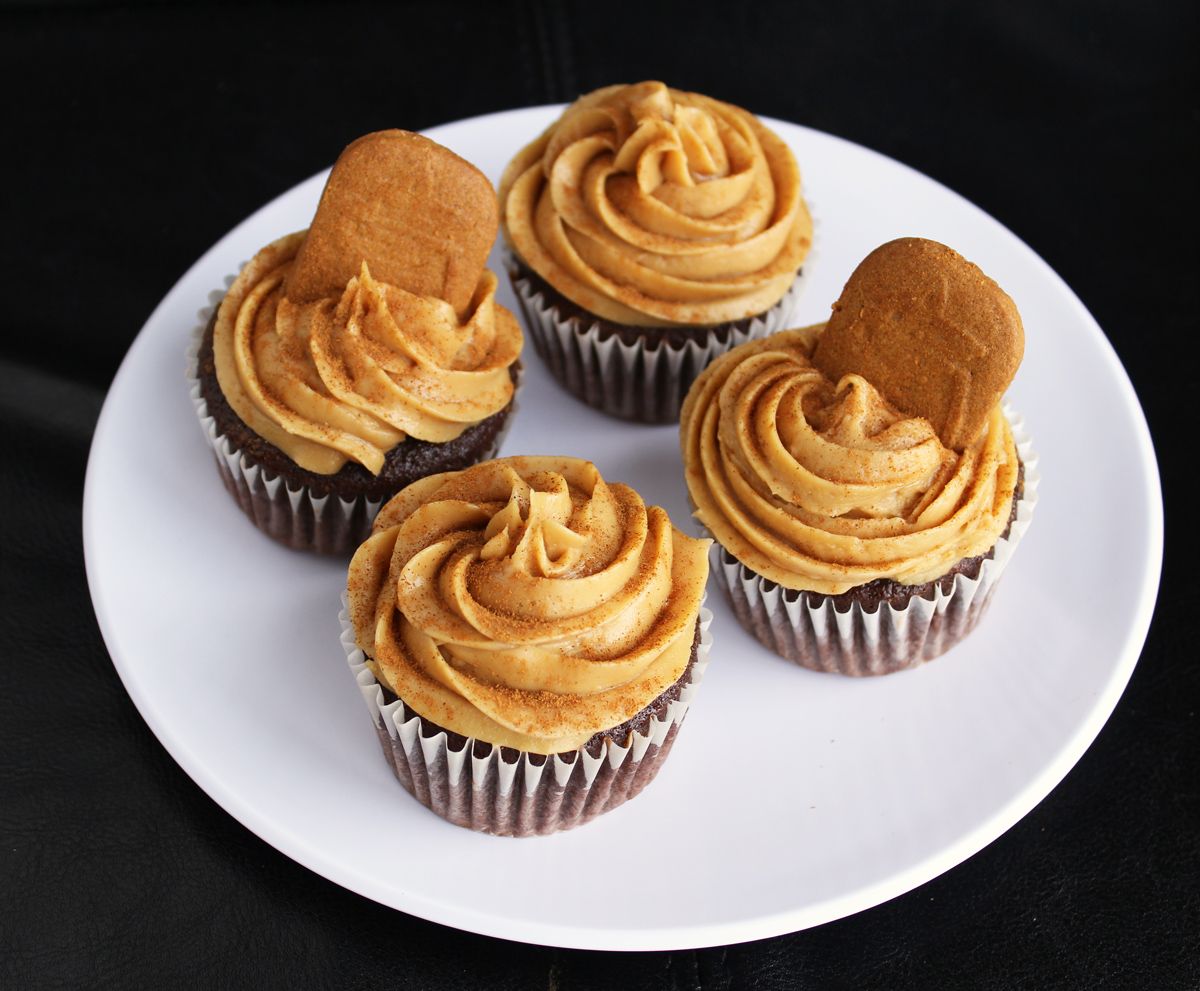
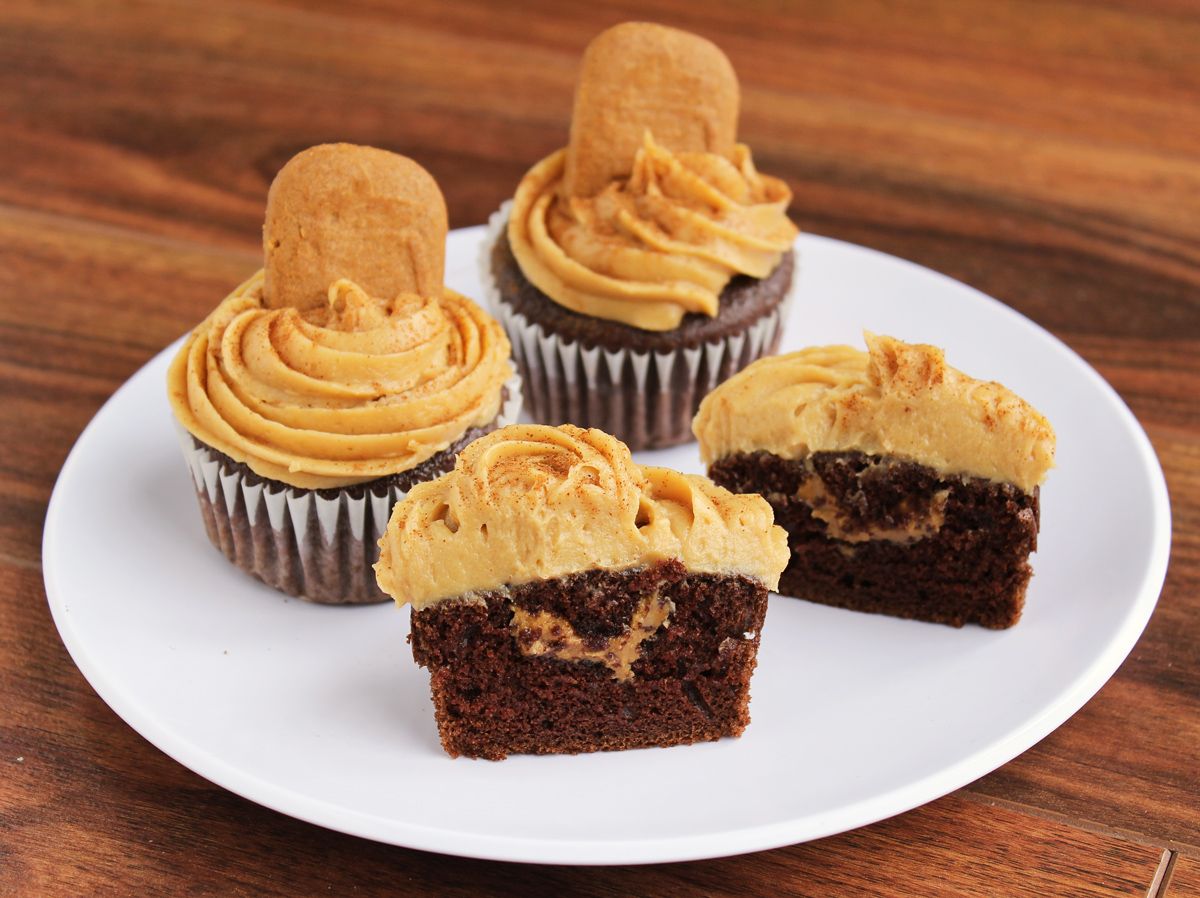
Chocolate Biscoff Cupcakes with Biscoff Cream Cheese Frosting

Chocolate Biscoff Cupcakes with Biscoff Cream Cheese Frosting

So this is the first Biscoff recipe on my blog, and I’m sure most of you are probably thinking that I’m the last one to the Biscoff party, which started almost two years ago. The thing is, Biscoff hasn’t really become as popular here in Canada as it has in the United States (or Europe, I assume, as that’s where it originated). In fact, when I sent these cupcakes to work with my boyfriend, he had to call me to ask me again what they were called because he had never heard of Biscoff, and apparently nobody at his work had either. And when I wrote about these cupcakes on Facebook, the first comment I got was asking me what Biscoff is.

So even though I feel like my fellow bloggers are probably already sick of Biscoff because it’s been popular on blogs for a while, in real life I don’t know anyone who’s even heard of the stuff, so I feel obligated to explain what it is!  But if you’ve already seen a thousand Biscoff recipes and have gone through fifty jars of the stuff at home, feel free to skip past these next paragraphs :)

Chocolate Biscoff Cupcakes with Biscoff Cream Cheese Frosting

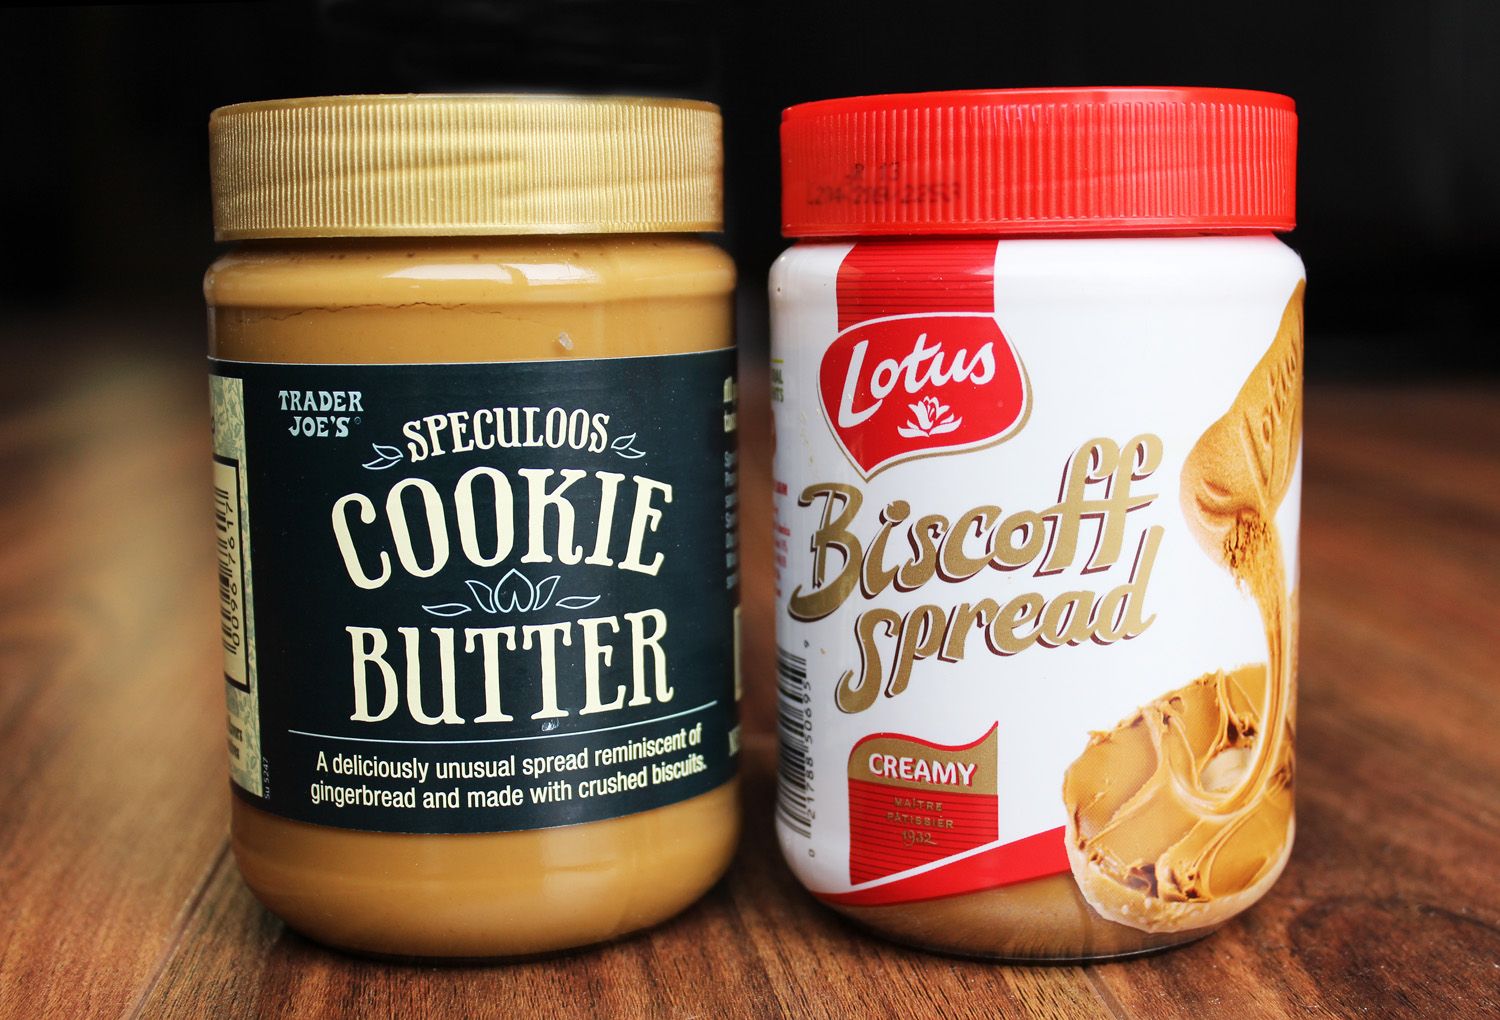
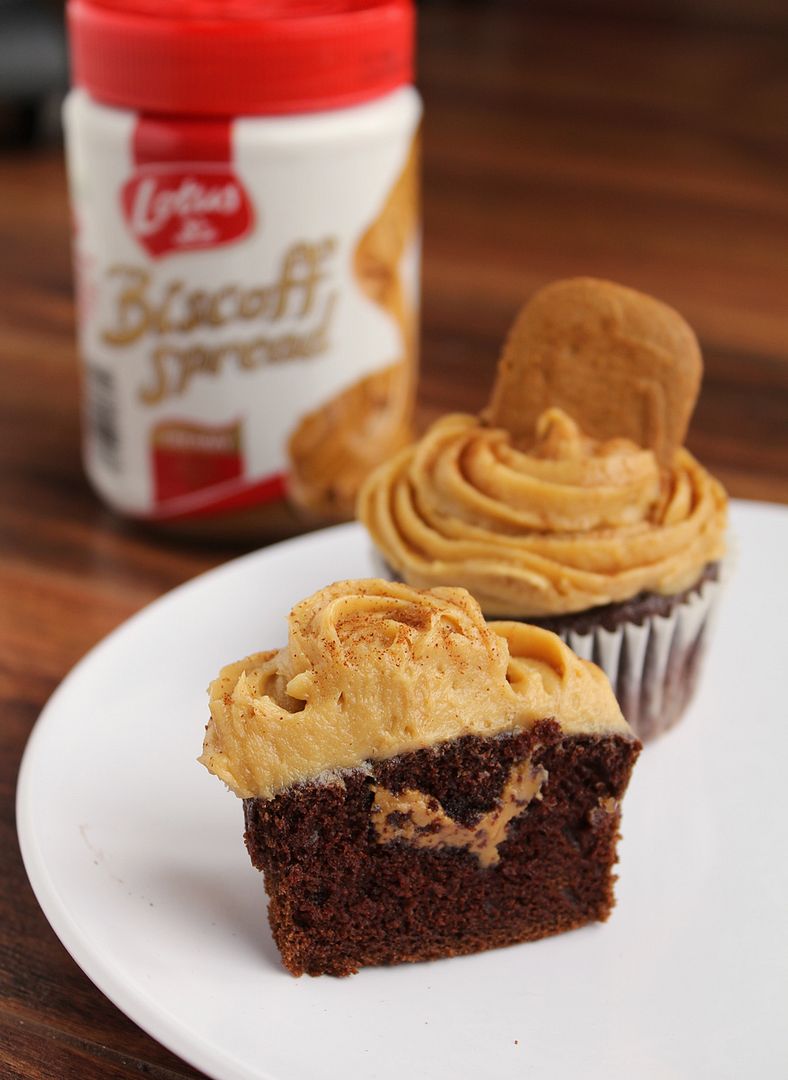
Biscoff cookies (“Europe’s favourite cookie with coffee”, according to their website), also known as Speculoos, are a crisp little Belgian cookie with a cinnamon/caramel/gingersnap-like flavour.  They originated in Europe but grew in popularity around the world when airlines like Delta started handing them out on flights.  A few years ago, the cookies were turned into a creamy spread with a consistency of peanut butter and taste of Biscoff/speculoos cookies.  The main ingredient in the spread is cookies, which is why it’s also referred to as cookie butter.  I think a lot of people eat the spread as they would peanut butter, such as on toast or as a dip for apples, but it’s also become really popular for use in baking.  There’s a nice little slideshow on Huffington Post of some of the ways you can use Biscoff spread!

cookie butter spreads

While it’s now available in many grocery stores in the United States, including Trader Joe’s, which has its own version called Speculoos Cookie Butter (pictured above), it hasn’t really appeared much in Canada yet, which is why most of my friends haven’t heard of it. I buy it when I go on trips to the US, but if you don’t live anywhere near the States (or Europe), I’d recommend looking in European grocery stores – I’ve actually spotted Biscoff at an Italian supermarket in Waterloo, Ontario, so it is out there!

 Chocolate Biscoff Cupcakes with Biscoff Cream Cheese Frosting

I had a hard time choosing what to make for my first experiment with Biscoff.  I’ve never really been a big fan of cupcakes, but I made some red velvet cupcakes on Valentine’s Day (which I posted about on Facebook, if you’re interested) and they turned out so well that they changed my mind about cupcakes.  Plus they are so fun to decorate!  

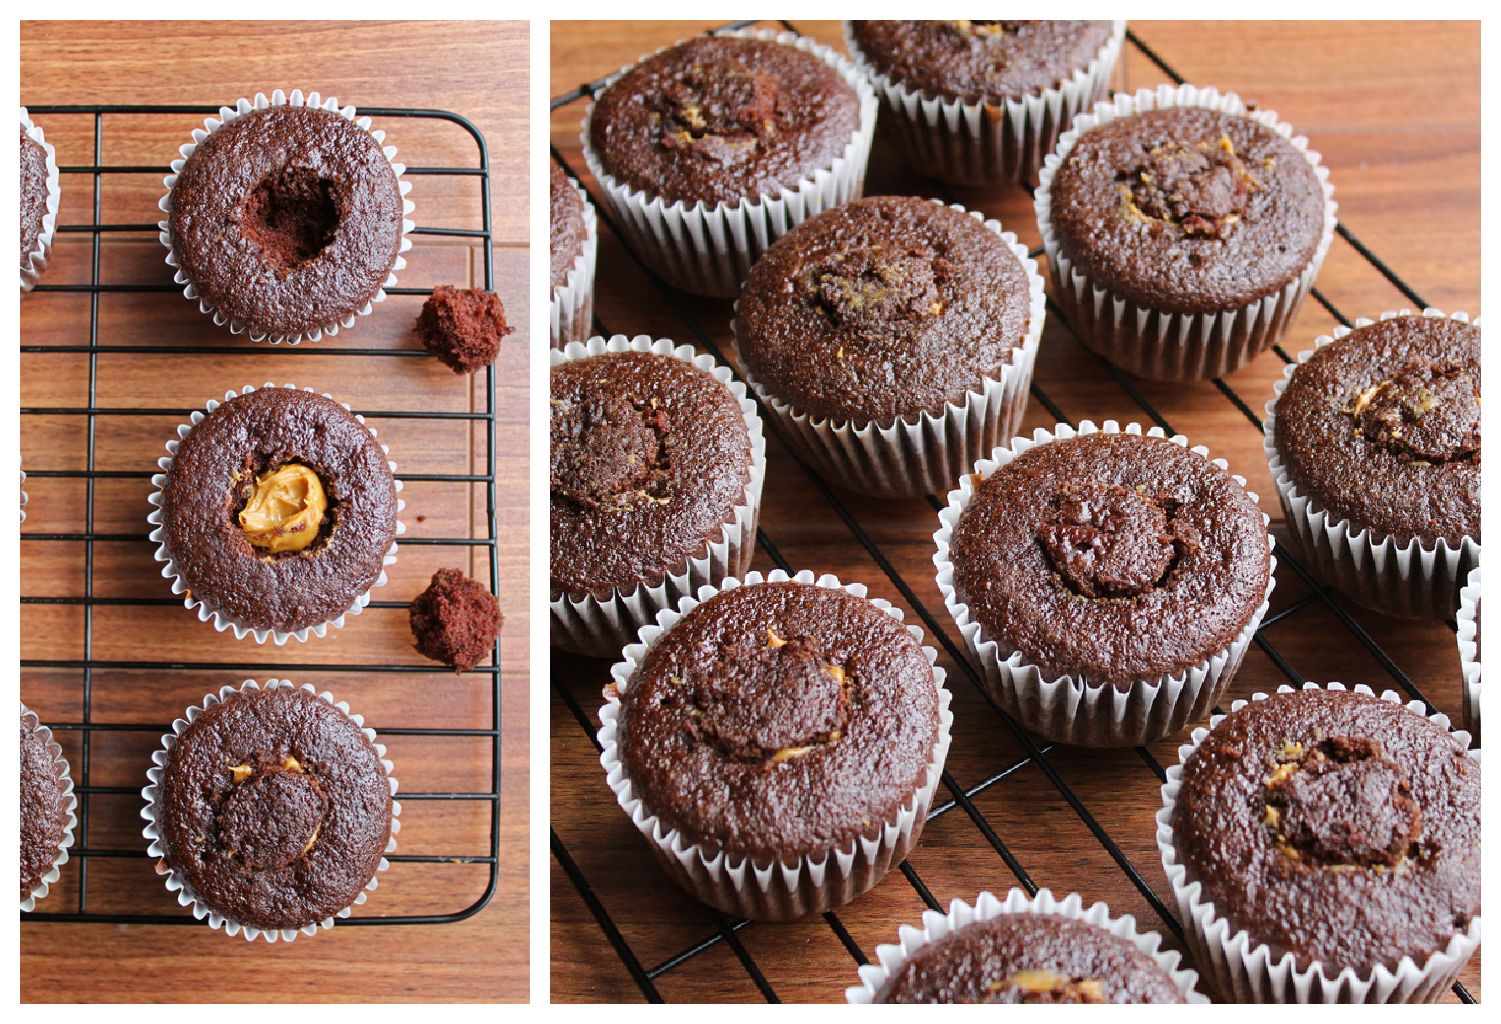
So I decided to make Biscoff cupcakes. My first thought was to make both the cupcake batter and frosting with Biscoff, but I thought that might be a bit too much, so I decided to go with a chocolate base instead.   I used Beantown Baker’s idea of stuffing a little Biscoff inside the cupcake for a fun surprise, which was super easy – you just have to cut a hole in the top of the cupcake after they’re done, fill it with a spoonful of Biscoff, and cover it back up.  Don’t try putting Biscoff in the center of the cupcake before you bake them – it will just sink to the bottom, trust me!  Here’s a little visual of how to fill the cupcakes:

 Filling Biscoff Chocolate Cupcakes

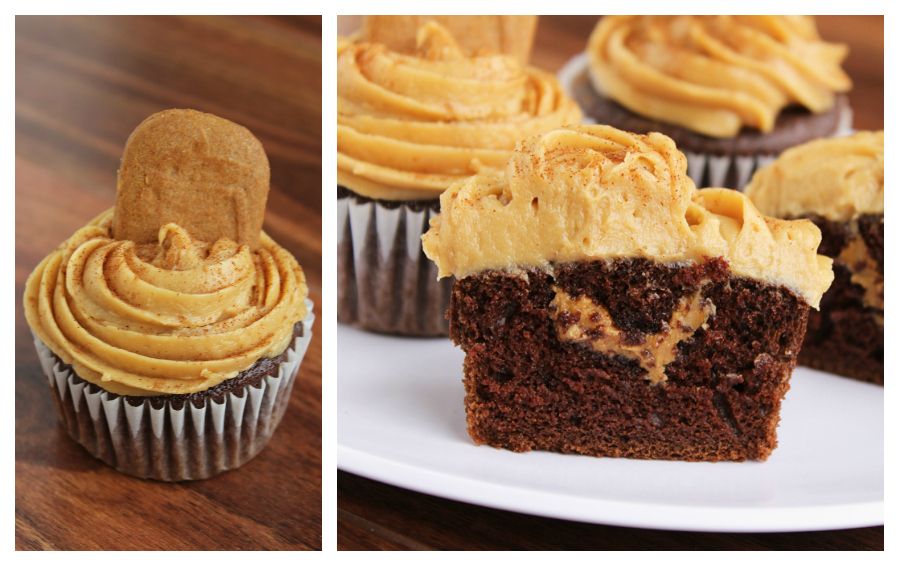
I was so happy with how these turned out! The Biscoff cream cheese frosting was my favourite part and the chocolate cupcake was the perfect complement to it, plus I loved the little surprise of Biscoff in the center! I ate two right after I made them then had to send the rest away to be shared before I got carried away, and I’m told they were very well received at work, even though most people probably didn’t know what they were eating!

 Chocolate Biscoff Cupcakes with Biscoff Cream Cheese Frosting

I still have a jar and a half of Biscoff to use up, so now that I’ve introduced you guys to it, expect to see a few more recipes here in the near future!

And if you have a favourite Biscoff recipe or way to use it, please feel free to share in the comments, I’d love to hear your ideas!

 Chocolate Biscoff Cupcakes with Biscoff Cream Cheese Frosting

Chocolate Biscoff Cupcakes with Biscoff Cream Cheese Frosting

Inspired by Beantown Baker, Chocolate cake recipe adapted from Hershey’s Kitchens, Biscoff frosting adapted from Biscoff

Makes about 12 cupcakes

Ingredients:

For the Cupcakes:
3/4 cup + 2 tablespoons all-purpose flour
1 cup sugar
1/4 cup + 2 tablespoons unsweetened cocoa powder
3/4 teaspoon baking soda
3/4 teaspoon baking powder
1/2 teaspoon salt
1/2 teaspoon cinnamon
1 large egg
1/2 cup milk
1/4 cup canola oil
1 teaspoon vanilla extract
1/2 cup brewed coffee
~1/4 cup Biscoff spread for filling

For the Frosting:
8 oz brick of cream cheese
1/2 cup Biscoff spread
1/2 cup icing sugar
1/4 teaspoon salt
1 teaspoon vanilla extract

Directions:

Preheat oven to 350°F.  Line a muffin tin with paper liners and spray with non-stick spray.

In a large bowl, whisk together the flour, sugar, cocoa powder, baking soda, baking powder, salt, and cinnamon until well combined.  In a separate bowl, whisk the egg, milk, oil, and vanilla extract until smooth.  Add the wet ingredients to the dry ingredients and mix well until smooth.  Stir in the coffee; batter will be thin.   Use a measuring cup to pour batter into liners, filling them only 2/3 full.  Bake in preheated oven for 22-25 minutes, until a toothpick inserted in the middle comes out clean.  Transfer to a wire rack and let cool completely.

Meanwhile, prepare frosting.  Beat the cream cheese and Biscoff together with an electric mixer until smooth, about 2 minutes.  Slowly add the icing sugar and mix on low speed until combined.  Mix in the salt and vanilla. 

Once cupcakes have cooled, use a sharp knife to cut a small cone out of the top of the cupcake.  Remove the top and fill with about 1 teaspoon of Biscoff spread.  Replace the top and push down to hide the biscoff inside the cupcake and create a flat surface on the top of the cupcake. (see here for pictures of the cone filling method).

Transfer cream cheese frosting to a piping bag (I fitted mine with a Wilton 1M tip) and frost cupcakes.  I decorated mine with Biscoff/Speculoos cookies and a dusting of cinnamon.

 Chocolate Biscoff Cupcakes with Biscoff Cream Cheese Frosting

January 22, 2013

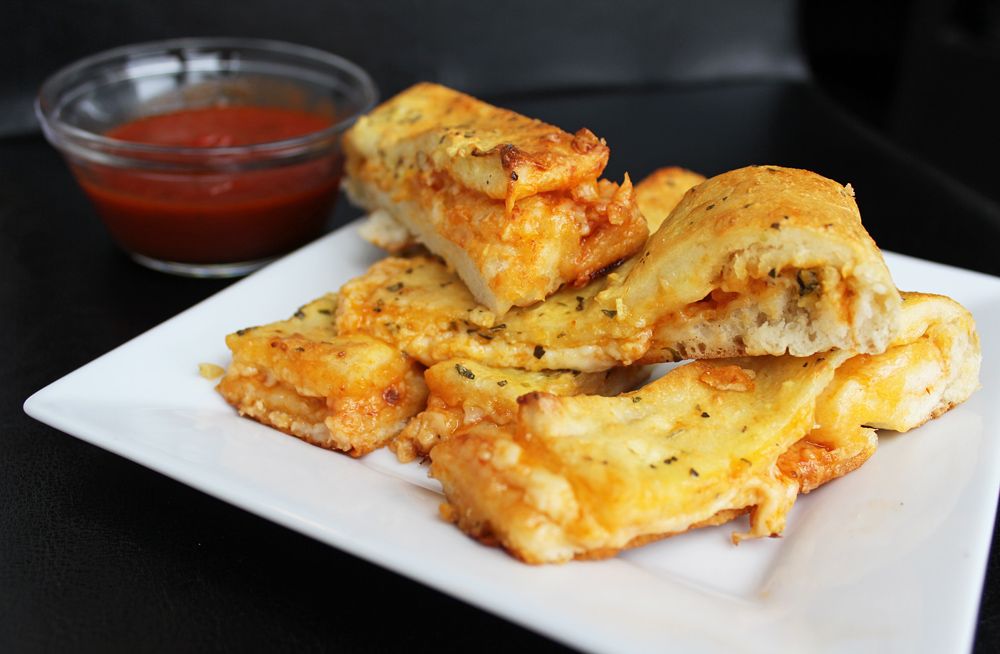
Pizza Stuffed Breadsticks

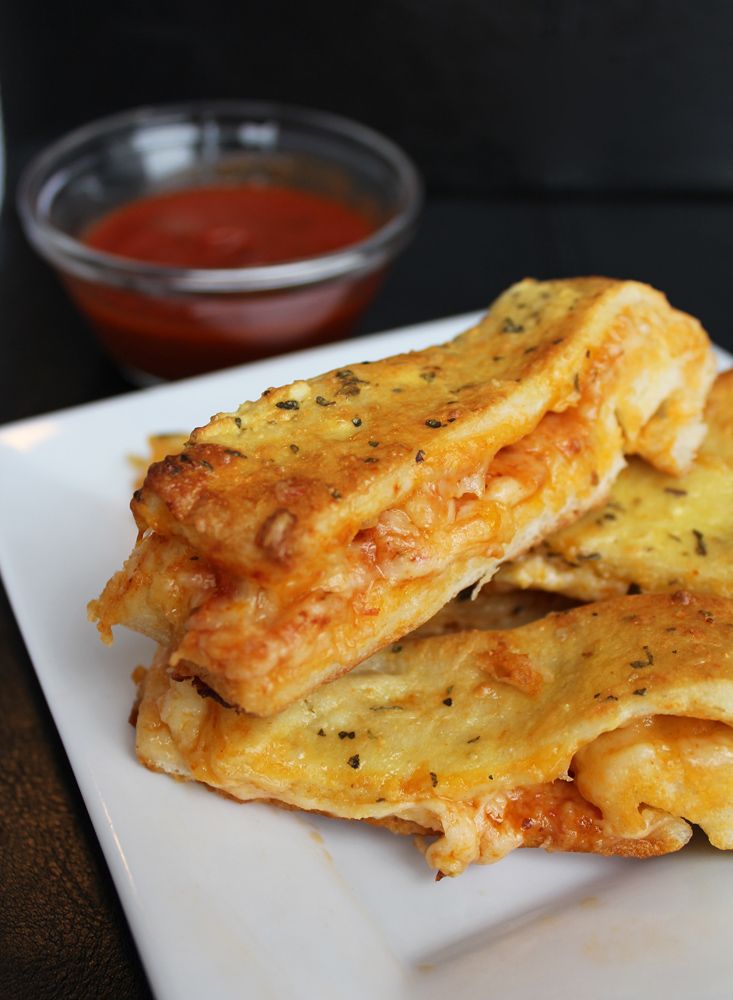
Pizza Stuffed Breadsticks

So it looks like I chose a pretty good year to be a Niners fan!  Let me rewind a bit .. With the NHL lockout earlier this year, my boyfriend decided to get into football more, and I decided it would be a lot more fun for me if I joined him.  I always watch the Super Bowl and sometimes playoff games, so I knew the basics of the game and who all the teams were, but I had never payed much attention to the regular season or had a favourite team.  So we each decided, before the season started, to choose a team to root for, and I chose the San Francisco 49ers.  I watched (almost) every game of theirs this season and discovered that football is probably the only sport I can watch on tv and actually enjoy every minute - it's so entertaining!

This past Sunday was especially exciting with the 49ers in the NFC Championship game (which they won, yay!), so I decided to make some football food to go along with the game.  Enter these pizza stuffed breadsticks!

Pizza Stuffed Breadsticks

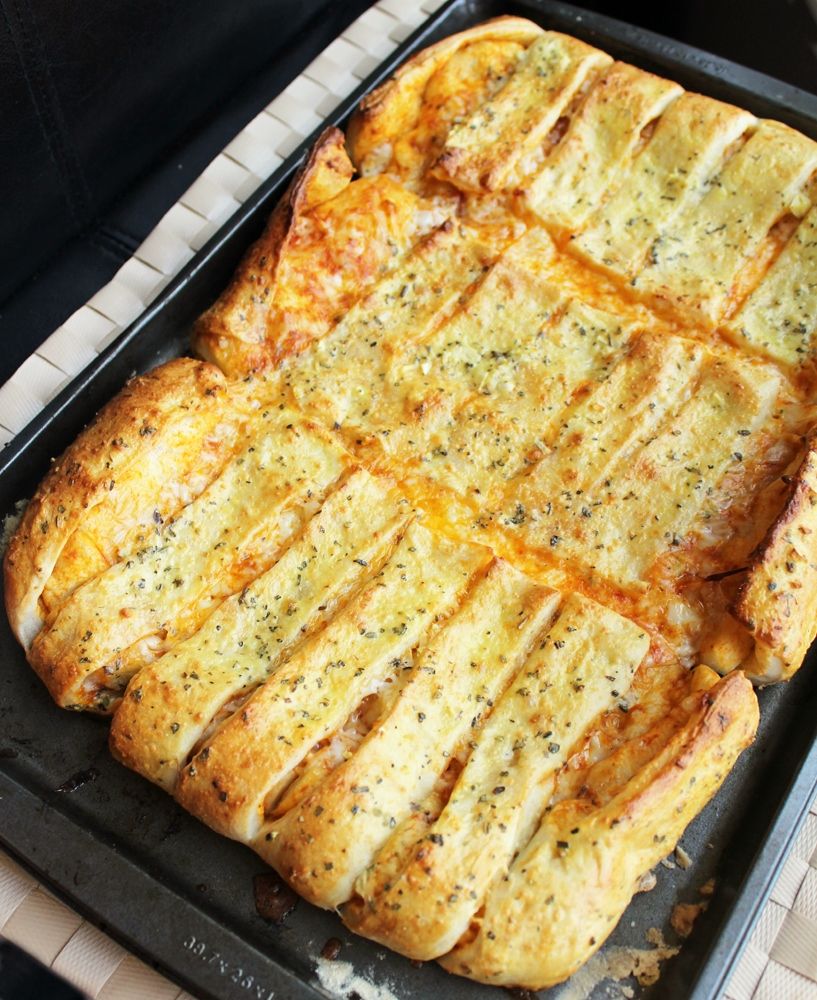
These are super easy and super tasty - you really can't go wrong with pizza dough and cheese.  Most cheese-stuffed breadstick recipes have you wrapping individual pieces of dough around cheese, but I went the lazy route with these. All you have to do is roll pizza dough into a rectangle, top it with marinara sauce and shredded cheese, add a top layer of dough (brushed with an egg wash, seasonings, and parmesan), then bake and slice it into breadsticks.  Served with marinara sauce for dipping, you get something that tastes like pizza but is more fun to eat!

Between eating these and watching the game, I was a happy girl on Sunday!  Now I can't wait for the Super Bowl!

Pizza Stuffed Breadsticks

Pizza Stuffed Breadsticks


Makes about 20 breadsticks

Ingredients:

1 ball of storebought frozen or refrigerated pizza dough (or 1 homemade pizza dough)
1/4 – 1/3 cup pizza/marinara sauce
200g brick of pizza mozzarella, shredded (about 2 cups)
1 large egg
2 tablespoons milk
2 tablespoons parmesan cheese
2 cloves garlic, minced
3/4 teaspoon dried basil
3/4 teaspoon dried oregano
Extra marinara sauce for dipping

Directions:

Preheat oven to 425°F.

Let pizza dough come to room temperature if using storebought dough.  Divide ball of dough in half.  Roll each half into a rectangle approximately 15”x10” on a floured surface.   If the dough won’t stay stretched, let it rest then try again.  Transfer one dough rectangle to a greased or parchment-lined 15x10-inch baking sheet, stretching as needed to meet edges of pan.  Brush pizza sauce over the surface, then sprinkle evenly with mozzarella.  Place second dough rectangle over top, and fold the edges under the bottom layer of dough, pinching to seal all around.

Use a pizza cutter to cut dough into 20-21 breadsticks (I cut it crosswise into thirds first, then cut each third into 7 breadsticks).  Do not separate the breadsticks.

Mix egg, milk, parmesan, garlic, basil, and oregano in a small bowl.  Use a pastry brush to brush over the tops of the breadsticks.  You won’t need to use all of it.  Bake in preheated oven for 15-20 minutes, until puffed and golden.  Recut along seams to separate breadsticks and serve warm with extra marinara sauce for dipping.

Note: Mennonite Girls Can Cook has some great step-by-step photos of her breadsticks if the above directions aren't clear - mine just used storebought dough, added marinara sauce in the middle layer, and used a little less cheese, but otherwise the steps were the same!

Note 2: (thanks to Genevieve for pointing this out in the comments): We loved these as is, but it could also be fun to try out different versions with various toppings stuffed in the middle!  I imagine that diced pepperoni or veggies would make fun variations!

January 11, 2013

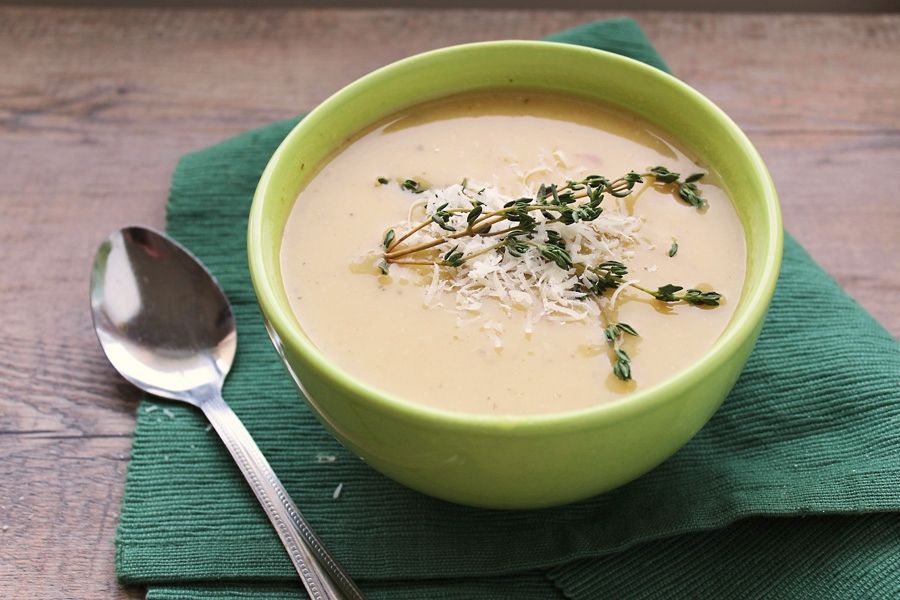
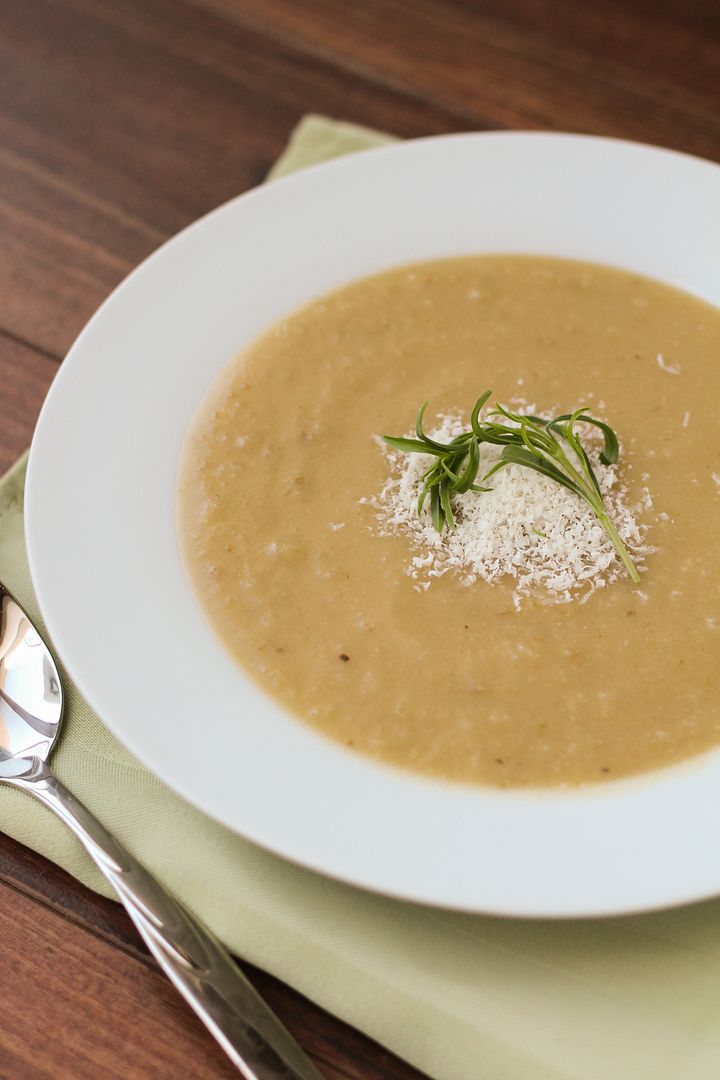
Roasted Garlic & Shallot Soup

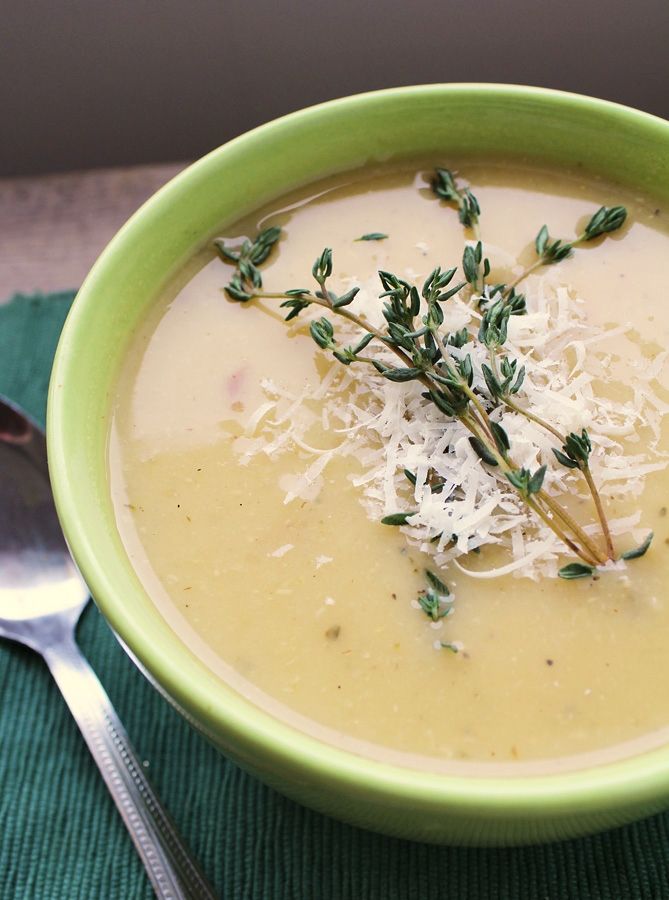
Roasted Garlic & Shallot Soup

Since my cold doesn't seem to be going anywhere, I tried to help it along this week with a big batch of garlic soup!  I remember reading somewhere that raw garlic is good for colds, and in the past I've tried horrible things like making garlic tea and scarfing down pieces of bread with raw cloves of garlic hidden inside.  But since those things probably don't make a difference anyway, this time I decided to go ahead and roast the garlic and turn it into a warm and comforting soup so I could at least enjoy a delicious meal in my runny, stuffy, coughy misery!

Roasted Garlic & Shallot Soup

Some of the reviews of the original recipe on Cooking Light said it had no flavour, but I don't know what they're talking about - I found that the roasted garlic and shallots provided so much flavour on their own, and then you add sauteed onions, white wine, vegetable broth, and fresh thyme - how much more flavour could you need?  I also made a few changes to the recipe, like using yellow fleshed potatoes instead of Russets because I find they have better flavour, substituting the chicken broth for vegetable to make it vegetarian, eliminating the blue cheese croutons and just topping the soup with parmesan to make it easier, and using skim milk instead of 2% so it was even lighter.

Don't be scared by the amount of garlic in this - it all gets roasted, which I can testify is about a million times better than eating whole cloves of garlic raw!  And while this may not have helped my cold at all, it still made me feel better to have this waiting for me for dinner every night this week!

roasted garlic and shallot soup

*The above picture was taken in Jan 2014 - same recipe, just used savory instead of thyme as I didn't have any thyme (and used better lighting!).

Roasted Garlic & Shallot Soup

Adapted from Cooking Light

Makes about 4 bigger portions or 8 smaller portions

Ingredients:

5 whole garlic heads, unpeeled (about 40-50 cloves) - try to use good quality garlic if possible as it will have more flavour than the cheap packages of imported garlic - I've learned that lesson!
3 tablespoons olive oil, divided
1 teaspoon salt, divided
1 teaspoon freshly ground black pepper, divided
10 shallots, unpeeled (about 3/4 pound)
2 cups coarsely chopped onion (about 2 small yellow onions)
1 cup dry white wine (I used Sauvignon Blanc), at room temperature
3 cups vegetable stock
2 cups (1/2-inch) cubed peeled yellow-fleshed potato (about 3/4 pound)
1 teaspoon chopped fresh thyme
1 cup skim or 2% milk, at room temperature
Grated parmesan cheese plus extra thyme for topping (optional)

Directions:

Preheat oven to 400°F. Remove the outside layer of white papery skin from the garlic, cut the tops off each head, and place on tin foil. Drizzle with 1 tablespoon olive oil and sprinkle with 1/4 teaspoon salt and 1/4 teaspoon pepper. Wrap with foil and place on a baking sheet, then roast for 10 minutes in preheated oven. Meanwhile, prepare a shallot foil package by drizzling shallots with 1 tablespoon oil, sprinkling with 1/4 teaspoon salt and 1/4 teaspoon pepper, and wrapping with foil. After the 10 minutes have passed, add the shallots to the pan and continue to roast both the garlic and shallots for another 25 minutes. Remove from oven and let cool until cool enough to handle. Squeeze garlic out of the skins and peel shallots, discarding skins.

While garlic and shallots are cooling, heat 1 tablespoon oil in a Dutch oven over medium heat. Add onion, and cook for 6-10 minutes, stirring occasionally, until softened and lightly browned. Add garlic cloves, peeled shallots, and wine. Reduce heat and simmer uncovered for 5 minutes.

Stir in vegetable stock, potatoes, and thyme. Bring to a boil, then cover, reduce heat, and let simmer for 20-25 minutes, until potatoes are tender. Cool slightly, then puree in batches in a blender (I did mine in 3 batches), transferring pureed portion to a bowl each time. Pour pureed soup back into Dutch oven, stir in milk, 1/2 teaspoon salt, and 1/2 teaspoon pepper. Reheat for about 5 minutes, taste, and adjust any seasonings if necessary.

Top each portion with grated Parmesan cheese and a sprinkling of fresh thyme, if desired.

December 19, 2012

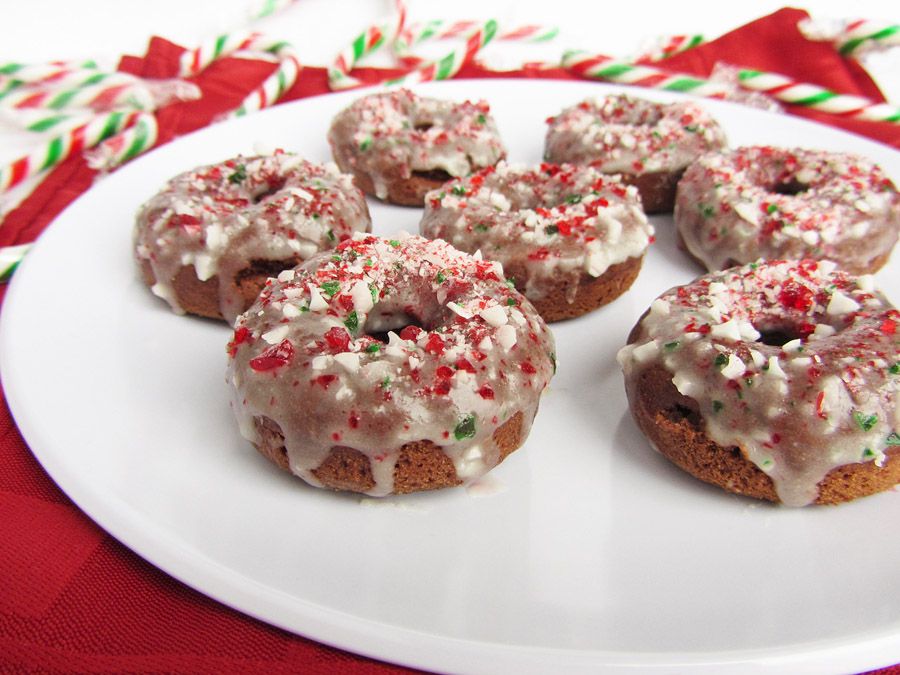
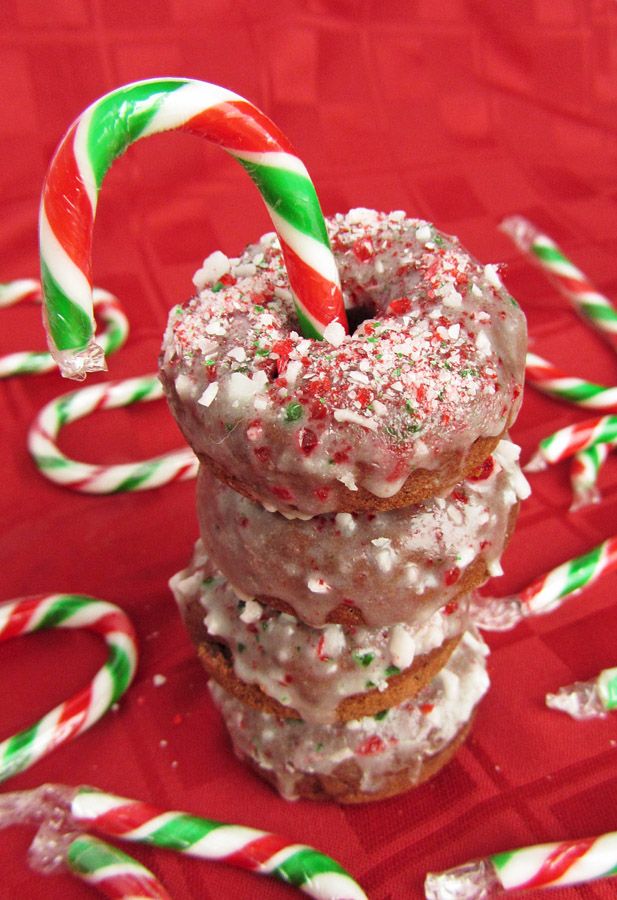
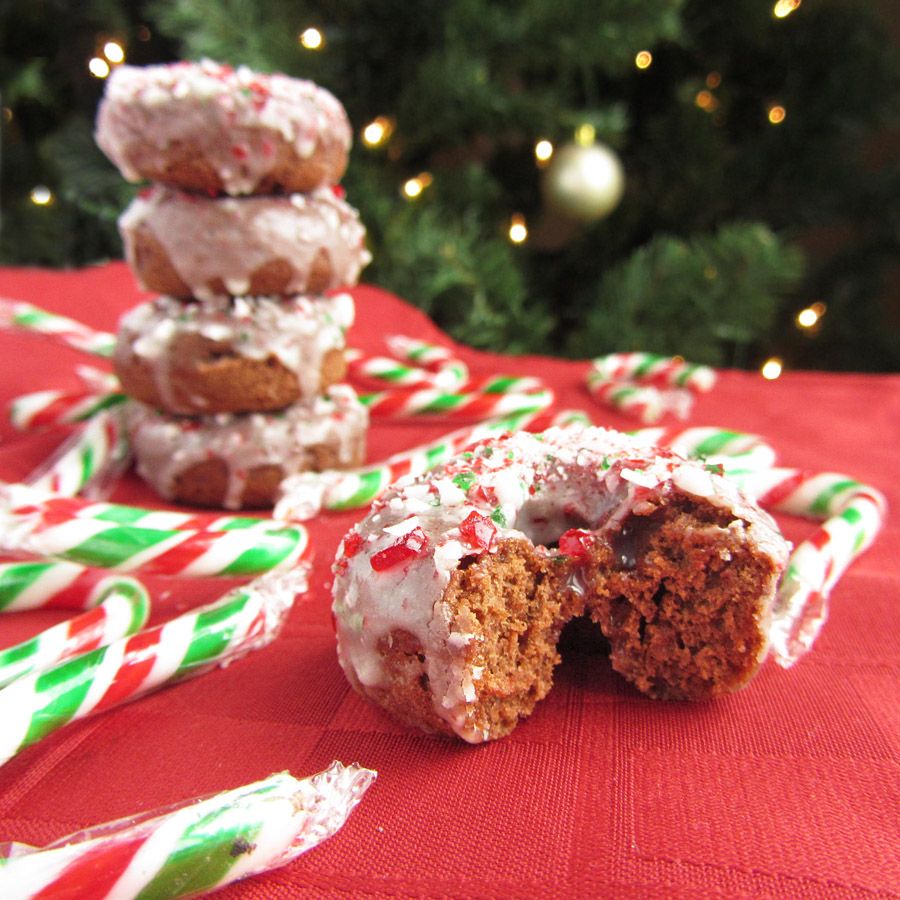
Mini Baked Peppermint Mocha Doughnuts

Mini Baked Peppermint Mocha Doughnuts

First I made cheesecake bars, then there were shortbread cookies, and now here I am with another peppermint holiday dessert, this time doughnuts! For those of you who hate peppermint, I promise this is the last one (at least for a little while)!

These go a step further than basic peppermint by adding chocolate and coffee flavours to resemble one of my favourite Starbucks’ holiday drinks, the peppermint mocha. (Although I’ve since discovered white peppermint mocha frappucinos and that is now my new favourite drink – try it!)

Mini Baked Peppermint Mocha Doughnuts

Though I don’t often make doughnuts because they’re better eaten fresh and I don’t usually have a big group of people to feed fresh doughnuts to, I do love them because they’re so cute and easy to eat, plus they’re a little better for you than their full-sized, fried counterpart.

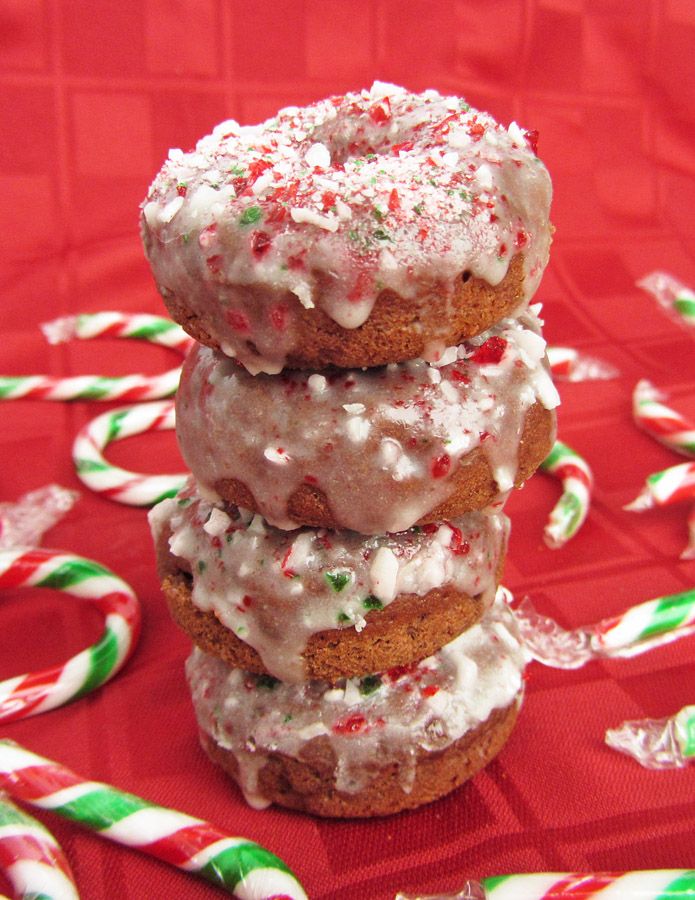
These little guys have a coffee chocolate base covered in a peppermint white chocolate glaze with a sprinkle of crushed candy canes on top. They’re so festive looking and reminded me a lot of a peppermint mocha!

These had just the right amount of subtle coffee flavour for me, but you could add more coffee or espresso powder if you want a strong coffee taste. Or you could eliminate it and just go with a chocolate base if you don’t like coffee. Similarly, you could eliminate the peppermint extract from the icing if you’re not into minty things – I know some people who tried these weren’t really a fan and I assume it’s because they either don’t like coffee baked goods or minty baked goods or the combination of the two. If you’re not sure if you do, just leave out the coffee and peppermint and you’ll have a chocolate doughnut with a little crunch of candy cane that will be just as good!

Mini Baked Peppermint Mocha Doughnuts

In other news, my holiday preparations are in a lot better shape than the last time I wrote – all but one of my gifts I ordered online have now arrived and I’ve finished my shopping for all but two people. I’m sure people who finished their shopping in November would scoff at that, but it’s pretty good for me! I’m also done with school for the semester (though I’ll still have work to do from home over the holidays) and am looking forward to spending lots of time with my family and boyfriend and doing lots of Christmassy activities over the next week!

Mini Baked Peppermint Mocha Doughnuts

Mini Baked Peppermint Mocha Doughnuts

Idea inspired by Starbucks’ peppermint mocha; glaze recipe my own; chocolate doughnut recipe adapted from Buns in My Oven

Makes 24 mini doughnuts

Ingredients:

For the Chocolate Coffee Doughnuts:
1 cup all purpose flour
1/4 cup + 2 tablespoons sugar
1 teaspoons baking powder
1/4 cup cocoa powder
1/4 teaspoon salt
1 tablespoon instant coffee
1 large egg
1/2 cup buttermilk (or regular milk with a teaspoon of white vinegar added)
1/2 teaspoon vanilla extract
1 tablespoon vegetable oil

For the White Chocolate Peppermint Glaze:
1/4 cup white chocolate chips
1/2 cup powdered sugar
1/2 teaspoon peppermint extract - optional for peppermint flavour, but you could leave out and just use the candy canes if you like
1-2 tablespoons milk
Crushed candy canes (about 1/4 cup total)

Directions:

Preheat oven to 325°F.  Lightly spray a mini doughnut pan with non-stick cooking spray.

In a large bowl, whisk together the flour, sugar, baking powder, cocoa, salt, and instant coffee.  In a medium bowl, whisk the egg, then whisk in the buttermilk, vanilla, and vegetable oil.  Add the wet ingredients to the dry ingredients and stir with a wooden spoon or spatula until just incorporated.  Transfer mixture to a ziplock bag, snip off the corner, and squeeze the batter into the doughnut pan, only filling each mold halfway full (they will puff up when baking).  It's a lot easier to fill the molds by squeezing it out of a bag, trust me.
Bake in preheated oven for 6-8 minutes, until cooked through and the top springs back when touched.  Remove from pan and let cool on a wire rack.

Prepare icing by melting the chocolate chips in a small bowl in the microwave, then stirring in the icing sugar and peppermint extract (if using).  Add 1 tablespoon of milk, stir, and add up to 1 additional tablespoon of milk until desired consistency is reached (I used the full 2 tablespoons, which makes a thin glaze).

Once doughnuts have cooled, dip the top of each doughnut in the icing, then set back on the wire rack, which should be placed over a baking sheet or sheet or parchment paper to catch drippings.  I like to coat each doughnut twice to ensure there is enough glaze.  Only coat a few doughnuts at a time the second time, then sprinkle crushed candy cane over the top while the icing is still wet so it sticks.

These are best served immediately and eaten on the same day, but note that after about half a day, the candy canes may start to melt into the icing.

September 12, 2012

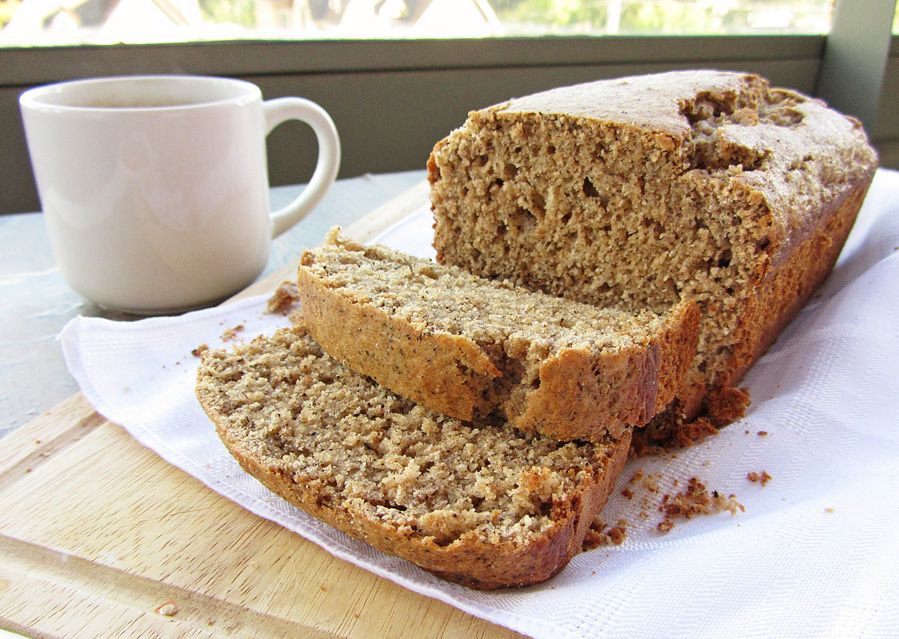
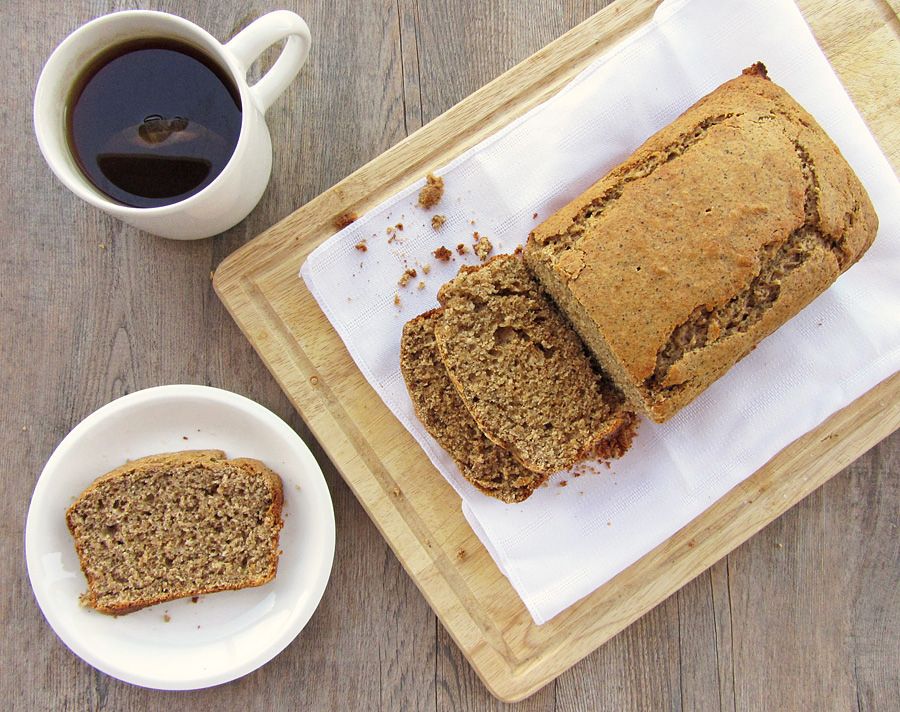
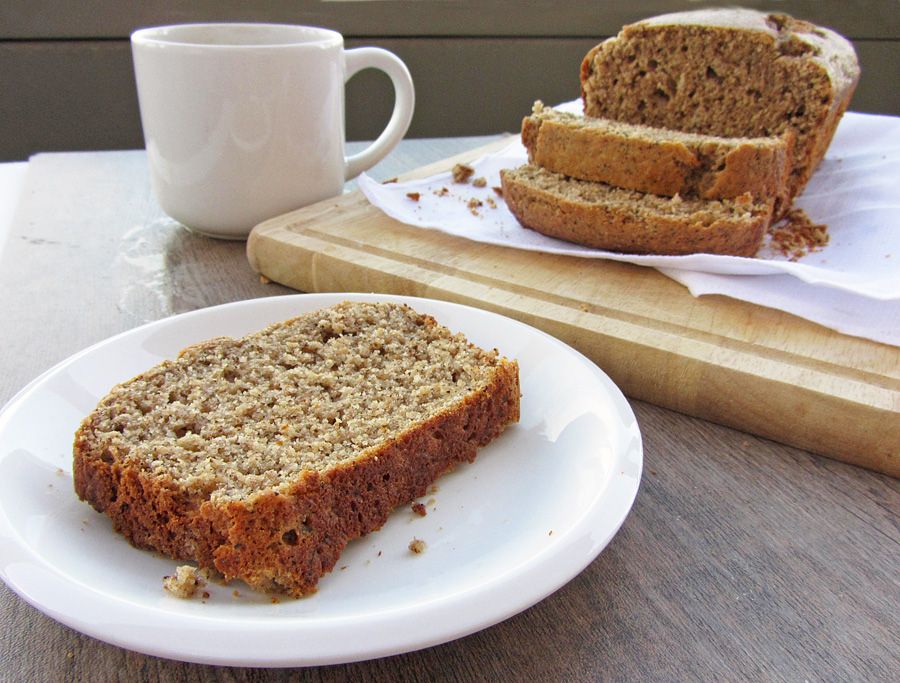
Earl Grey Vanilla Tea Cake

Earl Grey Vanilla Tea Cake

On Monday I got hit with a cold at full force ... I don't want to complain too much because I know a cold is to be expected around this germy time of back-to-school, but normally I get a few days of warning signs first.  You know that little tickle in your throat that tells you a cold is on its way and you'd better start taking vitamins like crazy to try to lessen its blow?  This one came with no warning signs, just the whole works right from the start - sore throat, runny nose, sinus congestion, fluctuating body temperature, I'm sure you all know the drill!

It doesn't help that I have a crazy amount of work to get done this week, which is hard when I'm so tired because my stuffy nose just does not want me to get any sleep!  So, in my efforts to rid myself of this cold as quickly as it came on, I have been taking lots of vitamins, eating lots of fruits and veggies, and drinking a TON of tea!

Earl Grey Vanilla Tea Cake

And what goes better with a cup of tea than a delightful tea cake!  

This healthy-ish and not-too-sweet loaf contains the actual contents of three bags of earl grey tea, steeped in a bit of milk, along with some warm spices and vanilla so the smell and taste of the end product really remind you of earl grey tea.  I've been snacking on this with every cup of tea (which is probably not a good thing considering how much tea I've been drinking), and it's especially good warmed up or toasted.  You could probably even change up the tea and spices to any flavour you like - a chai bread would be really nice too!
Even if all my tea drinking doesn't chase away this cold, at least it's given me an excuse to eat lots of tea cake :)

Earl Grey Vanilla Tea Cake

Earl Grey Vanilla Tea Loaf


Makes one 8x4 inch loaf

Note: This loaf has a light and delicate crumb, much more like a cake than more dense and moist banana bread-like loaves.  If you want to add to the subtle citrus notes of the Earl Grey tea, you can add a splash of lemon juice to the loaf.
Ingredients:

3 bags earl grey vanilla tea
1/4 cup milk
1 cup all-purpose flour
1 cup whole wheat pastry flour
2 teaspoons baking powder
1/2 teaspoon kosher salt
1/4 teaspoon cardamom
1/4 teaspoon nutmeg
1/2 teaspoon cinnamon
1/4 cup vegetable oil
3/4 cup sugar
2/3 cup plain yogurt
2 large eggs
1-1/2 teaspoons vanilla

Directions:

Preheat oven to 350°F.  Line the bottom of an 8-1/2 by 4-1/2 inch loaf pan with parchment paper and spray with non-stick cooking spray. 

Add the milk to a small saucepan and empty the contents of the tea bags (snip off the tops first) into the pan.  Heat over low heat, stirring occasionally, until the milk is warm and tea begins to steep.  Turn off heat and set aside.

In a large bowl, whisk together the flours, baking powder, salt, cardamom, nutmeg, and cinnamon.  In a medium bowl, combine the oil, sugar, yogurt, eggs, and vanilla.  Stir the milk and tea mixture into the wet ingredients.  Pour the wet ingredients into the dry mixture and fold together with a flexible spatula until just combined (do not overmix). 

Pour the batter into the prepared pan and bake in preheated oven for 40-50 minutes or until a tester inserted in the middle comes out clean (mine was just slightly overdone at 45 minutes so you might want to check on it at 40 minutes first, though the exact time will depend on your oven).  Cool completely on a wire rack before slicing.

Ingredient Index

Related Posts Plugin for WordPress, Blogger...