Showing posts with label oats. Show all posts

July 22, 2014

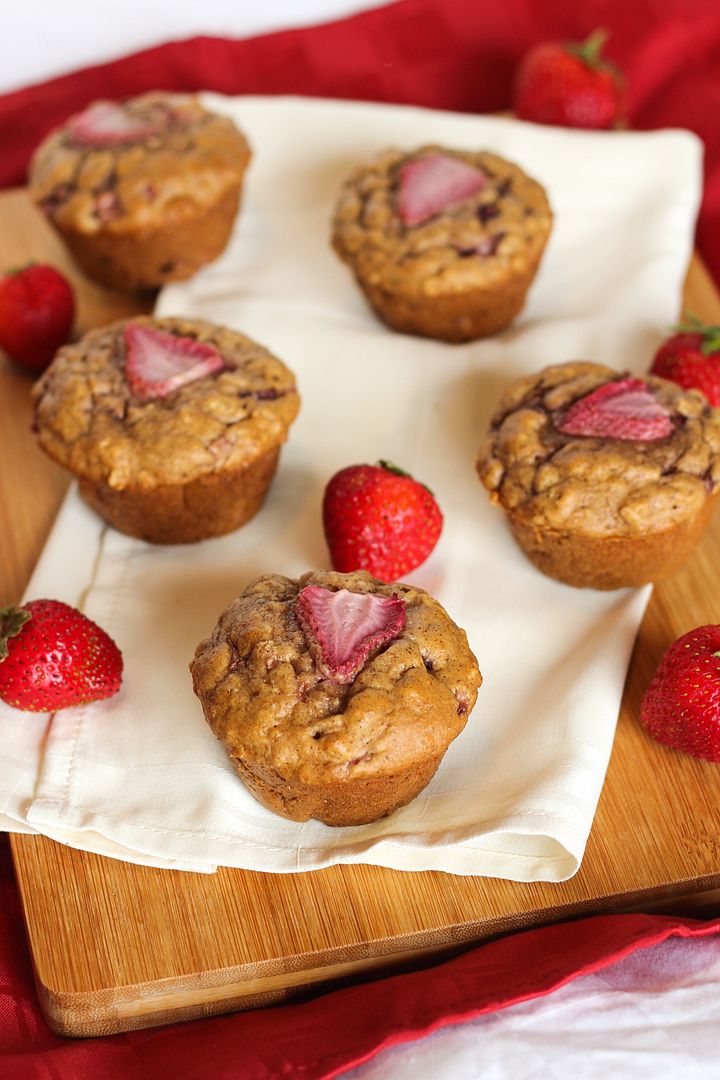
Strawberry & Peanut Butter Whole Wheat Oat Muffins

Strawberry & Peanut Butter Whole Wheat Oat Muffins

Somehow I always end up missing strawberry season because it seems to go by so quickly, so this year I was determined to bake at least one thing with strawberries. 

We don't really want a lot of desserts around right now though, so I decided to bake something on the healthier side.  And because we are only two people, I wanted something that can freeze well.  Enter muffins!

I had it in my head to make peanut butter and strawberry muffins, which surprisingly I could find almost no recipes for, so I decided to make up my own.  Peanut butter and jam goes together, so why not pb and fresh strawberries!
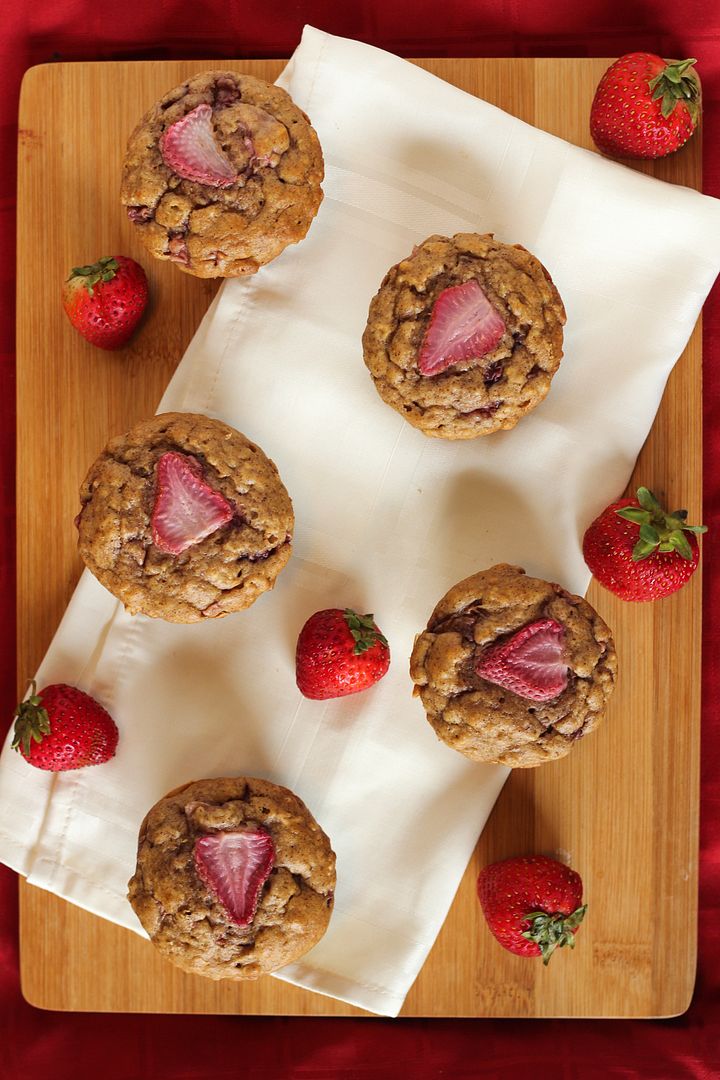
Strawberry & Peanut Butter Whole Wheat Oat Muffins

Because I wanted these to be on the healthier side, I used all whole wheat flour combined with oats, only a bit of pure maple syrup for sweetener instead of sugar, natural peanut butter, unsweetened almond milk, only a tablespoon of oil, and fresh strawberries instead of jam.

While they're not exactly low-fat because of the peanut butter, and not vegan because I included an egg (I haven't really had success with eggless baked goods in the past and don't have any problems personally with an egg being included), I still consider them a wholesome snack that is perfect for afternoon cravings as they satisfy hunger pretty well!
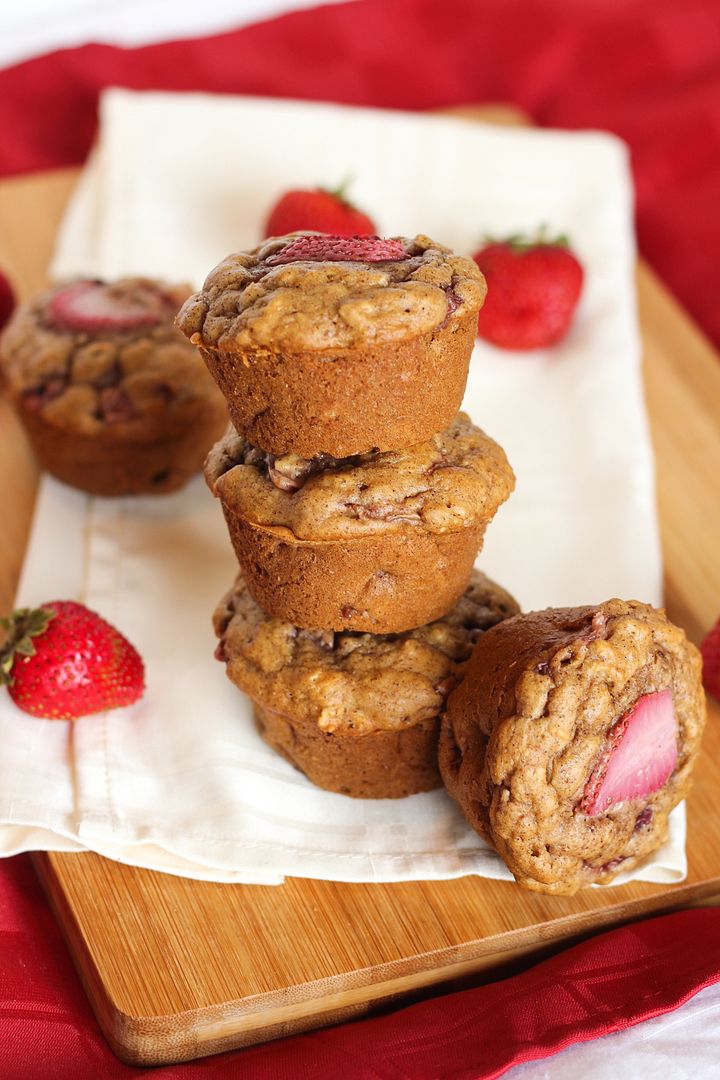
Strawberry & Peanut Butter Whole Wheat Oat Muffins

These were photographed over a day after making them, so the strawberries I had placed on top aren't looking so hot, but I assure you that these still turned out great!

I also love slathering these in chia jam for more strawberry goodness.  If you've never made chia jam before, I encourage you to give it a try!  It's super easy and quick to make and so much better for you than regular jam.  I used the jam recipe from these strawberry oat squares by Oh She Glows, another strawberry recipe I'll have to try soon before the season is over!
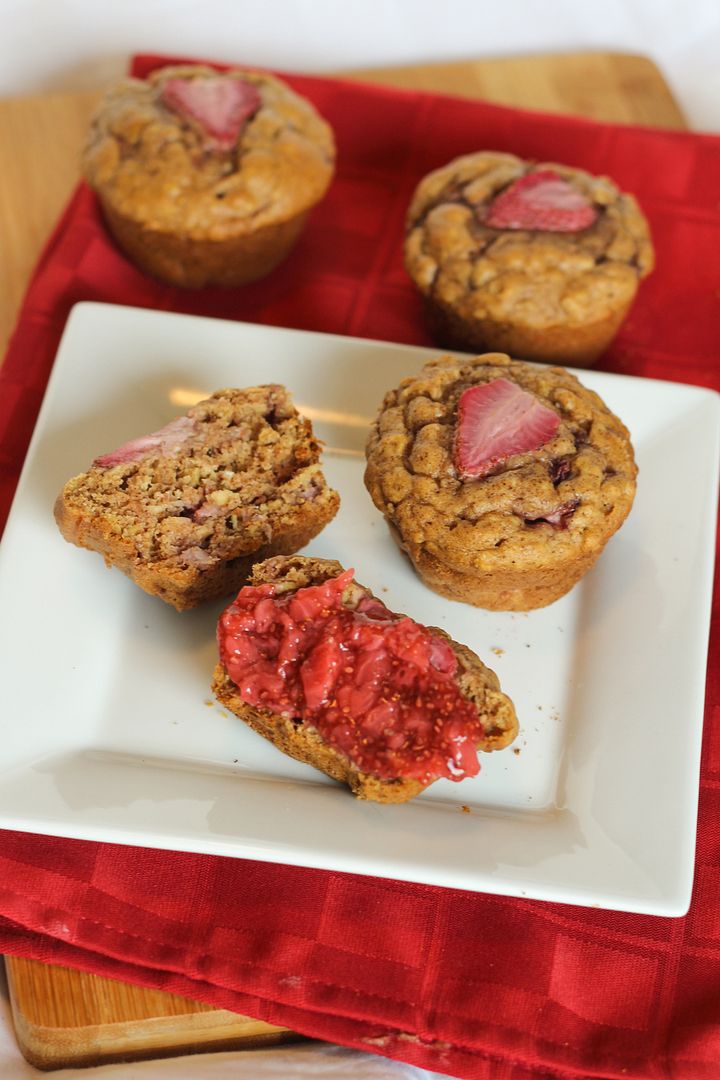
Strawberry & Peanut Butter Whole Wheat Oat Muffins


Strawberry & Peanut Butter Whole Wheat Oat Muffins

Makes 12 muffins

Ingredients:

1-1/4 cups whole wheat flour
3/4 cups rolled oats
1 teaspoon baking soda
1 teaspoon baking powder
1 teaspoon cinnamon
1/4 teaspoon salt
1 large egg, lightly beaten
1 cup unsweetened vanilla almond milk
1/2 cup natural peanut butter, melted slightly to mix in better
1/4 cup pure maple syrup (or I used 2 T maple syrup + 2 T honey)
1 teaspoon vanilla extract
1 tablespoon extra virgin olive oil
1 cup diced fresh strawberries
12 slices strawberries for the tops, if desired

Directions:

Preheat oven to 350°F.  Spray a regular 12-cup muffin tin with non-stick cooking spray.

Whisk the dry ingredients (flour through salt) together in a medium bowl.  In a separate bowl, mix the wet ingredients until just blended (egg through oil).  Add the wet ingredients along with the diced strawberries to the dry ingredients and fold together until just combined.

Divide batter evenly among the 12 muffin cups.  If desired, add a strawberry slice to the top of each muffin.  Bake muffins in preheated oven for 18-20 minutes or until toothpick inserted in middle of a muffin comes out clean.  Let cool for a couple minutes in the pan then remove to a wire rack to cool completely.

May 29, 2014

Buffalo Lentil Loaf

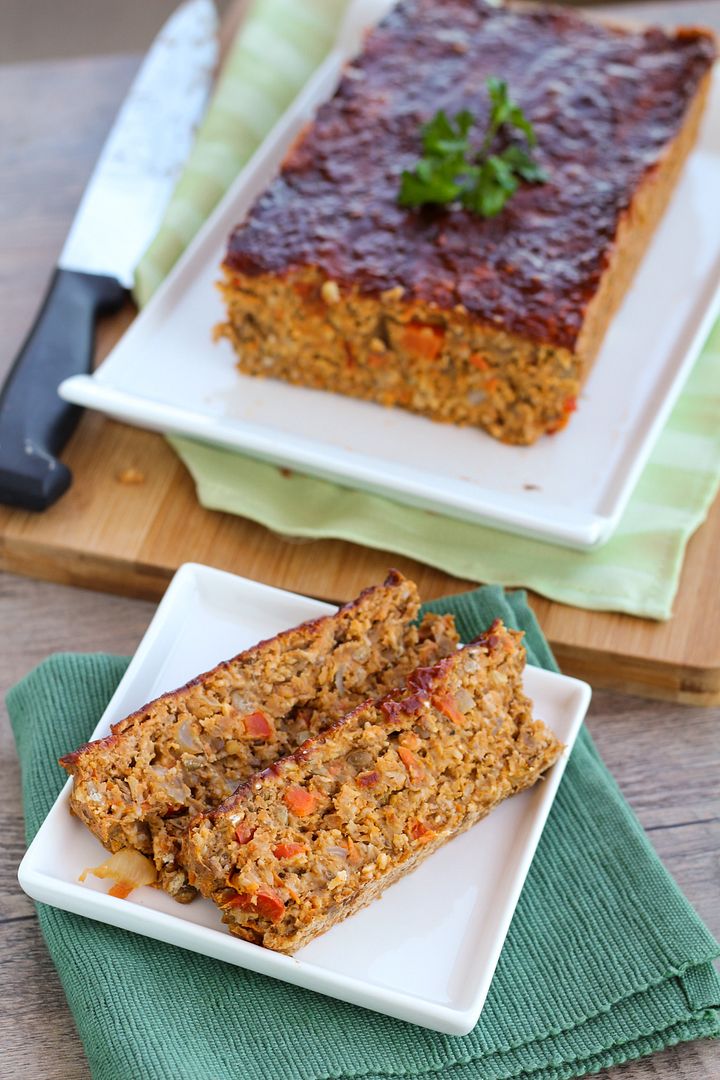
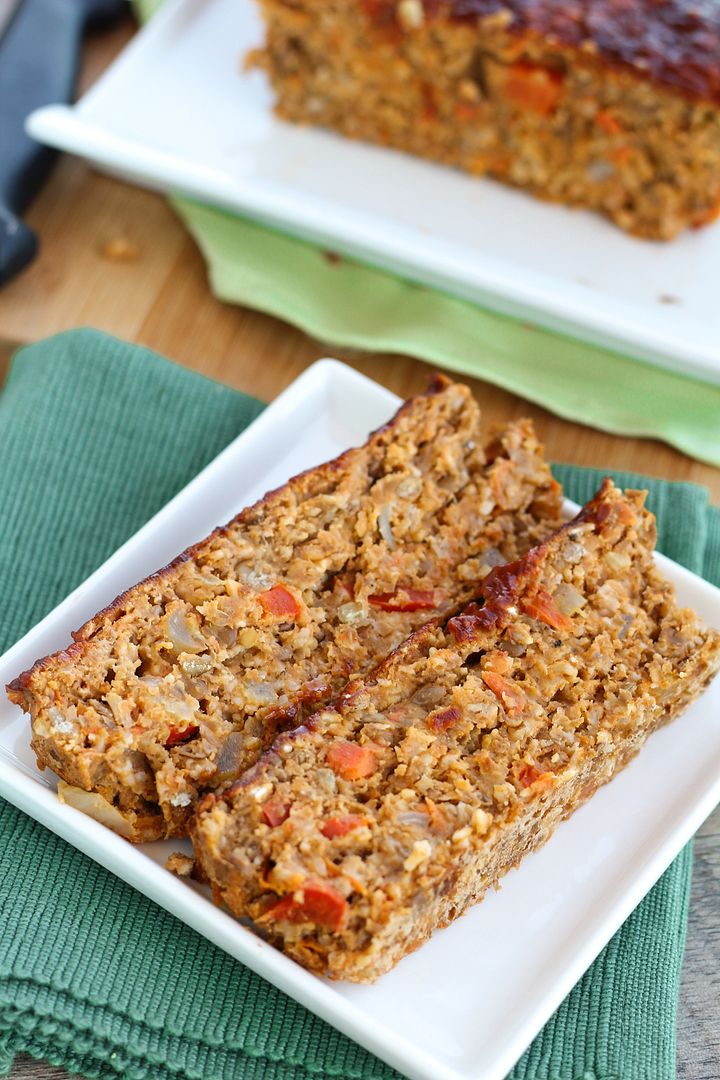
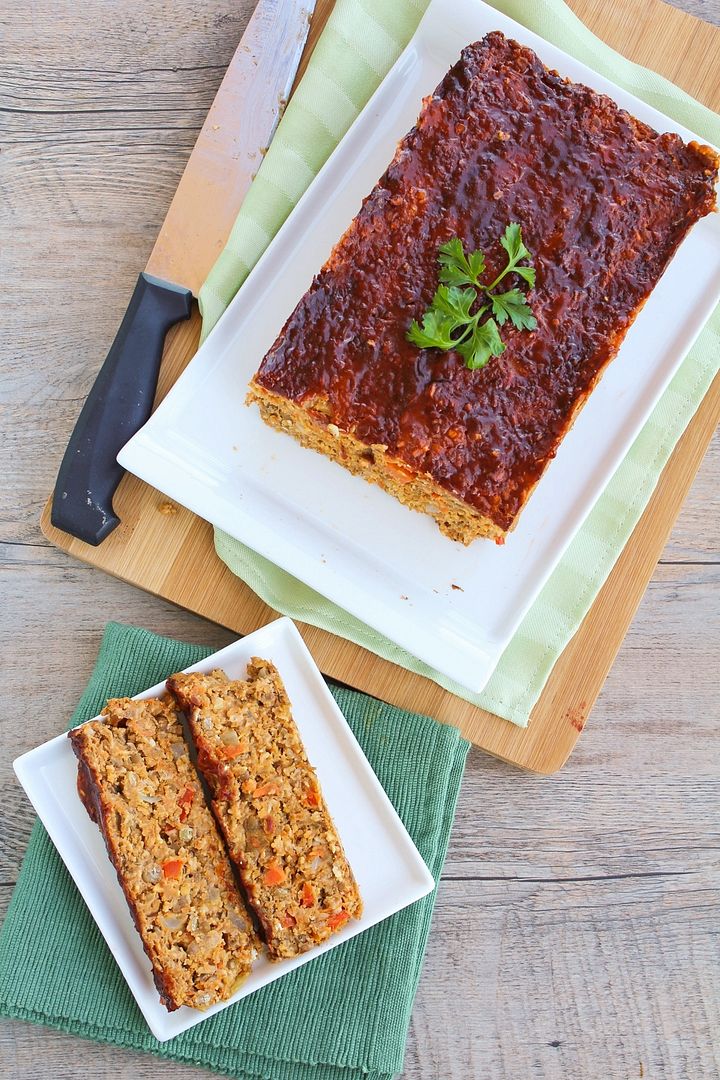
Buffalo Lentil Loaf - a healthy & tasty vegetarian meatloaf alternative!

I always hated meatloaf as a kid, and I still do.  I can’t even say the word meatloaf without adding ‘shmeatloaf’ after it.  It’s funny that when I was young, it was more the vegetables, onions and little crunchy bits in the meatloaf that I hated, and now it’s the idea of a tray full of packed meat that turns me off.  A lentil loaf full of vegetables though?  Much more up my alley!

I know some people will have the same reaction I have to meatloaf when they hear the word ‘lentil loaf’.  Indeed, my fiancé in particular was extremely skeptical at the idea.  But even he ended up admitting that this was really good, so if you’re hesitant, I encourage you to give it a chance!

Buffalo Lentil Loaf - a healthy & tasty vegetarian meatloaf alternative!

Why should you give this a chance over regular meatloaf?  Because lentils are full of fiber and protein to fill you up and give you energy, along with other important minerals like potassium, folate, and iron.  There’s also oats and a little egg for even more fiber and protein in this, along with vegetables like onions, carrots, and peppers for added nutrition.  Of course, I had to add a little extra appeal to convince the fiancé to try this, so I included buffalo sauce to give it extra flavour and kick, which I loved!  You could substitute bbq sauce though if you’re not into spicy food.

Buffalo Lentil Loaf - a healthy & tasty vegetarian meatloaf alternative!

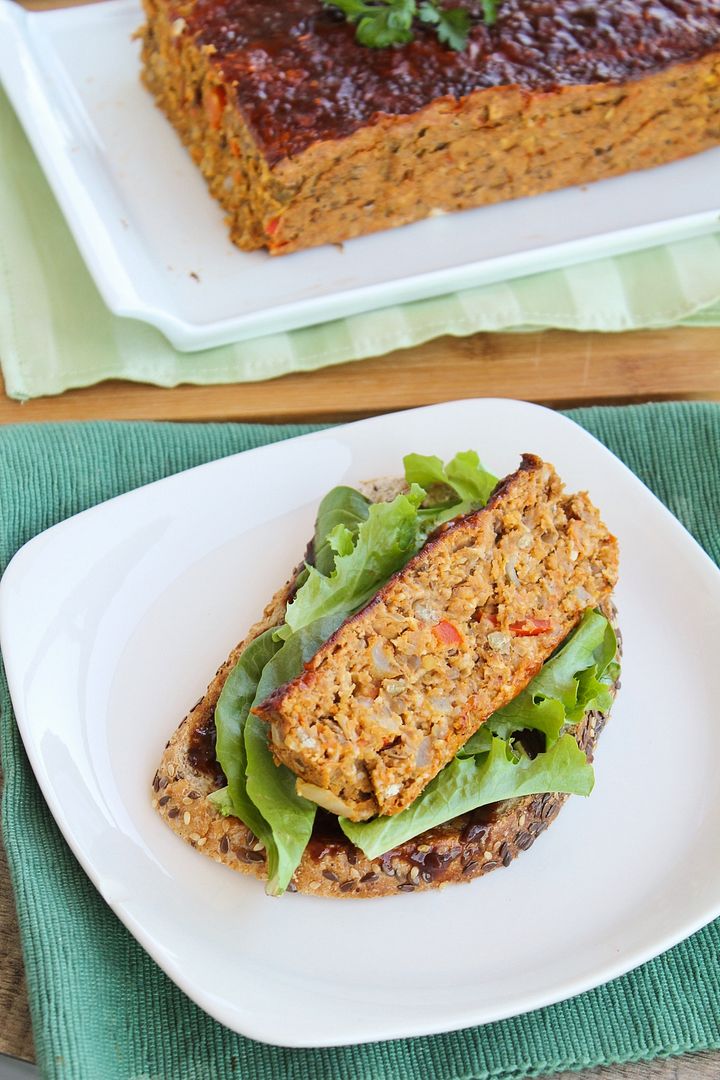
Though it takes a little time to cook, the result is worth it!  I love this lentil loaf on its own with a side of vegetables (mashed potatoes would be great too!), but I ate most of it in sandwiches for lunch.  Toast some whole grain bread, add some lettuce, barbeque or buffalo sauce, tomato, and a couple slices of lentil loaf and you’ve got a hearty, filling, and tasty meal!

Buffalo Lentil Loaf - a healthy & tasty vegetarian meatloaf alternative!

Buffalo Lentil Loaf

Lentil loaf recipe adapted from In Sonnet's Kitchen and The Simple Veganista

Makes one 9x5 loaf, serves about 4-6 (or more depending on how you serve the loaf)

Ingredients:

1 cup dry brown lentils
2-1/2 cups water
1 tablespoon olive oil
1 small or medium yellow onion, diced
3 garlic cloves, minced
1/2 a large red bell pepper, diced
1 large carrot, peeled and grated
1/2 teaspoon ground cumin
1/2 teaspoon garlic powder
1/2 teaspoon onion powder
1/4 teaspoon cayenne pepper (optional)
Pinch each of salt and pepper
1 cup rolled oats, pulsed in a blender or food processor a few times to more of a coarse crumb
2 large eggs, lightly beaten
1/2 cup buffalo sauce (your favourite brand, such as Frank's Red Hot Buffalo Wing Sauce or PC Buffalo Wing Sauce)

Glaze:
2 tablespoons bbq sauce (plus more for after baking, if desired)
2 tablespoons buffalo sauce

Directions:

Add lentils and water to a medium saucepan and bring to a boil.  Cover, reduce heat, and let simmer 25-30 minutes, until lentils are soft and water is mostly evaporated.  Remove from heat, drain any excess water, and puree about three-quarters of the lentils in a blender or food processor (or with an immersion blender).  Set aside to let cool slightly.  Preheat oven to 350°F.

Meanwhile, heat oil in a large saucepan over medium-high heat.  Add onion, garlic, red pepper, and carrot and sauté, stirring often, for about 5-7 minutes or until softened.  Stir in the spices (cumin, garlic powder, onion powder, cayenne, salt, and pepper), then remove from heat. 

Fold together the lentils, sautéed vegetables and spices, oats, eggs, and buffalo sauce in a large bowl or in the saucepan until combined.  Line a 9x5 loaf pan with parchment paper, spray lightly with cooking spray, and spread lentil mixture evenly in prepared pan.  Mix the 2 tablespoons each of bbq sauce and buffalo sauce for the glaze, and brush in an even layer on top of the loaf. 

Bake loaf in preheated oven for 45-50 minutes until the top of the loaf is dry, firm, and golden brown.  Let cool in pan for at least 10 minutes, run a knife around the edges, then use parchment paper to lift out of pan.  Top with a bit of additional bbq sauce if you like. Slice into 10-12 slices and serve however you desire – either on its own, in a sandwich, on top of a salad, etc.

May 22, 2014

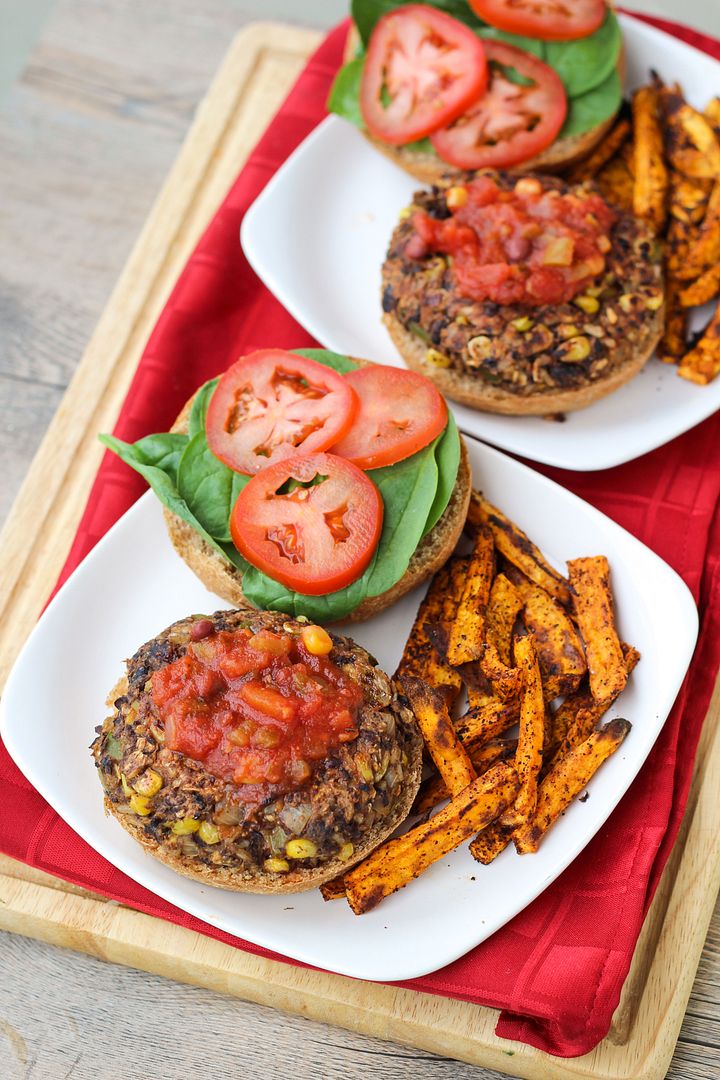
Southwestern Black Bean & Brown Rice Veggie Burgers

Southwestern Black Bean & Brown Rice Veggie Burgers

The (almost) return of summer means the return of burger season - one of my favourite foods!  I still make them in the winter on the stovetop (and even in the summer I use the stovetop because I'm scared of bbqs), but there's something about summer that makes me crave burgers all the time.

I've never liked beef burgers though, and a regular beef patty with the standard toppings doesn't appeal to me much.  Instead, I love experimenting with different chicken and turkey burgers - like buffalo chicken and cheddar burgers or apple turkey burgers with caramelized onions and brie - and veggie burgers, which are so customizable, like lemon chickpea quinoa burgers or portabello mushroom burgers with roasted red peppers and provolone!

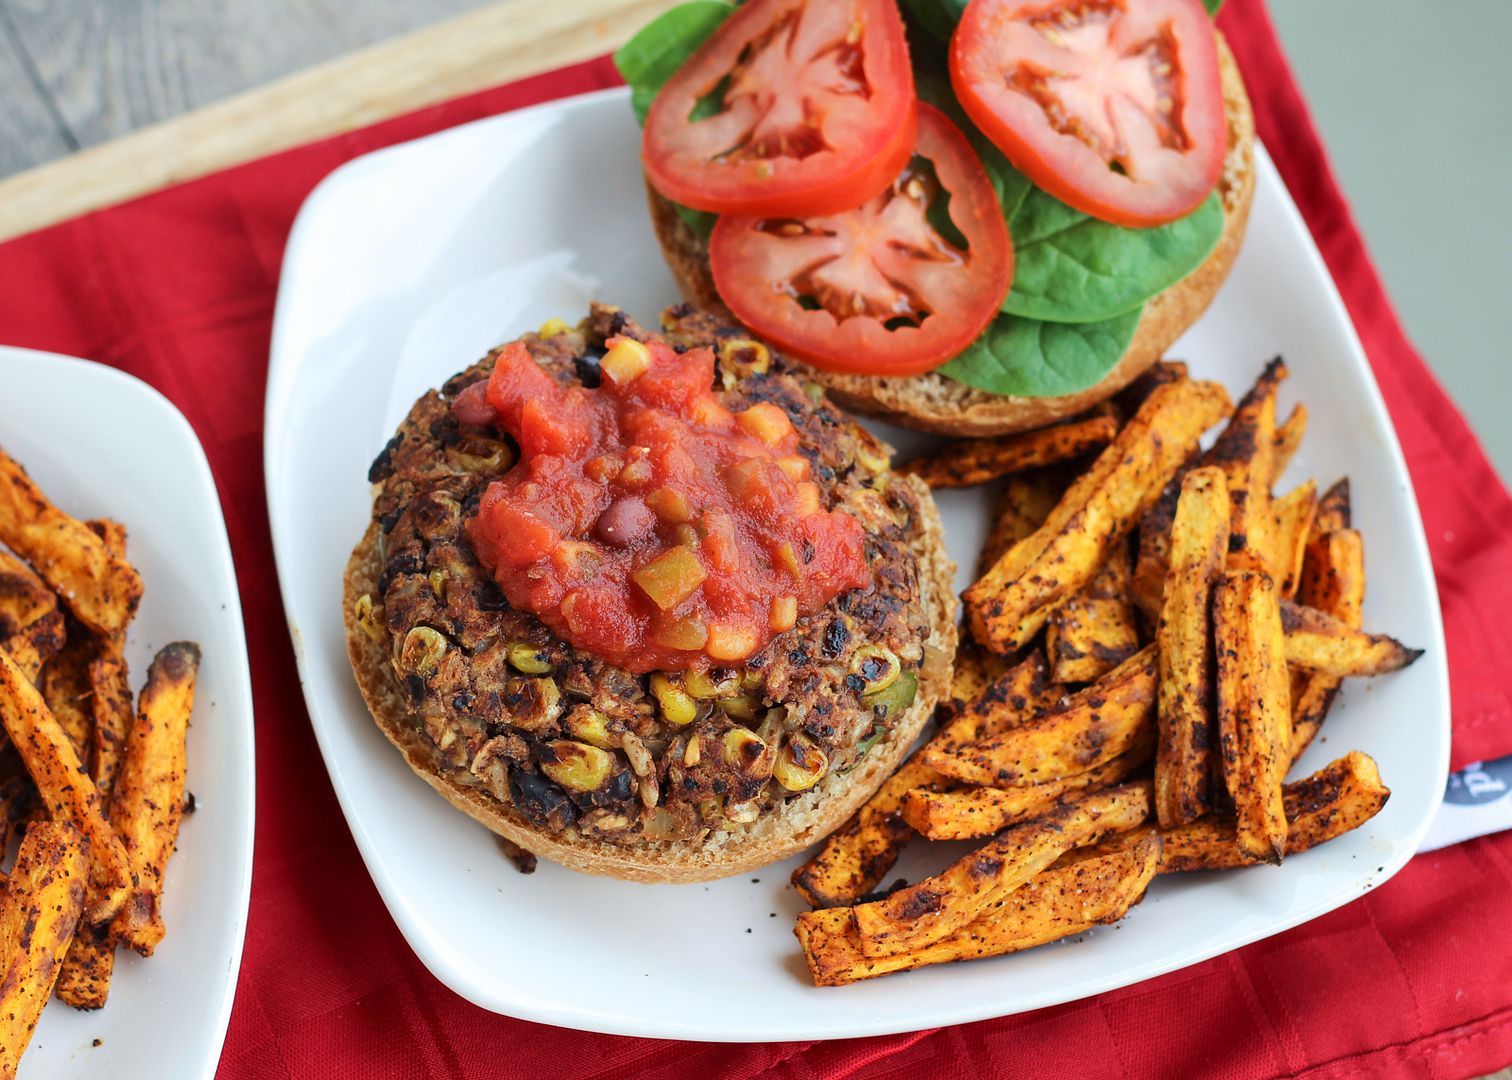
Southwestern Black Bean & Brown Rice Veggie Burgers

I love trying out new flavours and for my first veggie burgers of the post-winter season (it's hard to call this summer yet), I went with a Southwestern theme!

The veggie patties for these burgers are hearty and full of real veggies, just how I like them!  The base is a mixture of brown rice, oats, and black beans for plenty of protein and fiber, and mixed in are some onions, garlic, peppers, corn, and plenty of spices for added nutrition and flavour.


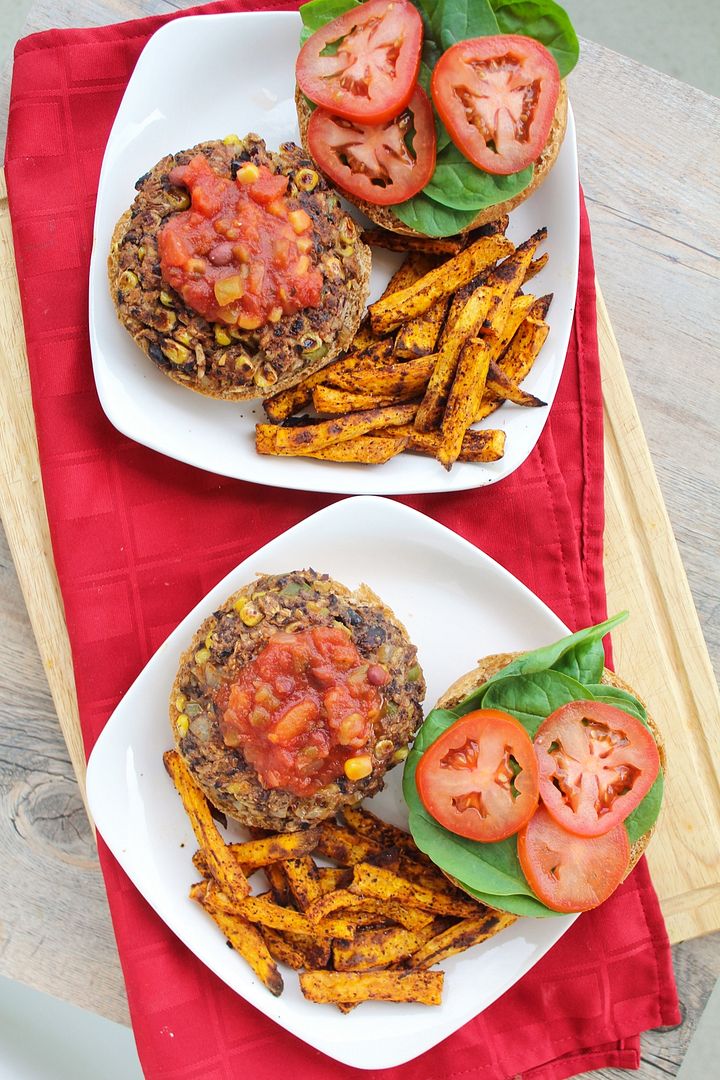
Southwestern Black Bean & Brown Rice Veggie Burgers

Ryan and I ate these for dinner three nights in a row (another great thing about veggie burgers is getting a lot of food for a pretty low cost!) and ate them differently each night.

The first time I topped mine with salsa and served them with chipotle sweet potato fries as pictured, which made for a pretty spicy meal though I still loved it!  The second night I added cheese on top, skipped the salsa, and used a light ranch dressing instead which was also awesome.  And the third night I crumbled my patty up and served it over a big spinach salad which was a refreshing change! 
If I had avocado I would have definitely added it to all three meals but avocados are so expensive these days I have to sadly try to limit my use of them.

You can eat these however you like and with whatever toppings you think sound good - hope you enjoy them as much as we did!

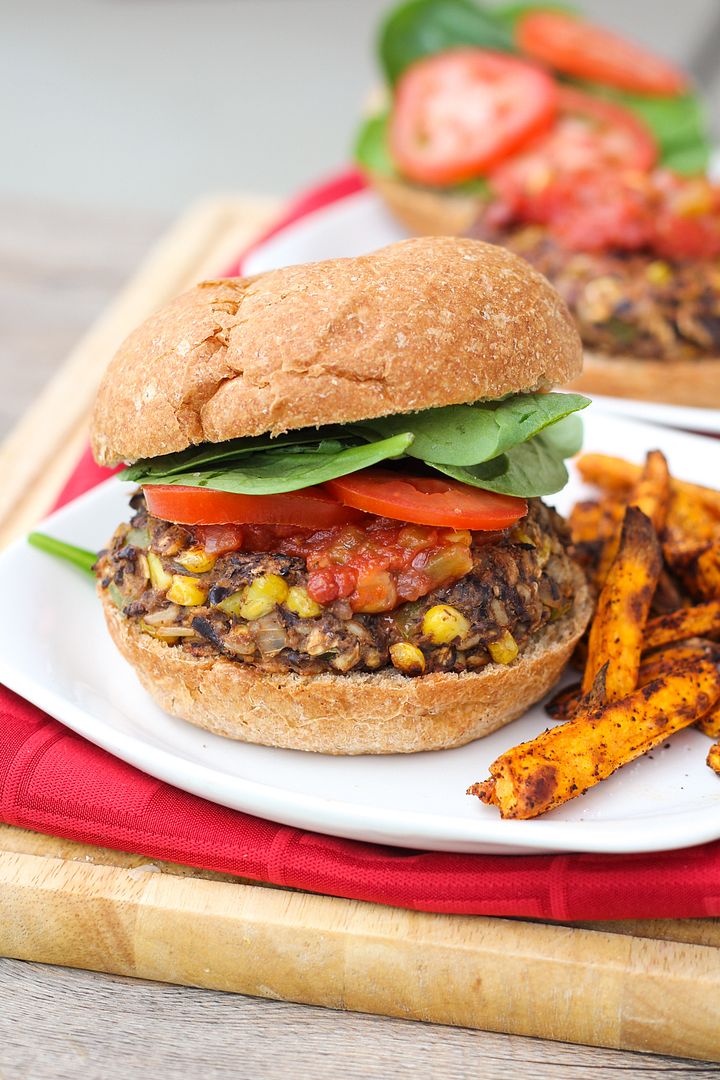
Southwestern Black Bean & Brown Rice Veggie Burgers

Southwestern Black Bean & Brown Rice Veggie Burgers

Inspired by and adapted from similar recipes seen on Simply Scratch, Veggie Belly, and Katherine Martinelli

Makes 6 burgers

Ingredients:

For the Burgers:
1/2 cup uncooked whole grain brown rice – I used pre-cooked instant rice
1/2 cup rolled oats, divided
1 (540mL) can of no-salt added black beans, rinsed and drained
1 medium yellow onion, diced
1/2 cup diced bell peppers – I used half a green pepper but you could use a mixture of green and red
3 cloves garlic, minced
3/4 cup thawed frozen corn kernels
1 teaspoon ground cumin
1 teaspoon chili powder
1/4 teaspoon salt
1 teaspoon chipotle chili powder for added spice (or substitute paprika)
1 large egg, lightly beaten

For Topping:
6 whole wheat hamburger buns
Lettuce or spinach
Sliced tomatoes
Sliced ripe avocado
Salsa (optional)
Cheddar or Monterey jack cheese (optional)

Directions:

Cook the rice according to package directions.  Let drain well.

Pulse 1/4 cup oats in a food processor to form crumbs.  Keep remaining 1/4 cup of oats whole.  Transfer all oats to a large bowl.  Reserve 1/4 cup black beans and transfer remaining beans to the food processor.  Pulse until most of the beans are mashed (but not completely mushy).  Add to the large bowl with the oats.

Heat oil in a large skillet over medium-high heat.  Add onions and peppers and sauté until softened, 7-10 minutes, stirring occasionally.  Add garlic and sauté for another minute.  Add corn and reserved 1/4 cup of black beans and stir.  Add all spices and sauté for another minute, stirring.  Remove from heat and let cool slightly.

Add vegetable mixture and rice to the bowl with the oats and black beans.  Add whisked egg and stir mixture until combined.  Form into 6 large patties or 8 smaller ones, if desired (I made 6 patties).

Heat two large skillets over medium heat.  Spray with non-stick cooking spray or use a light amount of oil.  Add 3 patties per pan and cook about 5-6 minutes per side, turning carefully in between, until browned and cooked through.  If using cheese, add slices to the tops of the patties about a minute or two before they’re done cooking to melt the cheese.  Remove from heat.

Add patties to buns and top with lettuce, tomatoes, avocado, salsa, or desired other toppings.  You could also crumble the patties and serve them on salad!

April 15, 2014

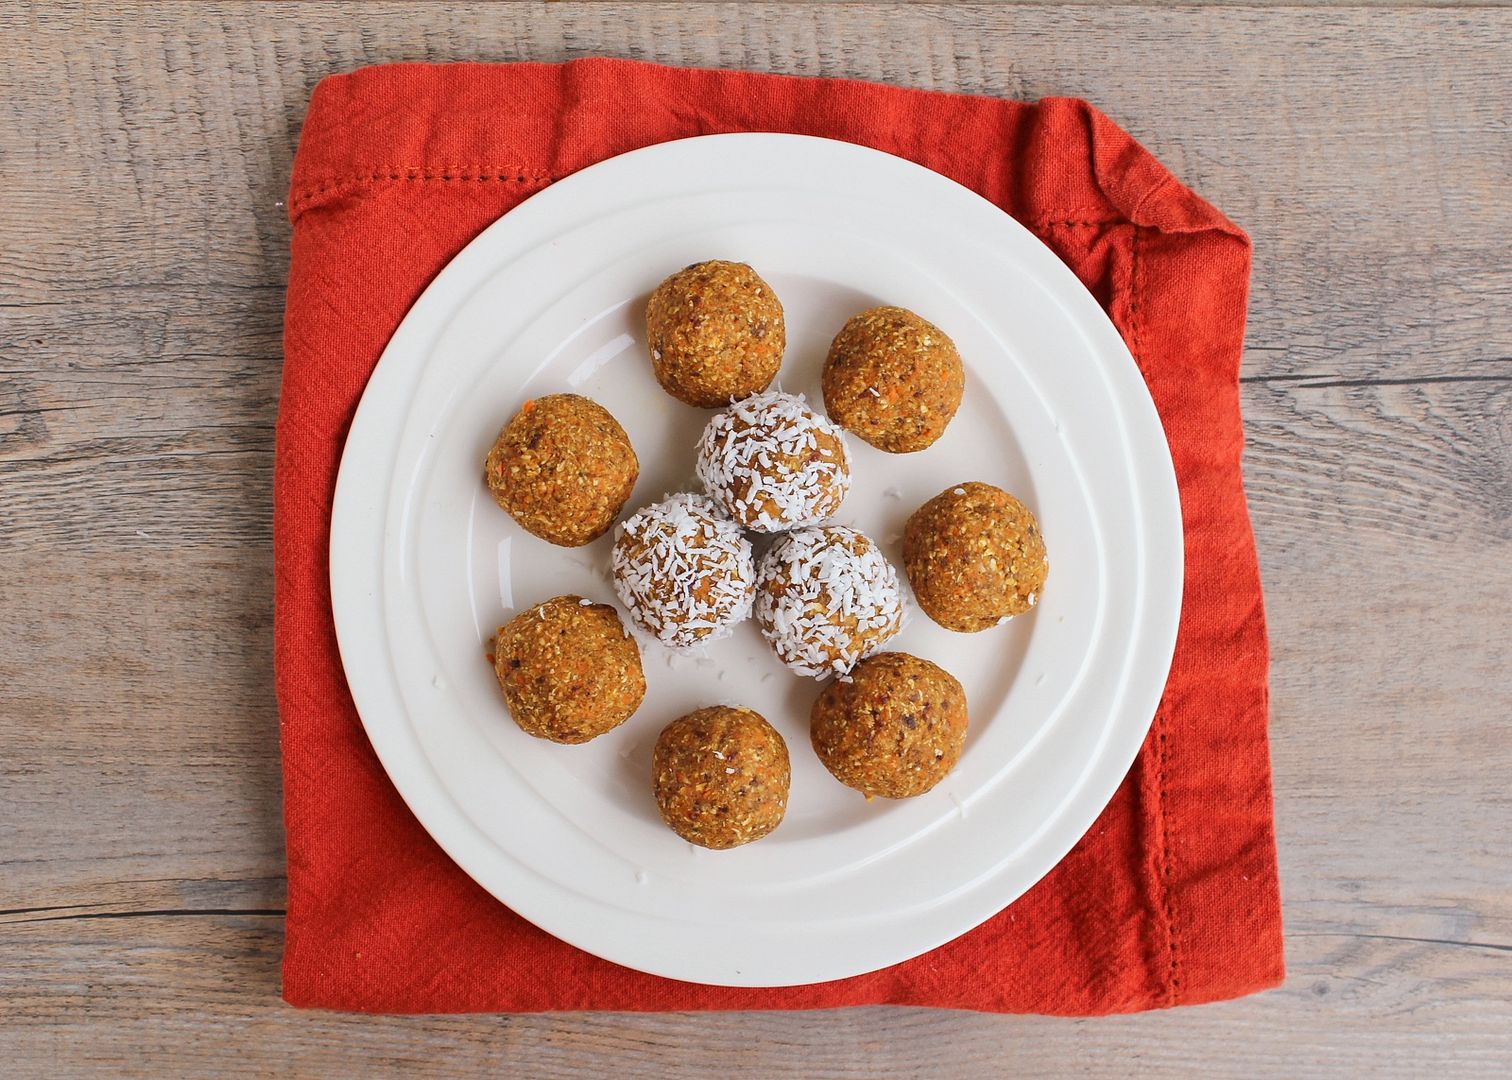
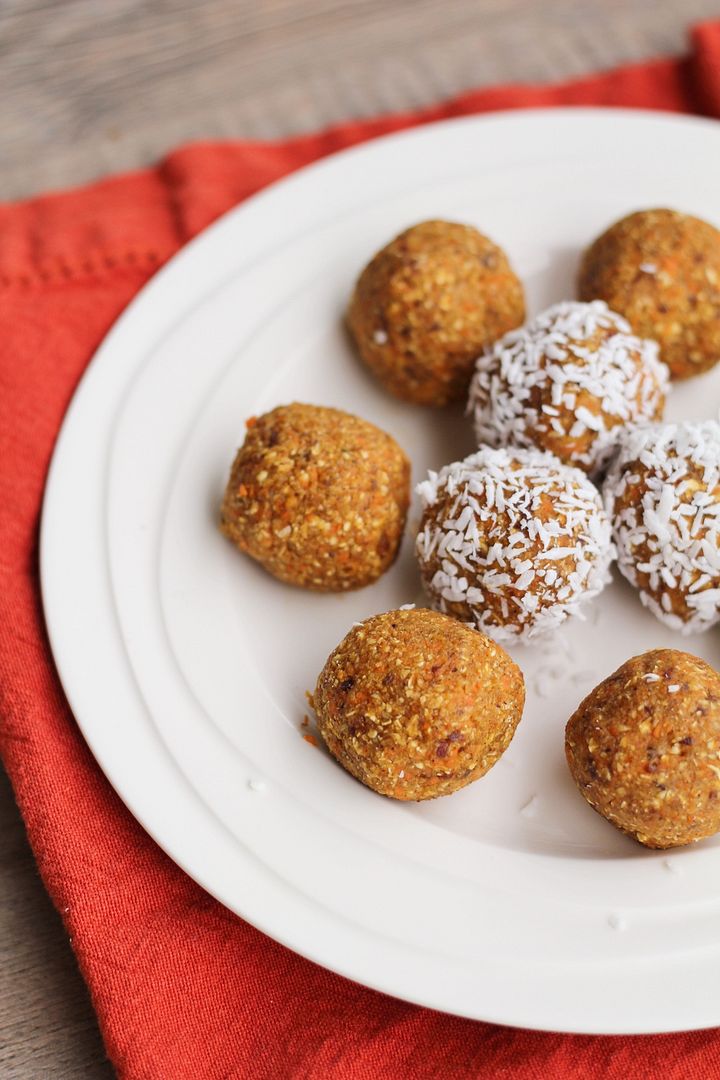
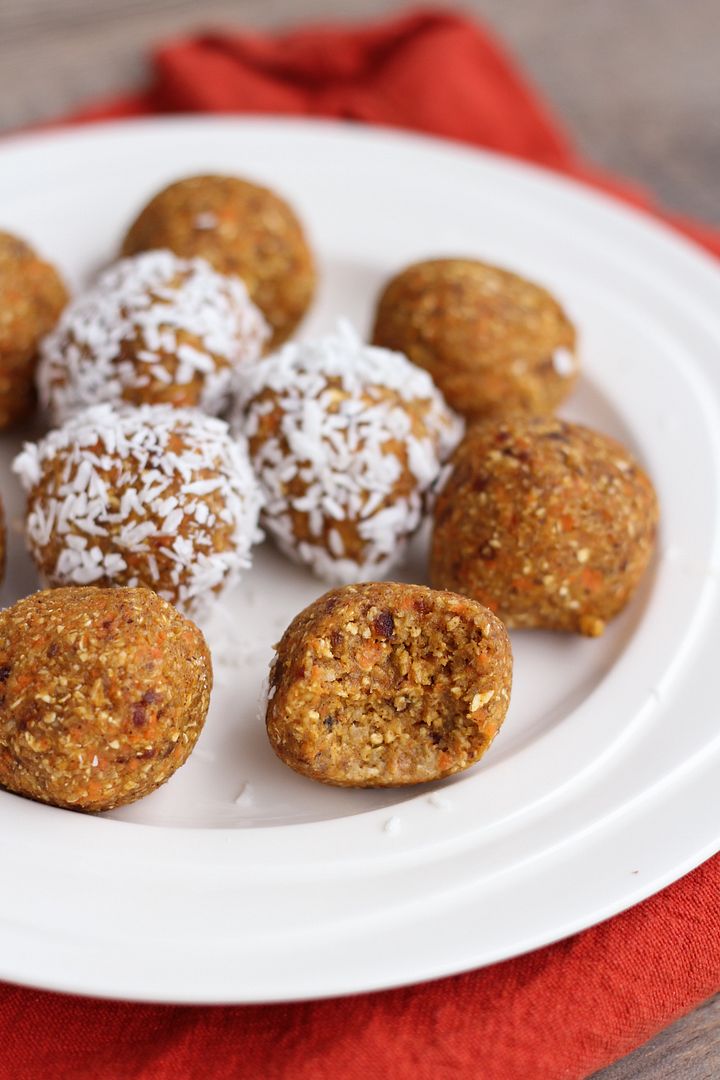
Healthy No-Sugar Carrot Cake Date Balls

Healthy No-Sugar Carrot Cake Date Balls

With Easter rapidly approaching (how is it this weekend already?!), I spent some time this past weekend trying to come up with a new Easter recipe to share.  Last year I stuck with an Easter egg theme with egg-shaped breakfast naan pizzas and Easter egg cheesecake bars, but this year I wanted to do something with carrot cake, which I consider a pretty standard Easter dessert and which is one of my favourite types of cake!

It seems like a carrot cake version of everything already exists though, like carrot cake oatmeal, carrot cake banana bread, carrot cake pancakes, carrot cake cheesecake, carrot cake whoopie pies, carrot cake rice krispie treats, etc., all of which look absolutely amazing, of course.  I haven't seen too many carrot cake versions of healthy no-bake balls, though, and after recently trying these oatmeal cinnamon truffles which I loved, I decided to make a carrot cake version!

Healthy No-Sugar Carrot Cake Date Balls

These are super quick and easy to make, with oats, dates, and walnuts as the main ingredients, along with shredded carrots (obviously needed for carrot cake, and with a bonus of added nutrients!), and vanilla, cinnamon, nutmeg, ginger, and salt to bring out the carrot cake flavour.

The end result is a sweet treat with a taste that really reminded me of carrot cake, even though dates are the predominant flavour.  I couldn't really taste the carrots, but I realized carrot cake doesn't taste like carrots either; you could always add more and adjust the ratio of other ingredients if you like though.  These would be a great sugar-free snack to have around this coming weekend to help balance out all the chocolate!

Healthy No-Sugar Carrot Cake Date Balls

No-Bake Healthy Carrot Cake Date Balls

Makes about 18 balls

Ingredients:

1-1/2 cups large-flake rolled oats
1/2 cup chopped walnuts
1/4 teaspoon sea salt
1/2 teaspoon cinnamon
1/4 teaspoon nutmeg
1/4 teaspoon ground ginger
12 medjool dates, pits removed, chopped into pieces
1 cup grated carrot (about 2 large carrots)
1/2 teaspoon pure vanilla extract

Optional: raisins, unsweetened shredded coconut

Directions:

Add oats, walnuts, salt, cinnamon, nutmeg, and ginger to the large bowl of a food processor.  Process until the mixture resembles fine crumbs.  Remove from food processor and set aside in a bowl.

Add dates to the food processor and mix until smooth.  I added 1 tablespoon of water to help them blend.  Add the carrots, vanilla, and oat mixture back to the food processor and pulse everything until combined and sticking together.  Taste mixture and add more spices or carrots if desired.

Remove mixture from food processor and roll into balls about 1” in diameter.  Keep covered in refrigerator and let refrigerate for at least a couple hours before eating for better texture.

Options:  If desired, you can add raisins to the balls to resemble carrot cake more; the date taste is already strong and sweet though so I didn’t feel it necessary.  Another option is to roll the balls in shredded coconut if you like; I’m not a huge fan of shredded coconut so I didn’t do this with all of mine but it sticks easily to the balls if you wish to roll them in it.

April 04, 2014

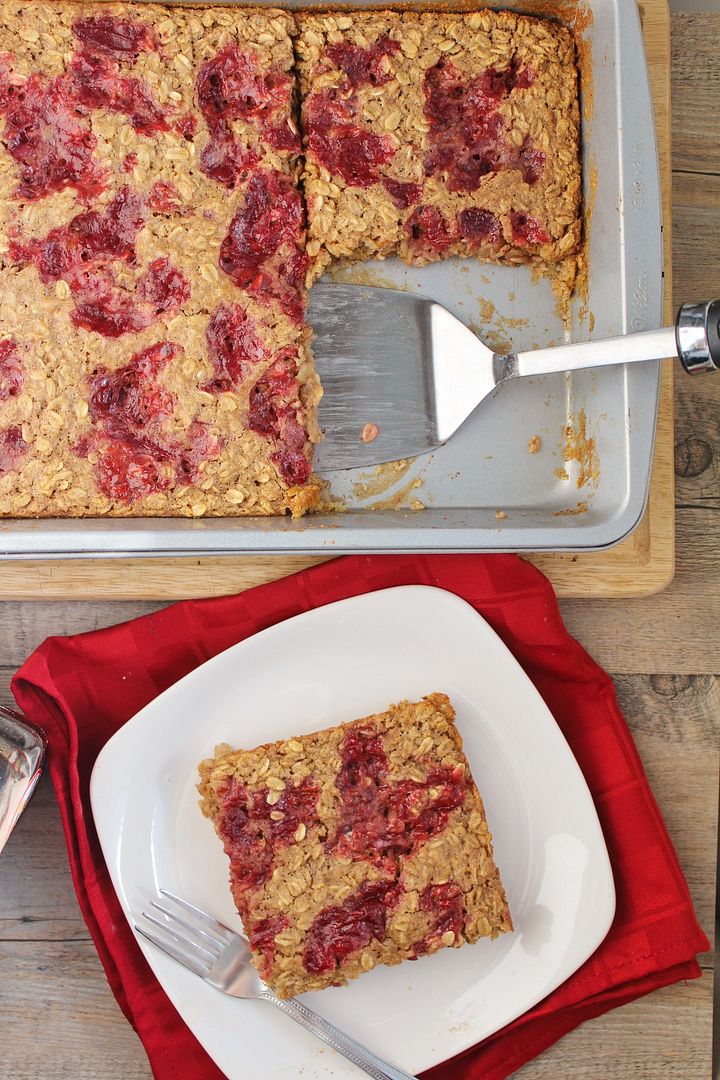
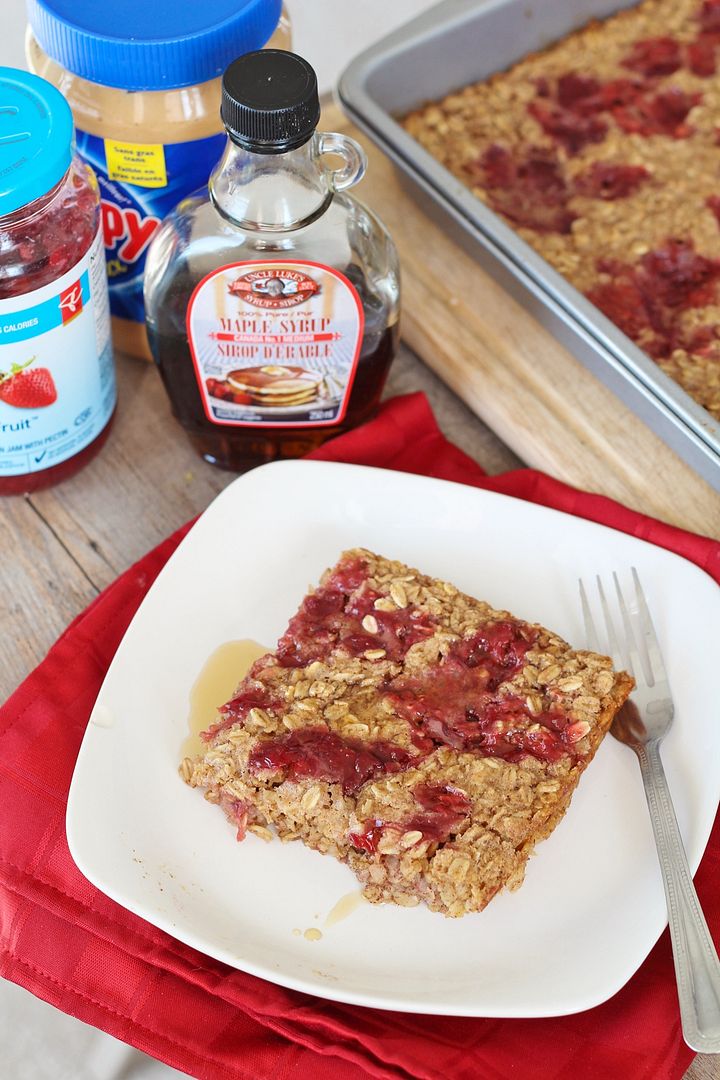
Peanut Butter & Jelly Baked Oatmeal

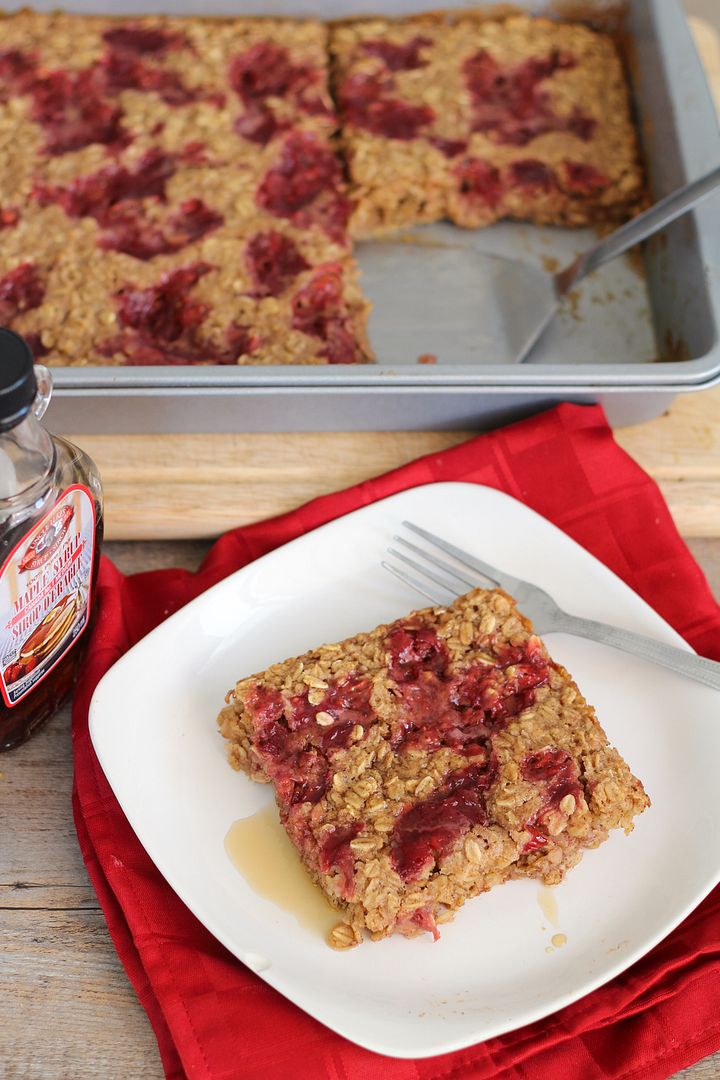
Peanut Butter & Jelly Baked Oatmeal

As a kid I used to love all the flavours of those little instant oatmeal packets that I'm sure are full of sugar and everything kids love.  Now the only instant oatmeal I'll occasionally buy comes from the organic aisle, but I need to eat at least two packages to sustain me for breakfast and even then I'll still be hungry a couple hours later.  I love making my own oatmeal on the stovetop, especially versions that are full of ooey gooey delicious things like bananas, peanut butter, or pumpkin.  Unfortunately, I don't do this often as I'm usually in too much of a hurry or too lazy in the mornings to make anything that requires effort.

Which is why I've become obsessed with baked oatmeal lately.  Sure it requires some effort to make, but you end up with a lot of leftovers that can be stored as individual servings in the fridge so all you have to do later on is reheat.  Perfect for busy mornings, and also for people who don't like the mushy texture of a bowl of stovetop oatmeal, as the baked version is a lot firmer.
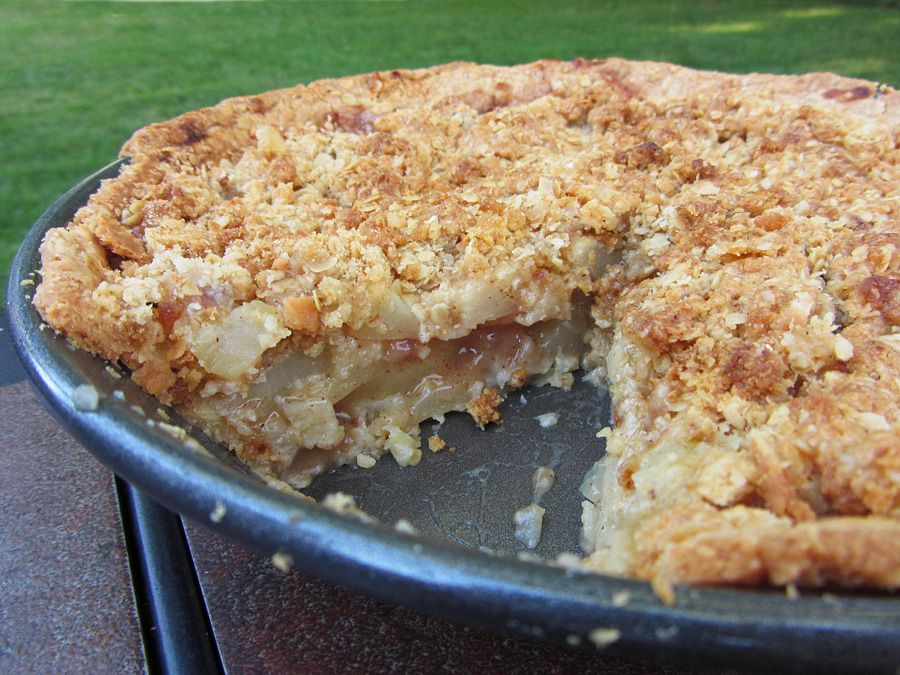
Peanut Butter & Jelly Baked Oatmeal

This peanut butter and jelly version of baked oatmeal is Ryan and my current favourite.  It has a strong peanut butter flavour with the perfect amount of jam to sweeten it up, and it's nice and filling.  It's pretty easy to throw together too - just add your wet ingredients (egg, milk, vanilla, peanut butter) to your dry ingredients (oats, a tiny bit of brown sugar, baking powder, cinnamon, and salt), drop some jam on top, and throw it in the oven.  The hardest part is waiting for it to be ready! 

I've made this with both grape and strawberry jam before and we love it both ways; I always try to choose a low sugar jam as I usually find regular jam way too sweet.  I consider this a reasonably healthy breakfast so I don't mind eating it for several breakfasts in a row or that Ryan now asks for it all the time!

Peanut Butter & Jelly Baked Oatmeal


Peanut Butter and Jelly Baked Oatmeal

Makes 6 servings

Ingredients:

2-1/2 cups large flake rolled oats
2 tablespoons light brown sugar
1-1/2 teaspoon baking powder
1/2 teaspoon salt
1-1/2 teaspoons cinnamon
1 large egg, lightly beaten
2 cups skim milk or almond milk
1 teaspoon vanilla extract
1/2 cup peanut butter - I usually use regular smooth peanut butter but natural would work too if you want slightly less sugar and salt
1/2 to 3/4 cup low-sugar jam – strawberry, grape, or mixed berry all work

Directions:

Preheat oven to 350°F.  Spray a 9x13 baking pan with non-stick cooking spray.

In a large bowl, whisk together the oats, brown sugar, baking powder, salt, and cinnamon.  In a separate bowl, whisk together the egg, milk, vanilla, and peanut butter. You can warm up the peanut butter for about 20-30 seconds in the microwave first to make it more liquid so it will mix in better.  Add the wet ingredients to the dry ingredients and stir just until combined. 

Spread mixture into pan and spread evenly with a spatula.  It will look like oats floating in a lot of liquid – that’s normal; the liquid will all be absorbed during baking.  Drop spoonfuls of jam evenly on top of the oatmeal.  If you like, you can leave the jam in little pockets, or take a butter knife and try to swirl the jam around to cover more surface area (that’s what I like to do).  Bake in preheated oven for 35-40 minutes, until edges are golden brown and middle is cooked through.  Divide into at least 6 servings and serve warm, with maple syrup if desired.

Leftovers can be stored covered in the fridge for a few days and reheated.

February 14, 2014

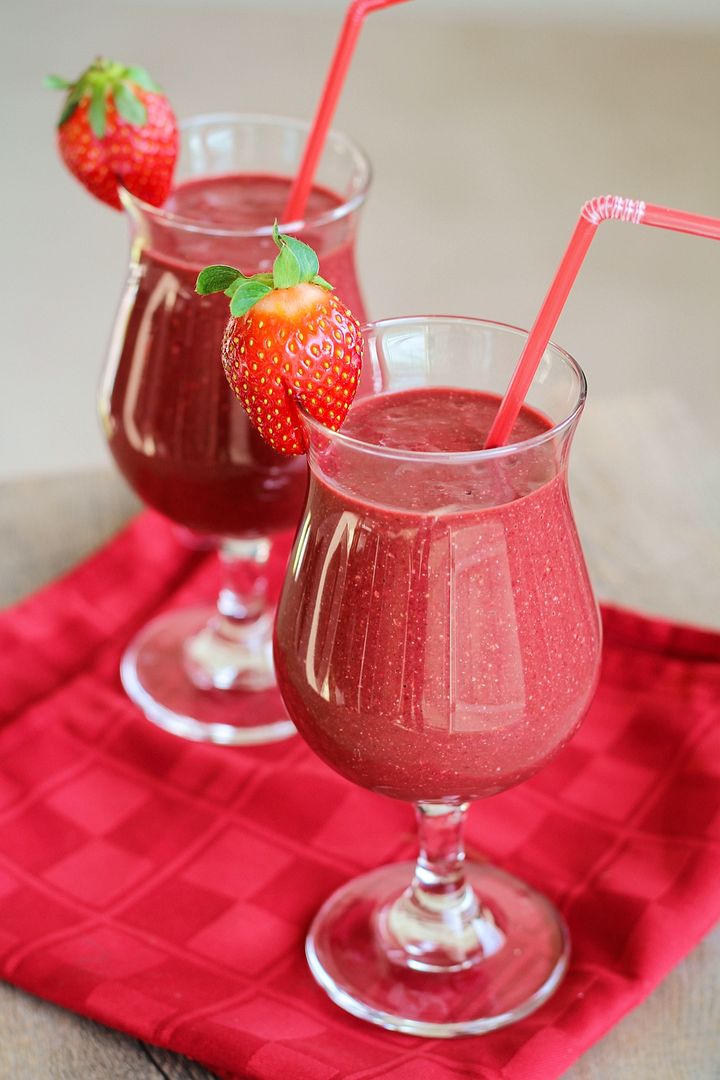
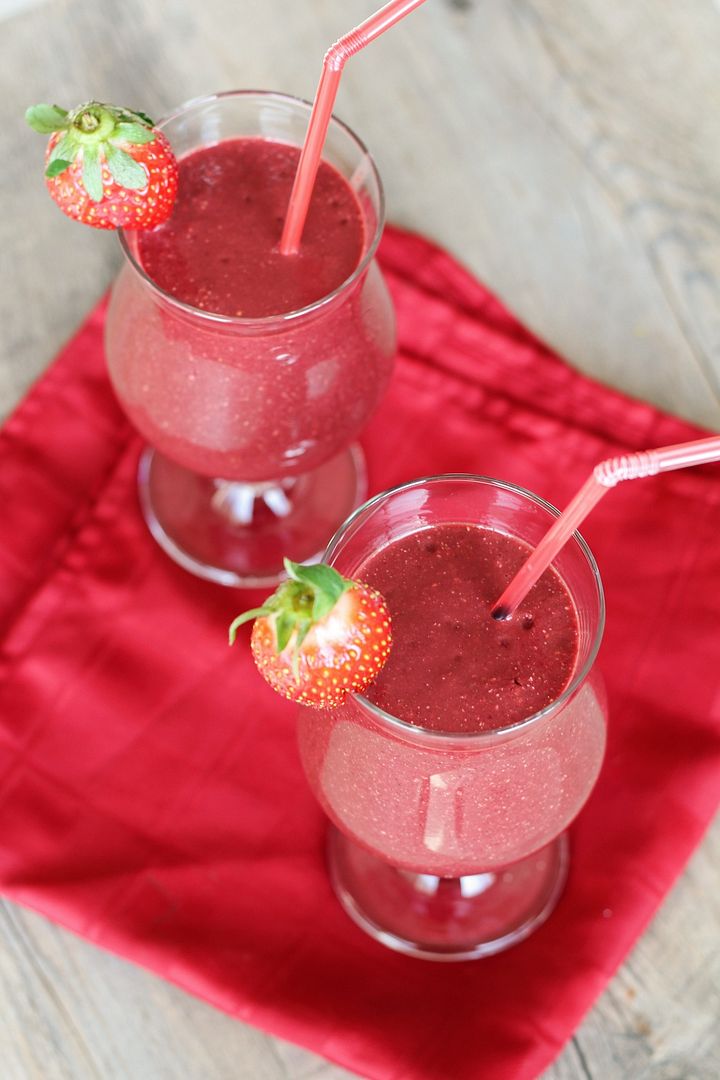
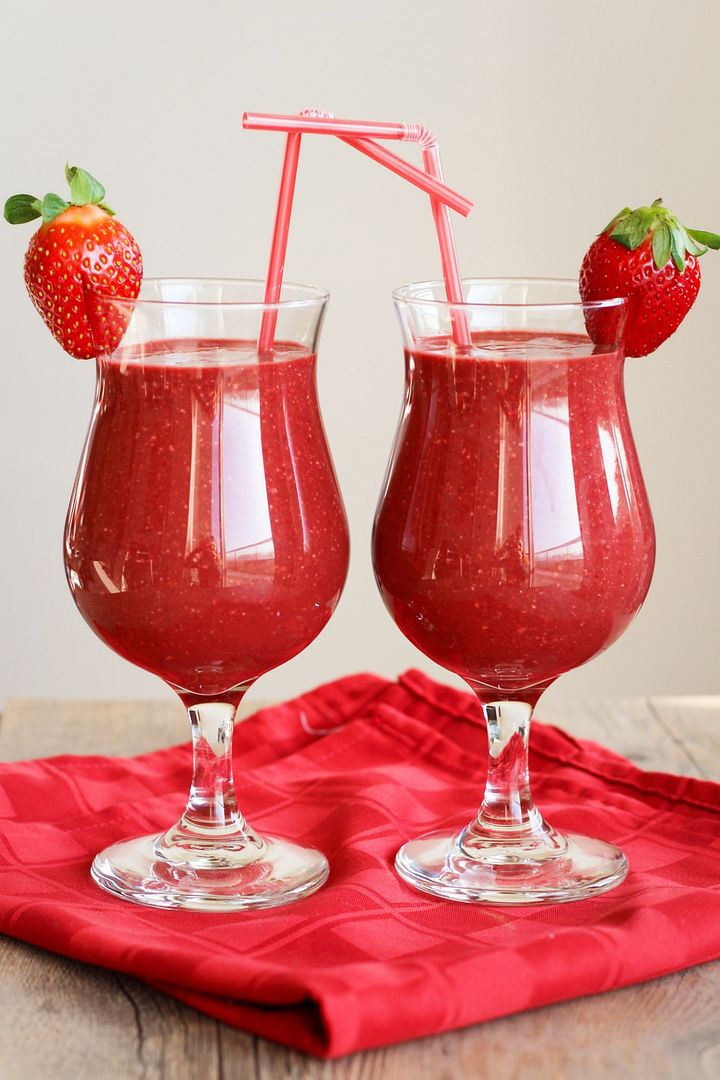
Strawberry Beet Chocolate Chia Smoothie

Strawberry Beet Chocolate Chia Smoothie

Happy Valentine’s Day!

Whether you celebrate the occasion or not, today is a great time to remember to show yourself some love in addition to the love you give out to others either today or any/every other day of the year! 

And what better way to treat yourself on Valentine’s Day than with this festive red chocolate flavoured smoothie that will feed your body with some of the good things it craves, especially during a time of year when many of us (definitely myself included) are indulging in a few more desserts than usual!

Strawberry Beet Chocolate Chia Smoothie

This smoothie gets its red colour from fresh strawberries and a roasted beet, darkened a bit by the cocoa powder which gives the smoothie a noticeable chocolate flavour that almost makes this feel more like dessert!  With the addition of chia seeds (aka little nutritional powerhouses), banana, almond milk, and oats, this is a great way to start your morning, or pick yourself up anytime of the day! 

If you’re worried about the beets, you could leave them out, but I gave one of these smoothies to Ryan when he woke up and he loved the strawberry and chocolate flavour, with absolutely no clue there were beets in it (which he claims not to like) until I told him after he drank the whole thing.  I love tricking him with vegetables!  I will make up for it tonight though by cooking a nice Valentine’s dinner (which I still need to figure out!). 

Hope you all have a great day!

Strawberry Beet Chocolate Chia Smoothie


Strawberry Beet Chocolate Chia Smoothie

Makes 2-3 smoothies

Ingredients:

1 medium beet, roasted* and chopped
2 cups milk of your choice – I used an almond/coconut milk blend
2 tablespoons chia seeds
1-1/2 cups chopped fresh strawberries
1 frozen banana, chopped
3 tablespoons cocoa powder
1/4 cup rolled oats

Directions:

*Before making this smoothie you will need to have a roasted or otherwise cooked beet on hand.  I roasted mine the night before: wrap the beet in foil, place on a baking sheet and roast in a 400°F oven for one hour or until tender.  Let cool then peel, chop, and transfer to refrigerator.   If you have a very powerful blender, you might be able to use the beet raw, but I haven’t been able to try this with my blender.

If you don’t keep frozen ripe bananas in the freezer (and you should, they are great for throwing in smoothies!), then be sure to put one in the freezer the night before too!

To make the smoothie, add all ingredients to a blender and puree until smooth.  Taste and adjust any amounts to your liking; you may wish to add a sweetener such as honey or agave depending on your tastes.  Pour into 2-3 glasses, garnish with a strawberry, and serve!

July 23, 2013

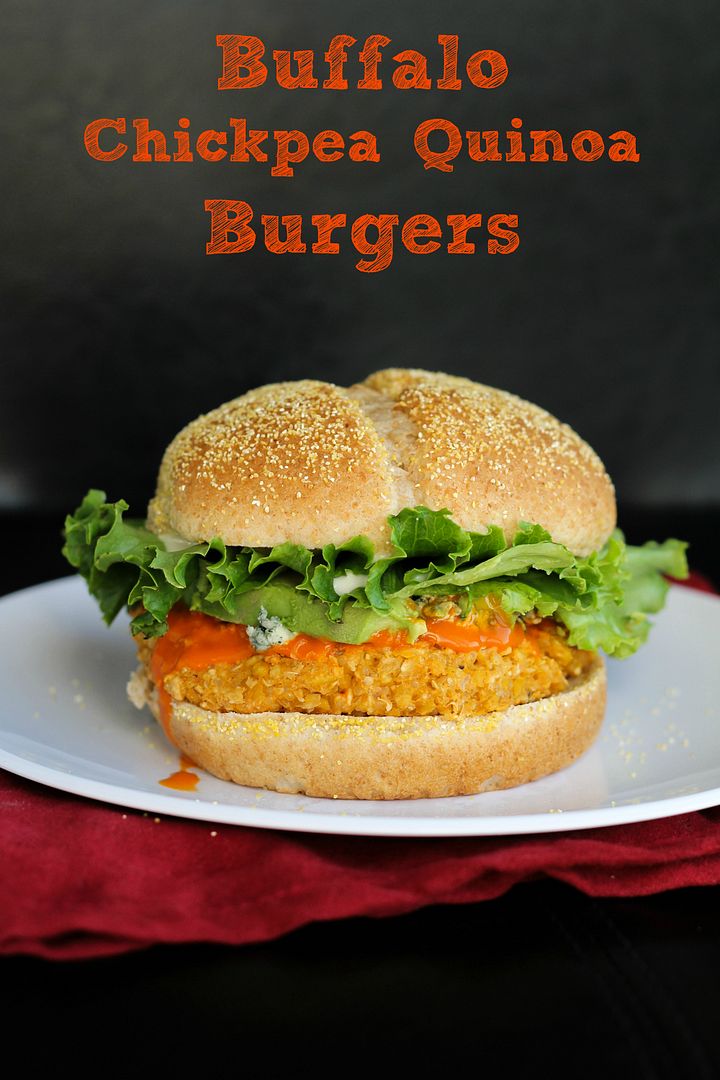
Buffalo Chickpea Quinoa Burgers

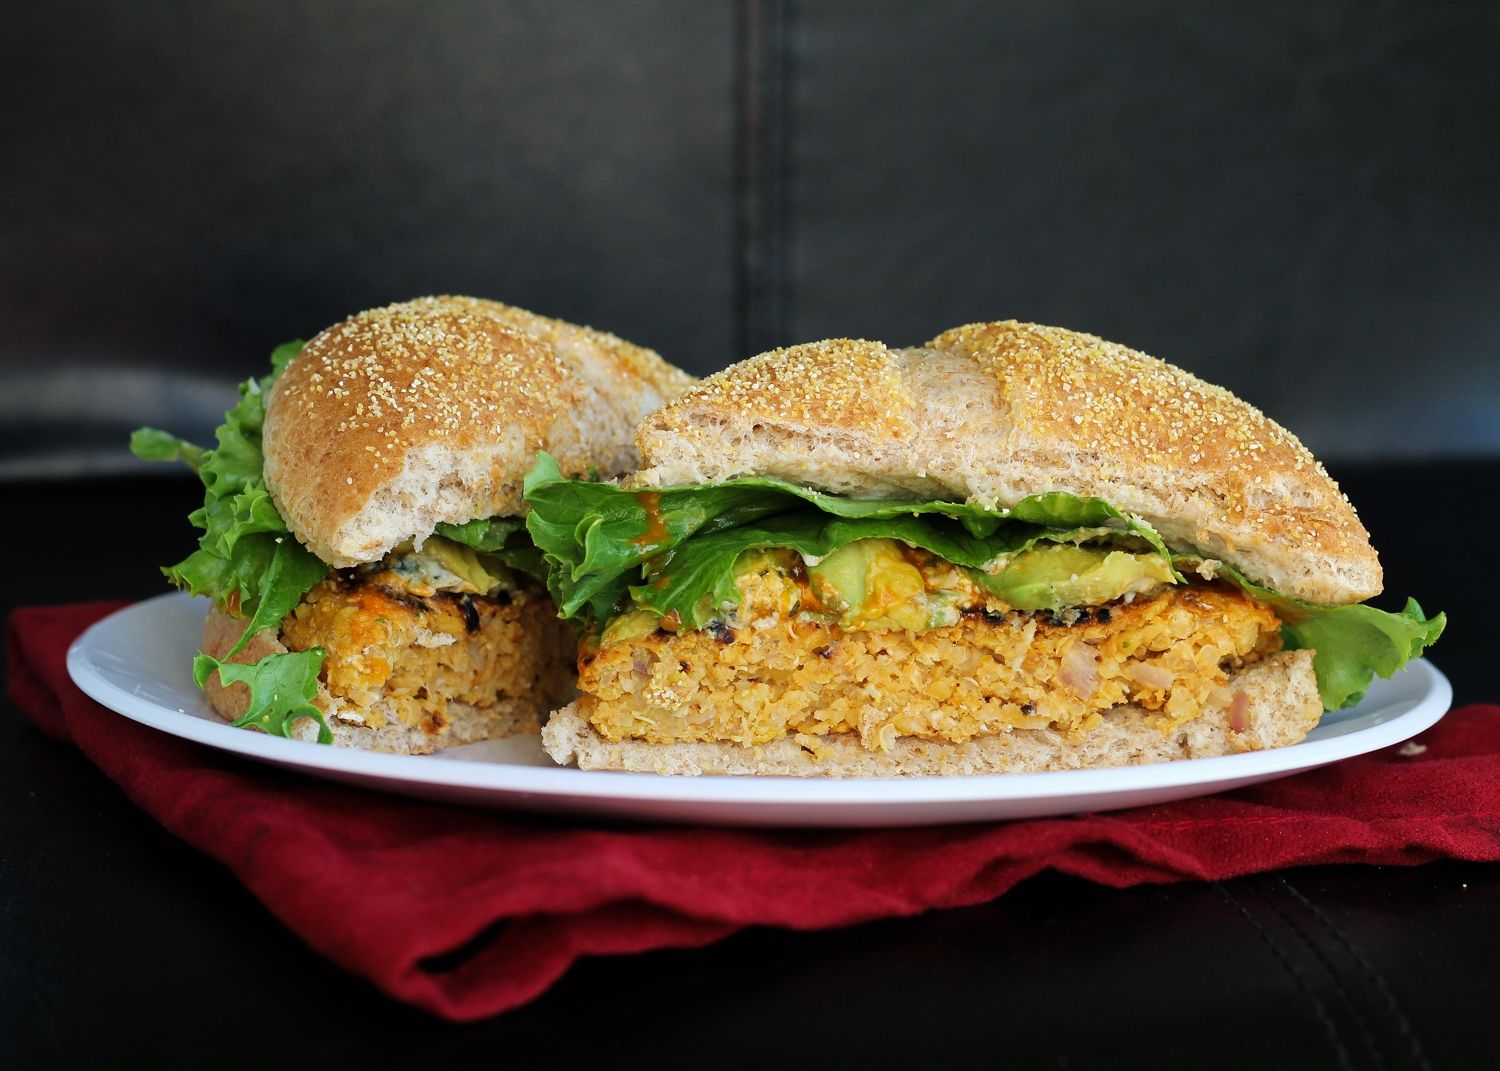
Buffalo chickpea quinoa burgers

When I made these lemon & feta chickpea quinoa burgers for my boyfriend Ryan and I last month, I was worried that he wouldn’t even be willing to try them because he doesn’t eat a lot of veggie burgers and isn’t the biggest lemon fan.  Fortunately, he not only tried them, but actually quite liked them!   Of course, he commented that they’d be much better if I’d made them with buffalo or chipotle sauce instead of lemon though.

Buffalo chickpea quinoa burgers

I love all things lemon but I’m also a big buffalo sauce fan, so I decided to give Ryan’s “manlier” version a try.  We love these buffalo chicken burgers, but finding a protein-packed vegetarian substitute to replace them with once in a while was a pretty good idea.

Turns out he knew what he was talking about, because I think I liked these even better than the lemon version!

Buffalo chickpea quinoa burgers

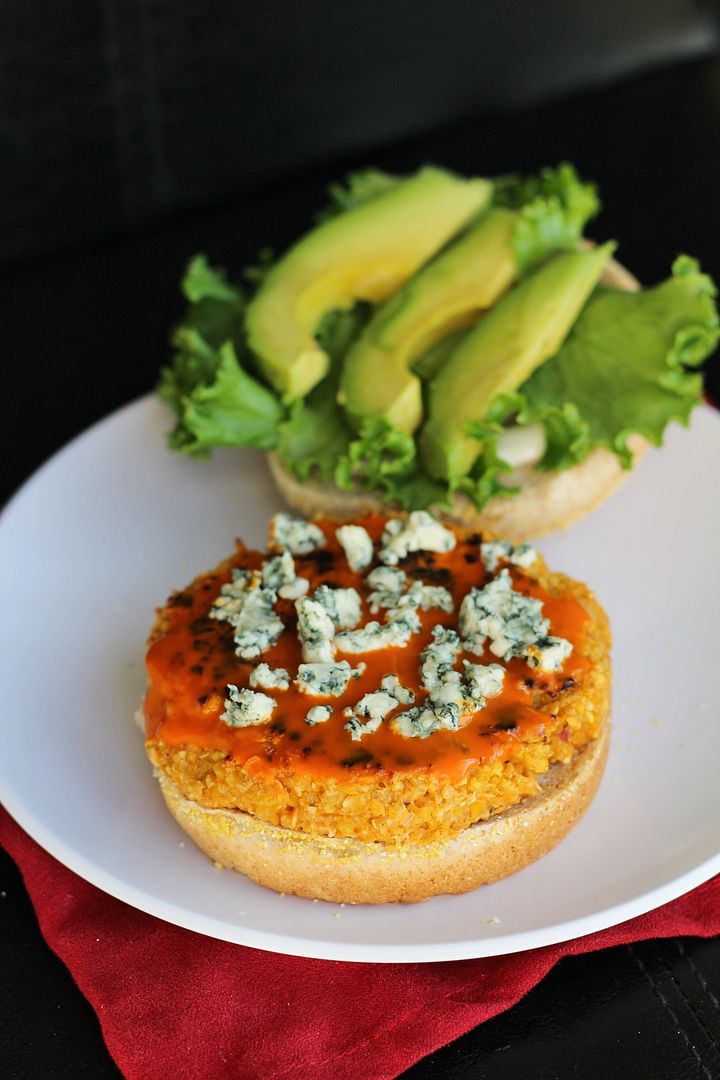
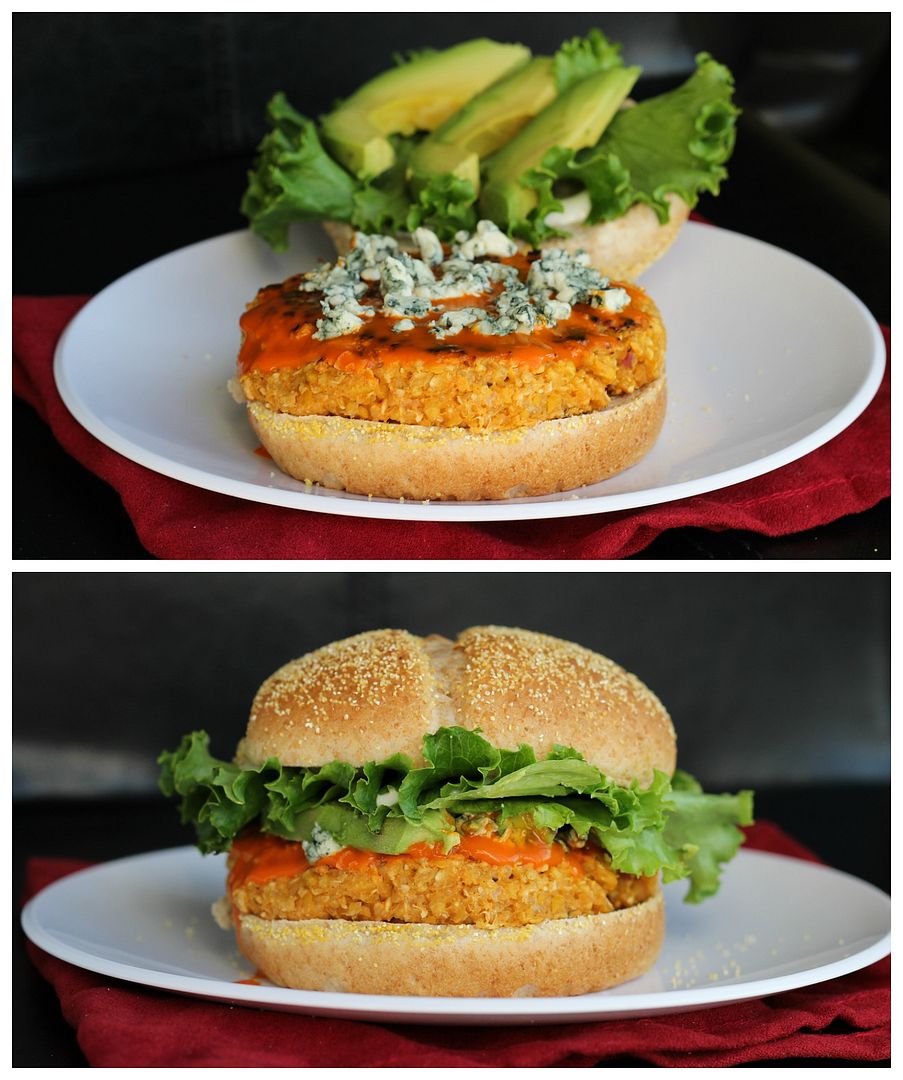
I used the same combination of chickpeas and quinoa as the base of the burger; with shallots and garlic added in for flavour and crunch; oats, breadcrumbs, and an egg to bind them; and buffalo sauce mixed into the patty and served on top for maximum buffalo flavour.  Combined with some blue cheese, lettuce, and avocado as toppings, these were hearty and full of flavour, and we both loved them!  Lesson learned: I should perhaps start listening to my boyfriend’s ideas more often.  Just don’t tell him I admitted that :)

Buffalo chickpea quinoa burgers


Buffalo Chickpea Quinoa Burgers


Makes 5 burgers

Ingredients:

For the Burgers:
1/4 cup uncooked quinoa
1 (540mL) can of chickpeas, drained and rinsed
1/2 cup rolled oats
1/4 cup minced shallot
2 garlic cloves, minced
1/4 cup buffalo sauce (your favourite brand, such as Frank's Red Hot Buffalo Wing Sauce or PC Buffalo Wing Sauce)
1 large egg, lightly beaten
1/2 teaspoon salt
1/4 teaspoon pepper
1/4 cup breadcrumbs

For Assembly:
5 whole grain hamburger buns
Crumbled blue cheese
Additional buffalo sauce
Lettuce
Ripe sliced avocado (optional)

Directions:

Bring 1/2 cup water to a boil.  Add quinoa, cover, reduce heat and let simmer 15 minutes.  Remove from heat and keep covered for 5 minutes.  Fluff with a fork and let cool slightly.
Meanwhile, add chickpeas to the bowl of a food processor or mini chopper and pulse until they are broken down into crumb-sized pieces.  Transfer to a large bowl.  Add oats to same food processor and pulse a few times to break them down into fine crumbs (but not a powder).  Add to chickpeas in large bowl.  Add to the bowl the shallots, garlic, buffalo sauce, egg, salt, and pepper.  Add the cooked quinoa.  Mix everything together with a large fork until well combined.  If mixture is still too wet to form patties, add the 1/4 cup of breadcrumbs (or enough to hold the mixture together).  Divide and shape into 5 patties.

Heat a non-stick skillet over medium-high heat and cook patties for about 4-5 minutes per side.

Assemble burgers by placing patty on bun, topping with additional buffalo sauce, a bit of blue cheese (be careful not to add too much so it’s not overpowering – I though the amount I used (in the pictures) was too much), lettuce, and avocado or tomato if desired.

June 14, 2013

Strawberries & Cream Baked Protein Oatmeal

Strawberries & Cream Baked Protein Oatmeal

I was recently contacted by the nice folks at Visalus to see if I wanted to participate in their '90 for 90' series, where 90 bloggers will create 90 recipes using their Vi-Shape Shake Mix.  For those who haven’t heard of Vi-Shape or their Body by Vi 90 Day Challenge, the shake mix is a low-fat, low-calorie, gluten-free, lactose-free, high protein nutritional shake (like a protein powder but with more vitamins, from my understanding) that tastes and smells like cake mix!

I haven’t loved a lot of protein powders I’ve tried before, but this one actually smells just like cake mix, and I liked that it had more than just protein in it, so I was intrigued to try it in a recipe!

Strawberries & Cream Baked Protein Oatmeal

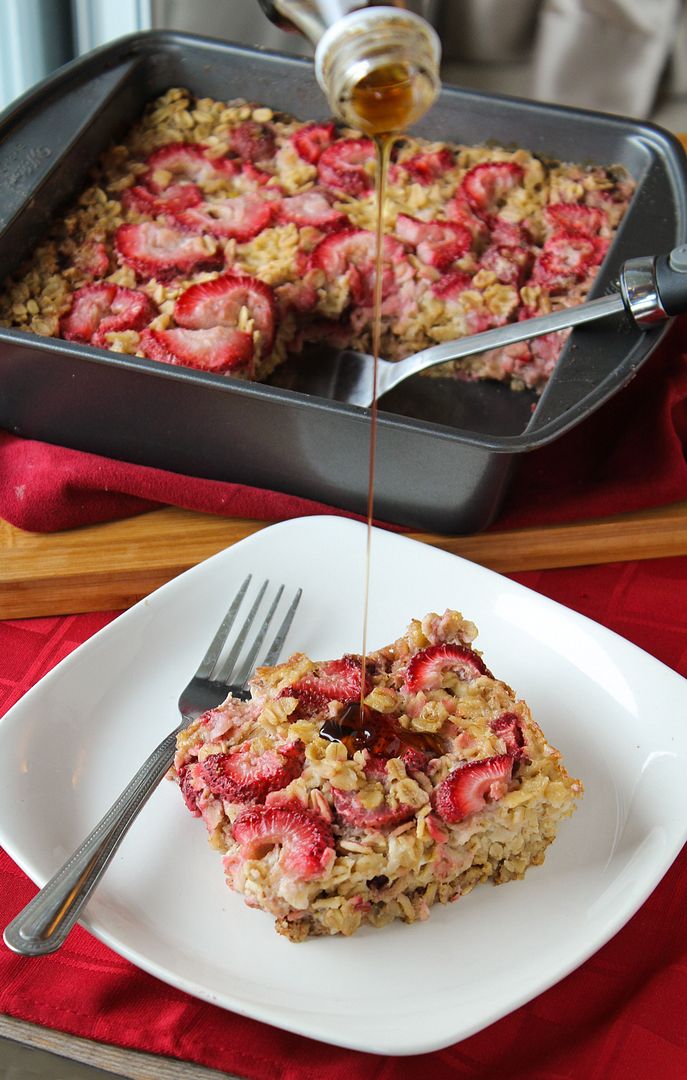
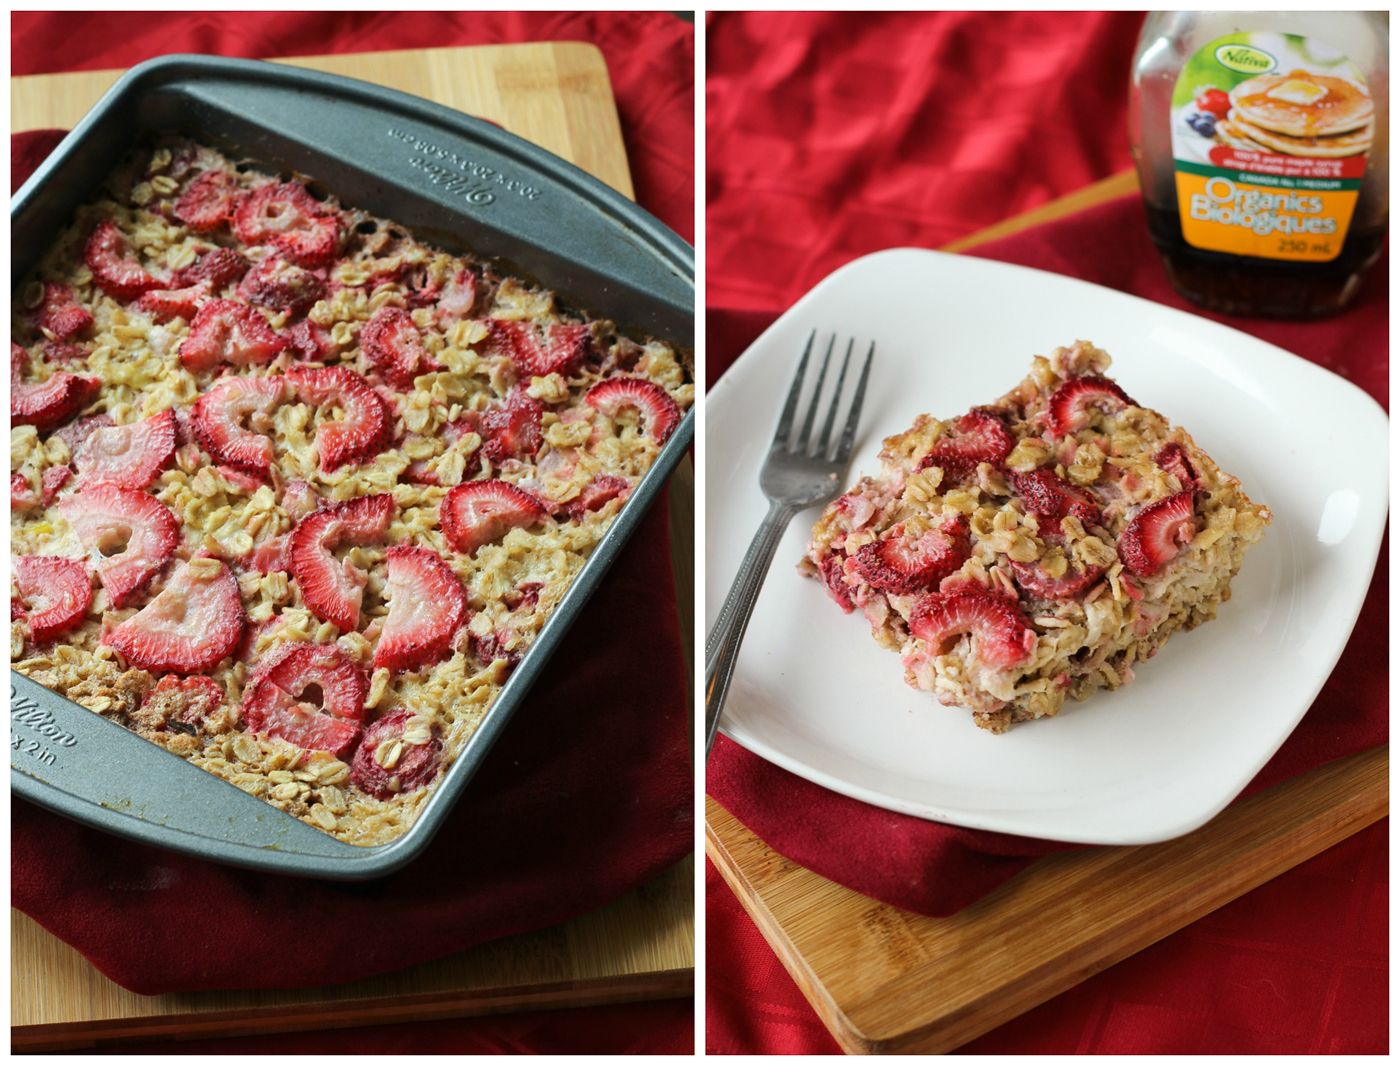
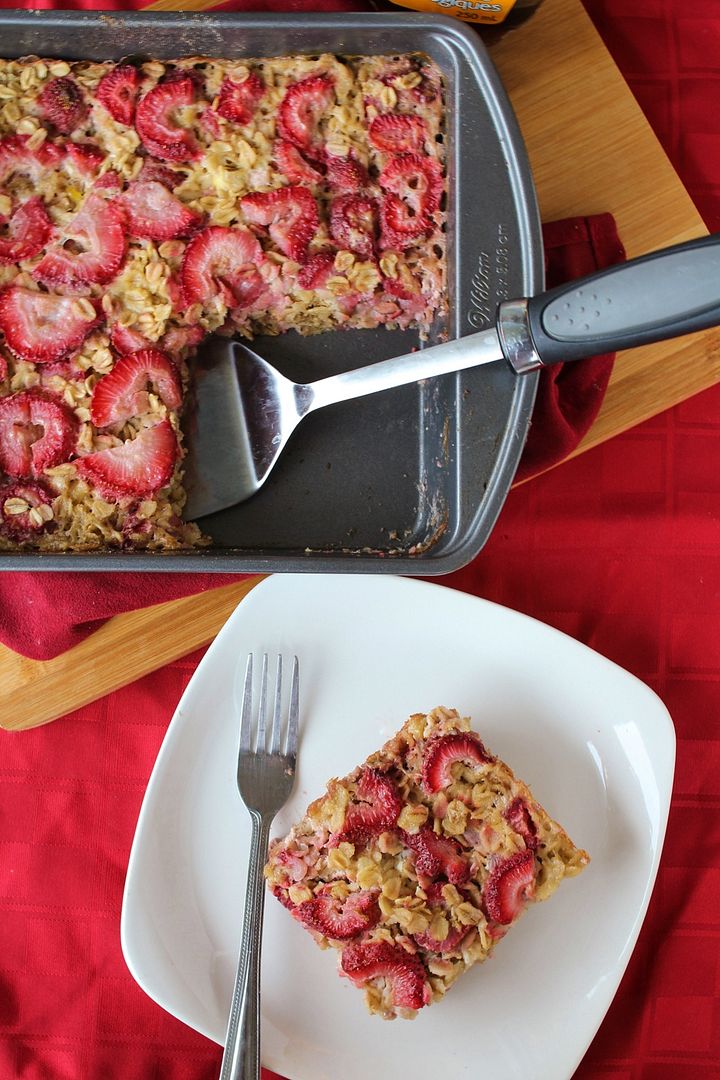
I came up with a few ideas before settling on my favourite one, this baked strawberries & cream oatmeal.  I love having oatmeal in the morning because it’s healthy and filling, but I’m usually too lazy to stand over a pot and wait for it to cook in the morning (and the instant stuff doesn’t usually cut it for me).  Baked oatmeal is so much better because you can mix together a batch, throw it in the oven to cook (hands-off), then have a bunch leftover for breakfasts through the week!

Strawberries & Cream Baked Protein Oatmeal

I looked at a lot of baked oatmeal recipes in developing this recipe, and most seemed to use a technique where they dump the oats and dry ingredients into the baking pan, then pour the wet on top and throw it in the oven, so the wet ingredients would slowly seep down through the oatmeal as it cooks.  The problem I had with this was that all the finer dry ingredients just fell right to the bottom, so you’d get super strong bites of cinnamon and salt when you got to the bottom, and the wet ingredients didn’t sink all the way down so I ended up with little bits of cooked egg on top, which wasn’t very appealing.

So the next time I just mixed all the wet and dry ingredients together before going in the pan, and it worked so much better, giving me firm, evenly mixed, and evenly baked delicious oatmeal.  The pictures I took were of the first version, but since they turned out well I didn’t bother redoing them because the next version looks almost the exact same.  Just picture this but a little more evenly cooked :)

Strawberries & Cream Baked Protein Oatmeal

Because the mix tastes like cake mix, it almost seems like you’re eating dessert for breakfast, and yet this is a healthy way to start the day, with only minimal sugar, no butter or oil, and lots of protein and vitamins from the Vi-Shape.  Some baked oatmeal recipes require lots of sugar and butter, and I tried this with more sugar and some olive oil instead of butter at first, but found I could reduce the sugar a lot and that the olive oil wasn’t even necessary.
I’m in love with this breakfast now, but I might have to use the rest of my Vi-Shape in some of the other amazing recipes I’ve been seeing, like individual vanilla cakes from Running to the Kitchen, yogurt covered blueberries from The Hungry Housewife, power waffles with cinnamon cream syrup from The Family Feed, or breakfast strawberry shortcake from A Nutritionist Eats - yum!

Strawberries & Cream Baked Protein Oatmeal

Strawberries & Cream Baked Protein Oatmeal

Makes 4-6 servings

Ingredients:

2 cups large-flake rolled oats (old fashioned oats)
1/4 cup light brown sugar
1 teaspoon baking powder
1/2 teaspoon salt
1 teaspoon cinnamon
1/2 cup Vi-Shape nutritional shake mix
1-1/2 cups sliced strawberries
2 cups low-fat milk (any type, as long as it's unsweetened - I’ve used almond milk and coconut-almond milk)
1 large egg
2 teaspoons vanilla extract

Directions:

Preheat oven to 375°F and spray an 8x8-inch square baking dish with non-stick cooking spray.
In a large bowl, whisk together the oats, sugar, baking powder, salt, cinnamon, and Vi-Shape.  In a separate medium bowl, whisk together the milk, egg, vanilla.  Add the wet ingredients to the dry ingredients and fold together with a flexible spatula until combined.  Stir in about 1 cup of the strawberries.  Pour mixture into prepared pan and spread out evenly as best as possible with your spatula.  Arrange remaining strawberries evenly on top (don’t press down on them so they stay on top).

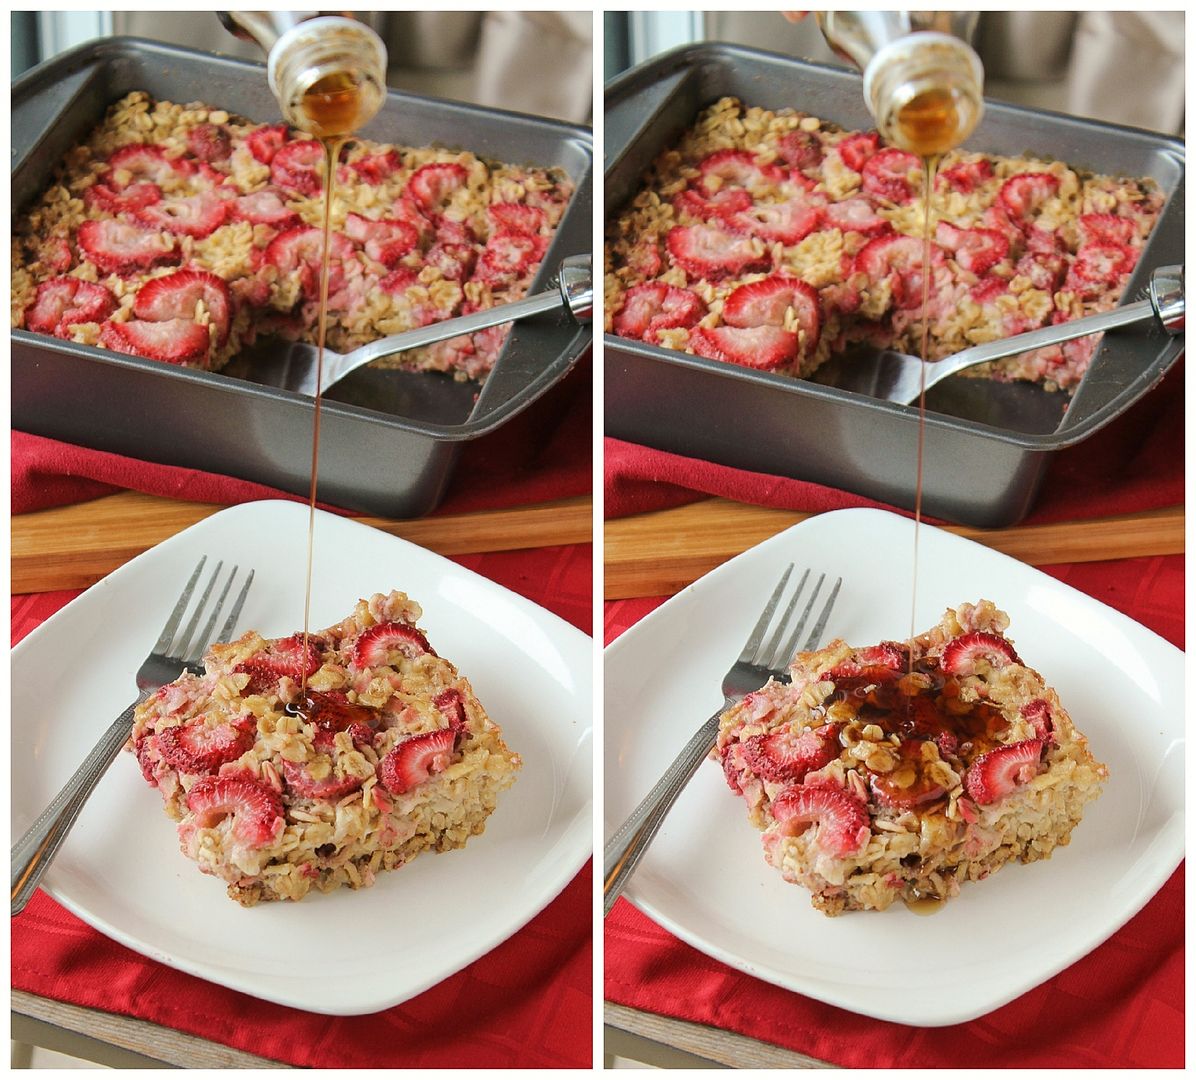
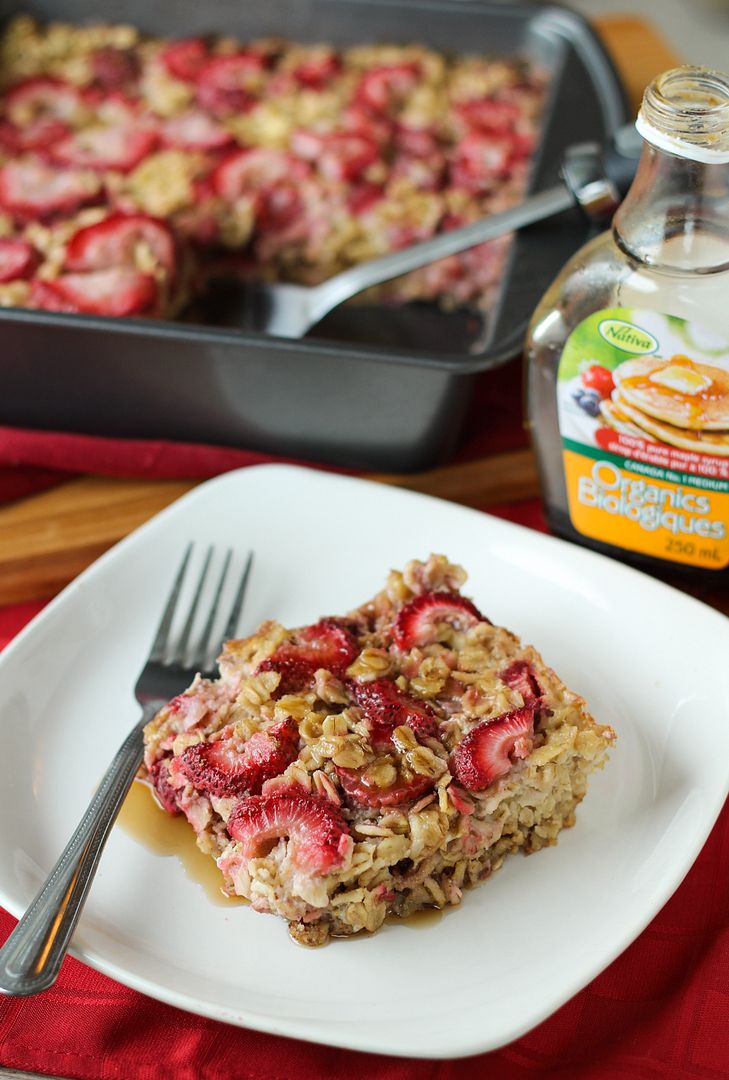
Bake in preheated oven for 35-40 minutes until golden brown and set.  Let cool for a few minutes before slicing.  Serve warm, with maple syrup if desired.

------------------------------------------------------------------------------------------------------------------------
Disclosure: This post was sponsored by Visalus.  I'm happy to talk about their product, but they didn't tell me to - all thoughts and opinions I share on this blog are completely my own. :)  If you have any questions about Vi-Shape, please check out this page.

June 11, 2013

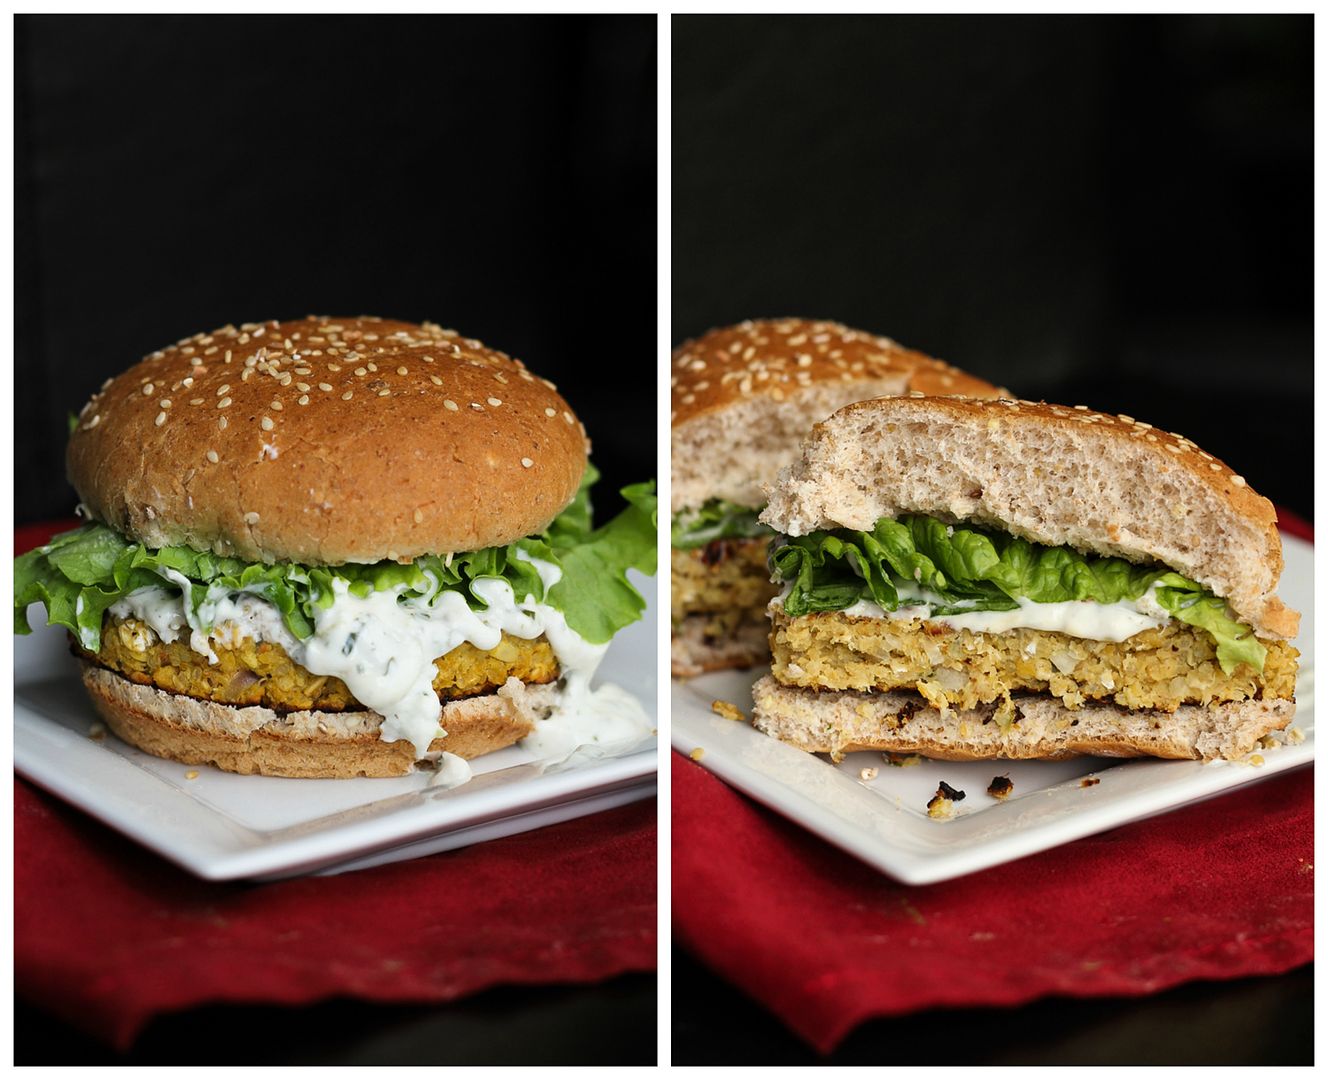
Lemon Chickpea Quinoa Burgers

Lemon Chickpea Quinoa Burgers

I love those free little newspaper/magazines that grocery stores put out to advertise their new products every season, mostly because I love anything that’s free, but also because I’m always looking for new sources of inspiration for ingredients and recipes.  It’s not often that I find a recipe I actually like in there, but when I saw these lemon chickpea quinoa burgers in the latest issue of Inspired (by Sobeys), I was intrigued because I’ve never seen anything quite like it.

So, I got right to work making my own version, with shallots instead of red onion, basil instead of parsley, more oats to firm the mixture up a bit, and a lemon yogurt sauce to serve with them.  I also refrained from processing the whole mixture to keep some texture in them, and I pan-fried my burgers instead of barbequing them (because I don’t have a bbq), but I think they’d be firm enough to bbq if you want to give it a try!

Lemon Chickpea Quinoa Burgers

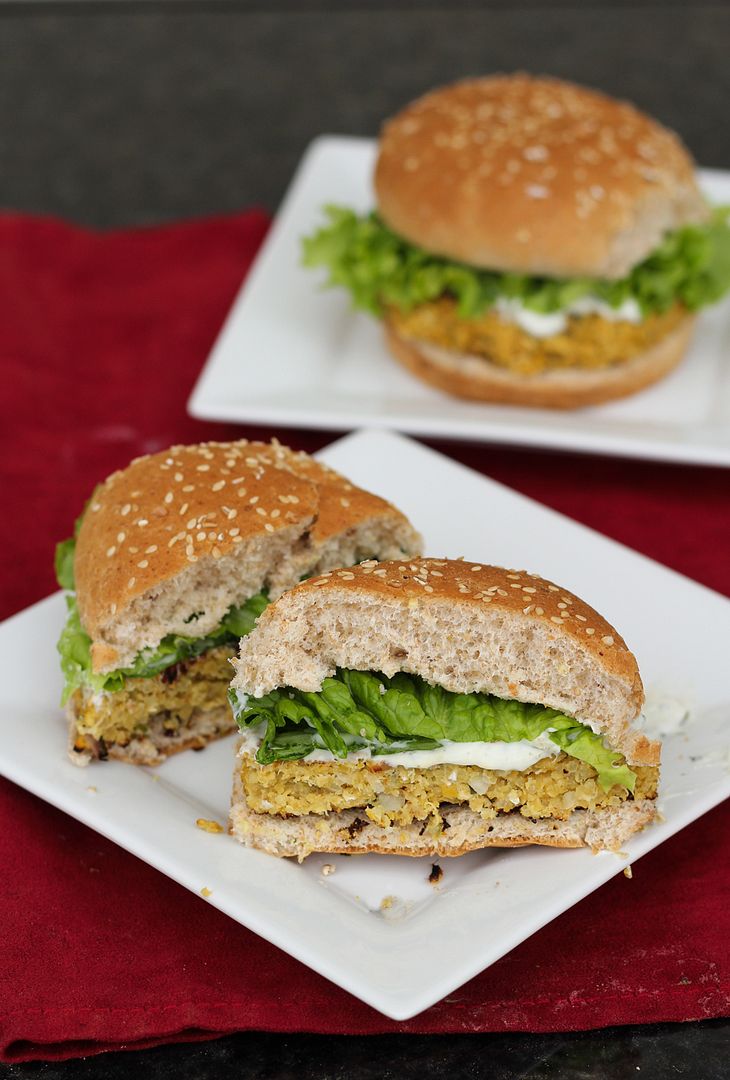
I loved the texture of the burgers, which held their shape and had a bit of crunch from the quinoa, and I loved the bright lemon flavour that really shone through in both the burgers and yogurt sauce.  I also think they would work really well as cute little vegetarian sliders at a bbq!

And as far as burgers go, these are pretty darn healthy!  They’re full of protein from the addition of chickpeas, quinoa, and Greek yogurt, as well as fiber from the oats and whole grain buns, and vitamins from the veggies and lemon.  

Lemon Chickpea Quinoa Burgers

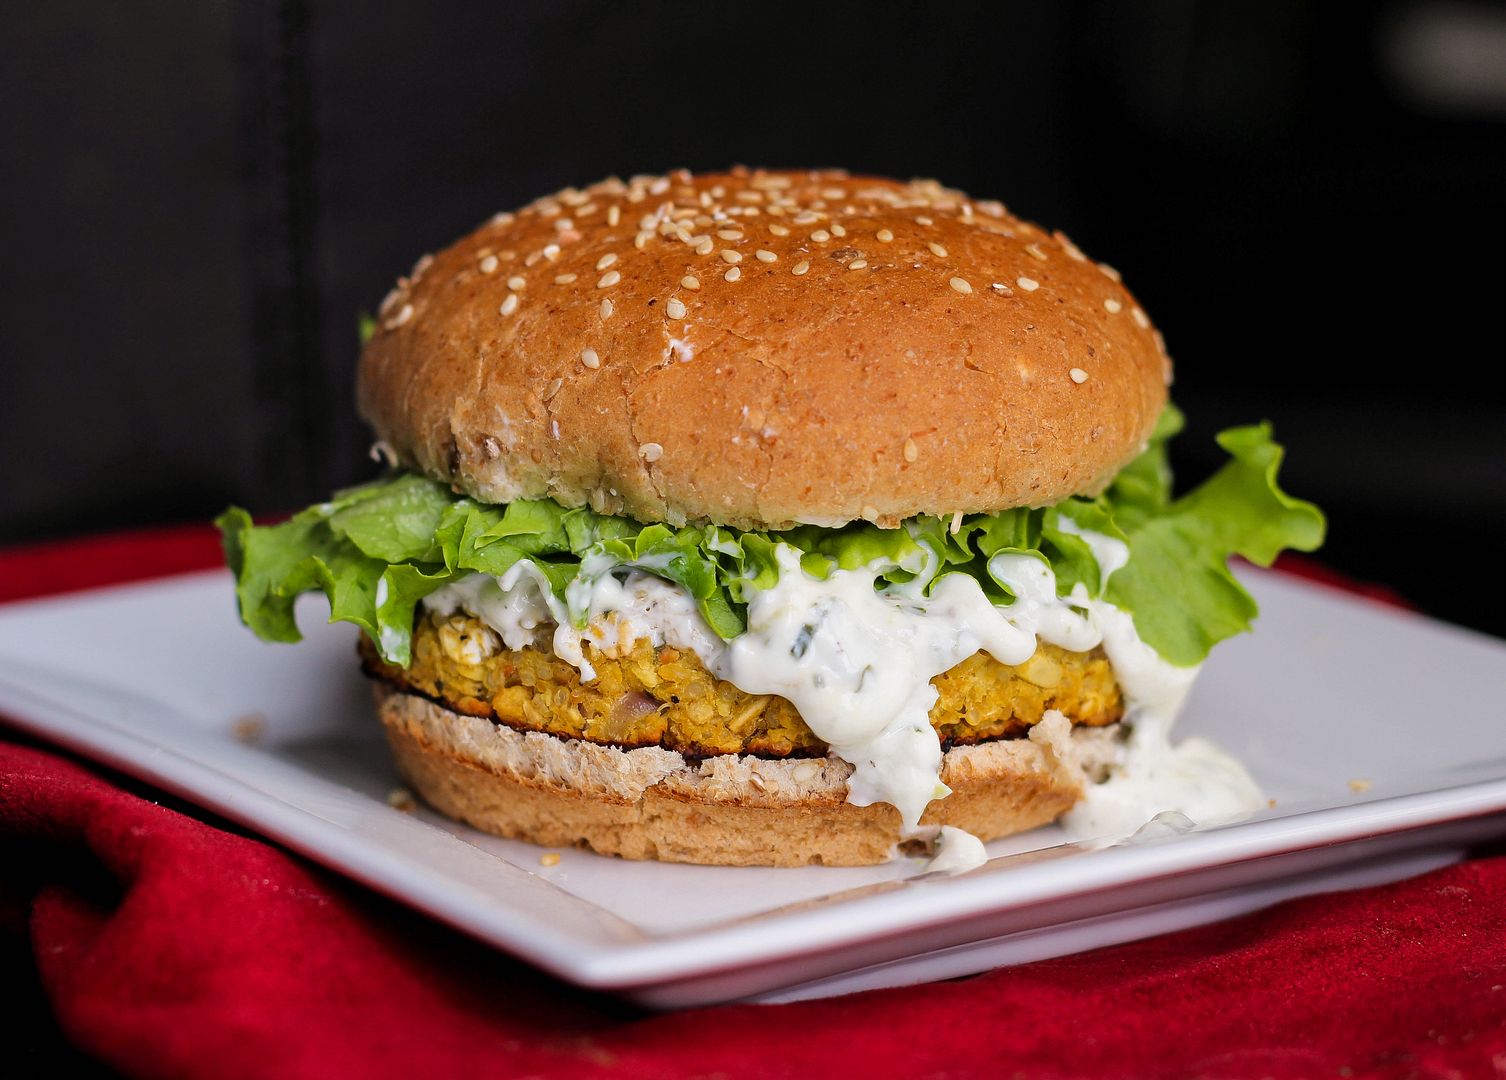
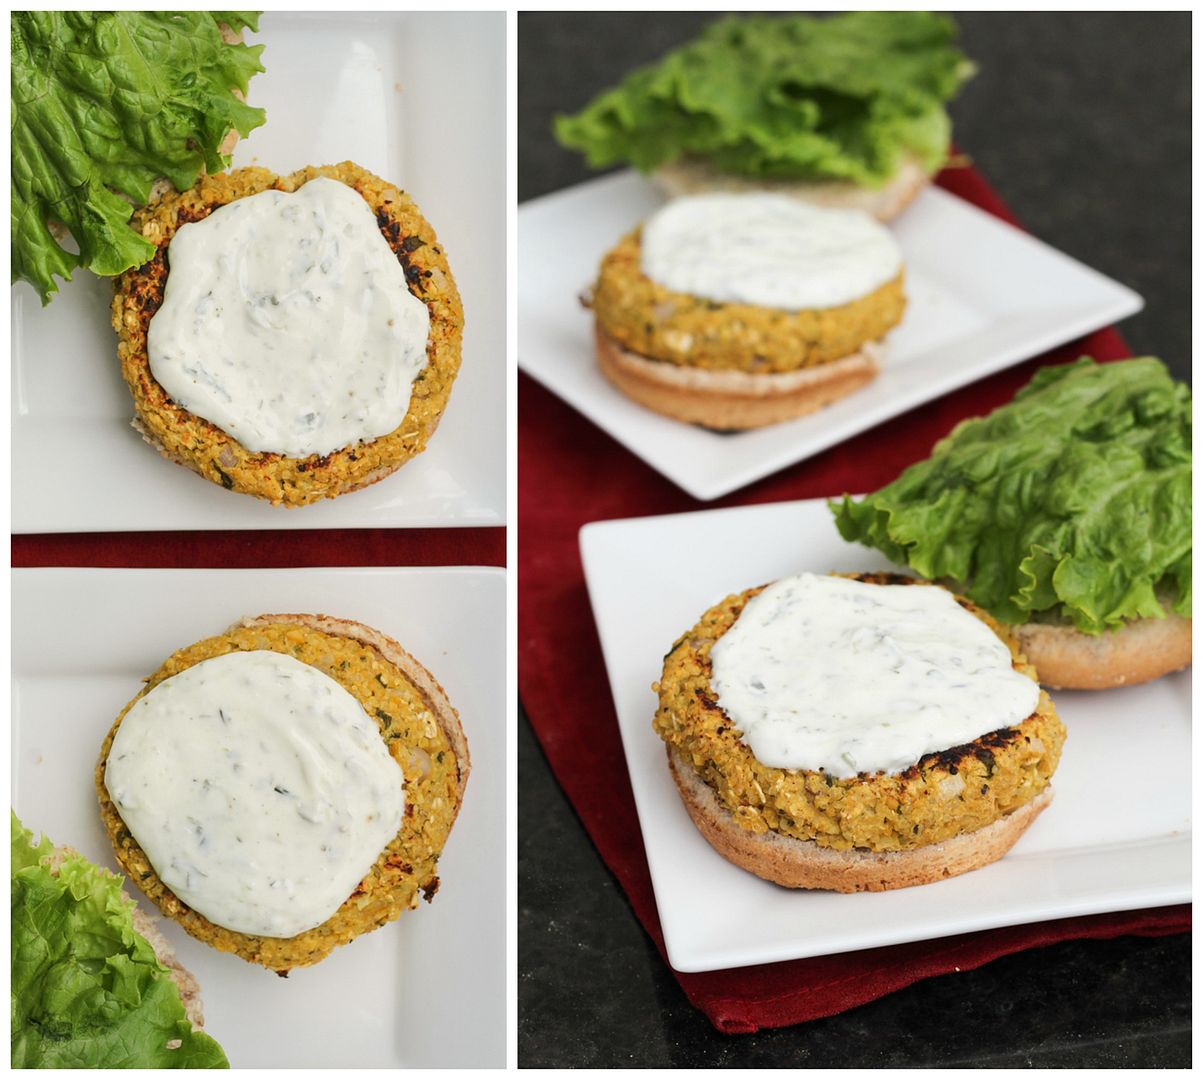
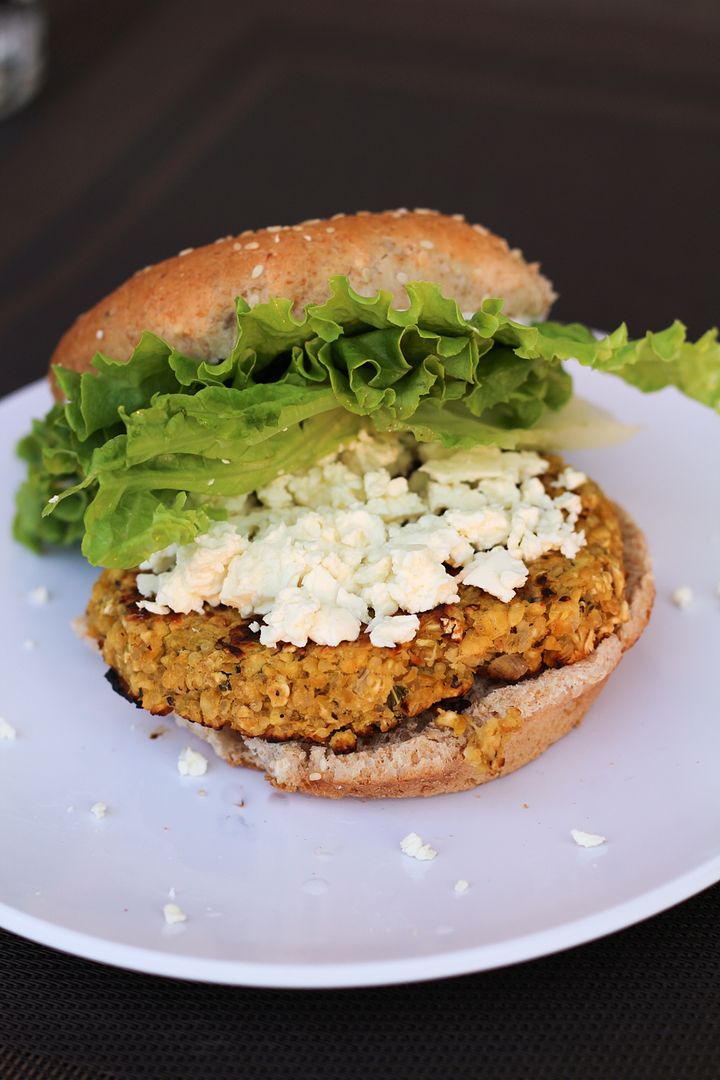
After tasting them, I did think they needed a little something extra to balance out all the lemony-ness, so the next night I added feta cheese on top of the burger, and the saltiness of the feta was the perfect thing to balance out the sour lemon.  So don’t leave out the feta!

(I had to take a quick shot the next night to document the feta since it wasn’t in any of the other pictures.  I went a little heavy with the feta, but a lot of it falls out anyway!  The sauce is still there, on top of the lettuce):

Lemon Chickpea Quinoa Burgers

Of course, the boyfriend said that these were good, but that next time I should maybe make them with buffalo or chipotle sauce instead of lemon (he’s not much of a lemon person, except for lemon poppy seed bread). 

But while these may not be much of a manly burger, I think the fact that he was willing to eat them for dinner three nights in a row shows that they’re still pretty tasty!

Lemon Chickpea Quinoa Burgers

Lemon Chickpea Quinoa Burgers

Adapted from Inspired

Makes 5 burgers

Ingredients:

For the Burgers:
1/4 cup uncooked quinoa
1 (540mL) can of chickpeas, drained and rinsed
1/2 cup rolled oats
1/4 cup minced shallot
2 garlic cloves, minced
1 tablespoon lemon zest
2 tablespoons fresh lemon juice
1 large egg, lightly beaten
1 teaspoon cumin
1/2 teaspoon salt
1/2 teaspoon pepper
2-3 tablespoons packed minced basil (or parsley if you like)

For the Sauce:
1/2 cup plain Greek yogurt
1 tablespoon fresh lemon juice
1 tablespoon minced basil
Salt and pepper

For Assembly:
5 whole grain hamburger buns
Lettuce
Feta cheese (low-fat, if desired)

Directions:

Bring 1/2 cup water to a boil.  Add quinoa, cover, reduce heat and let simmer 15 minutes.  Remove from heat and keep covered for 5 minutes.  Fluff with a fork and let cool slightly.

Meanwhile, add chickpeas to the bowl of a food processor or mini chopper and pulse until they are finely ground.  Transfer to a large bowl.  Add oats to same food processor and pulse a few times to break them down into fine crumbs (but not a powder).  Add to chickpeas in large bowl.  Add to the bowl the shallots, garlic, lemon zest, lemon juice, egg, cumin, salt, pepper, and basil.  Add quinoa.  Mix everything together with a large fork until well combined.  (note: leave the egg to mix in last if you want to be able to taste the mixture first and adjust seasonings or lemon juice to your liking). Divide and shape into 5 patties.

Heat a non-stick skillet over medium-high heat and cook patties for about 4-5 minutes per side.

Meanwhile, prepare yogurt sauce by mixing yogurt, lemon juice, and basil, and seasoning with salt and pepper to taste.

Assemble burgers with yogurt sauce, lettuce, and feta on whole grain buns.

September 18, 2012

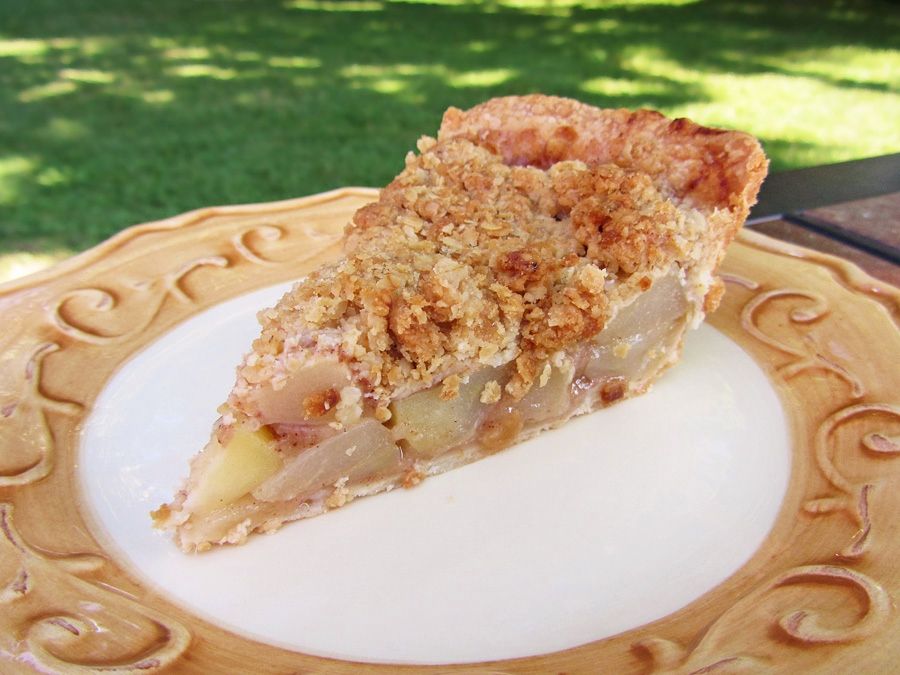
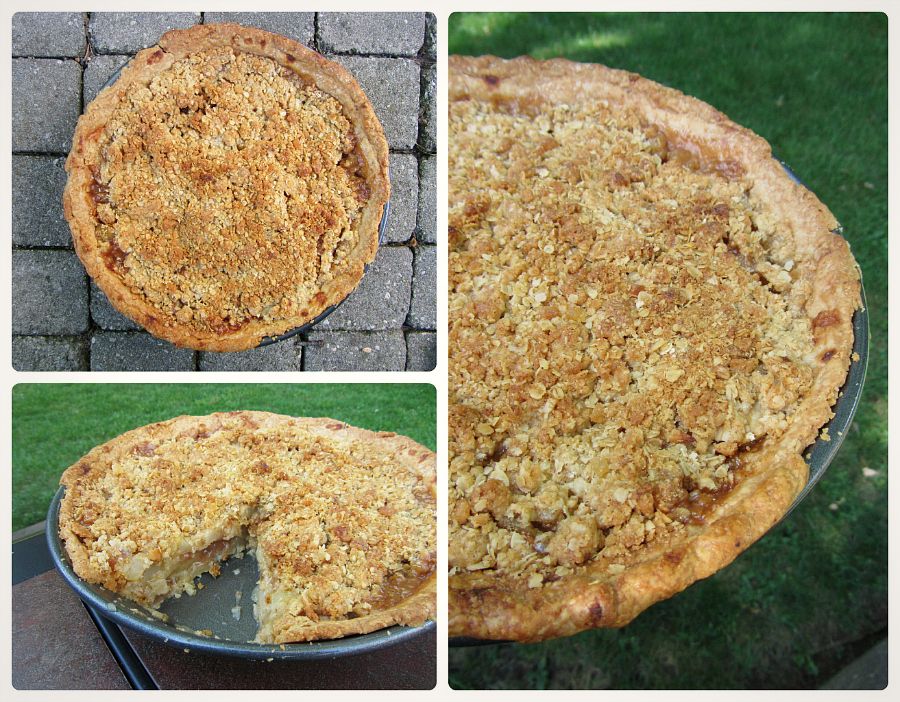
Autumn Fruit Ginger Crumble Pie

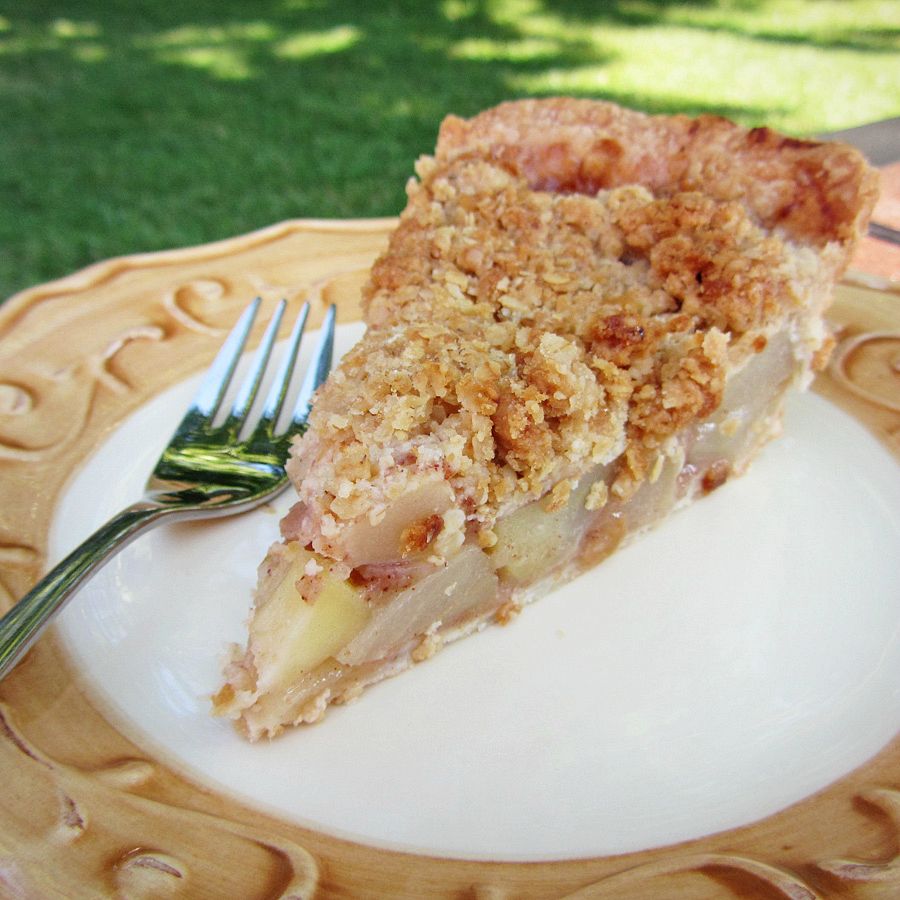
Autumn Fruit Ginger Crumble Pie

If given the choice between pie and cake, I’d choose pie every time.  Buttery pie dough wrapped around a creamy or fruity filling is just so much more appealing to me than cake and icing (not that I don’t love a good cake!).   Surprisingly though, there are very few pie recipes on my blog - apart from mini pies and a frozen peanut butter pie, both of which aren’t really the type of thing that comes to mind when you hear the word ‘pie’.  I guess it’s because I usually make cake when there’s a celebration, and if I’m making a dessert just for fun, I usually make cookies or bars because they’re easier to transport and share with others.  Pie just doesn’t seem to fit in anywhere!

But when I saw the autumn fruit pie with ginger crumble topping in this fall’s Food & Drink magazine (a wonderful magazine that’s free at the LCBO, which is where us Ontarians go to buy our alcohol), I knew I had to make it.  I love apple pie, but I also love unusual twists on classic desserts, so I loved that this version added pears and ginger!

Autumn Fruit Ginger Crumble Pie

I also liked that this pie was deep-dish, so I went out and bought a deep dish pie pan just for it.  But then on the day I wanted to make it, I already had a ton of stuff to do so I decided to use a storebought frozen pie crust instead.  I chose one that specifically said ‘deep dish pie crust’ on the box, but when I opened it up at home, it looked the exact same as a regular pie crust.  When I placed it in my deep dish pie pan to compare the size, it only went halfway up the sides of the pan.   Why do they call it deep dish if it’s not deep at all!?

Since at this point it was too late to make my own dough, I ended up cutting apart and piecing together two of the so-called deep dish pie crusts (thankfully there are two in a box) into one true deep-dish crust, and placing it in my pan.  At least the pan I bought came in handy!  So if you’re worried about the same thing happening to you, I’d recommend just making your own pie dough – it’s really not that hard and probably would have taken me less time than it did to piece together the two frozen ones!

Autumn Fruit Ginger Crumble Pie

Despite that little setback, this pie turned out wonderfully.  The pears and ginger add a nice little twist to an apple pie without taking it too far from the classic apple pie flavour we all love.  I was a little worried that the ginger would be overpowering, but it was actually quite subtle.  I almost would have preferred a stronger ginger flavour, but others thought that it was just right. 

Based on how quickly this pie disappeared (and everyone complained about only getting one piece, myself included), I think I need to start making pies more often!

Autumn Fruit Ginger Crumble Pie

Autumn Fruit Ginger Crumble Pie

Slightly adapted from Food & Drink, Autumn 2012 (issue not yet online)

Makes 1 deep dish pie

Ingredients:

1 deep dish 9-inch pie crust
3 cups peeled and sliced cooking apples (about 2-3 apples)
3 cups peeled and sliced just-ripe pears (about 3 pears)
3 tablespoons fresh lemon juice
1/3 cup packed brown sugar
1/4 cup all-purpose flour
1/2 teaspoon ground ginger
1/2 teaspoon cinnamon
1/4 teaspoon nutmeg

For the Crumble Topping:
3/4 cup rolled oats
1/4 cup all-purpose flour
3 tablespoons packed brown sugar
2 tablespoons finely chopped crystallized ginger
1/3 cup unsalted butter, cut into small pieces

Directions:

Preheat oven to 450°F.  If using a storebought deep dish frozen pie dough, allow to thaw 10-15 minutes before you’re ready to fill and bake the pie.*  Otherwise, you can prepare your favourite pie dough recipe, roll it into a deep-dish pie pan, and chill while preparing the filling.

Place apples, pears, and lemon juice in a large bowl.  Add the brown sugar, flour, ginger, cinnamon, and nutmeg, and toss everything together until fruit is well coated.  Transfer filling and any juices to the prepared pie shell, spreading it evenly and packing gently. 

Prepare the crumble by mixing oats, flour, brown sugar, and ginger in medium bowl, and cutting in the butter with a pastry cutter or fork until the mixture clumps together.  Sprinkle crumble over the fruit.

Place pie on a baking pan to catch any drippings and bake in lower third of oven for 15 minutes or until pastry edge looks cooked.  At this point, I wrapped a thin strip of aluminum foil around the edge of my pie to prevent the crust from burning.  Reduce oven heat to 375°F and bake for another 50 minutes or until juices are thick and bubbling and topping is brown.  Remove from oven and let cool completely before slicing.

This pie is great at room temperature, but I preferred it warmed up.

*Note: I bought a Tenderflake deep dish pie crust, but it was not as deep as a standard deep dish pie pan.  I ended up transferring the dough to a deep dish pie pan, then cutting dough from the second crust in the box and pinching it together with the other dough so that I had enough crust to fill the pan.

August 24, 2012

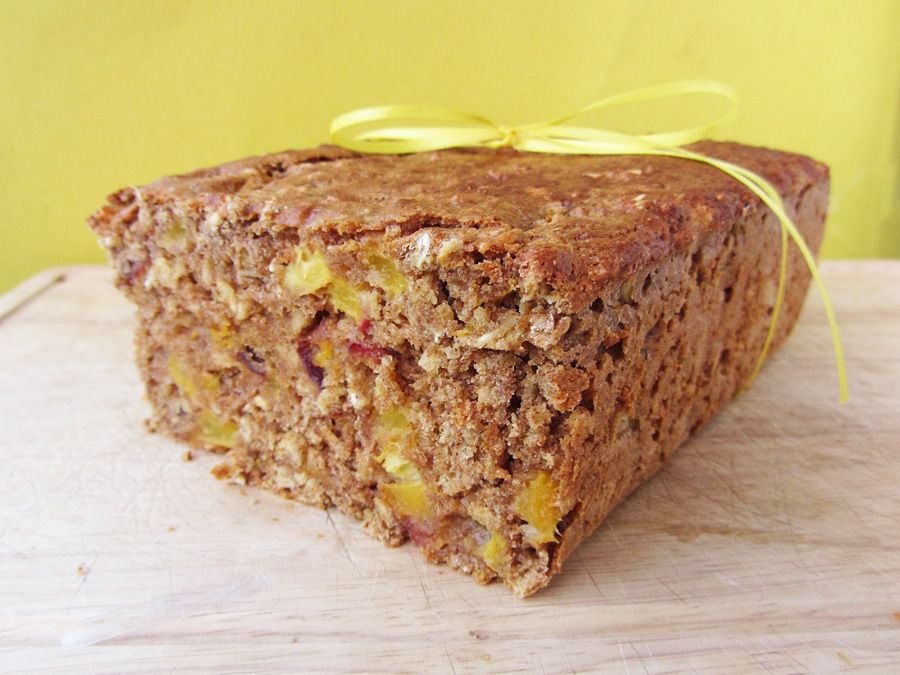
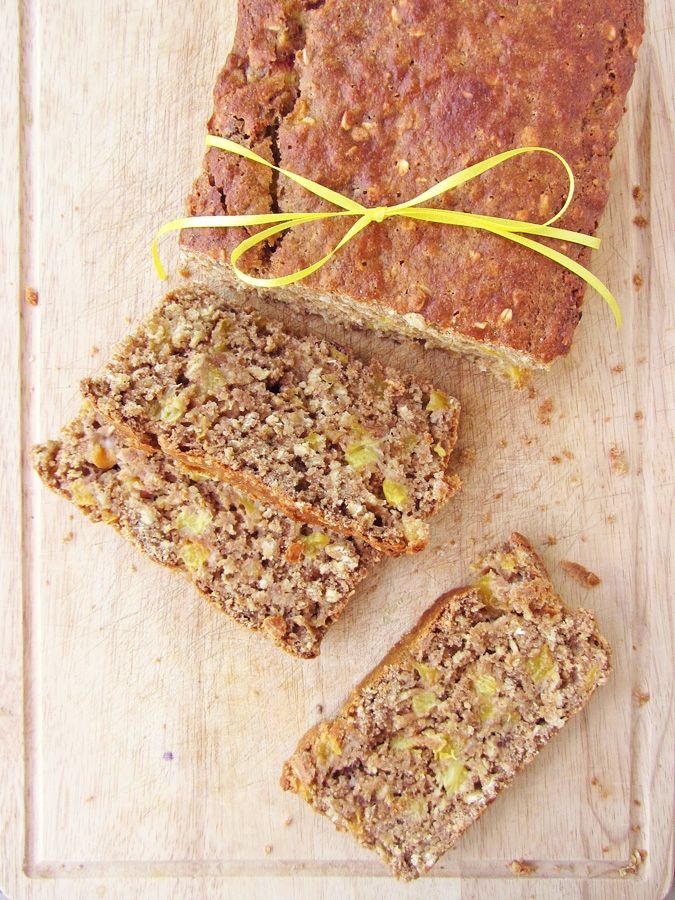
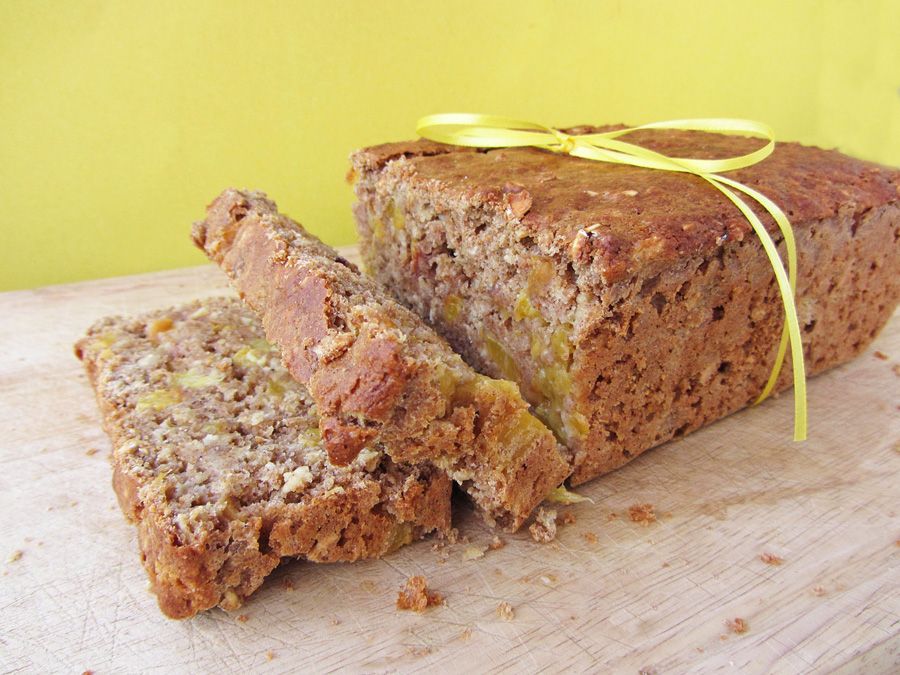
Whole Wheat Peach Oatmeal Bread

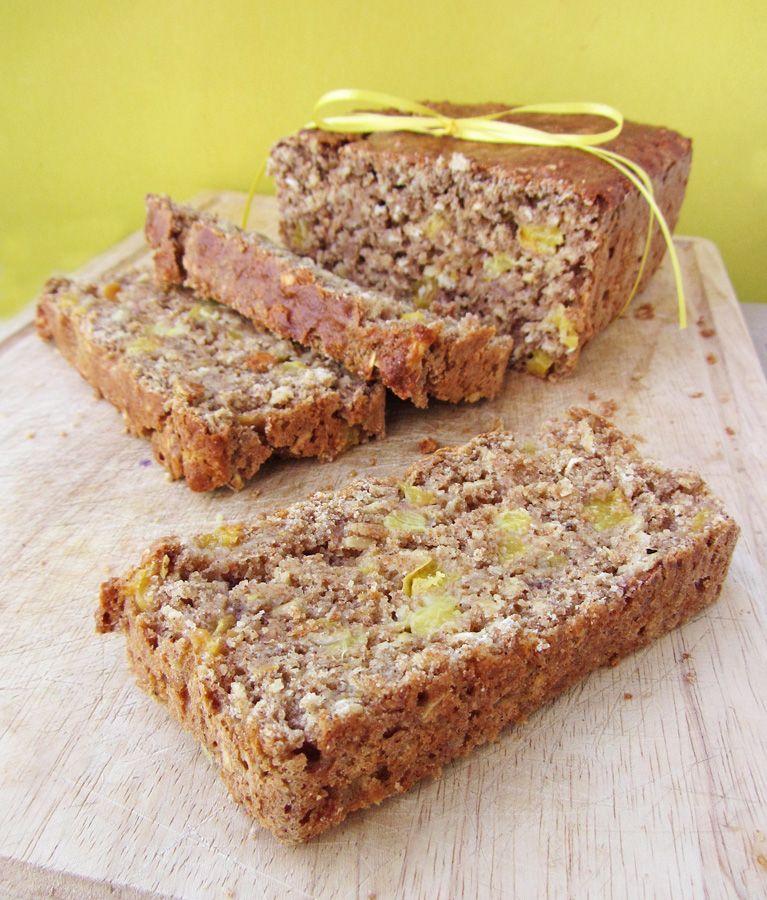
Whole Wheat Peach Oatmeal Bread


It seems that this time of year seems to divide people into two camps: those who are already dreaming of pumpkin pie, apple cider, cozy sweaters, and all those warm and fuzzy things that go along with the fall season, and those who are not yet ready to say goodbye to warm weather, long days of sunshine, and abundant fresh summer fruits and veggies.  I definitely fall into the latter camp; as much as I love fall, I always feel like summer’s way too short and I haven’t fit in enough peach/tomato/blueberry/corn/basil/etc. goodness yet!

Whole Wheat Peach Oatmeal Bread


I also feel like I have a ton of summer recipes still to share with you guys and I’m running out of time to do so, so I’m trying to switch from two to three posts per week over these last few weeks of summer.  So because I’ve spent more time than usual on blogging this week and also seem to have WAY more schoolwork than usual this week, I’m going to keep today’s post fairly short!

Whole Wheat Peach Oatmeal Bread


This is a dense, hearty bread with bursts of sweet peaches and hints of warm spices throughout, so it’s perfect for this transition period from summer to fall.  It’s also pretty healthy, made with whole wheat flour and oats, non-fat yogurt, and only 2 tablespoons of oil.  I’ve been loving eating it for a snack every day this week just on its own, but I think it would be amazing toasted with fresh peach jam too!

Whole Wheat Peach Oatmeal Bread


Whole Wheat Peach Oatmeal Bread

Adapted from King Arthur Flour Whole Grain Baking, via Slow Like Honey

Makes one 9x5 inch loaf

Ingredients:

2-1/2 cups whole wheat pastry flour
1/4 cup sugar
1/2 cup packed brown sugar
1 tablespoon baking powder
1/2 teaspoon baking soda
1/2 teaspoon kosher salt
1 teaspoon cinnamon
1/4 teaspoon nutmeg
1 cup old fashioned rolled oats
2 cups diced ripe peaches (from about 3 peaches)
2 large eggs (I used Omega 3 eggs)
1 cup plain non-fat yogurt
2 tablespoons vegetable oil
1 teaspoon pure vanilla extract

Directions:

Preheat oven to 350°F.  Line a 9 x 5 inch loaf pan with parchment paper and spray with cooking spray.

Whisk together the dry ingredients (flour through oats) in a large bowl.  Add the diced peaches and stir to coat the peaches.  In a separate bowl, whisk the eggs, yogurt, oil, and vanilla extract.  Add the wet ingredients to the dry ingredients, stirring until just evenly moistened.

Pour the batter into the prepared pan and bake for 50-60 minutes, until a toothpick inserted in the center comes out clean.  Let cool in the pan for 10 to 15 minutes, then remove and let cool completely on a wire rack before slicing.

Ingredient Index

Related Posts Plugin for WordPress, Blogger...