Showing posts with label oil - canola. Show all posts

January 13, 2014

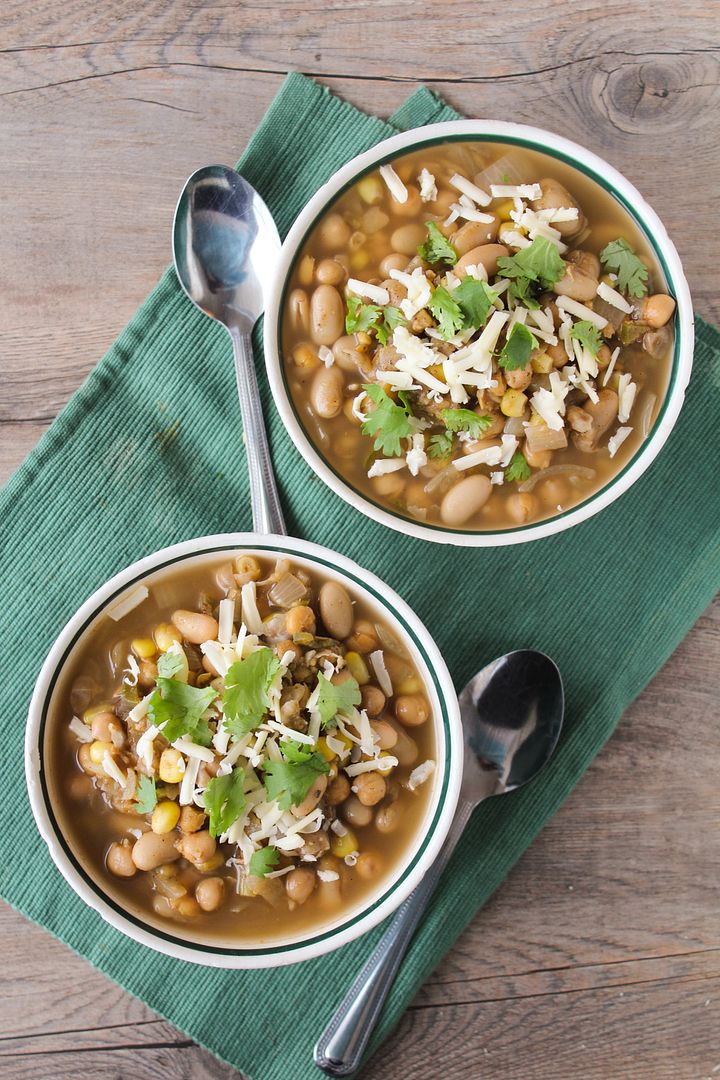
White Chickpea Chili

White Chickpea Chili - a healthy and easy vegetarian twist on white chicken chili

With the cold weather a lot of us experienced last week (except those lucky people in California!), I’m sure we’ve all been eating lots of warm comfort food lately.  When it gets that cold out all I want for dinner is soup, stew, or chili, but as these can often involve a lot of cooking time to develop enough flavour, during the week I need something that’s a little more quick and easy to prepare.  

Enter white chickpea chili!
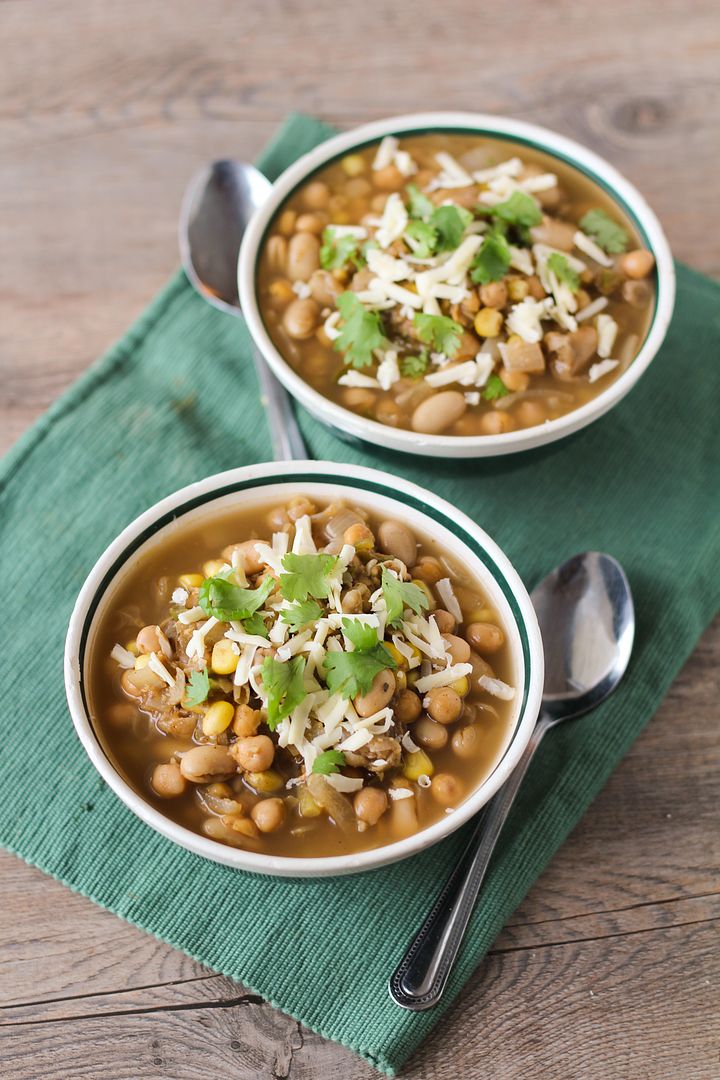
White Chickpea Chili - a healthy and easy vegetarian twist on white chicken chili

I love white chicken chili as a refreshing change from tomato-based versions, but I decided to make it a little easier and cheaper to make by using all beans and no chicken.  This vegetarian white chili includes mashed chickpeas throughout for thickness, whole chickpeas and white beans for texture (and tons of protein, so you won’t miss the meat!), some corn for a little sweetness, jalapeno for spice, and then vegetable broth, garlic, onions, and seasonings for plenty of flavour.

You end up with a healthy vegetarian chili that’s inexpensive, easy and fairly quick to make, and full of flavour.  Perfect for these cold winter nights, and also Sunday playoffs if you usually associate football with chili (and if you're still watching - my team's still in it so I'm all about the football food!)

Hope you all had a good weekend and are dethawing a bit now!
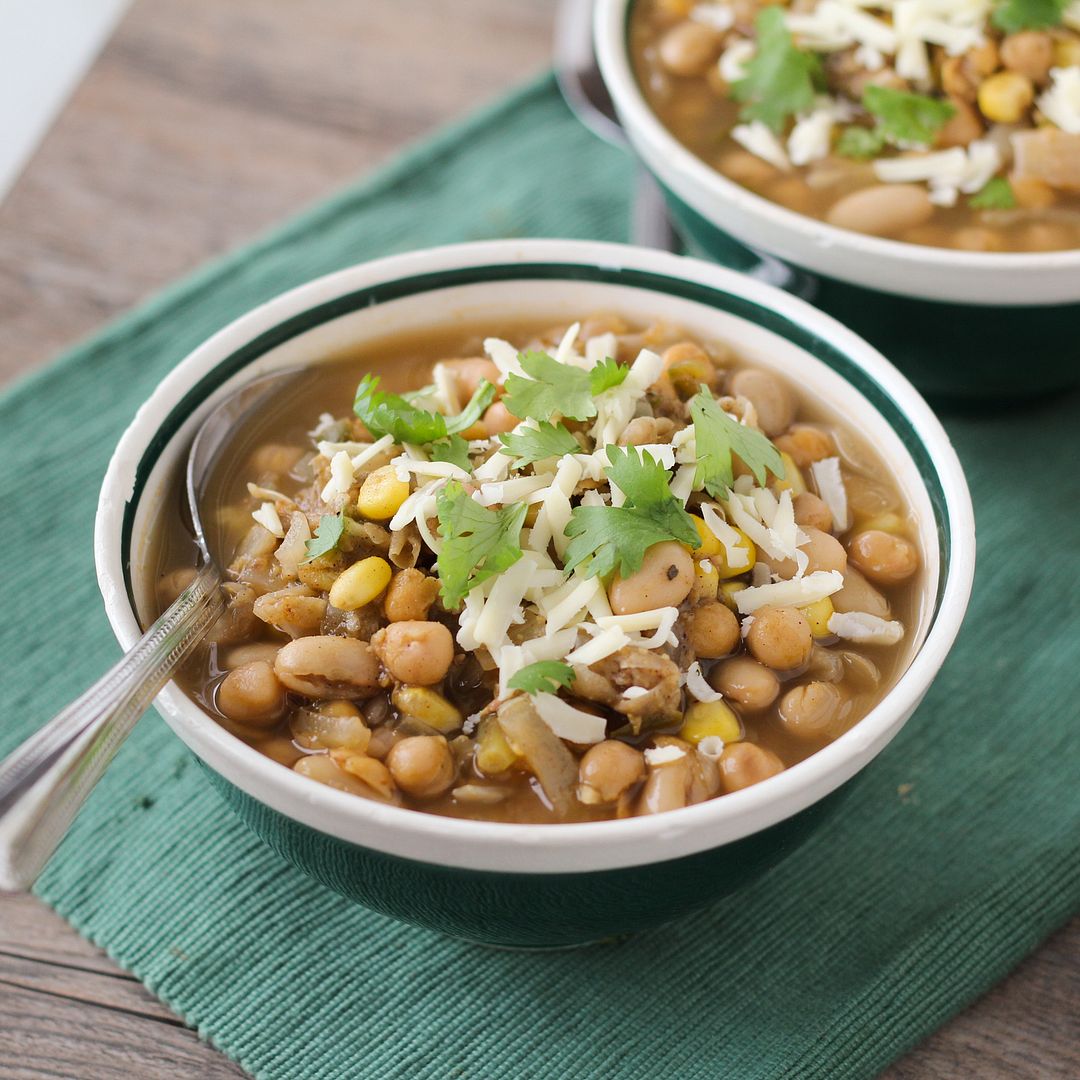
White Chickpea Chili - a healthy and easy vegetarian twist on white chicken chili

White Chickpea Chili

Adapted from The Neely’s white chicken chili recipe

Serves about 4

Ingredients:

1 teaspoon olive or canola oil
1 large or 2 small yellow onions, chopped
2 cloves garlic, minced
1 jalapeno, minced (use more if you want it to be spicier)
2 (540mL) cans chickpeas, drained and rinsed, divided
1 (540mL) can white kidney beans, drained and rinsed
2 teaspoons ground cumin
1 teaspoon chili powder
1 teaspoon dried oregano
4 cups low sodium vegetable broth
1 tablespoon fresh lime juice
1 cup frozen corn kernels
Salt and pepper to taste

Toppings:
Shredded white cheddar cheese
Chopped fresh cilantro
Light sour cream
Chopped ripe avocado (not pictured in my version but it would be a nice addition!)

Directions:

Heat oil in a large saucepan or Dutch oven over medium-high heat. Add onions, garlic, and jalapeno, stir to coat with oil, and sauté until soft and fragrant, stirring occasionally, about 5 minutes.

Meanwhile, rinse and drain your cans of beans, keeping one can of chickpeas separate. Transfer those chickpeas (1 can) to a medium bowl and mash with a potato masher until most beans have been smashed. Set aside.

Add cumin, chili powder, and oregano to the onion mixture in the pan. Stir to coat and let cook for about 1 minute. Add vegetable broth, lime juice, corn kernels, mashed beans, and remaining beans. Bring to a boil, then reduce heat to simmer and let cook about 10-15 minutes.

Season with salt and pepper to taste. Serve warm in bowls topped with shredded cheese, cilantro, a dollop of sour cream, avocado, and additional lime wedges, if desired.

December 17, 2013

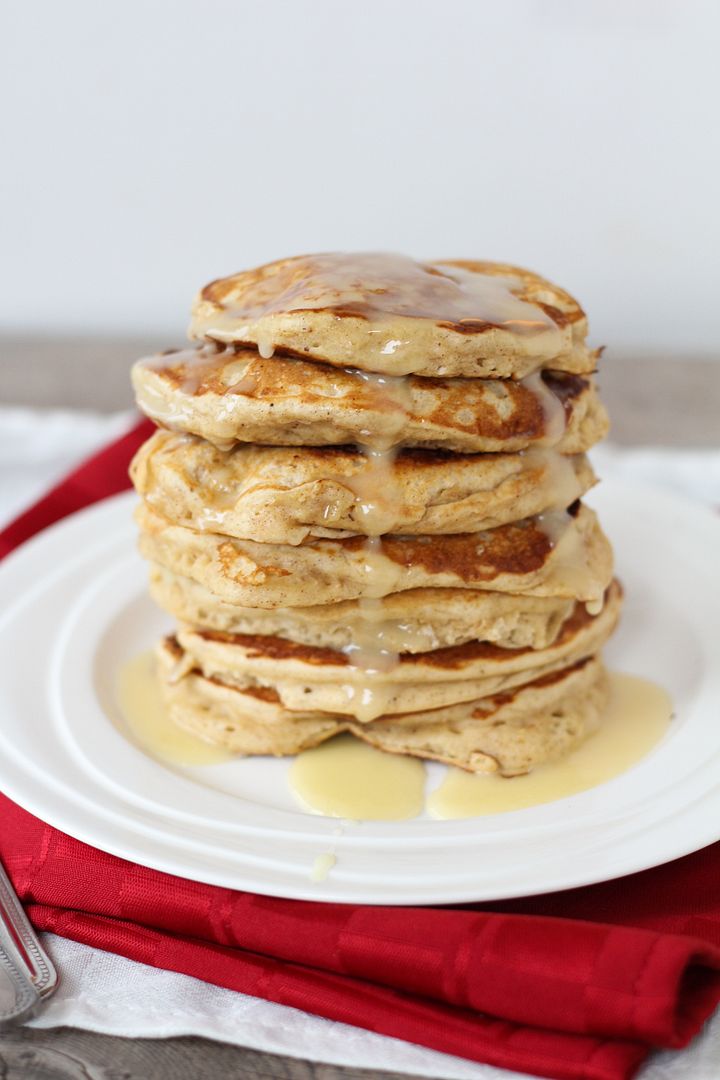
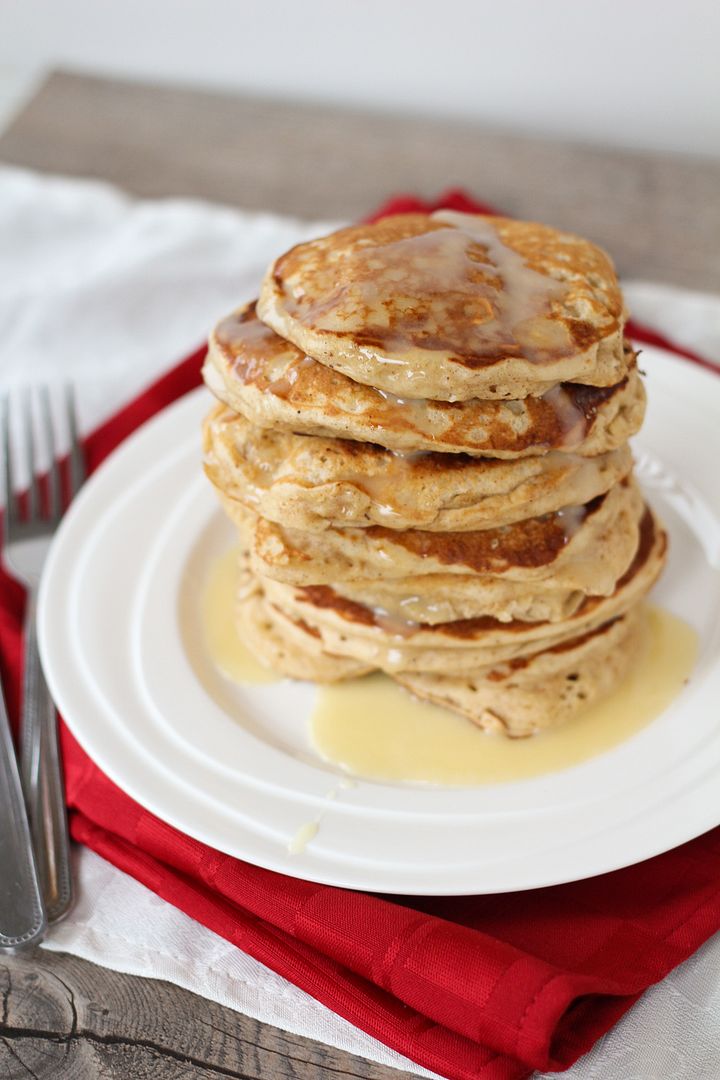
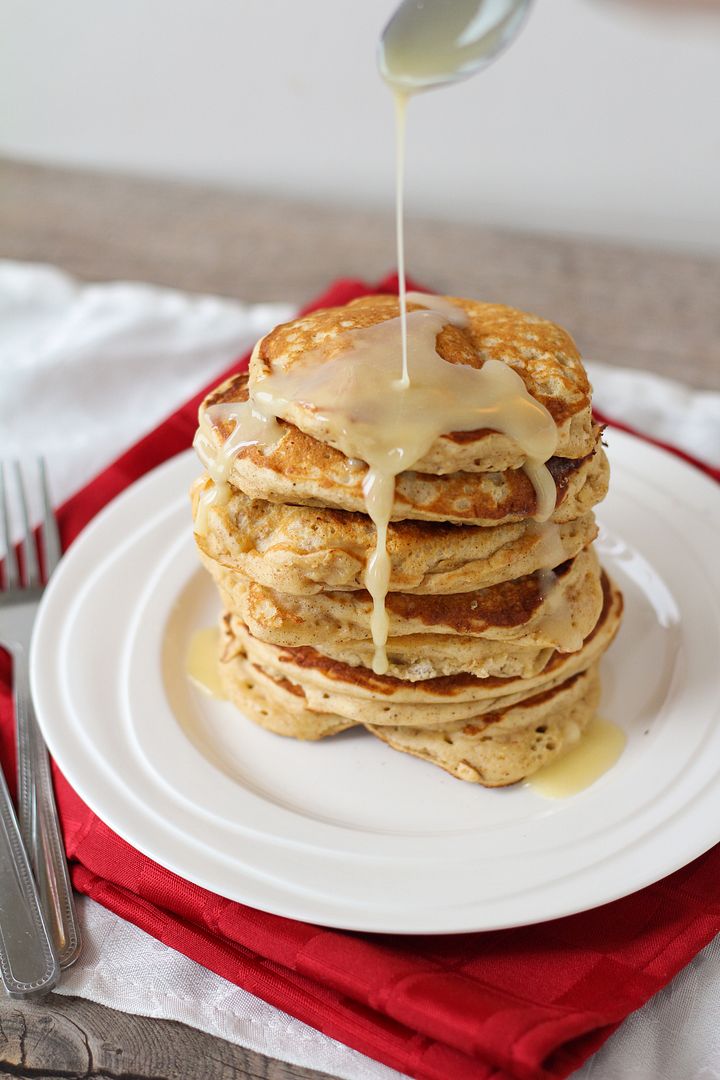
Eggnog Pancakes with Eggnog Glaze

Eggnog Pancakes with Eggnog Glaze

I can't believe Christmas is basically a week away and I haven't posted a single festive recipe on here yet.  I've been more focused on trying to get all my Christmas shopping done lately as I've had an extra hard time coming up with gift ideas this year and as it's looking now, I likely won't finish shopping until Christmas Eve.  Every year I tell myself I'm going to be more organized with everything Christmas-related but every year I end up with a TON of stuff to do last minute.  It's kind of part of the holiday rush and excitement though, and at least I usually get good deals by leaving my shopping so late!

Eggnog Pancakes with Eggnog Glaze

I do regret not being more organized with holiday recipes though.  I had a lot of ideas floating around my head in November but so far I've mainly just been consuming treats that involve eggnog and Kahlua or Baileys, which you don't really need a recipe for!  Other than those soft molasses cookies I told you about earlier, these pancakes are the only other festive thing I've made this year.  And while I'm disappointed I haven't been doing more cooking/baking, I'm pretty happy that the one thing I made turned out so well!

Eggnog Pancakes with Eggnog Glaze

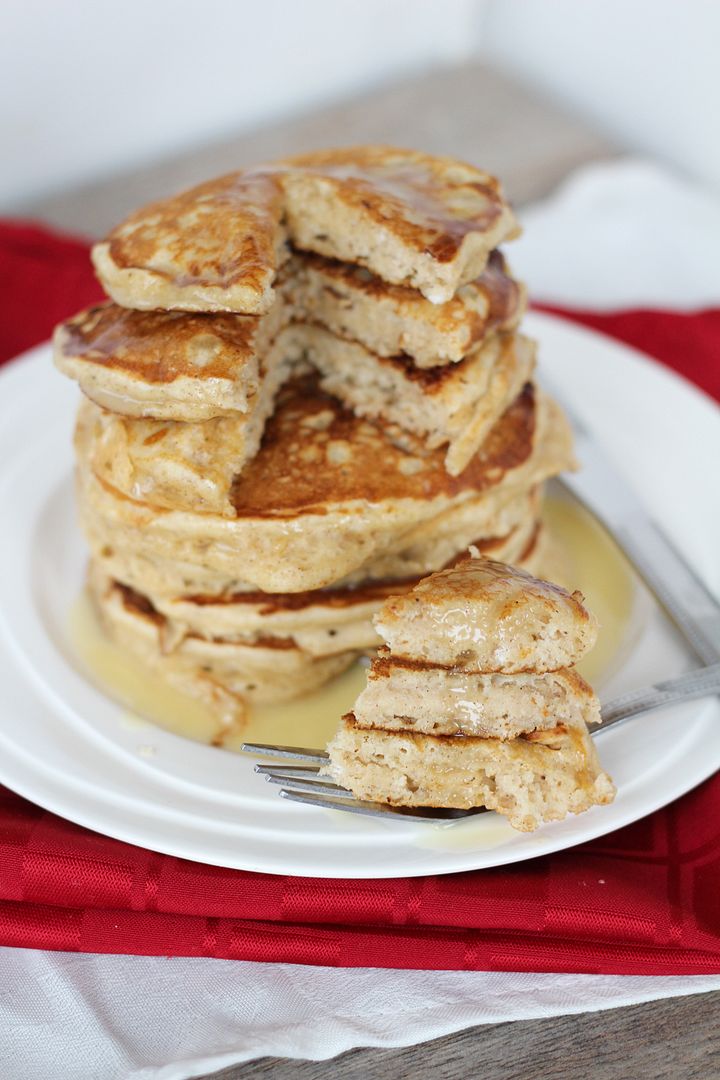
These pancakes are light and fluffy with eggnog in the batter and a pinch of spices to give them a subtle eggnog flavour, but the glaze is what really kicks up the eggnog flavour so you're certain you're eating a festive (and slightly decadent, but not over-the-top) breakfast and not just regular pancakes.  So don't skip it!  

I already can't wait to make these again for breakfast this weekend, and to hopefully squeeze in some holiday baking before then!

Eggnog Pancakes with Eggnog Glaze

Eggnog Pancakes with Eggnog Glaze

Recipe drew inspiration from several similar recipes, including Forkful of Comfort, Savory Simple, and SkinnyTaste

Serves about 4-6 (makes 16-18 pancakes)

Ingredients:

For the Pancakes:
2 cups all-purpose flour
4 teaspoons baking powder
1/2 teaspoon salt
1/2 teaspoon nutmeg
1 teaspoon cinnamon
2 large eggs, lightly beaten
2 cups eggnog (I used low-fat eggnog)
2 tablespoons vegetable or canola oil
2 teaspoons vanilla extract (or substitute half rum extract if desired)

For the Glaze:*
1/2 cup icing sugar
2 tablespoons eggnog
1 tablespoon maple syrup
1/2 teaspoon rum extract

Directions:

First, prepare the pancake batter.  Whisk all the dry ingredients (flour, baking powder, salt, nutmeg, and cinnamon) in a large bowl.  In a separate medium bowl, whisk together the wet ingredients (eggs, eggnog, oil, and vanilla extract).  Add the wet ingredients to the dry ingredients and fold together with a spatula until just combined (batter will be lumpy).

Heat a large non-stick skillet or griddle to medium heat and spray with non-stick cooking spray if necessary.  Pour pancake batter by 1/4 cup-fulls onto the pan.  Let cook until bubbles begin to form and pancake is browned on one side, a couple of minutes, then flip and cook until both sides are evenly browned.

While cooking pancakes, prepare the glaze by whisking all ingredients together in a small bowl.

Serve pancakes warm with a small amount of eggnog glaze on top.
*Note: The amount of glaze should be just enough for a small amount for each serving.  The glaze is quite sweet so you shouldn’t want too much, but feel free to double the amounts for the glaze if you like.

September 23, 2013

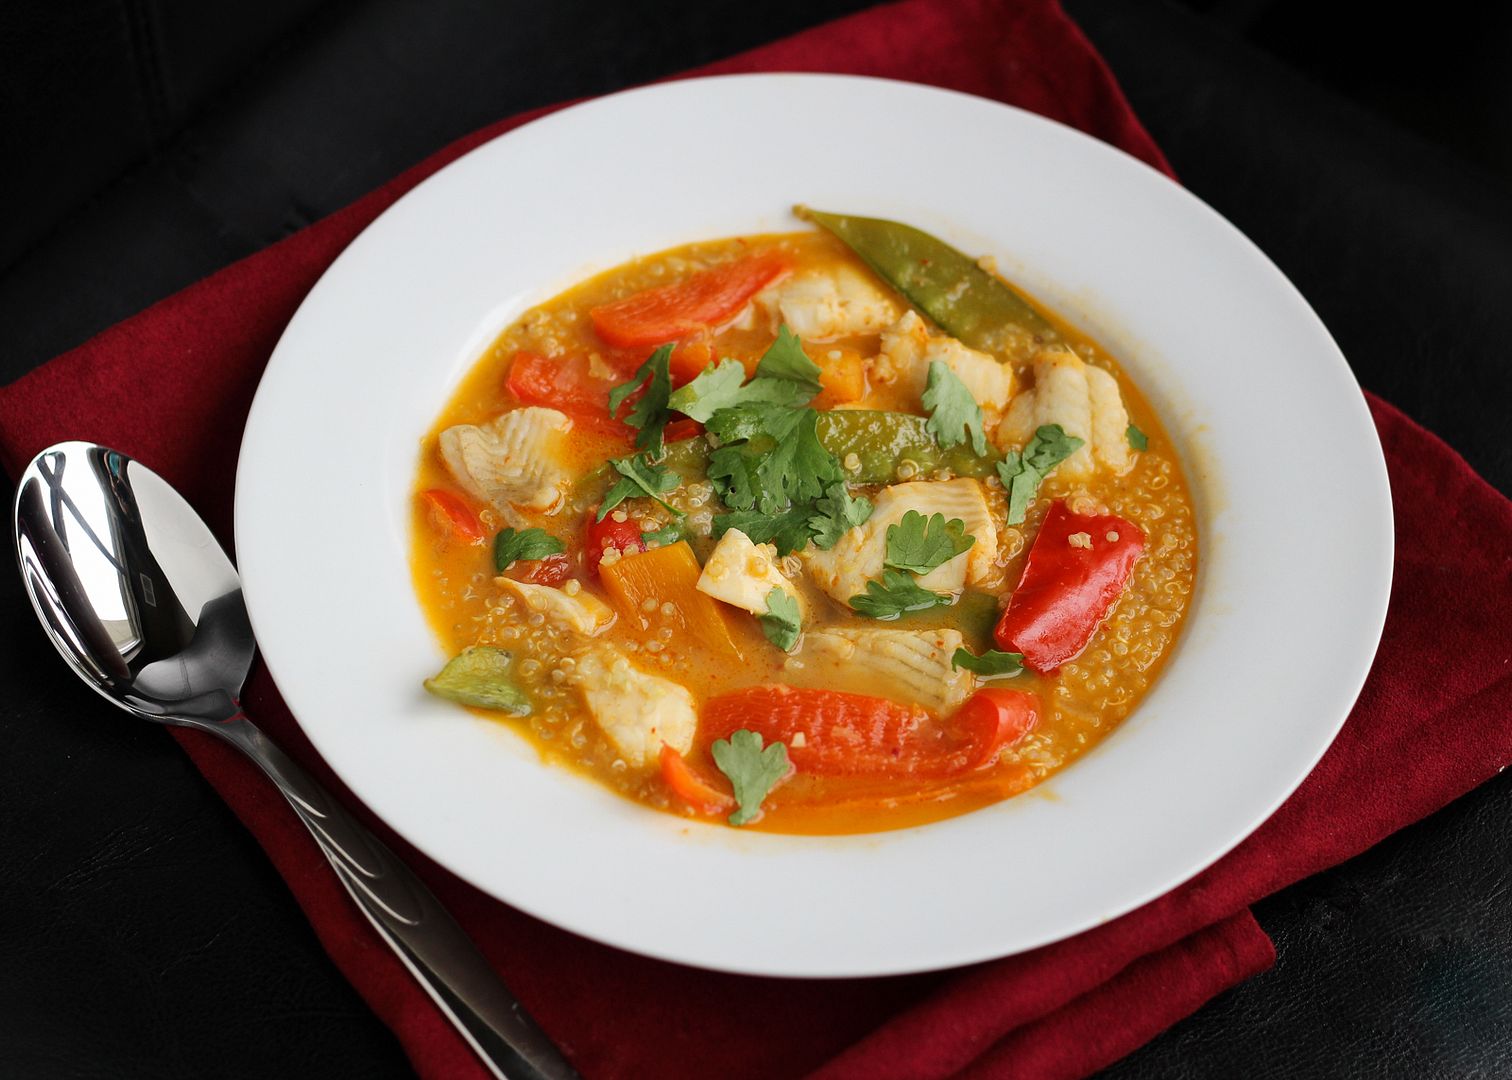
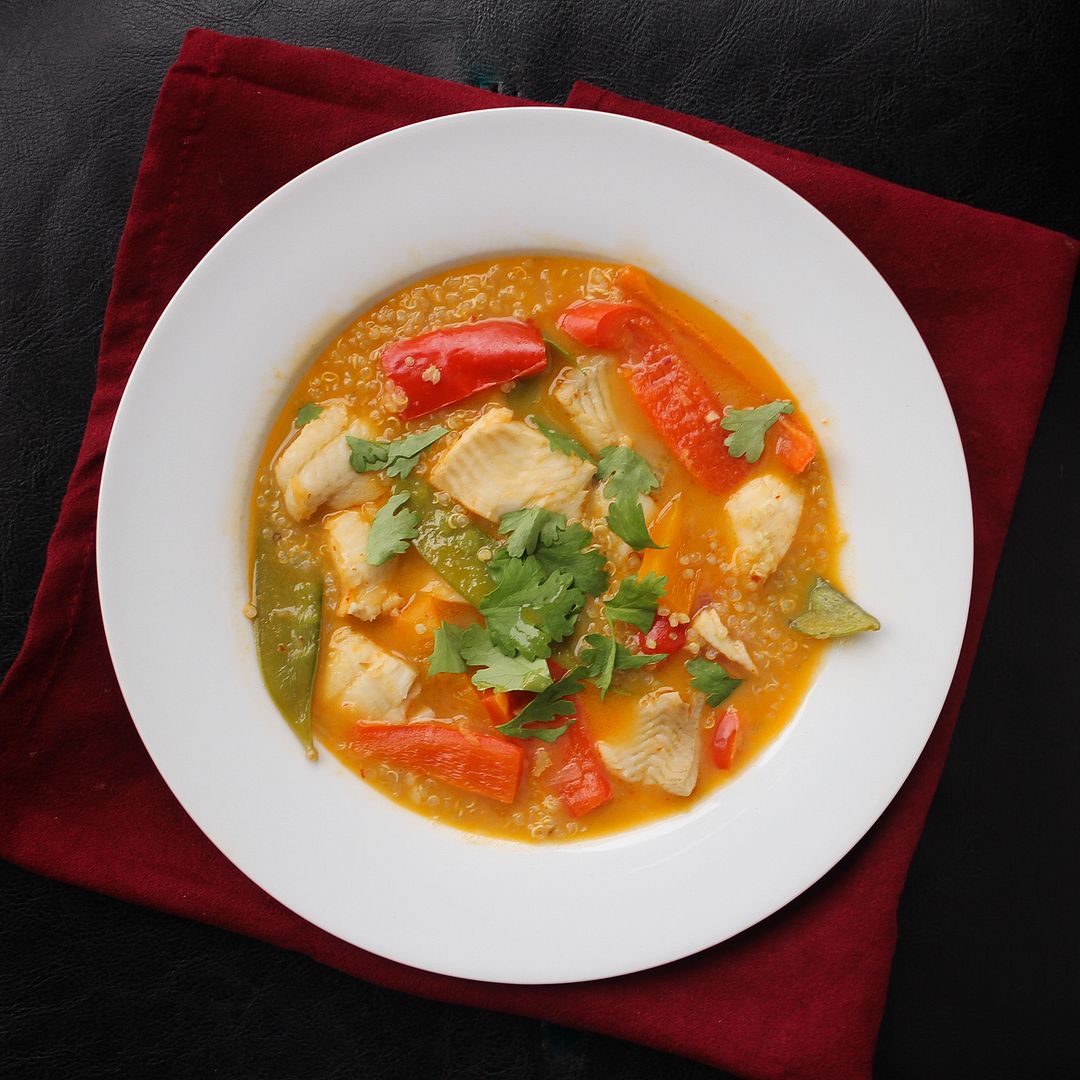
Thai Coconut Red Fish Curry with Quinoa

Thai Coconut Red Fish Curry with Quinoa

I'm super excited for today's post for two main reasons - first is that this is one of the tastiest dishes I've had in a while, and second is to announce that I've partnered with the Sustainable Seafood Blog Project!

The idea of the Sustainable Seafood Blog Project is to unite food bloggers and businesses interested in promoting sustainable seafood choices.  When Jessie from Life as a Strawberry asked if I'd be interested in joining, I admit that I was a tiny bit hesitant because while I've heard a lot about sustainable seafood lately and know that it's a really important issue, I didn't feel like I was well informed on it enough myself to talk about it with you guys.  But after a bit of research, I was happy to find out that there are so many resources out there to help consumers make smart choices, so while the idea of sustainable seafood might sound complicated, it's much easier than you might think!

Thai Coconut Red Fish Curry with Quinoa

We've all probably heard about the health benefits of eating fish, but many of us (myself included) are perhaps less aware of the impact certain fishing practises have had on the environment, including overfishing certain species of fish, damaging the environment through harmful fishing methods, and catching unwanted types of fish or marine life.

Without getting into too much detail or trying to sounding too preachy, the idea of sustainable seafood is to support fishing practices that will not damage our oceans or deplete marine life.  The infographic below (courtesy of Jessie) summarizes these issues in a much prettier way than I could put together!

The Sustainable Seafood Blog Project

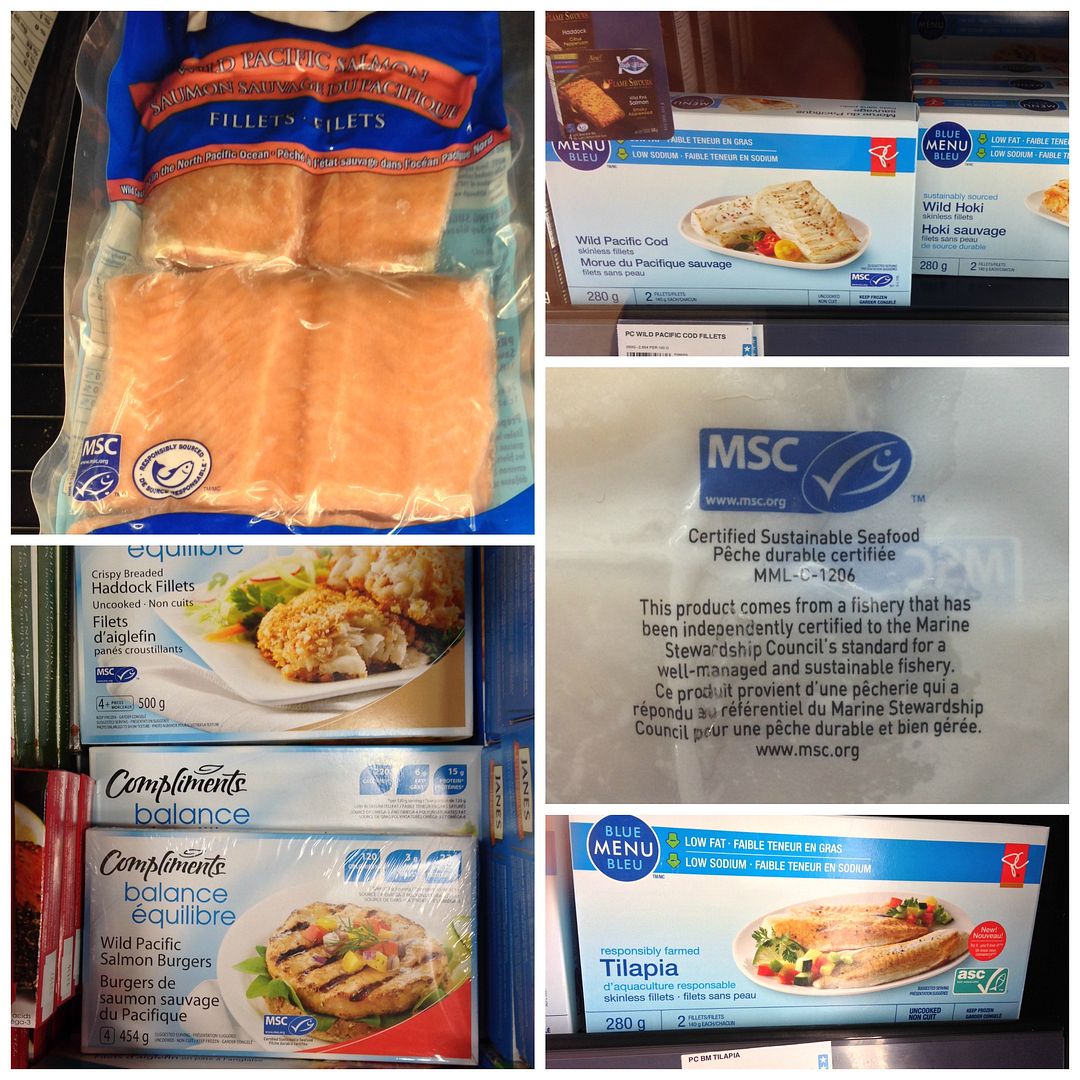
I'm happy to say that the two main grocery stores I shop at here in Ontario (Loblaw and Sobeys) have made commitments to selling sustainable seafood, and in addition, the Marine Stewardship Council has made it really easy to identify smart choices when you're shopping by just looking for their seal of approval on the product (see the blue checkmark in the images below).

I still only buy fish (or any meat) when it's on sale because it's usually expensive, but all the products pictured below were on sale and cost just as much or less than the fish without those labels, so it's nice that I didn't have to pay a fortune to choose them (unlike with organic fruits and vegetables)!

msc logo

And if you want to read more, there are tons of resources available to you, such as:

The Marine Stewardship Council
Monterey Bay Aquarium Seafood Watch
Vancouver Aquarium Ocean Wise
Sea Choice
And of course, the resources page of the Sustainable Seafood Blog Project.

Thai Coconut Red Fish Curry with Quinoa

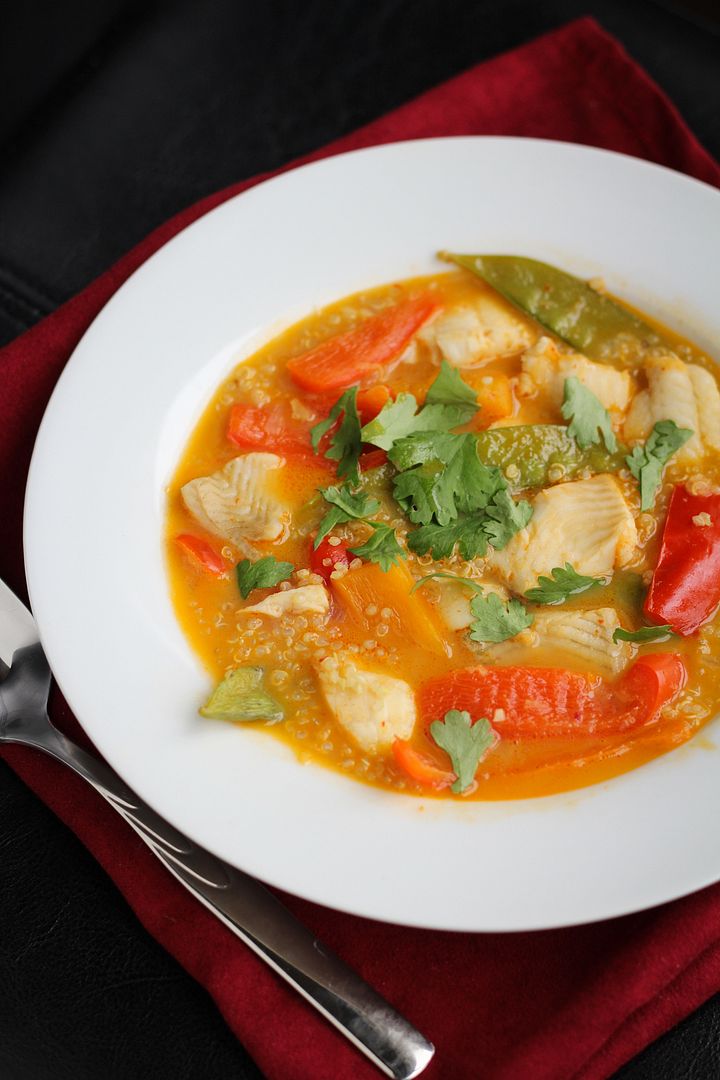
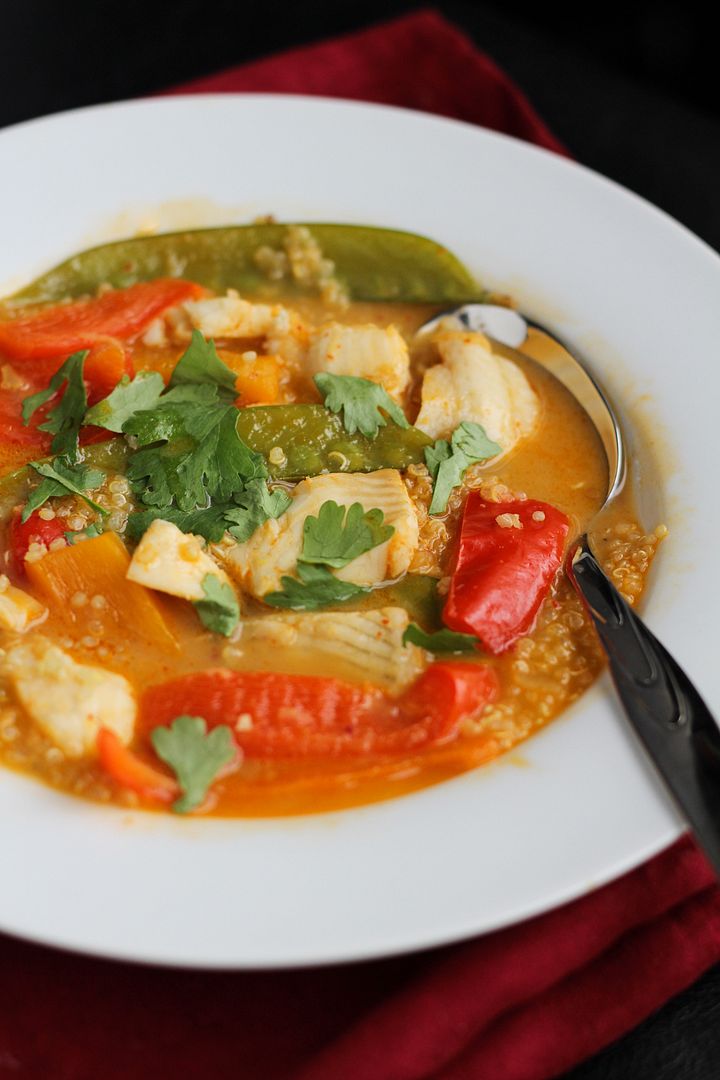
So moving on to this recipe, this curry is one of the tastiest meals I've made in a while!  It may look a little complicated at first, but is actually really easy (sound familiar?)... All you have to do is sauté some veggies, throw in a little curry paste (I used red curry paste but green or yellow would work well too!), coconut milk, and a little chicken broth, then add the fish to simmer and that's basically it.

Most curries like this would be served with white rice, but to add a little more nutrition I decided to use quinoa, which I think tastes even better.  The flavours in this dish all come together in such a great way, and it's a pretty healthful meal too, so you can feel good about eating it for lots of reasons!

And if you like seafood, please check out these fabulous bloggers who are also part of the Sustainable Seafood project and are posting more great recipes today!


Thai Coconut Red Fish Curry with Quinoa

Thai Coconut Red Fish Curry with Quinoa

Adapted from several sources, such as recipes from The Foodie Physician and Kristen’s Kitchen

Makes 4 servings

Ingredients:

~2 cups cooked quinoa
2 teaspoons canola oil
1 medium shallot, minced
2 cloves garlic, minced
1 tablespoon grated fresh ginger
1 red bell pepper, sliced into 1” long slices
1 yellow pepper, sliced into 1” long slices
1 thai chili pepper, minced (optional for added spice)
2 tablespoons red curry paste
1 cup fat-free low sodium chicken broth
1 (400mL or 13.5oz) can light coconut milk
1 tablespoon fish sauce
1-1/2 tablespoons brown sugar
2 tablespoons fresh lime juice
150g or about 5oz snow peas
4-6 white fish fillets, cut into 1” pieces – choose a mild white fish that is a sustainable option for your region, such as wild Pacific cod, Wild Alaskan or Pacific halibut, or wild haddock (Canadian)
1/2 teaspoon salt
4 tablespoons chopped cilantro (optional)

Directions:

Cook a box of quinoa according to package directions – I ended up using about 1/2 cup cooked quinoa per serving which was approximately one 200g box.

Heat oil in a large saucepan over medium-high heat.  Add shallot and garlic and cook for about 1 minute, stirring often.  Add ginger, red and yellow peppers, and chili pepper.  Let cook for 5-7 minutes, stirring occasionally, until slightly softened.  Add curry paste, stir to coat, and let cook for another minute.  Add chicken broth and coconut milk and let simmer for 8-10 minutes.  Add fish sauce, brown sugar, and lime juice, and let simmer for another 1-2 minutes.  Add fish, cover, and let simmer 5-7 minutes, until fish is cooked through (may depend on type and thickness of fish).  Season with salt.

Add about 1/2 cup quinoa to each of four bowls.  Pour curry overtop and garnish with about 1 tablespoon cilantro, if desired.  Serve warm.
February 22, 2013

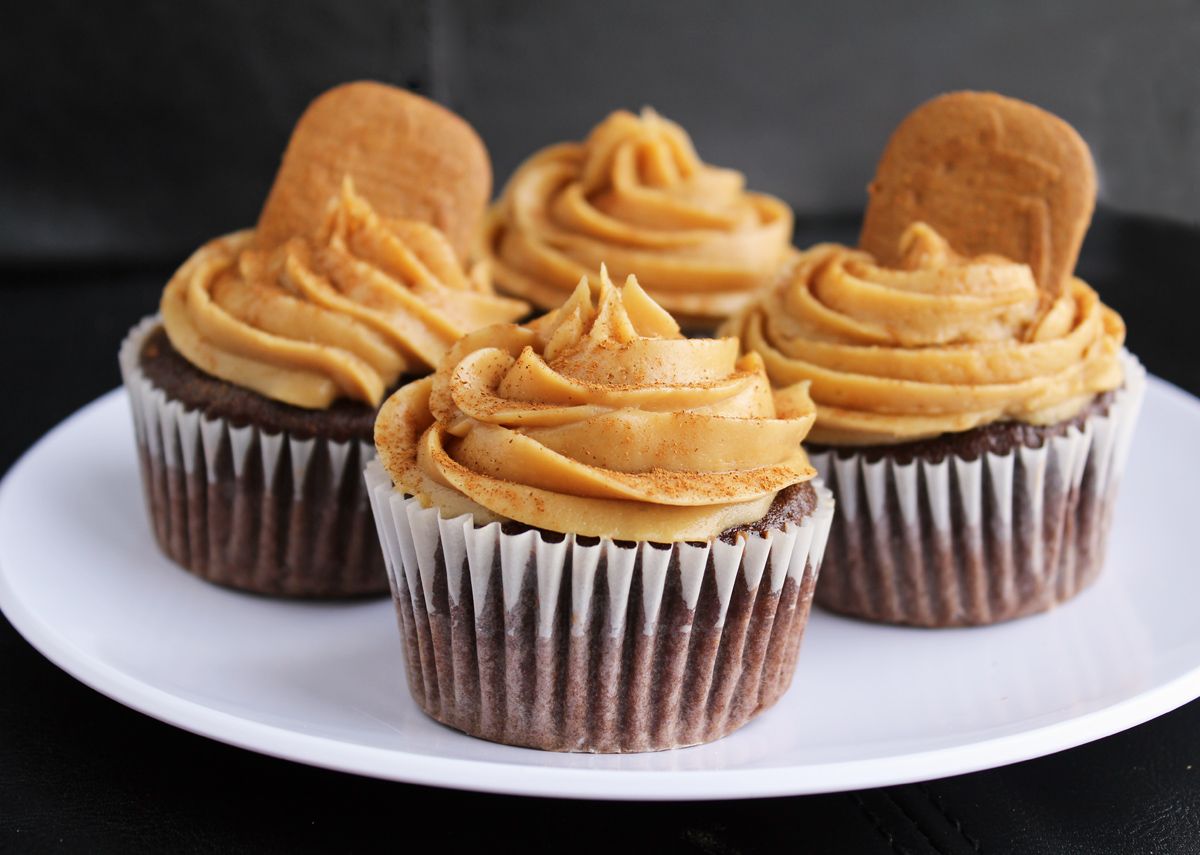
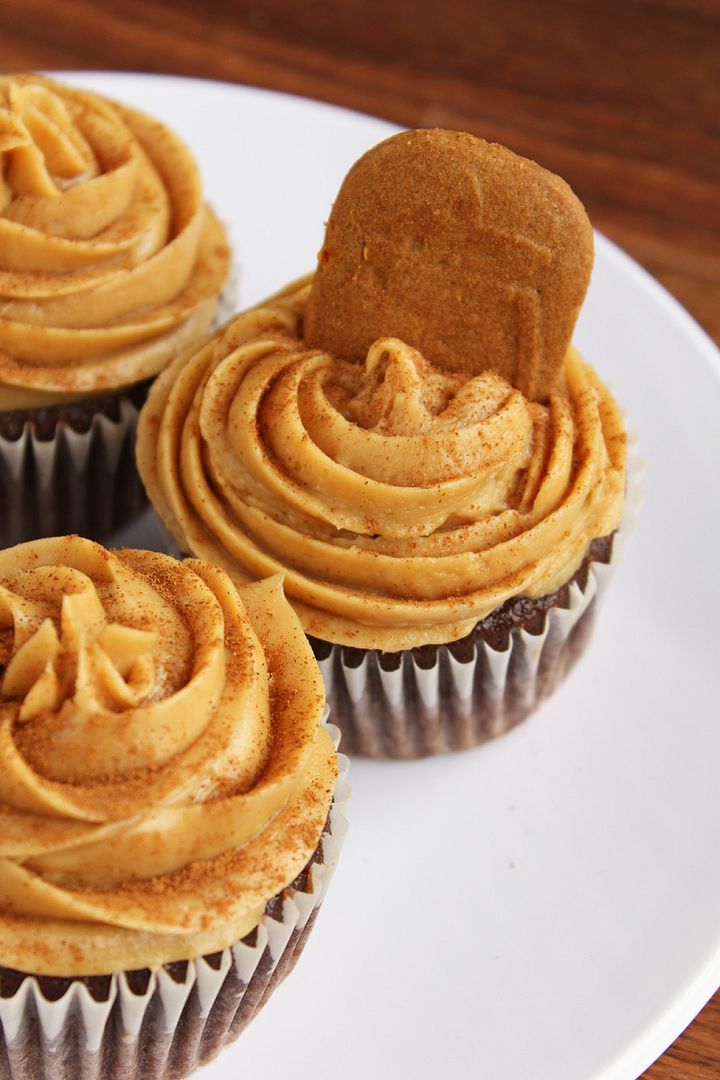
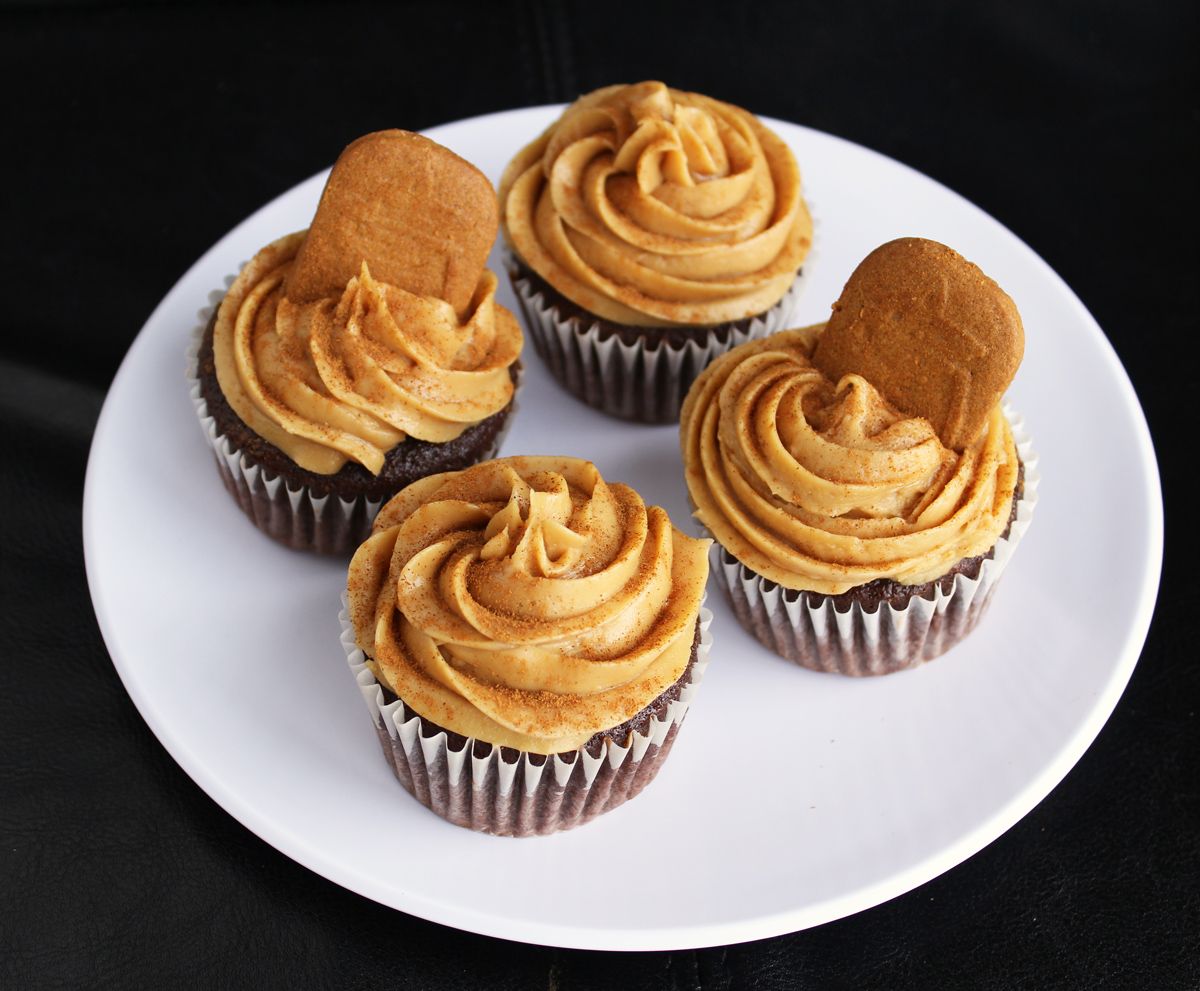
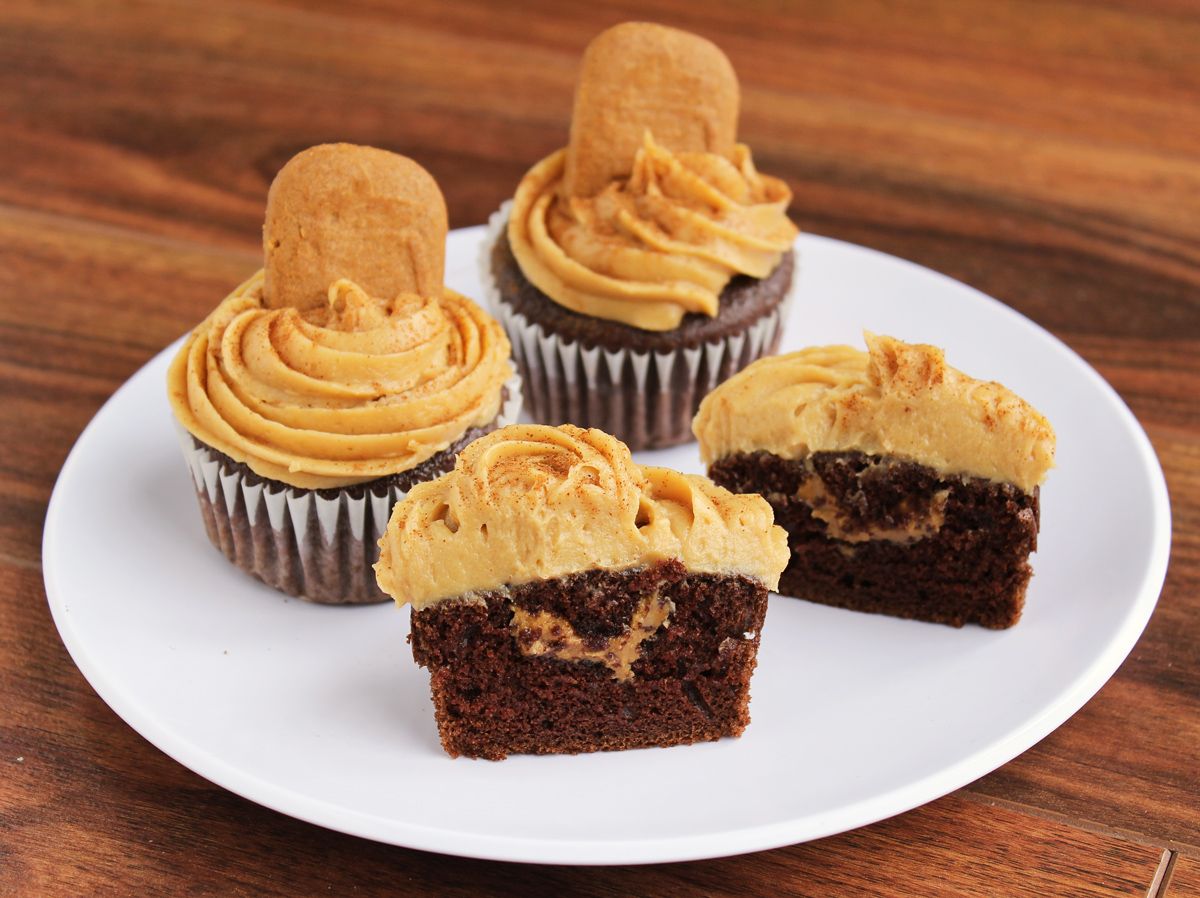
Chocolate Biscoff Cupcakes with Biscoff Cream Cheese Frosting

Chocolate Biscoff Cupcakes with Biscoff Cream Cheese Frosting

So this is the first Biscoff recipe on my blog, and I’m sure most of you are probably thinking that I’m the last one to the Biscoff party, which started almost two years ago. The thing is, Biscoff hasn’t really become as popular here in Canada as it has in the United States (or Europe, I assume, as that’s where it originated). In fact, when I sent these cupcakes to work with my boyfriend, he had to call me to ask me again what they were called because he had never heard of Biscoff, and apparently nobody at his work had either. And when I wrote about these cupcakes on Facebook, the first comment I got was asking me what Biscoff is.

So even though I feel like my fellow bloggers are probably already sick of Biscoff because it’s been popular on blogs for a while, in real life I don’t know anyone who’s even heard of the stuff, so I feel obligated to explain what it is!  But if you’ve already seen a thousand Biscoff recipes and have gone through fifty jars of the stuff at home, feel free to skip past these next paragraphs :)

Chocolate Biscoff Cupcakes with Biscoff Cream Cheese Frosting

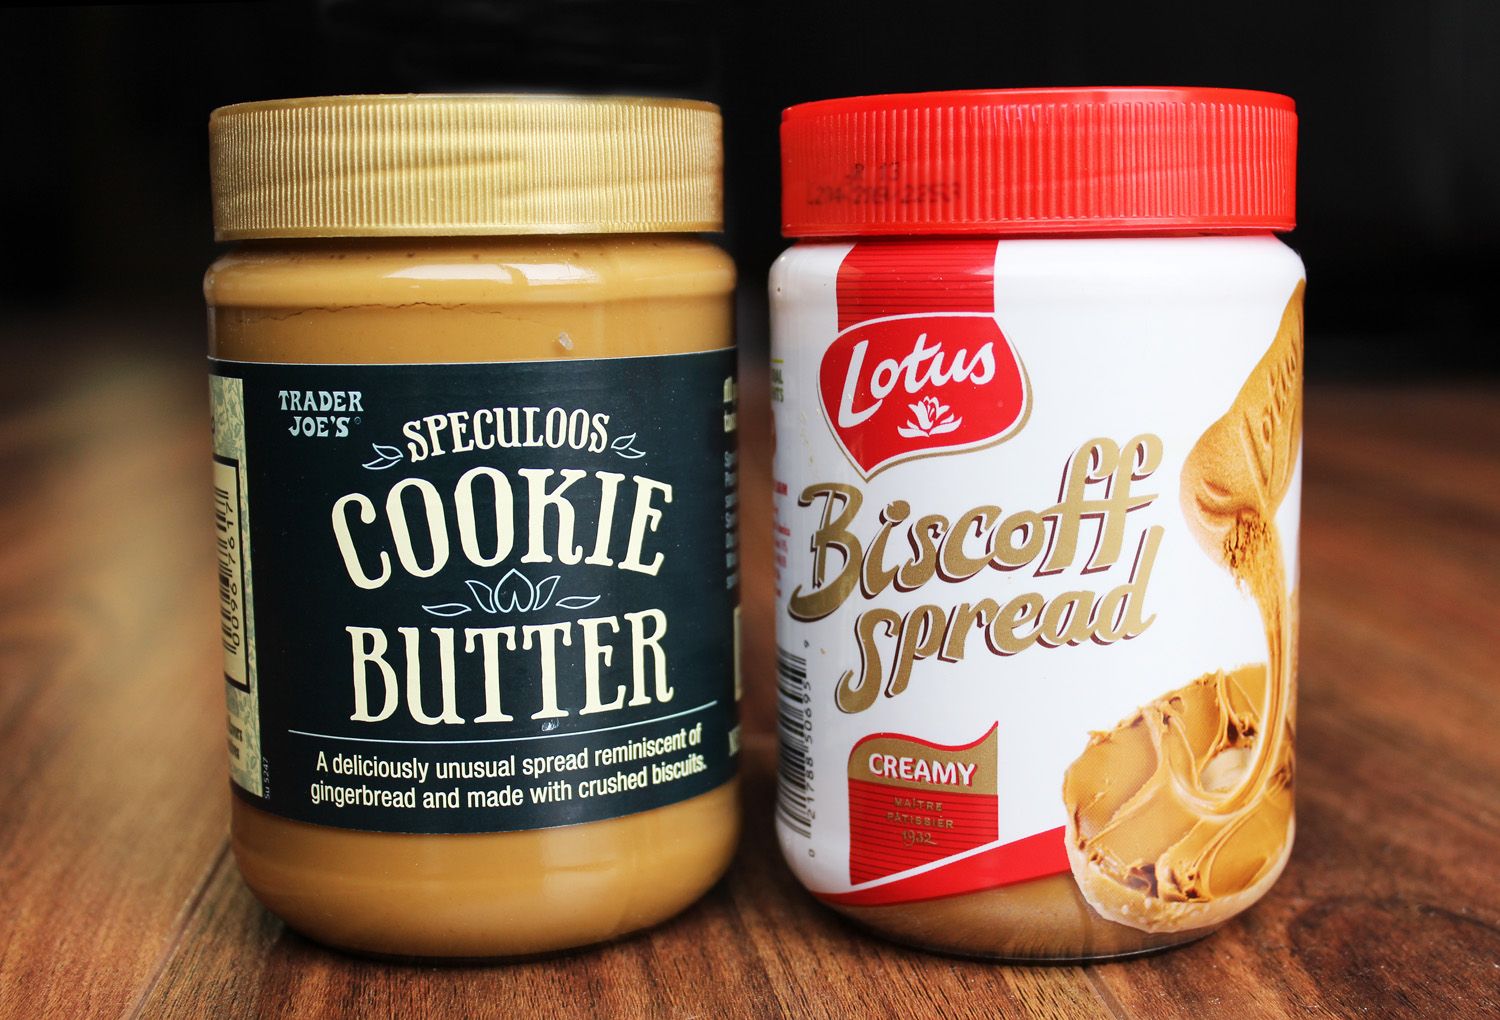
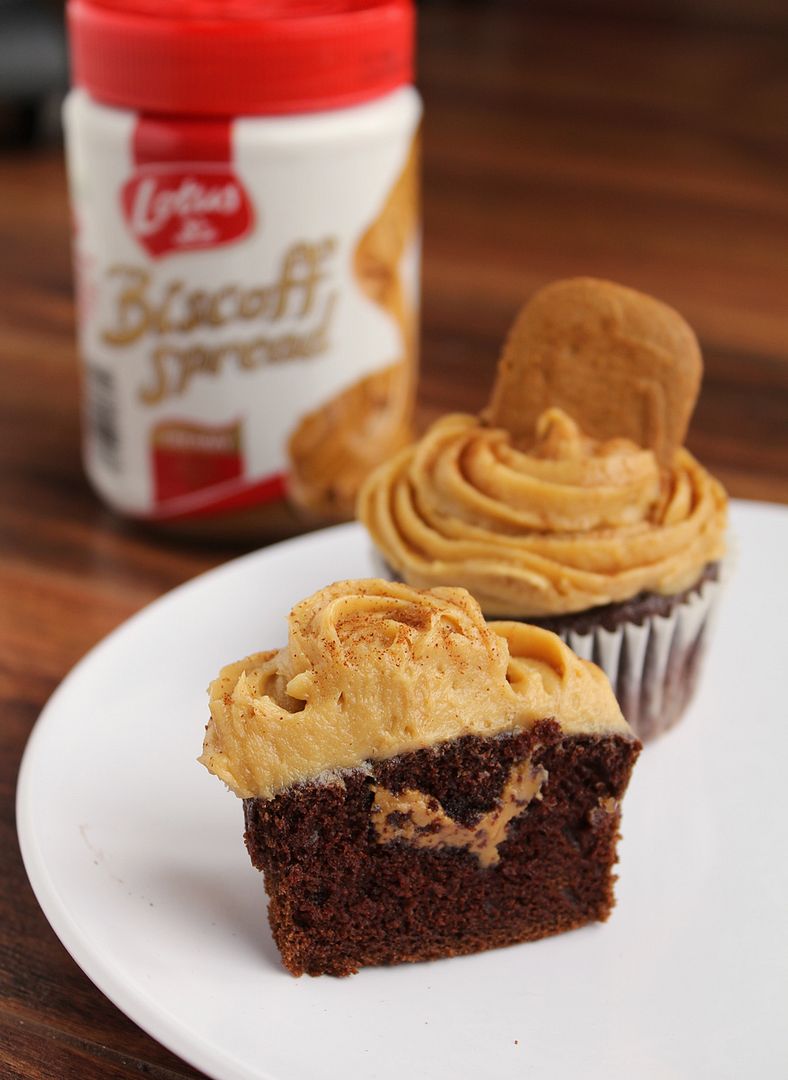
Biscoff cookies (“Europe’s favourite cookie with coffee”, according to their website), also known as Speculoos, are a crisp little Belgian cookie with a cinnamon/caramel/gingersnap-like flavour.  They originated in Europe but grew in popularity around the world when airlines like Delta started handing them out on flights.  A few years ago, the cookies were turned into a creamy spread with a consistency of peanut butter and taste of Biscoff/speculoos cookies.  The main ingredient in the spread is cookies, which is why it’s also referred to as cookie butter.  I think a lot of people eat the spread as they would peanut butter, such as on toast or as a dip for apples, but it’s also become really popular for use in baking.  There’s a nice little slideshow on Huffington Post of some of the ways you can use Biscoff spread!

cookie butter spreads

While it’s now available in many grocery stores in the United States, including Trader Joe’s, which has its own version called Speculoos Cookie Butter (pictured above), it hasn’t really appeared much in Canada yet, which is why most of my friends haven’t heard of it. I buy it when I go on trips to the US, but if you don’t live anywhere near the States (or Europe), I’d recommend looking in European grocery stores – I’ve actually spotted Biscoff at an Italian supermarket in Waterloo, Ontario, so it is out there!

 Chocolate Biscoff Cupcakes with Biscoff Cream Cheese Frosting

I had a hard time choosing what to make for my first experiment with Biscoff.  I’ve never really been a big fan of cupcakes, but I made some red velvet cupcakes on Valentine’s Day (which I posted about on Facebook, if you’re interested) and they turned out so well that they changed my mind about cupcakes.  Plus they are so fun to decorate!  

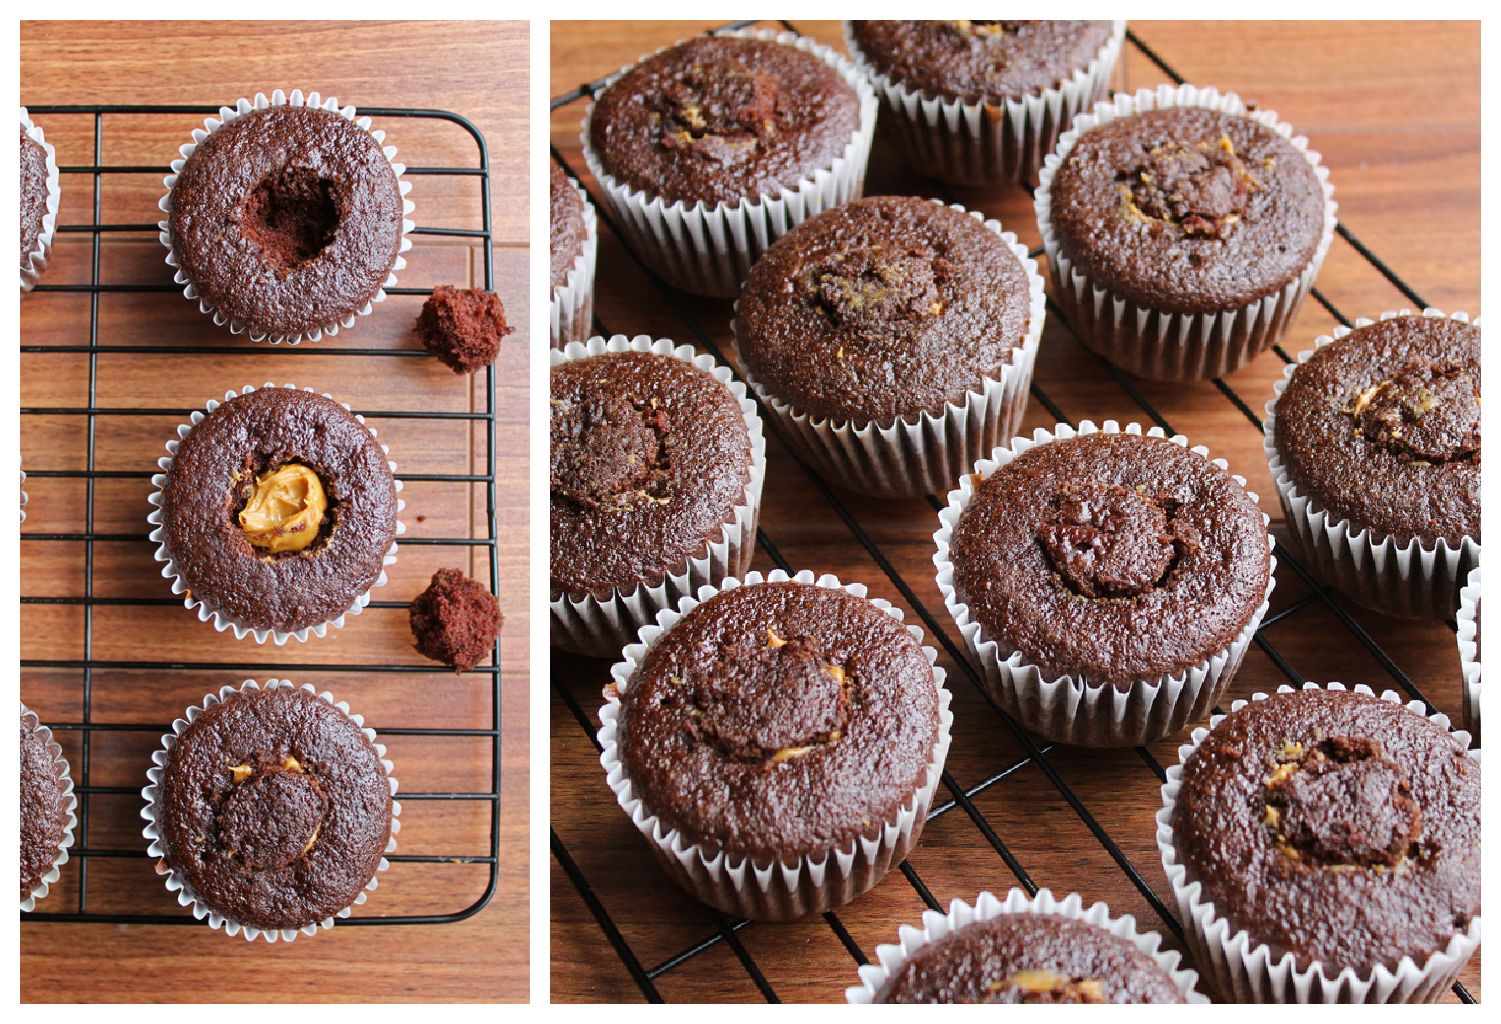
So I decided to make Biscoff cupcakes. My first thought was to make both the cupcake batter and frosting with Biscoff, but I thought that might be a bit too much, so I decided to go with a chocolate base instead.   I used Beantown Baker’s idea of stuffing a little Biscoff inside the cupcake for a fun surprise, which was super easy – you just have to cut a hole in the top of the cupcake after they’re done, fill it with a spoonful of Biscoff, and cover it back up.  Don’t try putting Biscoff in the center of the cupcake before you bake them – it will just sink to the bottom, trust me!  Here’s a little visual of how to fill the cupcakes:

 Filling Biscoff Chocolate Cupcakes

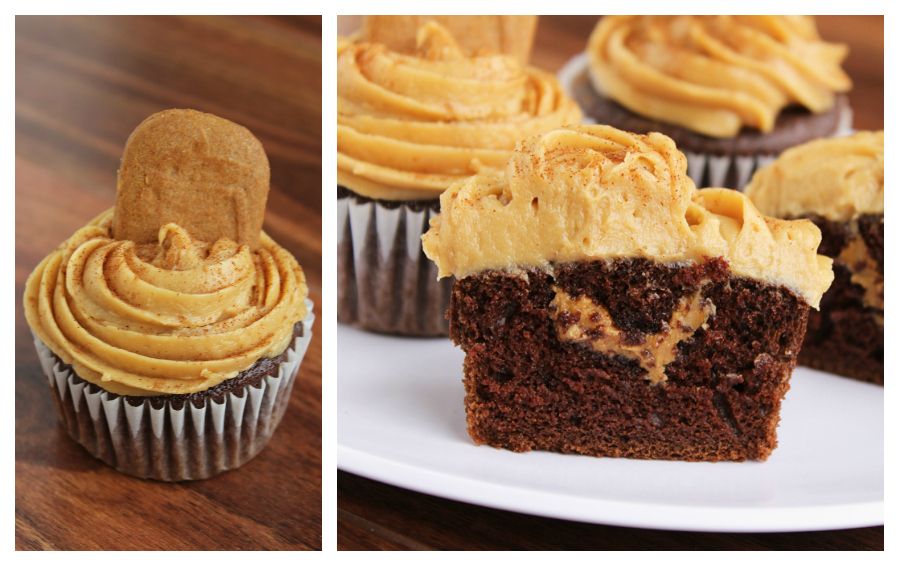
I was so happy with how these turned out! The Biscoff cream cheese frosting was my favourite part and the chocolate cupcake was the perfect complement to it, plus I loved the little surprise of Biscoff in the center! I ate two right after I made them then had to send the rest away to be shared before I got carried away, and I’m told they were very well received at work, even though most people probably didn’t know what they were eating!

 Chocolate Biscoff Cupcakes with Biscoff Cream Cheese Frosting

I still have a jar and a half of Biscoff to use up, so now that I’ve introduced you guys to it, expect to see a few more recipes here in the near future!

And if you have a favourite Biscoff recipe or way to use it, please feel free to share in the comments, I’d love to hear your ideas!

 Chocolate Biscoff Cupcakes with Biscoff Cream Cheese Frosting

Chocolate Biscoff Cupcakes with Biscoff Cream Cheese Frosting

Inspired by Beantown Baker, Chocolate cake recipe adapted from Hershey’s Kitchens, Biscoff frosting adapted from Biscoff

Makes about 12 cupcakes

Ingredients:

For the Cupcakes:
3/4 cup + 2 tablespoons all-purpose flour
1 cup sugar
1/4 cup + 2 tablespoons unsweetened cocoa powder
3/4 teaspoon baking soda
3/4 teaspoon baking powder
1/2 teaspoon salt
1/2 teaspoon cinnamon
1 large egg
1/2 cup milk
1/4 cup canola oil
1 teaspoon vanilla extract
1/2 cup brewed coffee
~1/4 cup Biscoff spread for filling

For the Frosting:
8 oz brick of cream cheese
1/2 cup Biscoff spread
1/2 cup icing sugar
1/4 teaspoon salt
1 teaspoon vanilla extract

Directions:

Preheat oven to 350°F.  Line a muffin tin with paper liners and spray with non-stick spray.

In a large bowl, whisk together the flour, sugar, cocoa powder, baking soda, baking powder, salt, and cinnamon until well combined.  In a separate bowl, whisk the egg, milk, oil, and vanilla extract until smooth.  Add the wet ingredients to the dry ingredients and mix well until smooth.  Stir in the coffee; batter will be thin.   Use a measuring cup to pour batter into liners, filling them only 2/3 full.  Bake in preheated oven for 22-25 minutes, until a toothpick inserted in the middle comes out clean.  Transfer to a wire rack and let cool completely.

Meanwhile, prepare frosting.  Beat the cream cheese and Biscoff together with an electric mixer until smooth, about 2 minutes.  Slowly add the icing sugar and mix on low speed until combined.  Mix in the salt and vanilla. 

Once cupcakes have cooled, use a sharp knife to cut a small cone out of the top of the cupcake.  Remove the top and fill with about 1 teaspoon of Biscoff spread.  Replace the top and push down to hide the biscoff inside the cupcake and create a flat surface on the top of the cupcake. (see here for pictures of the cone filling method).

Transfer cream cheese frosting to a piping bag (I fitted mine with a Wilton 1M tip) and frost cupcakes.  I decorated mine with Biscoff/Speculoos cookies and a dusting of cinnamon.

 Chocolate Biscoff Cupcakes with Biscoff Cream Cheese Frosting

February 12, 2013

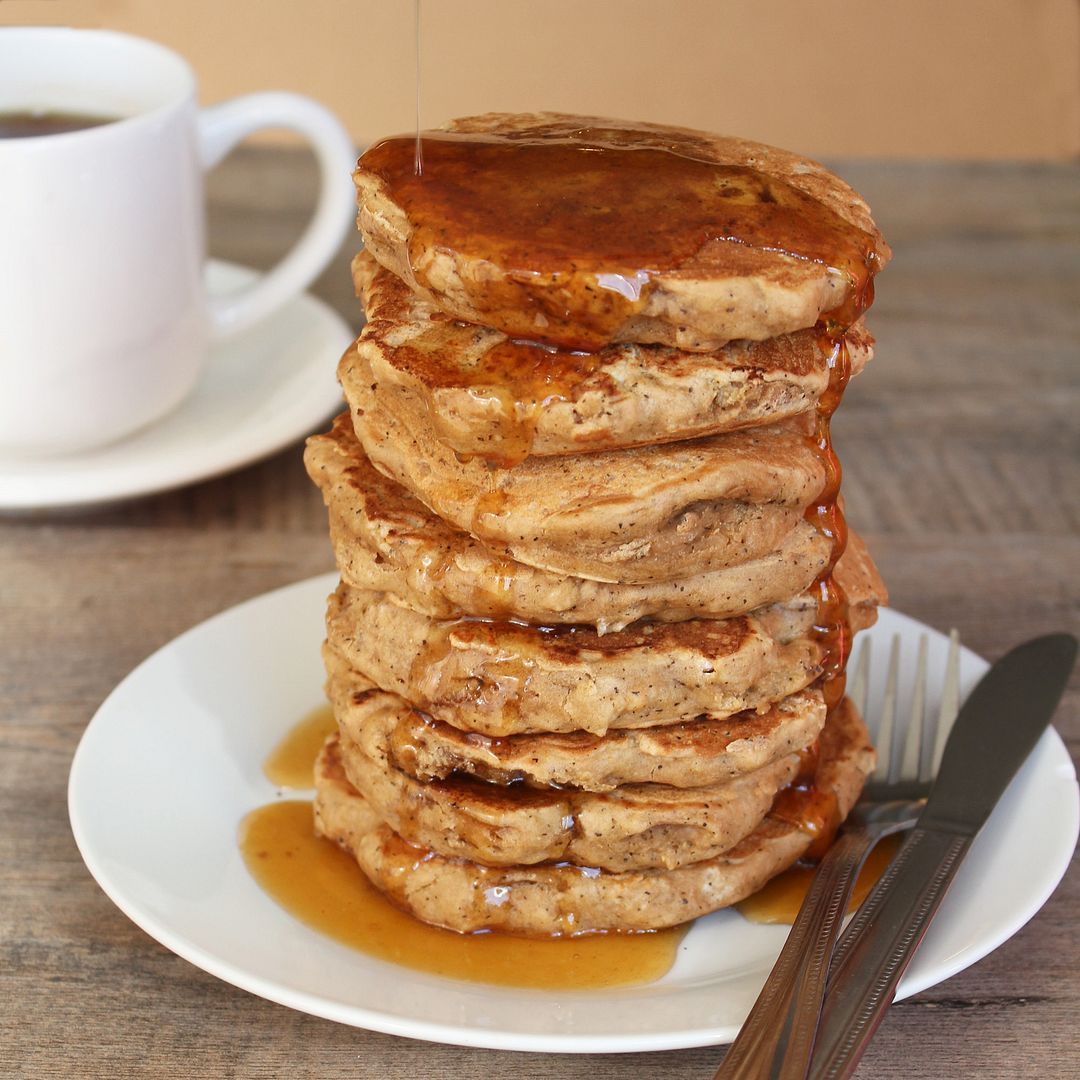
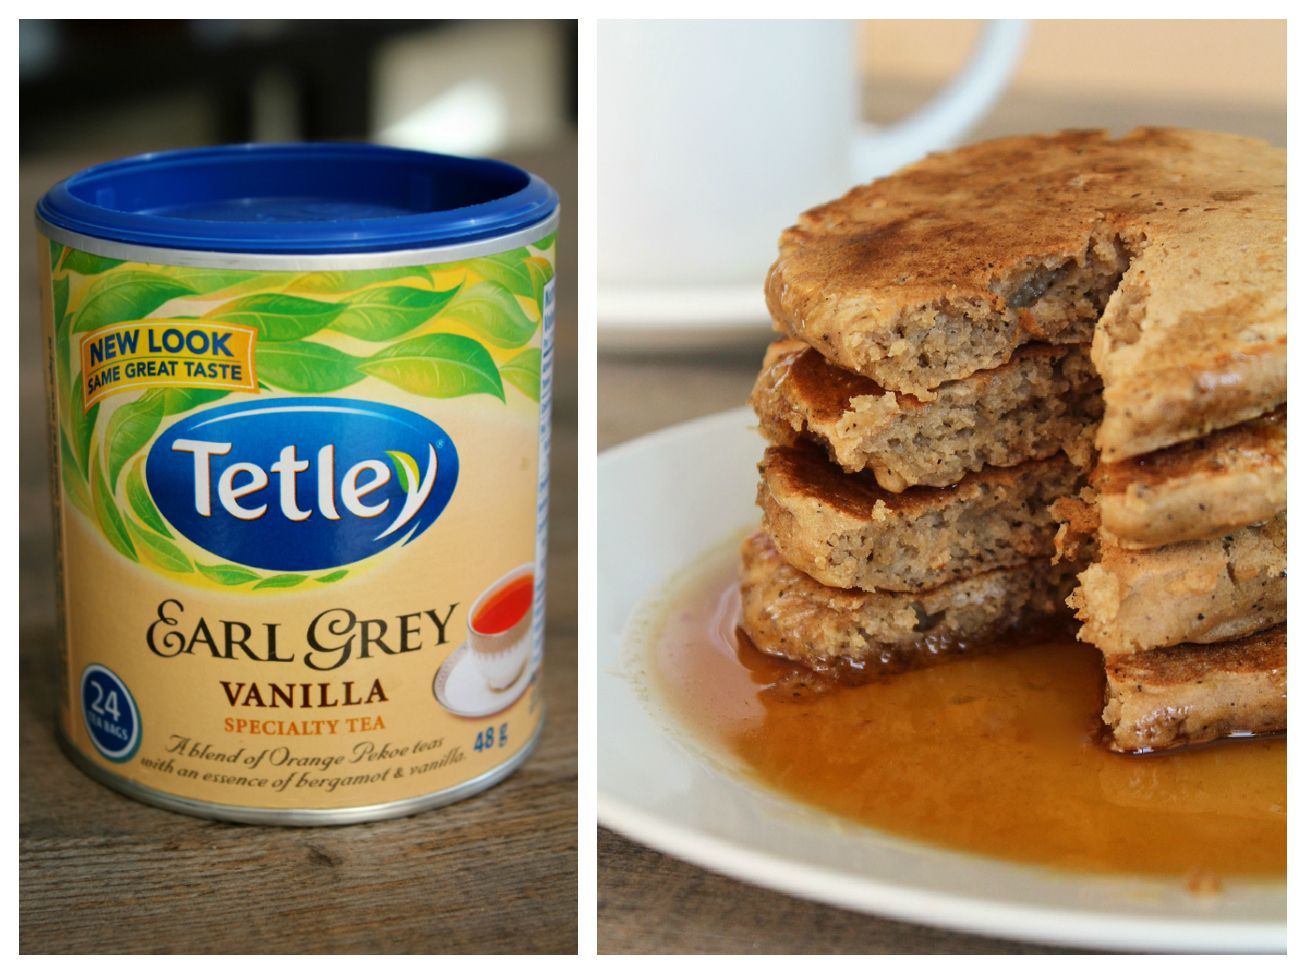
Earl Grey Vanilla Tea Pancakes with Honey Tea Syrup

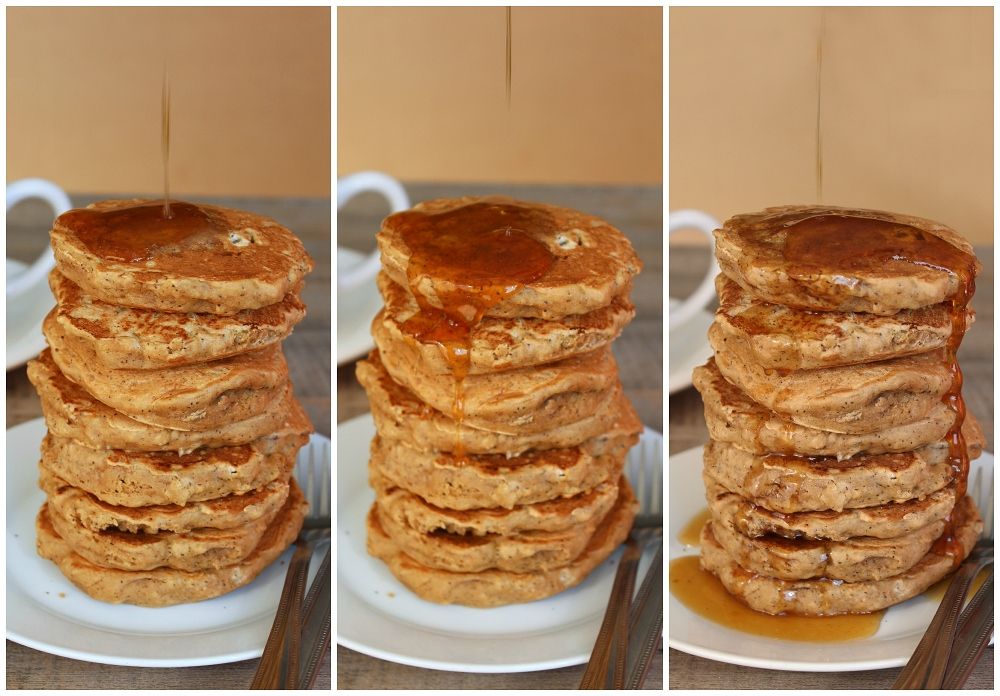
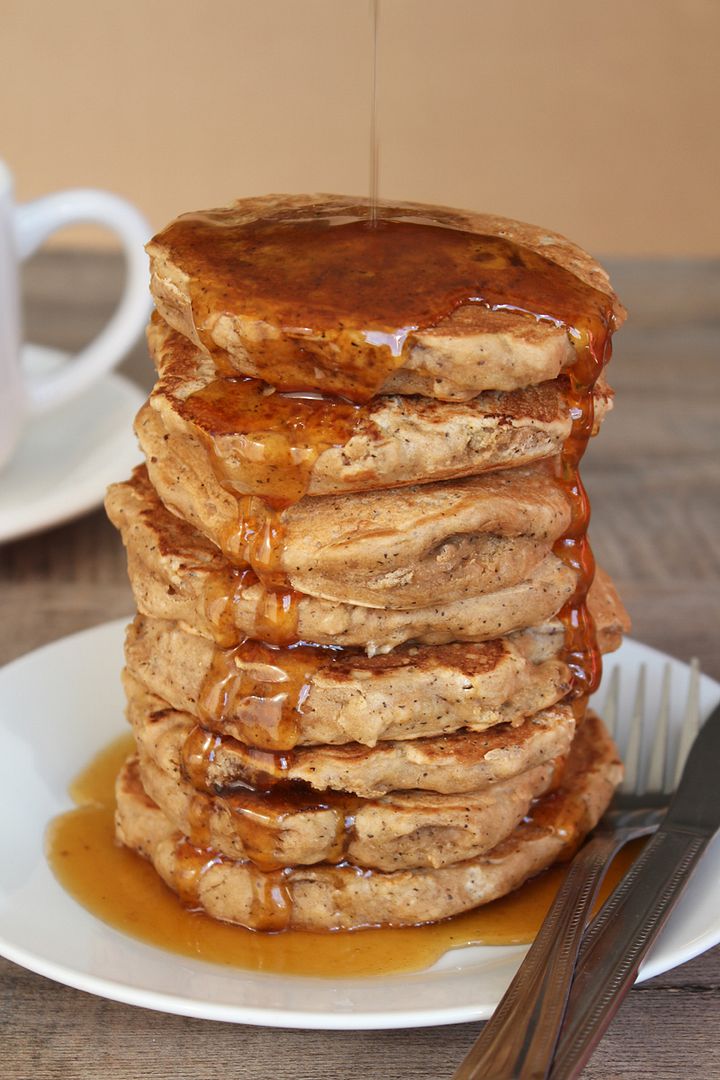
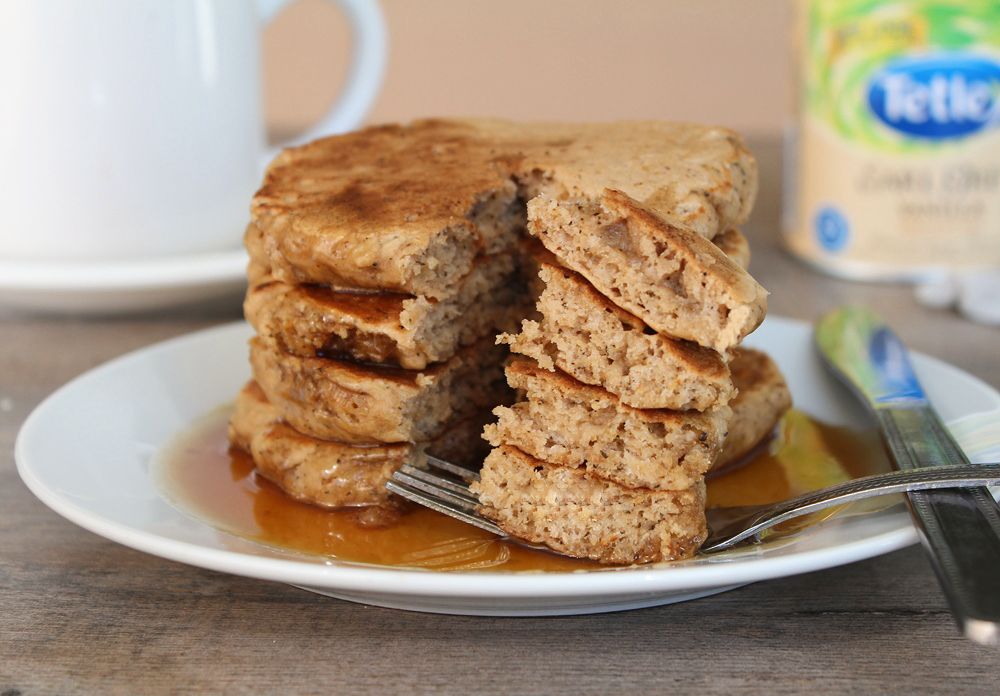
Earl Grey Vanilla Tea Pancakes with Honey Tea Syrup (aka London Fog Pancakes)

Happy Pancake Tuesday!

For those who have never heard of it, Pancake Tuesday (aka Shrove Tuesday, aka Fat Tuesday) falls on the day before Lent every year, and is associated with the practise of using up richer “fatty” foods like eggs, milk, and sugar (hence the pancakes) before the fasting season of Lent begins.

I don’t think it serves much of the same purpose today (at least not for me, as I don’t give anything up for Lent), but it’s still a great excuse to eat pancakes for dinner! Pancake Tuesday in my household always meant a big feast of at least four different types of pancakes for dinner, so you can see how it easily became a favourite holiday for me as a kid. Now that I don’t live at home, I still carry on the tradition of pancakes for dinner for myself, but also use it as a chance to test out new and exciting pancake recipes!

Earl Grey Vanilla Tea Pancakes with Honey Tea Syrup (aka London Fog Pancakes)

Last year I created coffee-flavoured pancakes with my delicious caramel latte pancakes, inspired by my favourite Starbucks latte.  This year I decided to create pancakes inspired by my favourite tea drink, the London Fog. 

A London Fog is a tea latte made with steamed milk, Earl Grey tea, and vanilla syrup.  Apparently Starbucks no longer calls it a London Fog and just uses the much more boring name of Earl Grey Tea Latte, but at Second Cup and Williams you can still order a London Fog, which I think sounds so much classier!

Earl Grey Vanilla Tea Pancakes with Honey Tea Syrup (aka London Fog Pancakes)

To recreate those flavours in pancakes, I knew I needed to infuse Earl Grey Vanilla tea (if you can’t find the vanilla flavour, just use regular Earl Grey) and vanilla extract into the pancakes. Baking with tea can get tricky because unlike coffee, it can be difficult to get a strong tea flavour to come out in the final baked good.

In my first attempt at these, I steeped vanilla almond milk with the tea before mixing the milk into the batter. They turned out well with a lovely Earl Grey fragrance, but the tea flavour wasn’t quite strong enough. In my second attempt, I still steeped the milk but also added a bag of tea to the dry ingredients and infused tea into a honey vanilla syrup to serve with the pancakes.

Earl Grey Vanilla Tea Pancakes with Honey Tea Syrup (aka London Fog Pancakes)

The end result was a light and fluffy stack of pancakes that smells just like a London Fog and has a subtle but very nice tea flavour that I loved! I think the honey syrup makes all the difference in making these resemble tea, so don’t skip it! I made these for breakfast Sunday morning and they made our apartment smell so nice – even later in the afternoon my sister kept commenting that she would get a whiff of tea wherever my pancakes had been (I had to carry them to a few different spots for photographs)!  And I saved just enough leftovers to eat for dinner tonight, which I’m quite looking forward to!

Sorry for the somewhat long post, and if you skipped by everything above just to see what the main point was, it’s that tonight it is perfectly acceptable, if not strongly encouraged, to eat pancakes for dinner – Happy Pancake Tuesday!

Earl Grey Vanilla Tea Pancakes with Honey Tea Syrup (aka London Fog Pancakes)

Earl Grey Vanilla Tea Pancakes with Honey Tea Syrup (aka London Fog Pancakes)

Makes about 9-10 pancakes

Ingredients:

For the Syrup:
1/4 cup honey
2 tablespoons water
1 Earl Grey Vanilla tea bag
1/2 teaspoon pure vanilla extract

For the Pancakes:
1-1/2 cups vanilla almond milk
4 Earl Grey Vanilla tea bags, divided
1-1/2 cups all-purpose flour
2 teaspoons baking powder
2 tablespoons sugar
1 large egg
2 tablespoons canola or vegetable oil
2 teaspoons pure vanilla extract

Directions:

First prepare the honey tea syrup.  Bring honey and water to a simmer in a small saucepan.  Add teabag and remove from heat.  Let steep for at least 5 minutes.  Remove teabag, scraping off as much honey as you can (discard) and stir in the vanilla.  Transfer to a small container and place in the refrigerator to cool and thicken.

Next prepare the steeped almond milk.  Add vanilla almond milk and 3 tea bags to a small saucepan.  Bring to a simmer, then reduce heat and let gently simmer for 3-5 minutes.  Remove teabags, squeezing the liquid out as you remove them (discard tea bags).  Let milk cool in the refrigerator.

Mix the dry ingredients for the pancakes: Whisk together the flour, baking powder, and sugar.  Stir in the contents of 1 tea bag.  My tea was very finely ground, but if yours is not, grind it first in a food processor. 

Once the milk has cooled, prepare the wet ingredients by whisking together the egg, milk, vegetable oil, and vanilla extract. 

Add the wet ingredients to the dry ingredients and gently fold together until just incorporated.  Do not overmix.  Heat a large non-stick skillet or griddle over medium heat.  Spray with non-stick cooking spray if desired (I find that I don’t need to).  Spoon 1/4 to 1/3 cup batter (depending on desired size – I used 1/3 cup measuring cup but didn’t fill it all the way) onto the pan and use your fingers to spread it out a little into a circle.  Cook until bubbles begin to form on surface, a couple of minutes, then flip over and repeat until golden brown on both sides.  Repeat with remaining batter.

Serve pancakes warm with honey syrup.

February 26, 2012

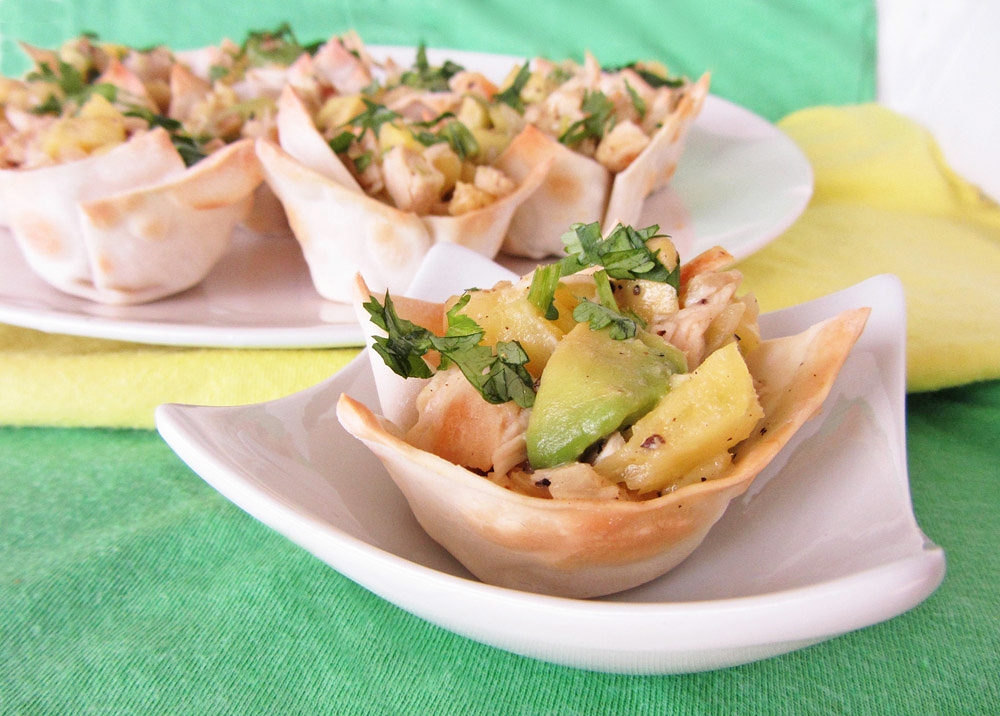
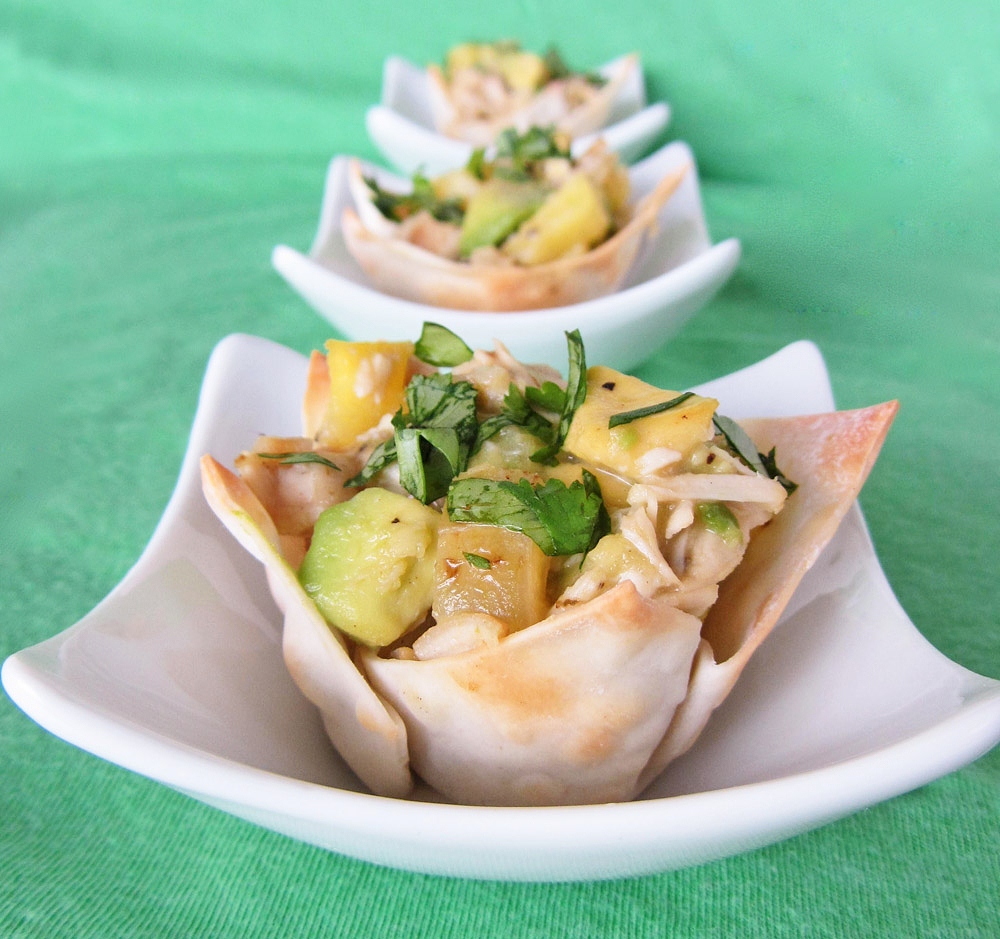
Tropical Chicken Cups

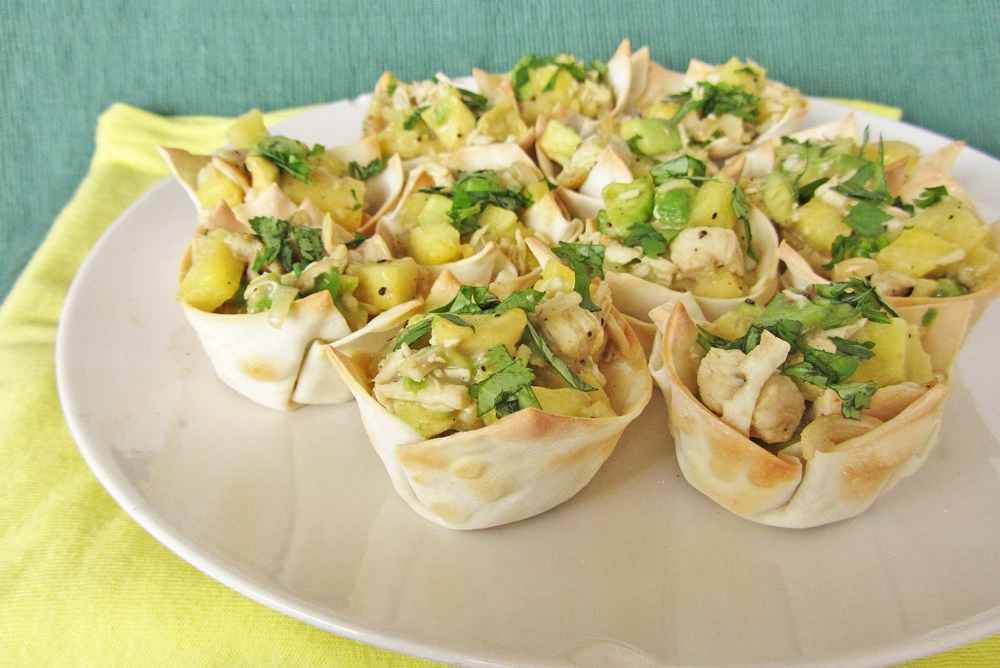
tropical chicken cups with pineapple and avocadoI've never been to an Oscars party and I usually don't last through the whole awards show, but I've been seeing a lot of Oscar menu ideas lately and I decided to make myself an Oscar-themed appetizer this year to eat during my favourite part of the show, the red carpet!

The four Best Picture nominees that I've seen are Moneyball, The Help, Midnight in Paris, and War Horse, so if I wanted to make something to match one of those, it would mean either baseball food, Southern food, French food, or.. horse food? None of those really appealed to me today, but when I read that The Descendants takes place in Hawaii, I decided to make something Hawaiian to eat because it seemed like the perfect thing to brighten a cold winter day. Even though I haven't seen The Descendants, I may have to root for it now - it deserves to win just for inspiring these delicious tropical chicken cups!

My sister showed me the original recipe for coconut mango chicken cups on Liv Life because she thought they'd be up my alley, and she was right! I hadn't seen this blog before, but it has tons of fantastic looking recipes and photos so I can't wait to try more from it. Kim says that she's made her chicken cups for lots of different gatherings, so I knew they would be good. Hers had mango chutney and curry paste in them, but I decided to give them a Hawaiian twist by using pineapple instead, and I added in avocado because I think it pairs really well with pineapple. I left in the coconut milk and lime juice so that the whole thing would have a tropical taste!

tropical chicken cups with pineapple and avocadoThese were pretty easy to make and were bursting with bright flavour! I think they'd make a perfect party appetizer that would be very quickly gobbled up (I know from the surprising rate that these disappeared from my own plate!) You could probably make a vegetarian version of them too by replacing the chicken with black beans, or even adding some coconut sticky rice for a bit more substance.

I realize you won't have time to make these in time for tonight's Oscars yourselves, but they'd be great for any occasion (and really, it's a bit of a stretch for me to call them Oscar-inspired anyway)! And now that I know what a great vessel wontons make for appetizers, I keep thinking of other filling ideas that would be fabulous in these - and if you decide to experiment, let me know what works!

Are you watching the Oscars tonight, and did you make any Oscar-inspired food?

tropical chicken cups with pineapple and avocado
Tropical Chicken Cups (with Pineapple, Avocado, Coconut, & Lime)

Makes 24 cups

Ingredients:

24 wonton wrappers
1 tsp canola oil
1 small onion, diced
3 cloves garlic, minced
1-1/2 tablespoons minced fresh ginger
2 cups cooked diced chicken (or you could use fish instead!)
3/4 cup light coconut milk
2 tablespoons fresh lime juice
1-1/2 cups diced fresh ripe pineapple
1 ripe avocado, diced
salt and pepper
cilantro for topping (optional)

Directions:

Preheat oven to 350°F. Spray a mini muffin pan with non-stick spray. Press 24 wonton wrappers into the mini muffin tin, pressing any folds firmly to the sides. Bake for 5-10 minutes, until golden. Set aside to cool.

Heat oil in a large non-stick skillet over medium-high heat. Add onion and sauté about 5 minutes, or until soft. Add the garlic and ginger and cook for another minute. Add the chicken, coconut milk, and lime juice, and cook for a few minutes until coconut milk is mostly absorbed. Gently stir in pineapple and avocado. Season generously with salt and pepper, tasting to adjust any amounts to taste. Remove from heat and cool slightly.

Spoon filling into wonton cups (you may have a bit of extra filling, which you can taste before filling the wonton cups to make sure it’s to your liking). Sprinkle chopped cilantro on top, if desired (if you're serving these to a big group, you may only want to put cilantro on half of the chicken cups because a lot of people don't like it). Serve warm or at room temperature.

October 04, 2011

Thanksgiving Week Day 3 - Hearty Sweet Potato Braids

sweet potato bread
For Day 3 of Thanksgiving Week, I decided to share this recipe for hearty sweet potato braids. Bread is an essential part of any meal, but especially the Thanksgiving meal. I think there are two types of bread people – the first likes to eat their bread on the side of their meal, and the other uses it to construct a sandwich out of everything else on their plate. I used to be in the former category, until I discovered how amazing all the components of Thanksgiving dinner (turkey, cranberry sauce, potatoes, stuffing) taste when mixed together on top of a slice of thick bread. But either way you like to eat it, this sweet potato bread is delicious!

This is not a light and fluffy bread – it’s dense and moist, hence the word ‘hearty’ in the title. It’s also not a sweet bread as you might expect from having the sweet potato in there – the addition of the thyme makes it a savory bread, but you could always adjust any of the spices to your own taste! I really enjoyed this bread as is, and I think it would be a great addition to a Thanksgiving meal on its own. But it would also work really well as a base for the spicy pumpkin hummus appetizer I shared yesterday (I tried this and they paired really well together)!

sweet potato bread
The recipe makes two loaves, and while one would be enough to feed a crowd, you might as well make two loaves because it would be tricky to divide a package of yeast in half. This also means you get to keep a whole extra loaf all to yourself – just slice it, wrap it up well and pop it in the freezer after you bake it, then you can pull out a slice or two to thaw anytime you want! One of my favourite dinners last week consisted of a few slices of this bread topped with a ton of roasted garlic with salt and pepper – amazing!

As with any yeast bread, this does take a while to make, but most of it is “hands off” time, freeing you up to work on your other Thanksgiving dishes! This was my first time making a braided bread, and it was actually much easier than I thought! If you’ve ever braided hair, then it’s just like that (although a little heavier and doughier!) After dividing your dough into six equal portions, you roll each one into a 20” rope – if you have a pastry mat with measurements on it, then this part is really easy! Ryan’s mom gave me one and it makes rolling out pie dough and other dough so much easier than my old method of trying to line up a bunch of rulers on the counter. It also makes clean up much simpler too!

sweet potato bread

I tried two methods for braiding the dough. First I tried braiding from the centre of the ropes:

sweet potato bread

For my second loaf, I tried braiding from the end of the ropes:

sweet potato bread
Both worked, but as you can see from the pictures, the first method resulted in a slightly more even braid, so I think I’d recommend you try the braiding from the middle method.

If you don’t have time to make a yeasted bread on Thanksgiving, then check out the Thanksgiving Week recipe for rosemary sweet potato cornbread over at Vanilla & Spice!

sweet potato bread
Hearty Sweet Potato Braids

Adapted from Taste of Home

Makes 2 loaves

Ingredients:

1 package (1/4 ounce) active dry yeast
1/4 cup warm water (110° to 115°)
1/2 teaspoon sugar
~1.5 lbs sweet potato, peeled and cubed (from about 1 large or 2 medium sweet potatoes)
1 cup warm skim milk (110° to 115°)
1/4 cup canola oil
3 tablespoons honey
1 cup all-purpose flour
1/2 cup yellow cornmeal
2 teaspoons kosher salt
1 teaspoon dried thyme
1/2 teaspoon nutmeg
2-3/4 to 3-1/4 cups whole wheat flour

Directions:

Bring a large pot of water to a boil. Add the sweet potato cubes and simmer about 15 minutes, until tender. Drain and rinse with cold water, then transfer to a bowl and mash the sweet potatoes with a fork. Let cool to room temperature.

In a small bowl, dissolve the yeast into the warm water. Add the sugar, stir, and leave for 10 minutes. Mixture should foam and double in size – if it doesn’t, the yeast is no longer active, and you’ll have to start again with a new pack.

Pour the yeast mixture into the bowl of an electric mixer, or a large bowl. Add the mashed sweet potatoes, milk, oil, honey, all-purpose flour, cornmeal, salt, thyme, nutmeg, and 2 cups of the whole-wheat flour. Beat until smooth. Stir in enough of the remaining whole wheat flour to form a firm dough.

Attach the dough hook to the mixer and knead for 6-8 minutes until smooth and elastic. If you don’t have a dough hook, knead the dough by hand on a floured surface. Add more flour as you’re kneading if the dough is too sticky.

Transfer the ball of dough into a large, lightly oiled bowl. Cover and let rise in a warm place until doubled, about 1 hour.

Punch down dough and divide into six equal portions (a scale is helpful here). Shape each portion into a 20-inch rope. Place three ropes side by side on a baking sheet that has been lightly greased or lined with parchment paper. Braid the three ropes and pinch each end to seal, tucking under the braid. Repeat with the remaining ropes to form two braids. Cover and let rise in a warm place until doubled, about 35 minutes. Meanwhile, preheat oven to 350°F.
Bake loaves together at 350°F for 30-35 minutes or until golden brown. Remove to wire racks to cool. Slice diagonally.

-------------------------------------------------------------------------------------------------------------------------------
For other Thanksgiving bread ideas, check out these links:

Perfect dinner rolls from Mel’s Kitchen Café
Buttermilk cluster from The Fresh Loaf
Soft garlic knots from Annie’s Eats
Parmesan pull-apart rolls from Picky Cook
Cranberry walnut bread rolls from La Tartine Gourmande
Pumpkin garlic knots from Handle the Heat
Rosemary pumpkin crescent rolls from Heat Oven to 350
-------------------------------------------------------------------------------------------------------------------------------

Ingredient Index

Related Posts Plugin for WordPress, Blogger...