Showing posts with label oil - sesame. Show all posts

April 10, 2014

Chickpea & Veggie Brown Rice Barley Bowl with Tahini Dressing

Chickpea & Roasted Veggie Brown Rice Barley Bowl with Tahini Dressing

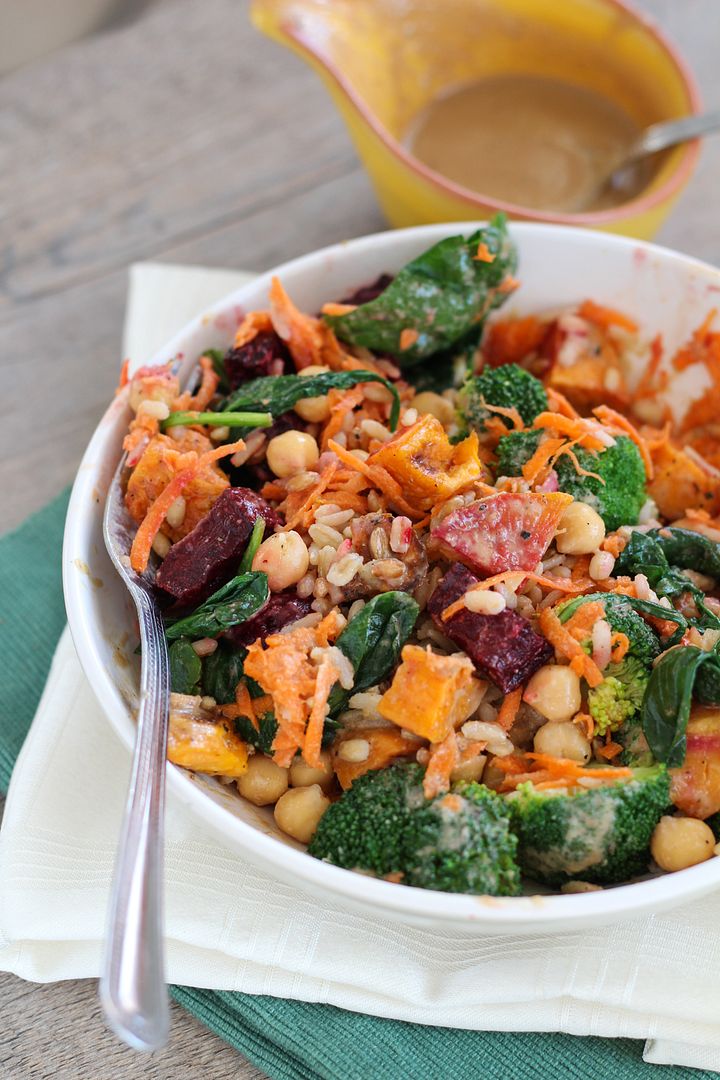
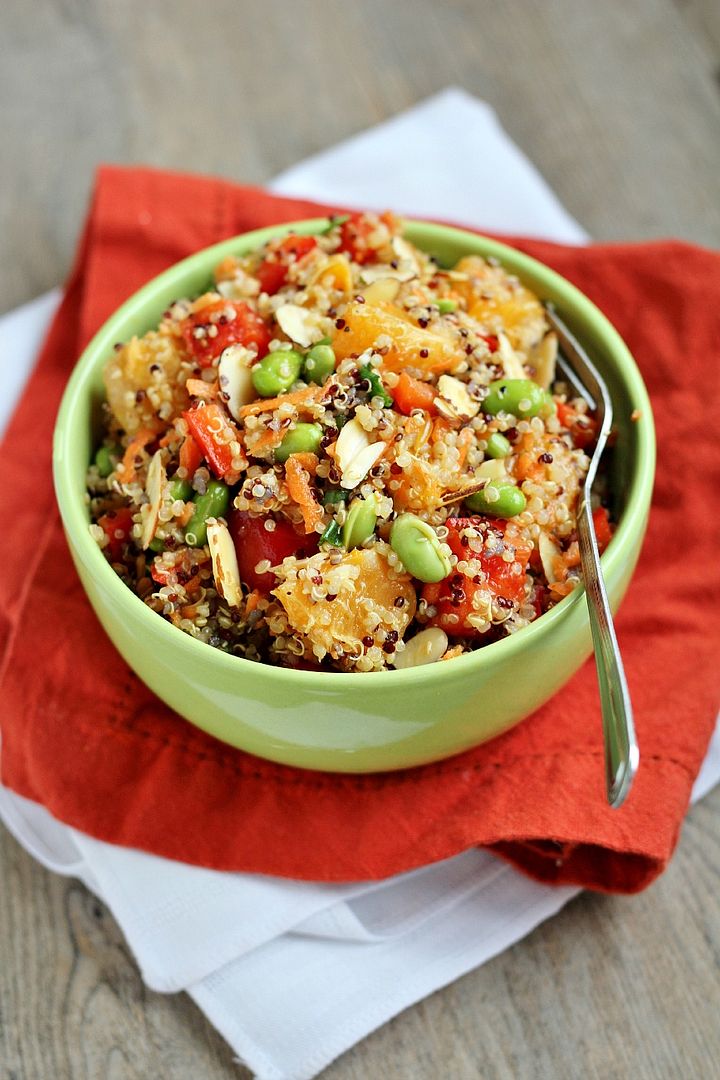
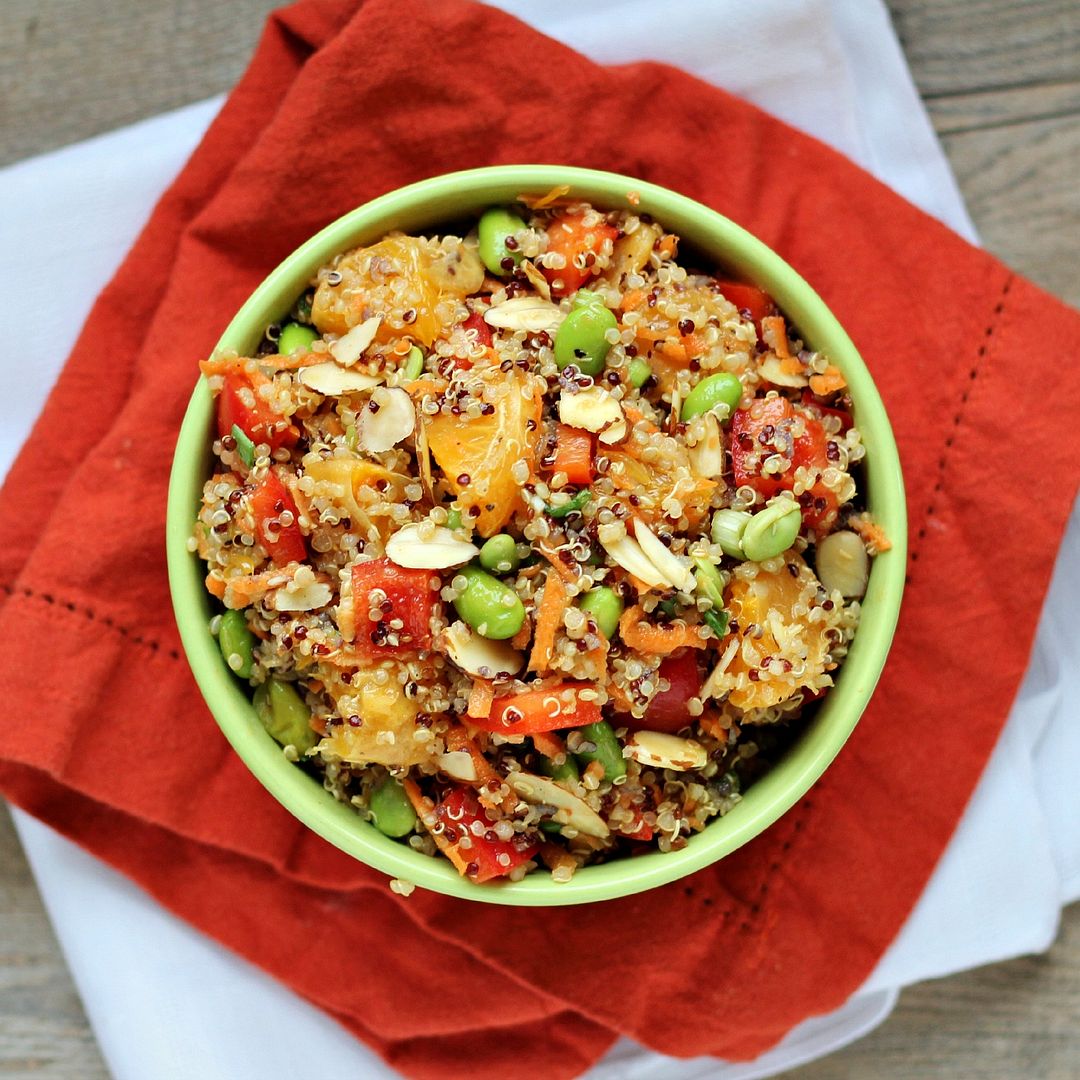
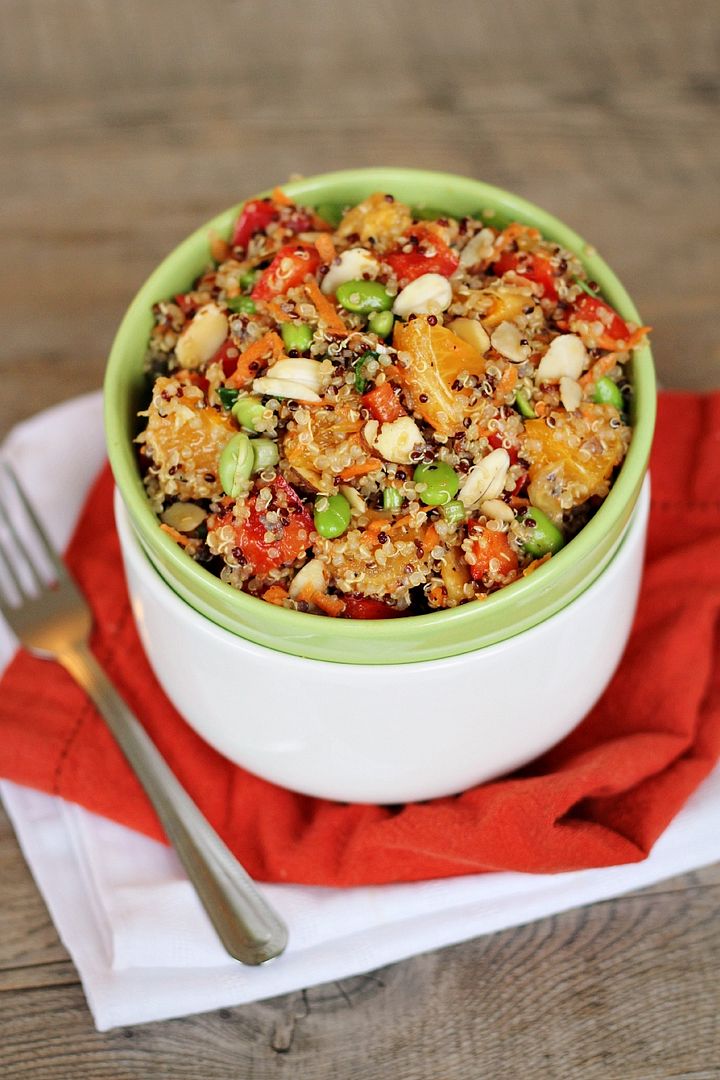
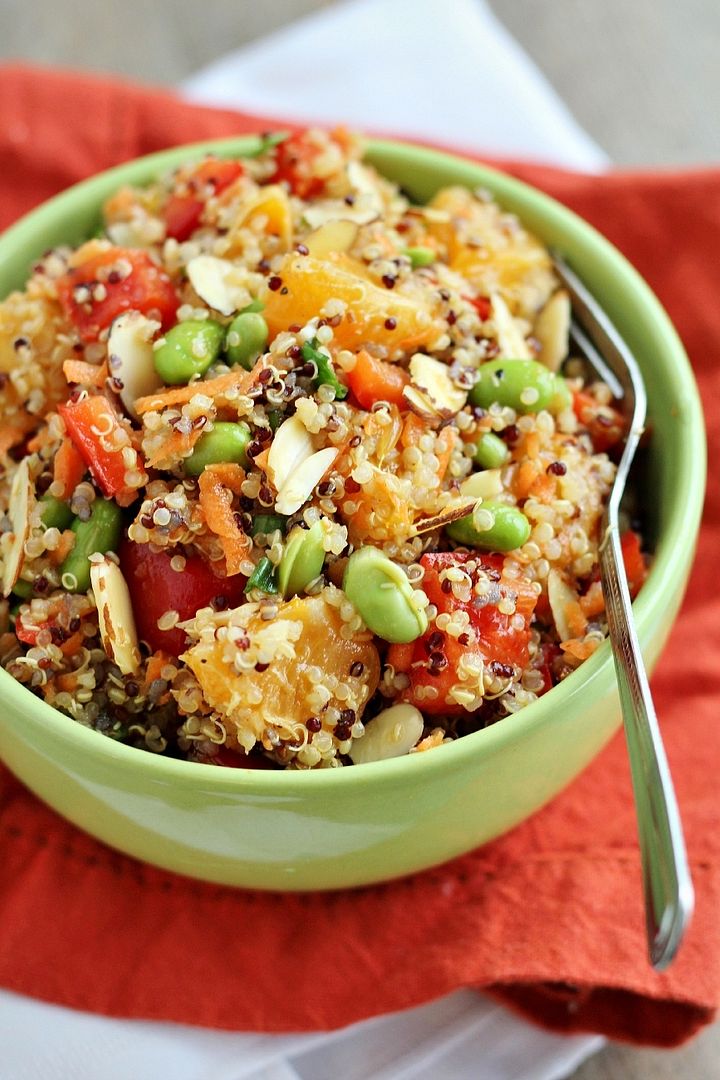
Healthy "bowls" seem to becoming more and more popular these days both across the internet and in cafes and restaurants.  They have many names and variations, but the basic concept is that you combine a base of grains (like rice, quinoa, barley, etc), several different vegetables (raw or cooked), a protein or two (chicken, tofu, beans, nuts, or cheese), and a delicious sauce to tie it all together, thus giving you a complete meal in a bowl.

I find myself drawn to any healthy meal that ends in "bowl" because I love a meal with different textures, flavours, and colours that all fit together in one dish, and these bowls are easy to make super nutritious.

Chickpea & Roasted Veggie Brown Rice Barley Bowl with Tahini Dressing

The problem with ordering them in a restaurant is that they're usually pretty expensive, and while making them at home can require a bit of effort, it's cheaper and you can make a lot so that you have delicious healthy bowls for lunches through the week!

For my version, I combined the following:

Chickpea & Roasted Veggie Brown Rice Barley Bowl with Tahini Dressing

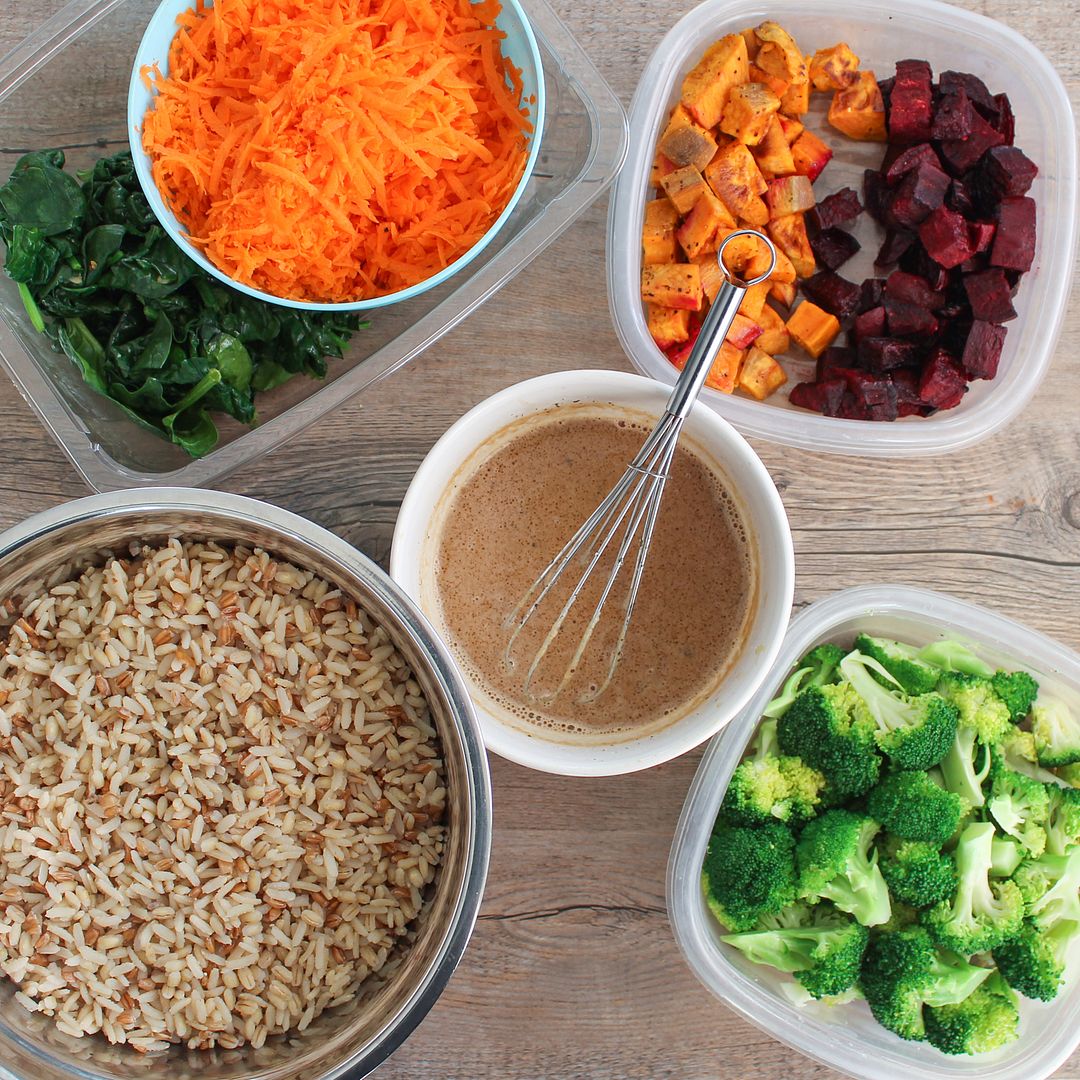
Base - a mix of brown rice, barley, and spelt (I used a PC blend of the three for convenience!)
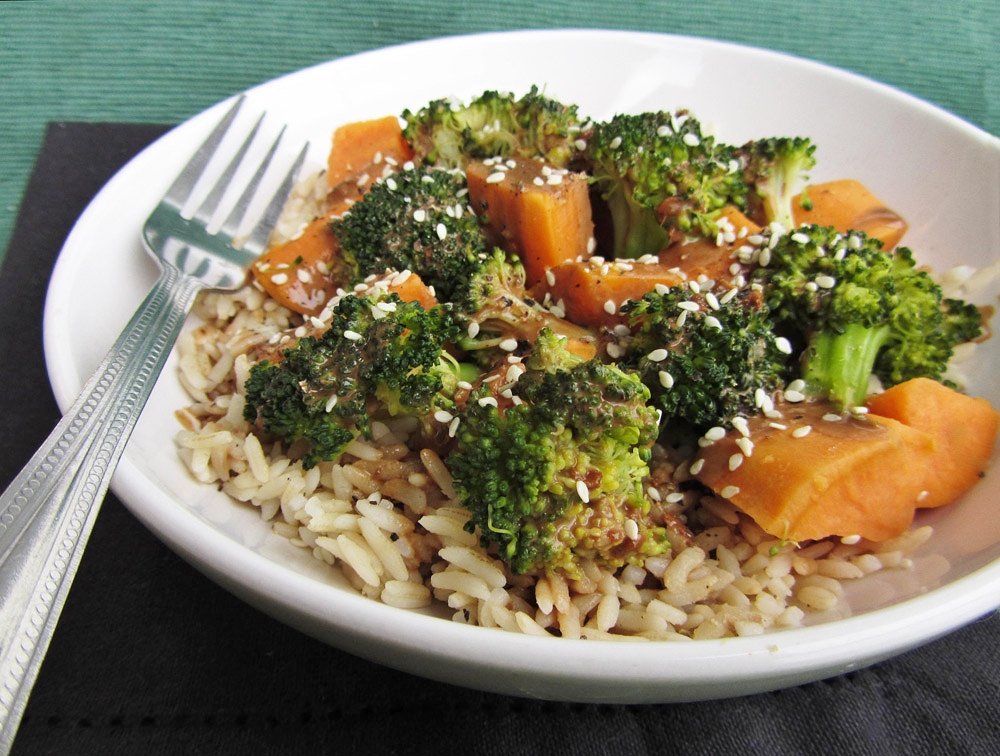
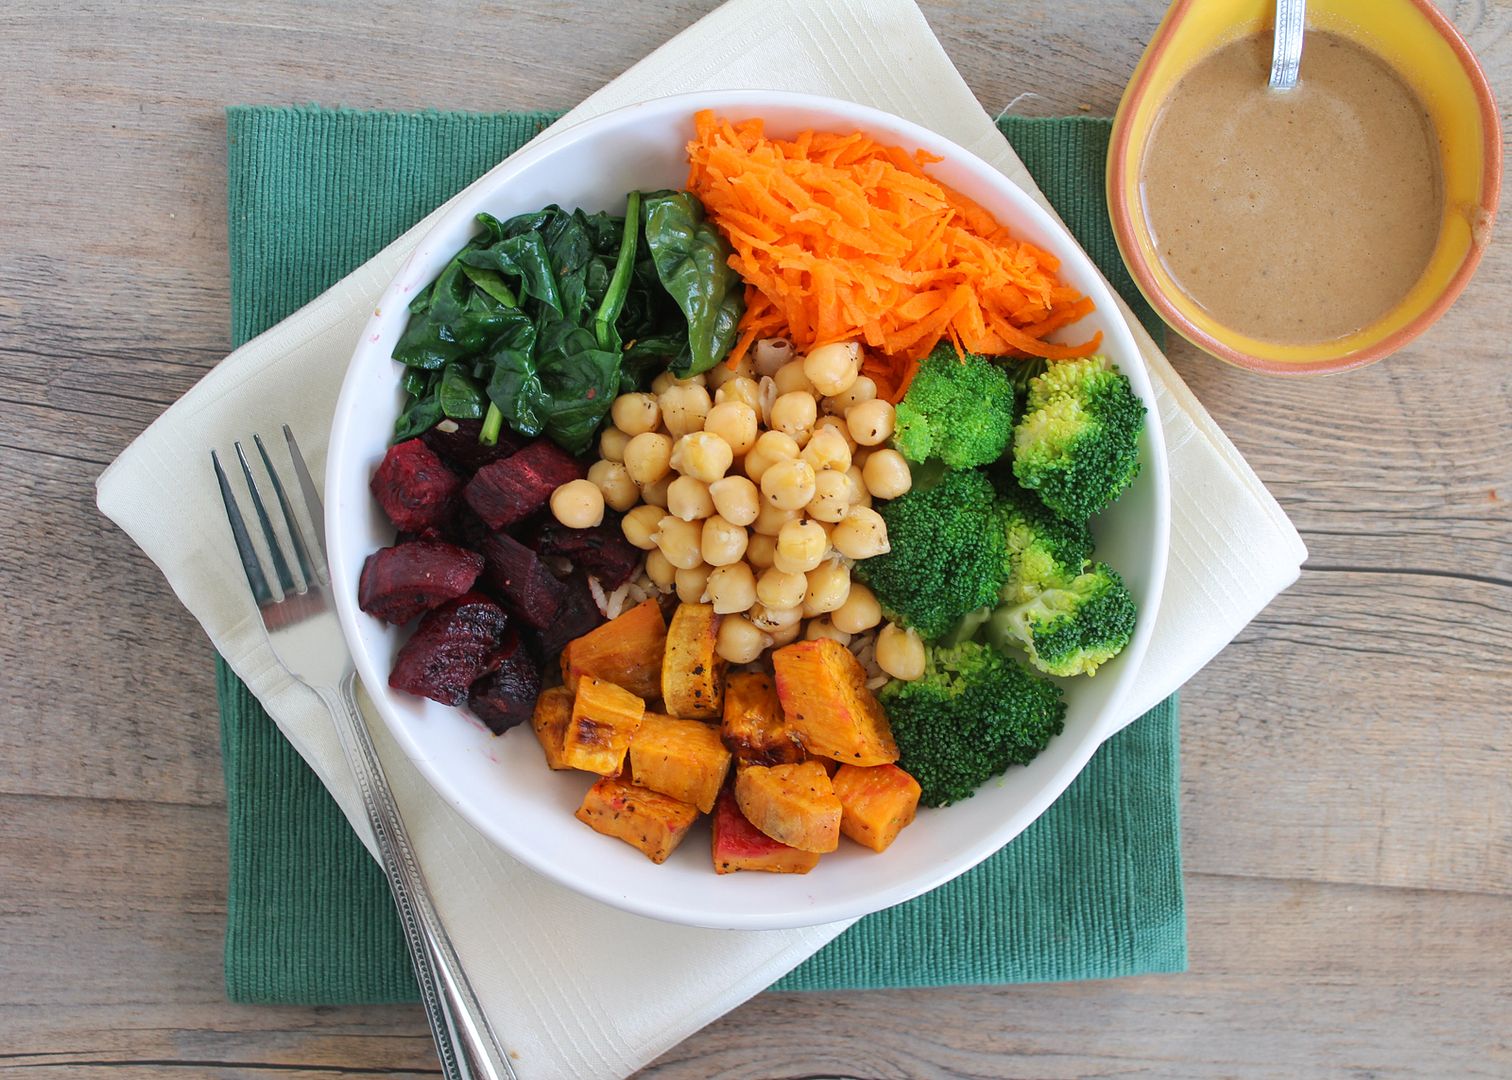
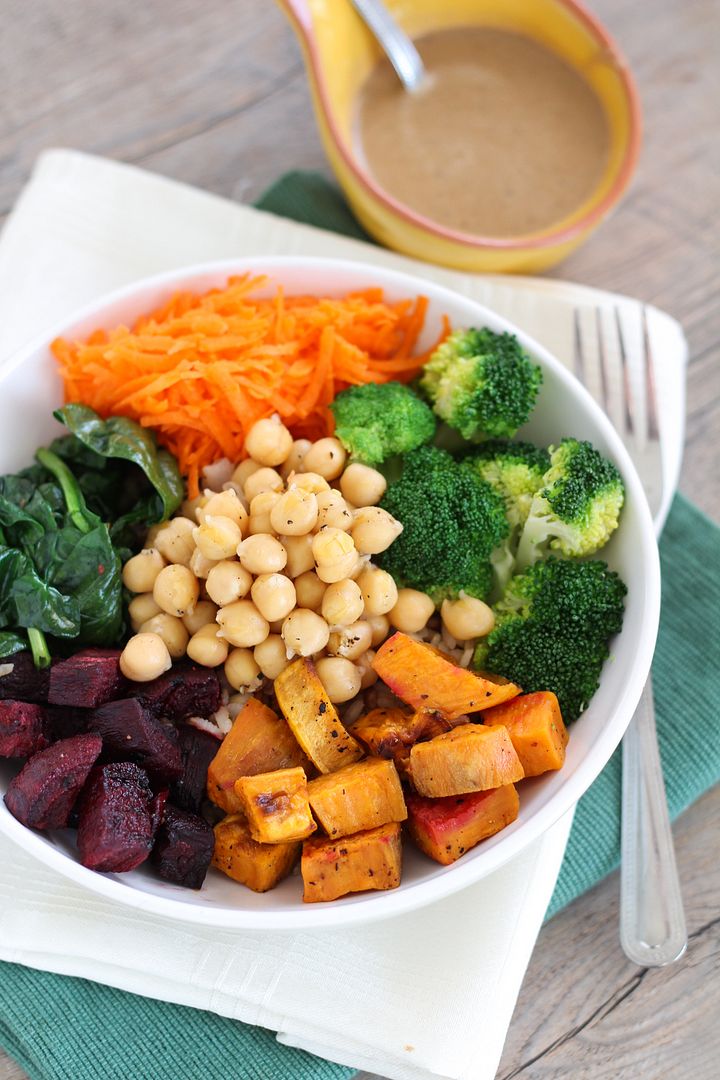
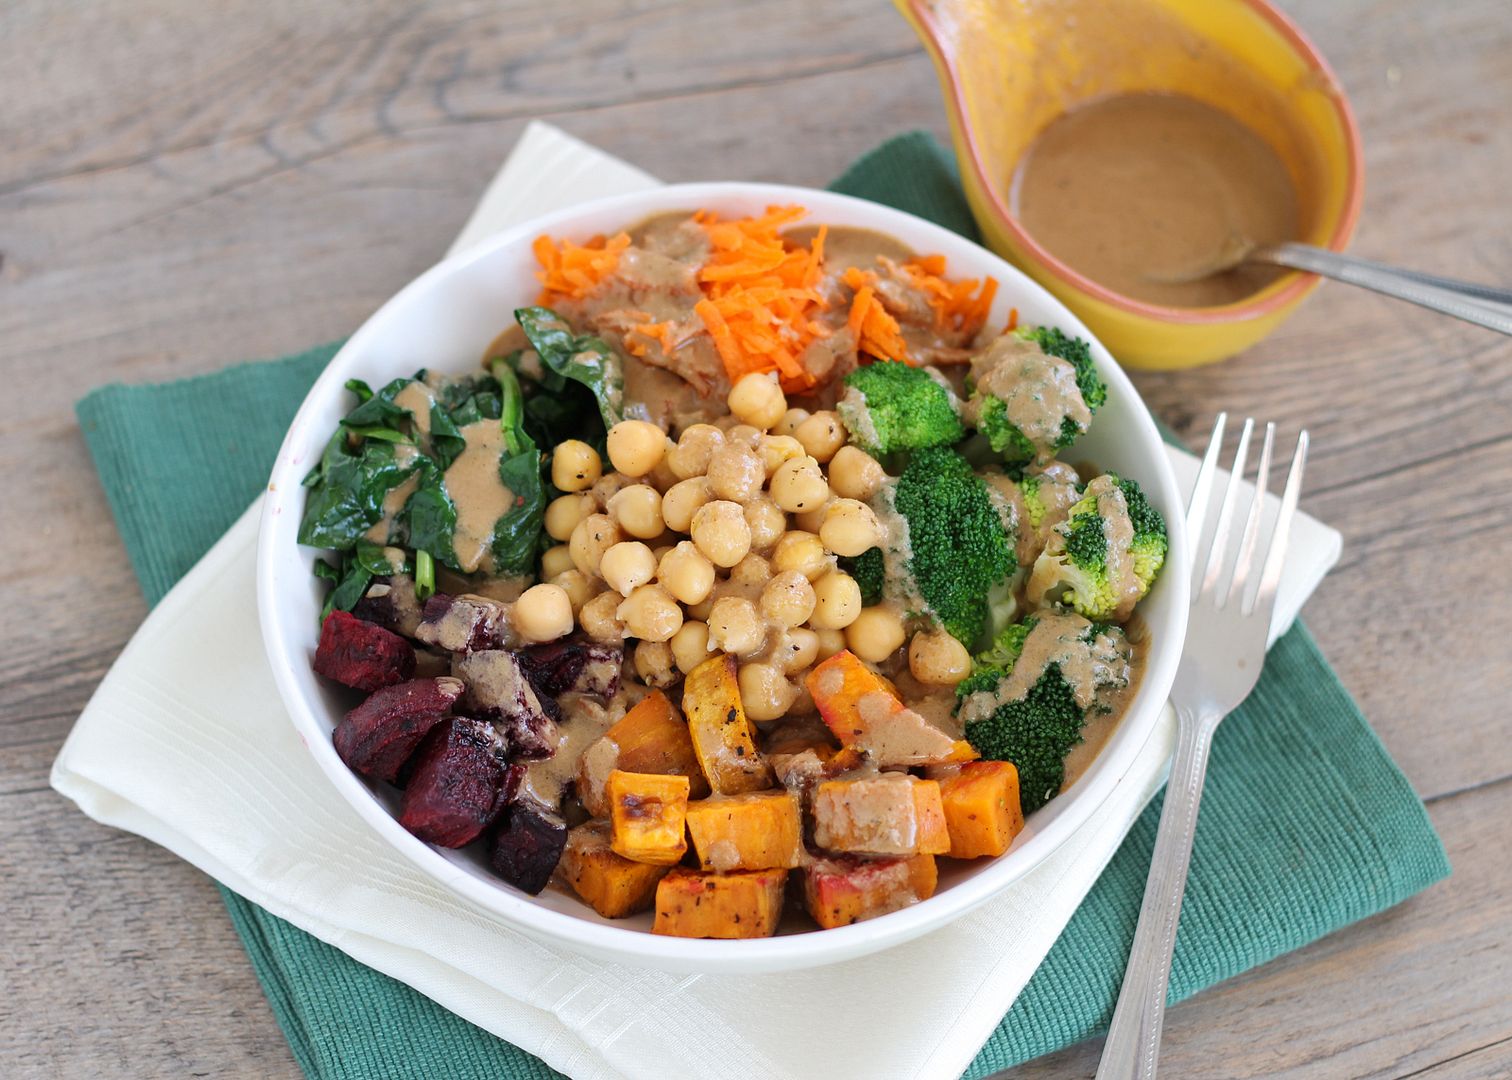
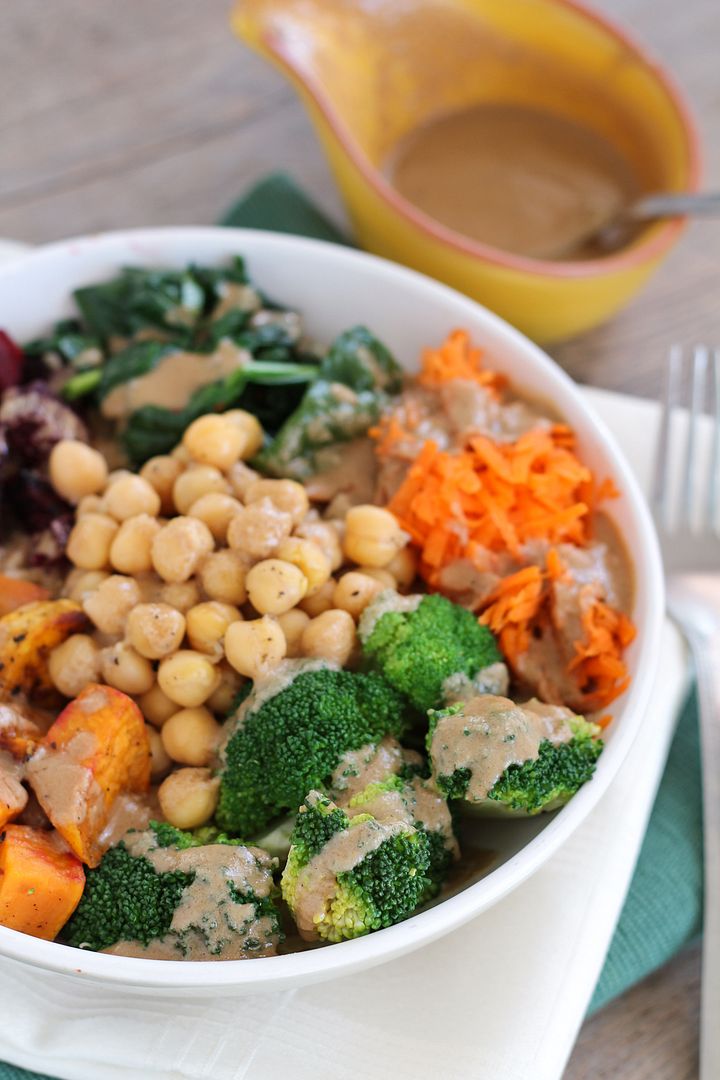
Veggies - steamed broccoli, roasted beets and sweet potatoes, sauteed spinach with garlic, and grated raw carrots
Protein - I forgot to include this in the picture above, but I used chickpeas
Sauce - tahini dressing with soy sauce and sesame oil for flavour!

Chickpea & Veggie Brown Rice Barley Bowl with Tahini Dressing

Another nice thing about these is that they're highly adaptable, so if you don't like the ingredients that I used, you can make whatever substitutions you like, as long as you maintain a variety of colour and textures!

Try using quinoa as a base if you don't like rice; substitute the chickpeas for chicken or tofu if you like; grate raw beets instead of roasting them; sautee brussels sprouts or kale instead of spinach; roast squash instead of sweet potato ... you get the idea!

Chickpea & Veggie Brown Rice Barley Bowl with Tahini Dressing

This makes a filling lunch or dinner that will leave you feeling great.  If you're making enough to have leftovers (which I recommend you do!), just be sure to store the sauce separately or else it will get absorbed and leave the dish feeling sauceless, which won't be as good as sauce is the most important part!

Chickpea & Veggie Brown Rice Barley Bowl with Tahini Dressing

Chickpea & Veggie Brown Rice Barley Bowl with Tahini Dressing

Inspired by several recipes, such as ones seen on Paint + Tofu, Dishing Up The Dirt, and Grace Bezanson

Makes 3-6 servings, depending on serving size

Ingredients:

For the Toppings:
~1 tablespoon olive oil
1 large sweet potato, chopped into bite-sized pieces
2 large beets, chopped into bite-sized pieces
1 head of broccoli, chopped into small florets
1 teaspoon sesame oil
1 clove garlic, minced
1 bunch of baby spinach (however much you like; I used a small container)
2 large carrots, grated (a food processor with the grater attachment works well for this!)
1 can of chickpeas, drained and rinsed

For the Base:
3-4 cups cooked brown rice and/or barley (I used a bag of mixed brown rice, barley, and spelt) or your favourite grain, such as quinoa (about 1 to 1-1/2 cups uncooked)

For the Sauce:
1/2 cup tahini
1/2 cup water
1/4 cup fresh lemon juice
1/4 cup soy sauce
2 teaspoons sesame oil
1 tablespoon + 1 teaspoon honey or agave
1/4 teaspoon each salt and pepper

Directions:

Preheat oven to 400°F.  Toss sweet potatoes and beets with olive oil, season with salt and pepper, and spread in an even layer on a foil-lined baking sheet. Roast in preheated oven for 25-35 minutes, until tender.  The sweet potatoes will likely be done sooner than the beets; just transfer them to a bowl and put the beets back in the oven.  I prefer roasting beets whole but this takes longer; if you have time, just roast the whole beet for 1 hour, drizzled with oil and wrapped in foil, then peel and chop it after.

Meanwhile, you can cook the broccoli, spinach, and your grains.  Steam the broccoli in a steamer basket over boiling water, covered, for about 2-3 minutes until bright green and tender.  Rinse with cold water and drain.  For the spinach, heat sesame oil in a large skillet over medium heat.  Add garlic and cook for 30 seconds (this is optional; you could also use a different oil if you like), then add spinach and cook just until wilted.  Remove from heat.  Cook your grains according to package directions; I cooked mine uncovered in simmering water for around 18 minutes, then seasoned with salt and pepper.

Prepare the dressing by whisking all ingredients in a small bowl until smooth.  Taste and adjust any amounts to your liking.  Note that this makes a lot of dressing and likely more than you’ll need; just save any extras for another use!

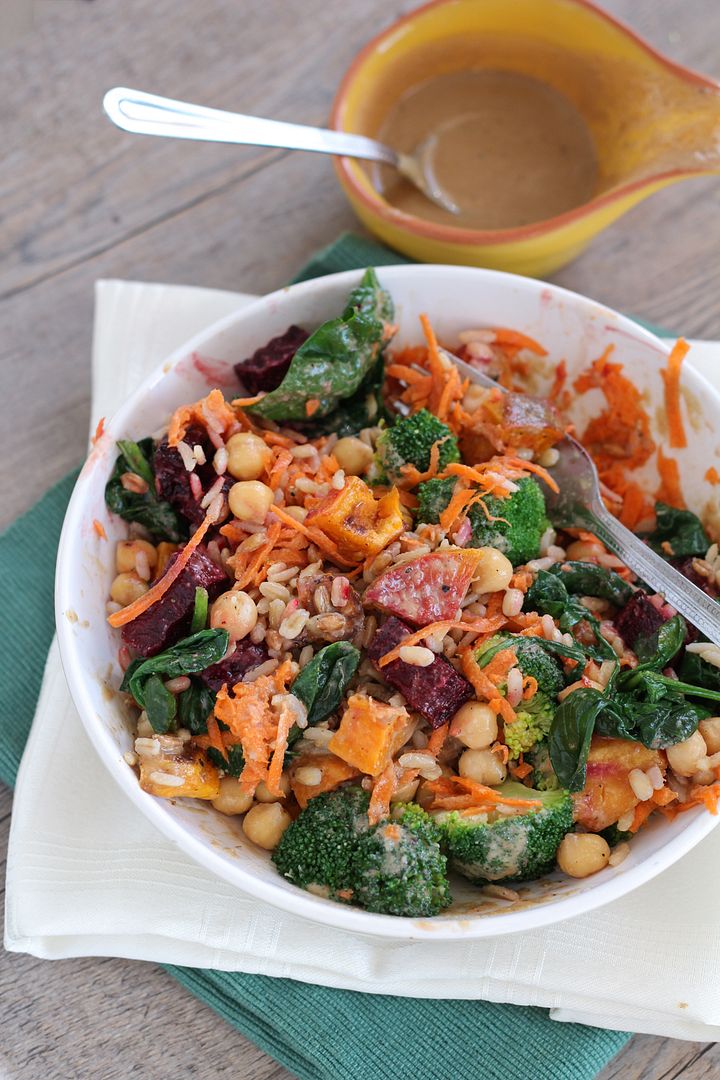
Prepare bowls by adding grains to the bottom, topping with vegetables (beets, sweet potatoes, broccoli, carrots, spinach) and chickpeas, and drizzling tahini dressing on top.  Toss to coat and season with salt and pepper, if desired.  You can eat this warm or at room temperature.

If you have leftovers, you can portion out everything together into containers except the sauce - that should  be kept separate and drizzled on right before eating so it doesn't get absorbed.

Chickpea & Veggie Brown Rice Barley Bowl with Tahini Dressing

August 13, 2013

Ponzu Glazed Salmon with Miso Slaw

Ponzu Glazed Salmon with Miso Slaw

I leave for a conference in Japan tomorrow, and as with any trip, the most important thing I’ve researched beforehand (I haven’t done much preparation for this trip) is what the food will be like!   I don’t have a lot of experience with Japanese food outside of sushi, and even the sushi rolls I normally choose are more like Western versions of sushi (yes I like California rolls, sorry sushi purists!).  So I decided to buy a few Japanese ingredients I haven’t tried before – specifically, miso and ponzu sauce - and use them in a dish before I left, and this is what I came up with!

I’ve always wanted to try miso (a thick, salty soy paste), but whenever I see it I talk myself out of it because it’s kind of expensive and I’m never sure what to do with it.  I’d also never tried ponzu, but from the description – like a citrusy soy sauce – I knew I’d like it.  I considered using them in some sort of soba noodle salad, but I’ve eaten lots of soba noodles before (I love them!), so I decided to go with something a little different and use the ponzu as a marinade and glaze for salmon, and the miso in a dressing for a simple slaw on the side.

Ponzu Glazed Salmon with Miso Slaw

Because I’ve been pretty busy the last few days, I tried to keep things as simple as possible, making an easy 2-ingredient ponzu and ginger marinade for the salmon along with a 3-ingredient glaze of ponzu along with rice vinegar and orange juice to lighten it up.  For the slaw, I cheated and used a storebought bag of coleslaw mix (but feel free to make your own), and then played around with a dressing until I reached a combination of flavours - trying to balance out the salty miso with rice vinegar for acidity, honey for sweetness, and some fresh orange juice to lighten it up - that I liked. 

The whole dish didn’t take long to prepare and I ended up loving it so much!  The ponzu and orange juice glaze gave the salmon such a great flavour that was similar to soy sauce but not quite as rich and salty, and the marinade made the salmon so tender.  The slaw was also really flavourful, though perhaps almost a little too similar to the taste of the salmon for them to be served together with no other side dish to cleanse the palate.  Next time I think I’d either add in another simple side like mashed potatoes (even though that’s not Japanese at all, but then the salmon and slaw might not really be either!), or serve the ponzu salmon alongside a brighter and lighter orange slaw like this one. 

Nevertheless, I still loved both components, and they were a great way to get me looking forward to trying some real Japanese food soon!  I’ll be sure to take lots of pictures of anything I try so I can share it when I get back!

And if you have any suggestions on things to eat or look for there, feel free to share!  Tips on vegetarian restaurants/food would be especially welcome for my sister who will be traveling with me!

Ponzu Glazed Salmon with Miso Slaw

Ponzu Glazed Salmon with Miso Slaw

Loosely guided by a recipe from Bon Appetit

Serves 2

Ingredients:
For the Salmon:
2 fresh salmon fillets (about 3-4 ounces each)
2 tablespoons ponzu sauce
1 teaspoon grated fresh ginger

For the Ponzu Glaze:
2 tablespoons ponzu sauce
1/4 cup fresh orange juice
1/2 teaspoon rice vinegar

For the Miso Slaw:
3 cups prepared coleslaw mix (or make your own using cabbage, carrots, red pepper, cucumber)
1 tablespoon white miso
1 tablespoon water
2 tablespoons fresh orange juice
1/2 teaspoon honey
1/2 teaspoon sesame oil
1/2 teaspoon ponzu sauce
2 teaspoons rice vinegar
1/2 teaspoon grated ginger

Directions:

Add salmon fillets, 2 tablespoons ponzu, and 1 teaspoon grated ginger to a ziplock bag.  Seal and rub the sauce around to make sure salmon is coated, then place in refrigerator to marinate for 30 minutes.  Preheat oven to 425°F.

Meanwhile, prepare miso slaw.  Add miso, water, orange juice, sesame oil, ponzu, rice vinegar, and ginger to a small bowl and whisk to combine.  Taste and adjust any amounts to your liking.  Add coleslaw and toss to coat.  Refrigerate until ready to serve.

Once salmon has marinated and oven is ready, transfer salmon to a foil-lined baking sheet (skin side down, if skin is attached), and roast for 10-14 minutes, until tender.  Meanwhile, prepare the ponzu glaze by adding the 2 tablespoons ponzu, 1/4 cup orange juice, and 1/2 teaspoon rice vinegar to a small saucepan.  Bring to a boil, then reduce to simmer and let simmer until sauce is thickened and reduced by about half (about 5-7 minutes).  Brush on cooked salmon.  Serve salmon alongside slaw.

*Note: You might want to add in another more plain side dish (like a carb) to balance out the flavours.

May 29, 2013

Asian-Inspired Mandarin Quinoa Salad

Asian-Inspired Mandarin Quinoa Salad

I don’t know if it’s the call of summertime (and bikinis) or just the longer hours of daylight available in a day, but over the past month I’ve started fitting a lot more exercise into my schedule.  I’d only just started getting into fitness in January but started off pretty slowly so I didn’t overdo anything (I have a bad knee that likes to act up a lot), but when new fitness classes became available in May, my sister and I started trying out a bunch and so far we've kept it up!

I’ve discovered a love for Zumba (my favourite of all classes; I am hopeless when it comes to the more salsa-esque moves but it is still so fun!) and yoga, along with a love/hate relationship with bootcamp style classes, which are so hard but also so effective!  And tonight I’m going to try my first AquaZumba class (basically Zumba in the water), which should be interesting!

Asian-Inspired Mandarin Quinoa Salad

All this exercise not only has me craving healthy food more, but also needing quick dinners that can be waiting for me in the fridge when I get home later than normal and am starving! I especially love quinoa salads for this purpose because they keep well in the fridge, are full of protein, and can be customized to endless flavour combinations!

Asian-Inspired Mandarin Quinoa Salad

I’ve been wanting to try an Asian flavoured quinoa for a while, and when I started thinking of ingredients to include in one, I remembered this mandarin chicken salad I made a while ago and loved.  So I decided to incorporate many of those same ingredients into a quinoa salad – I kept the red pepper, carrot, edamame, and mandarin oranges, added green onion, almonds, and orange juice in the dressing, and left out the chicken because there was already plenty of protein in this salad from the quinoa, edamame, and almonds (though you could certainly add chicken if you like!).

This was so fresh and every bite was full of flavour, with a wide range of textures from the crunchy red peppers to juicy oranges and buttery soft edamame.  Regardless of whether I can keep up my fitness motivation or not, I know I’ll still be making this quinoa many more times this summer!

Asian-Inspired Mandarin Quinoa Salad

Asian-Inspired Mandarin Quinoa Salad

Makes 2-3 main dish servings or around 6 side dish servings

Ingredients:

For the Quinoa:
1 cup uncooked quinoa (I used golden & black mix)
1 cup vegetable broth, optional
1 cup shelled frozen edamame
1 red bell pepper, chopped
1 to 1.5 mandarin oranges, peeled and chopped
2 large carrots, grated
2 green onions, chopped
1/4 cup sliced almonds, toasted if desired (I was too lazy but almonds are usually better toasted!)

For the Dressing:
2 tablespoons fresh mandarin orange juice (squeezed from about half a mandarin)
2 tablespoons rice vinegar
2 tablespoons sesame oil
1/2 teaspoon chili garlic sauce (optional for a bit of spice)
1-1/2 teaspoons honey (use agave or brown sugar to make this dish vegan)
2 teaspoons soy sauce
1 garlic clove, minced
Dash each of salt and pepper

Directions:

Bring 1 cup water and 1 cup vegetable broth to a boil in a medium saucepan.  Add quinoa, cover, and reduce heat to simmer for 15 minutes.  Remove from heat and let sit, covered, for 5 minutes, then remove lid and fluff with a fork.  Let quinoa cool.  (Note that the vegetable broth is optional to add a little extra flavour; if you choose not to use it then use 2 cups water total instead)

Meanwhile, cook edamame according to package directions - I added my edamame beans to 1 cup of boiling water, let them simmer for 3-4 minutes, then drained and rinsed them.  Also whisk together all ingredients for the dressing in a small bowl and set aside.

Once quinoa has cooled to room temperature, combine quinoa, edamame, red pepper, oranges, carrots, green onions, and almonds in a large bowl.  Pour dressing overtop and mix to combine.  Serve at room temperature or chilled.

April 09, 2013

Smoked Salmon & Avocado Fresh Spring Rolls with Soy Dipping Sauce

Smoked Salmon & Avocado Fresh Spring Rolls with Soy Dipping Sauce

While my wishing for the snow to stop seems to have worked because we haven't had snow the last few days, now we are getting rain - A LOT of rain! - much of Southern Ontario has been issued a special rain warning with flood watches for the week.  I guess the old saying "be careful what you wish for" has some truth to it - so now I'm wishing that the phrase "April showers bring May flowers" is also true, and that the May flowers part includes May veggies!  And to help wish Spring along, I made spring rolls - clever right?  :)

When it comes to spring rolls, I actually much prefer fresh rolls made with rice paper than the more common deep fried version, because the focus is on the fresh ingredients inside the roll, whose flavour isn't masked by a thick fried wrapper.  Plus fresh rolls are super easy to make - just lay some ingredients you like on a circle of rice paper and roll it up!  Rice paper wrappers get pretty sticky when they're wet so they'll stay together well as long as you wrap them up tightly.  The only down side is they have to be eaten pretty soon after making them so they don't harden, but with these smoked salmon and avocado rolls, you won't have any problem eating them all up right away!

Here are the ingredients I put in my fresh rolls: smoked salmon, avocado, carrots, cucumber, basil, lettuce, and a sprinkle of sesame seeds.

Ingredients for Smoked Salmon & Avocado Fresh Spring Rolls

Just soak your rice paper wrapper, lay it on a clean surface (I used a damp paper towel), place your ingredients in the bottom half, then roll it up!  Easy peasy!

Making Smoked Salmon & Avocado Fresh Spring Rolls

I loved how the creamy avocado and smoked salmon paired with the crunchy veggies in these fresh rolls, but the best part was the soy dipping sauce that infused the whole thing with even more flavour - it's an absolute must!

If smoked salmon isn't your thing, I also love these sweet & spicy kiwi mango fresh rolls with lime dipping sauce.  And if you have other fresh rolls flavour combos that you love, let me know - I have a ton of rice paper wrappers to use up now!

Smoked Salmon & Avocado Fresh Spring Rolls with Soy Dipping Sauce

Smoked Salmon & Avocado Fresh Spring Rolls with Soy Dipping Sauce

Adapted from Eating Well

Makes 6 fresh rolls

Ingredients:

For the Fresh Rolls:
6 (9-inch) rice paper wrappers
6 pieces of lettuce
1 (100g or 3-4oz) package smoked salmon, in 6 slices
1 large carrot, peeled and julienned (you might not use the whole carrot)
Half a cucumber, julienned
1 ripe avocado, sliced (you might not use the whole avocado – I only used about half of one but that was being stingy)
1/4 cup sliced basil
1 tablespoon sesame seeds

For the Dipping Sauce:
2 tablespoons soy sauce
2 tablespoons rice vinegar
1 teaspoon sesame oil
1 teaspoon minced ginger
1 teaspoon sweet thai chili sauce
2 teaspoons sugar
1 green onion, chopped

Directions:

Have all of your components for the spring rolls prepared before you start rolling them (i.e. slice your carrot, cucumber, avocado, basil, and salmon, and have the lettuce and sesame seeds ready to go).  

Soak one rice paper wrapper at a time in a shallow dish of hot water for about 10 seconds until it is soft and bendable.  Remove, let excess water drip off, and lay on a damp paper towel (the original recipe suggests a cutting board, which would work too, but I liked to keep the wrapper damp).  Lay lettuce on bottom third of wrapper, top with a piece of salmon, a few pieces of carrot, a couple pieces of cucumber, a slice or two of avocado, a bit of basil, and a sprinkle (about 1/2 teaspoon) of sesame seeds.  Fold the wrapper up over the filling and roll into a tight cylinder, folding in the sides as you go.  Remember that the wrapper will stick to itself, so make your folds where you want them, as it can be hard to undo!  Repeat with remaining wrappers and filling.  Cut each finished roll in half.

*Note: I also tried rolling one with the ingredients placed in the center before rolling and found that it worked that way too, but I preferred starting to roll from the bottom.

To prepare dipping sauce, whisk all ingredients together in a small bowl.  Serve rolls immediately with the dipping sauce, or refrigerate for up to 4 hours covered with a damp paper towel so they don’t harden (the original recipe suggests individually wrapping them in parchment or wax paper).

May 10, 2012

Sesame Soba Noodle Salad

soba noodle salad

I'm back!  I had a wonderful, relaxing week on vacation in beautiful Cuba, but now I'm having a hard time adjusting back to work and reality!  I apologize for the lack of posts lately, as well as my delay in checking in with other blogs (I currently have over 800 unread blog posts in my Google Reader to get to!), but I'm hoping this tasty and refreshing sesame soba noodle salad will help make up for it!

This is actually a dish inspired by a meal I ate in a Japanese restaurant on my earlier trip to Singapore.  I wasn't exactly sure what I was ordering when I requested the soba noodle salad, but I certainly didn't expect to see lettuce and noodles mixed together!  I didn't have high hopes for it when it appeared in front of me, but was pleasantly surprised when I took a few bites.  Since the noodles were cold, the whole salad was light and refreshing with an interesting mix of textures that worked well together.  But what really made the dish stand out was the delicious sesame dressing that was served with it.  

You may remember the picture I posted of the dish back in my recap of what I ate in Singapore, where I promised I would try to replicate it back at home.  Well, I stayed true to my word and recreated it the weekend after I got home from that trip!

soba noodle salad 3

The salad part was easy - I just used some of my favourite salad ingredients, topped them with a pile of cooked soba noodles and a garnish of sliced nori and sesame seeds.  The salad dressing was a little harder as I had to play around with different ingredients quite a bit until I found the perfect balance, but I think I ended up with a pretty amazing dressing!

This salad tasted just as good as the one I remembered eating in Singapore - it was cool, fresh, and full of flavour thanks to the filling sesame peanut dressing.  It's great for summer and I will definitely be making this again now that my trip to Cuba has given me a taste of the hot weather I have to look forward to!

soba noodle salad 2

Sesame Soba Noodle Salad

Inspired by a dish I ate at Rakuzen in Singapore

Serves 2

Ingredients:

For the Dressing:
2 tablespoons peanut butter
1 tablespoon tahini
2 tablespoons sesame oil
2 tablespoons rice vinegar
1 teaspoon low-sodium soy sauce
1 clove garlic, minced
1 teaspoon minced ginger
1 teaspoon honey
Dash of salt
2 tablespoons water

For the Salad:
4-6 oz soba noodles (depending on desired amount)
Lettuce (desired amount for 2 people)
Sliced cucumber, carrot, mushrooms, and snowpeas (or other desired salad ingredients)

For Topping:
1 sheet of nori, thinly sliced for garnishing
2 tablespoons sesame seeds

Directions:

Cook soba noodles as per package ingredients.  Drain and rinse well with cold water.  Let cool.

In a small bowl, whisk together all ingredients for the salad dressing.  Taste and adjust any amounts to your liking, and add more water to thin it out if necessary.

Divide lettuce and salad ingredients between two bowls/plates.  Top with cooked cooled soba noodles.  Garnish with nori and sesame seeds and serve with sesame dressing.

April 13, 2012

Mandarin Chicken Salad

Mandarin chicken salad

I’ve been fortunate enough to travel to Asia a few times now, and while I love experiencing the incredible and diverse food Asia has to offer, one of the things I always find myself missing is a fresh, crisp salad. A lot of vegetables over there are cooked, and sometimes you can’t trust the fresh ones because they may have been washed in tap water. Towards the end of my trips, I actually start dreaming about raw vegetables and would give up all the amazing food there just to have one bowl of refreshing salad!

So the first thing I did when I got home from my most recent trip was to make myself a giant bowl of salad! I wanted to make something with Asian ingredients though, and realized it was the perfect time to try a salad recipe I’d had bookmarked for a year but kept forgetting to make: this mandarin chicken salad from Munchin with Munchkin. While it looked like a lot of ingredients to buy, I actually had all the ingredients for the dressing already, and I didn't mind buying the vegetables because I knew I'd eat whatever was leftover as a snack, so it was money well spent!

I changed quite a few little things with the recipe in order to suit my tastes (and based on what ingredients I had on hand), so be sure to check out the original recipe too so that you can also adjust the ingredients to your tastes! You should also check out the rest of Kris’ amazing blog while you’re there – it was just voted the Best Recipe Blog in The Kitchn’s Homies awards!
This salad was so fresh and flavorful and exactly what I was craving after my trip. I loved how the sweet mandarins were balanced by all the crunchy vegetables, and the sweet and sour vinaigrette gave it the Asian flavour I was still desiring. I have a feeling I’ll be craving this salad a lot more now that I know how much I love it!

Mandarin chicken salad
Mandarin Chicken Salad

Adapted from Munchin with Munchkin

Serves 2

Ingredients:

For the Dressing:
1 tablespoon rice vinegar
1 tablespoon fresh lime juice

1/4 teaspoon chili garlic sauce (optional for a bit of spice)
1 tablespoon sesame oil
1 teaspoon soy sauce
1 tablespoon dark brown sugar
1 garlic clove, minced
1/2 teaspoon sweet Thai chili sauce 
Dash of salt

For the Salad:
1 boneless, skinless chicken breast, cooked and shredded into small pieces (I cooked mine in sesame oil)
2 cups lettuce
1/2 red bell pepper, cut into thin strips
1 medium carrot, cut into matchsticks
1/4 cup snow peas
1/4 cup shelled edamame, cooked as per package directions
2-3 mandarins, segmented
2 tablespoons ground peanuts (ground in a food processor)
2 tablespoons sesame seeds

Directions:

In a small bowl, whisk together all ingredients for the dressing. Taste and adjust any amounts to your liking. Set aside.

In a large bowl, combine salad ingredients, toss with dressing, and divide salad between two plates/bowls, with the peanuts and sesame seeds sprinkled on top.

Notes:
- Next time I might eliminate the carrots and snow peas and increase the mandarins. Choose ingredients and amounts to your own taste!
- Optional additional toppings may include green onions, cilantro, and chow mein noodles

February 22, 2012

Sesame Soy Spaghetti Squash with Broccoli and Edamame

sesame soy spaghetti squash with broccoli and edamame
After the rather indulgent caramel latte pancakes I last posted (not to mention the amount of pancakes I ate yesterday), I felt like I should post something healthier today. This sesame soy spaghetti squash with broccoli and edamame is a dish I’ve made quite a few times lately because it’s so healthy and really tasty!

I think the inspiration for this dish originally came from this steamed broccoli and squash with tahini dressing that I saw in a Whole Living magazine. I liked the idea but ended up changing everything around to my own tastes, so that the only parts of the original that really remained were the broccoli and tahini.

For my tahini sauce, I wanted to give it more of an Asian flavour with sesame and soy sauce. After a bit of experimentation, I came up with a sauce that I thought was full of flavour, and is filling and healthy from the addition of the tahini (sesame seed paste).

The first time I made the sauce, I paired it with steamed broccoli and sweet potato over brown rice (pictured below):

sesame soy broccoli and sweet potatoes on riceWhile I loved the sauce and veggies, I didn't like the way the rice absorbed all of the sauce and didn't think the textures of the dish were quite right.

So for my second try, I decided to make the same dish over soba noodles instead:

sesame soy broccoli and sweet potatoes on soba noodles
The soba noodles provided a much better base for both the sauce and the vegetables, and I really loved this version.

But a few days later I had a spaghetti squash to use up, so I decided to try the dish again, using the spaghetti squash as the base instead of soba noodles. Since I already knew that the sesame soy tahini sauce went well the sweet potatoes, I figured squash would also pair well with it.

If you've never tried spaghetti squash before, it's a lot like other winter squashes except that when the flesh is cooked, it scrapes off like strands of spaghetti! This makes it a great healthy and low-carb substitute for pasta - I've seen it in lots of recipes from basic tomato sauce with spaghetti squash to baked dishes with lots of other add-ins.

spaghetti squash
I used the cooked spaghetti squash "noodles" as the base for my latest version of this sesame soy tahini dish. I kept in the steamed broccoli but this time I added cooked edamame for protein. This combination turned out to be my favourite version of all, and was also the healthiest!

I think I've now found the dish I'm going to stick with, but if I experiment more in the future, I may try pairing the sesame soy sauce with salmon or chicken, I think that would go really well!
sesame soy spaghetti squash with broccoli and edamame
Sesame Soy Spaghetti Squash with Broccoli and Edamame

Makes 2 servings

Ingredients:

Sesame Soy Tahini Sauce:
3 tablespoons tahini (sesame seed paste)
2 tablespoons low-sodium soy sauce
1 tablespoon rice vinegar
1 teaspoon sesame oil
2 teaspoons honey
1 teaspoon minced fresh ginger
1 clove garlic, minced
Dash of cayenne pepper
1-2 tablespoons water

Half of a spaghetti squash
Half a head of broccoli, chopped into florets
1 cup frozen shelled edamame
Sesame seeds for topping
Salt and pepper

Directions:

Preheat oven to 400°F. Cut spaghetti squash in half and scoop out the seeds and pulp from the center. Place one half with the cut side facing down on a greased or lined baking sheet (keep other half wrapped in the fridge for another use). Roast for 30-40 minutes, or until tender - it may take longer, depending on the size of your squash. When done, use a fork to scrape the flesh off the skin and into a bowl (it will scrape off in strands, like spaghetti).

While the squash is cooking, prepare the remaining components:

Whisk together all ingredients for the sauce. Taste and adjust any seasonings to taste. If the sauce is too thick, add a bit more water to thin it out.

Place chopped broccoli in a steamer basket and steam over boiling water for 3-5 minutes, until crisp-tender and bright green. Set aside. Cook edamame according to package directions.

When all components are ready, divide spaghetti squash into two bowls, top with broccoli and edamame, and drizzle sesame soy tahini sauce overtop. Top with sesame seeds and season with salt and pepper, if desired.

This is best eaten on the day that it's made.

December 30, 2011

Garlic Chicken on Bok Choy Rice Cakes

garlic chicken on bok choy rice cakes
I don’t normally post two days in a row but these were so good that I couldn’t wait to share them, especially because I want to make sure you have time to prepare them for your New Year’s Eve party – they’d be perfect! Little pieces of chicken are coated in a sweet, garlicky sauce and placed atop bites of cool sticky rice mixed with bok choy and green onions. It’s kind of like sushi, but easier!

These might look difficult to make, especially if you’ve already scrolled down to take a look at the recipe, but trust me that they’re not! I have absolutely no experience with sushi or even sticky rice, but I had no problem making these on my own. It also probably looks like there are a lot of ingredients to buy, but most of the ingredients were things I already had in my fridge or cupboard so I didn’t have to buy much. The one thing I had trouble finding was the black sesame seeds – my dad and I searched through Loblaws and Bulk Barn with no luck, then went to an Asian grocery store where after searching every aisle, we finally found them in the last place we checked. I don’t think they’re that essential for taste though, so if you can’t find them, just use regular sesame seeds or leave them out. Or you can try to see how kind a sushi bar employee is by asking them to lend you a couple tablespoons of black sesame seeds – I was too shy to ask :)

garlic chicken on bok choy rice cakes
I served these to my parents as a pre-dinner appetizer the last two nights in a row, and both times they couldn’t stop raving about them. They’re not only tasty but also look so pretty and elegant, which is why they’d be the perfect thing to impress your guests on New Year’s Eve or at any other party. The rice cakes can be made up to two days in advance, then you can cut up the chicken and make the sauce early in the day, so all you have to do when you’re ready to serve them is cook the chicken and place it on the rice cakes. Even if you don’t have a party to serve these at, I hope you’ll still try them for yourself!

I wish you all a safe and happy New Year’s Eve, and hope you come back early in the New Year for my round-up of my favourite dishes of 2011!

garlic chicken on bok choy rice cakes
Garlic Chicken on Bok Choy Rice Cakes

Adapted from LCBO’s Food & Drink magazine, Holiday 2011

Makes about 25 portions

Ingredients:

For the Rice Cakes:

2 cups (uncooked) short or medium-grain sticky rice (Japanese-style rice used for making sushi)
1 cup finely diced bok choy stalks and greens (from about 2 large stalks)
2 green onions, finely chopped
2 tablespoons rice vinegar
1 tablespoon sugar
1 ½ teaspoons salt
1 teaspoon sesame oil
2 tablespoons toasted black sesame seeds

For the Chicken:

2 boneless, skinless chicken breasts (about 250g or 8oz total)
2 tablespoons hoisin sauce
1 tablespoon brown sugar
2 teaspoons sherry
1 teaspoon light soy sauce
1/2 teaspoon Asian chili sauce
4 cloves garlic, minced
2 tablespoons vegetable oil
1 teaspoon sesame oil
2-3 green onions, finely shredded, for garnish

Directions:

For the Rice Cakes:

Cook sticky rice according to package directions. Once cooked and while still hot, stir bok choy, green onions, rice vinegar, sugar, salt, and sesame oil into the pot and stir to mix evenly with the rice. Scrape mixture into a greased 9x13 baking pan. Use the back of a large spoon to spread the rice in an even layer covering the pan. Sprinkle evenly with sesame seeds. Let cool to room temperature, then refrigerate 2 hours or until firm.

Use a 1.5-inch round cookie cutter to cut the rice into about 25 cakes (or as many as you can get). I didn’t have a round cutter so I simply cut out circles freehand using a knife. If you have troubles cutting round circles, use a small shotglass as a guide to cut around. Discard excess rice and return the cakes, covered, to the refrigerator until ready to use. Finished cakes can be made up to 2 days in advance.

For the Chicken:

Slice chicken breast across the width into thin (1/4” thick) slices, then cut each slice into 1 inch pieces.

In a small bowl, whisk together the hoisin sauce, brown sugar, sherry, soy sauce, chili sauce, and garlic.

Heat vegetable oil in a large non-stick skillet over medium-high heat. Add chicken and cook until lightly browned, about 3-5 minutes. Remove to a small plate. Pour sauce mixture into pan, bring to a boil and reduce by half, or until sauce is thick and glossy. Return chicken to the pan with the sauce and simmer for about 30 seconds until chicken is cooked through, stirring to coat with the sauce. Remove from heat and stir in sesame oil.

To Assemble:

Use tongs to place warm chicken on top of individual rice cakes. Top each with a small garnish of shredded green onion.

Ingredient Index

Related Posts Plugin for WordPress, Blogger...