Showing posts with label onion - yellow. Show all posts

October 28, 2014

Southwestern Quinoa Stuffed Pepper Jack O' Lanterns

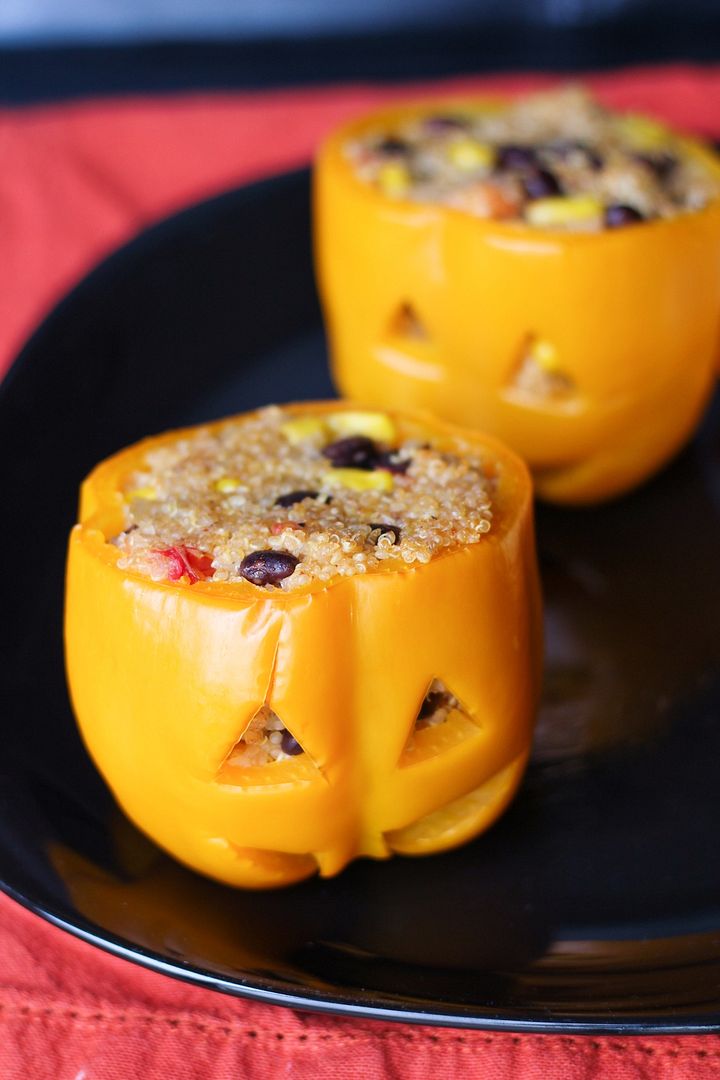
Southwestern Quinoa Stuffed Pepper Jack O' Lanterns - easy and fun dinner idea for Halloween!

I love making cute Halloween themed treats, and dinner ideas are even better since there are already so many sweets around this time of year.  I've seen the idea of carving stuffed peppers like jack o' lanterns on several blogs before and wanted to try it for myself this year.  Even though I'm certainly not the first to try these, they turned out so cute and tasty that I had to share them with you guys!

Southwestern Quinoa Stuffed Pepper Jack O' Lanterns - easy and fun dinner idea for Halloween!

These are also really easy to make and completely customizable!  Just find some orange peppers, cut the tops off and scrape out any seeds or ribs inside, then carve your jack o lantern face with a small knife.  You don't want to cut out too big of holes so that the filling could escape, but even though these are a lot smaller to work with than pumpkins, I found them much easier to "carve"!

After prepping your little pumpkin lookalikes, you make your filling, stuff the insides of the peppers, and bake them to soften the peppers.  I also like to parboil the peppers first to reduce the amount of time needed to soften the peppers in the oven later, which will also help save time if you're trying to make these on Halloween evening before trick or treating starts!
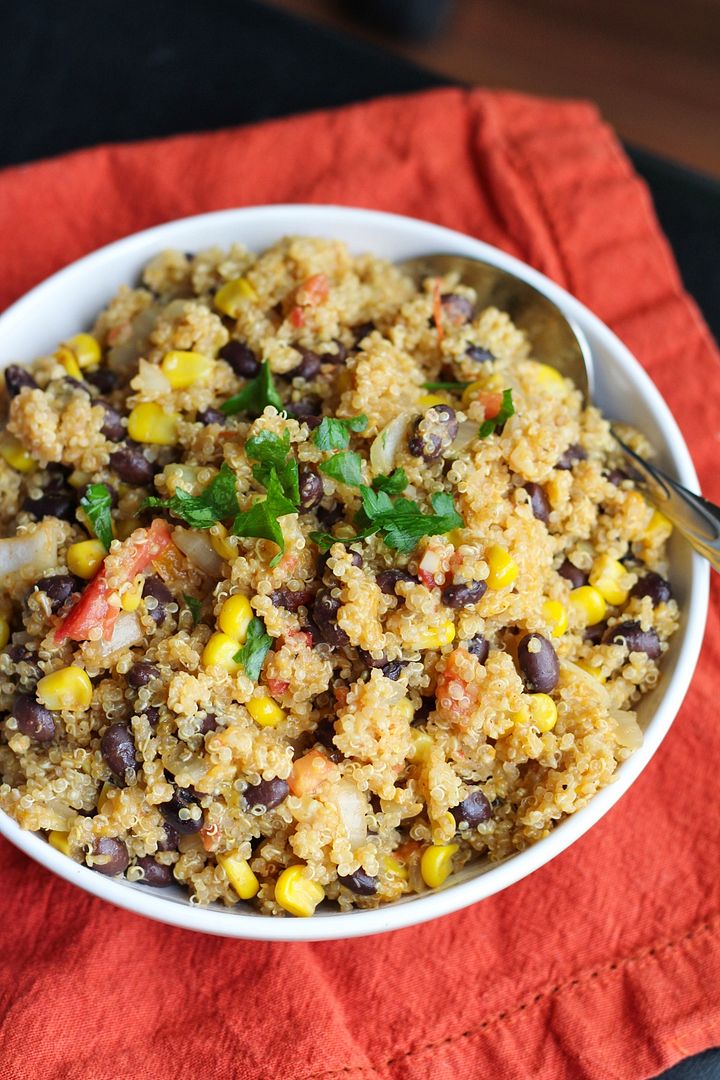
southwestern quinoa

I filled mine with one of my favourite southwestern-flavoured quinoa mixtures, which is vegetarian and pretty healthy too.  I cook the quinoa in vegetable broth which is important for giving it more flavour, then mix in some sauteed onion and garlic, tomatoes, black beans, corn, spices, and cheese.  You could add in more vegetables like spinach or mushrooms if you like, or leave out the spices if your kids won't like them.

I'm going to a Halloween potluck tomorrow and plan on making some scary cookies so if those turn out well I'll have another treat to share later this week!  Happy week of Halloween!
Southwestern Quinoa Stuffed Pepper Jack O' Lanterns - easy and fun dinner idea for Halloween!

Southwestern Quinoa Stuffed Pepper Jack O’ Lanterns

Serves 4-6

Ingredients:

2 cups vegetable broth
1 cup dry quinoa
4-6 orange bell peppers
1 teaspoon olive oil
1 yellow onion, diced
1 clove garlic, minced
2 small tomatoes, diced
1 (540mL) can black beans, drained and rinsed
1 cup corn kernels (thawed if frozen)
1 teaspoon cumin
1/2 teaspoon chili powder
Salt and pepper
1 cup shredded cheddar cheese (or Mexican or taco blend)

Directions:

Bring 2 cups of vegetable broth to a boil in a medium saucepan.  Add quinoa, cover, reduce heat to simmer and let simmer for 15 minutes.  Remove from heat and let sit, covered, for 5 minutes.  Remove lid and fluff with a fork.

Meanwhile, cut the tops off the bell peppers and use a knife to scrape out the remaining seeds and ribs of the pepper, leaving the pepper in tact (as seen in pictures).  Leave the tops aside if you wish to include them for presentation later.  Bring a large pot of water to a boil, with enough water to cover the peppers.  Add peppers and let simmer for about 4 minutes, until slightly softened.  Carefully remove and set aside.

Preheat oven to 350°F.

In a medium pan, heat oil over medium-high heat.  Add onion and saute for about 5 minutes, stirring often, until softened.  Add garlic and saute for 30 seconds, stirring. Add tomatoes, black beans, corn, cumin, and chili powder, and season with salt and pepper.  Stir and saute for a few minutes.  Remove from heat, stir in quinoa and cheddar cheese and mix until incorporated.

Spoon quinoa mixture into the peppers.  There should be enough to fill 6 peppers or you can really fill 4 peppers quite full, and might still have some quinoa leftover.  You could also just stop now and eat the quinoa on its own!  Leave tops off the peppers, spray a 9x13 glass baking dish with non-stick cooking spray, and place filled peppers standing up in the dish.  Cover with aluminum foil and bake in preheated oven for 25-35 minutes, until peppers are softened to your liking (I did 25 minutes as I was impatient but would have preferred 30).  Remove and serve with tops on the peppers if desired.  Eat by slicing everything up with a knife and fork and eating the quinoa and pepper together.


--------------------------------------------------------------------------------------------------
For more Halloween dinner ideas, try these:

Halloween mummy potatoes with turkey meatballs

Halloween Mummy Potatoes with Meatballs

Pumpkin, chicken, & goat cheese quesadillas

Pumpkin, Chicken, & Goat Cheese Quesadillas(for Halloween!)

September 19, 2014

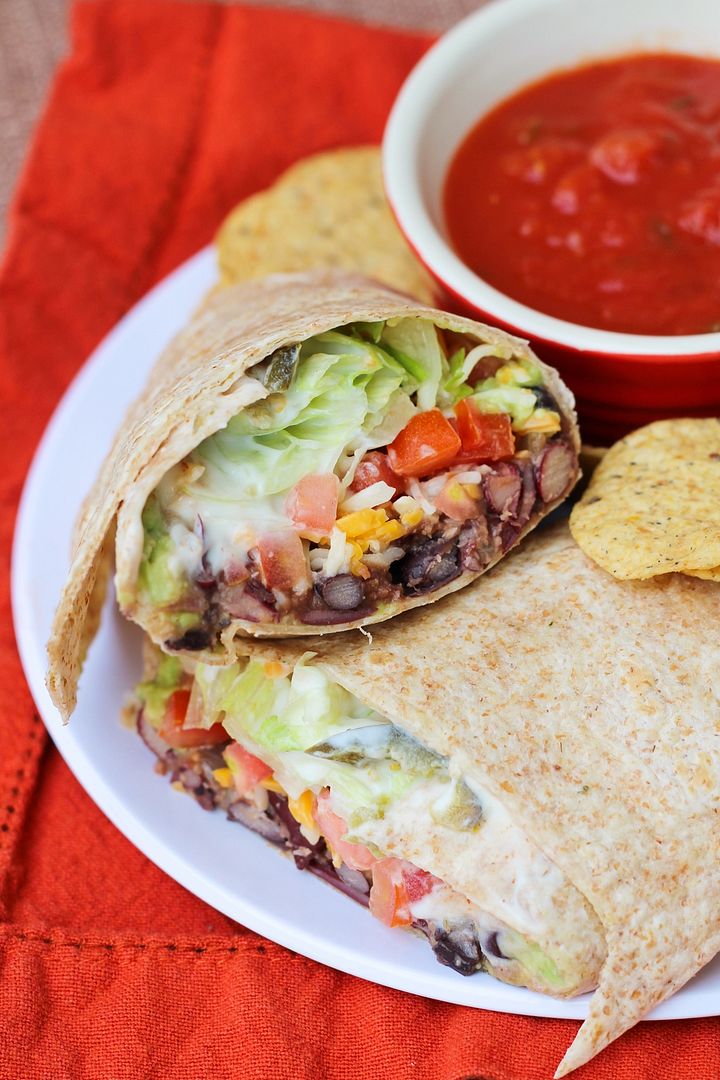
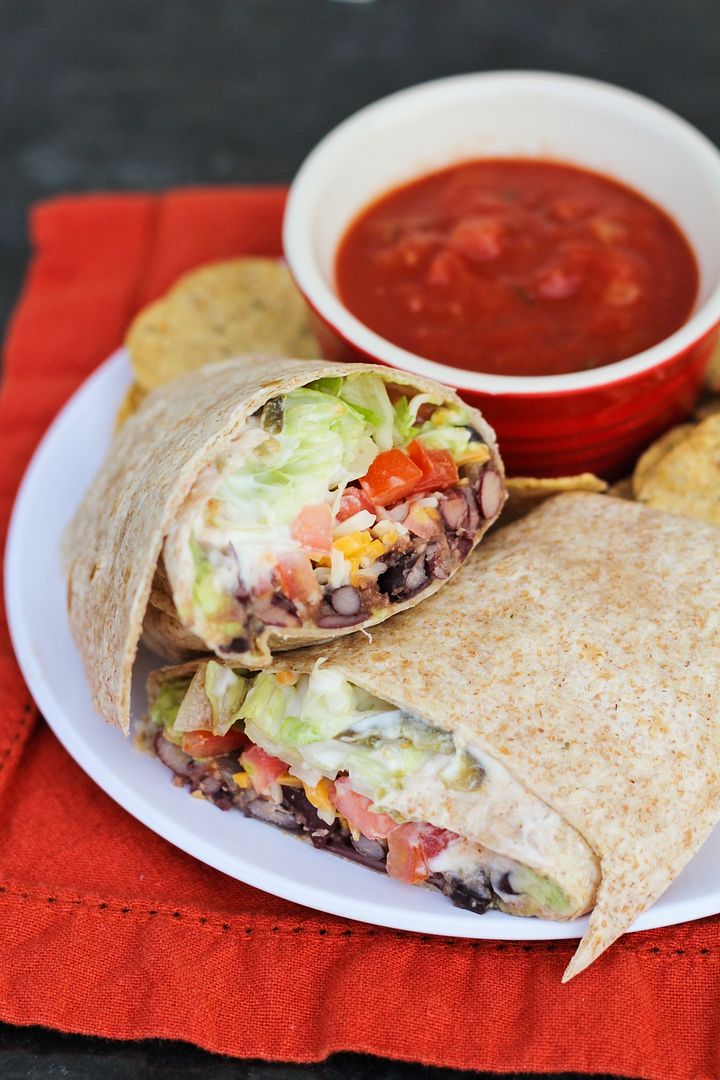
Chipotle Bean Burritos

Chipotle Bean Burritos

As much as I love cooking, I don’t like having to coordinate a bunch of dishes at once or cook multiple nights in a row, so meals that consist of one dish and make lots of leftovers are a favourite around here. And these burritos fit the bill perfectly!

I consider these a fairly healthy version of a burrito with beans instead of meat, some veggies, low-fat sour cream, not too much cheese, and whole wheat tortillas (which taste just as good as regular tortillas in my opinion!).
Chipotle Bean Burritos

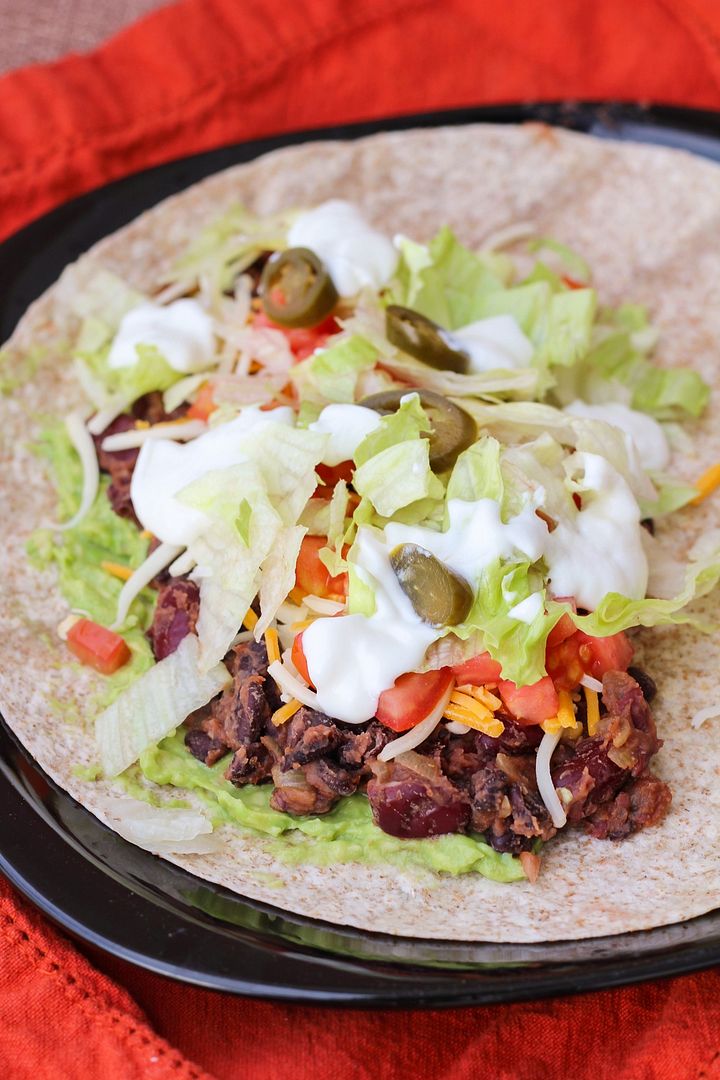
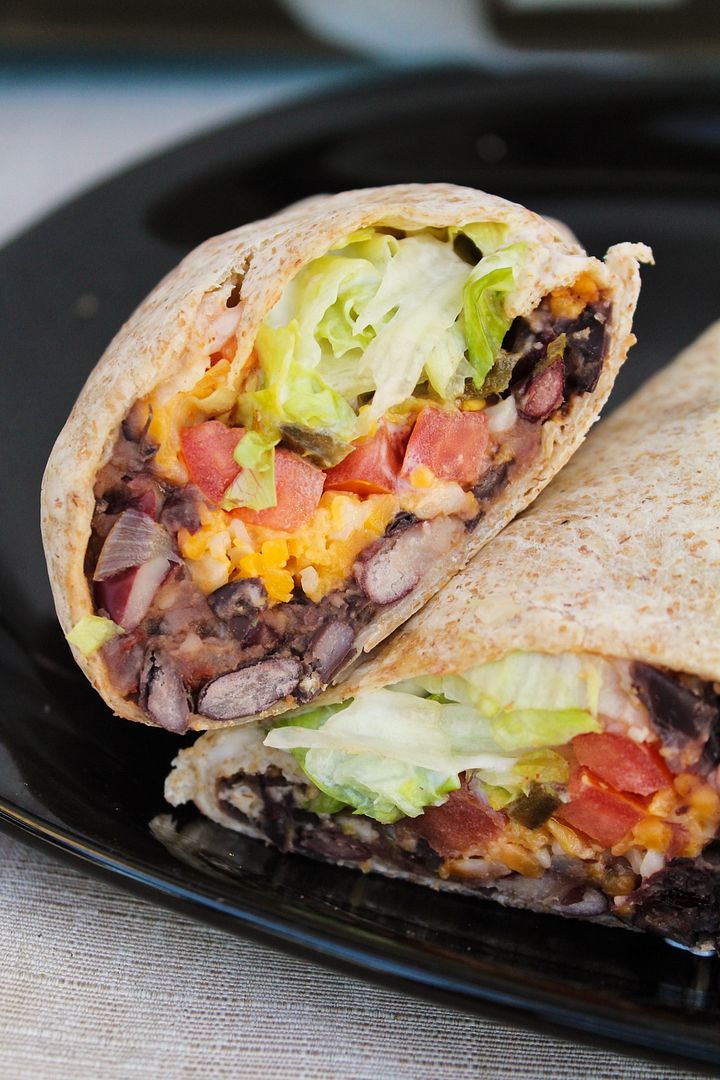
These also involve fairly minimal effort to make, and make six servings, which meant lots of leftovers for us!  To prepare them, a mixture of black beans and kidney beans gets cooked with some onion, garlic, vegetable broth, spices, chipotle sauce, and salsa to give it lots of flavour. It’s then rolled up with lettuce, tomatoes, mashed avocado, cheese, sour cream, a few pickled jalapenos, and some chipotle hot sauce for a packed and flavour-filled meal-in-one.

Chipotle Bean Burritos

We ate these three nights in a row this week and liked them more each time. That may have to do with my getting much better at rolling them with more practice (the last picture was the third night’s burrito which I thought looked much better than the first!)

Ryan commented on how good these are each time too and said they’re way better than beef burritos, and I’d have to agree! (though I don’t like beef anyway, so I’m a little biased)

Chipotle Bean Burritos


Chipotle Bean Burritos

Adapted from Cooking Light

Serves 6

Ingredients:

For the bean mixture:
1 teaspoon canola or olive oil
2 cloves of garlic, minced
1 small yellow onion, diced
1/2 teaspoon chipotle chile powder*
1/4 teaspoon salt
1/2 cup vegetable broth
1 (540mL) can black beans, drained and rinsed
1 (540mL) can kidney beans, drained and rinsed
1/2 cup chunky salsa – Mild or medium depending on your preference.  You could also use a chipotle salsa for more chipotle flavour!
2 teaspoons chipotle chile in adobo

Remaining burrito ingredients:
6 large (10-inch) whole wheat tortillas
2 large or 3 small ripe avocados
~1 cup shredded cheddar or monterey jack cheese (or a blend of cheese)
3 plum tomatoes, diced
1-1/2 to 2 cups shredded iceberg lettuce
~1/4 cup pickled jalapenos, optional
~6 tablespoons low-fat sour cream
Chipotle or regular hot sauce, optional

*I get chipotle chile powder at the bulk store.  If you can't find it, you can use a combination of regular chile powder and some cumin for spice.

Directions:

Heat oil in a large non-stick saucepan over medium heat.  Add onion and saute about 5 minutes, stirring often, until translucent and starting to turn golden brown.  Add garlic and saute for 30 seconds.  Add chile powder and salt and stir to coat for another 30 seconds.  Stir in vegetable broth and beans and bring to a boil.  Let simmer about 7-10 minutes, or until no liquid remains. Remove from heat and stir in salsa and chipotle sauce.  Partially mash mixture.

Warm tortillas up for about 30 seconds in the microwave, wrapped in damp paper towel, so they are easier to roll.  To form burritos, spread 1/6 of the bean mixture (so it divides evenly among 6 burritos) onto one half of the tortilla, leaving about a 1-inch border.  Top with avocado, cheese, tomatoes, lettuce, pickled jalapenos, sour cream, and hot sauce (again dividing evenly among 6 burritos).  Roll up the side closest to the filling, then fold in each end, and roll the burrito toward the empty side of the tortilla, wrapping the filling completely.  Others prefer to fold in the sides of the burrito first, then roll up from the bottom.  I've also seen starting with the filling in the middle.  Use whatever method works for you but make sure to roll tightly and keep the filling in!
Serve while filling is still slightly warm.  I like to warm my completed burrito up in the toaster oven for a couple minutes before eating to make sure it's warm throughout.

If you have leftovers, keep everything separate.  Warm bean mixture up in the microwave and then prepare burrito as before.

May 29, 2014

Buffalo Lentil Loaf

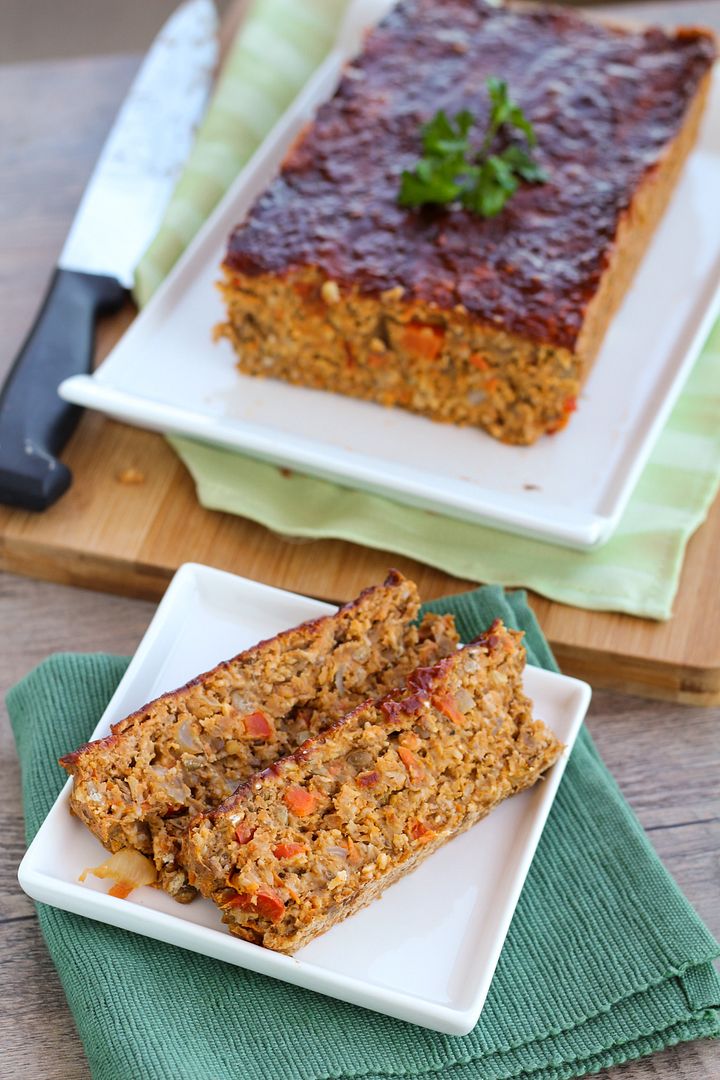
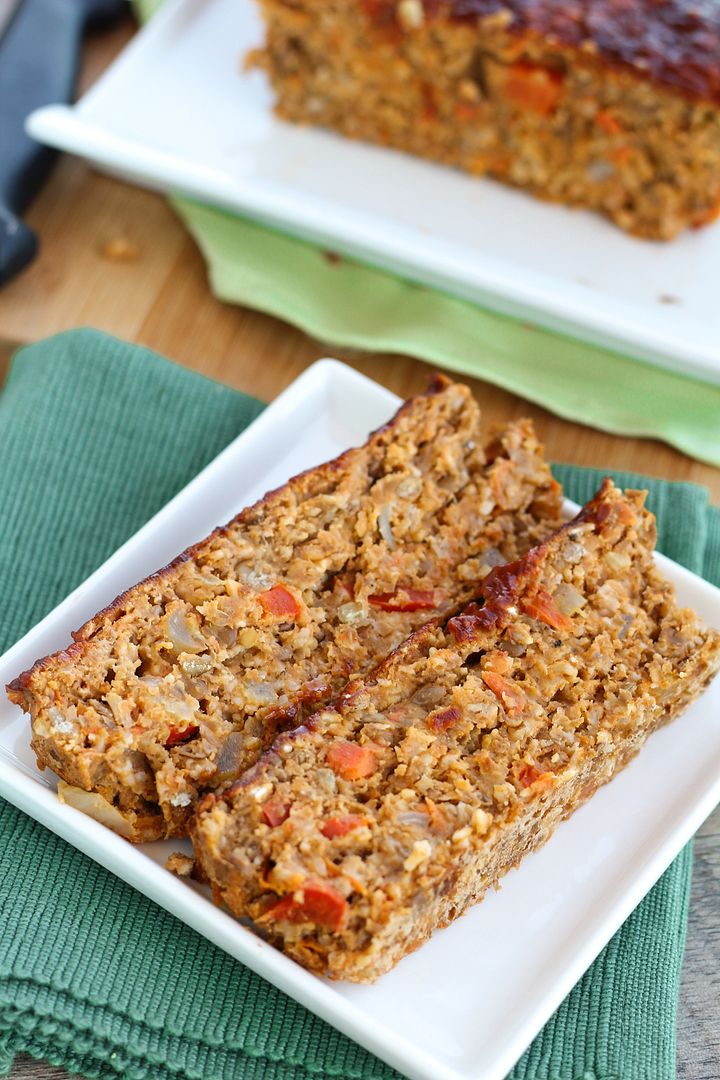
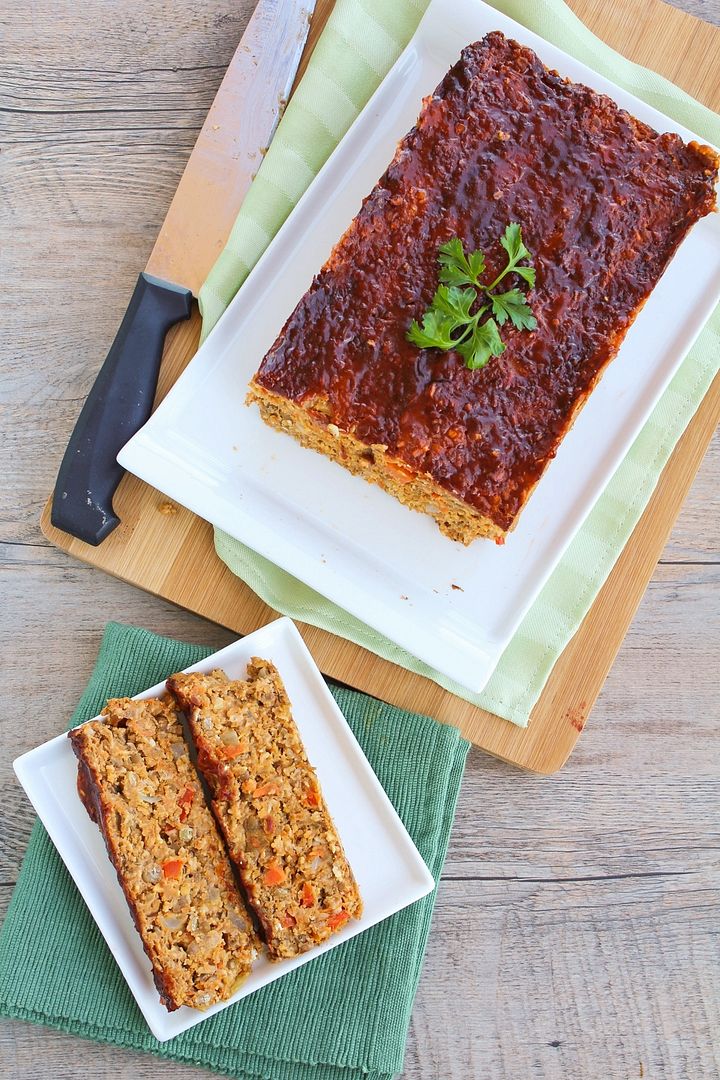
Buffalo Lentil Loaf - a healthy & tasty vegetarian meatloaf alternative!

I always hated meatloaf as a kid, and I still do.  I can’t even say the word meatloaf without adding ‘shmeatloaf’ after it.  It’s funny that when I was young, it was more the vegetables, onions and little crunchy bits in the meatloaf that I hated, and now it’s the idea of a tray full of packed meat that turns me off.  A lentil loaf full of vegetables though?  Much more up my alley!

I know some people will have the same reaction I have to meatloaf when they hear the word ‘lentil loaf’.  Indeed, my fiancé in particular was extremely skeptical at the idea.  But even he ended up admitting that this was really good, so if you’re hesitant, I encourage you to give it a chance!

Buffalo Lentil Loaf - a healthy & tasty vegetarian meatloaf alternative!

Why should you give this a chance over regular meatloaf?  Because lentils are full of fiber and protein to fill you up and give you energy, along with other important minerals like potassium, folate, and iron.  There’s also oats and a little egg for even more fiber and protein in this, along with vegetables like onions, carrots, and peppers for added nutrition.  Of course, I had to add a little extra appeal to convince the fiancé to try this, so I included buffalo sauce to give it extra flavour and kick, which I loved!  You could substitute bbq sauce though if you’re not into spicy food.

Buffalo Lentil Loaf - a healthy & tasty vegetarian meatloaf alternative!

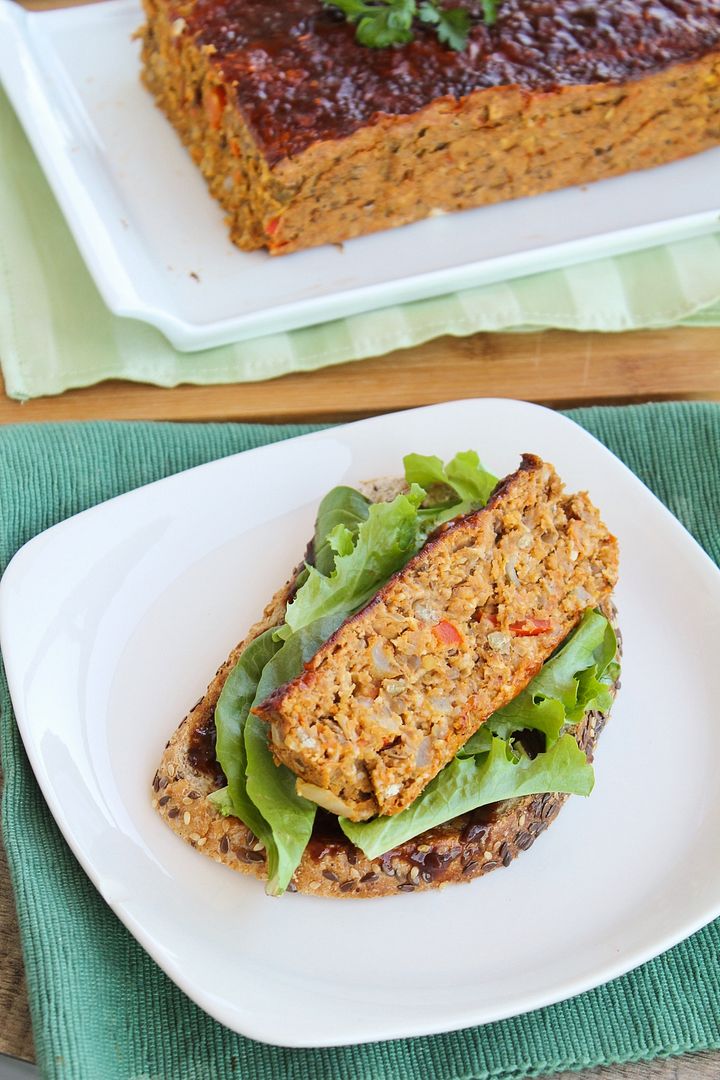
Though it takes a little time to cook, the result is worth it!  I love this lentil loaf on its own with a side of vegetables (mashed potatoes would be great too!), but I ate most of it in sandwiches for lunch.  Toast some whole grain bread, add some lettuce, barbeque or buffalo sauce, tomato, and a couple slices of lentil loaf and you’ve got a hearty, filling, and tasty meal!

Buffalo Lentil Loaf - a healthy & tasty vegetarian meatloaf alternative!

Buffalo Lentil Loaf

Lentil loaf recipe adapted from In Sonnet's Kitchen and The Simple Veganista

Makes one 9x5 loaf, serves about 4-6 (or more depending on how you serve the loaf)

Ingredients:

1 cup dry brown lentils
2-1/2 cups water
1 tablespoon olive oil
1 small or medium yellow onion, diced
3 garlic cloves, minced
1/2 a large red bell pepper, diced
1 large carrot, peeled and grated
1/2 teaspoon ground cumin
1/2 teaspoon garlic powder
1/2 teaspoon onion powder
1/4 teaspoon cayenne pepper (optional)
Pinch each of salt and pepper
1 cup rolled oats, pulsed in a blender or food processor a few times to more of a coarse crumb
2 large eggs, lightly beaten
1/2 cup buffalo sauce (your favourite brand, such as Frank's Red Hot Buffalo Wing Sauce or PC Buffalo Wing Sauce)

Glaze:
2 tablespoons bbq sauce (plus more for after baking, if desired)
2 tablespoons buffalo sauce

Directions:

Add lentils and water to a medium saucepan and bring to a boil.  Cover, reduce heat, and let simmer 25-30 minutes, until lentils are soft and water is mostly evaporated.  Remove from heat, drain any excess water, and puree about three-quarters of the lentils in a blender or food processor (or with an immersion blender).  Set aside to let cool slightly.  Preheat oven to 350°F.

Meanwhile, heat oil in a large saucepan over medium-high heat.  Add onion, garlic, red pepper, and carrot and sauté, stirring often, for about 5-7 minutes or until softened.  Stir in the spices (cumin, garlic powder, onion powder, cayenne, salt, and pepper), then remove from heat. 

Fold together the lentils, sautéed vegetables and spices, oats, eggs, and buffalo sauce in a large bowl or in the saucepan until combined.  Line a 9x5 loaf pan with parchment paper, spray lightly with cooking spray, and spread lentil mixture evenly in prepared pan.  Mix the 2 tablespoons each of bbq sauce and buffalo sauce for the glaze, and brush in an even layer on top of the loaf. 

Bake loaf in preheated oven for 45-50 minutes until the top of the loaf is dry, firm, and golden brown.  Let cool in pan for at least 10 minutes, run a knife around the edges, then use parchment paper to lift out of pan.  Top with a bit of additional bbq sauce if you like. Slice into 10-12 slices and serve however you desire – either on its own, in a sandwich, on top of a salad, etc.

May 22, 2014

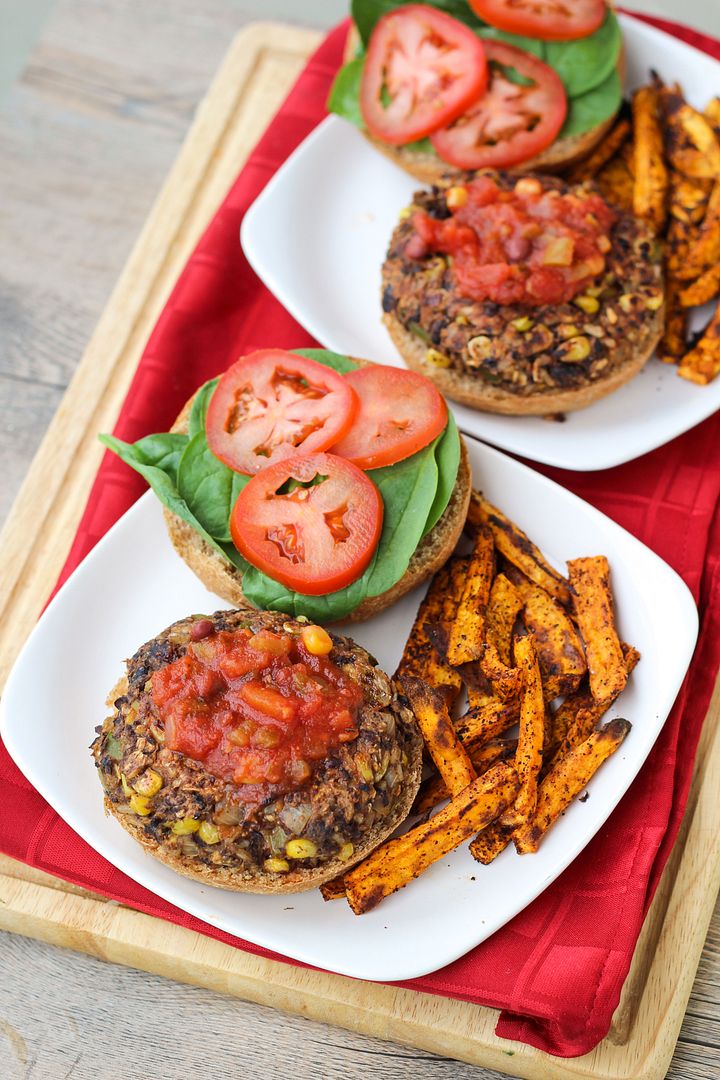
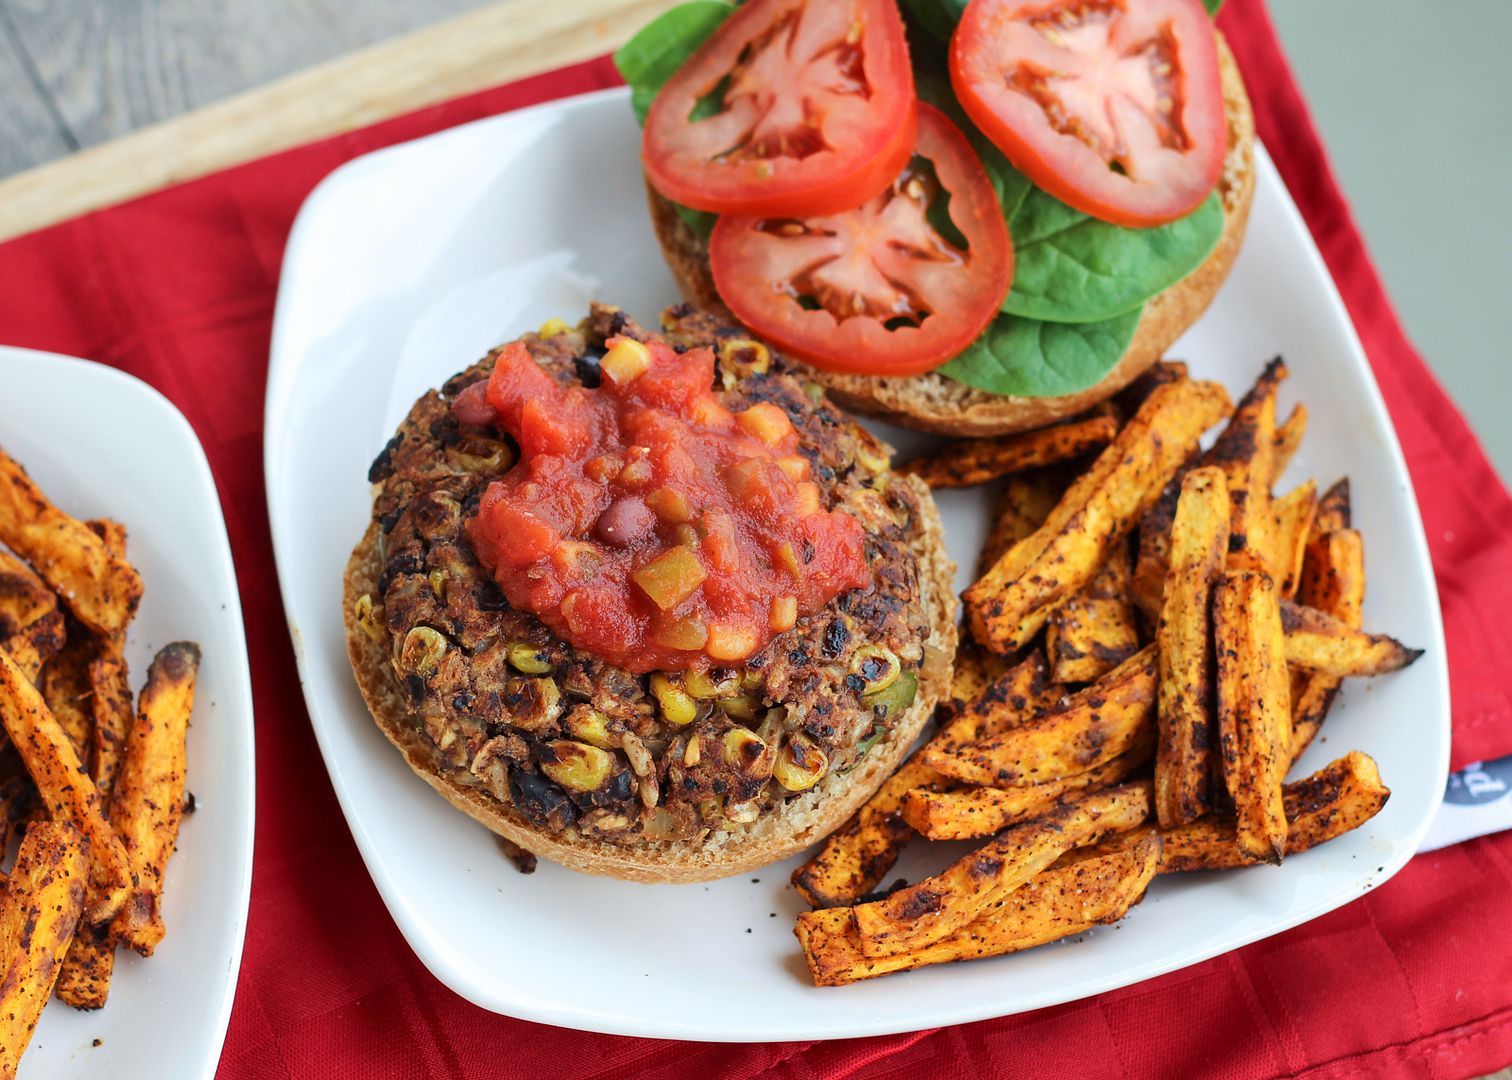
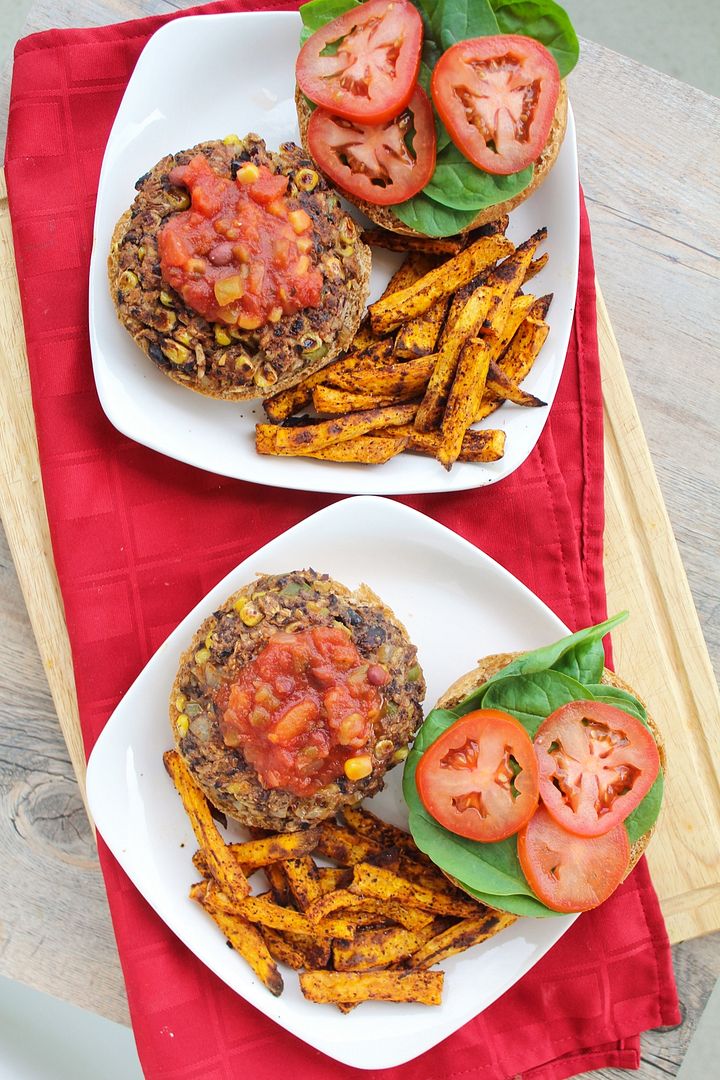
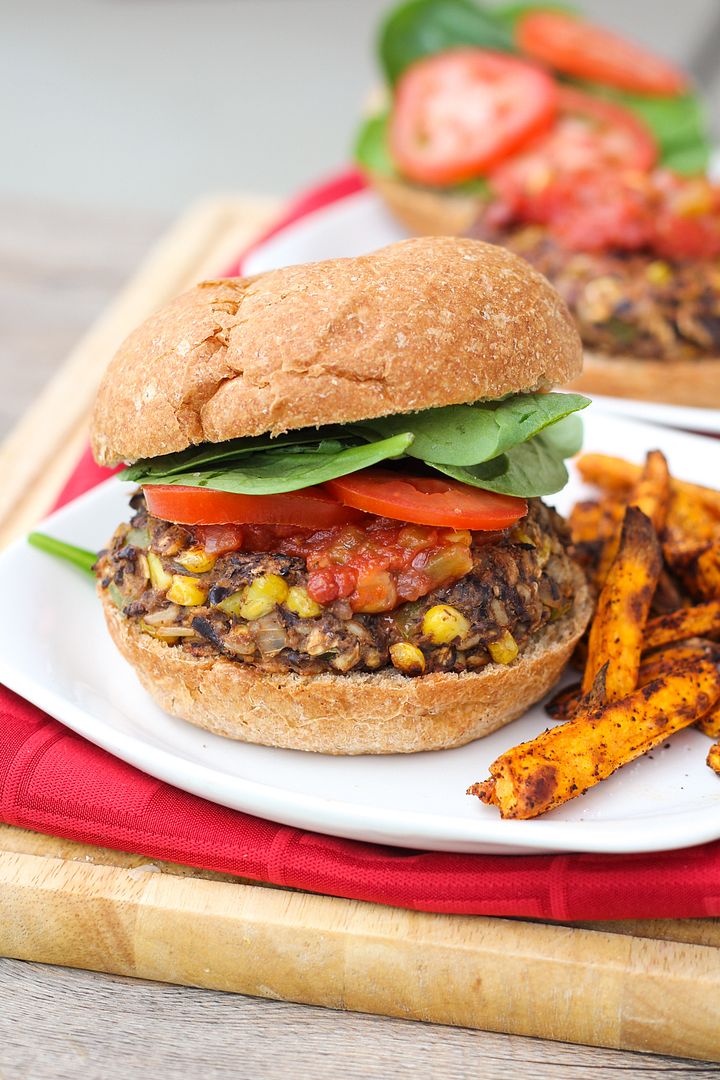
Southwestern Black Bean & Brown Rice Veggie Burgers

Southwestern Black Bean & Brown Rice Veggie Burgers

The (almost) return of summer means the return of burger season - one of my favourite foods!  I still make them in the winter on the stovetop (and even in the summer I use the stovetop because I'm scared of bbqs), but there's something about summer that makes me crave burgers all the time.

I've never liked beef burgers though, and a regular beef patty with the standard toppings doesn't appeal to me much.  Instead, I love experimenting with different chicken and turkey burgers - like buffalo chicken and cheddar burgers or apple turkey burgers with caramelized onions and brie - and veggie burgers, which are so customizable, like lemon chickpea quinoa burgers or portabello mushroom burgers with roasted red peppers and provolone!

Southwestern Black Bean & Brown Rice Veggie Burgers

I love trying out new flavours and for my first veggie burgers of the post-winter season (it's hard to call this summer yet), I went with a Southwestern theme!

The veggie patties for these burgers are hearty and full of real veggies, just how I like them!  The base is a mixture of brown rice, oats, and black beans for plenty of protein and fiber, and mixed in are some onions, garlic, peppers, corn, and plenty of spices for added nutrition and flavour.


Southwestern Black Bean & Brown Rice Veggie Burgers

Ryan and I ate these for dinner three nights in a row (another great thing about veggie burgers is getting a lot of food for a pretty low cost!) and ate them differently each night.

The first time I topped mine with salsa and served them with chipotle sweet potato fries as pictured, which made for a pretty spicy meal though I still loved it!  The second night I added cheese on top, skipped the salsa, and used a light ranch dressing instead which was also awesome.  And the third night I crumbled my patty up and served it over a big spinach salad which was a refreshing change! 
If I had avocado I would have definitely added it to all three meals but avocados are so expensive these days I have to sadly try to limit my use of them.

You can eat these however you like and with whatever toppings you think sound good - hope you enjoy them as much as we did!

Southwestern Black Bean & Brown Rice Veggie Burgers

Southwestern Black Bean & Brown Rice Veggie Burgers

Inspired by and adapted from similar recipes seen on Simply Scratch, Veggie Belly, and Katherine Martinelli

Makes 6 burgers

Ingredients:

For the Burgers:
1/2 cup uncooked whole grain brown rice – I used pre-cooked instant rice
1/2 cup rolled oats, divided
1 (540mL) can of no-salt added black beans, rinsed and drained
1 medium yellow onion, diced
1/2 cup diced bell peppers – I used half a green pepper but you could use a mixture of green and red
3 cloves garlic, minced
3/4 cup thawed frozen corn kernels
1 teaspoon ground cumin
1 teaspoon chili powder
1/4 teaspoon salt
1 teaspoon chipotle chili powder for added spice (or substitute paprika)
1 large egg, lightly beaten

For Topping:
6 whole wheat hamburger buns
Lettuce or spinach
Sliced tomatoes
Sliced ripe avocado
Salsa (optional)
Cheddar or Monterey jack cheese (optional)

Directions:

Cook the rice according to package directions.  Let drain well.

Pulse 1/4 cup oats in a food processor to form crumbs.  Keep remaining 1/4 cup of oats whole.  Transfer all oats to a large bowl.  Reserve 1/4 cup black beans and transfer remaining beans to the food processor.  Pulse until most of the beans are mashed (but not completely mushy).  Add to the large bowl with the oats.

Heat oil in a large skillet over medium-high heat.  Add onions and peppers and sauté until softened, 7-10 minutes, stirring occasionally.  Add garlic and sauté for another minute.  Add corn and reserved 1/4 cup of black beans and stir.  Add all spices and sauté for another minute, stirring.  Remove from heat and let cool slightly.

Add vegetable mixture and rice to the bowl with the oats and black beans.  Add whisked egg and stir mixture until combined.  Form into 6 large patties or 8 smaller ones, if desired (I made 6 patties).

Heat two large skillets over medium heat.  Spray with non-stick cooking spray or use a light amount of oil.  Add 3 patties per pan and cook about 5-6 minutes per side, turning carefully in between, until browned and cooked through.  If using cheese, add slices to the tops of the patties about a minute or two before they’re done cooking to melt the cheese.  Remove from heat.

Add patties to buns and top with lettuce, tomatoes, avocado, salsa, or desired other toppings.  You could also crumble the patties and serve them on salad!

May 16, 2014

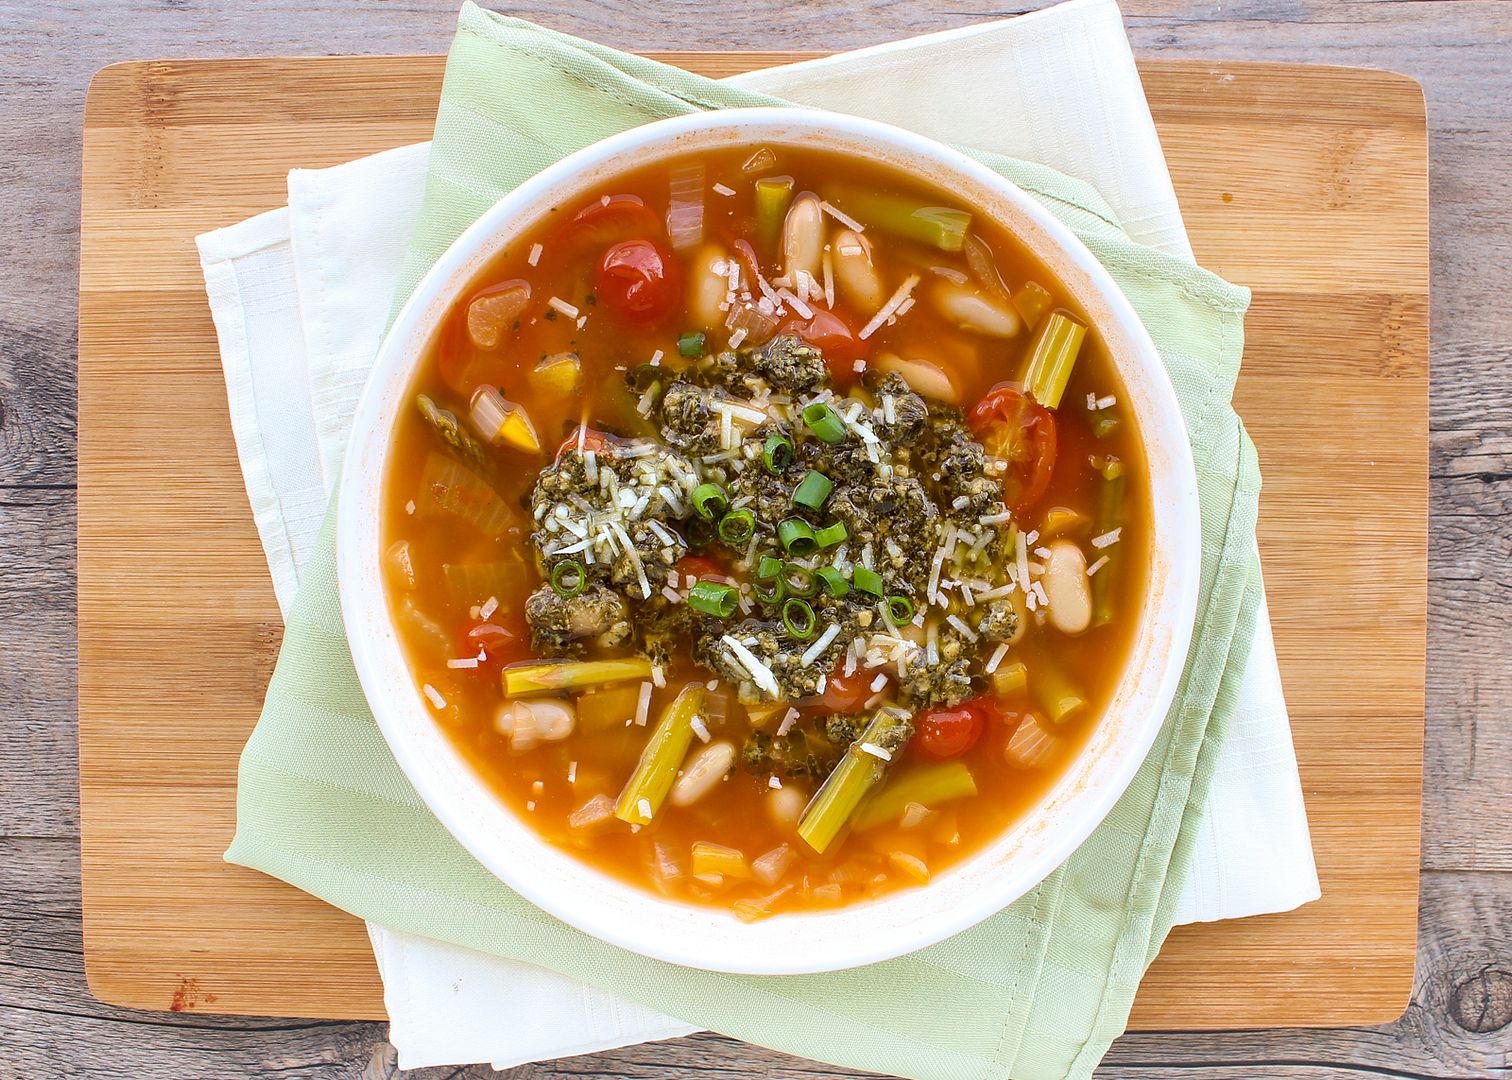
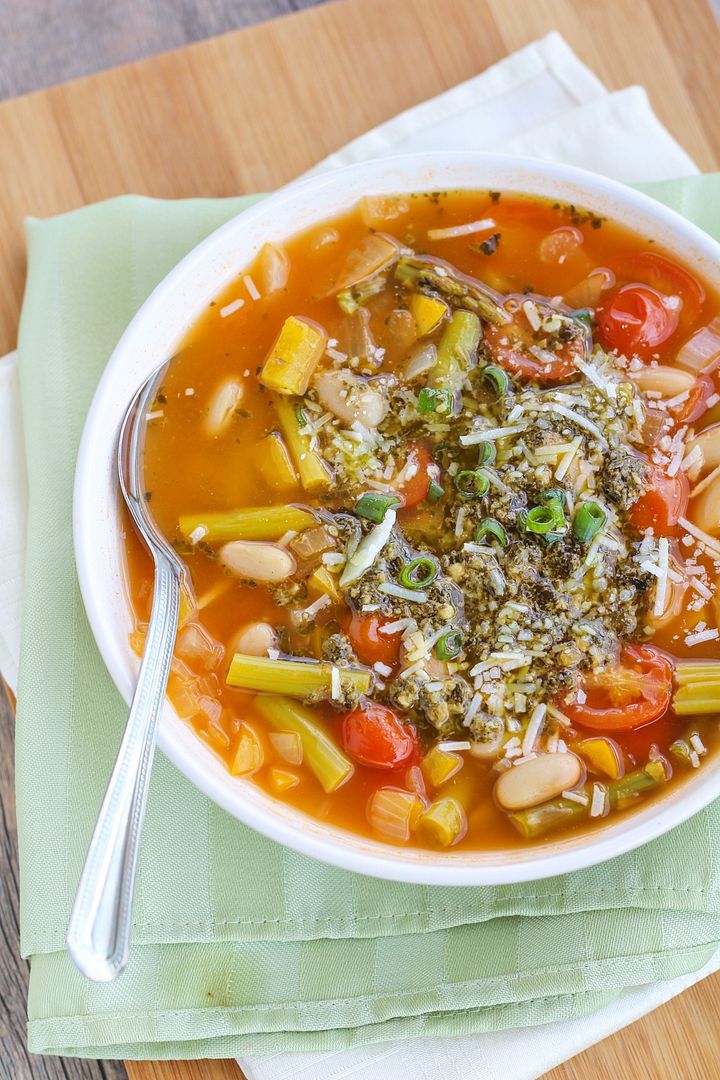
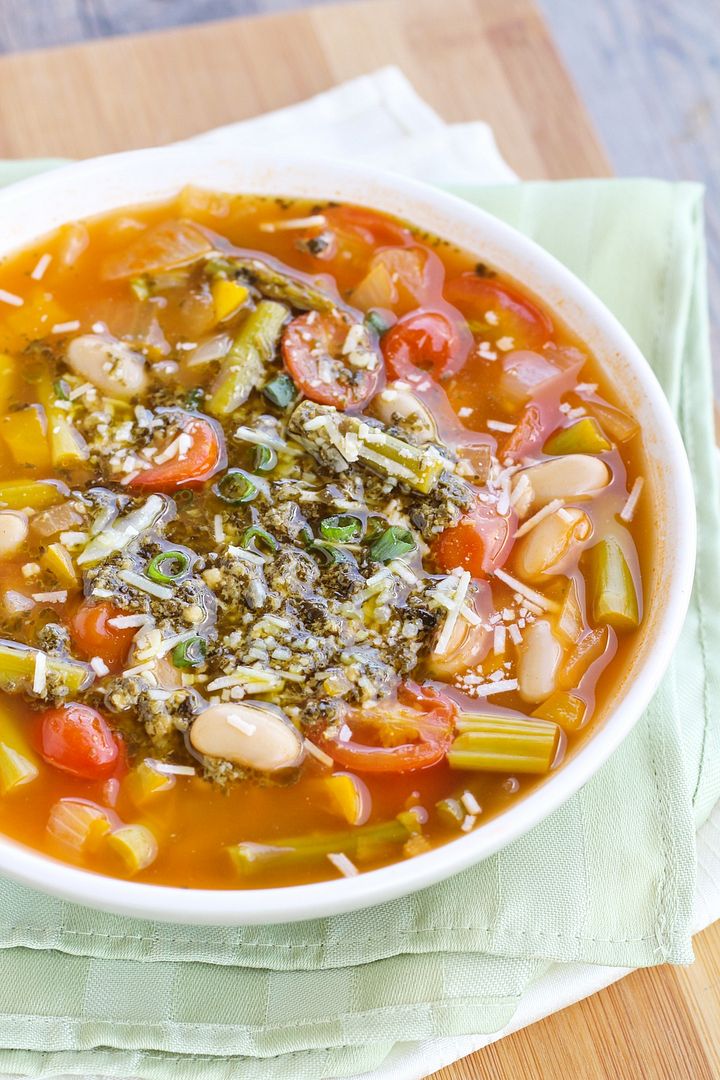
Spring Vegetable Minestrone with White Beans & Pesto

Spring Vegetable Minestrone with White Beans & Pesto

After a tease of summer-like weather last weekend, we've been making up for it all week here with rain, rain, and more rain.  Just in time for the long weekend!

For us Canadians, this May long weekend is sort of the unofficial kickoff to summer, but almost invariably ends up being cold and rainy.  So while soup isn't the type of recipe you would normally kick off a late May long weekend with, it's pretty appropriate for this wet and rainy spring weather we've been experiencing!

Spring Vegetable Minestrone with White Beans & Pesto

This is not a traditional minestrone soup, using asparagus and yellow peppers for some bright spring flavour along with the tomatoes, white beans for protein, no pasta, and with pesto and parmesan added in at the end for a boost of richness and flavour.

I realize now that my pictures don't really do this soup justice with the way I slightly overcooked my asparagus and then pretty much covered the whole bowl in pesto, but I do love pesto!  This was the perfect type of comfort spring food that's needed this time of year as we patiently wait for summer to kick in for good - hopefully not that long now!

Spring Vegetable Minestrone with White Beans & Pesto

Spring Vegetable Minestrone Soup with White Beans and Pesto

Adapted from Food & Drink Magazine

Serves 4-6

Ingredients:

1 tablespoon olive oil
3 cloves garlic, minced
2 small yellow onions, peeled and diced
2 cups finely chopped yellow bell peppers, (about 1-1/2 peppers; red or orange would also work)
1 tablespoon tomato paste
1 cup halved grape tomatoes
1 (540mL) can cannellini or white kidney beans, rinsed and drained
6 cups vegetable broth (I use low-sodium broth)
1-1/2 cups chopped asparagus (half inch pieces; woody ends of asparagus removed)
Salt and pepper

For Topping:
~1 tablespoon prepared pesto per serving
Grated parmesan cheese
Chopped fresh basil, parsley, or green onion (optional)

Directions:

In a large saucepan, heat oil over medium heat.  Add garlic and sauté for 30 seconds.  Add onions and peppers and sauté for another 10 minutes, stirring often.

Add tomato paste and sauté for 30 seconds, stirring often.  Add grape tomatoes and sauté for another minute.  Add white beans and vegetable stock, bring to a boil, cover, and let simmer 10 minutes.  Add asparagus and simmer for another 5-10 minutes, or until all vegetables are tender (I did 10 minutes and my asparagus was a little overdone).  Season to taste with salt and pepper.

Divide among bowls and serve warm, topped with pesto, parmesan cheese, and herbs, if desired.  Season with additional salt and pepper if needed.

March 25, 2014

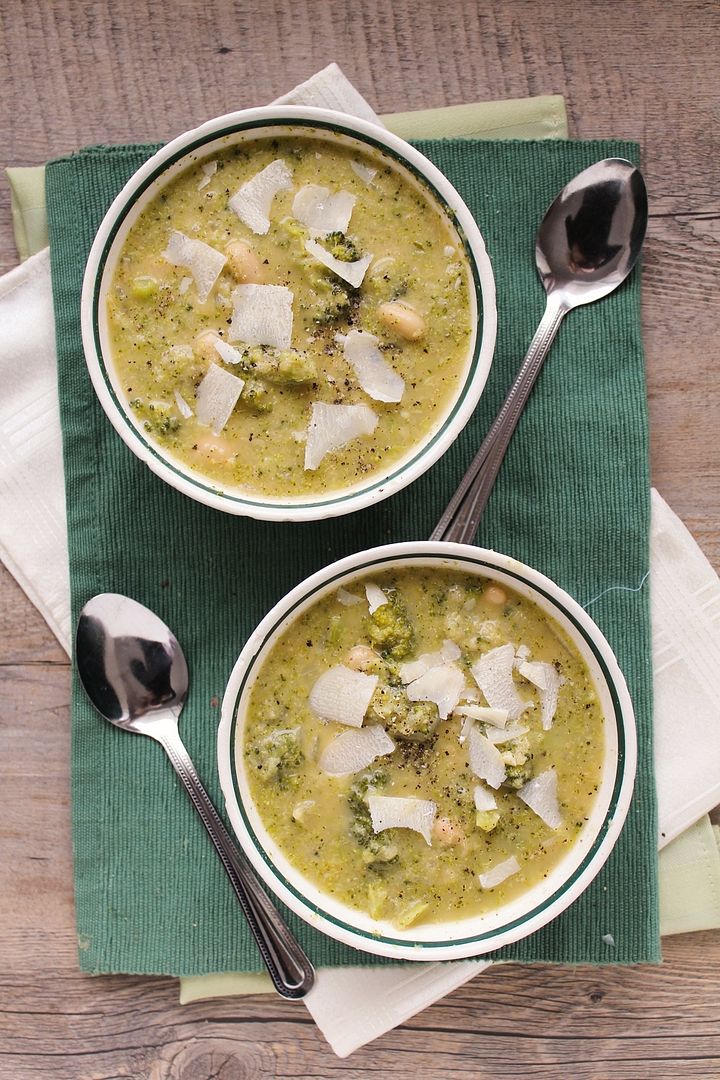
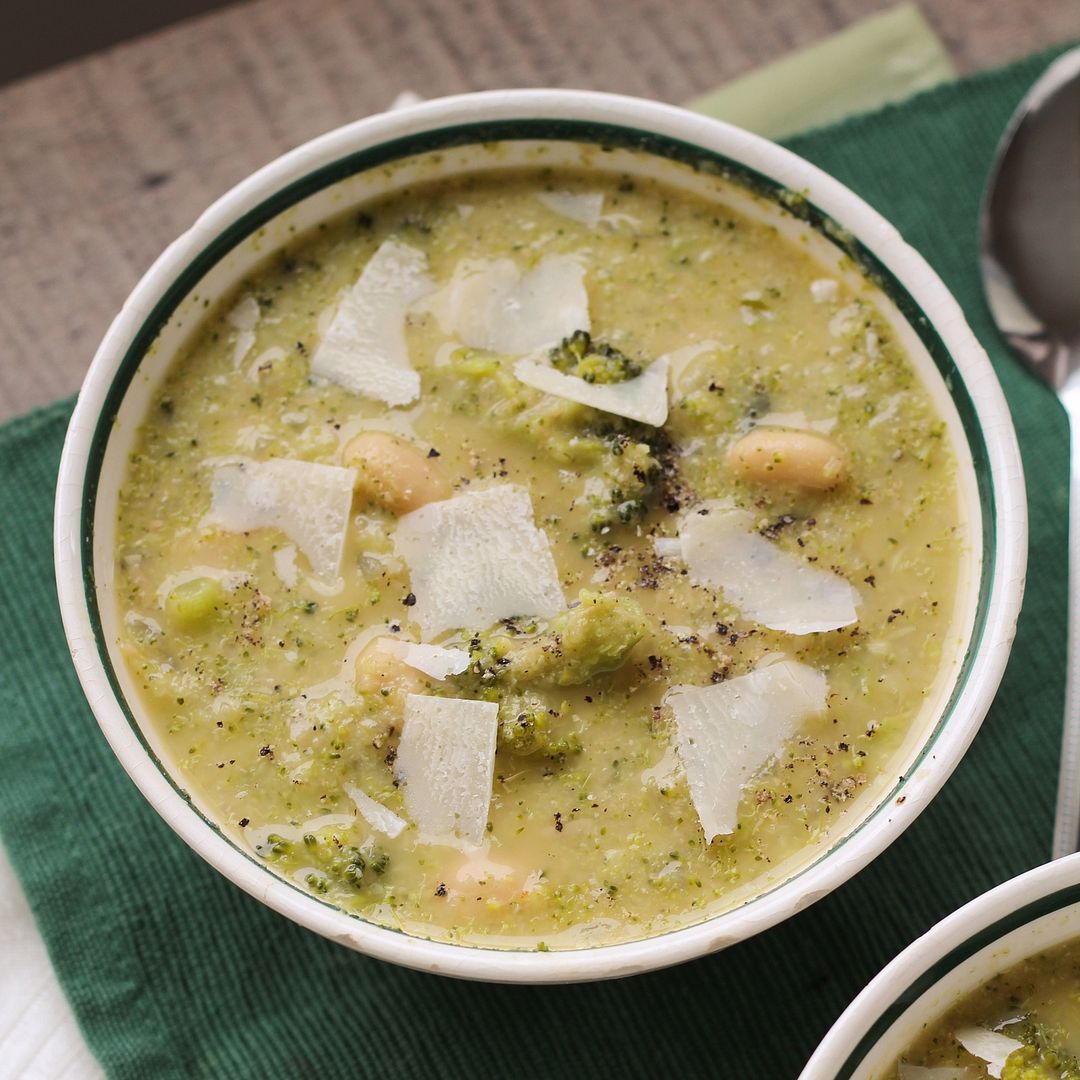
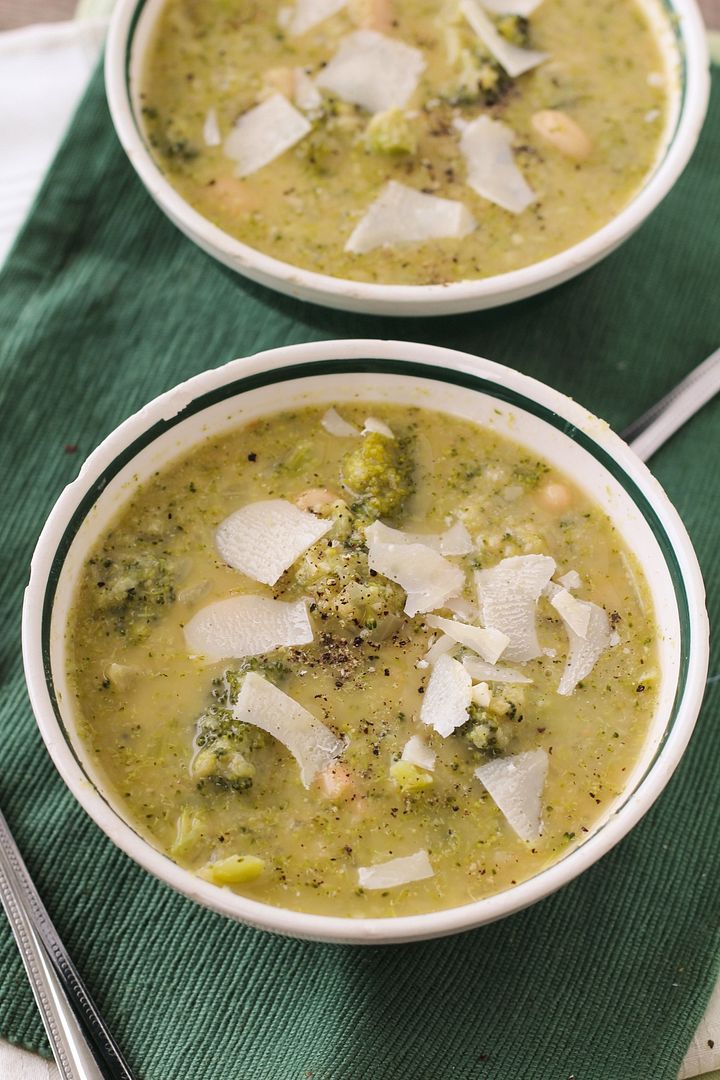
Broccoli White Bean Soup

Broccoli White Bean Soup

Winter is still showing no signs of slowing down here in Ontario, so despite it technically being spring, I'm still eating comfort food like cozy warm soups.  Which I'm not complaining about, as soups (at least the versions I make) are one of the easiest and quickest meals to prepare and they make great leftovers to be welcomed home to after a cold bus ride home after school!

This broccoli white bean soup is not only quick and easy to prepare but is nutritious and filling too.  I've used beans as a soup thickener before (like in this curried chickpea and kale soup or this roasted tomato white bean soup) and though it doesn't give it the same silky smooth texture that full fat cream would, I actually prefer the slightly chunky texture and thickness that beans add, not to mention it's a great way to sneak in protein to a vegetable soup!

Broccoli White Bean Soup

In addition to the white beans, this simple soup mainly just consists of broccoli and vegetable broth along with some basic flavourings like onion, garlic, and lemon juice.  I added nutritional yeast to the soup to give it a bit of cheesy, nutty flavour (and added nutrition) without any cheese, but some shavings of good quality parmesan on top are also critical for flavour.  I decided to only halfway puree my soup to leave some texture in it, but you can definitely puree it all if you prefer a smooth soup.

While you won't trick anyone into thinking this is a traditional butter, cream, and cheese filled broccoli soup, it's a great alternative if you're looking for a more nutritious but still comforting version of broccoli soup!

Broccoli White Bean Soup

Broccoli White Bean Soup

Adapted from Whole Living

Serves around 3-4

Ingredients:

1 head of broccoli, chopped into florets
1 tablespoon olive oil
1 medium to large yellow onion, diced
2-3 cloves garlic, minced
1 (540mL) can of no-salt added white kidney beans or cannellini beans, drained and rinsed
2 1/2 cups low-sodium vegetable broth
1/4 teaspoon red pepper flakes
1/4 cup nutritional yeast (or grated parmesan if desired)
1 teaspoon lemon juice
Salt and pepper (I used around 1/2 teaspoon each)
Shaved parmesan for topping

Directions:

Steam broccoli in a steamer basket, covered over simmering water, for about 3-4 minutes, until bright green and tender.  Set aside.

In a large saucepan, heat oil over medium heat.  Add onion and garlic and sauté until softened and translucent, about 6-7 minutes.  Add the beans and broth and bring to a simmer.  Add broccoli and red pepper flakes and stir.  Remove from heat and puree about half to two-thirds of the soup either by transferring to a blender or using an immersion blender.  I wanted to leave some texture to the soup, but you can puree all of it if you prefer the soup to be smooth.  Return to saucepan and stir.  Stir in the nutritional yeast, lemon juice, and season with salt and pepper to taste.

Serve warm, topped with shaved parmesan.

March 12, 2014

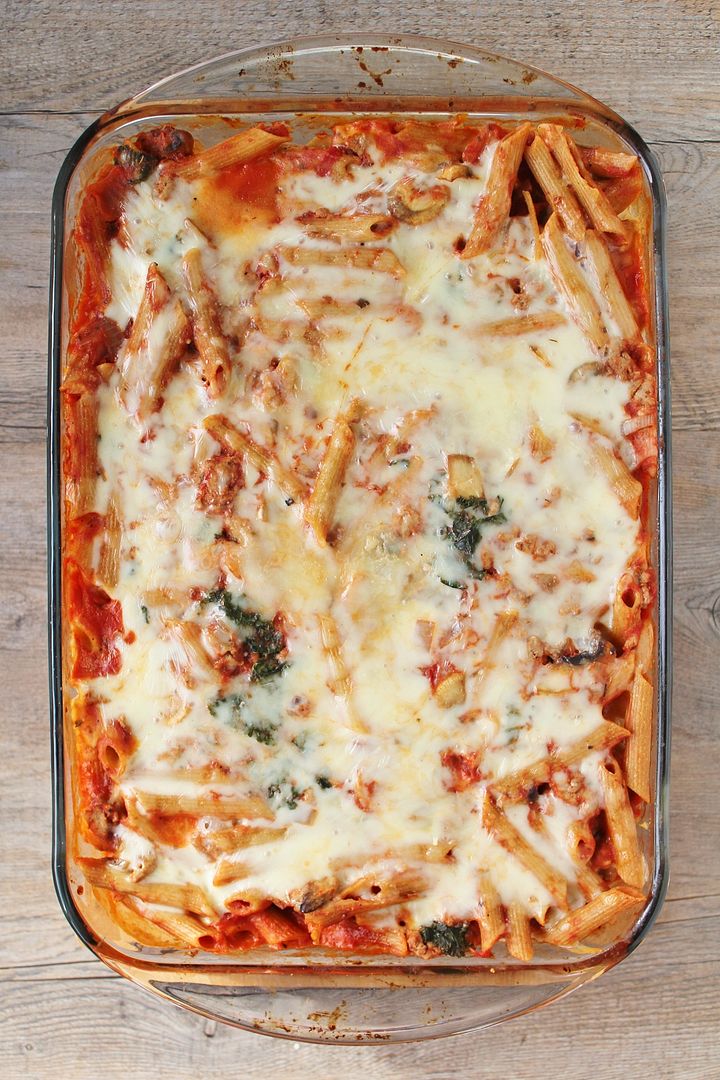
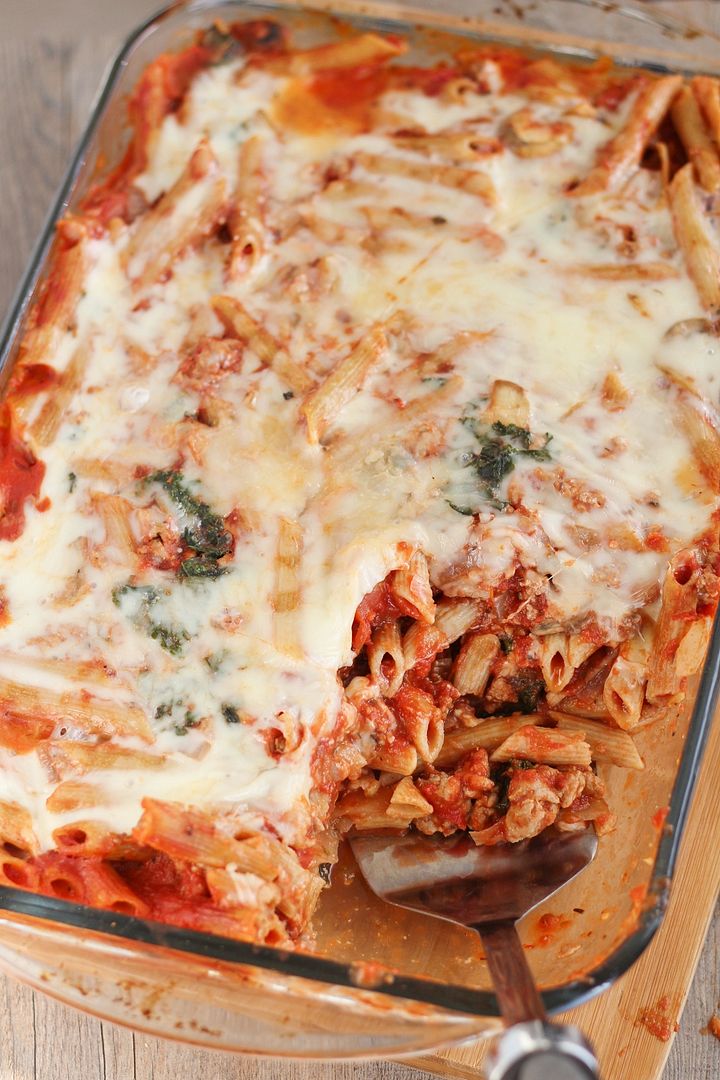
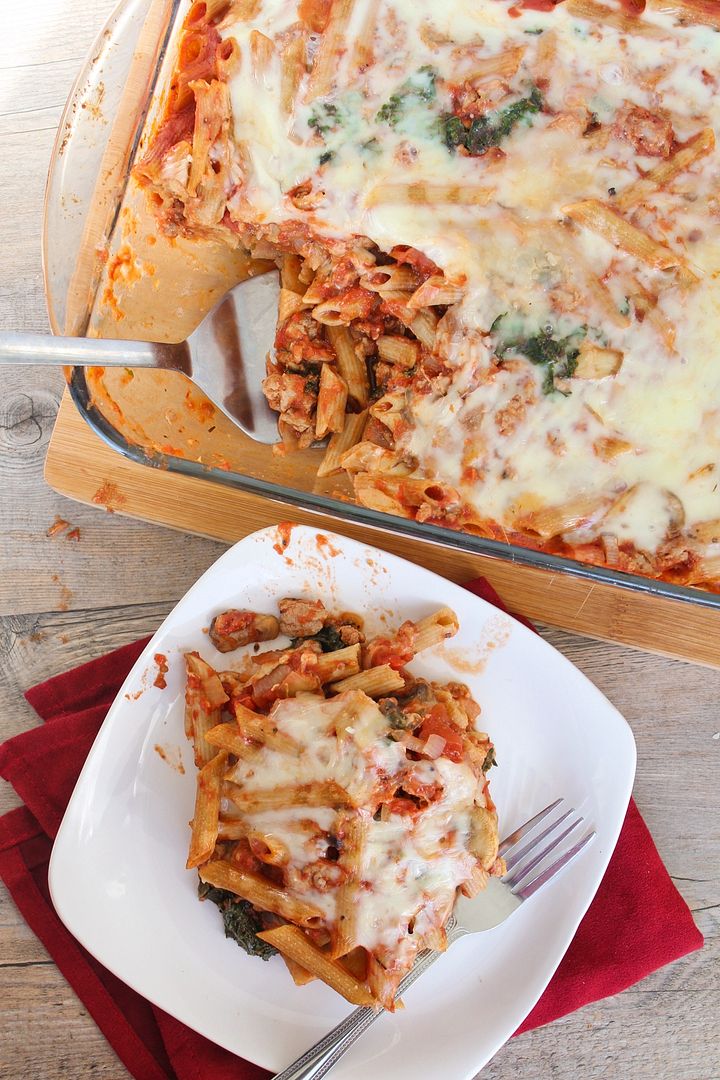
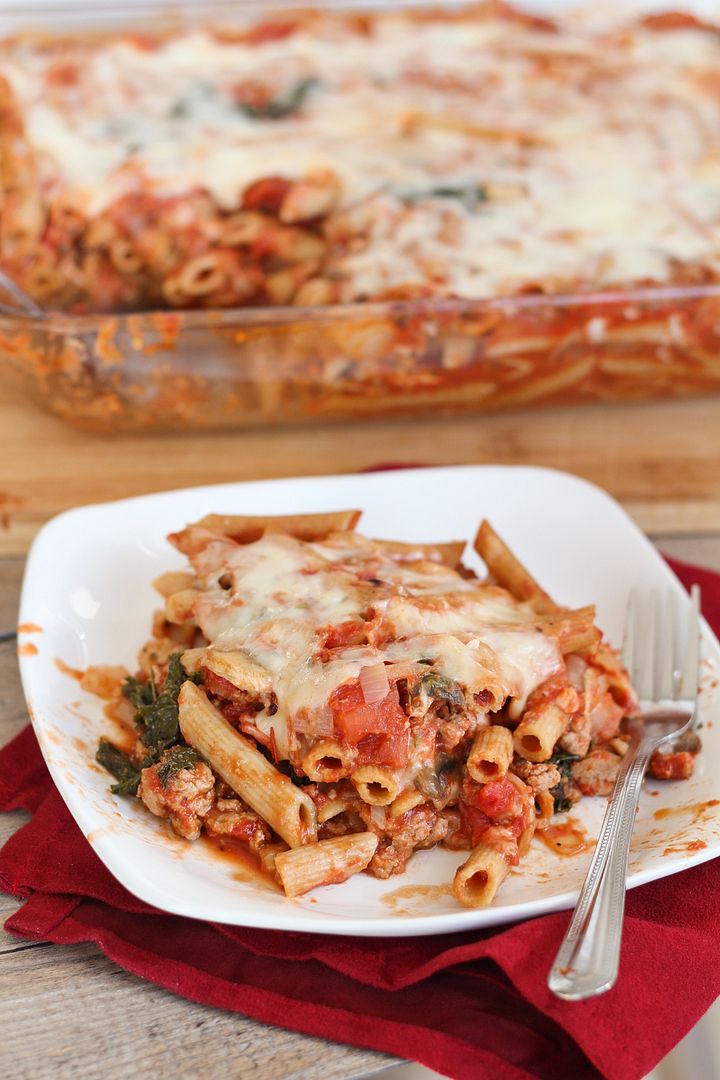
Turkey & Kale Whole Wheat Pasta Bake

Turkey & Kale Whole Wheat Pasta Bake

I mentioned in my most recent monthly recap that I've been having to make a lot of quick and easy meals lately, often just throwing together whatever I can find in my fridge or pantry.  This sometimes means that my meal is missing a key component though, like a protein or vegetables.

But when I know I have a busy week ahead and I actually take the time to make sure I have something more substantial but also healthful around to eat, this turkey and vegetable pasta bake is usually my go-to meal!

Turkey & Kale Whole Wheat Pasta Bake

This easy pasta dish is made by tossing together some whole wheat pasta, sauteed veggies (including onion, mushrooms, and kale) and seasonings, lean ground turkey, canned tomatoes, and just enough cheese, then baking it in the oven, which is the most time consuming (but hands-off) part. 

You end up with a well-balanced meal with plenty of whole grains, fiber, protein, and nutrients, that's hearty and filling!  I've reduced the amount of cheese that I used when I first made this dish (so it has much less than many baked pasta dishes) and find there's still plenty of cheese to satisfy me.  And if you're vegetarian, I think you could easily throw in some black beans or chickpeas instead of the turkey for added protein.

Turkey & Kale Whole Wheat Pasta Bake

I love that this is a baked pasta because I can just cover the dish with saran wrap and throw it in the fridge, then I can easily cut out a square of pasta to throw in a container for lunch the rest of the days of the week.  The pictures I took here were right after this pasta came out of the oven; it does firm up afterwards.

I've made this many times already and I'm sure I'll make it many more times until I get sick of it :)  If you have any great go-to meals to have around for busy weeks, feel free to share as I'm finding I need them more and more!

Turkey & Kale Whole Wheat Pasta Bake

Turkey & Kale Whole Wheat Pasta Bake

Adapted from ifoodreal

Serves 6-8

Ingredients:

1 (375g or 13oz) box of whole wheat penne, rotini, or fusilli
1 teaspoon olive oil
1 lb lean ground turkey
2 cloves garlic, minced
1 yellow onion, chopped
2 cups sliced white or cremini mushrooms
4 cups (packed) chopped kale
1 (28oz) can crushed tomatoes  (I don’t use the whole can; maybe around 3 cups) OR 1 jar of your favourite pasta sauce (I've used this one)
1 (14oz) can diced tomatoes (I usually use a seasoned variety)
1 tablespoon Italian seasoning
Salt and pepper
1/2 teaspoon crushed red pepper flakes
2 cups shredded part-skim mozzarella cheese
1/4 cup grated parmesan cheese

Directions:

Preheat oven to 375°F.  Bring a large pot of water to a boil and cook pasta to al dente, according to times on package directions.  I’ve used penne, rotini, and fusilli for this before and all work fine.  Drain when finished.

Meanwhile, heat oil in a large saucepan over medium-high heat.  Add turkey, season lightly with salt and pepper, and use a wooden spoon to break it up as you cook, letting cook until evenly browned (around 5 minutes).  Remove turkey and set aside in a bowl.  Using the same saucepan, add your garlic and onion and cook until slightly softened for a few minutes.  You can add a small amount of oil to the pan first if needed.  Add mushrooms and continue to cook until mushrooms are browned, another 5-7 minutes.  Add the kale and cook until wilted, stirring often.  Add the cans of tomatoes, Italian seasoning, red pepper flakes, a pinch each of salt and pepper or to taste, along with the turkey and the cooked pasta to the pan.  Stir and let cook over low-medium heat for a few minutes.  Add half of the mozzarella cheese (1 cup) and all of the parmesan cheese and stir.

Spray a 9x13 glass baking dish with non-stick cooking spray.  Pour the pasta mixture into the pan and top with remaining mozzarella cheese (1 cup).  Cover with aluminum foil and bake in preheated oven for 25-30 minutes.  Remove foil and bake for another 3-5 minutes.  Remove from oven and let sit for at least 5 minutes before serving (this is important!).

*Note: If you want to use spinach instead of kale, use about a 5oz container of baby spinach and stir in to the mixture when you add the turkey and pasta.

February 25, 2014

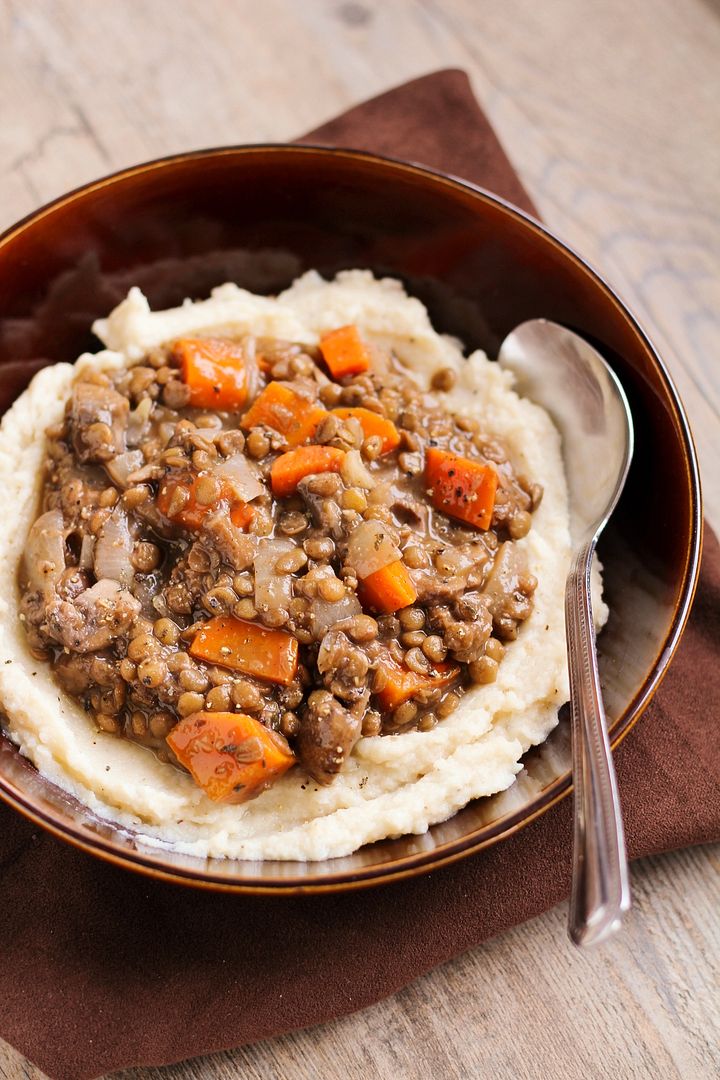
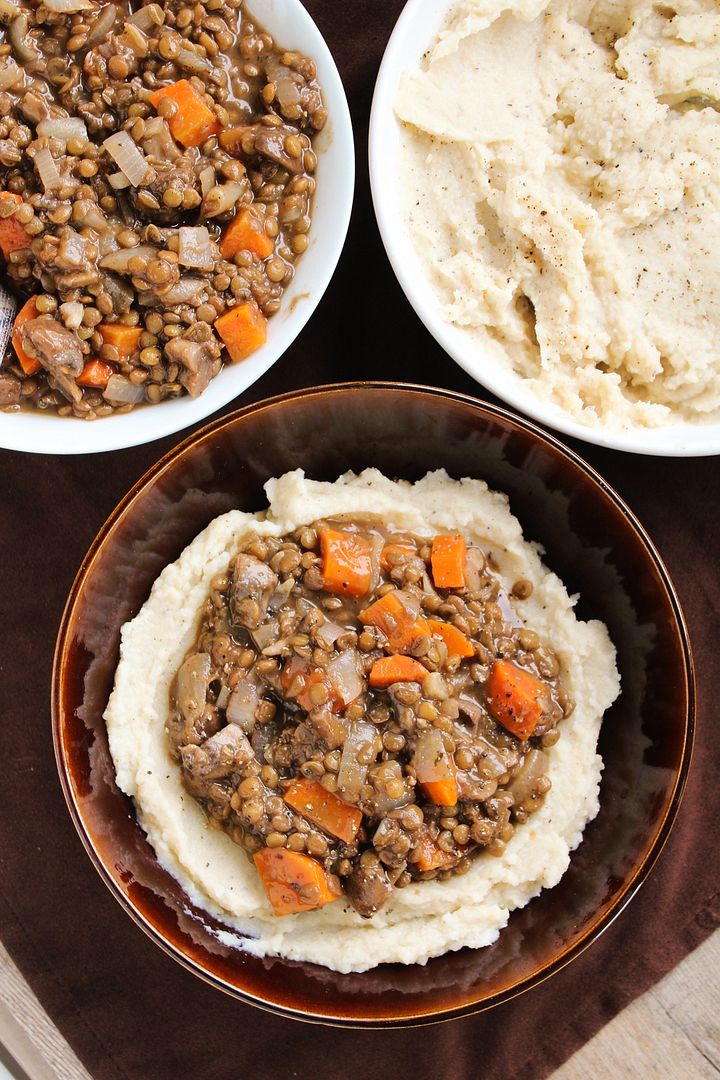
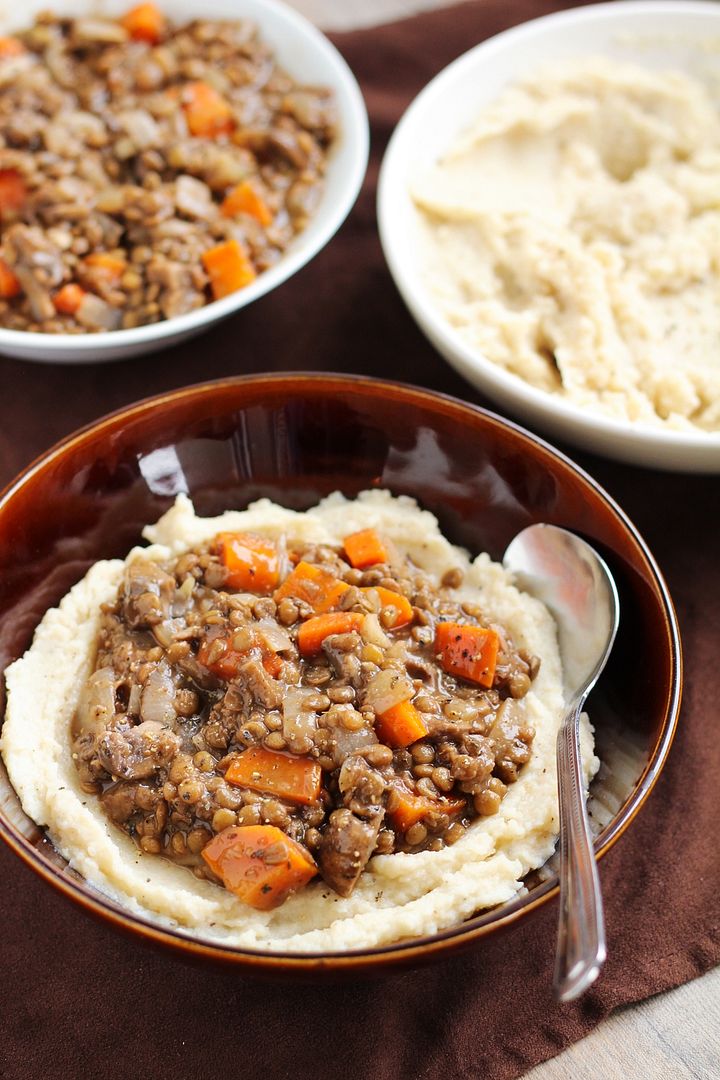
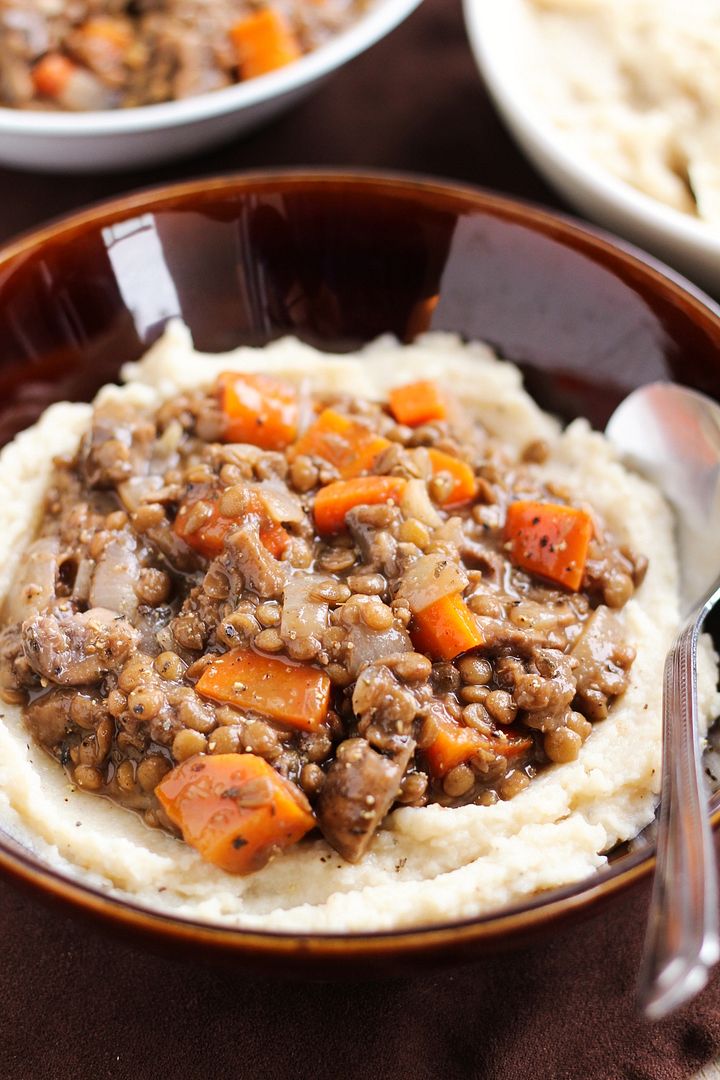
Lentil & Vegetable Stew with Cauliflower White Bean Puree

Lentil & Vegetable Stew with Cauliflower White Bean Puree

So I realize this isn't the most attractive looking plate of food you've ever seen...  I was cringing as I put together this post, wondering why I thought brown on brown on brown was a good idea for food styling, or why I didn't add a garnish on top for some colour.  I will hopefully redo these photos in the future, but I wanted to make sure I shared this now while you're still in the mood for hearty winter comfort food.  Not that winter seems to be showing any signs of ending soon!

Hopefully you're willing to get past appearances here because I promise the taste is worth it.  And not only is this dish comforting, filling, and full of flavour, but it's also really good for you!

Lentil & Vegetable Stew with Cauliflower White Bean Puree

This stew is made with lentils (obviously), onion, garlic, mushrooms, carrots, vegetable broth, plenty of seasonings, and a splash of red wine for good measure.  So you're getting a ton of vitamins, fiber, and protein to fill you up and keep you energized through the day or night.  I love using lentils in meals because they're a great source of protein, they're easy to cook, and they're really cheap!

And to make this even more of a protein power bowl, I pureed white beans with cauliflower to serve as the base for the stew.  Steaming and pureeing cauliflower is one of my favourite ways to eat it and I honestly like it even better than regular mashed potatoes.  Sometimes I'll puree cauliflower with chickpeas or white beans and some flavourful mustard and just eat that for dinner on its own, but it goes even better with a hearty stew on top! 

Lentil & Vegetable Stew with Cauliflower White Bean Puree


In case you're skeptical, or plan on serving this to picky eaters, I told Ryan that the cauliflower was just mashed potatoes, and after I'd finished watching him eat his meal while trying to hold in my evil grin the whole time, I told him it was really cauliflower and beans and he was completely surprised!

You can also eat the stew on its own if you prefer, and if your leftovers thicken up more than you like in the fridge, just add a splash of water or vegetable broth before you warm it up (this makes great lunch leftovers!)

It may not be pretty, but this is just what you need to get through these never ending winter days!

Lentil & Vegetable Stew with Cauliflower White Bean Puree

Lentil & Vegetable Stew with Cauliflower White Bean Puree

Recipe adapted from Unprocessed People’s Lentil Not Roast

Makes about 4 servings

Ingredients:

For the Lentil Stew:
1 cup dry green or brown lentils
2 teaspoons olive oil
1 lb (two 8oz containers) white or crimini mushrooms, chopped (around 2.5 cups)
2 large carrots, peeled and diced
2 medium yellow onions, peeled and diced
3 cloves garlic, minced
1/2 teaspoon cumin
1/2 teaspoon dried oregano
1/2 teaspoon dried basil
1/2 tablespoon dried thyme
1 tablespoon tomato paste
2 teaspoons cornstarch
1/2 cup red wine
2 cups low-sodium vegetable broth
2 bay leaves
2 teaspoons Worcestershire sauce (use vegetarian Worcestershire sauce to keep this vegetarian/vegan)
Salt and pepper

For the Cauliflower:
1 large head of cauliflower, chopped into florets
3 cloves garlic, crushed
1 can white kidney beans, drained and rinsed
2 teaspoons extra virgin olive oil
~1/2 teaspoon each salt and pepper

Directions:

Bring 2 cups water to a boil in a medium saucepan.  Add lentils, reduce heat to medium-low, and let simmer uncovered for 20-30 minutes, until cooked through and water is absorbed. Set aside when done.

Meanwhile, in a separate large saucepan or dutch oven, heat olive oil over medium heat.  Add mushrooms, carrots, onion, garlic, and dry seasonings (cumin through thyme), stir, and let cook for around 5-7 minutes, stirring often.  Add tomato paste, stir to coat, and let cook for about a minute. Add cornstarch, stir to coat, and cook for another minute.  Add red wine and let simmer for about 3 minutes.  Add vegetable broth and bay leaves and lower heat to a simmer.  Add lentils and let simmer for at least 5 minutes.  Remove bay leaves, stir in Worcestershire sauce, and season to taste with salt and pepper.

While your lentil stew is simmering, prepare the cauliflower bean mash.  Add cauliflower and garlic to a steamer basket and steam over boiling water, covered, for about 10 minutes.  Transfer to a food processor, add white beans, and process until smooth.  Slowly add olive oil, then season with salt and pepper.

Serve lentil stew warm over pureed cauliflower.  Garnish with chopped parsley if desired.

January 22, 2014

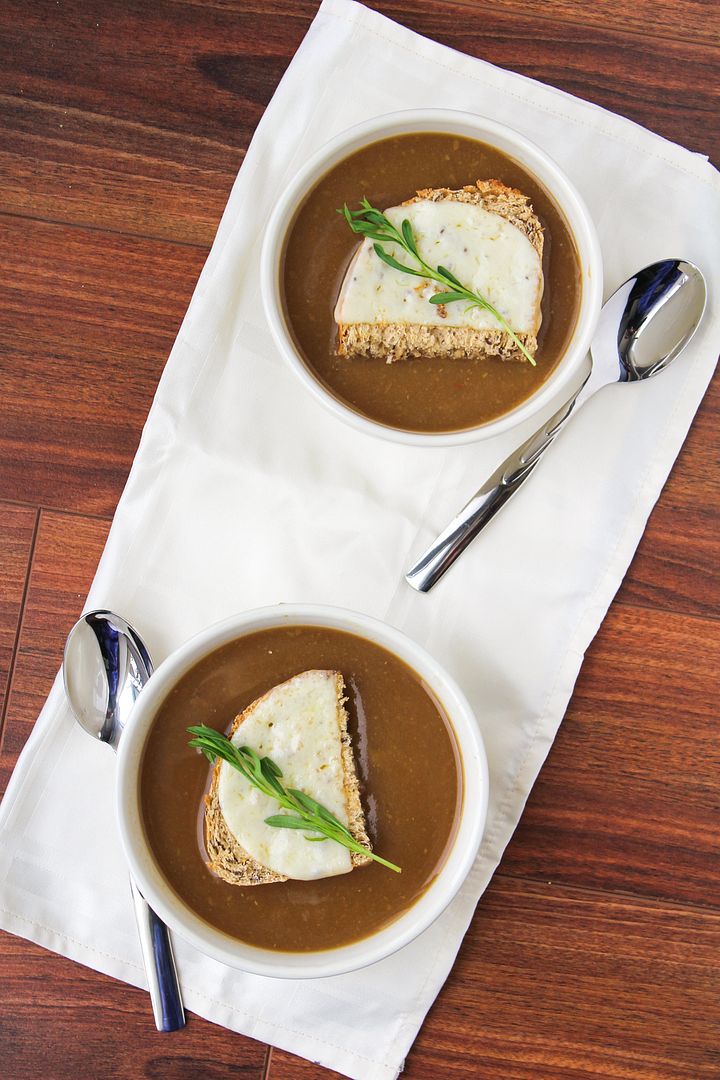
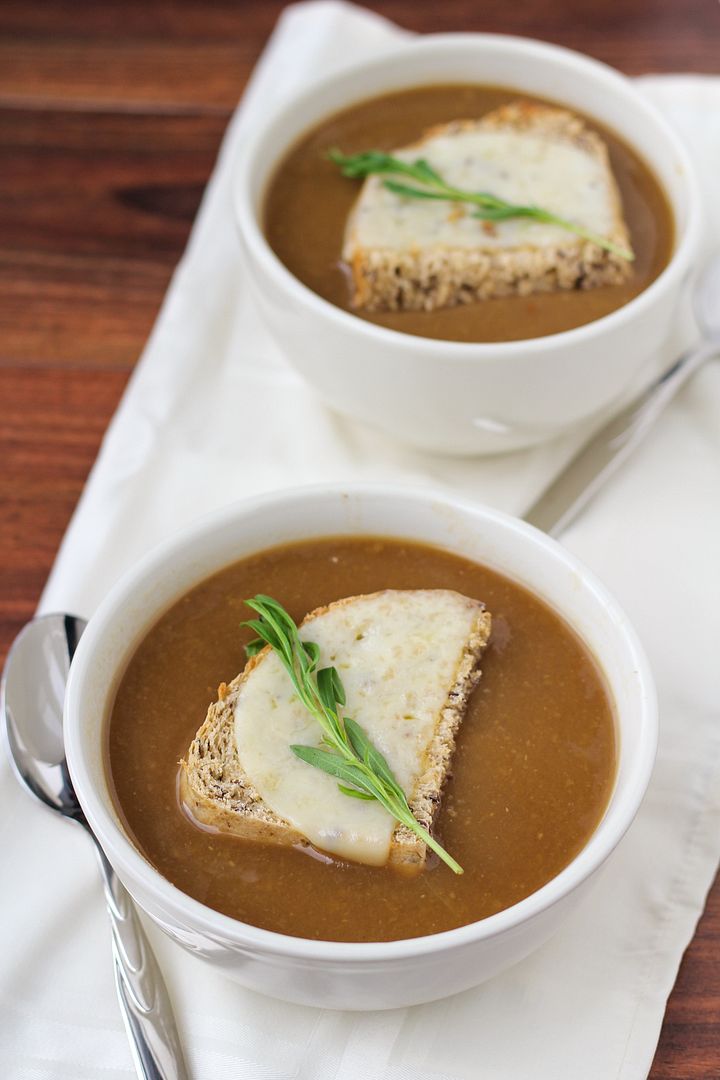
Caramelized Onion and Potato Soup

Caramelized Onion and Potato Soup

And just when we thought the worst of the cold weather was over, it came back this week to give us a reminder of why summer is so great!

I'd almost forgotten already what it feels like when your nostrils start to freeze up as soon as you step outside and your lungs hurt when you breathe in the cold air.  Needless to say, I'll be spending as much time indoors as possible this week and enjoying lots of hot chocolate and soup!

Caramelized Onion and Potato Soup

I've actually been making a lot more soup than normal lately, not just because of the weather but because I received an immersion blender for Christmas that I've loved trying out!  It makes pureeing soups so much easier than transferring it in batches to a blender, and more importantly it means a lot less dishes to clean up after, which is probably my favourite thing about it.

I have my eye on so many soup recipes I want to try now, but onion soup has stood out as the most comforting option lately, and it was an excellent choice!

Caramelized Onion and Potato Soup

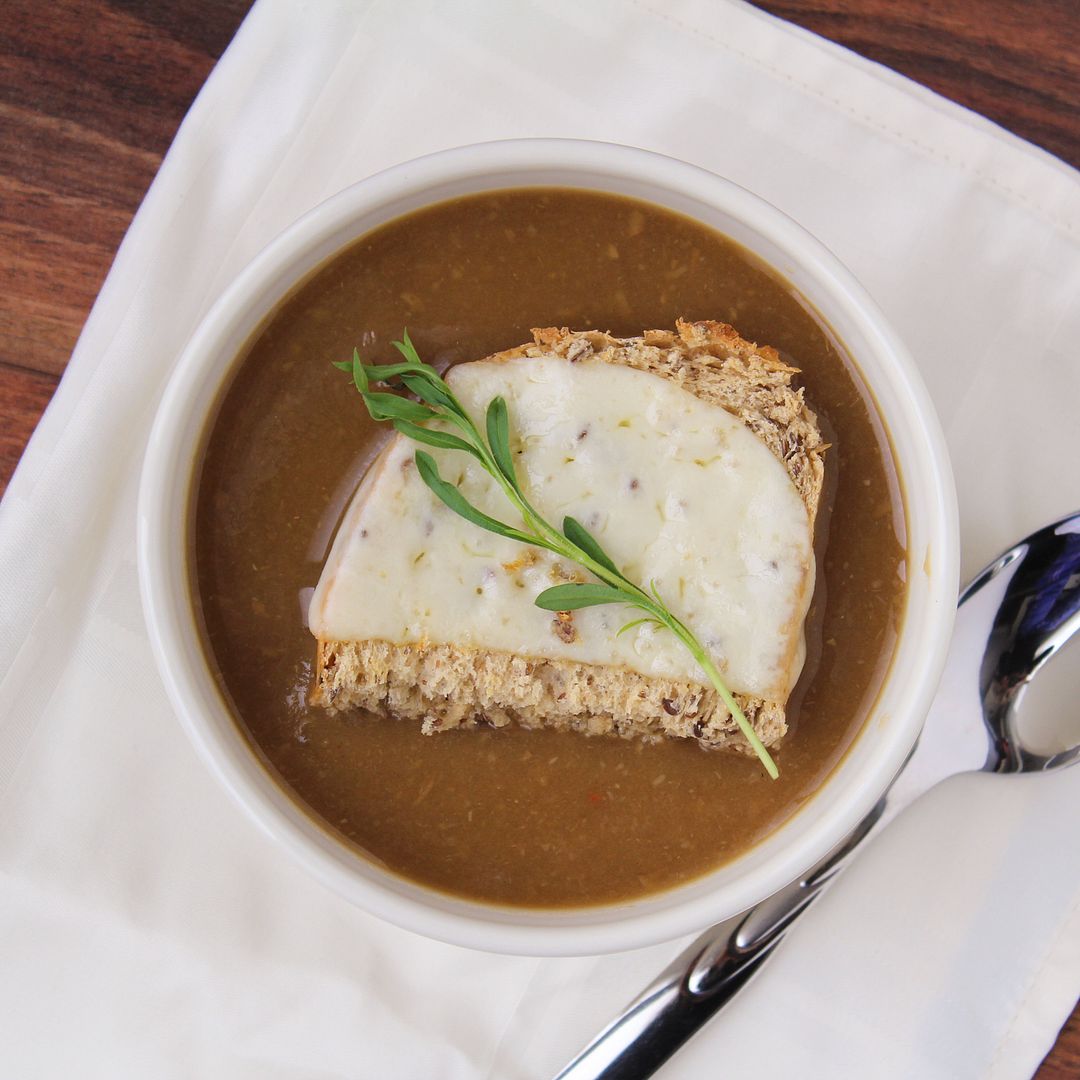
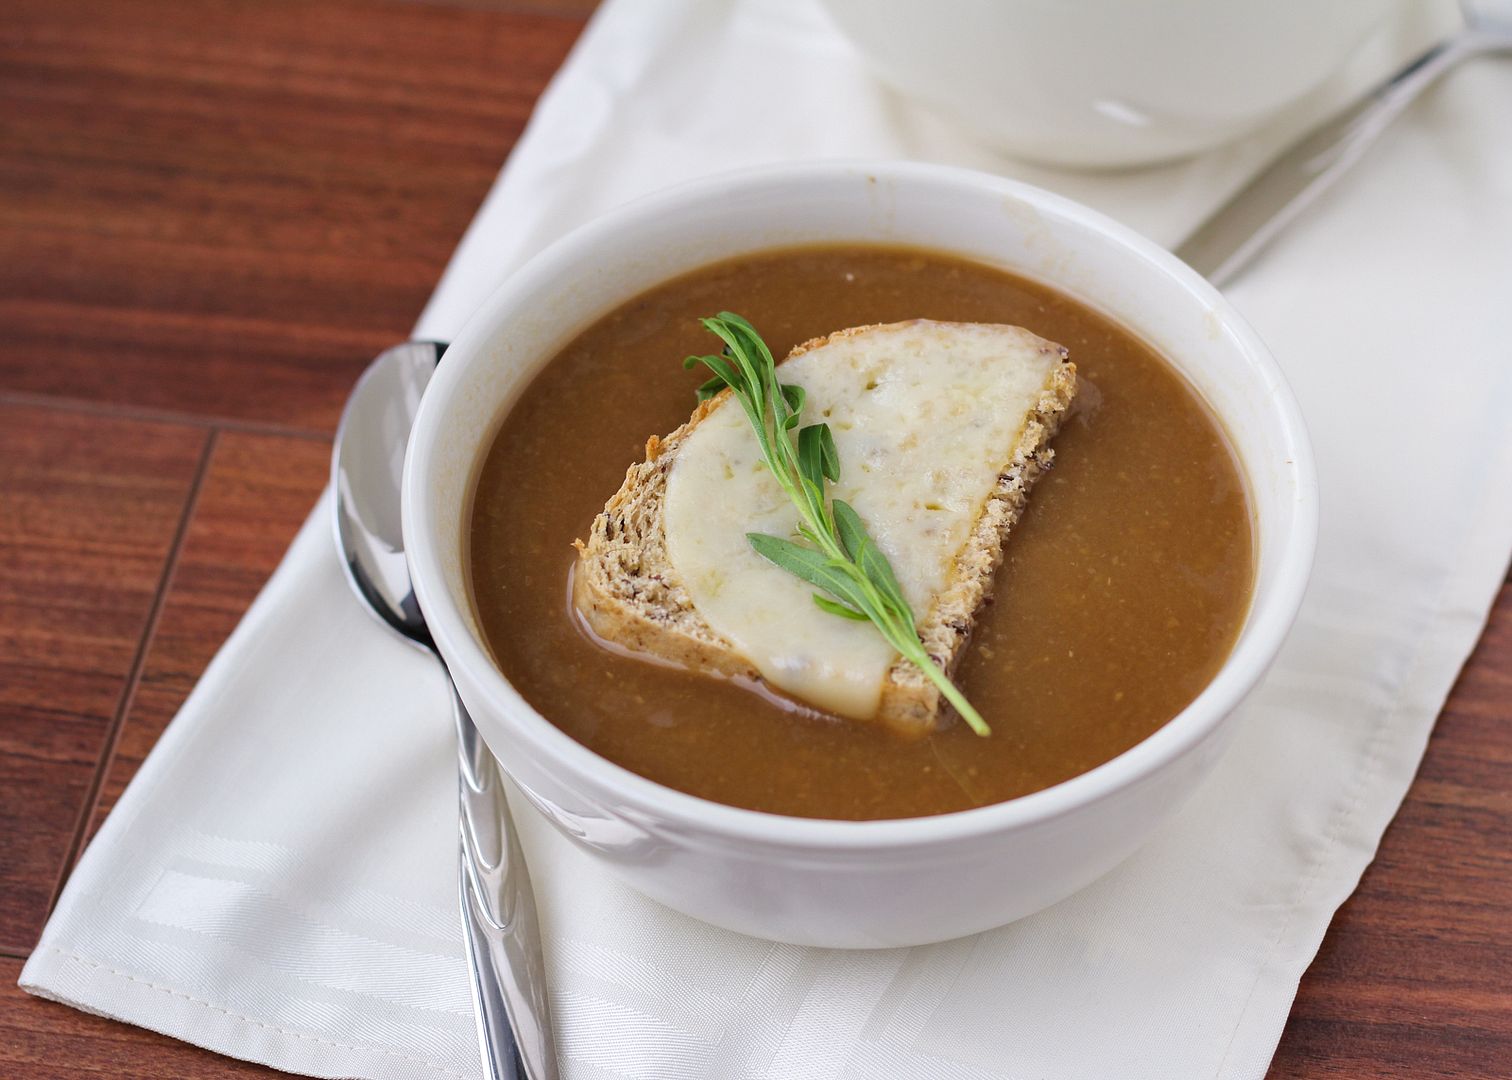
This caramelized onion and potato soup is very similar to a French onion soup, but easier and faster to prepare, and perhaps a little bit healthier.  I didn't cook my onions quite as long as you would for a French onion soup - just long enough to give them that deep golden brown colour and rich flavour - and I also cooked them in just a bit of olive oil instead of tons of butter.  The other  main differences are that this version contains some garlic for flavour and potatoes for thickness, and that I pureed it all into a smooth soup (though next time I'll probably leave a few chunks in there for texture - I just got carried away with my immersion blender!).  Then I topped it with a simple piece of toasted whole grain bread with some melted cheese instead of baking the whole thing in the oven (with a lot more cheese).

You end up with a rich but light tasting soup that's perfect for a cozy winter evening indoors!

Caramelized Onion and Potato Soup


Caramelized Onion & Potato Soup

Adapted from different recipes found on Whole Living, Yankee Magazine, and Bon Appetit

Serves around 4 as main course servings; 8 as smaller side dish servings

Ingredients:

2 tablespoons olive oil or canola oil
6 medium yellow onions, peeled and thinly sliced into half moons (or 3-4 large onions)
4 cloves garlic, minced
Salt and pepper
1 tablespoon white wine vinegar
1/2 cup dry white wine
1 tablespoon all-purpose flour
8 cups (2L) low sodium beef broth
1-1/2 to 2 cups chopped yellow potatoes
2 bay leafs
2 sprigs of thyme
4-7 slices thick rustic whole grain bread
4-8 slices gruyere, swiss, or provolone cheese

Directions:

Heat oil in a large heavy-bottomed saucepan or Dutch oven over medium heat.  Add onions and garlic, stir to coat with oil, and let sit for about 5 minutes, stirring occasionally.  Season with salt and pepper and stir.  Cook for an additional 25-30 minutes, stirring occasionally, until softened and caramelized with a deep golden brown colour.  (Cook for up to 45 minutes if needed).  Add vinegar to deglaze the pan.  Add wine and stir, scraping up the browned bits from the bottom of the pan.  Let simmer until reduced slightly, about 2-3 minutes.  Sprinkle flour over onions and stir.

Add beef broth, potatoes, thyme, and bay leaves.  Bring to a boil, then reduce heat and let simmer, partially covered, stirring occasionally, until potatoes are softened.  Discard bay leaves and thyme sprigs.  If desired, puree soup with an immersion blender or by transferring in batches to a blender.  You may puree all of the soup if you want it to be smooth, part of the soup for some texture, or none if you want it to be chunky, depending on what you prefer.  Season with salt and pepper to taste.

Preheat broiler.  Arrange cheese on bread and broil until cheese is melted, about 1 to 2 minutes.  Serve alongside or on top of soup.

January 13, 2014

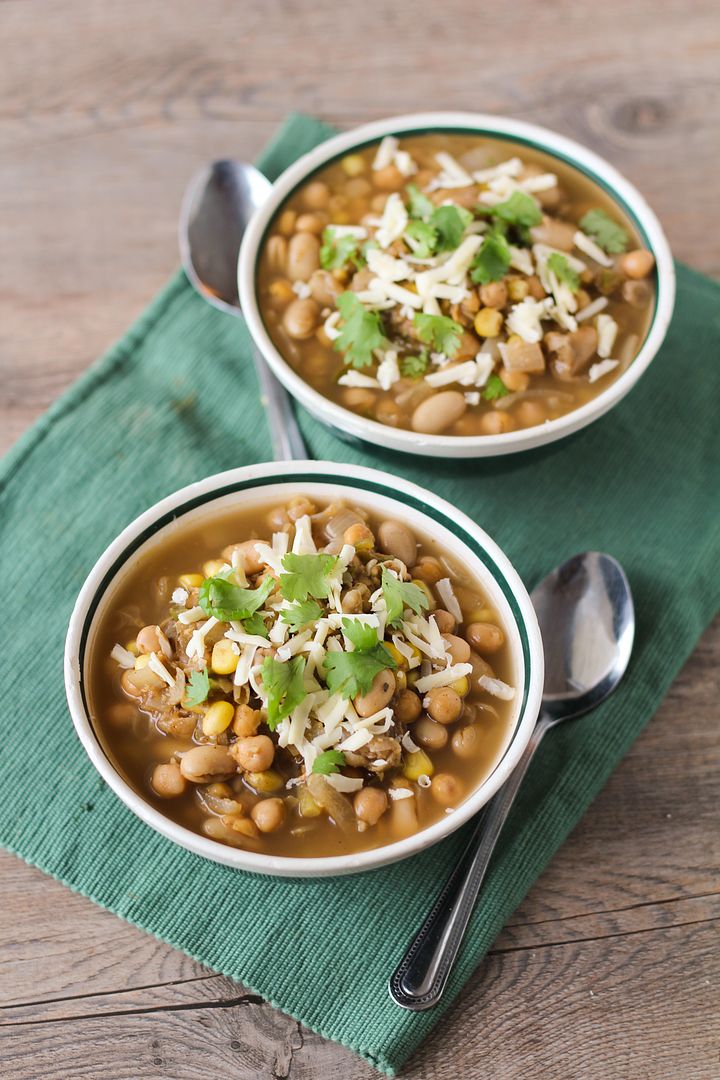
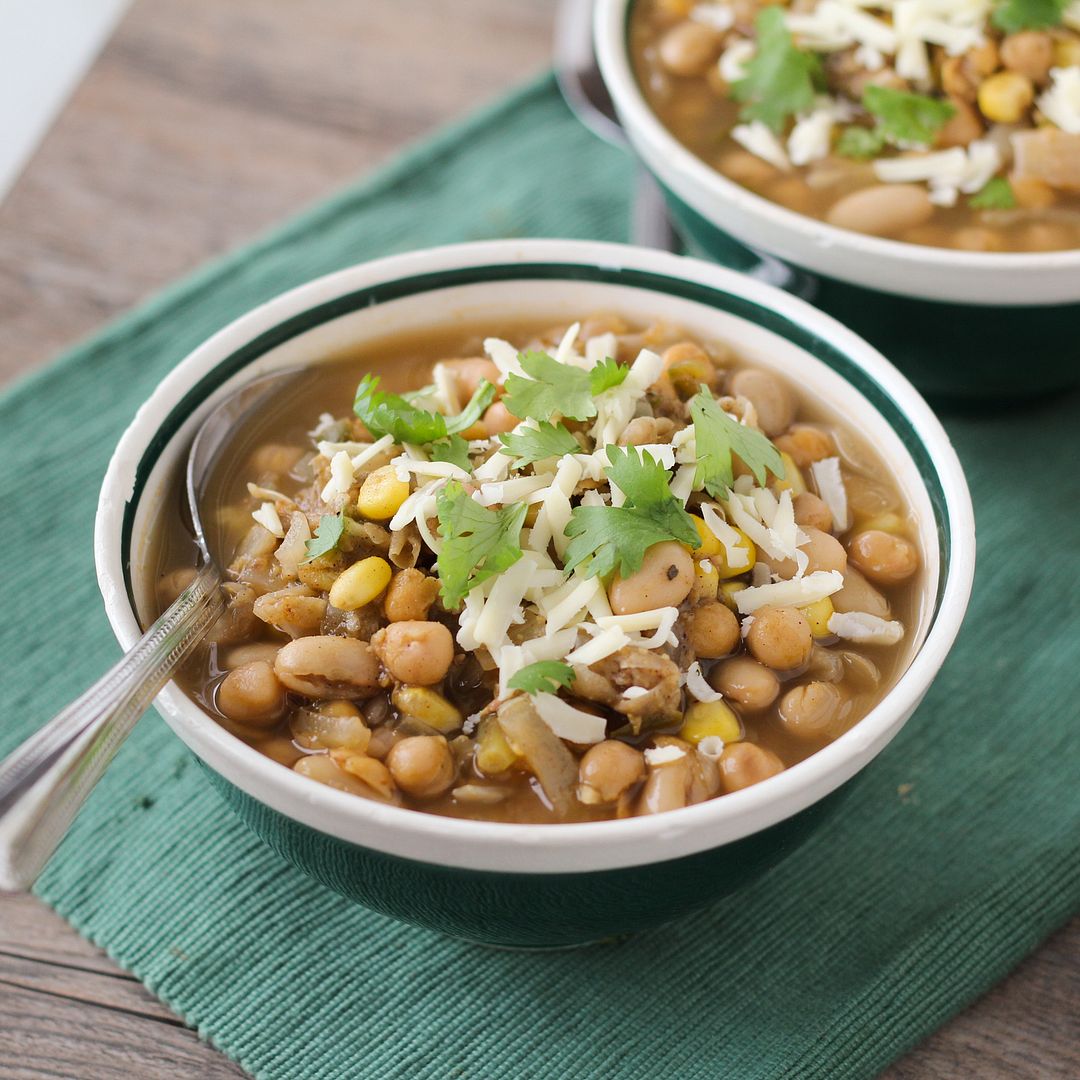
White Chickpea Chili

White Chickpea Chili - a healthy and easy vegetarian twist on white chicken chili

With the cold weather a lot of us experienced last week (except those lucky people in California!), I’m sure we’ve all been eating lots of warm comfort food lately.  When it gets that cold out all I want for dinner is soup, stew, or chili, but as these can often involve a lot of cooking time to develop enough flavour, during the week I need something that’s a little more quick and easy to prepare.  

Enter white chickpea chili!

White Chickpea Chili - a healthy and easy vegetarian twist on white chicken chili

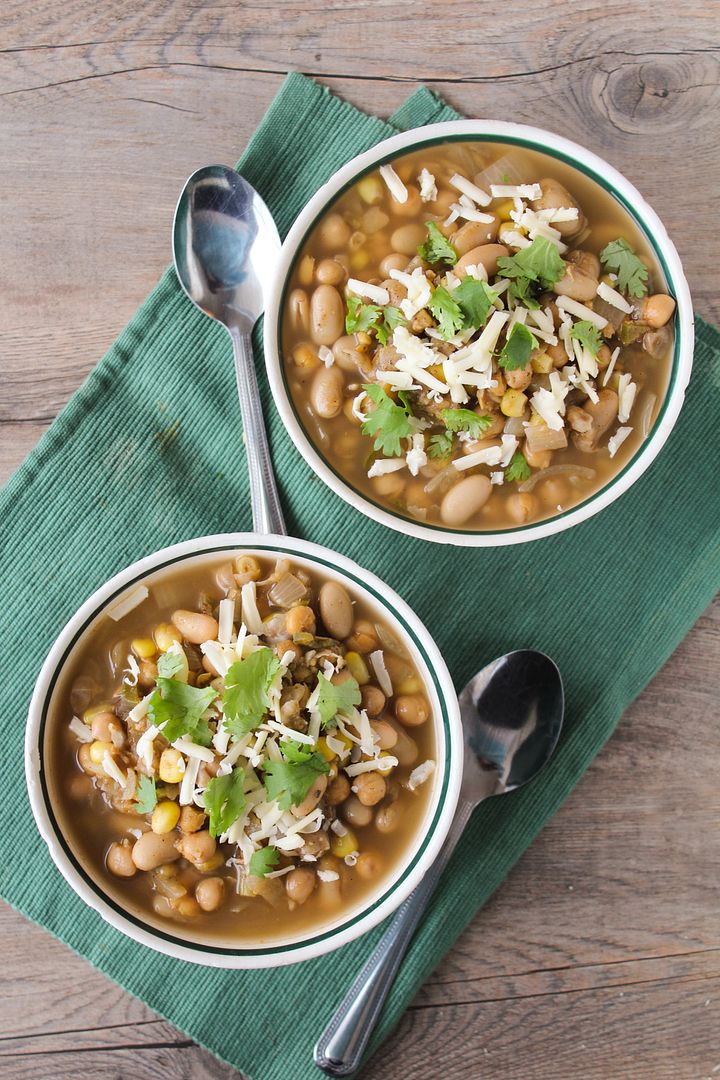
I love white chicken chili as a refreshing change from tomato-based versions, but I decided to make it a little easier and cheaper to make by using all beans and no chicken.  This vegetarian white chili includes mashed chickpeas throughout for thickness, whole chickpeas and white beans for texture (and tons of protein, so you won’t miss the meat!), some corn for a little sweetness, jalapeno for spice, and then vegetable broth, garlic, onions, and seasonings for plenty of flavour.

You end up with a healthy vegetarian chili that’s inexpensive, easy and fairly quick to make, and full of flavour.  Perfect for these cold winter nights, and also Sunday playoffs if you usually associate football with chili (and if you're still watching - my team's still in it so I'm all about the football food!)

Hope you all had a good weekend and are dethawing a bit now!

White Chickpea Chili - a healthy and easy vegetarian twist on white chicken chili

White Chickpea Chili

Adapted from The Neely’s white chicken chili recipe

Serves about 4

Ingredients:

1 teaspoon olive or canola oil
1 large or 2 small yellow onions, chopped
2 cloves garlic, minced
1 jalapeno, minced (use more if you want it to be spicier)
2 (540mL) cans chickpeas, drained and rinsed, divided
1 (540mL) can white kidney beans, drained and rinsed
2 teaspoons ground cumin
1 teaspoon chili powder
1 teaspoon dried oregano
4 cups low sodium vegetable broth
1 tablespoon fresh lime juice
1 cup frozen corn kernels
Salt and pepper to taste

Toppings:
Shredded white cheddar cheese
Chopped fresh cilantro
Light sour cream
Chopped ripe avocado (not pictured in my version but it would be a nice addition!)

Directions:

Heat oil in a large saucepan or Dutch oven over medium-high heat. Add onions, garlic, and jalapeno, stir to coat with oil, and sauté until soft and fragrant, stirring occasionally, about 5 minutes.

Meanwhile, rinse and drain your cans of beans, keeping one can of chickpeas separate. Transfer those chickpeas (1 can) to a medium bowl and mash with a potato masher until most beans have been smashed. Set aside.

Add cumin, chili powder, and oregano to the onion mixture in the pan. Stir to coat and let cook for about 1 minute. Add vegetable broth, lime juice, corn kernels, mashed beans, and remaining beans. Bring to a boil, then reduce heat to simmer and let cook about 10-15 minutes.

Season with salt and pepper to taste. Serve warm in bowls topped with shredded cheese, cilantro, a dollop of sour cream, avocado, and additional lime wedges, if desired.

October 08, 2013

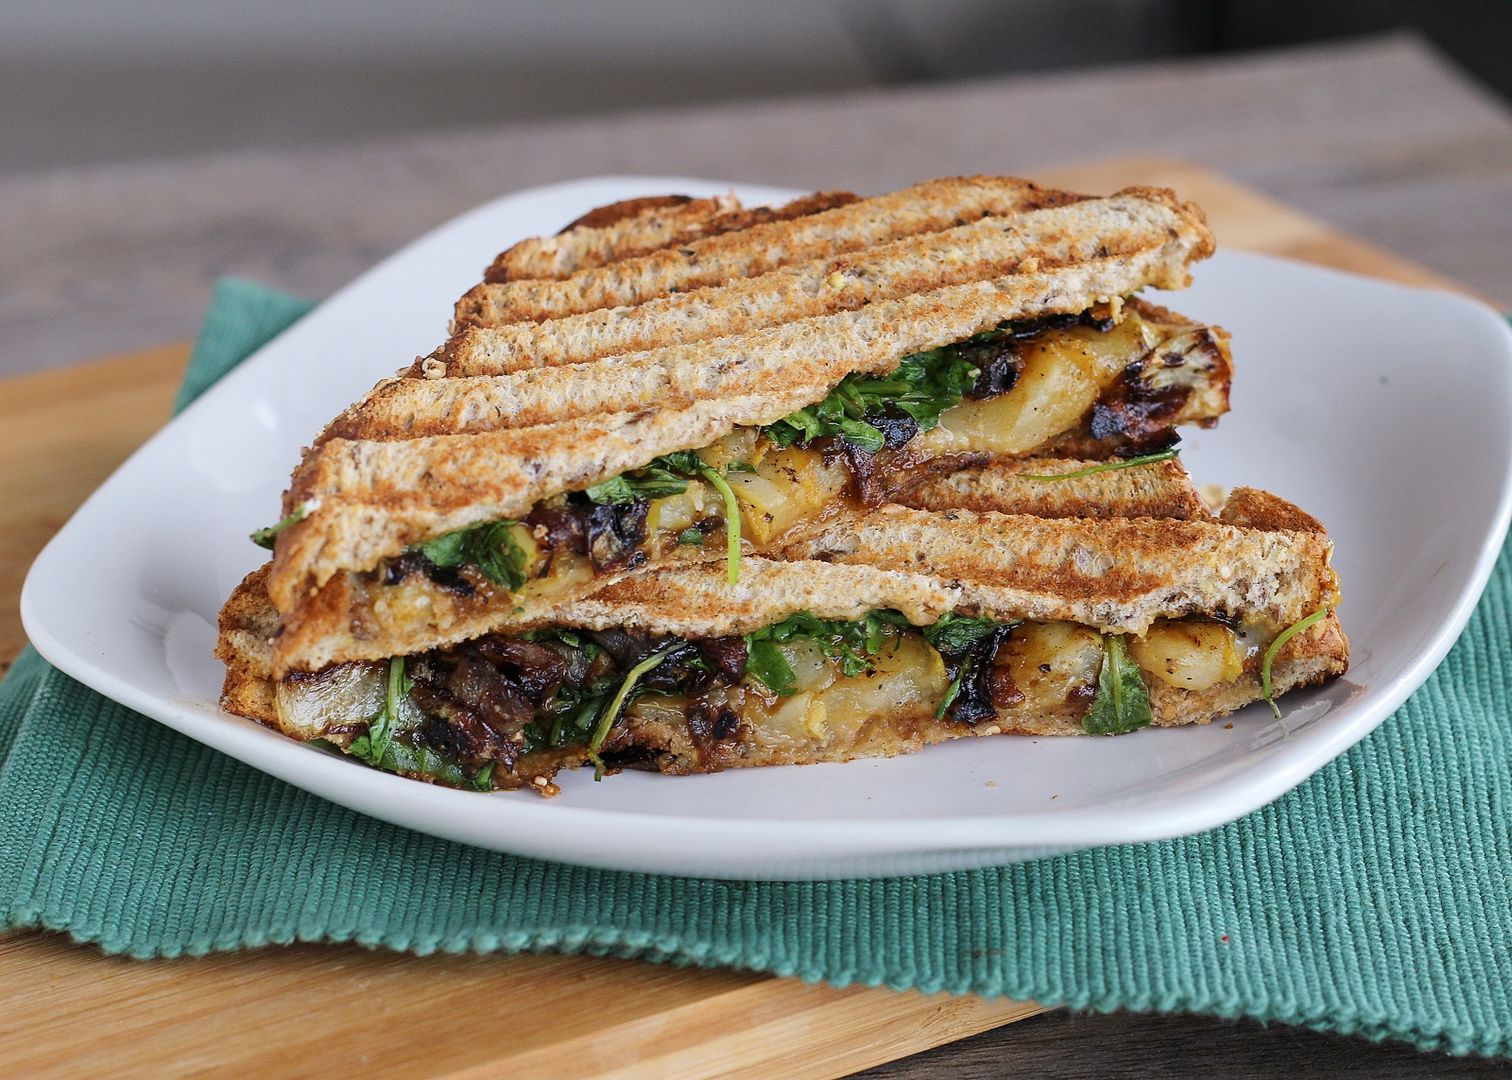
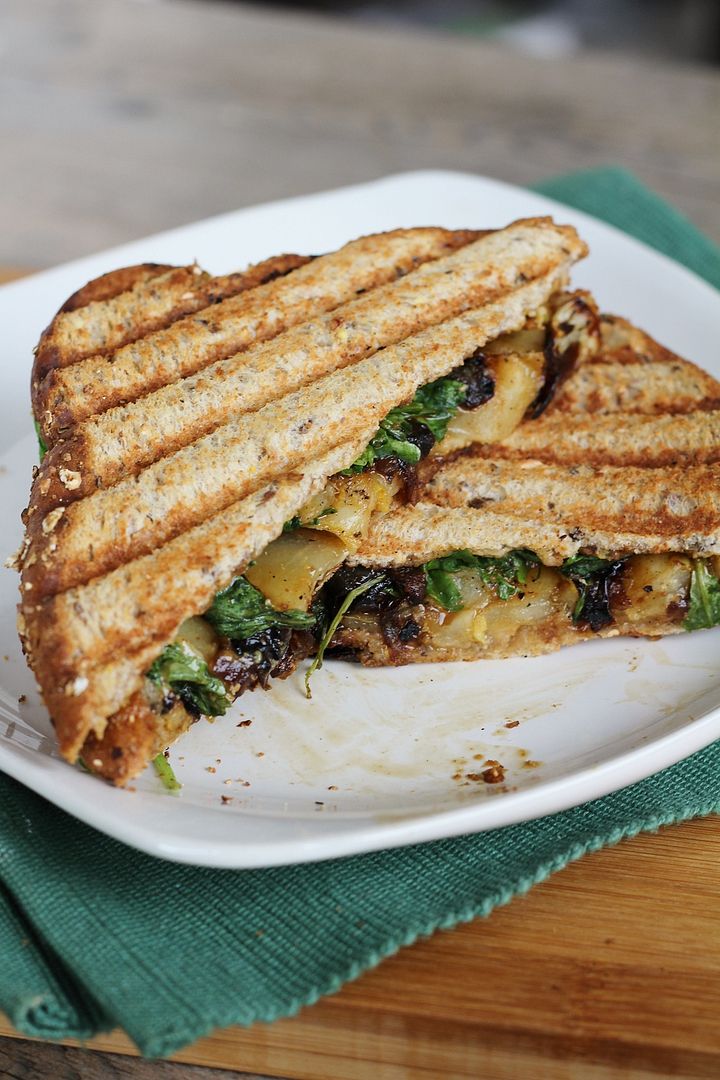
Pear, Blue Cheese, & Caramelized Onion Panini

Pear, Blue Cheese, & Caramelized Onion Panini

I know I just posted a panini recipe fairly recently, but this new panini was so good that I had to share it with you guys immediately!

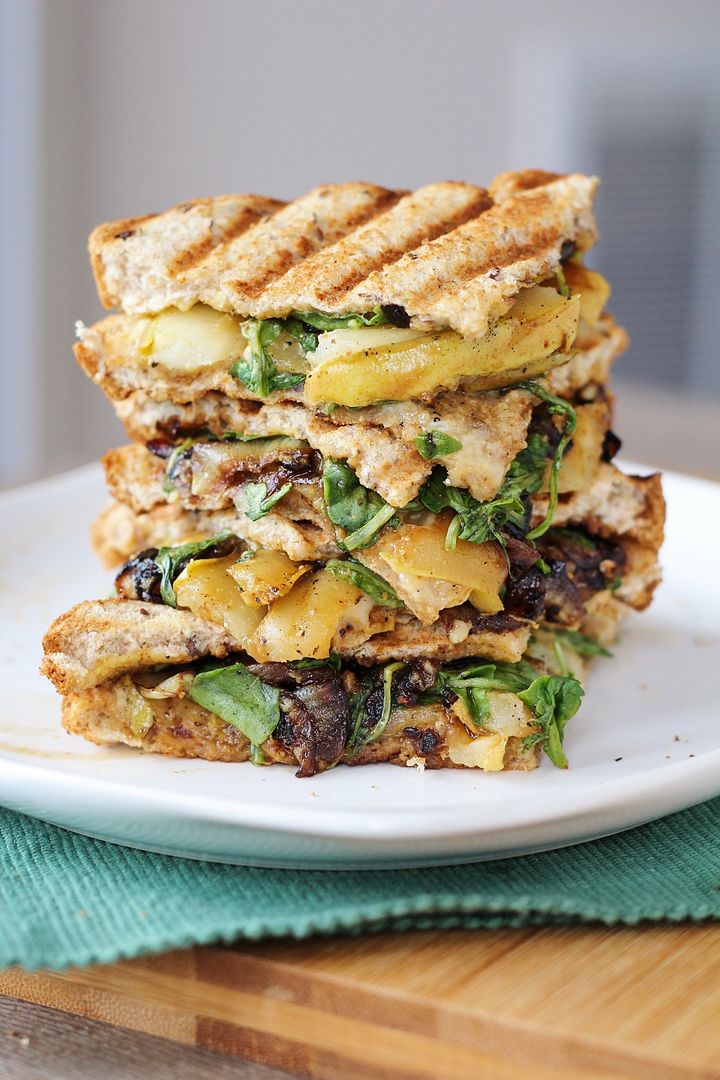
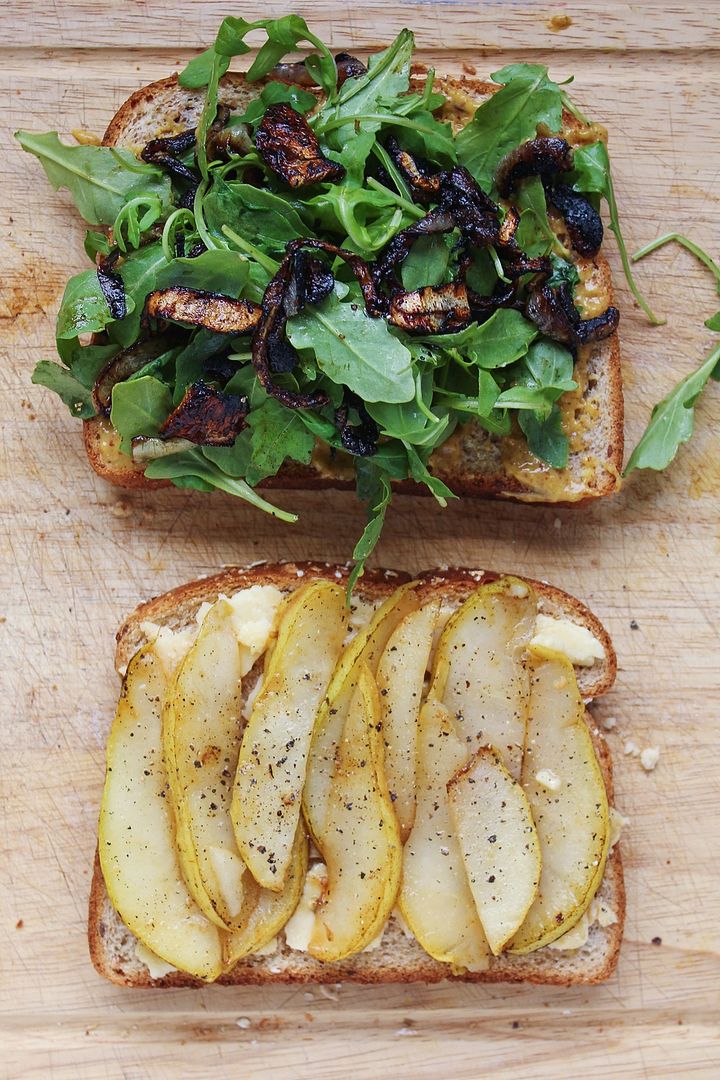
I also know that these pictures are extremely similar to the last set, but there are only so many ways you can photograph a sandwich. The one thing I don’t like about paninis is that because everything gets pressed together, whatever's between the bread is almost impossible to show in photos (and what parts you can see look indistinguishable).  But I love making and eating paninis, so you’ll have to use your imagination a little to see through those pieces of bread to the deliciousness that’s in between them!  Here's a little help - this is what was inside my sandwich before I pressed it together:

Pear, Blue Cheese, & Caramelized Onion Panini

I wanted to make an autumn-ish panini with one of my favourite flavour combinations – pears or apples with blue cheese and caramelized onions.  I’ve used at least a couple of these ingredients together in the past, like in these apple, caramelized onion, and blue cheese naan pizzas, apple turkey burgers with caramelized onions and brie, and roasted potatoes and green beans with caramelized onions and blue cheese – there’s something about caramelized onions and blue cheese together that I just can't get enough of.  

Add in some juicy, lightly sautéed pears, some peppery arugula and spicy honey Dijon, press it together until it's warm and melty, and you have what may be my new favourite sandwich!

Pear, Blue Cheese, & Caramelized Onion Panini

And before someone points it out, yes I’m aware that the onions as pictured above are much more on the burnt side than the caramelized side – I swear I do know how to caramelize onions, but I only had a tiny onion to work with that had been open in the fridge plus I was in a big rush when I made this.  Too thin slices + too high heat = burnt onions.  Try not to make the same mistake I did, but if you’re really in a hurry, you could leave them out and this panini would still be delicious; I recommend making time to add them in though - caramelized onions make everything better!  Plus they can always be made ahead of time and stored in the fridge to add to all sorts of things!

I’ve also been on a big blue cheese kick lately, adding it to anything I can think of, but I know a lot of you don’t like blue cheese (though I cannot understand why!), so you could substitute something like brie or gruyere instead if you like.  Your sandwich will have a different flavour profile, but will still be amazing and even more melty!

Pear, Blue Cheese, & Caramelized Onion Panini

Pear, Blue Cheese, Caramelized Onion, & Arugula Panini

Adapted from Clean Eating

Makes 1 sandwich

Ingredients:

1/2 tablespoon olive oil
1/2 medium-large yellow or red onion, thinly sliced
Salt & Pepper
1 teaspoon balsamic vinegar (optional)
1/2 ripe pear, cored and thinly sliced
2 slices whole grain bread
2 teaspoons honey Dijon mustard
1/2 oz blue cheese, sliced thinly
Handful of baby arugula

Directions:

Heat oil in a medium to large skillet over medium heat.  Add onions, stir to coat with oil, and season with salt and pepper.  Let cook over medium-low heat, stirring occasionally, until onions are soft and caramelized, about 25-30 minutes.  I like to add a splash of balsamic vinegar in the last few minutes of cooking to deglaze the pan and add some flavour to the onions, but this step is optional.

Remove onions from pan, and add sliced pear.  Cook over medium heat for around 3 minutes, until softened and slightly golden coloured.  Remove from heat.

Spread mustard on one slice of bread, top with arugula, onions, pears, and blue cheese, and the other piece of bread.  Heat in a panini press, or if you don’t have one, heat the sandwich on a griddle pan (or skillet) with a heavy pot on top of the sandwich to press it into the skillet (I put a can inside the pot to weigh it down), then flip and repeat on the other side.  Serve warm.

September 10, 2013

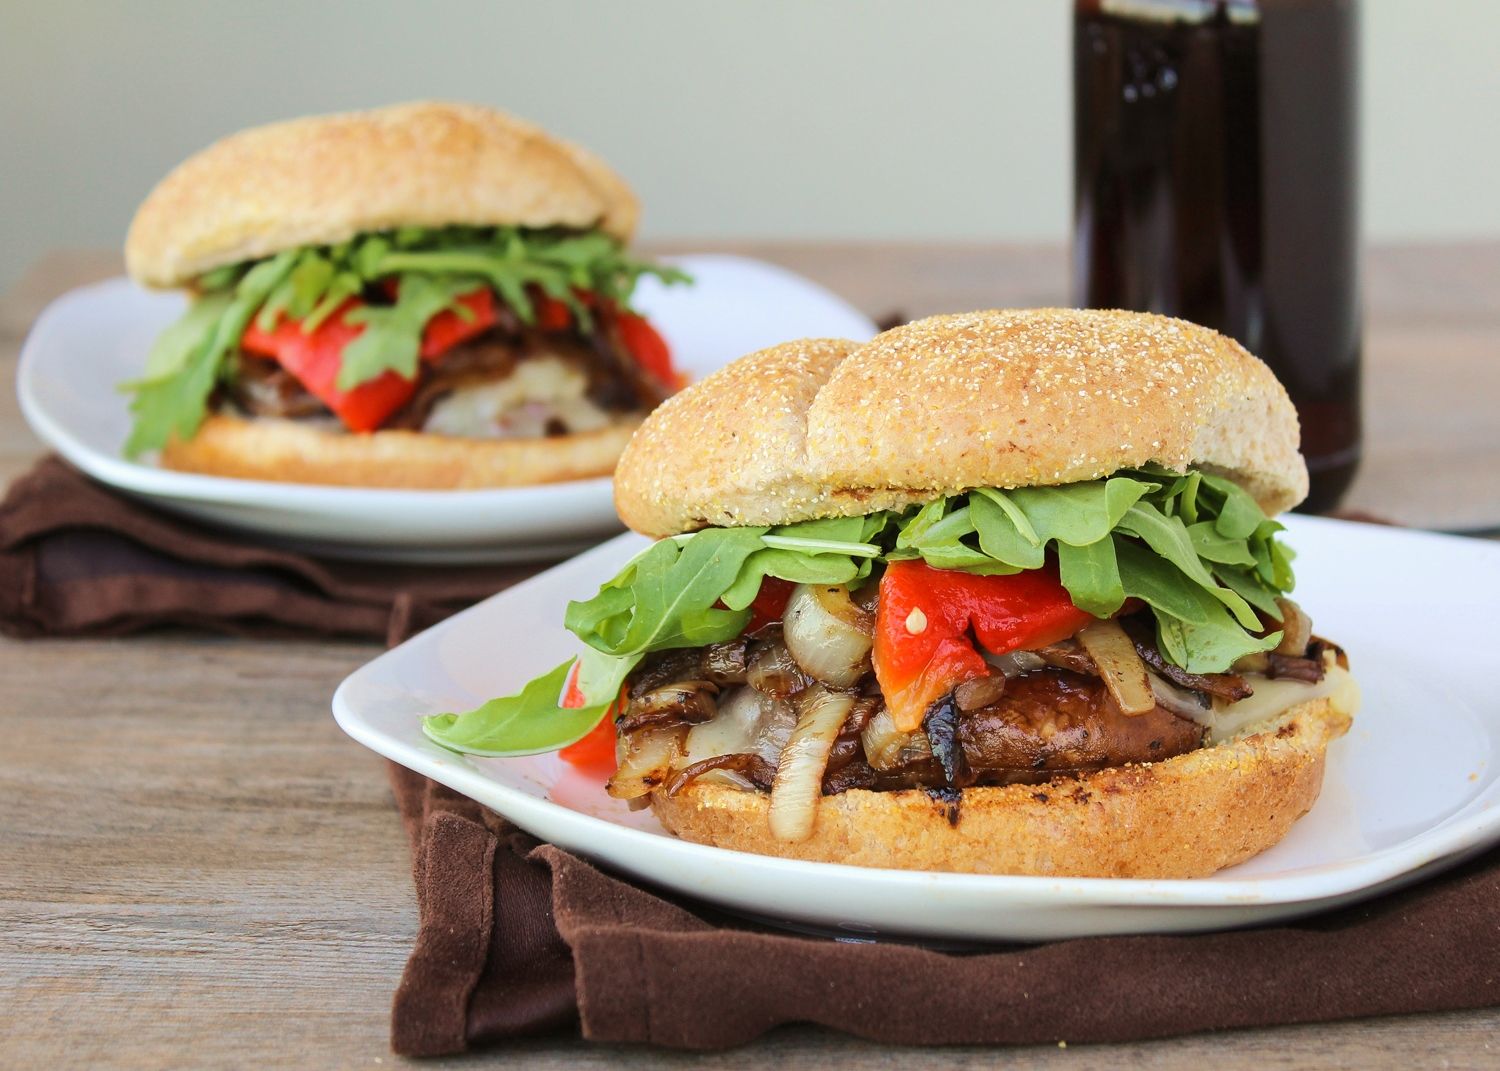
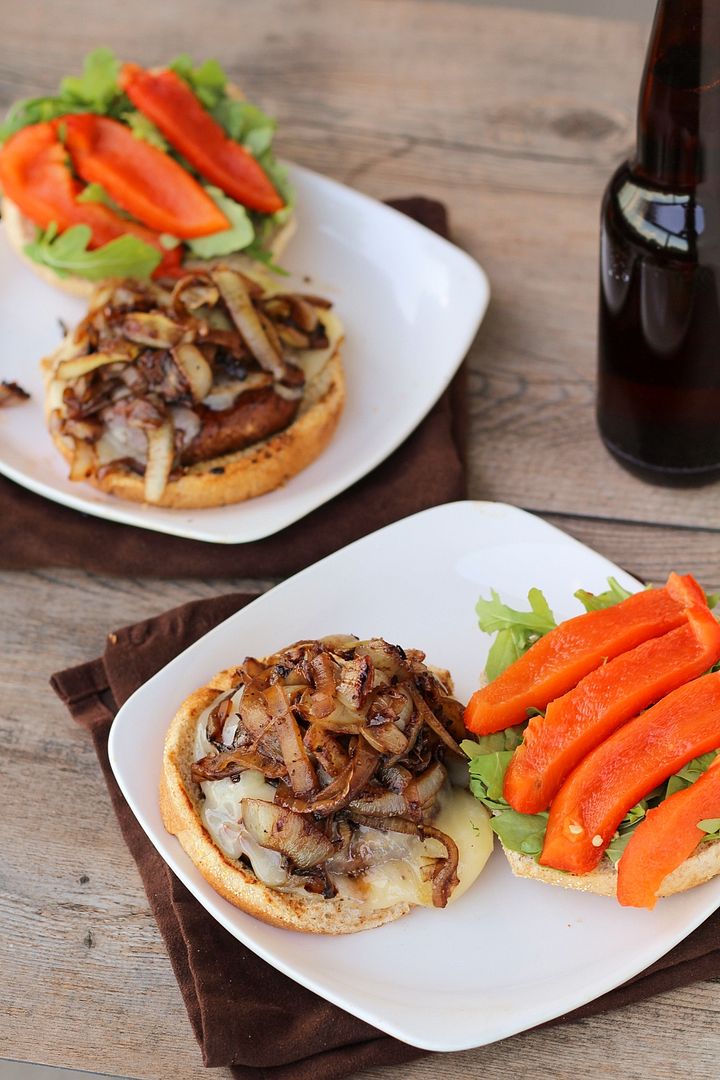
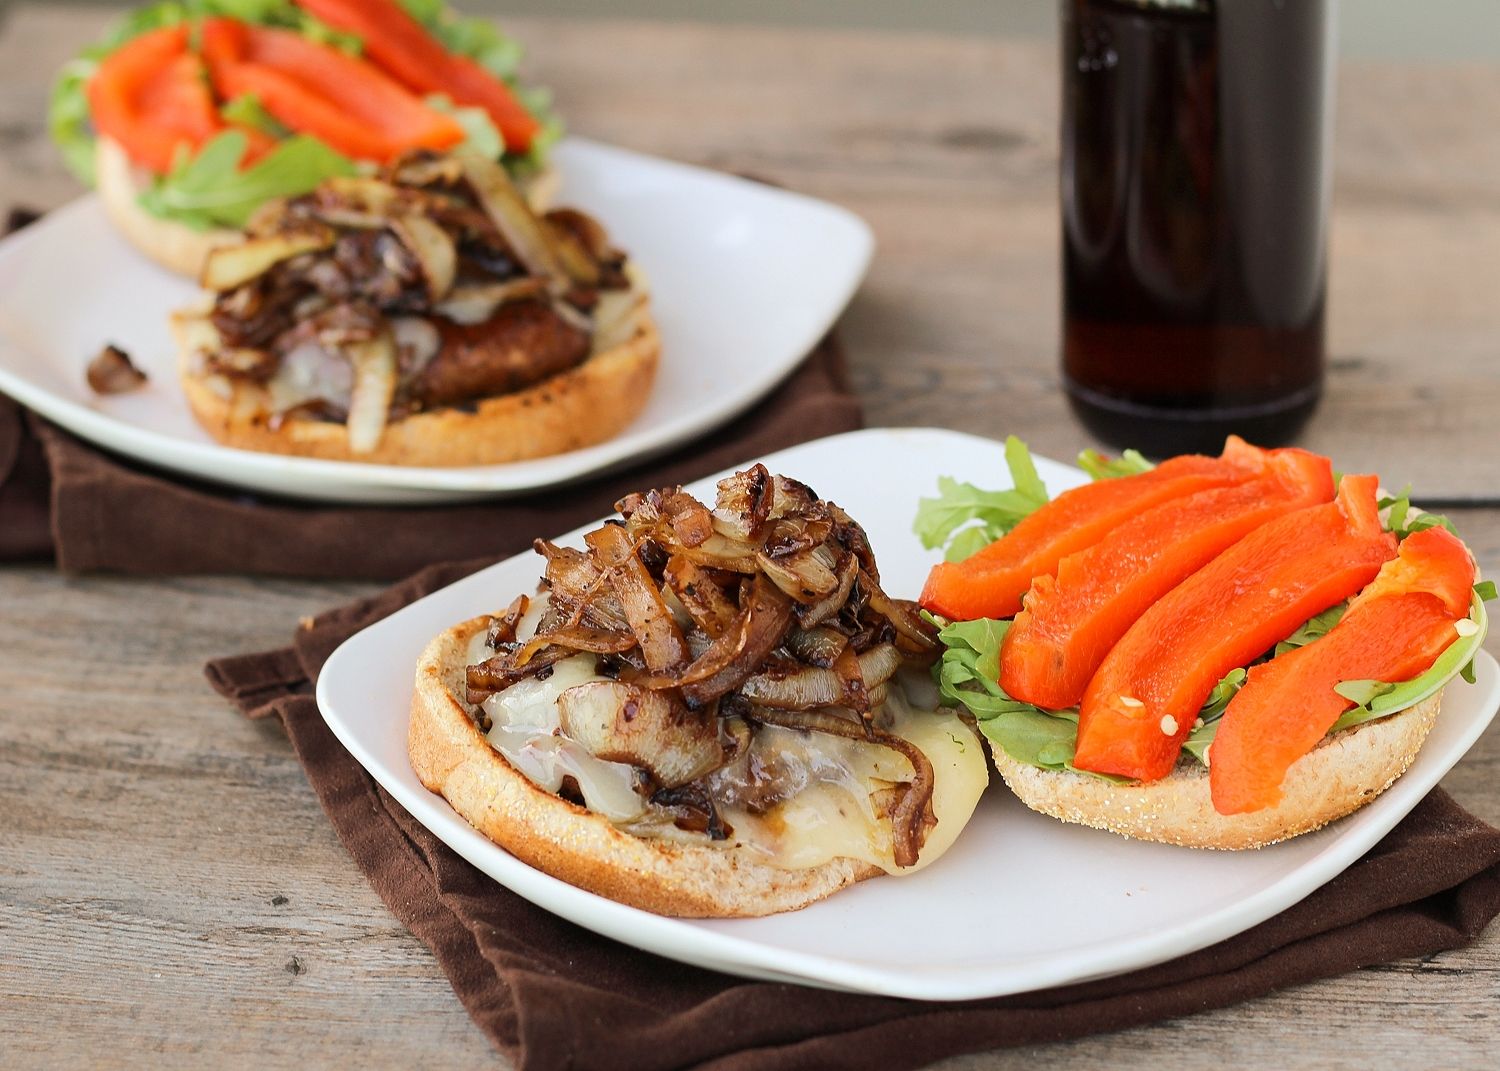
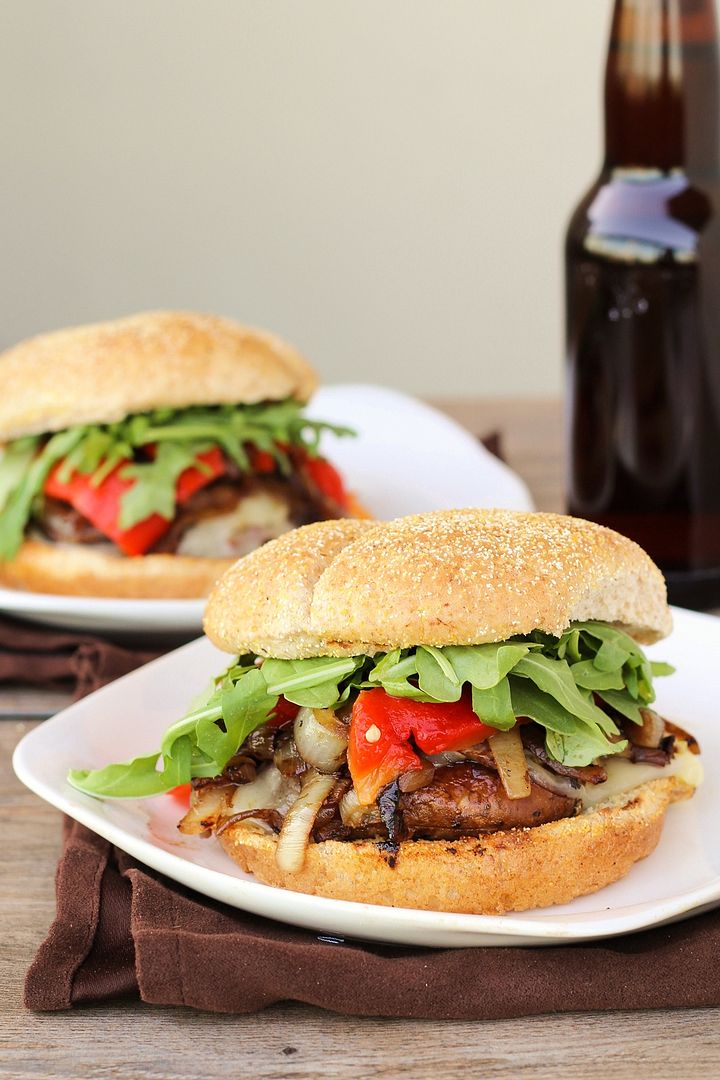
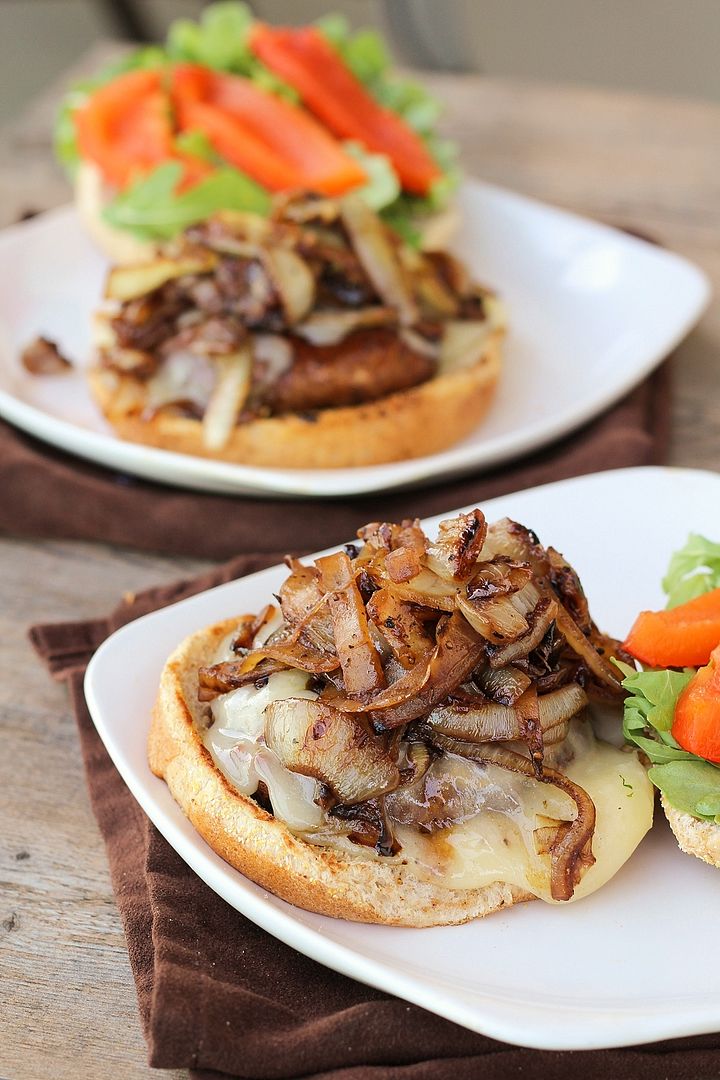
Portabella Mushroom Burgers with Provolone, Caramelized Onions, & Roasted Red Peppers

Portabella Mushroom Burgers with Provolone, Caramelized Onions, & Roasted Red Peppers

This is the last recipe that I made during summertime but hadn’t shared yet, and it’s appropriate that I waited to post it until today considering the high is 34°C (93F) here, with a humidex of over 40°C (104F) – it feels hotter today than most days we had during real “summer”!  Not that I’m complaining, because it’s lovely to get one more blast of heat before it likely cools down for good. And I’m ready for that too – football started this past weekend (go niners!), my sister went apple picking, and there was a chill in the air but still sunny skies, all of which got me pretty excited for fall!

And while burgers are usually seen more as summertime food, the earthy, smoky flavours in this particular burger make it great for this transition period into fall!

Portabella Mushroom Burgers with Provolone, Caramelized Onions, & Roasted Red Peppers

I’ve eaten portabella (or portobello, if that’s how you like to spell it) burgers a few times before but had never made one myself until now. Portabella mushrooms make a great vegetarian substitute for burgers because they have a meaty texture and earthy taste, but without the fat that usually comes along with meat burgers!

Plus mushrooms make a great canvas for piling on flavourful toppings. For my version, I decided to complement the smoky, savoury flavour of the mushrooms with caramelized onions and a little provolone cheese, which I then balanced out with sweet roasted red peppers and peppery fresh arugula.

Portabella Mushroom Burgers with Provolone, Caramelized Onions, & Roasted Red Peppers

Not only was this burger pretty healthful, but it was also packed with flavour – I devoured mine and then immediately scolded myself for not making portabella burgers earlier!

A few tips I learned along the way: 1) Marinating the mushrooms beforehand gives them extra flavour, as otherwise mushrooms on their own can be somewhat bland; 2) Be sure to spray or oil your grill/pan because the mushrooms can be somewhat sticky!; and 3) Mushrooms shrink as they cook and release moisture – I chose large buns based on their size pre-cooking, but as you can see, they didn’t fill the bun after cooking, so smaller buns would have been a better choice!

Portabella Mushroom Burgers with Provolone, Caramelized Onions, & Roasted Red Peppers

Don’t wait as long as I did to try these if you haven’t yet; and if you’re already a mushroom burger fan, feel free to share your own cooking tips or favourite recipes!

If you’re having as great as weather as we are here today, hope you get a chance to get outside and enjoy it!

Portabella Mushroom Burgers with Provolone, Caramelized Onions, & Roasted Red Peppers

Portabella Mushroom Burgers with Provolone, Caramelized Onions, & Roasted Red Peppers

Makes 2 burgers

Ingredients:

For the Mushrooms:
2 portabella mushrooms
2 tablespoons balsamic vinegar
1 tablespoon olive oil
Pinch each dried basil and oregano
1 clove garlic, minced
Salt & Pepper

For the Toppings:
1 red bell pepper
1 tablespoon olive oil, divided
1 large or 2 small yellow onions, peeled and sliced into half moons
Salt and pepper
Splash of balsamic vinegar
2 large slices of provolone cheese (enough to cover the two mushrooms)
2 handfuls of baby arugula
2 whole wheat hamburger buns

Directions:

Preheat oven to broil.

Remove stems of mushrooms and scrape out the gills, if desired.  Whisk together the vinegar, oil, basil, oregano, garlic, and a bit of salt and pepper in a small bowl.  Add mushrooms and marinade to a bowl, tossing mushrooms to coat well.  Leave to marinate for 20-30 minutes.

Rub red pepper with a teaspoon of olive oil (don’t use extra virgin olive oil as it has a lower smoke point.  Vegetable or canola oil would also work.)  Place on foil-lined baking sheet on the top rack of the oven.  Broil until dark blotches begin to appear on one side, then turn with tongs and repeat until all sides have black patches.  Amount of cooking time will vary depending on your oven and the size of your pepper; mine took around 15-20 minutes total.  When done, remove from oven and place in a bowl.  Cover tightly with saran wrap to let pepper steam (and loosen the skin) for about 15 minutes or until slightly cooled, then remove the skin, cut pepper in half, scrape out the seeds and membranes, and slice into strips.  
*Note: If you’re short on time, you can use storebought roasted red peppers in a jar.  I preferred to make my own to use less oil; it does take some time, but it can be done while you’re marinating/cooking the mushrooms and caramelizing the onions so everything finishes in roughly the same amount of time.

Meanwhile, heat 2 tablespoons of oil in a large non-stick skillet over medium heat.  Add sliced onions, stir to coat with oil, and season with salt and pepper.  Spread onions out evenly across the pan and let cook, stirring occasionally, until onions are soft and caramelized, about 25-30 minutes. Don’t stir the onions too often so they can brown, but don’t leave them alone long enough to burn or stick to the pan. Add a splash of balsamic vinegar about 20 minutes into cooking to deglaze the pan and darken the onions.  When done, set aside in a small bowl.

When mushrooms are done marinating, heat a grill or indoor grill pan over medium heat.  Brush grate with oil or spray grill pan to prevent sticking, then place mushrooms on grill with gill sides up first.  Grill for 5-7 minutes per side or until tender, brushing with the marinade a few times.  In last 2 minutes of cooking, add provolone cheese on top of each mushroom to melt.  If desired, toast buns on grill for 1-2 minutes as well.

Assemble burgers by topping the provolone mushrooms with the caramelized onions, roasted red peppers, and arugula on whole wheat buns.  Season with additional salt and pepper if desired.

Ingredient Index

Related Posts Plugin for WordPress, Blogger...