Showing posts with label oregano - dried. Show all posts

January 13, 2014

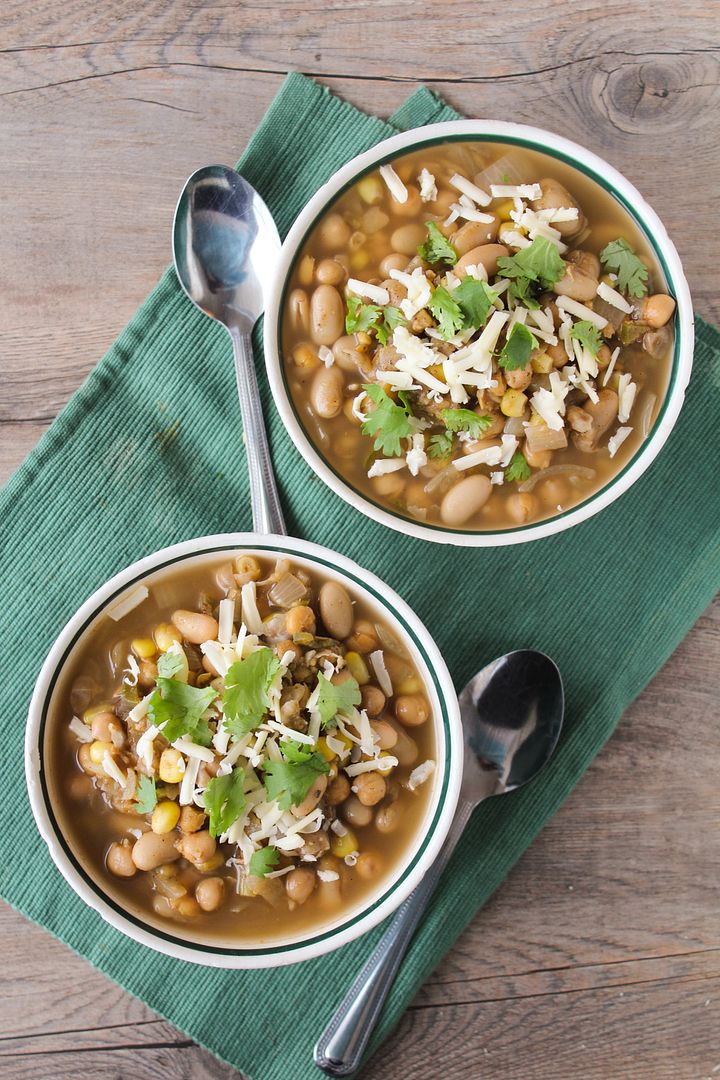
White Chickpea Chili

White Chickpea Chili - a healthy and easy vegetarian twist on white chicken chili

With the cold weather a lot of us experienced last week (except those lucky people in California!), I’m sure we’ve all been eating lots of warm comfort food lately.  When it gets that cold out all I want for dinner is soup, stew, or chili, but as these can often involve a lot of cooking time to develop enough flavour, during the week I need something that’s a little more quick and easy to prepare.  

Enter white chickpea chili!
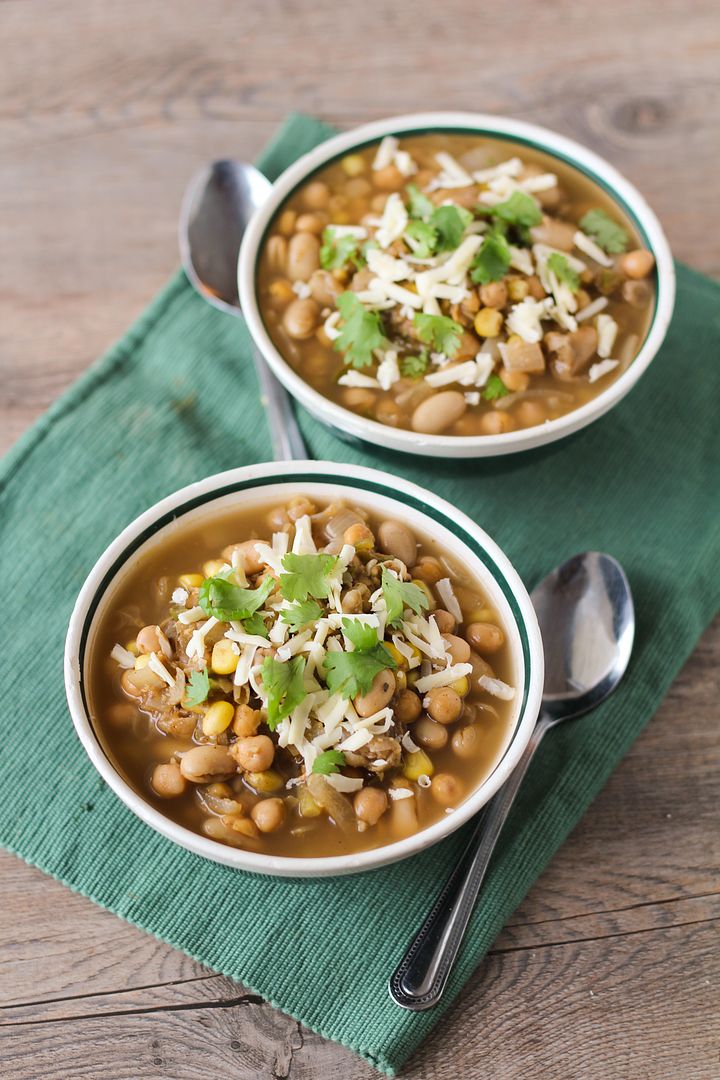
White Chickpea Chili - a healthy and easy vegetarian twist on white chicken chili

I love white chicken chili as a refreshing change from tomato-based versions, but I decided to make it a little easier and cheaper to make by using all beans and no chicken.  This vegetarian white chili includes mashed chickpeas throughout for thickness, whole chickpeas and white beans for texture (and tons of protein, so you won’t miss the meat!), some corn for a little sweetness, jalapeno for spice, and then vegetable broth, garlic, onions, and seasonings for plenty of flavour.

You end up with a healthy vegetarian chili that’s inexpensive, easy and fairly quick to make, and full of flavour.  Perfect for these cold winter nights, and also Sunday playoffs if you usually associate football with chili (and if you're still watching - my team's still in it so I'm all about the football food!)

Hope you all had a good weekend and are dethawing a bit now!
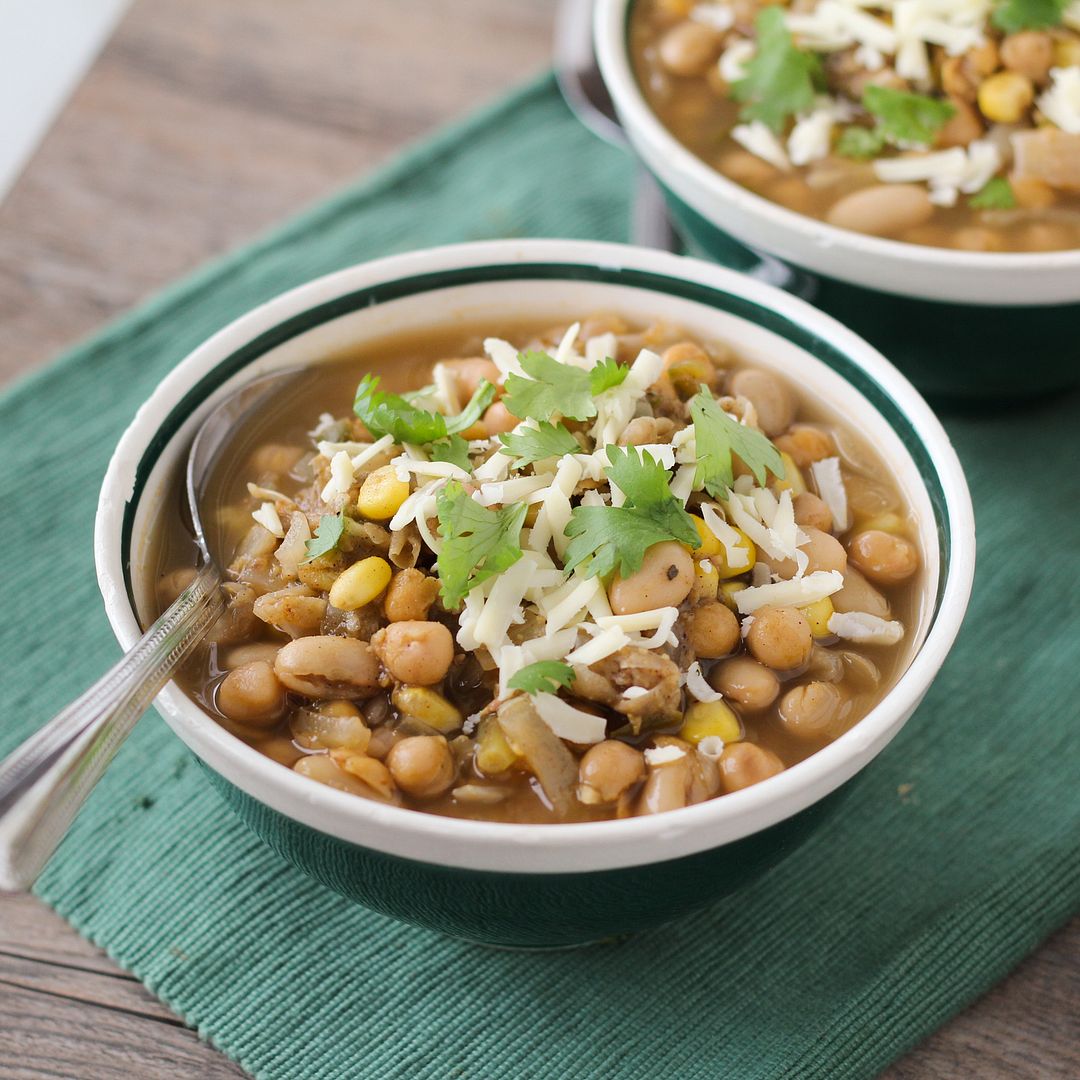
White Chickpea Chili - a healthy and easy vegetarian twist on white chicken chili

White Chickpea Chili

Adapted from The Neely’s white chicken chili recipe

Serves about 4

Ingredients:

1 teaspoon olive or canola oil
1 large or 2 small yellow onions, chopped
2 cloves garlic, minced
1 jalapeno, minced (use more if you want it to be spicier)
2 (540mL) cans chickpeas, drained and rinsed, divided
1 (540mL) can white kidney beans, drained and rinsed
2 teaspoons ground cumin
1 teaspoon chili powder
1 teaspoon dried oregano
4 cups low sodium vegetable broth
1 tablespoon fresh lime juice
1 cup frozen corn kernels
Salt and pepper to taste

Toppings:
Shredded white cheddar cheese
Chopped fresh cilantro
Light sour cream
Chopped ripe avocado (not pictured in my version but it would be a nice addition!)

Directions:

Heat oil in a large saucepan or Dutch oven over medium-high heat. Add onions, garlic, and jalapeno, stir to coat with oil, and sauté until soft and fragrant, stirring occasionally, about 5 minutes.

Meanwhile, rinse and drain your cans of beans, keeping one can of chickpeas separate. Transfer those chickpeas (1 can) to a medium bowl and mash with a potato masher until most beans have been smashed. Set aside.

Add cumin, chili powder, and oregano to the onion mixture in the pan. Stir to coat and let cook for about 1 minute. Add vegetable broth, lime juice, corn kernels, mashed beans, and remaining beans. Bring to a boil, then reduce heat to simmer and let cook about 10-15 minutes.

Season with salt and pepper to taste. Serve warm in bowls topped with shredded cheese, cilantro, a dollop of sour cream, avocado, and additional lime wedges, if desired.

September 10, 2013

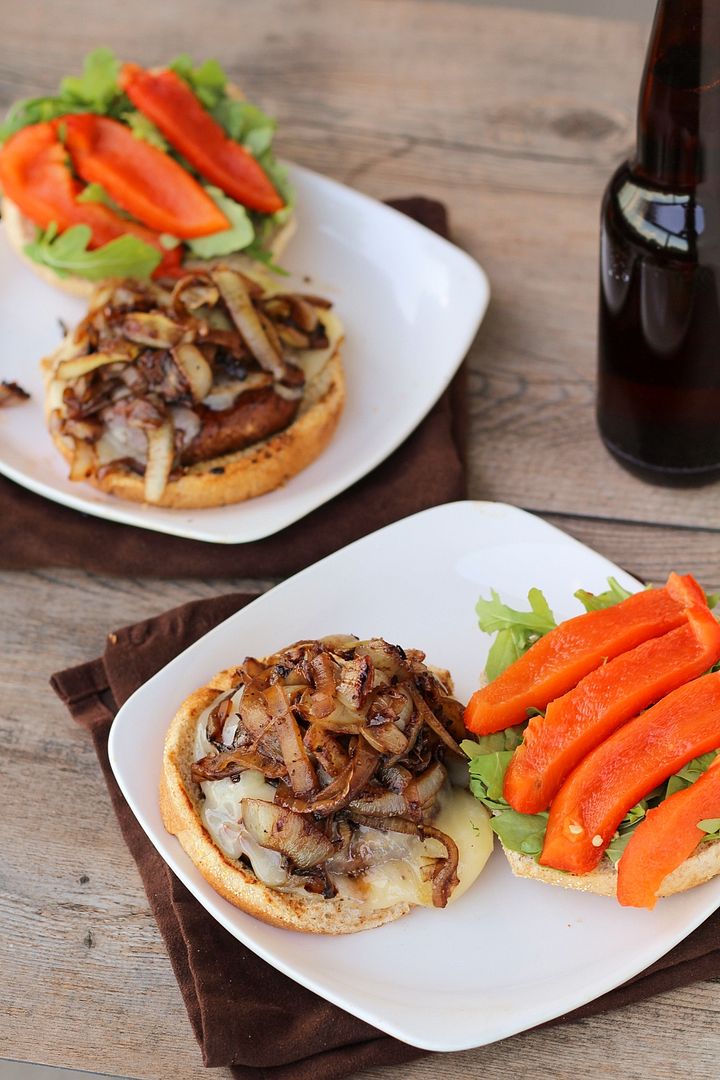
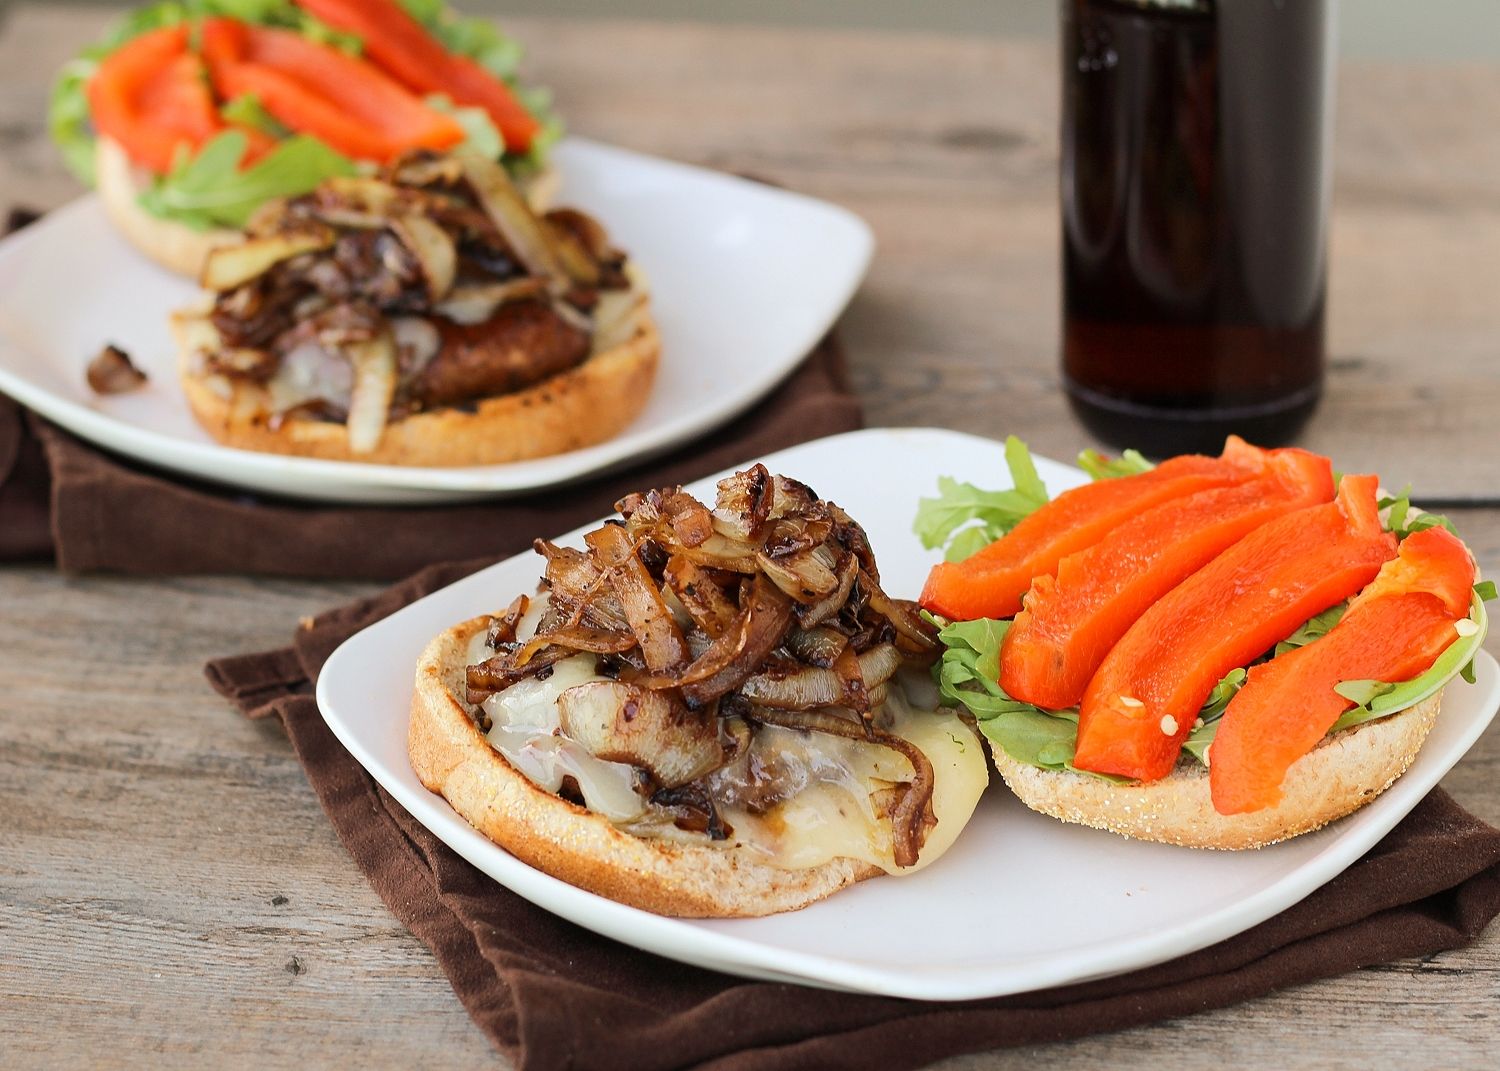
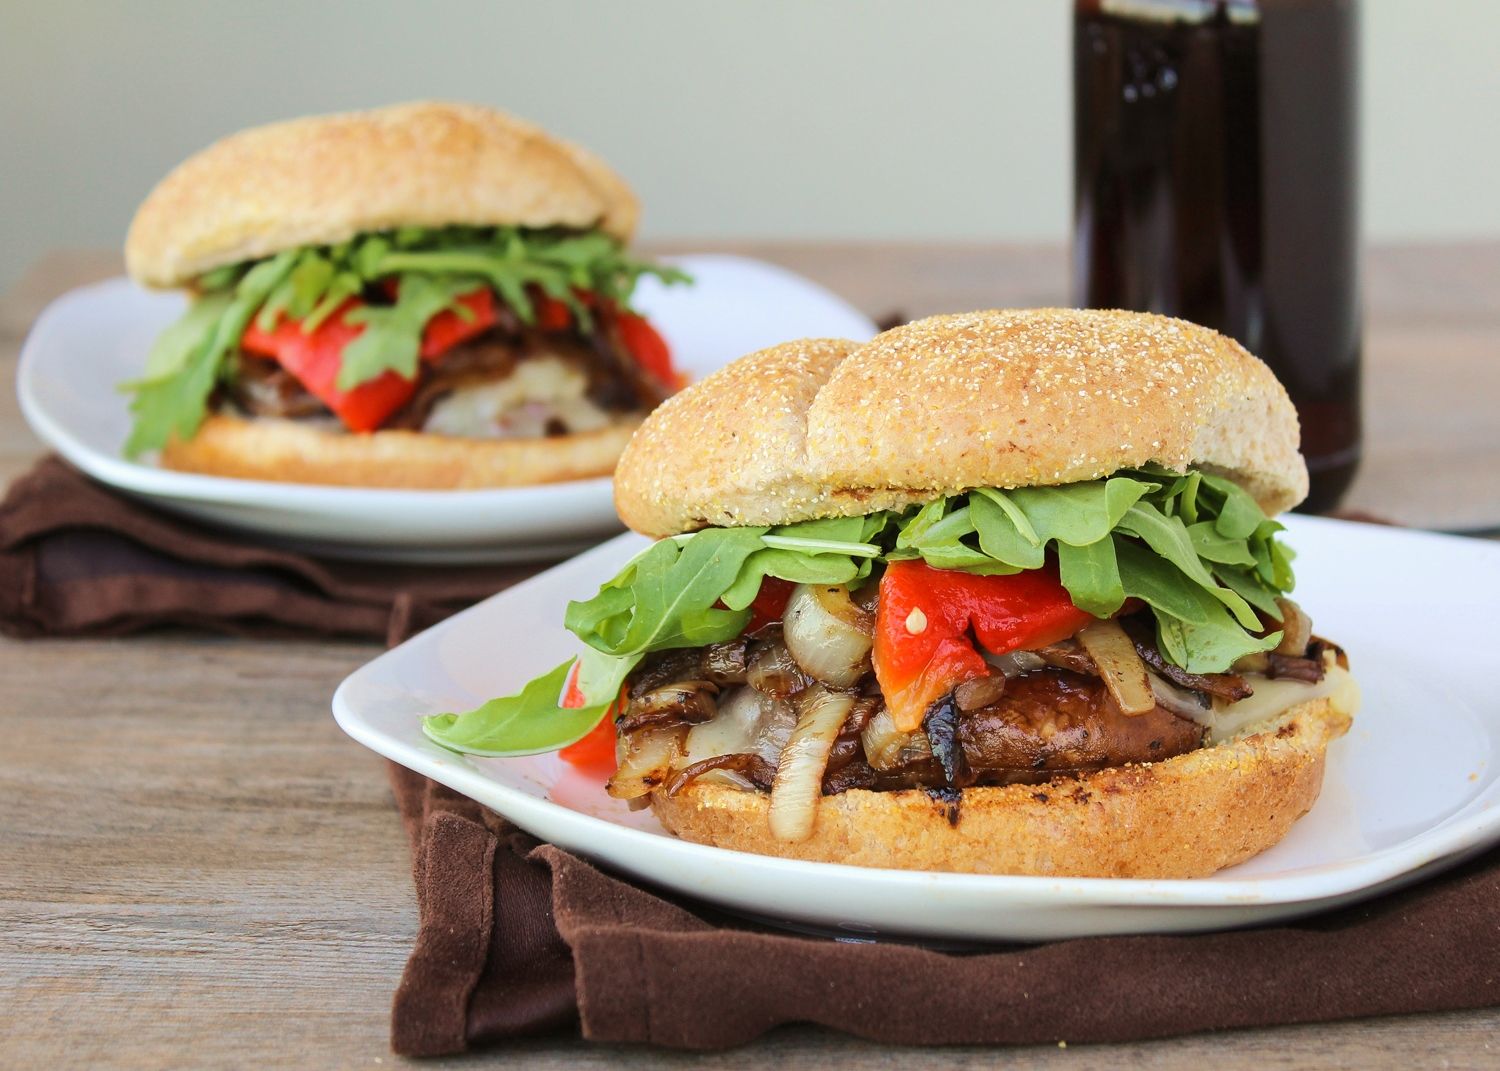
Portabella Mushroom Burgers with Provolone, Caramelized Onions, & Roasted Red Peppers

Portabella Mushroom Burgers with Provolone, Caramelized Onions, & Roasted Red Peppers

This is the last recipe that I made during summertime but hadn’t shared yet, and it’s appropriate that I waited to post it until today considering the high is 34°C (93F) here, with a humidex of over 40°C (104F) – it feels hotter today than most days we had during real “summer”!  Not that I’m complaining, because it’s lovely to get one more blast of heat before it likely cools down for good. And I’m ready for that too – football started this past weekend (go niners!), my sister went apple picking, and there was a chill in the air but still sunny skies, all of which got me pretty excited for fall!

And while burgers are usually seen more as summertime food, the earthy, smoky flavours in this particular burger make it great for this transition period into fall!

Portabella Mushroom Burgers with Provolone, Caramelized Onions, & Roasted Red Peppers

I’ve eaten portabella (or portobello, if that’s how you like to spell it) burgers a few times before but had never made one myself until now. Portabella mushrooms make a great vegetarian substitute for burgers because they have a meaty texture and earthy taste, but without the fat that usually comes along with meat burgers!

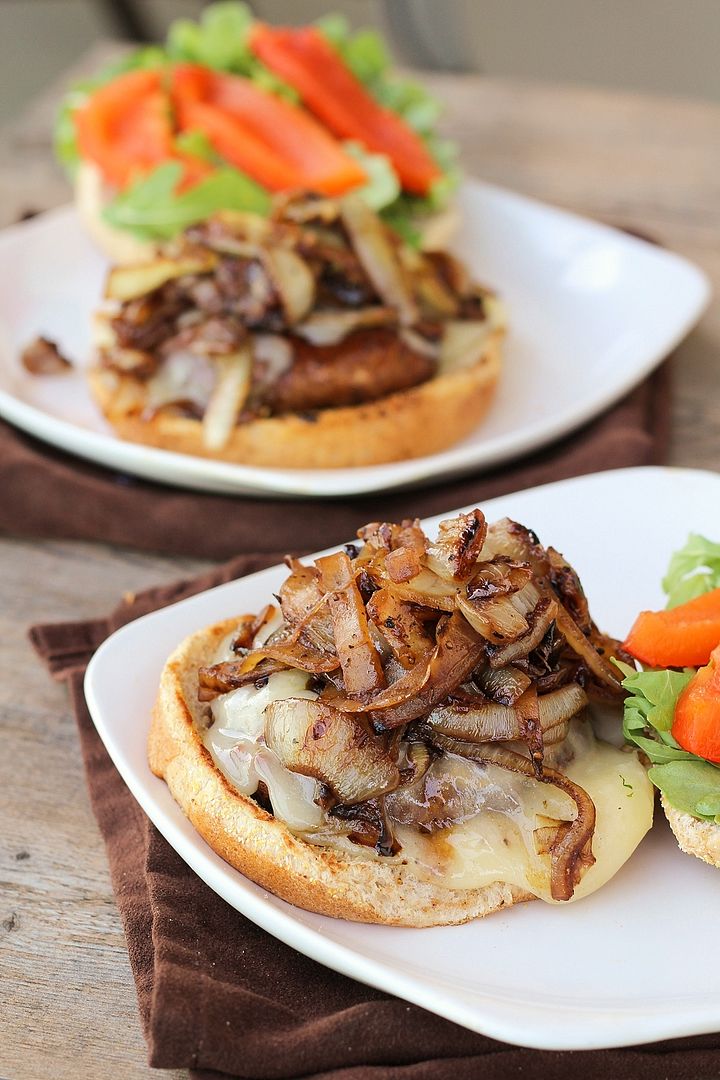
Plus mushrooms make a great canvas for piling on flavourful toppings. For my version, I decided to complement the smoky, savoury flavour of the mushrooms with caramelized onions and a little provolone cheese, which I then balanced out with sweet roasted red peppers and peppery fresh arugula.

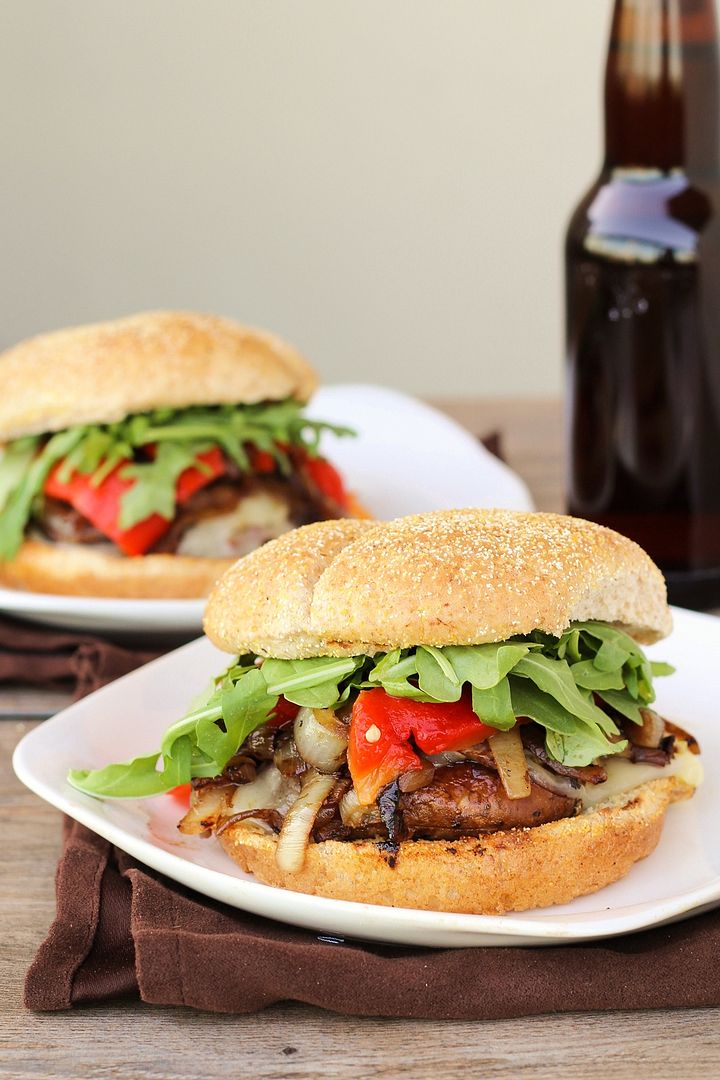
Portabella Mushroom Burgers with Provolone, Caramelized Onions, & Roasted Red Peppers

Not only was this burger pretty healthful, but it was also packed with flavour – I devoured mine and then immediately scolded myself for not making portabella burgers earlier!

A few tips I learned along the way: 1) Marinating the mushrooms beforehand gives them extra flavour, as otherwise mushrooms on their own can be somewhat bland; 2) Be sure to spray or oil your grill/pan because the mushrooms can be somewhat sticky!; and 3) Mushrooms shrink as they cook and release moisture – I chose large buns based on their size pre-cooking, but as you can see, they didn’t fill the bun after cooking, so smaller buns would have been a better choice!

Portabella Mushroom Burgers with Provolone, Caramelized Onions, & Roasted Red Peppers

Don’t wait as long as I did to try these if you haven’t yet; and if you’re already a mushroom burger fan, feel free to share your own cooking tips or favourite recipes!

If you’re having as great as weather as we are here today, hope you get a chance to get outside and enjoy it!

Portabella Mushroom Burgers with Provolone, Caramelized Onions, & Roasted Red Peppers

Portabella Mushroom Burgers with Provolone, Caramelized Onions, & Roasted Red Peppers

Makes 2 burgers

Ingredients:

For the Mushrooms:
2 portabella mushrooms
2 tablespoons balsamic vinegar
1 tablespoon olive oil
Pinch each dried basil and oregano
1 clove garlic, minced
Salt & Pepper

For the Toppings:
1 red bell pepper
1 tablespoon olive oil, divided
1 large or 2 small yellow onions, peeled and sliced into half moons
Salt and pepper
Splash of balsamic vinegar
2 large slices of provolone cheese (enough to cover the two mushrooms)
2 handfuls of baby arugula
2 whole wheat hamburger buns

Directions:

Preheat oven to broil.

Remove stems of mushrooms and scrape out the gills, if desired.  Whisk together the vinegar, oil, basil, oregano, garlic, and a bit of salt and pepper in a small bowl.  Add mushrooms and marinade to a bowl, tossing mushrooms to coat well.  Leave to marinate for 20-30 minutes.

Rub red pepper with a teaspoon of olive oil (don’t use extra virgin olive oil as it has a lower smoke point.  Vegetable or canola oil would also work.)  Place on foil-lined baking sheet on the top rack of the oven.  Broil until dark blotches begin to appear on one side, then turn with tongs and repeat until all sides have black patches.  Amount of cooking time will vary depending on your oven and the size of your pepper; mine took around 15-20 minutes total.  When done, remove from oven and place in a bowl.  Cover tightly with saran wrap to let pepper steam (and loosen the skin) for about 15 minutes or until slightly cooled, then remove the skin, cut pepper in half, scrape out the seeds and membranes, and slice into strips.  
*Note: If you’re short on time, you can use storebought roasted red peppers in a jar.  I preferred to make my own to use less oil; it does take some time, but it can be done while you’re marinating/cooking the mushrooms and caramelizing the onions so everything finishes in roughly the same amount of time.

Meanwhile, heat 2 tablespoons of oil in a large non-stick skillet over medium heat.  Add sliced onions, stir to coat with oil, and season with salt and pepper.  Spread onions out evenly across the pan and let cook, stirring occasionally, until onions are soft and caramelized, about 25-30 minutes. Don’t stir the onions too often so they can brown, but don’t leave them alone long enough to burn or stick to the pan. Add a splash of balsamic vinegar about 20 minutes into cooking to deglaze the pan and darken the onions.  When done, set aside in a small bowl.

When mushrooms are done marinating, heat a grill or indoor grill pan over medium heat.  Brush grate with oil or spray grill pan to prevent sticking, then place mushrooms on grill with gill sides up first.  Grill for 5-7 minutes per side or until tender, brushing with the marinade a few times.  In last 2 minutes of cooking, add provolone cheese on top of each mushroom to melt.  If desired, toast buns on grill for 1-2 minutes as well.

Assemble burgers by topping the provolone mushrooms with the caramelized onions, roasted red peppers, and arugula on whole wheat buns.  Season with additional salt and pepper if desired.

September 05, 2013

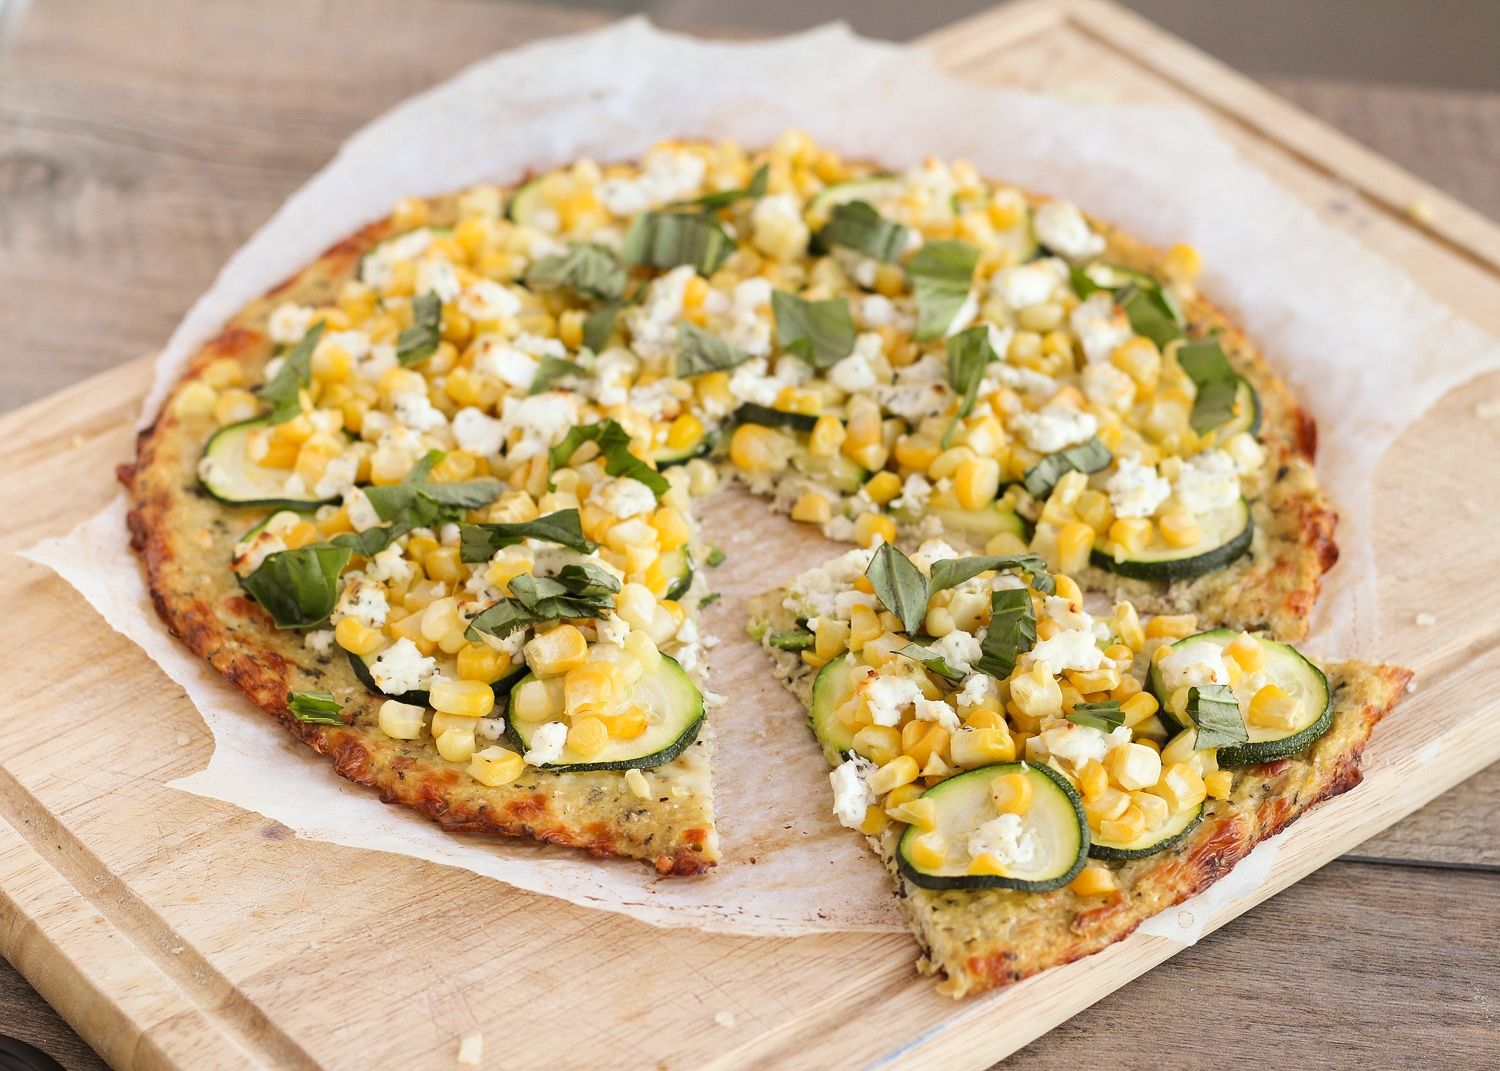
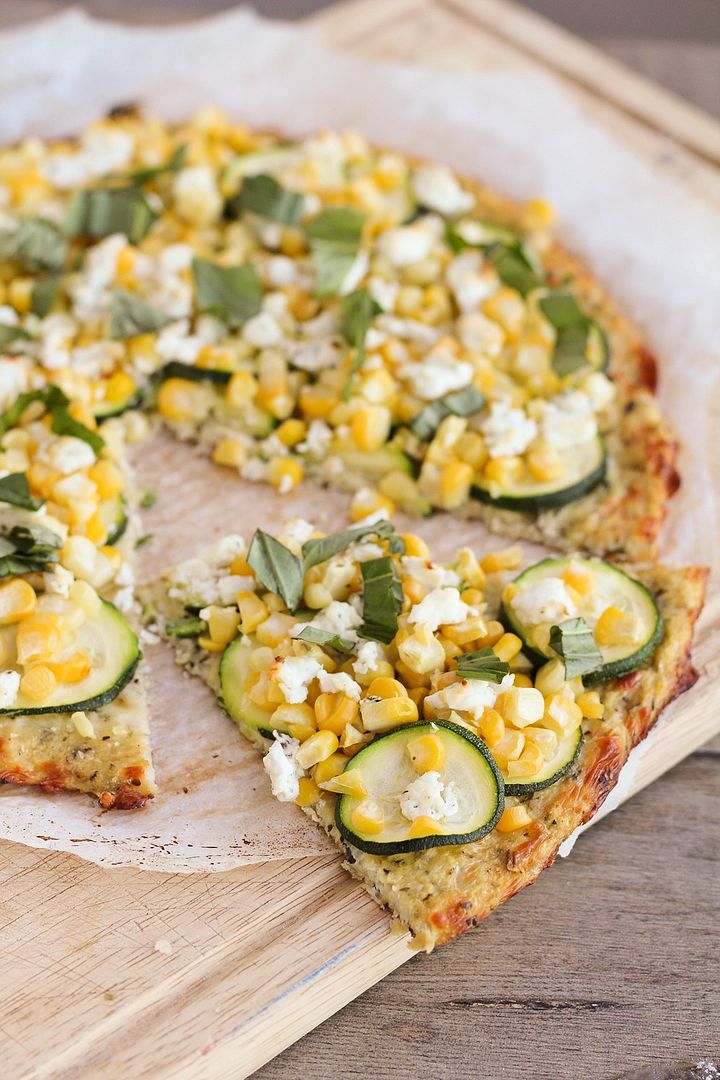
Cauliflower Crust Pizza with Corn, Zucchini, & Goat Cheese

Cauliflower Crust Pizza with Corn, Zucchini, & Goat Cheese

If you read blogs regularly or look at food on Pinterest, you've probably noticed at least a few recipes for cauliflower crust pizza before.  I've been seeing it all over the place for a while now and keep adding it to my list of things I need to try, but for some reason it took me until now to finally make it.  I admit I was skeptical that this was another fad that people go crazy for because it sounds good but in reality tastes disgusting (*cough*egg baked in an avocado*cough*), but I'm happy to report that this tastes as good as it sounds! (unless you think it sounds gross, like a certain boyfriend who shall remain unnamed, in which case you are wrong!)

If you have no idea what I'm even talking about when I refer to cauliflower crust pizza, I'll give a quick explanation of what it is.  Basically it's a breadless pizza crust that's made by mixing pulverized cauliflower with cheese, egg, and spices (if you like) to form a "crust" that is then baked and topped with any pizza toppings you like.  So it's healthier than pizza in the sense that there is actually some nutrition in the crust instead of empty carbs, but I should be clear that it's also not some sort of miracle calorie-free pizza because there is a lot of cheese in the crust, if that's what you're concerned about!

Cauliflower Crust Pizza with Corn, Zucchini, & Goat Cheese

There are lots of different recipes for cauliflower crust floating around, but I used one from The Lucky Penny Blog (with a few small changes), which Jessica from How Sweet It Is recently affirmed is the best cauliflower crust pizza recipe around, and though I haven't tried any other versions, this one worked so well that I know I won't need to (though she does have a cheese-free version if you're interested in trying it)!

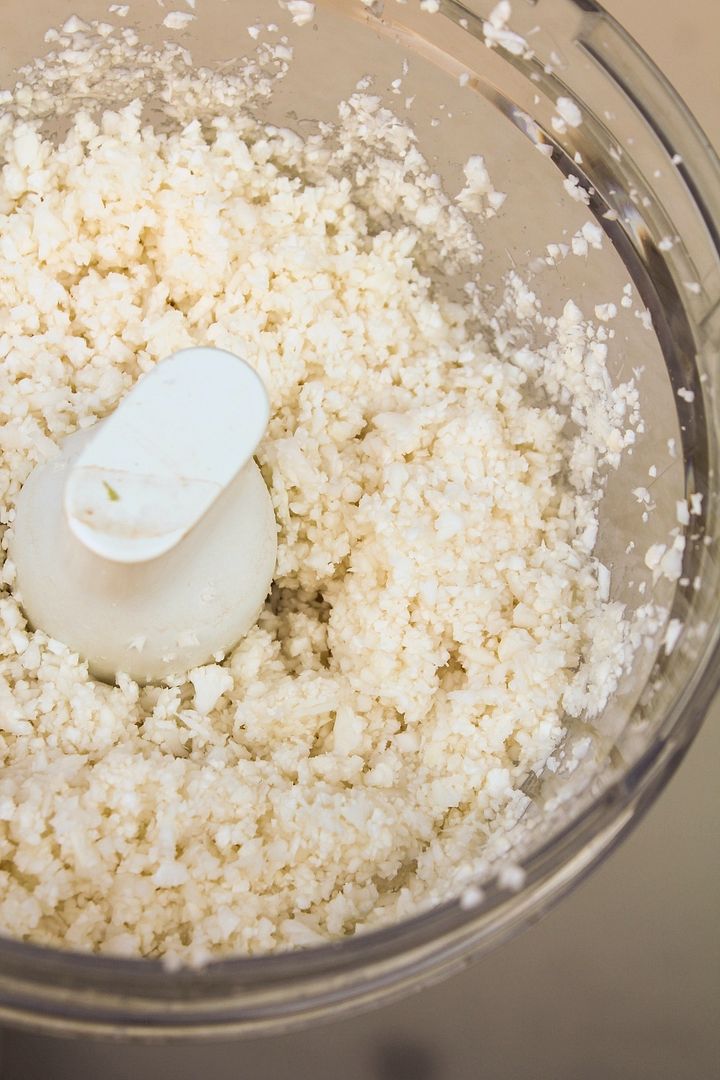
Making the crust is pretty simple.  You start by pulsing your cauliflower florets in a food processor until you get a bowl of fluffy snow-like "crumbs":

Making cauliflower crust pizza

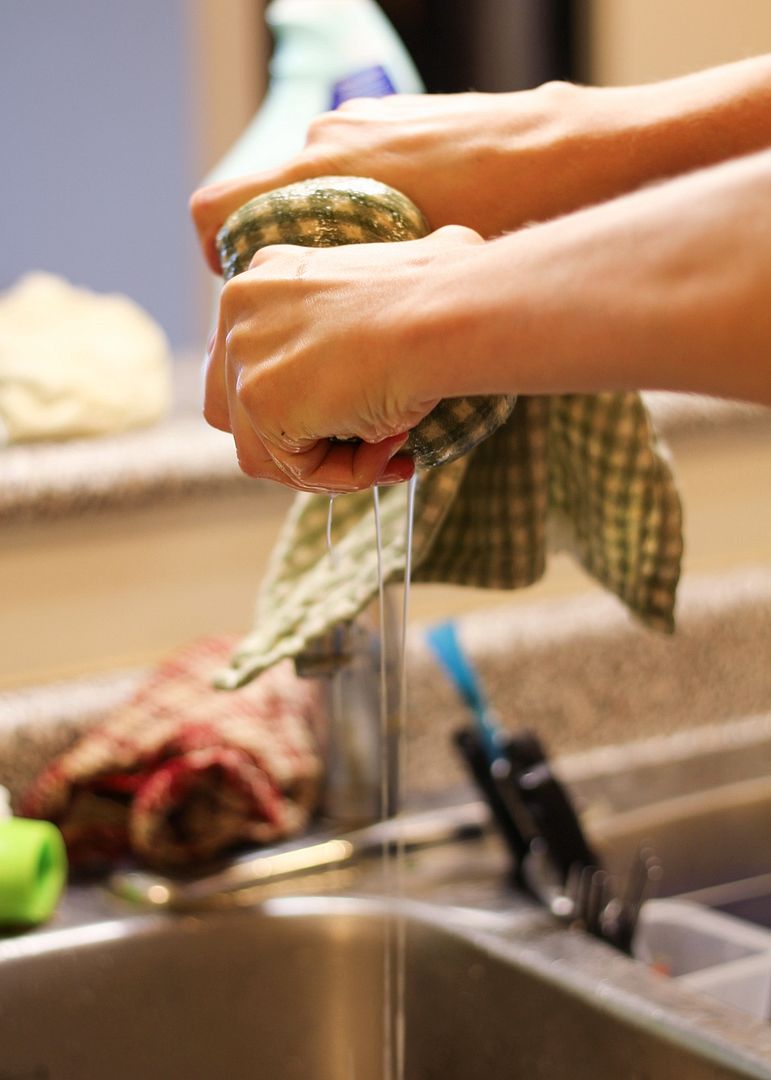
You then cook the "crumbs" in the microwave, let them cool, then transfer them to a towel to wring out all the water.  This is probably the most important step, as it will help make sure your crust stays together later.  You'll be surprised at how much water comes out - and you'll get a bit of an arm workout during the process!

Making cauliflower crust pizza

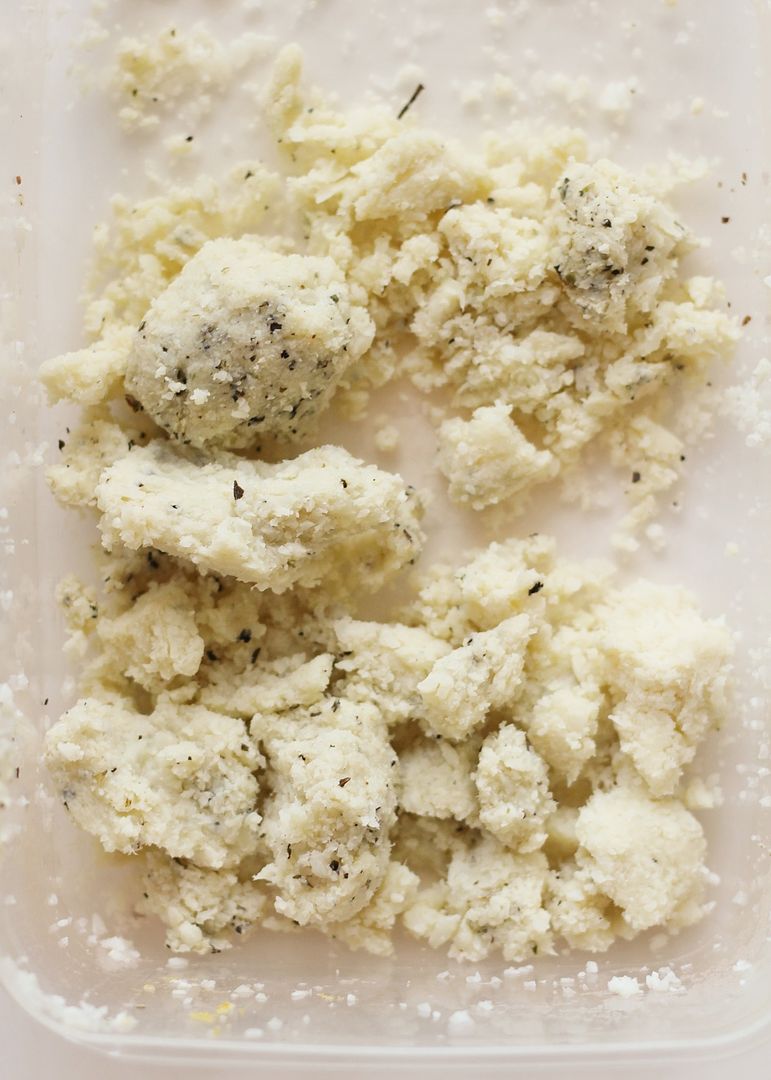
After you wring out all the moisture, the cauliflower will look completely different and if you smoosh it together with your hands it should actually stay together in clumps:

Making cauliflower crust pizza

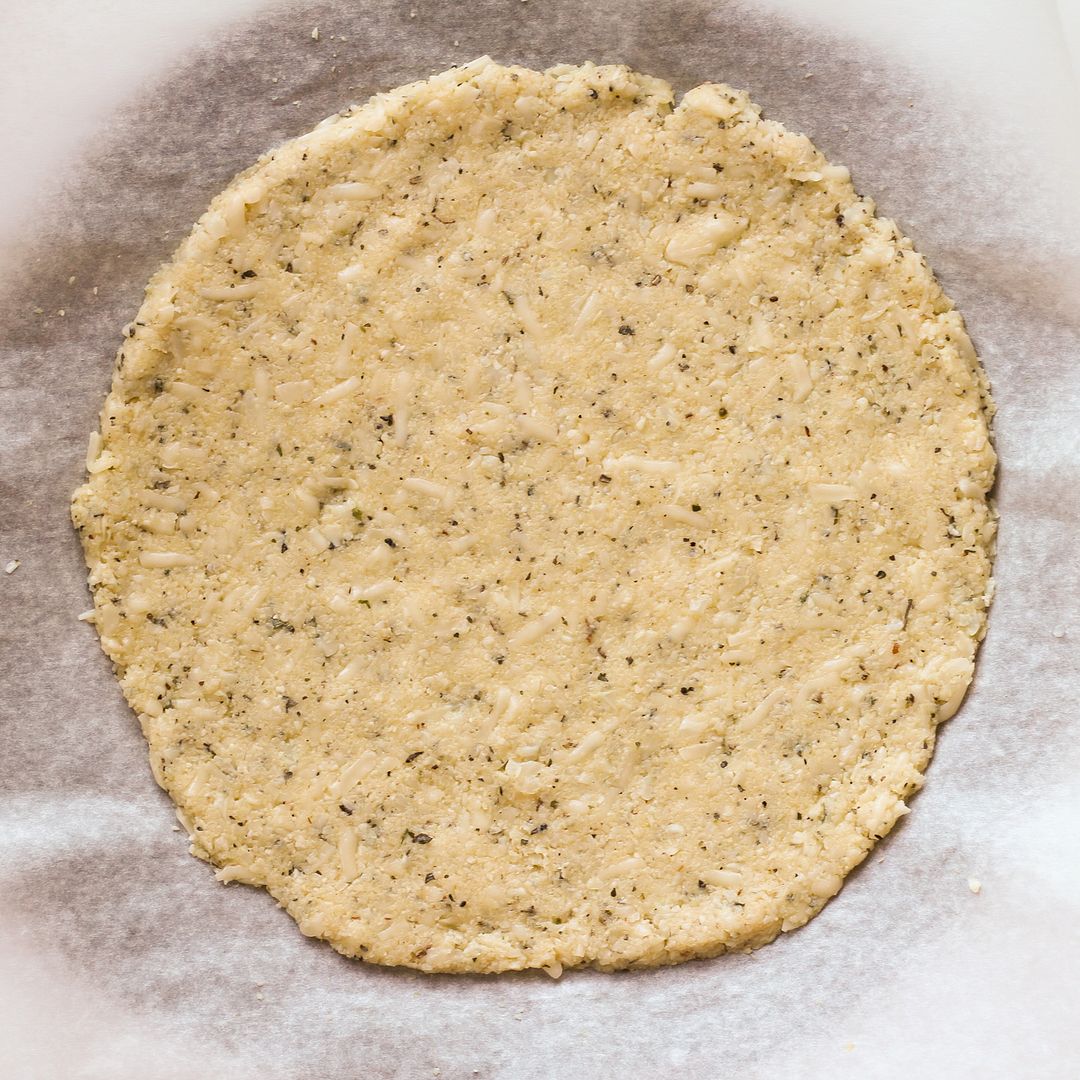
You then mix in your cheese, egg, and seasonings (if you like - I added dried basil, oregano, salt, pepper, and nutritional yeast for added cheesy flavour).  Then you pat the mixture into a pizza crust shape:

Making cauliflower crust pizza

You'll need to prebake your crust, during which time you can get all your toppings ready, then return the pizza to the oven with the toppings, wait very impatiently for it to be ready, and eat!

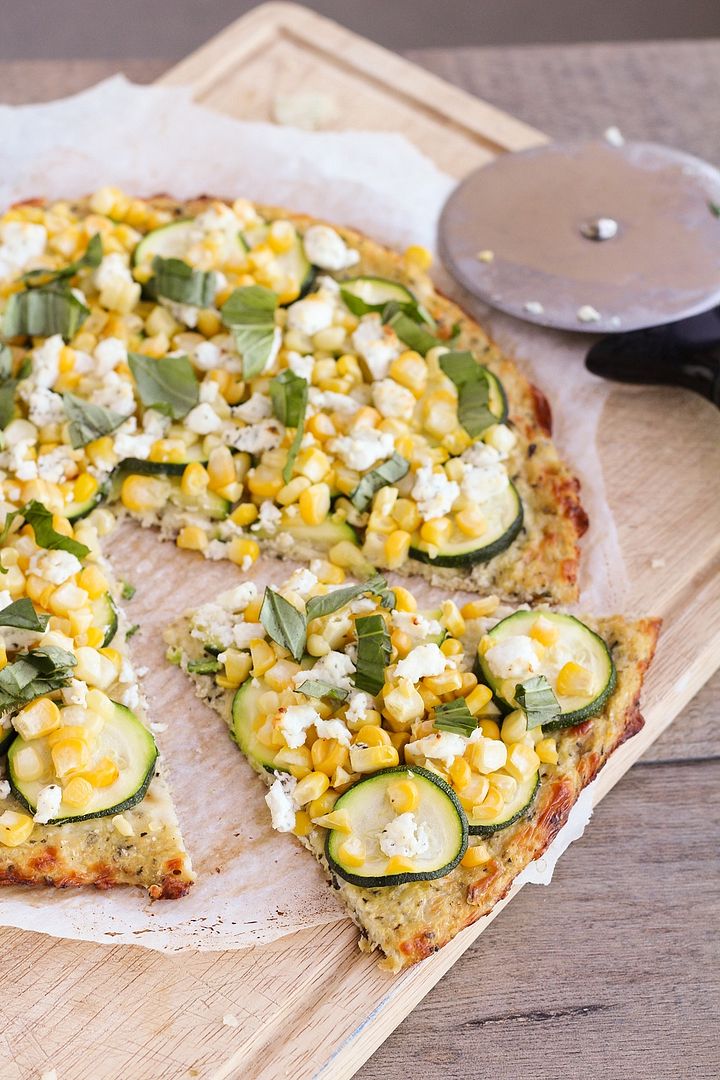
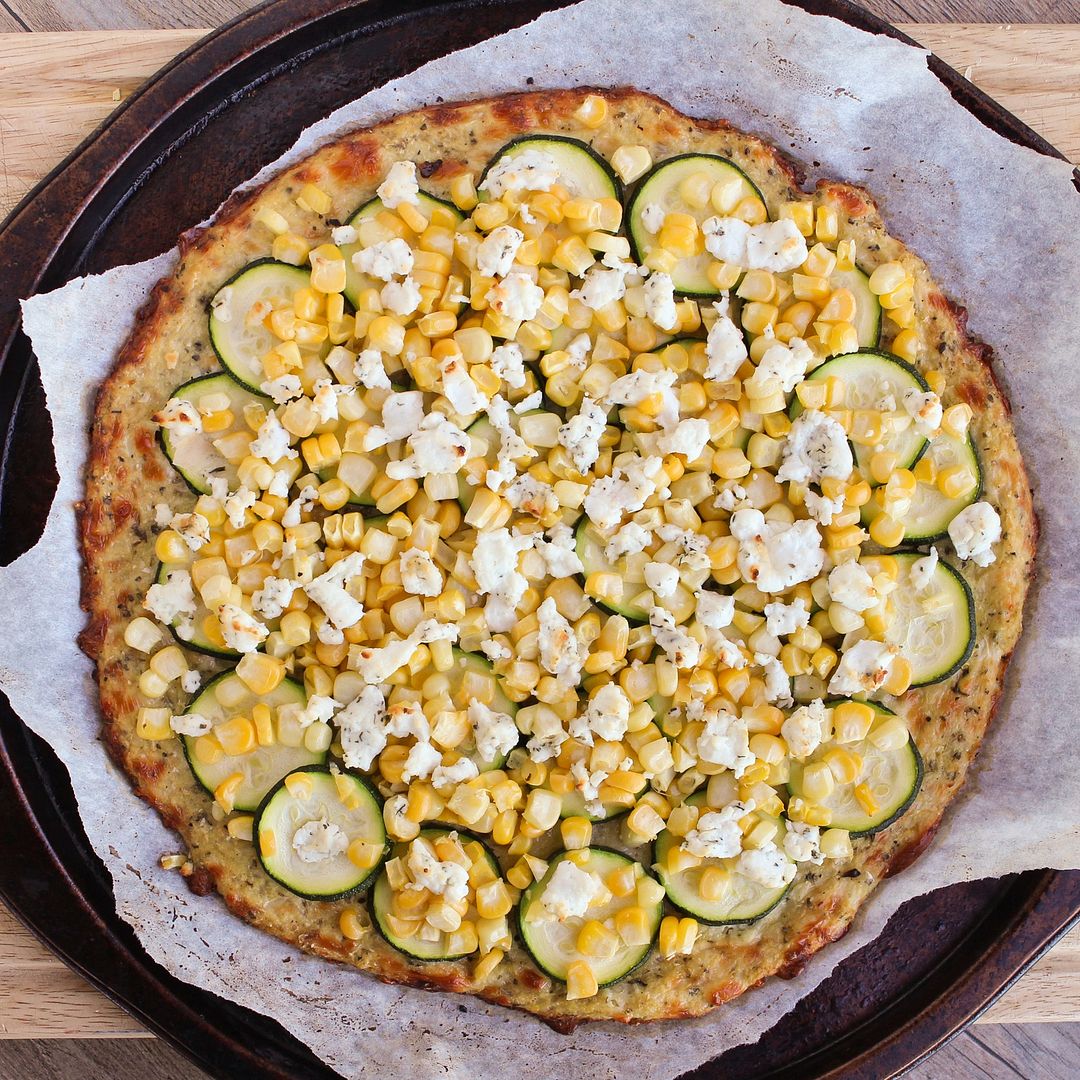
Cauliflower Crust Pizza with Corn, Zucchini, & Goat Cheese

I decided to keep my toppings light and summery with corn, zucchini, and basil.  Even though the air is definitely getting chillier around here, it's still summer and there's still lots of corn and zucchini available!

I didn't use a sauce or cheese except for the goat cheese on top, as there's already cheese in the crust and I didn't want this to be too heavy.  Everything worked so well together and tasted fresh, which I loved!

Cauliflower Crust Pizza with Corn, Zucchini, & Goat Cheese

The crust was also way better than I expected!  It definitely doesn't taste anything like traditional pizza crust, so if that's what you're expecting then you'll be sadly disappointed.  Instead, it's chewy and flavourful and cheesy, and I think I actually might like it even better than regular crust!

Not that this will be replacing regular pizza for me as there's definitely still a time and place for that, but it's nice to have an alternative!

Cauliflower Crust Pizza with Corn, Zucchini, & Goat Cheese

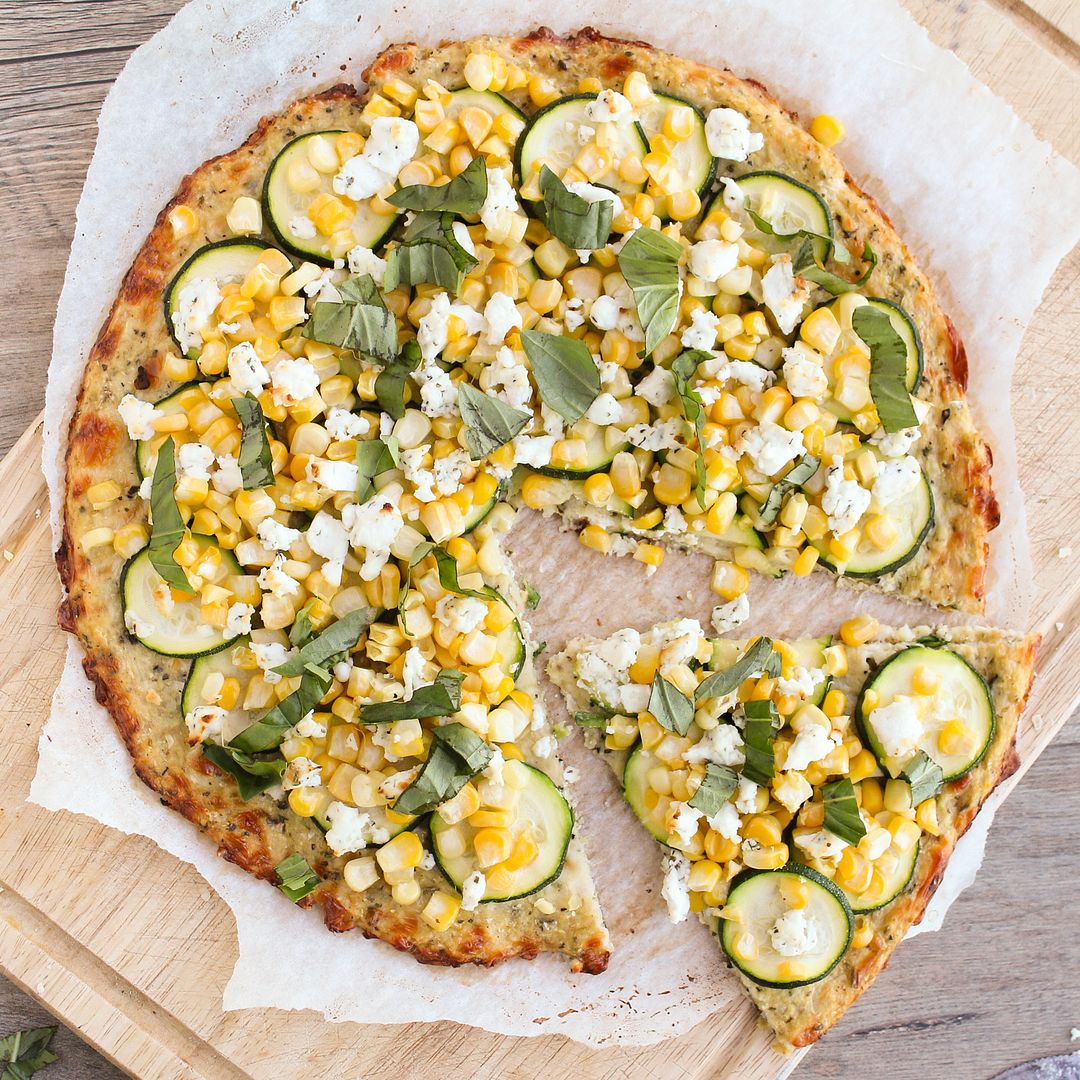
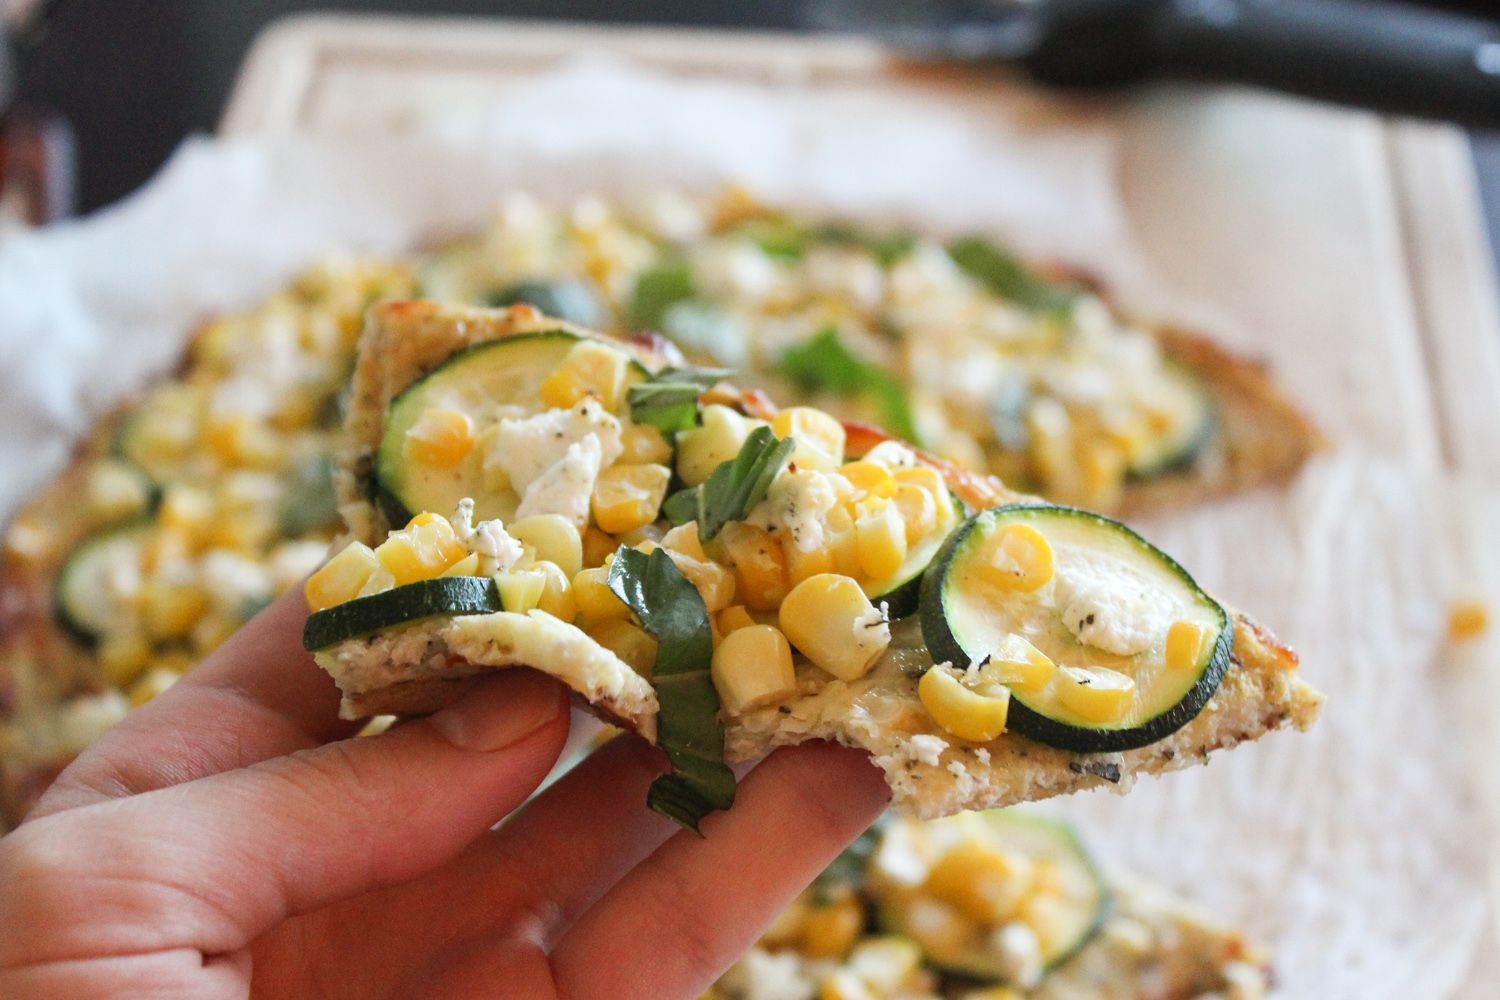
The only problem some people have noted is that the crust isn't super sturdy, so it can be hard to pick it up and eat it with your hands like regular pizza.  I found that I could still pick up the slices of pizza (see picture below for an idea - sorry it's so dark, I didn't think to take a picture until I'd already started eating), but because I chose corn as a topping, it was a bit hard to keep everything in place!  But as long as you don't mind getting a bit messy, it's worth it!  (and you can always eat with a knife and fork if you prefer!)

Cauliflower Crust Pizza with Corn, Zucchini, & Goat Cheese

Cauliflower Crust Pizza with Corn, Zucchini, & Goat Cheese

Crust recipe adapted from The Lucky Penny

Serves 2-3

Ingredients:

For the Crust:
1 medium head of cauliflower
1 cup grated part-skim mozzarella cheese
1/2 teaspoon dried basil
1/2 teaspoon dried oregano
1/2 teaspoon salt
1/4 teaspoon pepper
1 teaspoon nutritional yeast (optional)
1 large egg

For the Toppings:
1 small zucchini, sliced into thin rounds
1 ear of corn, kernels removed
2 oz herbed goat cheese (or plain goat cheese)
A few leaves of fresh basil, sliced thinly

Directions:

Preheat oven to 450°F and line a baking sheet with parchment paper.

Chop the cauliflower into florets (try to remove the stems).  Place in the large bowl of a food processor and pulse for about 30 seconds, just until all of the florets have been pulsed into very fine crumbs.  You should have about 3 cups of crumbs.  Transfer to a microwave safe bowl, cover, and microwave on high for 4 minutes.  Remove and let cool slightly.  Transfer to a clean tea towel (don’t use paper towels - they will shred), wrap up tightly in the towel, and wring all the water out of the cauliflower over the sink.  You will be surprised at how much water comes out!  Keep wringing to get as much water out of the cauliflower as you can – this will prevent the crust from crumbling.  Combine dried cauliflower with the cheese, basil, oregano, salt, pepper, nutritional yeast, and egg.  Mix to combine (I just used my hands).  Transfer to prepared baking sheet and form into a 10” thin circle.  Bake in preheated oven for 10-11 minutes.

Once crust has precooked, remove from oven and top with zucchini, corn, and goat cheese (you might not be able to fit all of the zucchini or corn kernels, depending on how big the zucchini and ear of corn were).  Top with crumbled goat cheese.  Return to oven and bake for another 15-20 minutes.  Remove from oven, top with sliced basil, season with additional pepper if desired, and serve!

Note that this is best eaten fresh - it doesn't keep very well.

January 22, 2013

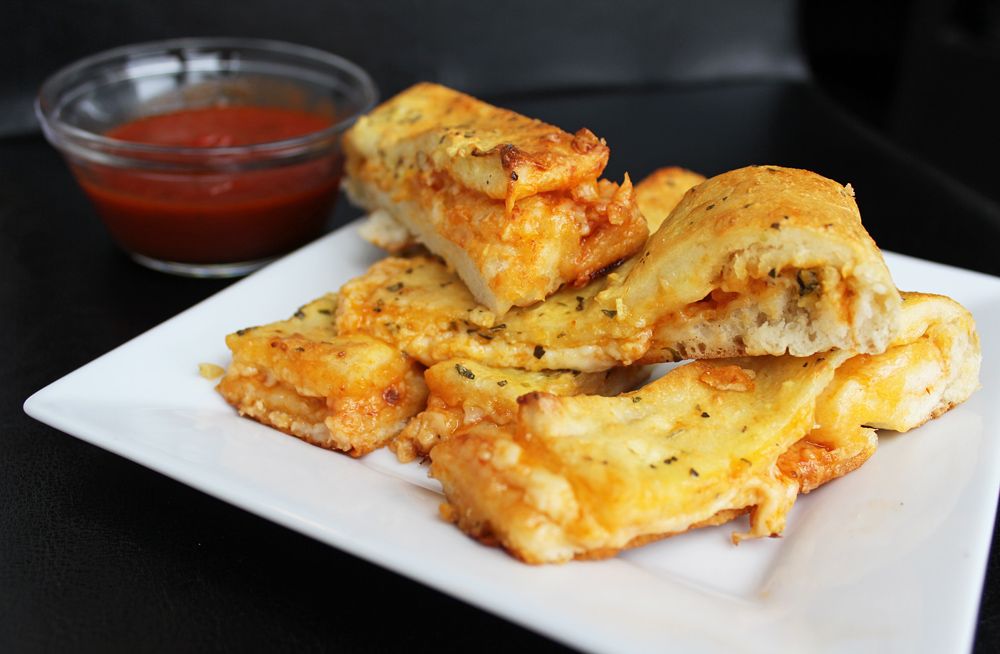
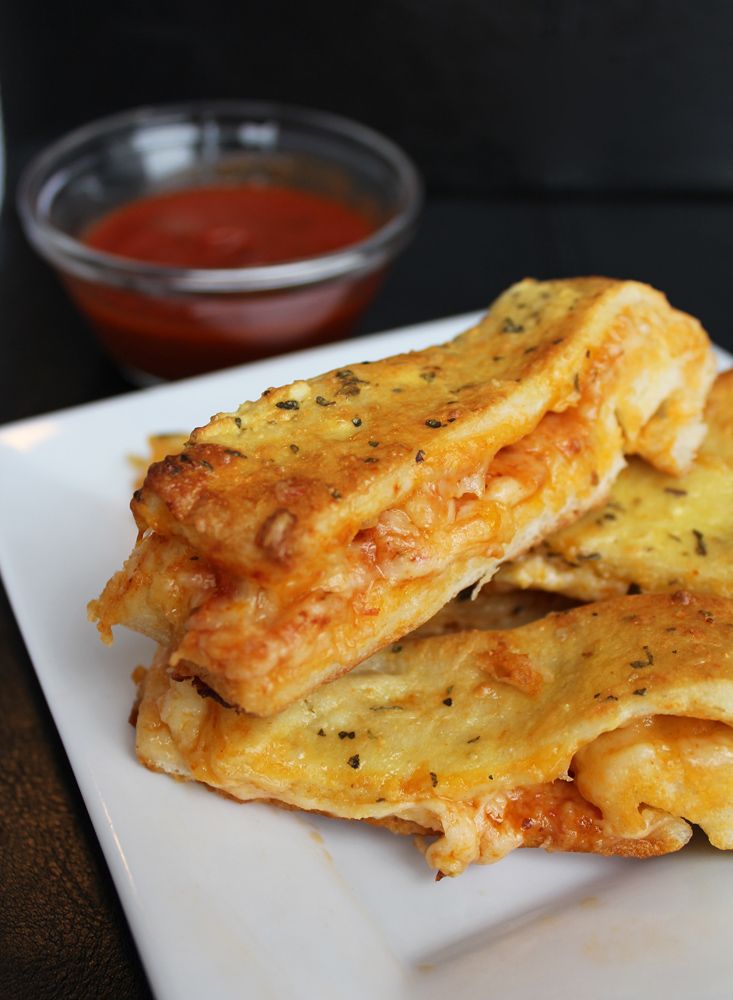
Pizza Stuffed Breadsticks

Pizza Stuffed Breadsticks

So it looks like I chose a pretty good year to be a Niners fan!  Let me rewind a bit .. With the NHL lockout earlier this year, my boyfriend decided to get into football more, and I decided it would be a lot more fun for me if I joined him.  I always watch the Super Bowl and sometimes playoff games, so I knew the basics of the game and who all the teams were, but I had never payed much attention to the regular season or had a favourite team.  So we each decided, before the season started, to choose a team to root for, and I chose the San Francisco 49ers.  I watched (almost) every game of theirs this season and discovered that football is probably the only sport I can watch on tv and actually enjoy every minute - it's so entertaining!

This past Sunday was especially exciting with the 49ers in the NFC Championship game (which they won, yay!), so I decided to make some football food to go along with the game.  Enter these pizza stuffed breadsticks!

Pizza Stuffed Breadsticks

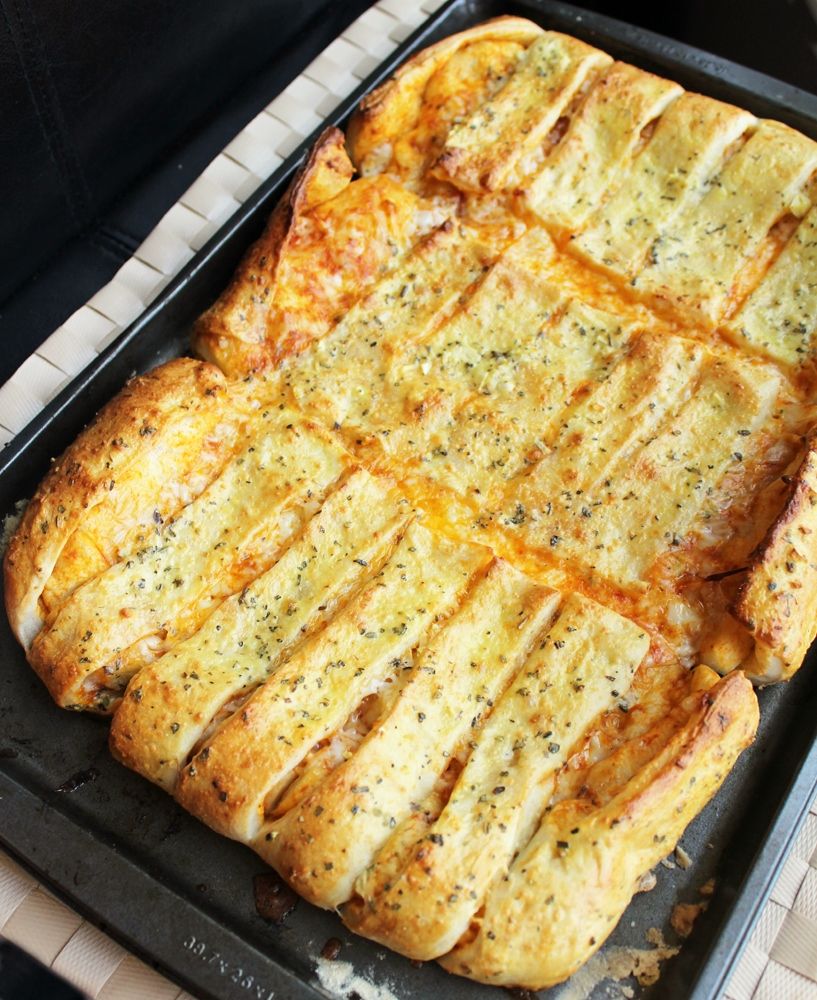
These are super easy and super tasty - you really can't go wrong with pizza dough and cheese.  Most cheese-stuffed breadstick recipes have you wrapping individual pieces of dough around cheese, but I went the lazy route with these. All you have to do is roll pizza dough into a rectangle, top it with marinara sauce and shredded cheese, add a top layer of dough (brushed with an egg wash, seasonings, and parmesan), then bake and slice it into breadsticks.  Served with marinara sauce for dipping, you get something that tastes like pizza but is more fun to eat!

Between eating these and watching the game, I was a happy girl on Sunday!  Now I can't wait for the Super Bowl!

Pizza Stuffed Breadsticks

Pizza Stuffed Breadsticks


Makes about 20 breadsticks

Ingredients:

1 ball of storebought frozen or refrigerated pizza dough (or 1 homemade pizza dough)
1/4 – 1/3 cup pizza/marinara sauce
200g brick of pizza mozzarella, shredded (about 2 cups)
1 large egg
2 tablespoons milk
2 tablespoons parmesan cheese
2 cloves garlic, minced
3/4 teaspoon dried basil
3/4 teaspoon dried oregano
Extra marinara sauce for dipping

Directions:

Preheat oven to 425°F.

Let pizza dough come to room temperature if using storebought dough.  Divide ball of dough in half.  Roll each half into a rectangle approximately 15”x10” on a floured surface.   If the dough won’t stay stretched, let it rest then try again.  Transfer one dough rectangle to a greased or parchment-lined 15x10-inch baking sheet, stretching as needed to meet edges of pan.  Brush pizza sauce over the surface, then sprinkle evenly with mozzarella.  Place second dough rectangle over top, and fold the edges under the bottom layer of dough, pinching to seal all around.

Use a pizza cutter to cut dough into 20-21 breadsticks (I cut it crosswise into thirds first, then cut each third into 7 breadsticks).  Do not separate the breadsticks.

Mix egg, milk, parmesan, garlic, basil, and oregano in a small bowl.  Use a pastry brush to brush over the tops of the breadsticks.  You won’t need to use all of it.  Bake in preheated oven for 15-20 minutes, until puffed and golden.  Recut along seams to separate breadsticks and serve warm with extra marinara sauce for dipping.

Note: Mennonite Girls Can Cook has some great step-by-step photos of her breadsticks if the above directions aren't clear - mine just used storebought dough, added marinara sauce in the middle layer, and used a little less cheese, but otherwise the steps were the same!

Note 2: (thanks to Genevieve for pointing this out in the comments): We loved these as is, but it could also be fun to try out different versions with various toppings stuffed in the middle!  I imagine that diced pepperoni or veggies would make fun variations!

May 18, 2012

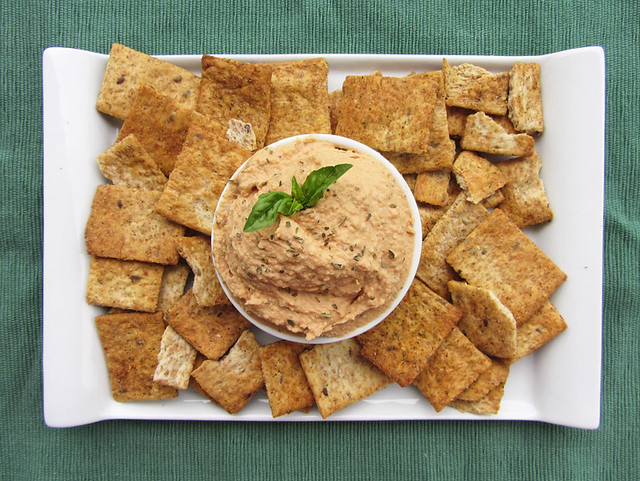
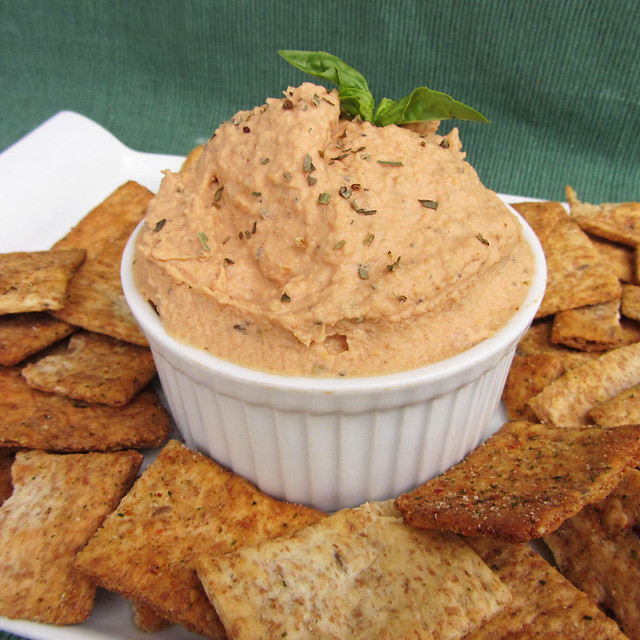
Pizza Hummus

pizza hummus

It's a long weekend here in Canada, and I'm currently on a train headed toward our nation's capital, Ottawa, for a wedding weekend!  The weather is supposed to be hot and sunny over the next few days so it should be a great weekend!

I had a bit of a rough start to the trip this morning, waking up at the ungodly hour of 4:30am to be at the train station by 6am for a 6:30 train.  Around the time our train was scheduled to arrive, they announced that it was actually cancelled due to an accident, and we'd be switched to a later (and much less comfortable) train that would allow me only 15 minutes to make my connecting train in Toronto.  I haven't taken a train in ages so I was a bit panicked when we arrived at the station and I had no idea where to go or how to get to my next train!  I followed a crowd down a set of stairs, carrying my giant heavy suitcase along with three other bags, only to realize at the bottom that the exit led out to the street.  I turned around to try to go back up the stairs against a swarm of people trying to go down.  Just when I was sure I was going to topple backwards with all my bags in tow, an extremely nice guy carrying his bicycle down the stairs saw me struggling, grabbed my suitcase, and carried it AND his bicycle backwards all the way back up the stairs for me.  I'm definitely not a girl who gets offended from offers of help from strong men - I was so grateful!  I eventually managed to figure out how to get to my train and hopped on with about 5 minutes to spare before it left, and before the lump in my throat started to turn into tears haha - I'd had a dream the night before that I missed my train so I was so worried it was going to come true!  Anyways, the rest of the trip should be smooth sailing now, and I'm really excited to see a bit of Ottawa and also Quebec, which I rarely get to visit!

As I have about four free hours on the train before we arrive, I wanted to share a quick snack recipe that I made a while ago and have been dying to share!  You probably know by now that I love making hummus, but I was a bit nervous about the idea of pizza hummus, which I'd seen in my Food Network magazine a while back.  I loved their buffalo wing hummus from the same issue though, so I decided to give this one a shot too, and I was so glad I did!


pizza hummus

I noticed that Tessa from Handle the Heat recently wrote about this hummus too, so I thought now would be a good time to share it and spread the pizza hummus love further!  I made quite a few changes to the recipe though, as the original calls for 3 cups of chickpeas, which is an odd amount when working from canned chickpeas.  So I adjusted all the amounts to work with just  one regular can, and also added in some nutritional yeast, because what's a pizza hummus without cheesy flavour!

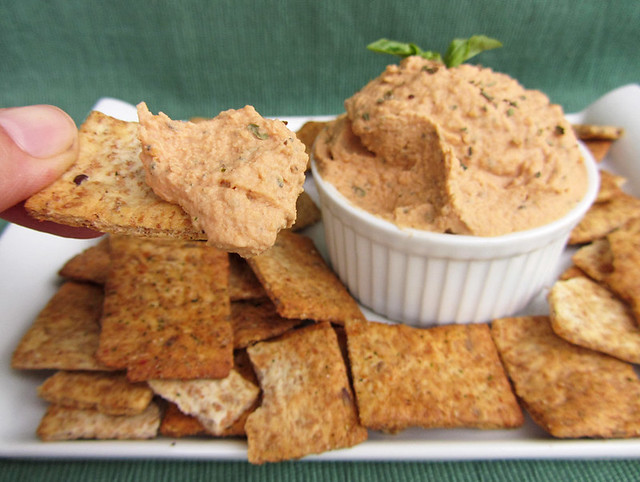
While it may seem odd, this hummus truly tastes like pizza, with just the right combination of tomato, herb, and cheese flavours.  Though the tomato paste gave it a rather unfortunate-looking pinkish hue, the taste totally made up for it!

I could not stop eating this hummus right after I made it, but I managed to force myself to put it in the fridge to save for later.  It still didn't last too long though!  I ate it with garden herb pita chips and I loved how the extra herbs in the chips enhanced the flavour of the pizza hummus.  I think I've seen parmesan herb pita chips before though, so if you can find those then they'd probably be an even better match!

Hope my fellow Canadians have a wonderful long weekend and get a chance to enjoy the sunshine!

pizza hummus

Pizza Hummus

Adapted from Food Network

Makes about 2 cups

Ingredients:

1 (540mL) can chickpeas
1/3 cup liquid from the chickpea can
3 tablespoon tahini
3 tablespoons tomato paste
1-1/2 tablespoons fresh lemon juice
2 cloves garlic, minced
1-1/2 teaspoons dried oregano
1 teaspoon dried basil
1/2 teaspoon salt
1 tablespoon nutritional yeast
2 teaspoons olive oil
Additional salt and pepper for seasoning

Directions:

Add all ingredients except for the olive oil to the large bowl of a food processor and blend until smooth.  Add olive oil to feed tube and process as the oil slowly mixes in.  Taste and season with salt and pepper if desired; adjust any amounts to your liking (e.g. Add more dried herbs for a stronger herb flavour, add more nutritional yeast for a stronger cheesy flavour, add more tomato paste for stronger tomato flavour, etc.)

Ingredient Index

Related Posts Plugin for WordPress, Blogger...