Showing posts with label raspberry. Show all posts

July 16, 2012

Raspberry Cherry Crumb Bars

Raspberry Cherry Crumb Bars

If I had to choose my favourite of all the summer berries, I think I'd have to pick raspberries.  I'm pretty sure there's no better taste than a sweet, plump, fresh local raspberry that you let melt in your mouth because you want to hold on to the flavour as long as you can. I picked some up at the farmer's market a couple of weeks ago that were the best tasting raspberries I've ever had!  Of course, there was a special price if you mixed and matched three different berries, so I grabbed some blueberries, and on a whim, I decided to try out some cherries. 

I've always thought that I didn't like cherries and have always avoided them, but after I tried one, then another, and another, I realized they're pretty darn good!  I think that all this time that I thought I didn't like them was because I associated them with that artificial cherry taste and those overly sweet maraschino cherries from the top of ice cream sundaes.  Real, fresh cherries, however, remind me a lot of plums, which I love!

I immediately started thinking of ways to pair my raspberries and 
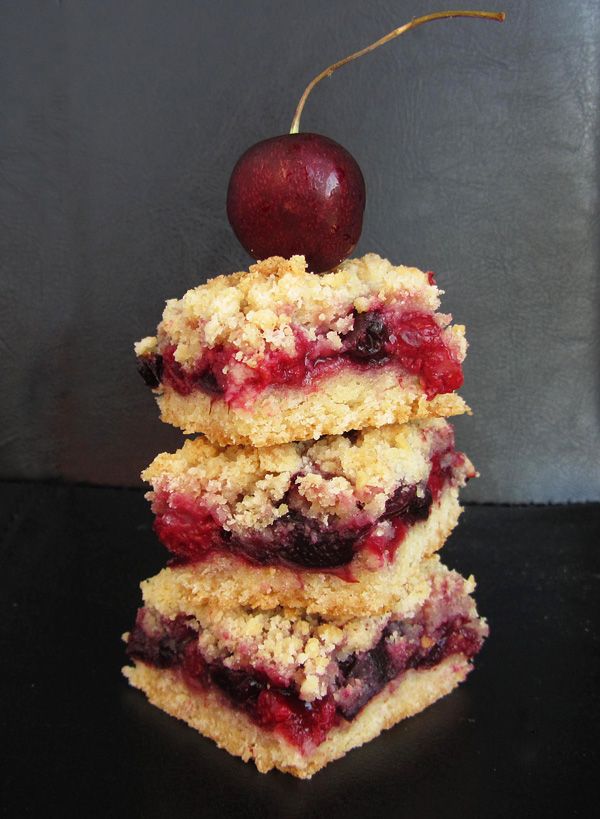
cherries together and came up with these delightful crumb bars!

Raspberry Cherry Crumb Bars

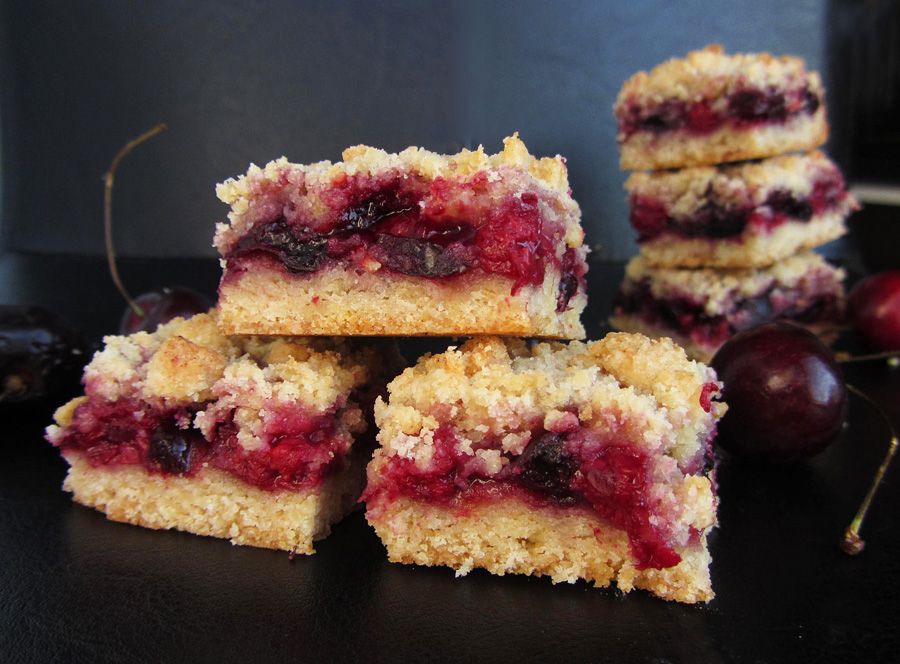
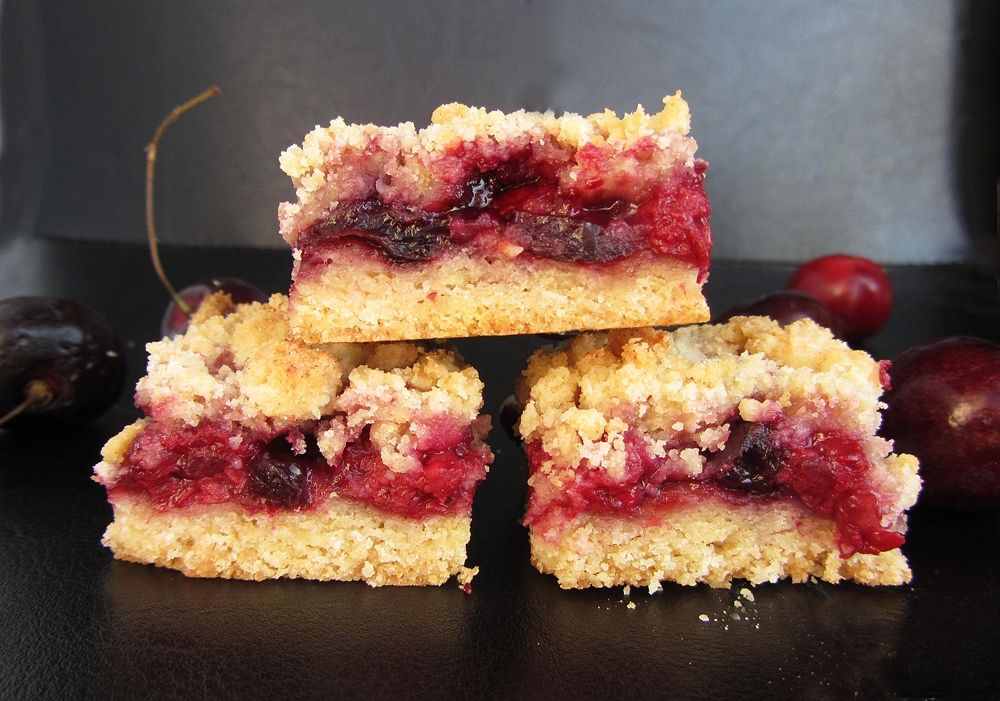
Fruit crumb bars are one of the easiest desserts to make and are such a great way to highlight the wonderful flavours of summer fruits and berries in a light and summery dessert.  And all you have to do is make one sweet buttery dough that you use for the base and topping, then sandwich a gooey layer of sweet berries or fruit in between.  In this case, the middle layer was made up of cherries and raspberries, which is surprisingly a combination that you don't see a lot in recipes.  I don't know why, because they worked so well together!

These bars turned out even better than I'd hoped!  I could have eaten the whole tray myself, but I decided to share, and everyone else loved them too.  Not only do they taste great, but they look stunning with their gorgeous deep red colour from the cherries and raspberries, and they're so easy to make!

Raspberry Cherry Crumb Bars

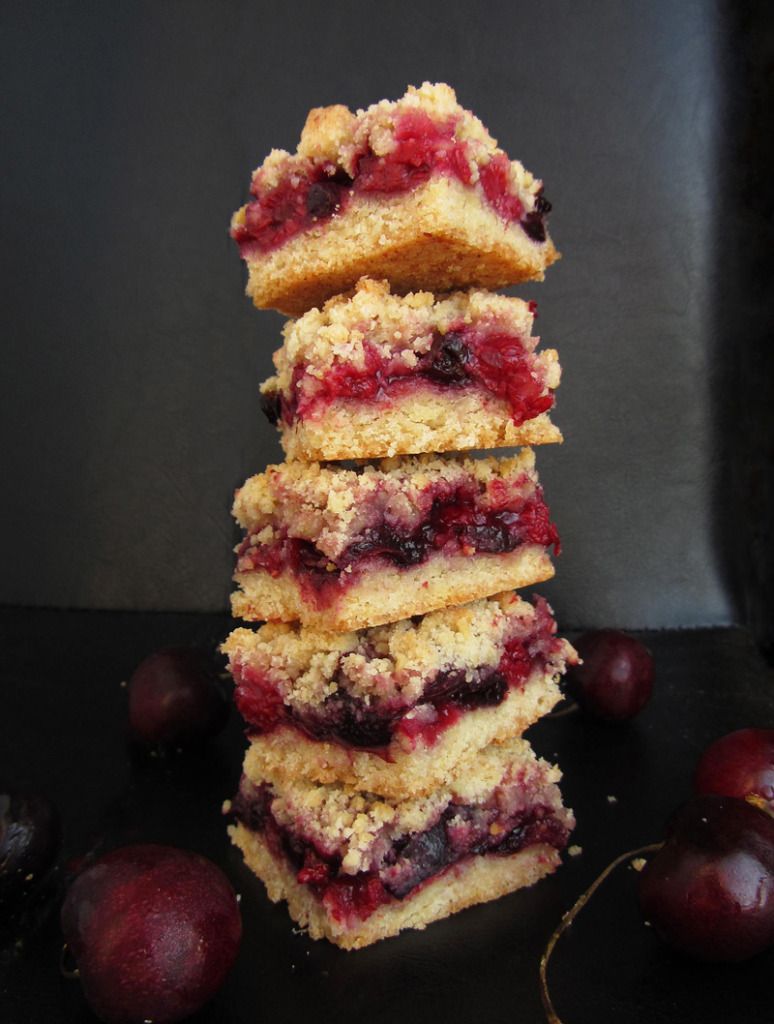
I only made an 8x8 pan of bars, but the original recipes I based this on were made in a 9x13 pan.  Sometimes cutting bars in half this way doesn't work because an 8x8 pan isn't exactly half of a 9x13 pan, but in this case it worked fine, so if you want to feed more people then you can easily just double the recipe below and bake them in a 9x13 dish.

I'm so sad that raspberry season is ending so quickly after it began here, but if you can't find good raspberries anywhere, I think these would be just as great with a cherry-blueberry filling, or cherry-peach, or peach-blueberry!  The combinations are endless, and there's still plenty of time left of summer to try them all out :)

Raspberry Cherry Crumb Bars

Raspberry Cherry Crumb Bars

Adapted from All Recipes and Beach Bakeaholic

Makes 16 squares in an 8x8 pan

Ingredients:

For the Filling:
1 cup chopped fresh cherries (pits and stems removed)
1 cup fresh raspberries
1/4 cup sugar
1-1/2 teaspoons cornstarch

For the Dough:
1-1/2 cups all-purpose flour
1/4 cup packed brown sugar
1/4 cup granulated sugar
1/2 teaspoon baking powder
1/8 teaspoon salt
1/2 cup unsalted butter, cut into small pieces
1/2 of a large egg (whisk one egg in a bowl then divide in half and use only half)
1/2 teaspoon vanilla extract

Directions:

Preheat the oven to 375°F. Line an 8x8 pan with parchment paper or aluminum foil and spray with non-stick cooking spray.

In a medium bowl, combine the cherries and raspberries with the sugar and cornstarch, and toss to coat.  Set aside while you prepare the dough.

In a large bowl, whisk together the flour, sugars, baking powder, and salt.  Add the butter and use a pastry cutter or food processor to mix in until coarse crumbs form.

In a small bowl, whisk together the egg and vanilla.  Add the egg mixture to the dough and mix until combined (using a fork, spoon, or your hands).

Press half the dough into the bottom of your prepared pan, patting it down evenly in one layer.  Spread the berry mixture evenly over the dough.  Crumble the remaining dough overtop.  Bake in preheated oven for 35-40 minutes, until dough is golden brown.  Let cool completely before cutting into bars.

January 27, 2012

Mini Heart Shaped Raspberry White Chocolate Cheesecake

mini heart shaped raspberry white chocolate cheesecake
With just over two weeks until Valentine’s Day, cute heart-shaped things are starting to pop up all over the blogosphere, and I couldn’t wait to join in! I’m actually not that big into mushy Valentine’s Day stuff and I certainly don’t need to receive any gifts (I always seem to kill flowers within a day and I don’t even like chocolate), but I do enjoy the spirit of the holiday, and am super excited to bake Valentine’s themed treats!

My first Valentine’s Day recipe this year was this mini heart-shaped white chocolate cheesecake, and it turned out so well that I almost want to quit now while I’m ahead, because I don’t think I can top this!

mini heart shaped raspberry white chocolate cheesecake plain
My mom got me this mini heart-shaped springform pan last year and I was eager to test it out last Valentine’s Day. At first I had a hard time finding any recipes online that would fit the pan, so I was excited when I found this gorgeous cheesecake from Pennies on a Platter, with raspberry swirls in a white chocolate batter over an Oreo crust.

I wanted to make something similar to hers because I love white chocolate and raspberry together, but her recipe was for an 8” cheesecake so I had to play around with the ingredients quite a bit to figure out how to make just the right amount for a 4” pan. I was close with my first try last year, but still ended up with too much leftover batter. The cheesecake was just as delicious as I expected though, so I was more than happy to give it another try this year!

mini heart shaped raspberry white chocolate cheesecake
This year, not only did I get the amount of ingredients just right for the mini pan, but I also discovered that spreading raspberry sauce across the top of the cheesecake (instead of swirling it into the batter) makes it even prettier! I loved the colour contrast of the red, white, and black together, but I loved the flavour even more! Each forkful gives you the perfect combination of raspberry, cheesecake, and chocolate, and the texture of the cheesecake was creamy and rich and everything a cheesecake should be.

mini heart shaped raspberry white chocolate cheesecake
After I started photographing the cheesecake I realized it needed something else on top, so I melted some white chocolate and wrote a simple Valentine’s message on it. Obviously chocolate isn’t the best choice for this type of thing because it hardens in the fridge, so you’ll probably want to use an icing instead, but the chocolate still worked well if you’re in a pinch!

Cut in half, this is just the right size to serve two people, making it perfect for a Valentine’s date. I actually cut each half in two so that I could share it with my sister and parents, and the smaller pieces were a nice size for a snack or light dessert that doesn’t leave you feeling stuffed, but we were all wishing for more after because it was so good!

I shared this link in Sweets for Saturday over at Sweet as Sugar Cookies.

mini heart shaped raspberry white chocolate cheesecake

Mini Heart-Shaped Raspberry White Chocolate Cheesecake


Makes one 4-inch cheesecake, Serves 2-4

Ingredients:

For the Oreo Crust:
1/2 cup Oreo cookie crumbs
1 tablespoon sugar
2 tablespoons melted butter

For the Cheesecake:
4 oz (half a brick) cream cheese
2 tablespoons sugar
1/2 a large egg (whisk one egg in a bowl first then divide in half)
2 tablespoons sour cream
1/2 teaspoon vanilla
2 oz melted white chocolate

For the Raspberry Sauce:
5oz raspberries
1 tablespoons sugar
1 teaspoon cornstarch
1/4 cup water

Directions:

For the Oreo Crust:

Preheat oven to 350°F.

Mix Oreo crumbs with sugar and melted butter in a small bowl, until all crumbs are all moistened with butter. Pour into a 4” heart-shaped springform pan and press down with your fingers to cover the bottom of the pan and slightly up the sides. I ended up with a bit of extra leftover crumbs.

Bake in preheated oven for about 7-10 minutes. Remove and leave on a wire rack to cool.

For the Cheesecake:

Mix cream cheese and sugar in a small bowl until completely softened and smooth. I just used a whisk and mixed this by hand, but make sure you mix the cream cheese well. Add the half egg and mix until combined.

Add the sour cream and vanilla and mix until combined. Lastly, add the melted white chocolate and mix until combined.

Transfer the cheesecake to the springform pan with the cooled crust. Bake at 350°F for 20-30 minutes, then lower oven temperature to 250°F and bake for another 45 minutes to 1 hour. Turn off oven and let cheesecake cool in oven for 1 hour or until it’s cool enough to touch. Remove and let cool at room temperature until completely cooled.

For the Raspberry Sauce:

Bring raspberries, sugar, cornstarch, and water to a boil in a small saucepan. Let boil about 5 minutes, until thickened. Press through a fine mesh sieve to discard the seeds.

Pour raspberry sauce over the cooled cheesecake and smooth with a spatula. Transfer cheesecake to a covered container and refrigerate at least 4 hours or overnight before serving.

mini heart shaped raspberry white chocolate cheesecake
Giveaway: (now closed)

Now I know a lot of you are thinking you won't be able to make this because you don't have the same pan I used. Well not to worry because all this lovey-dovey stuff has put me in a generous mood, so I'm giving one reader the chance to win their own Wilton mini heart-shaped springform pan!

How to Enter:
Leave a comment on this post telling me What would be your ideal Valentine's Day dessert?

Optional Additional Entries:
If you want the chance for up to 2 additional entries, you can do either or both of the following (just be sure to leave a separate comment here for each one, in addition to the comment mentioned above):
  • Like Once Upon A Cutting Board on Facebook and leave a separate comment on this post to say you do.
  • Subscribe to Once Upon A Cutting Board's RSS Feed and leave a separate comment on this post to say you do.
Rules and Details:
  1. This giveaway is only open to those with Canadian or U.S. shipping addresses.
  2. Include your name and a valid email address with each entry so that I can contact you (the comment system will ask for your email address but it will not be published).
  3. Entries must be submitted by Monday, January 30 at midnight EST.
  4. I will randomly choose the winning comment on Tuesday morning and email the winner. That person will have 48 hours to respond with their shipping address or a new winner will be selected.
Good luck!

This post/giveaway is in no way sponsored by or affiliated with Wilton. I just like this pan and want to share it with someone else!

UPDATE
:
The giveaway is now closed and a winner has been selected. Thanks to all for your entries!

September 20, 2011

Raspberry Cheesecake Crepes

raspberry cheesecake crepes
As I've mentioned before, breakfast is my favourite meal of the day. Even though it’s usually eaten as quickly as possible while I check my email in the morning before heading off to school, and it usually consists of something simple like a bowl of cereal or toast with peanut butter, there’s something so comforting about starting your day with a familiar meal that will fuel you through the morning. While I usually try to keep it healthy at breakfast, I do like to splurge on weekends with Ryan, experimenting with different pancake or crepe recipes so that he can wake up to a delicious meal (he’s spoiled).

These raspberry cheesecake crepes were my latest creation, and also the most decadent breakfast I’ve made in a while – not to mention the most delicious! A thin vanilla crepe is wrapped around a filling of sweet cream cheese, raspberries, and crushed graham crackers, then topped with warm raspberry sauce and icing sugar – just writing that sentence already has my mouth watering again! Here’s a shot of the inside of the crepe:

raspberry cheesecake crepes
Note that I didn’t put quite enough cream cheese or graham crackers in the crepe that’s pictured, and I also topped it with a little too much raspberry sauce, so it tasted more like a raspberry crepe and than a raspberry cheesecake crepe. That’s not a bad thing, but if you want the cheesecake flavour to come through more strongly, then add more filling than I did. The recipe makes enough filling – I just wasn’t sure how much to put on my first crepe, so if you make them all at once you’ll be able to divide it up a little better. You could also eliminate the fresh berries in the middle of the crepe, or add some crushed graham crackers on top if you want to play around with it a bit to your liking.

I’ve broken the recipe down into different parts to make it a little easier to read, but writing it that way probably makes it seem like more work that it actually was. While there are a few different components to make, overall this dish is quite easy - the crepe batter is all mixed in one bowl, and the other components only take a couple minutes to assemble. Don’t tell your guests that though – they’ll be so impressed with this dish that they might even offer to do the dishes for you – mine did! (but I helped him – did I mention he’s spoiled?)

While we ate this for breakfast (or brunch I guess, since we ate around 11am), they would also be a great dessert to serve to guests or a loved one for a special occasion. Whatever your reason for making them, just be sure you do, you won’t regret it!

raspberry cheesecake crepes
Raspberry Cheesecake Crepes

Crepe recipe adapted from All Recipes, everything else is my own recipe

Makes 4-5 crepes (Serves 2 as a filling meal, or 4-5 as a lighter meal of one crepe each)

Ingredients:

For the filling:
3 oz reduced-fat cream cheese
1/2 cup icing sugar
1/2 teaspoon vanilla
4-5 graham crackers
1/2 cup raspberries
For the raspberry sauce:
1/2 to 3/4 cup raspberries
1 tablespoon sugar
1 tablespoon water

For the crepes:
1/2 cup + 1 tablespoon milk
1 egg
2 teaspoons vanilla
1/2 cup all-purpose flour
2 teaspoons granulated sugar
1/8 teaspoon salt
1 tablespoon melted butter

Directions:

For the filling:
In a small bowl, beat the cream cheese until smooth. Add the icing sugar and vanilla and beat until smooth (this can all be done by hand). Set aside.
In another small bowl, crush the graham crackers into small pieces –about half should be crushed into fine crumbs and half in small pieces. Set aside.
Set the raspberries aside also. Having all three components ready will make it easier to assemble the crepes when they’re done.

For the raspberry sauce:
Place the raspberries in a small saucepan over medium heat. Sprinkle the sugar and water over the berries and let simmer gently while you make the crepes. Mash the berries as they’re cooking. You can strain out the seeds afterwards if desired, but I don’t bother.

For the crepes:
In a large bowl, whisk together the milk, egg, and vanilla. Stir in the flour, sugar, salt, and melted butter until well blended. The consistency should be thin and pourable, like a drinkable yogurt.
Heat a large non-stick skillet over medium heat until hot, and coat with cooking spray. Pour about ¼ cup of the batter into the pan and quickly tip the pan to swirl the batter around so that it coats the pan. When the edges are dry and pulling away from the sides of the pan, and bubbles are forming in the middle of the crepe, then it’s time to flip it over (this only takes about a minute). Gently flip the crepe using a spatula, and cook briefly on the other side until lightly browned. Repeat with the rest of the batter, using ¼ cup at a time.

To assemble crepes:
Lay a crepe flat on a plate. Spread cream cheese mixture down the centre of the crepe. Top with fresh raspberries and graham cracker crumbs. Roll each edge of the crepe over the filling. Top with raspberry sauce, and sprinkle icing sugar or extra graham cracker crumbs on top if desired. Serve warm.

raspberry cheesecake crepes

August 27, 2011

Coconut Lime Berry Cake with Lime Whipped Cream

coconut lime berry cake
The other week we had a family gathering for my Grandma’s birthday and I volunteered to be in charge of dessert. Usually, choosing a dessert for a celebration like this takes me forever because I have to go through my hundreds of bookmarked recipes to decide what would be most appropriate for the occasion, what I would have time to make, what would be the least expensive, and what would appeal to the most people. But this time I had to make my decision pretty quickly as it was already noon and the celebration was that night. Fortunately, I had been eyeing this coconut lime berry cake on Two Peas and Their Pod for a while, just waiting for the chance to make it, so it immediately sprang to mind and I got started right away!

It turned out I made the perfect choice! The cake was so moist and flavorful, but also tasted so light, which was exactly what everyone wanted after eating a big meal. The three flavours (coconut, lime, berries) worked so well together and matched the season perfectly. I thought the fresh berries stood out the most while I was eating it, but others said they mainly tasted the coconut and lime, and Ryan said he tasted all three in different stages. I decided to whip up a lime whipped cream I’d seen on How Sweet It Is, and it was the perfect addition to the cake to make it worthy of a celebration, but I also think the cake would have been delicious on its own.

I will definitely be keeping this recipe in the back of my mind for the next time I need an easy and crowd-pleasing summer dessert!

coconut lime berry cake

Coconut Lime Berry Cake with Lime Whipped Cream

Adapted from Two Peas and Their Pod, originally from Everyday Food, May 2011

Makes one 9 x 13 cake, about 12 servings

Ingredients

For the cake:
3/4 cup unsalted butter, at room temperature
1 ¾ cups plus 1 tablespoon all-purpose flour
2 teaspoons baking powder
1/2 teaspoon salt
1 cup packed sweetened shredded coconut
1 cup plus 1 tablespoon sugar
3 large eggs
1 teaspoon vanilla
3/4 cup buttermilk (or mix ¾ cup milk + ¾ tablespoon lime juice if you don't have buttermilk)
2 teaspoons finely grated lime zest
2 tablespoons fresh lime juice
3 cups mixed berries, such as raspberries and blueberries
3 tablespoons fresh orange juice

For the whipped cream:


1 cup cold whipping cream
1/4 teaspoon vanilla extract
1 ½ tablespoons powdered sugar
1/2 tablespoon lime zest

Directions


Preheat oven to 350°F. Grease and flour a 9-by-13-inch baking dish (I just lined mine with parchment paper).

In a large bowl, whisk together 1 3/4 cups flour with the baking powder, salt, and coconut.

In the bowl of an electric mixer, beat butter and 1 cup sugar on high, scraping down bowl as needed, until light and fluffy, for about 4 minutes. Add eggs, one at a time, and beat until combined. Add vanilla and mix until combined. With mixer on low, add flour mixture in three additions, alternating with two additions of the buttermilk, and beat until combined. Stir in lime zest and juice. Pour batter into dish and smooth the top with a small rubber spatula.

In a medium bowl, toss berries with 1 tablespoon flour, 1 tablespoon sugar, and the fresh orange juice. Scatter berry mixture over the batter.

Bake until cake is golden at edges and a toothpick inserted in center comes out clean, about 35 minutes. Let cake cool in pan on a wire rack for about 20 minutes before slicing.

While cake is baking, make the lime whipped cream. Chill the bowl of an electric mixer before using. Once bowl is chilled, add cream, vanilla, and sugar. Beat on high until cream stiffens, about 5-6 minutes. Gently fold in lime zest. Refrigerate until ready to serve.

Serve cake warm or at room temperature, with lime whipped cream dolloped on top of each slice.

coconut lime berry cake

Ingredient Index

Related Posts Plugin for WordPress, Blogger...