Showing posts with label rum. Show all posts

July 19, 2013

Frozen (Spiked) Strawberry Lemonade

Frozen Spiked Strawberry Lemonade

From what I've been reading from others, Southern Ontario isn't the only place experiencing a major heat wave this week!  Temperatures have been in the 30s with humidex ratings in the 40s (above 100F) all week, so as soon as you step outside you're completely smothered in heat to the point where it sometimes feels hard to breathe.  Apparently it's even been hot enough to bake cookies in your car, though I'm not sure I'd want to eat those cookies...

I don't actually mind that much since I've been begging for warm weather since April, but I also work in an air conditioned office and come home to an air conditioned apartment, so I have no reason to complain.  For those who've been suffering through the heat this week though, you deserve this frozen strawberry lemonade today!

Frozen Spiked Strawberry Lemonade

This drink is the perfect way to cool down and reward yourself for a hard week's work on a Friday evening.  It's made with pink lemonade concentrate and frozen strawberries to give it a lovely strawberry lemonade flavour that's not too sour or sweet.  I added coconut rum hoping to taste the coconut but it didn't really come through, so next time I'd probably just use regular rum - either works though, or you can just leave it out, though I highly recommend it!

Frozen Spiked Strawberry Lemonade

I used a spoon to get all the ice-cold slushy parts into my mouth asap, but you could drink this with a thick straw or just out of the glass if you prefer.  Either way, it likely won't last long!

Hope you all have a great weekend and stay safe out there in this heat!

Frozen Spiked Strawberry Lemonade

Frozen Strawberry Lemonade with Rum

Inspired by Cooking Light

Makes 2 drinks

Ingredients:

1 cup ice
1 cup frozen strawberries
1/3 cup frozen pink lemonade concentrate
1/4 cup rum (I used Malibu rum which isn’t very strong so next time I might add more, but with regular rum it should be fine – adjust amount to your own liking)

Directions:

Add all ingredients to a blender and blend until slushy. Divide among two glasses and garnish with a lemon wedge if desired. Serve with a spoon or straw if desired (drinking it out of the glass would work fine too).

June 28, 2012

Watermelon Daiquiri Pops for Canada Day

Frozen Watermelon Daiquiri Pops for Canada Day

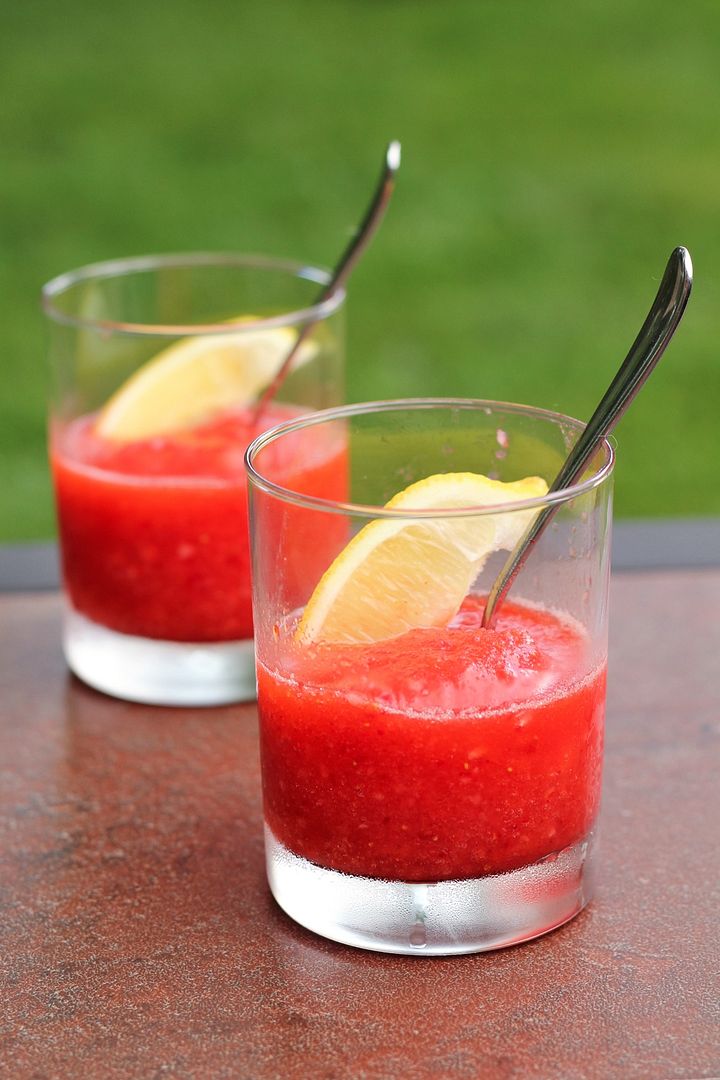
As I mentioned in my last post about our "food on a stick" themed meal, there was one more theme-related snack we enjoyed before dinner that I was saving for a separate post - these adorable and refreshing frozen watermelon daiquiri pops!

I didn't even know you could freeze watermelon until I saw a post recently (and can't remember where) showing how to insert popsicle sticks into watermelon slices and freeze them for a super easy popsicle.  I then wondered about the possibility of adding alcohol, as watermelon often seems to be paired with booze, and then found a post on The Shiksa in the Kitchen that did just that!

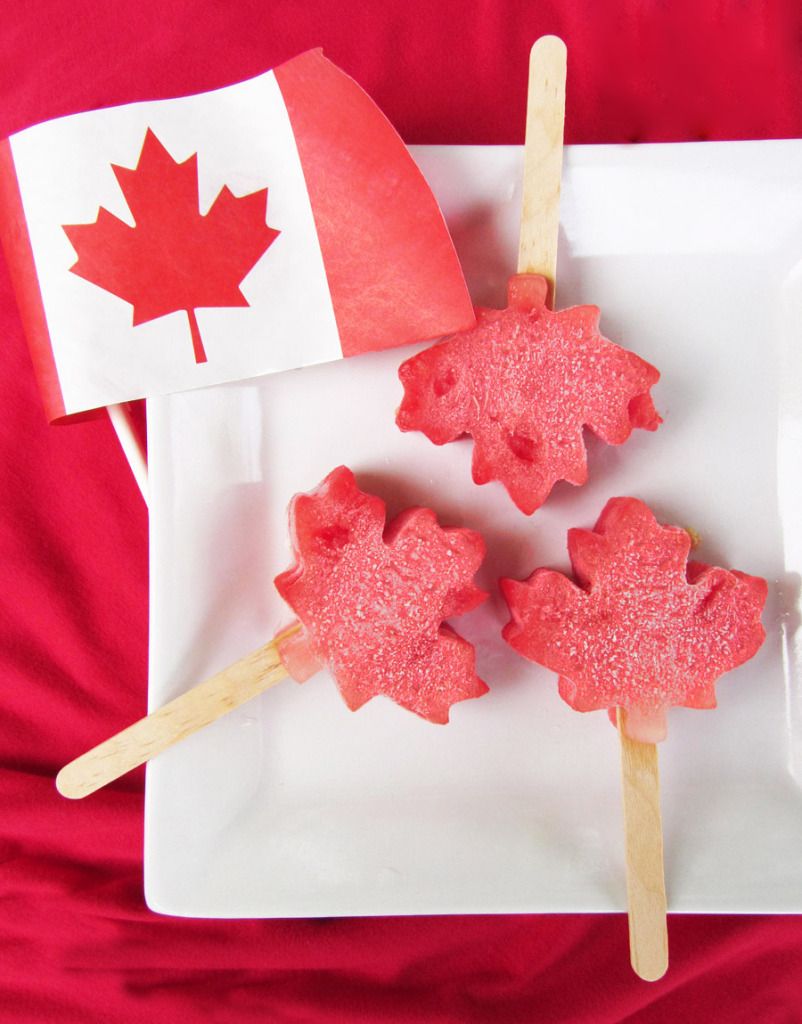
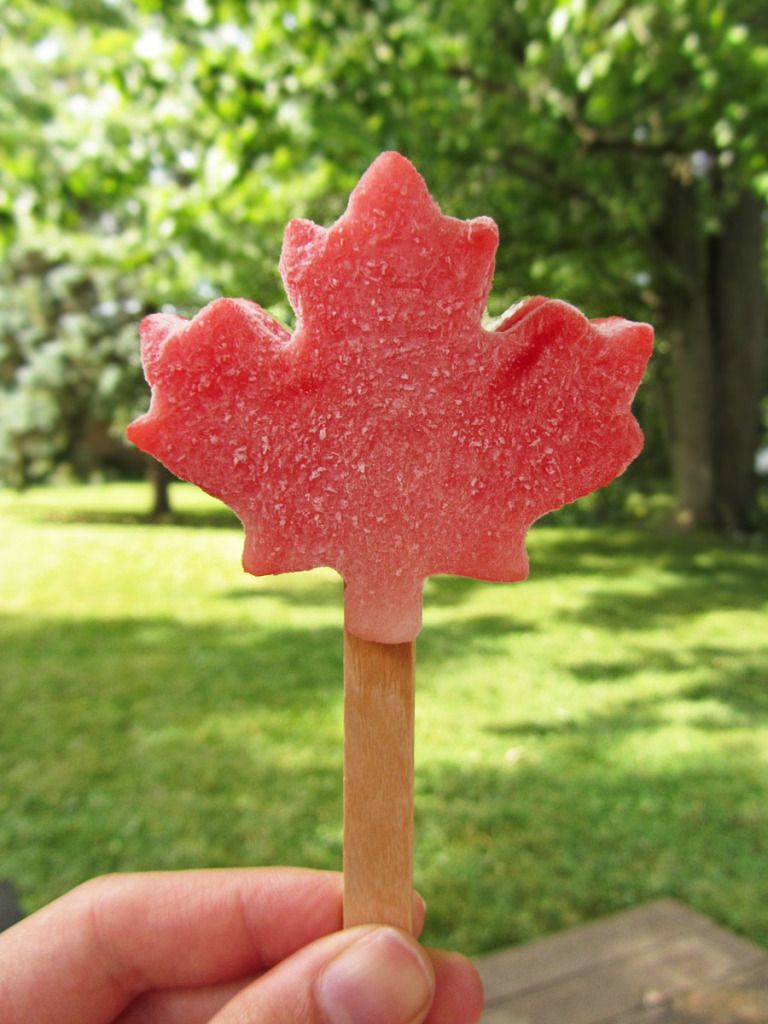
I knew I wanted to try them, especially with the hot weather we've been having lately, but then I wondered if I could turn them into a Canada Day treat by shaping each pop into a maple leaf, and this is what I ended up with!

Frozen Watermelon Daiquiri Pops

Tori from The Shiksa in the Kitchen gives some great tips about freezing watermelon; she says you can't just freeze it as is or it will lose a lot of flavour.  Instead, it's best to soak it in some sort of sweet liquid first, and using alcohol to make cocktail-flavoured pops works perfectly!  For those who want an alcohol-free treat, she also gives suggestions for that, so be sure to check out her post!

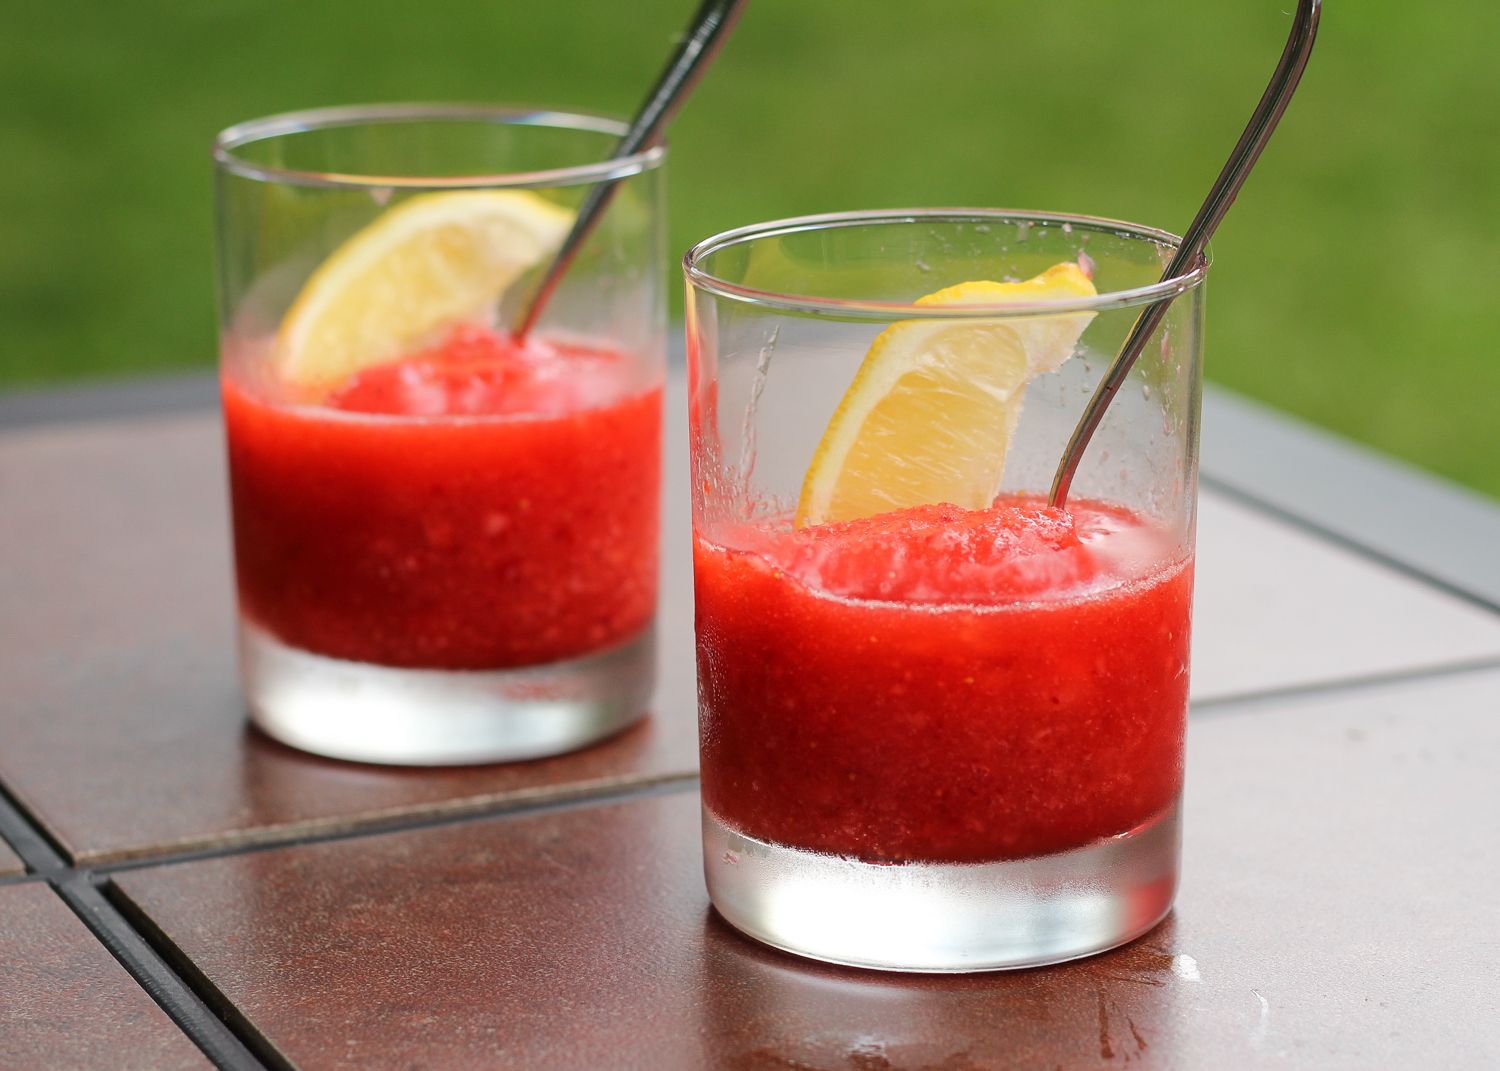
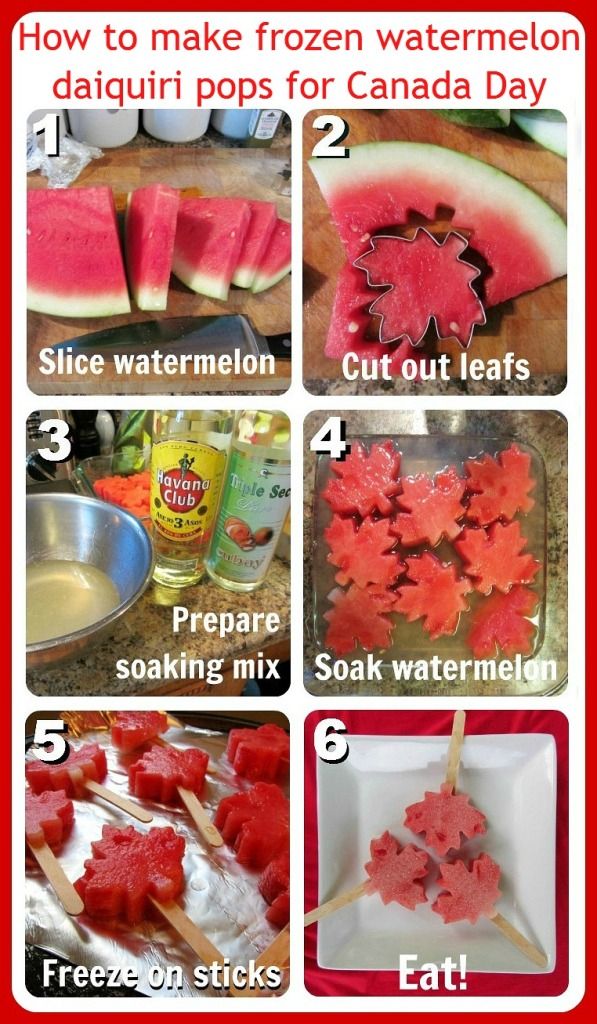
Tori made watermelon mojito pops, but I decided to make watermelon daiquiri pops using rum, triple sec, lime juice, and simple syrup.  All you do is cut the watermelon into maple leafs using a cookie cutter (which worked so well!), soak the pieces in your booze mixture, insert popsicle sticks, freeze, and then you have a sweet and refreshing treat that's perfect for Canada Day and the hot weather!

Frozen Watermelon Daiquiri Pops

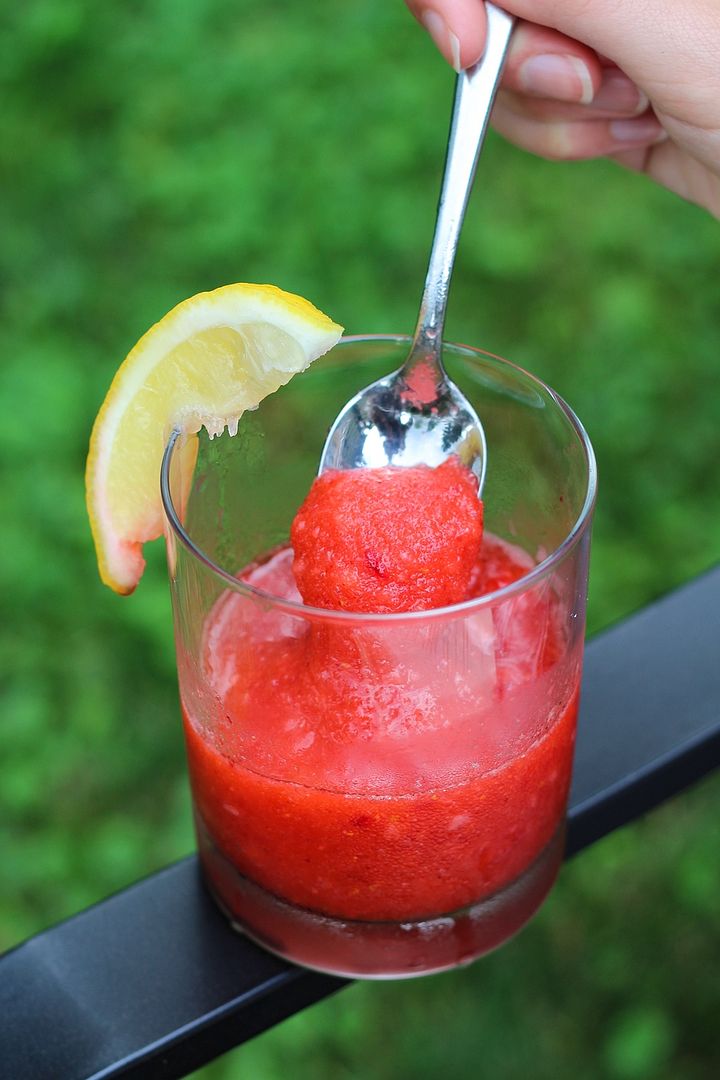
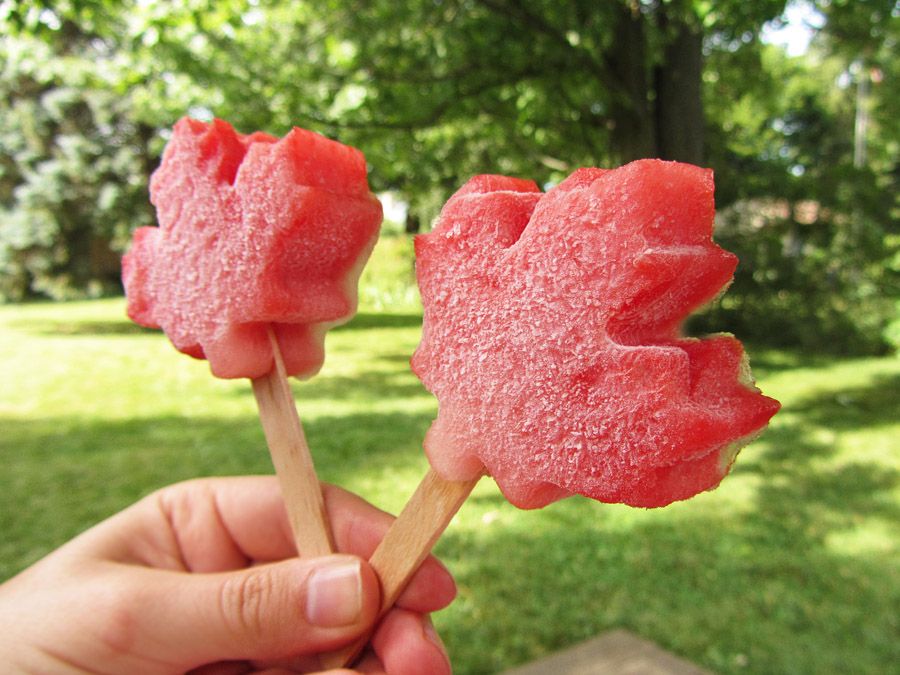
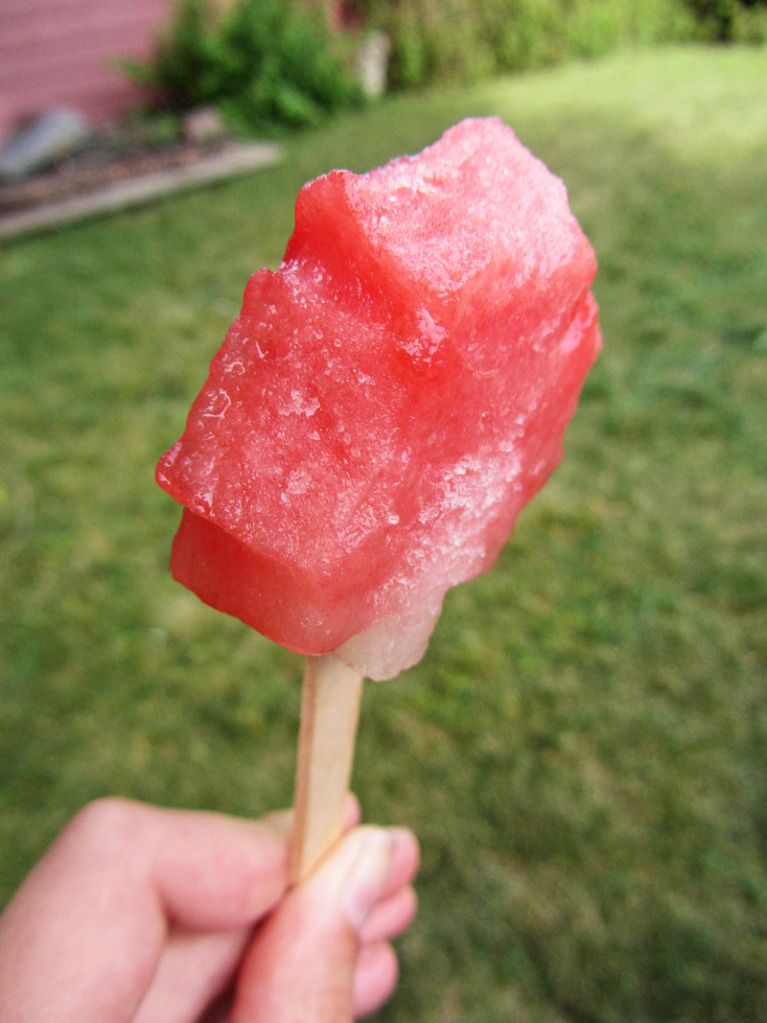
There are two things to note about this recipe, the first is that you don't want to eat them the second they come out of the freezer, as they'll be a little too hard.  Just let them thaw for about 5 to 10 minutes before serving, but make sure you don't let them thaw too much!

You can see the difference between a frozen and slightly thawed popsicle in the pictures above and below - the popsicles above are straight out of the freezer and still a little icy, and the popsicle below is one I had taken a few bites out of it already!

Frozen Watermelon Daiquiri Pops

The second thing to mention is that these don't taste too strongly of alcohol, so if you're looking for a super boozy pop, these probably won't satisfy you!  The original recipe said to soak the watermelon in the alcohol mixture for 20 minutes, and most other similar recipes I've seen call for about 15-20 minutes.  I soaked mine a bit longer (for a total of 30 minutes), but of the seven people who tried one, I was one of the only ones who could taste the alcohol in them.

Now don't get me wrong, everyone still loved them, but I just wanted to warn you that they're not a super boozy treat!  I'm guessing that if you wanted to taste the alcohol more, you could try soaking them even longer than I did, or maybe try injecting the alcohol into the watermelon with a syringe.  Just note that I haven't actually tried those methods myself so I can't verify that they'll work, but leave a comment if you do give it a shot and let me know how it turns out!

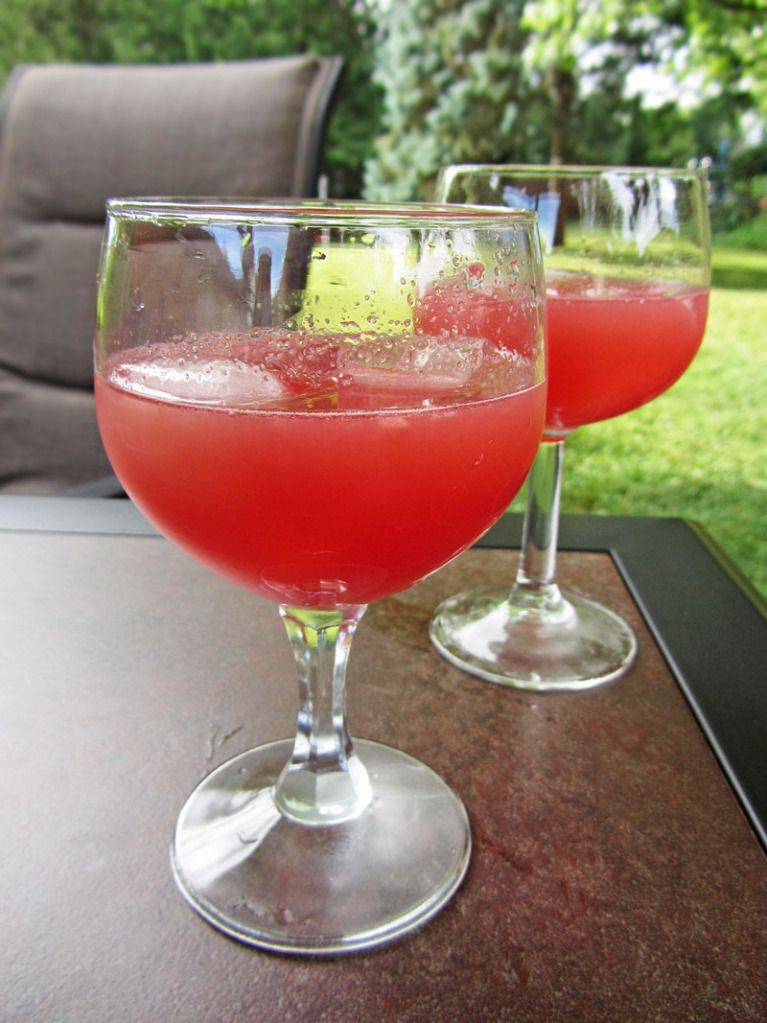
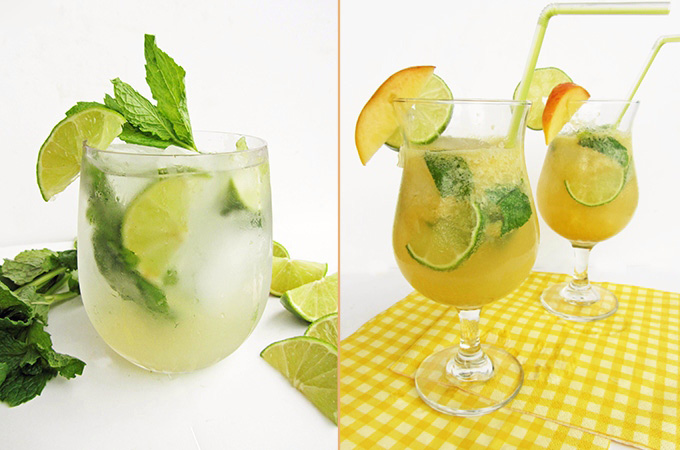
Anyways, I didn't mind that the watermelon pops weren't too strong because they still tasted great, and I just used my leftover soaking liquid to make daiquiris afterwards by mixing it with some blended watermelon (I got about three drinks out of it, in case you're wondering).  So tasty!

Watermelon Daiquiri

I hope you give this idea a try, and stay tuned because I have another Canada Day recipe coming your way soon!

Frozen Watermelon Daiquiri Pops for Canada Day

Adapted from The Shiksa in the Kitchen

Makes around 7-8 pops, depending on the size of your cookie cutter

Ingredients:

One quarter of a seedless watermelon (about a 4 pound piece)
1/4 cup + 2 tablespoons sugar
1/4 cup + 2 tablespoons water
1/4 cup rum
1/4 cup triple sec
Juice of one lime (2-3 tablespoons)

Special Equipment: Maple leaf shaped cookie cutter, popsicle sticks

Directions:

Slice watermelon into 1-inch wedges (About 8-10 wedges).  Use maple leaf cookie cutter to cut a leaf out of each wedge (make sure you don’t use any of the rind).  You’ll have some scraps leftover, which can be used for another purpose, such as blending up for a drink later!  Transfer pieces to an 8x8 dish, or a dish just big enough to just fit the slices in an even layer.

Note: If you just want a Canada Day-themed simple snack, you could stop here and just serve the leaf-shaped watermelon slices as is, or with a popsicle stick inserted as a fun snack!

Prepare simple syrup: Add sugar and water to a small saucepan, and bring to a boil, whisking constantly, until sugar is dissolved.  Remove from heat and let cool.

Mix simple syrup, rum, triple sec, and lime juice in a small bowl.  Pour mixture over the watermelon slices, and let soak for about 15 minutes per side (30 minutes total). 

Carefully insert a popsicle stick into the bottom of each maple leaf, pushing through the center until it almost reaches the top.  I found this easier if I made a small insertion with a knife first.  Place the popsicles on a foil-lined baking sheet and place in the freezer to freeze for at least 1-2 hours.  Reserve the soaking liquid to make cocktails later!

Remove from freezer about 10 minutes before serving so they're not too hard, but don't let them thaw too much!

Here's a quick step-by-step visual to help you out!

How to make frozen watermelon daiquiri pops for Canada Day

September 04, 2011

Mojito Tilapia Bites

mojito tilapia bites
On Friday, I talked about how easy it is to make authentic tasting mojitos at home. Today, I’m going to share how easy it is to capture the amazing taste of a mojito in a meal!

This recipe came from Jessica at How Sweet It Is. If you haven’t checked out her blog before, you definitely should – her writing always makes me laugh, and she has really creative recipes that are always delicious and make you wonder how you never thought of them before! When I first saw her recipe for mojito tilapia bites, I knew I had to make them – they combined some of my favourite flavours in a fun bite-sized form, plus they looked so easy to make.

After my first bite of these, I was hooked. They’ve become one of my very favourite meals, which is a good thing because they’re pretty healthy too. The marinade for the fish smells just like a mojito, so you may have to restrain yourself from drinking it before the fish goes in there.
This will be much easier if you make yourself an actual mojito to drink while you’re cooking (and another one while you're eating – if there’s ever a time to drink a mojito, it’s with mojito tilapia bites!) Once the fish gets cooked and mixed in with the avocado and mint, you’ll once again have to restrain yourself, this time from just eating the mixture straight out of the bowl before putting it on the pitas. But trust me, the pitas are the perfect vessel for eating this, and they’re so easy to make too (just slice pitas into triangles, spray with some cooking spray, sprinkle on some salt and bake in the oven). The original recipe called for baked tortillas, which would also be delicious – I just like using pitas so I can use the leftover pita chips for dips!

I’m pretty satisfied eating these as a main course, but they’d also be a fun party appetizer. And if you like the idea of cocktail-inspired meals, you should also try Jessica’s crispy margarita chicken tacos with strawberry avocado salsa – they’re a bit more work than the mojito bites but they're also delicious!

Hope everyone is enjoying the long weekend – happy Labour Day!

Mojito Tilapia Bites

Adapted from How Sweet It Is

Serves 2

Ingredients:

2 tilapia fillets
2 tablespoons rum
1/4 cup fresh lime juice
2 teaspoons lime zest
1/2 teaspoon sugar
1 clove garlic, minced
1/2 avocado, chopped
2 tablespoons chopped mint
2 large (8 inch) pitas
salt & pepper

Directions:

For the marinade:
Mix the rum, lime juice, garlic, sugar, and 1 teaspoon lime zest in a small bowl. Season tilapia fillets with salt and pepper, then place in a ziplock bag with the lime juice mixture and let marinate in the fridge for 30 minutes to 2 hours.

For the pitas:
Preheat oven to 400°F and spray a large baking sheet with cooking spray. Cut the pitas into chip-sized triangles and spread in an even layer on baking sheet. Spray with cooking spray and season with salt and oregano (if desired). Bake at 400°F for 8-12 minutes until toasted and crisp.

For the fish:
If you have fresh tilapia fillets, you can either bake them at 400 degrees for about 15-18 minutes, depending how thick they are, or you can pan-fry them on medium heat for about 3-4 minutes per side. The fish should flake easily with a fork when done.
I just use frozen tilapia fillets, which I defrost before marinating, then cook at 425°F for 6-8 minutes, as per the package directions.

Assembling:
Once the fish is cooked, flake it into small pieces with a fork. Mix in a medium bowl with the chopped avocado, mint, and 1 teaspoon lime zest. Season with salt and pepper to taste. Spoon onto cooked pita chips to serve.

September 02, 2011

Classic and Peach Mojitos

mojito recipes
On a hot day and the start to a long weekend, I thought it was the perfect time to share a drink recipe!

I’ve been lucky enough to travel to the gorgeous country of Cuba twice, and I cannot wait for the chance to go back again. While Cuban resorts aren’t exactly known for the quality of their food, the drinks are another story, especially drinks made with rum! I usually stick to girly frozen drinks when I’m there, like pina coladas, strawberry daiquiris, and blue hawaiis, because it’s impossible to make them as well at home. But on a scorching hot day at the beach, nothing quite compares to the traditional Cuban drink, the mojito.

I had never tried making a mojito at home because I assumed I couldn’t make it taste as good as the real thing from Cuba. But the other week I had some mint to use up and my thoughts wandered back to those refreshing summer drinks. I looked up some mojito recipes and realized they were actually quite easy to make, and with half a bottle of Cuban rum from my last trip still sitting in my cupboard, I had no reason not to make one!

I chose a recipe that most resembled the way I remembered mojitos being made, though I used regular sugar instead of powdered sugar because that seemed a bit strange to me. I imagine caster sugar would have been ideal because it would have dissolved best, but mine still dissolved perfectly fine. I put 2 ounces of rum in each drink, which was a bit strong, but I think these are meant to be slipped slowly anyway, preferably while sitting outside with a good company or a good book :) Of course the amount of rum (along with all the other ingredients) can be adjusted to taste. I didn’t have a muddler or a highball glass, but the back of a spoon and a regular old glass seemed to work just fine! The mojito was the perfect combination of sweet (from the sugar), sour (from the lime), and refreshing (from the mint and water).

Mojitos

Adapted from Taste of Cuba

Serves 2

Ingredients:

8-10 mint leaves
Juice of 1 lime
2 teaspoons sugar
4 oz white rum
4 oz club soda
Extra mint and lime wedges for garnishing

Directions:

In each glass: Place 4-5 mint leaves in the bottom of the glass, along with the juice of half a lime and 1 teaspoon of sugar. Muddle with the back of a spoon by pressing down and twisting to release the oils in the mint (you're not trying to break the mint apart) . Add ice to the top of the glass. Pour in 2 oz rum, followed by 2 oz club soda (or enough to fill the glass). Garnish with additional mint leaves or lime wedges, if desired.

mojito recipe
The next week I had some peaches to use up and started thinking about the possibility of a flavoured mojito. I’d already made a lot of peach dishes this season, but had yet to use them in a drink. I looked up some recipes for peach mojitos but none of them quite matched what I was looking for so I ended up just adapting the same recipe from above by adding some puréed peaches. The result had just a mild peach flavour that wasn’t too sweet, so it still retained the classic mojito taste. The amount of sweetness may depend on how ripe your peach is, so add more sugar if you want it to be sweeter.

I can’t decide which one I liked better – they were both so good!

Peach Mojitos

Serves 2

Ingredients:

8-10 mint leaves
Juice of 1 lime
2 teaspoons sugar
1 ripe peach
4 oz rum
4 oz club soda
Extra peach slices and lime wedges for garnishing

Directions:

Peel and chop the peach, then puree in a food processor or blender. Strain, if desired (I didn’t bother).

In each glass, place 4-5 mint leaves in the bottom of the glass, along with the juice of half a lime and 1 teaspoon of sugar. Muddle with the back of a spoon. Add ice to the top of the glass. Pour in 1/4 cup peach puree, 2 oz rum, and 2 oz club soda (or enough soda to fill the glass). 

Garnish with additional peach slices, lime wedges, and mint leaves, if desired.

peach mojito

Ingredient Index

Related Posts Plugin for WordPress, Blogger...