Showing posts with label sugar - brown. Show all posts

September 25, 2014

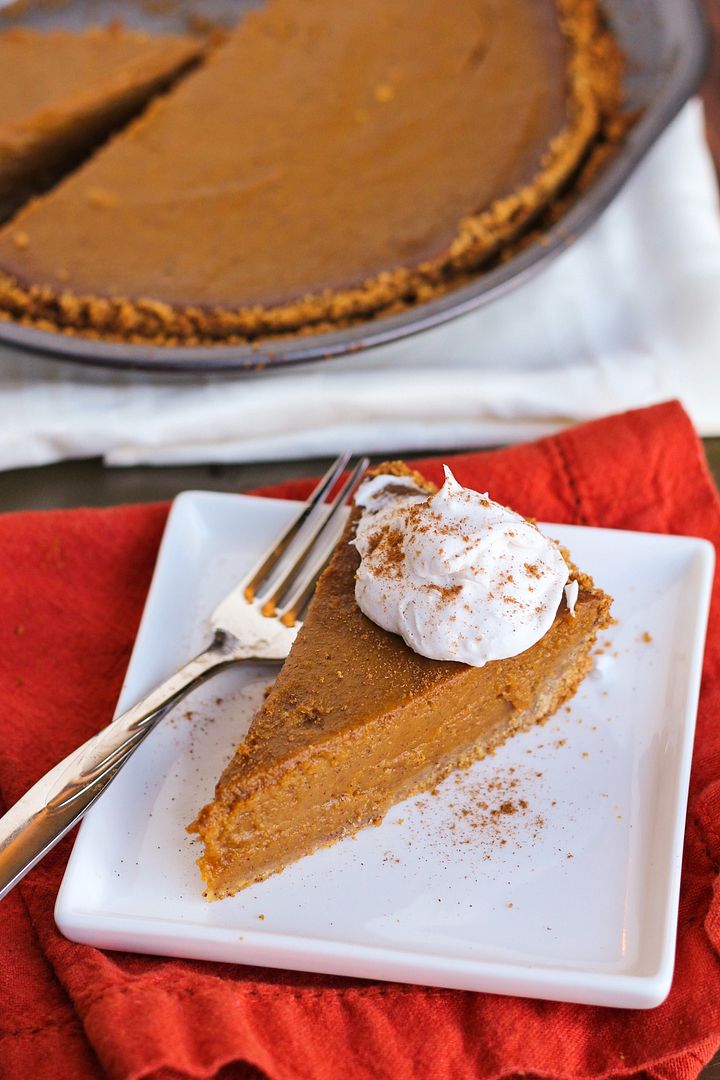
Vegan Pumpkin Pie

Healthy vegan pumpkin pie

Pumpkin pie is my (and a lot of people's, I'm sure) favourite type of pie, and the type I have the least self-control around because it's so easy to just take a little slice from the fridge, and then one more little slice, and suddenly you've eaten a whole pie just like that.  Ryan has been wanting to buy a pumpkin pie for weeks now but I told him that since it would just be the two of us eating it (and I intend on eating much more pumpkin pie in the coming months!) I wanted to try making a healthy pie that we wouldn't feel guilty about eating!
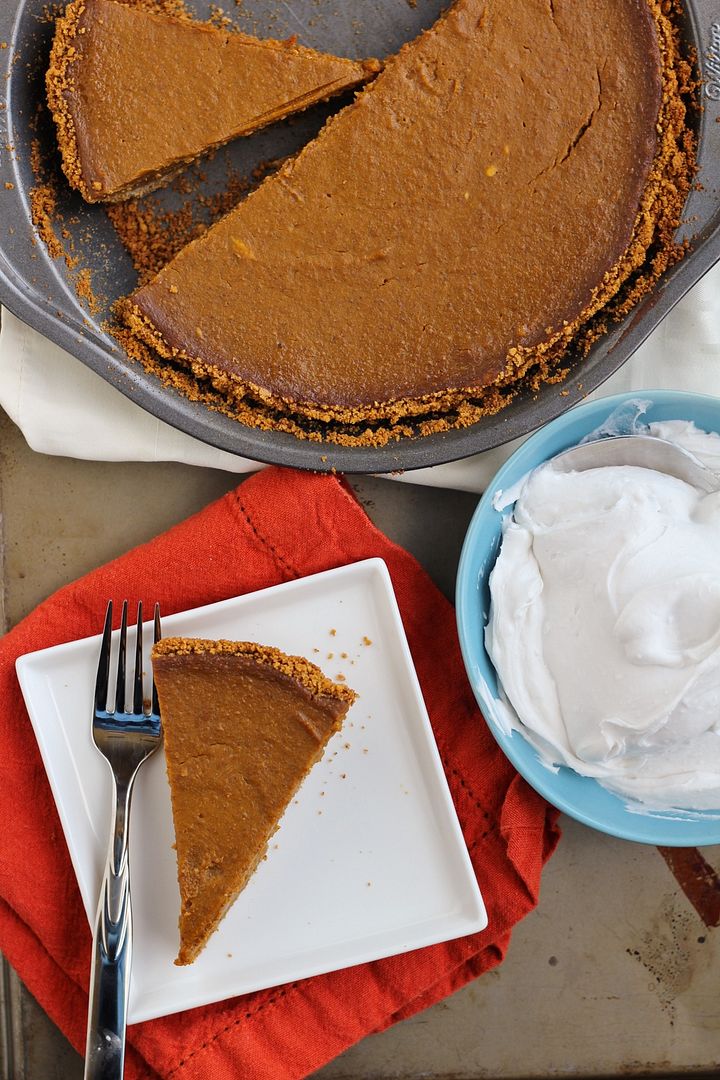
Healthy vegan pumpkin pie

This pumpkin pie is pretty healthy and also happens to be vegan.  The crust is made from low-fat graham crackers mixed with a bit of coconut oil, so the crust alone has a lot less "bad" fats than a typical butter or shortening-packed pie crust.  (Not that I have anything wrong with eating the occasional piece of traditional pie, but like I said, I wanted to make a healthier version!)  I could have made a healthier crust with nuts and dates but I wanted to keep this as easy and inexpensive as possible since we wanted it to be more of an every day dessert pie.

The filling is made up of pumpkin puree, unsweetened almond milk, no eggs, a reduced amount of brown sugar and some pure maple syrup for sweetening, cornstarch to help everything set, and of course the usual pumpkin spices.
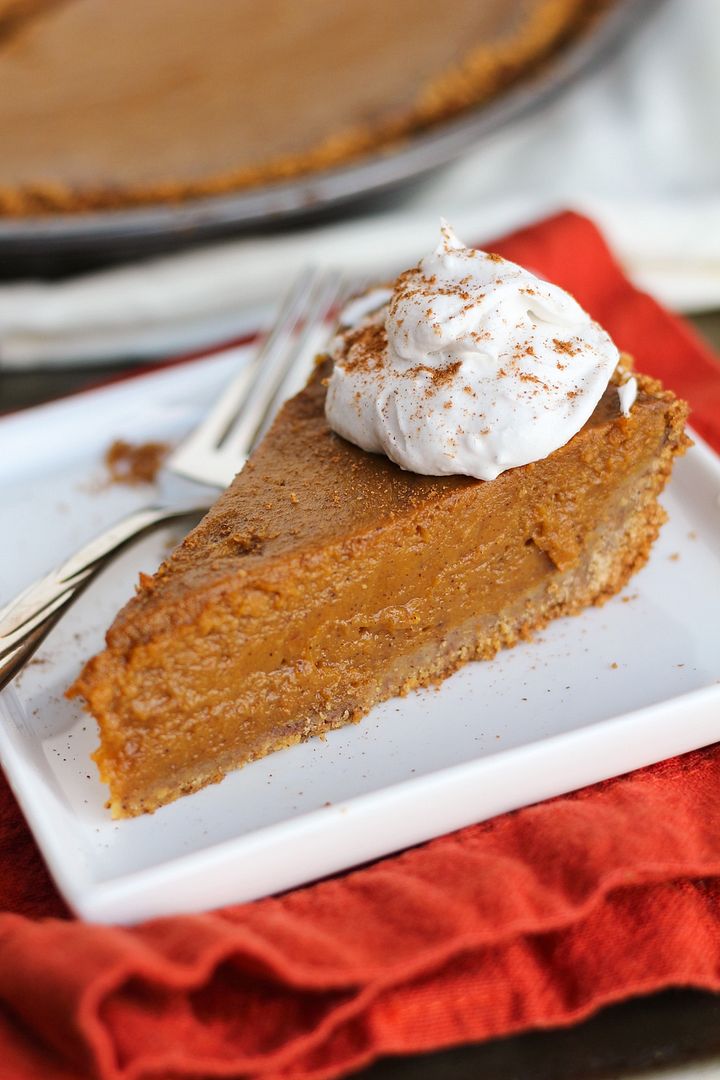
Healthy vegan pumpkin pie

For a topping, I made a batch of coconut whipped cream, which is a great vegan alternative to traditional whipped cream!  To make it, you basically put a can of coconut milk in the fridge for a while so that the cream separates from the liquid, then you scoop out the coconut cream and whip it in a chilled bowl until it's fluffy.  It doesn't need much sweetener but I added a tiny bit of powdered sugar and vanilla extract to mine.  It tastes amazing and the slight coconut flavour really complements pumpkin pie!  Oh She Glows has a great tutorial for making whipped cream if you've never tried it before!
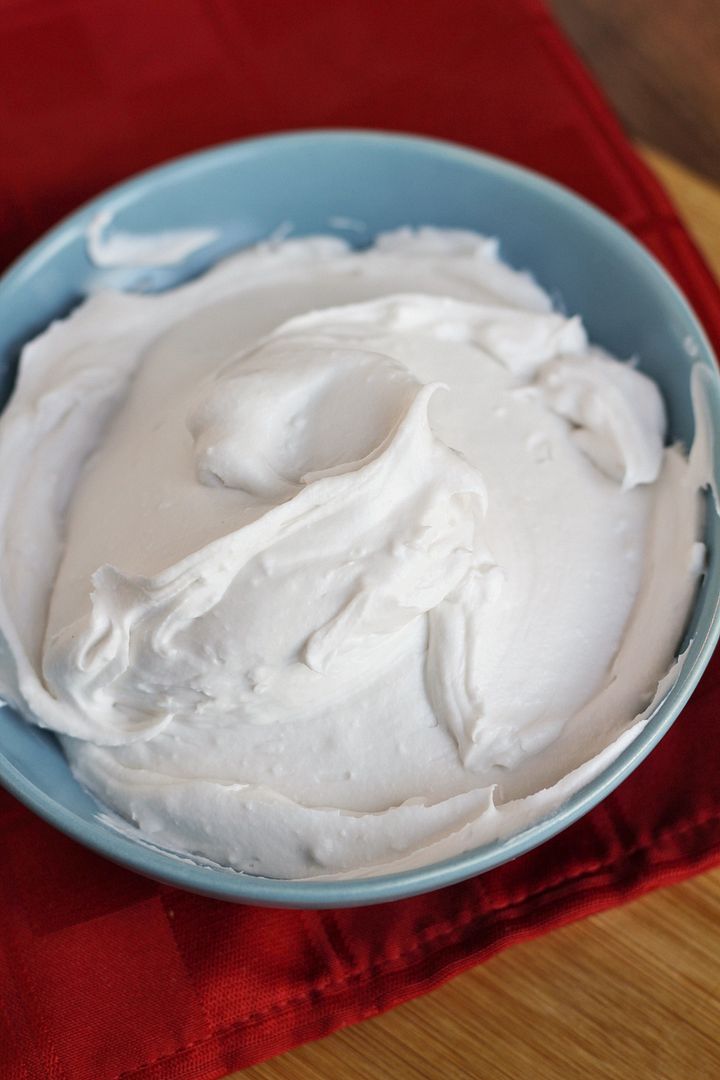
Coconut whipped cream

I was worried that either the taste or texture of this pie wouldn't turn out right but it turned out so much better than I'd even hoped!  It had a really nice bold pumpkin flavour from all the spices and addition of molasses (you can cut back if you don't like a lot of spice though!), the filling set perfectly and was smooth and creamy, and the crust sort of softened but stayed firm.  I won't say that it tastes exactly the same as a traditional pumpkin pie, but we both loved this and will likely be making it again soon!

With (Canadian) Thanksgiving quickly approaching, this would be a great dessert if you'll have any vegans at the table, or just want a lighter option after a big meal!
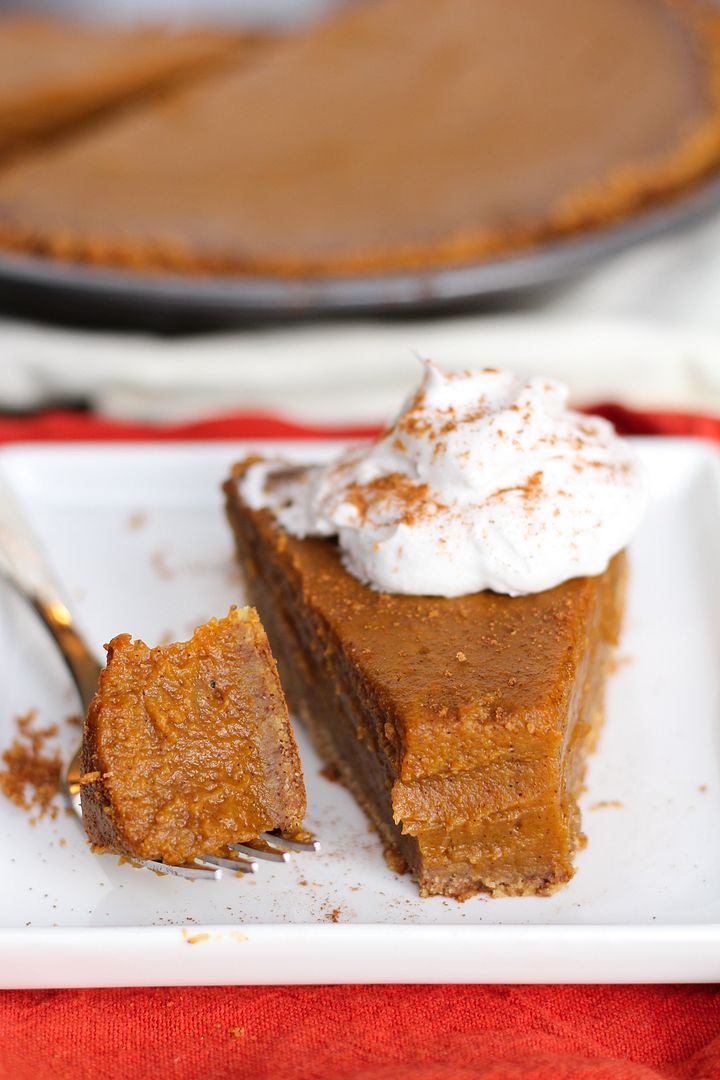
Healthy vegan pumpkin pie

Vegan Pumpkin Pie

Recipe inspired by and adapted from several sources, including Vegetarian Times, Minimalist Baker, and Oh She Glows

Makes one 9-inch pie

Ingredients:

For the Crust:
10 sheets of low-fat graham crackers (about 1.5 cups of crumbs)
1 teaspoon cinnamon
1/4 cup melted organic coconut oil

For the Filling:
2 cups canned pumpkin puree (not pumpkin pie filling)
1 cup unsweetened almond milk
3-1/2 tablespoons cornstarch
1/3 cup brown sugar
1/4 cup pure maple syrup
1 tablespoon molasses
1 teaspoon vanilla extract
1-1/2 teaspoons cinnamon
1/2 teaspoon ground ginger
1/4 teaspoon nutmeg
1/4 teaspoon sea salt

Directions:

Preheat oven to 350°F.  Lightly spray a 9” pie pan with non-stick cooking spray.

Pulse graham crackers in a food processor until they form fine crumbs. Transfer to a bowl and mix in the cinnamon with a whisk or a fork.  Add the melted coconut oil and mix together (I use a fork) until well combined.  Pour crumb mixture into the prepared pie pan and press evenly across the bottom and up the sides to form a pie crust.  Bake in preheated oven for about 7 minutes, then remove.  Leave oven on.

For the filling, mix all ingredients together in a large bowl, whisking together until just combined.  You could do the wet and dry ingredients separately if you like but I saved bowls and just mixed everything together in one.  Pour filling over the baked pie crust, return to oven, and bake for 55-60 minutes, until set. 

Remove from oven and let cool at room temperature for at least an hour, then transfer to refrigerator and let cool for 3-4 hours or overnight before slicing and serving.

Serve with coconut whipped cream, if desired.  Follow the link for instructions on making coconut whipped cream; note that your coconut milk will need to be in the fridge the day before so plan ahead!

April 04, 2014

Peanut Butter & Jelly Baked Oatmeal

Peanut Butter & Jelly Baked Oatmeal

As a kid I used to love all the flavours of those little instant oatmeal packets that I'm sure are full of sugar and everything kids love.  Now the only instant oatmeal I'll occasionally buy comes from the organic aisle, but I need to eat at least two packages to sustain me for breakfast and even then I'll still be hungry a couple hours later.  I love making my own oatmeal on the stovetop, especially versions that are full of ooey gooey delicious things like bananas, peanut butter, or pumpkin.  Unfortunately, I don't do this often as I'm usually in too much of a hurry or too lazy in the mornings to make anything that requires effort.

Which is why I've become obsessed with baked oatmeal lately.  Sure it requires some effort to make, but you end up with a lot of leftovers that can be stored as individual servings in the fridge so all you have to do later on is reheat.  Perfect for busy mornings, and also for people who don't like the mushy texture of a bowl of stovetop oatmeal, as the baked version is a lot firmer.

Peanut Butter & Jelly Baked Oatmeal

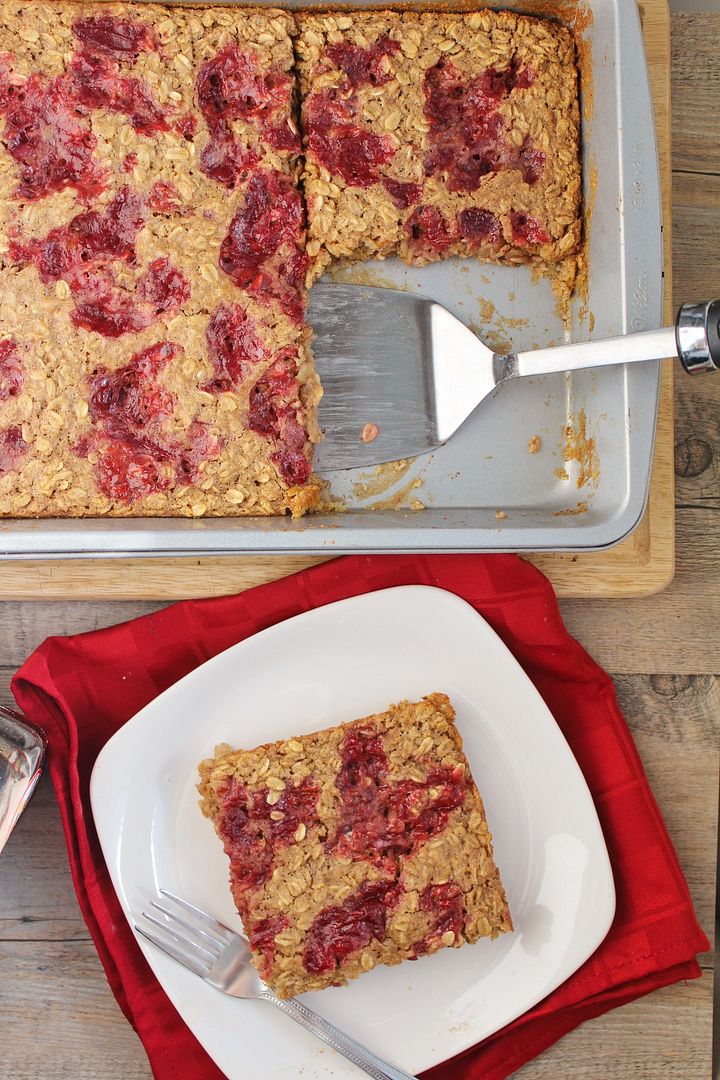
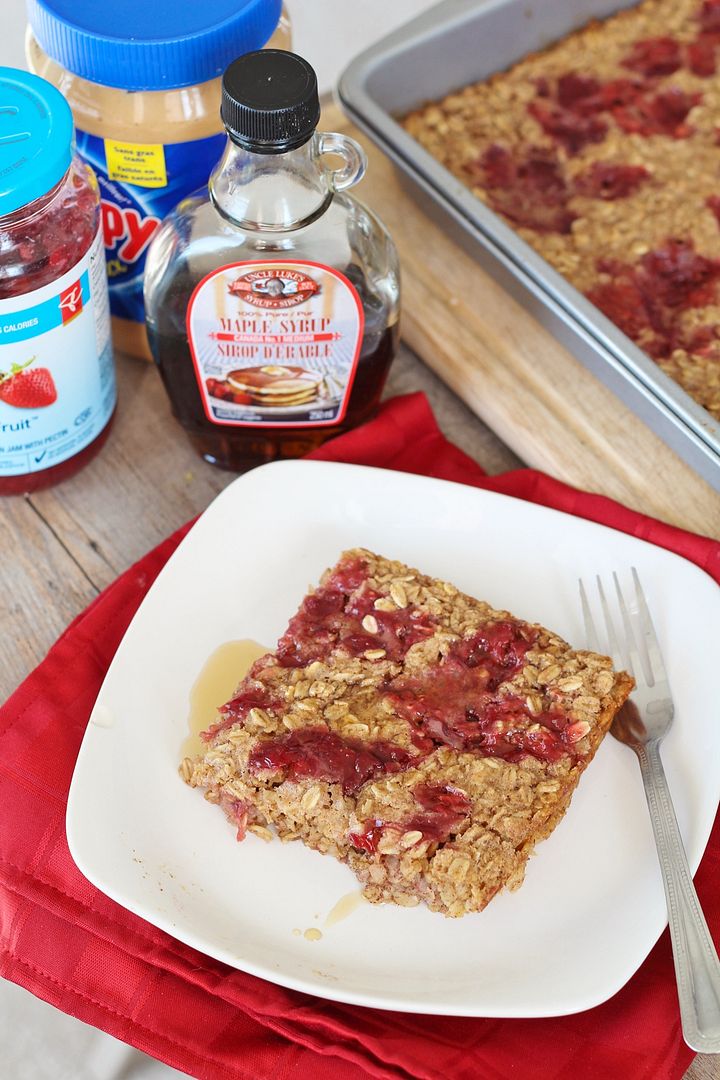
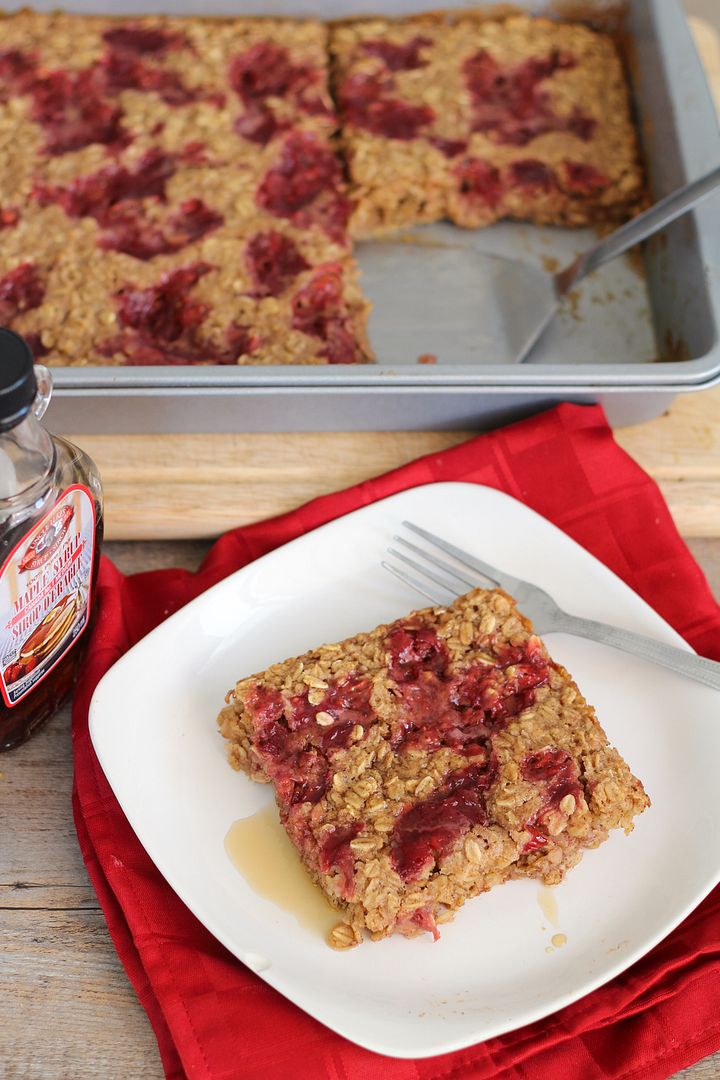
This peanut butter and jelly version of baked oatmeal is Ryan and my current favourite.  It has a strong peanut butter flavour with the perfect amount of jam to sweeten it up, and it's nice and filling.  It's pretty easy to throw together too - just add your wet ingredients (egg, milk, vanilla, peanut butter) to your dry ingredients (oats, a tiny bit of brown sugar, baking powder, cinnamon, and salt), drop some jam on top, and throw it in the oven.  The hardest part is waiting for it to be ready! 

I've made this with both grape and strawberry jam before and we love it both ways; I always try to choose a low sugar jam as I usually find regular jam way too sweet.  I consider this a reasonably healthy breakfast so I don't mind eating it for several breakfasts in a row or that Ryan now asks for it all the time!

Peanut Butter & Jelly Baked Oatmeal


Peanut Butter and Jelly Baked Oatmeal

Makes 6 servings

Ingredients:

2-1/2 cups large flake rolled oats
2 tablespoons light brown sugar
1-1/2 teaspoon baking powder
1/2 teaspoon salt
1-1/2 teaspoons cinnamon
1 large egg, lightly beaten
2 cups skim milk or almond milk
1 teaspoon vanilla extract
1/2 cup peanut butter - I usually use regular smooth peanut butter but natural would work too if you want slightly less sugar and salt
1/2 to 3/4 cup low-sugar jam – strawberry, grape, or mixed berry all work

Directions:

Preheat oven to 350°F.  Spray a 9x13 baking pan with non-stick cooking spray.

In a large bowl, whisk together the oats, brown sugar, baking powder, salt, and cinnamon.  In a separate bowl, whisk together the egg, milk, vanilla, and peanut butter. You can warm up the peanut butter for about 20-30 seconds in the microwave first to make it more liquid so it will mix in better.  Add the wet ingredients to the dry ingredients and stir just until combined. 

Spread mixture into pan and spread evenly with a spatula.  It will look like oats floating in a lot of liquid – that’s normal; the liquid will all be absorbed during baking.  Drop spoonfuls of jam evenly on top of the oatmeal.  If you like, you can leave the jam in little pockets, or take a butter knife and try to swirl the jam around to cover more surface area (that’s what I like to do).  Bake in preheated oven for 35-40 minutes, until edges are golden brown and middle is cooked through.  Divide into at least 6 servings and serve warm, with maple syrup if desired.

Leftovers can be stored covered in the fridge for a few days and reheated.

November 26, 2013

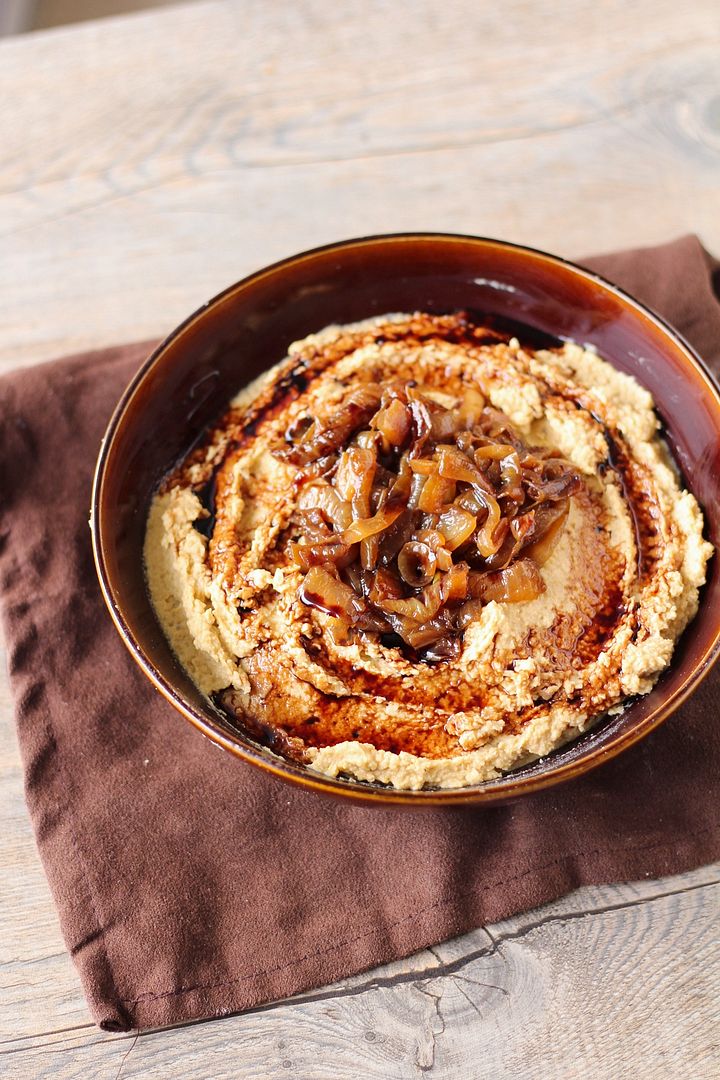
Balsamic Caramelized Onion Hummus

Balsamic Caramelized Onion Hummus

Sorry I haven't posted very much lately!  I had wanted to share a few Thanksgiving-y recipes before American Thanksgiving this week (even though we already had our Thanksgiving over a month ago, I always love an excuse to make comfort food!) but I just didn't have time.   I did, however, make this amazing balsamic caramelized onion hummus last weekend so I'm selling it as a last-minute Thanksgiving appetizer idea for my American friends, but you can and should make it any other time you want!

Balsamic Caramelized Onion Hummus

If you've read my blog for some time you know I love hummus, and especially trying new flavours of hummus.  I try to make it myself when I can because it's usually cheaper and healthier (plus you get a much bigger batch than the tiny containers from the store!), but I often buy it too, especially when a new flavour catches my eye at the grocery store.  The latest one to do so was Summer Fresh's caramelized onion hummus, which I completely devoured and then vowed to make my own version.

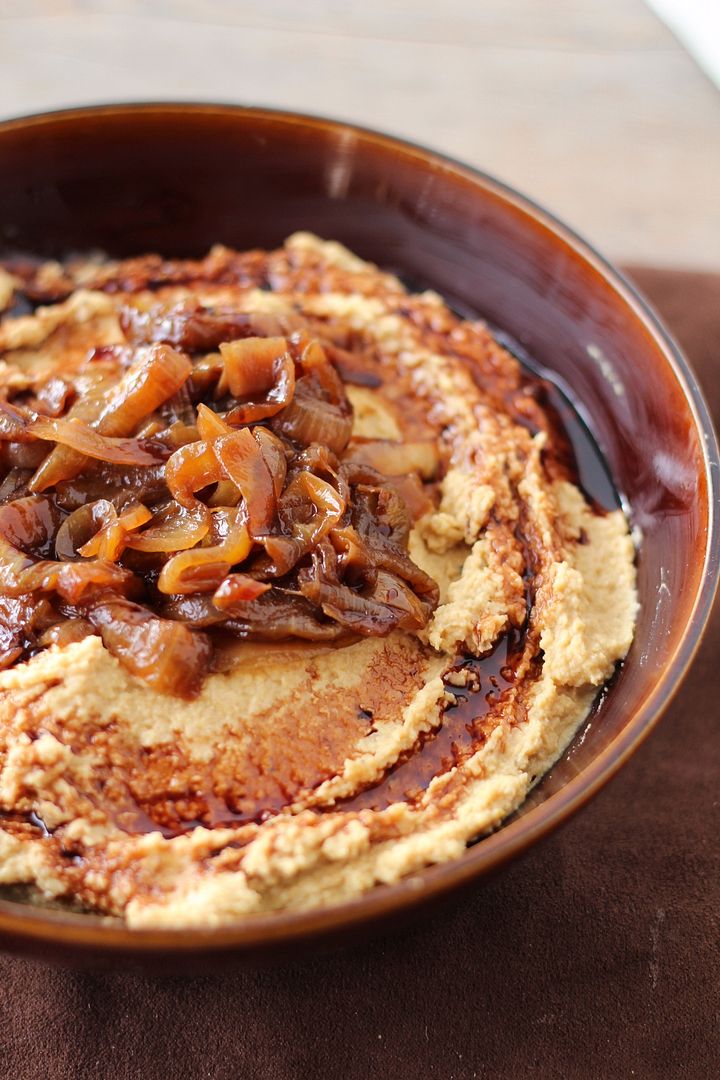
Balsamic Caramelized Onion Hummus

So I drew inspiration from the ingredient list on the container as well as a few recipes I easily found online to make my own recipe, and at the last minute decided to drizzle in a balsamic reduction to make it extra special!

Balsamic Caramelized Onion Hummus

I know I say this after every hummus I make, but I think this is my new favourite hummus!  Caramelized onions are already one of my favourite things to add to any dish, but they work especially well blended into a creamy dip and complemented with the sweetness of the balsamic reduction.  I left some caramelized onions whole too which gave the dip a nice added texture.

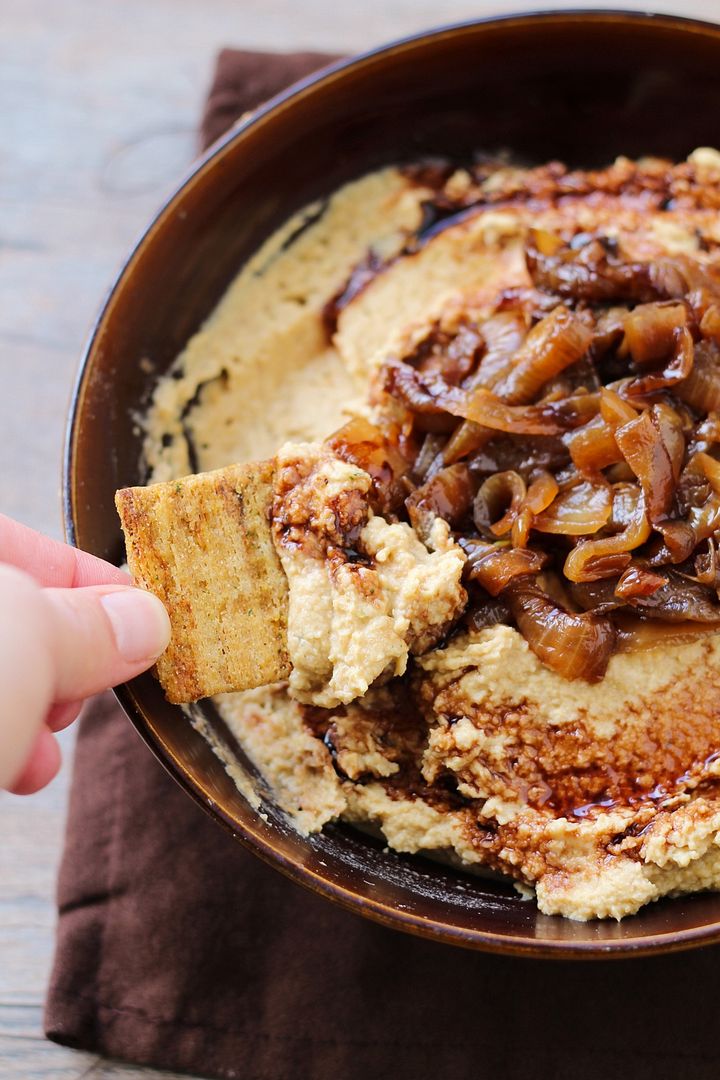
Balsamic Caramelized Onion Hummus

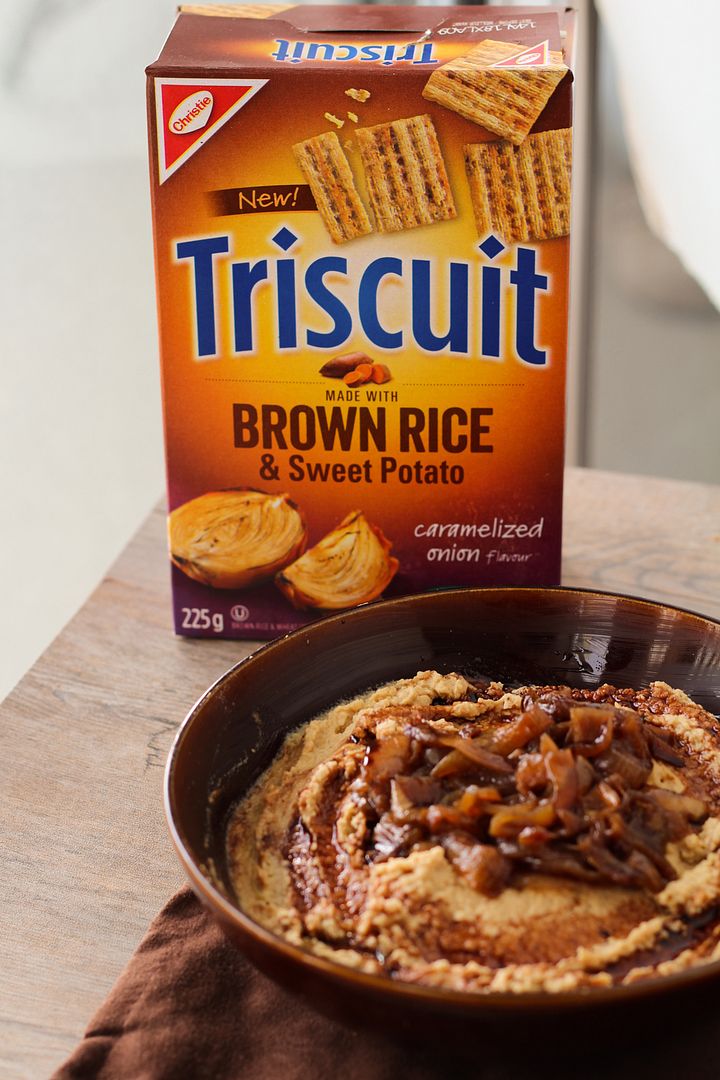
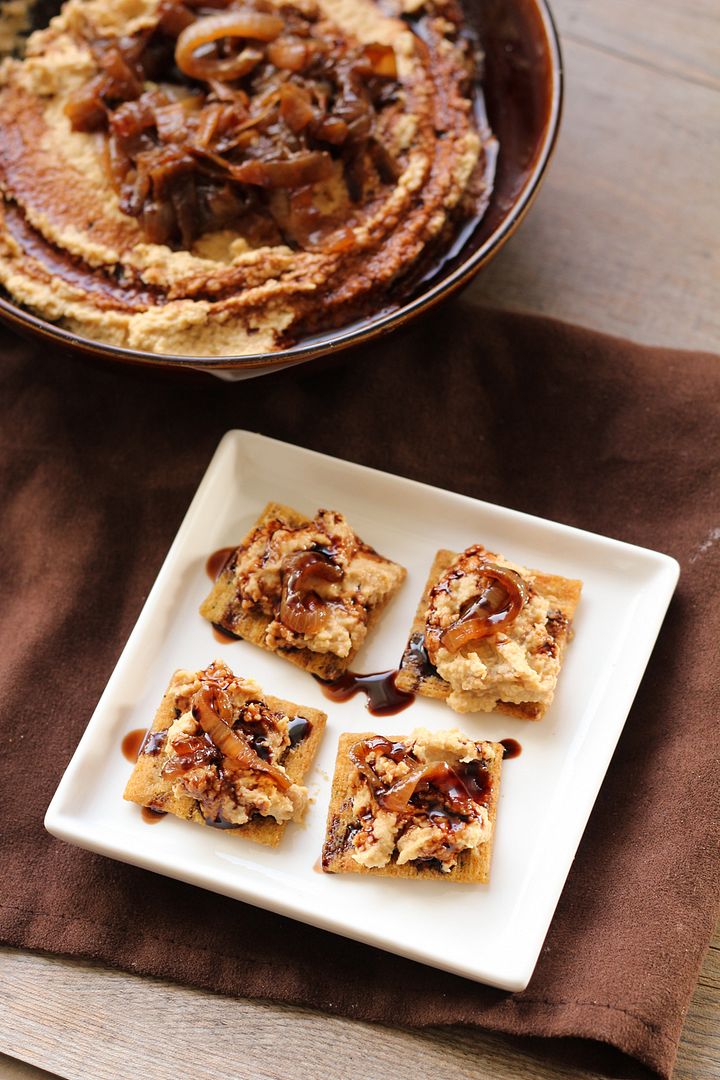
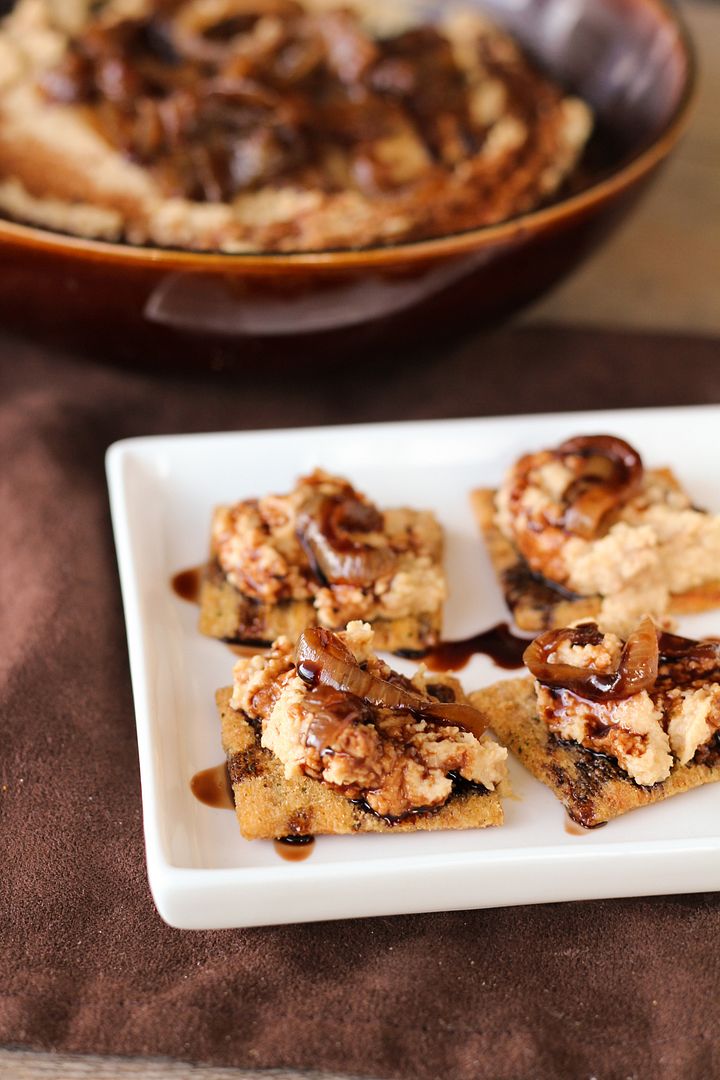
I ate mine with caramelized onion triscuits which obviously went perfectly well with the hummus.  They made great dippers, but if you want to make this a bit of a fancier appetizer, you can spread some hummus on the crackers and top them with a little caramelized onions and balsamic drizzle.
 A little more work but also a little prettier!

If you're celebrating Thanksgiving this week, I hope you have a wonderful time with family, friends, and food! 

Balsamic Caramelized Onion Hummus


Balsamic Caramelized Onion Hummus

Recipe inspired by Summer Fresh Caramelized Onion Hummus with additional inspiration from several sources including The Real Housewife, An Edible Mosaic, The Sweets Life

Ingredients:

2 teaspoons olive oil
2 medium yellow or sweet onions, thinly sliced
1-1/2 teaspoons brown sugar, divided
1/4 cup + 1 tablespoon balsamic vinegar, divided
1 (540mL) can chickpeas
3 tablespoons reserved liquid from can of chickpeas
3 tablespoons tahini
1 clove garlic, minced
1-1/2 to 2 tablespoons fresh lemon juice
1/2 teaspoon salt
1/4 teaspoon pepper

Directions:

Heat oil in a large non-stick skillet over medium heat.  Add onions and stir to coat with oil.  After about 5 minutes, season with a bit of salt.  Spread onions out evenly across the pan and let cook, stirring about every 3-4 minutes, until softened, about 20-30 minutes total.  In the last 5 minutes of cooking, add 1 teaspoon brown sugar and 1 tablespoon balsamic vinegar, and stir to coat.  Once they are caramelized to your liking, remove from pan.  Save a small amount of onions to top the hummus later, if desired.  Add the rest to the large bowl of a food processor. 

Meanwhile, reserve about 3 tablespoons of liquid from the chickpea can and drain and rinse the rest of the chickpeas.  Add 1/4 cup balsamic vinegar to a small saucepan, bring to a boil, and let simmer until reduced to a thick, syrupy liquid, about 1-2 tablespoons worth.  Remove from heat and set aside.

Add to the food processor the chickpeas, liquid from the chickpea can, tahini, garlic, lemon juice, 1/2 teaspoon brown sugar, salt, and pepper.  Process until smooth.  Adjust any ingredient amounts to your liking, if necessary.

Serve hummus topped with reserved caramelized onions and drizzle with the balsamic reduction.

September 23, 2013

Thai Coconut Red Fish Curry with Quinoa

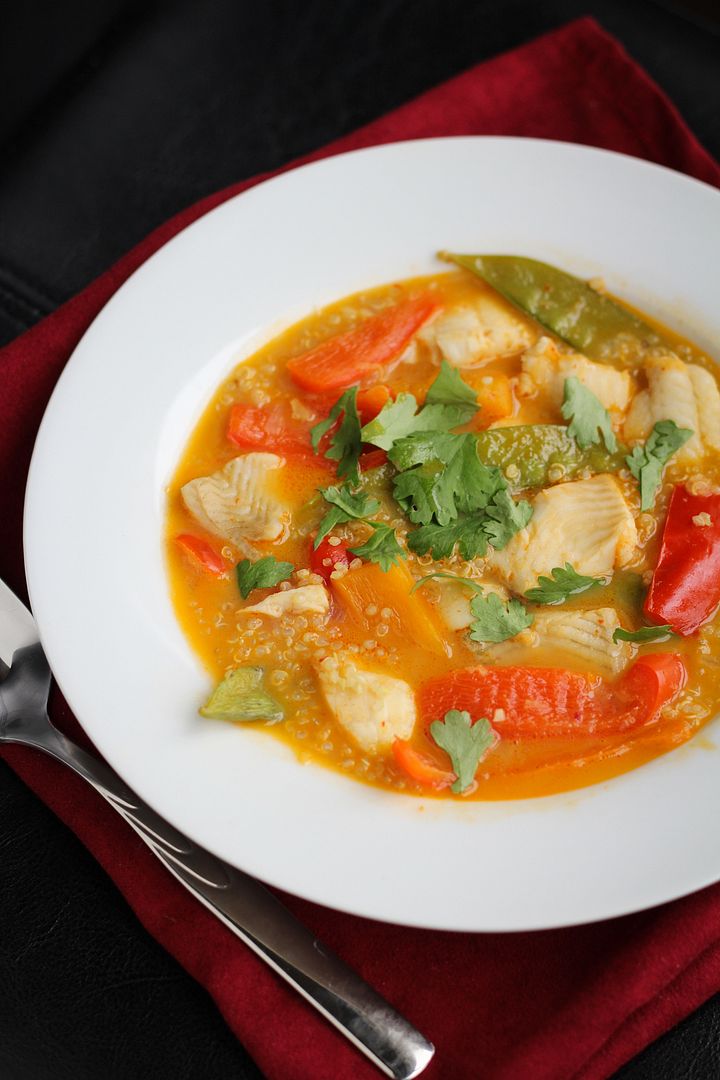
Thai Coconut Red Fish Curry with Quinoa

I'm super excited for today's post for two main reasons - first is that this is one of the tastiest dishes I've had in a while, and second is to announce that I've partnered with the Sustainable Seafood Blog Project!

The idea of the Sustainable Seafood Blog Project is to unite food bloggers and businesses interested in promoting sustainable seafood choices.  When Jessie from Life as a Strawberry asked if I'd be interested in joining, I admit that I was a tiny bit hesitant because while I've heard a lot about sustainable seafood lately and know that it's a really important issue, I didn't feel like I was well informed on it enough myself to talk about it with you guys.  But after a bit of research, I was happy to find out that there are so many resources out there to help consumers make smart choices, so while the idea of sustainable seafood might sound complicated, it's much easier than you might think!

Thai Coconut Red Fish Curry with Quinoa

We've all probably heard about the health benefits of eating fish, but many of us (myself included) are perhaps less aware of the impact certain fishing practises have had on the environment, including overfishing certain species of fish, damaging the environment through harmful fishing methods, and catching unwanted types of fish or marine life.

Without getting into too much detail or trying to sounding too preachy, the idea of sustainable seafood is to support fishing practices that will not damage our oceans or deplete marine life.  The infographic below (courtesy of Jessie) summarizes these issues in a much prettier way than I could put together!

The Sustainable Seafood Blog Project

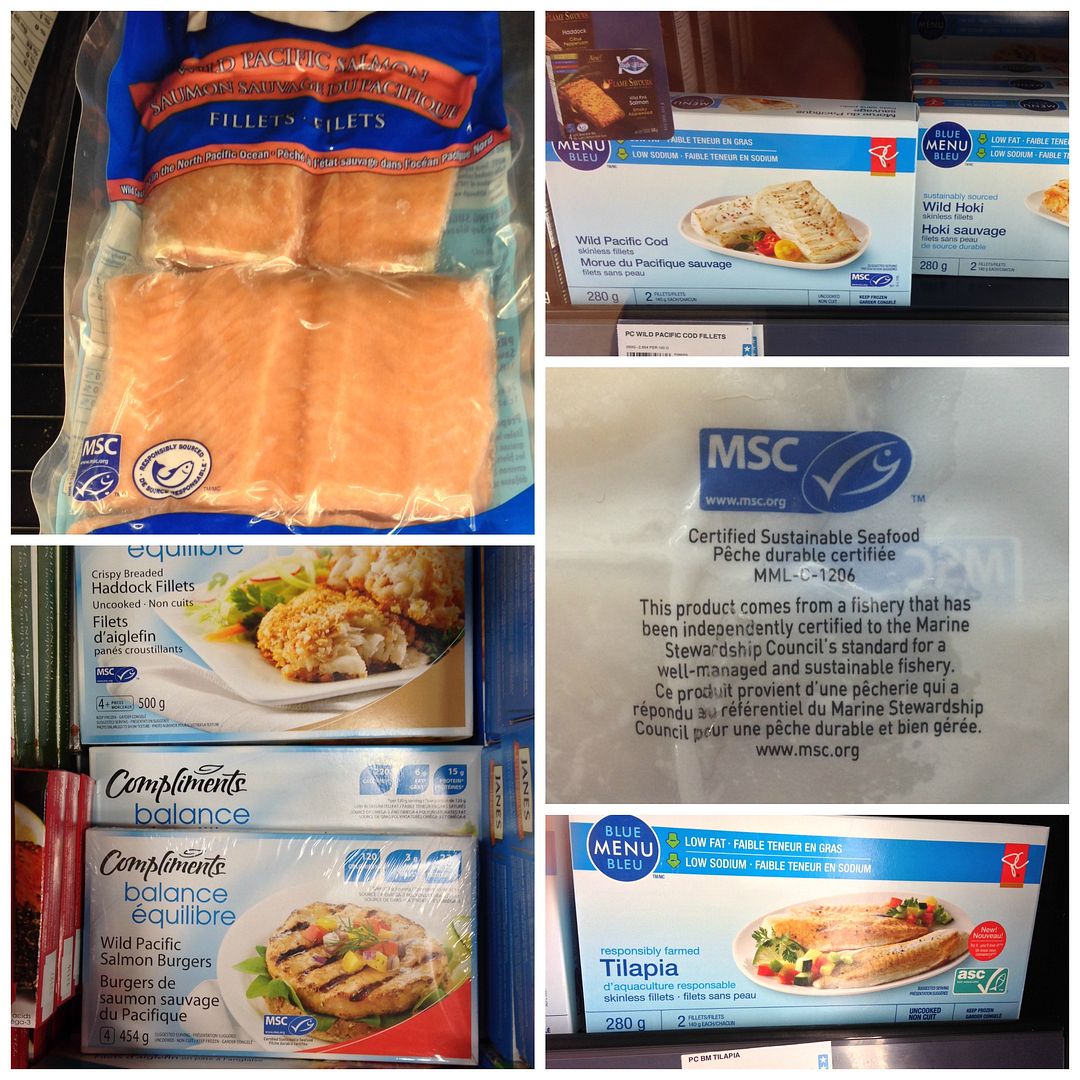
I'm happy to say that the two main grocery stores I shop at here in Ontario (Loblaw and Sobeys) have made commitments to selling sustainable seafood, and in addition, the Marine Stewardship Council has made it really easy to identify smart choices when you're shopping by just looking for their seal of approval on the product (see the blue checkmark in the images below).

I still only buy fish (or any meat) when it's on sale because it's usually expensive, but all the products pictured below were on sale and cost just as much or less than the fish without those labels, so it's nice that I didn't have to pay a fortune to choose them (unlike with organic fruits and vegetables)!

msc logo

And if you want to read more, there are tons of resources available to you, such as:

The Marine Stewardship Council
Monterey Bay Aquarium Seafood Watch
Vancouver Aquarium Ocean Wise
Sea Choice
And of course, the resources page of the Sustainable Seafood Blog Project.

Thai Coconut Red Fish Curry with Quinoa

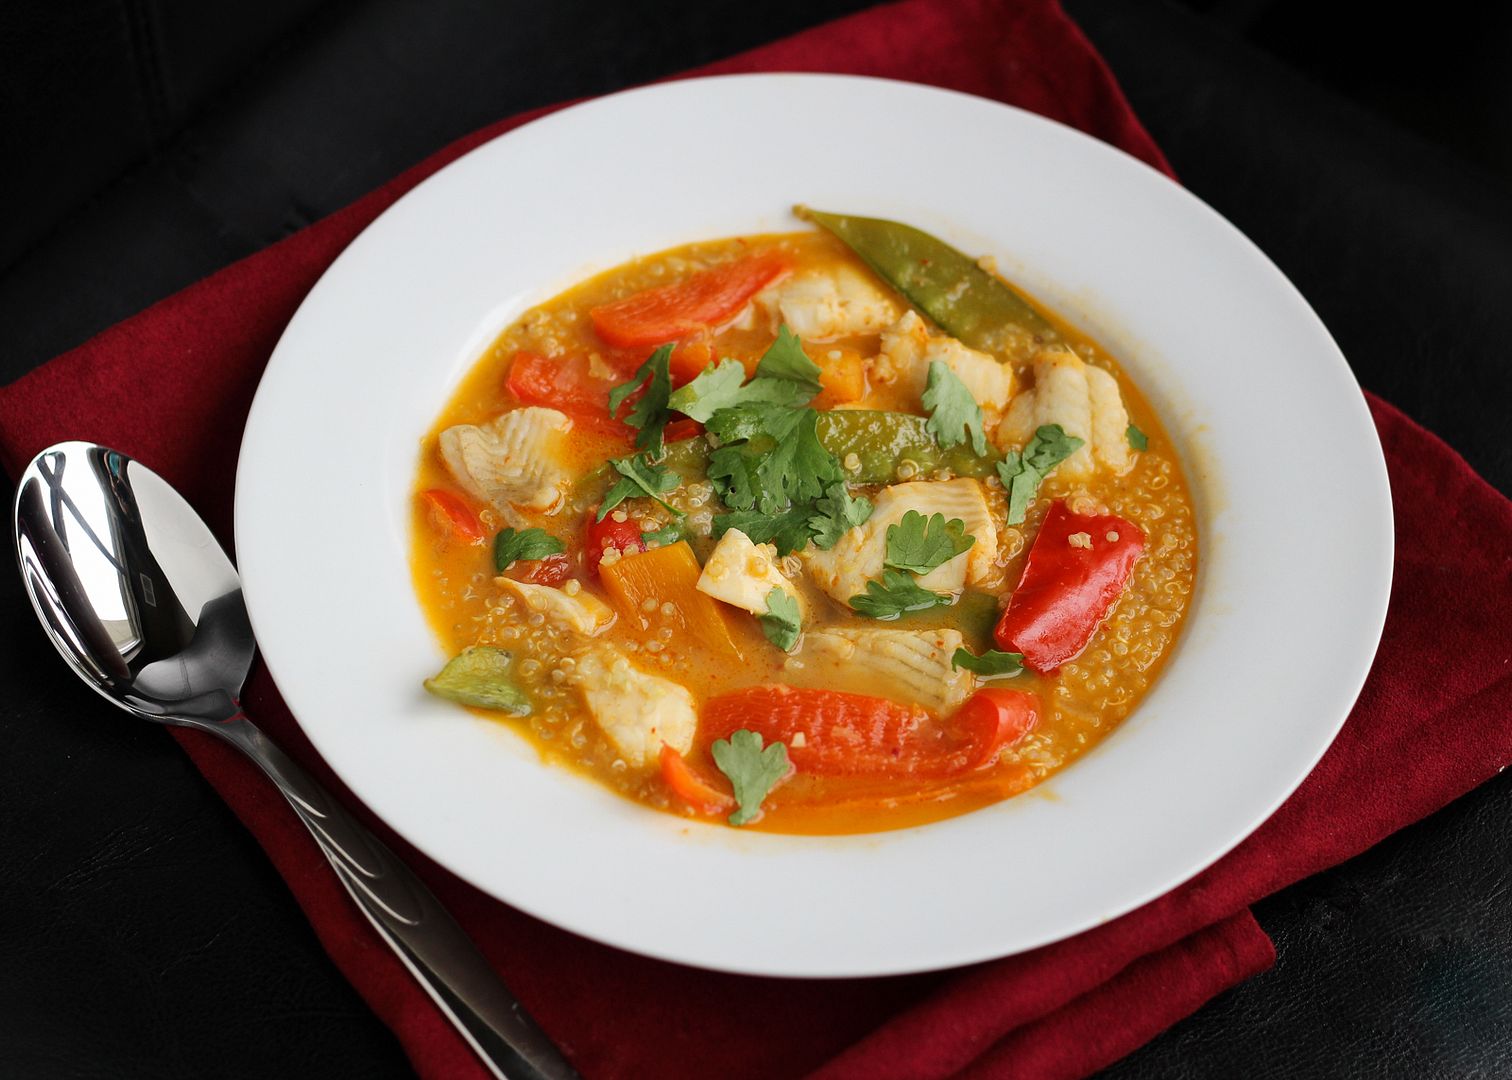
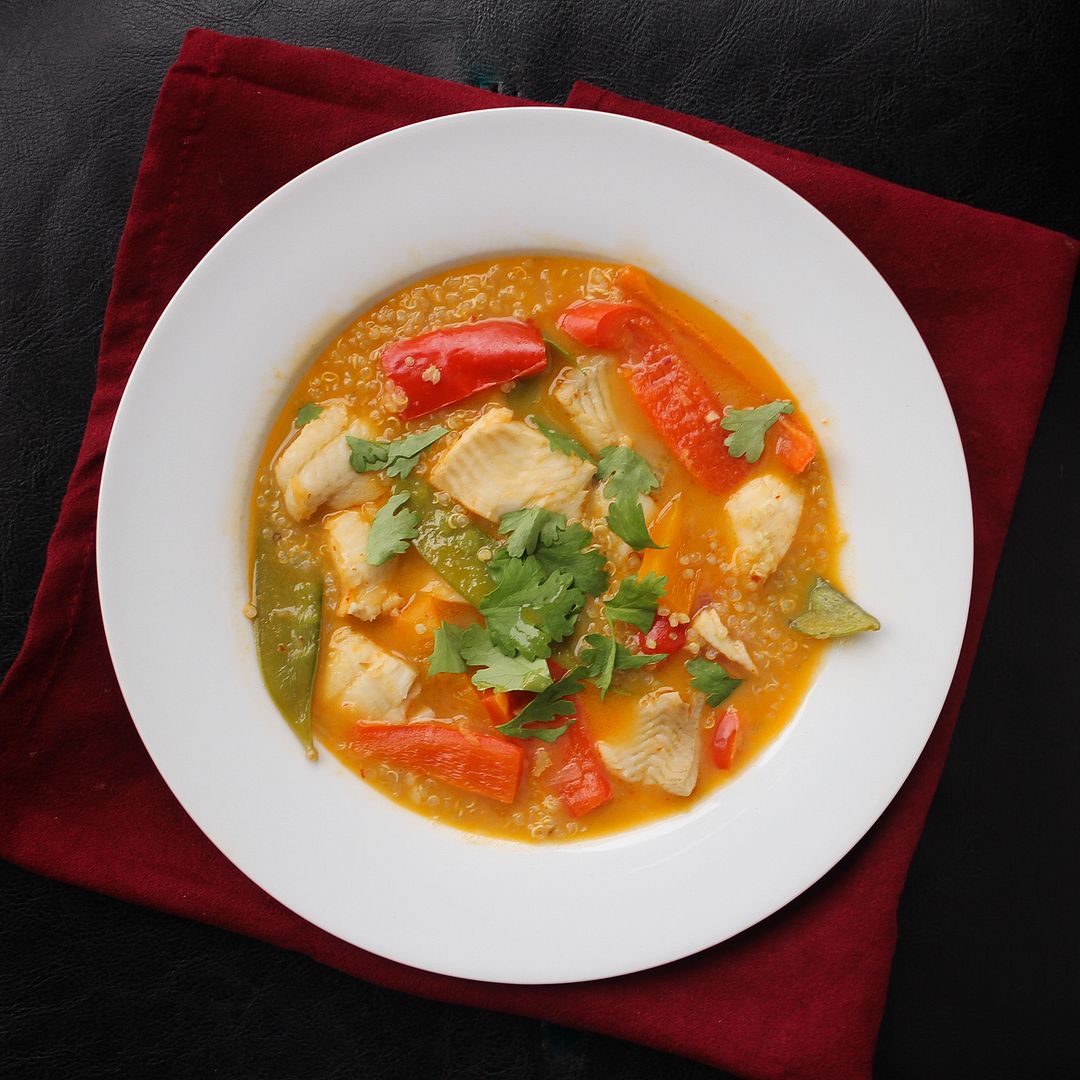
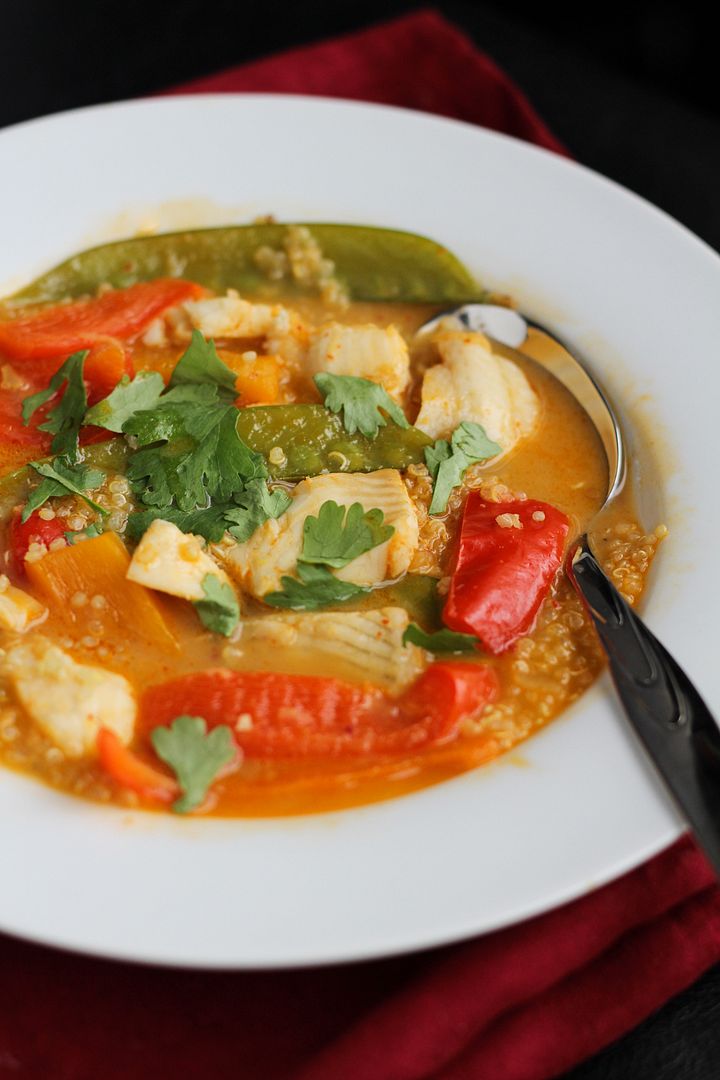
So moving on to this recipe, this curry is one of the tastiest meals I've made in a while!  It may look a little complicated at first, but is actually really easy (sound familiar?)... All you have to do is sauté some veggies, throw in a little curry paste (I used red curry paste but green or yellow would work well too!), coconut milk, and a little chicken broth, then add the fish to simmer and that's basically it.

Most curries like this would be served with white rice, but to add a little more nutrition I decided to use quinoa, which I think tastes even better.  The flavours in this dish all come together in such a great way, and it's a pretty healthful meal too, so you can feel good about eating it for lots of reasons!

And if you like seafood, please check out these fabulous bloggers who are also part of the Sustainable Seafood project and are posting more great recipes today!


Thai Coconut Red Fish Curry with Quinoa

Thai Coconut Red Fish Curry with Quinoa

Adapted from several sources, such as recipes from The Foodie Physician and Kristen’s Kitchen

Makes 4 servings

Ingredients:

~2 cups cooked quinoa
2 teaspoons canola oil
1 medium shallot, minced
2 cloves garlic, minced
1 tablespoon grated fresh ginger
1 red bell pepper, sliced into 1” long slices
1 yellow pepper, sliced into 1” long slices
1 thai chili pepper, minced (optional for added spice)
2 tablespoons red curry paste
1 cup fat-free low sodium chicken broth
1 (400mL or 13.5oz) can light coconut milk
1 tablespoon fish sauce
1-1/2 tablespoons brown sugar
2 tablespoons fresh lime juice
150g or about 5oz snow peas
4-6 white fish fillets, cut into 1” pieces – choose a mild white fish that is a sustainable option for your region, such as wild Pacific cod, Wild Alaskan or Pacific halibut, or wild haddock (Canadian)
1/2 teaspoon salt
4 tablespoons chopped cilantro (optional)

Directions:

Cook a box of quinoa according to package directions – I ended up using about 1/2 cup cooked quinoa per serving which was approximately one 200g box.

Heat oil in a large saucepan over medium-high heat.  Add shallot and garlic and cook for about 1 minute, stirring often.  Add ginger, red and yellow peppers, and chili pepper.  Let cook for 5-7 minutes, stirring occasionally, until slightly softened.  Add curry paste, stir to coat, and let cook for another minute.  Add chicken broth and coconut milk and let simmer for 8-10 minutes.  Add fish sauce, brown sugar, and lime juice, and let simmer for another 1-2 minutes.  Add fish, cover, and let simmer 5-7 minutes, until fish is cooked through (may depend on type and thickness of fish).  Season with salt.

Add about 1/2 cup quinoa to each of four bowls.  Pour curry overtop and garnish with about 1 tablespoon cilantro, if desired.  Serve warm.

July 25, 2013

Caramel Latte Cheesecake Squares for my 2nd Blogiversary (+ a Giveaway!)

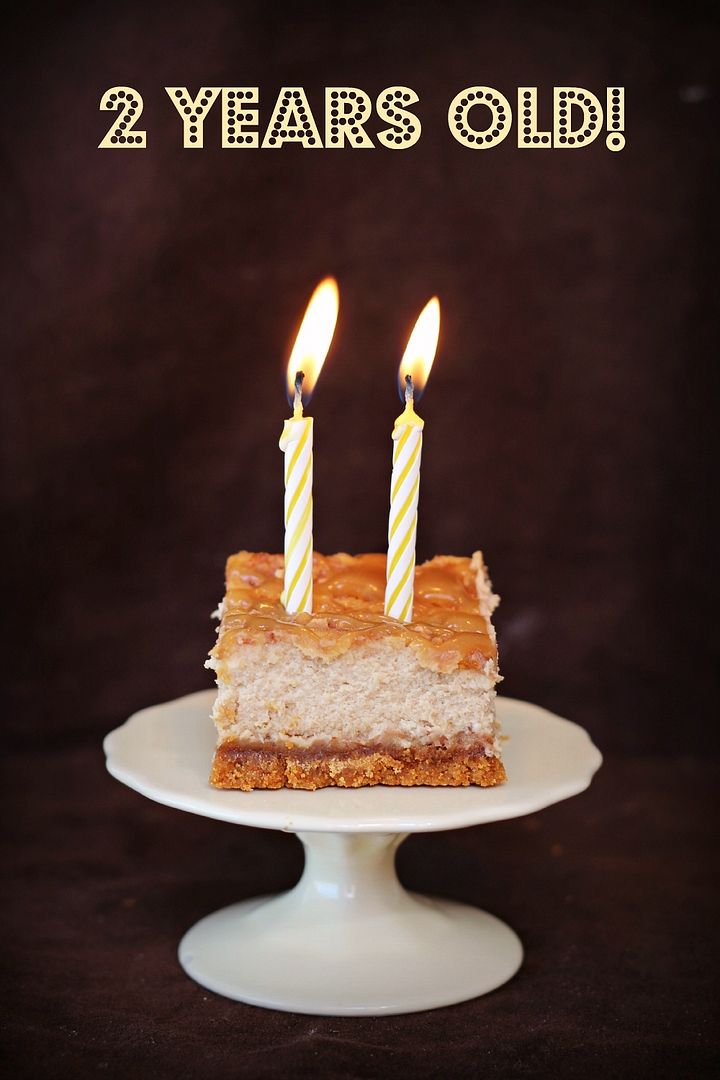
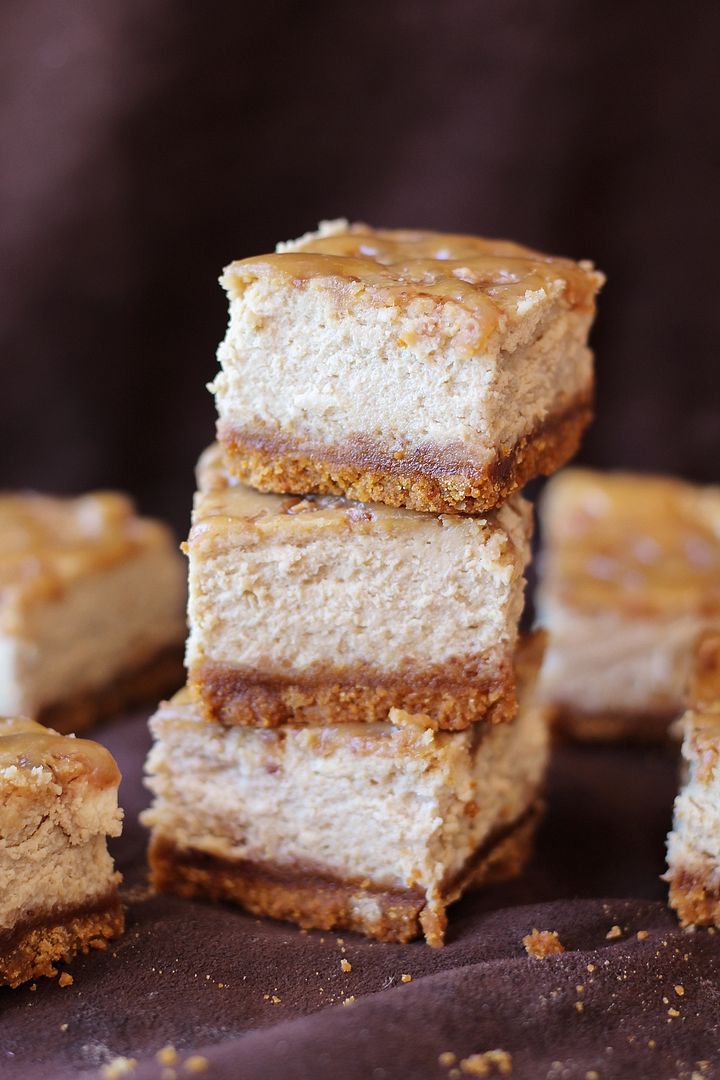
Caramel Latte Cheesecake Squares

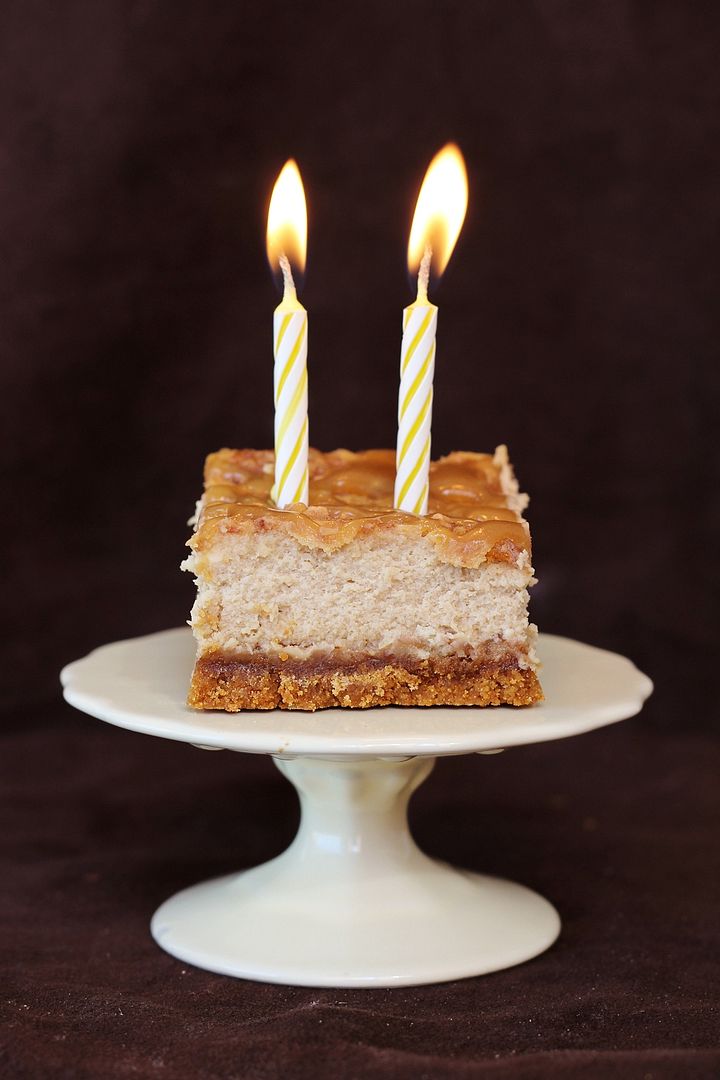
It’s my second blogiversary!  Well, technically it was yesterday, but due to a minor disaster with my planned dessert and my subsequent freak out, I’m celebrating a day late.

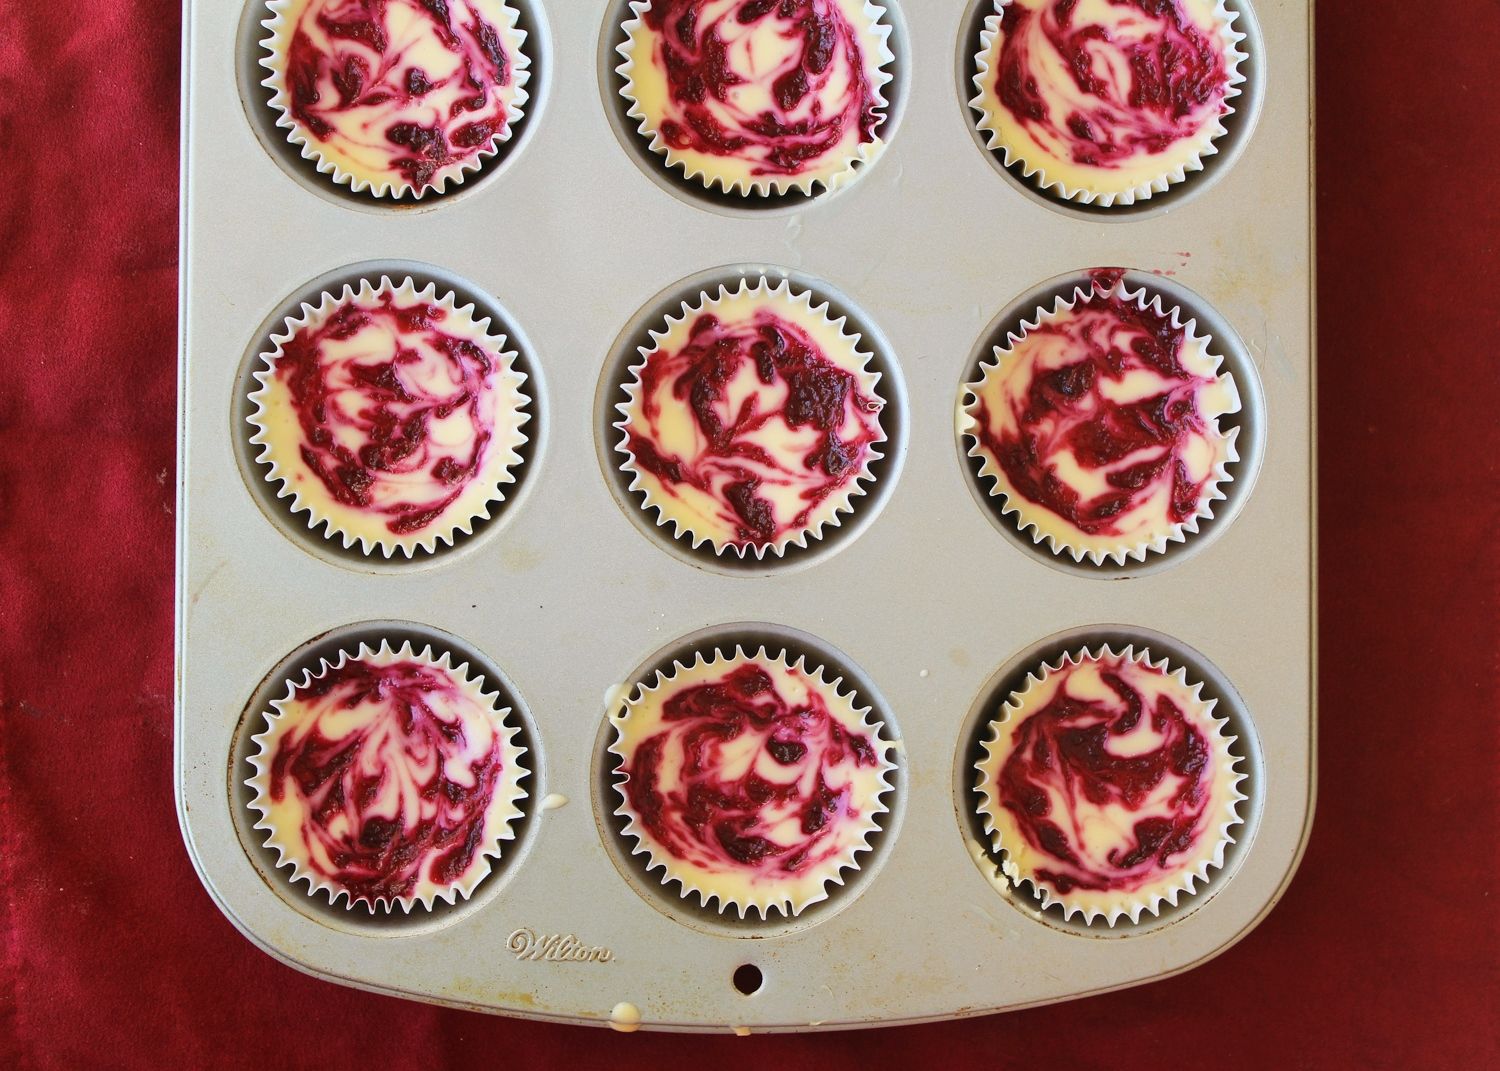
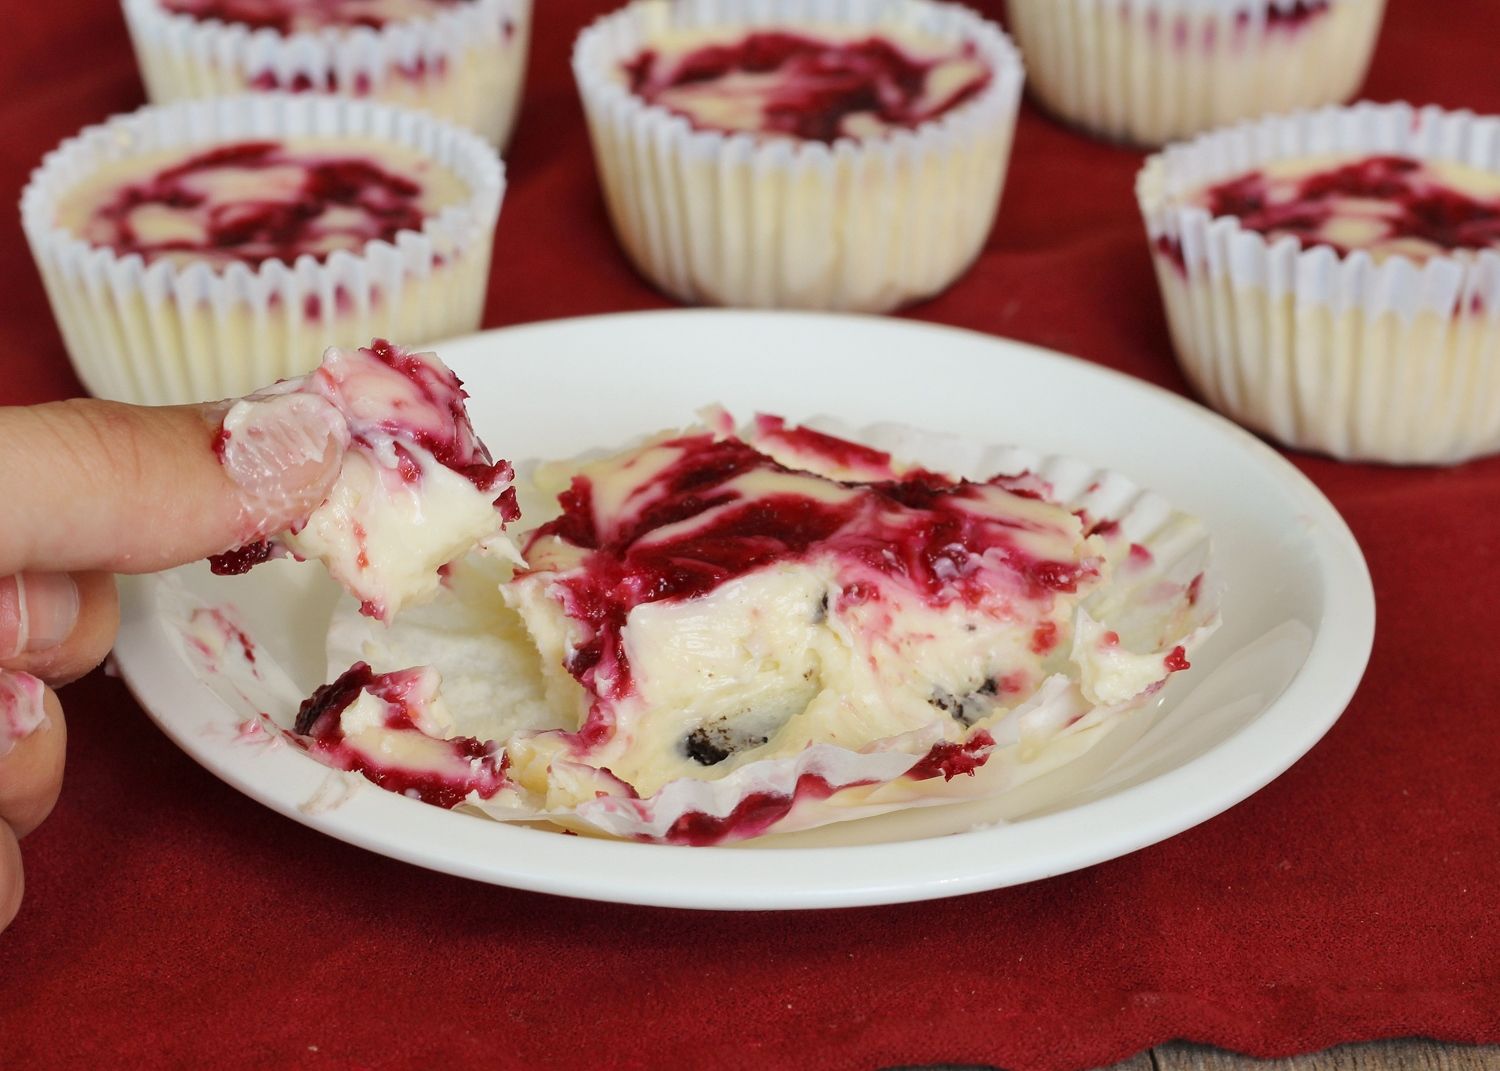
I spent a long time trying to choose the perfect dessert for a two year anniversary/birthday.  I wanted something cupcake-like because I feel like cupcakes are worthy of a celebration, but I had a hard time thinking of a recipe idea considering I’m actually not the biggest cupcake fan.  So when I remembered these raspberry swirl cheesecake cupcakes based on a Martha Stewart recipe I thought I’d found the perfect solution; mini cheesecakes baked in a cupcake pan – perfect!

cherry swirl cheesecakes

I decided to use a chocolate crust and a cherry swirl instead of raspberry, so I went out and spent a lot of money on cream cheese (cream cheese is expensive here – almost $4.50 each if you can’t get it on sale) and cherries, and went to work making my little cheesecakes Tuesday night.

They looked beautiful coming out of the oven, but when I took them out of the fridge Wednesday morning, I discovered that they were still mushy with an almost pudding-like texture (see picture below). I’m not quite sure what went wrong, but I suspect it may have had to do with the fact that I was making these late at night and somehow got it in my head that halving a recipe for 32 cheesecakes meant I should make 12. Don’t judge!

failed cheesecakes

I was so sad to not only have wasted my time and money, but that I wouldn’t have a dessert ready for my blogiversary. I considered just skipping the celebration because I’ve been super busy with school this week anyway, but I thought about it and realized that if there’s one thing that the last two years of blogging have taught me, it’s that things won’t always go as planned, but instead of giving up or getting upset, you just have to keep moving forward and things will often turn out just as well if not better (and you usually learn something along the way too).

Caramel Latte Cheesecake Squares

If I gave up every time a recipe didn’t work out the first time; if I worried too much about losing readers every time I was too busy to share a post one week; if I cried every time an anonymous person left me a mean comment; if I criticized myself every time I compared myself to bigger and prettier blogs; then I would have quit a long time ago.

The truth is I love my little space I’ve built on the internet, I love having a motivation to try new things in the kitchen every week, I love the warm and friendly comments I receive from my amazing readers, and any of the failures and criticisms I’ve experienced along the way have all helped me to learn and grow.

Caramel Latte Cheesecake Squares

So I picked myself up and went for a new dessert. Still cheesecake-themed, but using a recipe I know works as a base this time, and going with new flavours that I know I love - caramel and coffee!

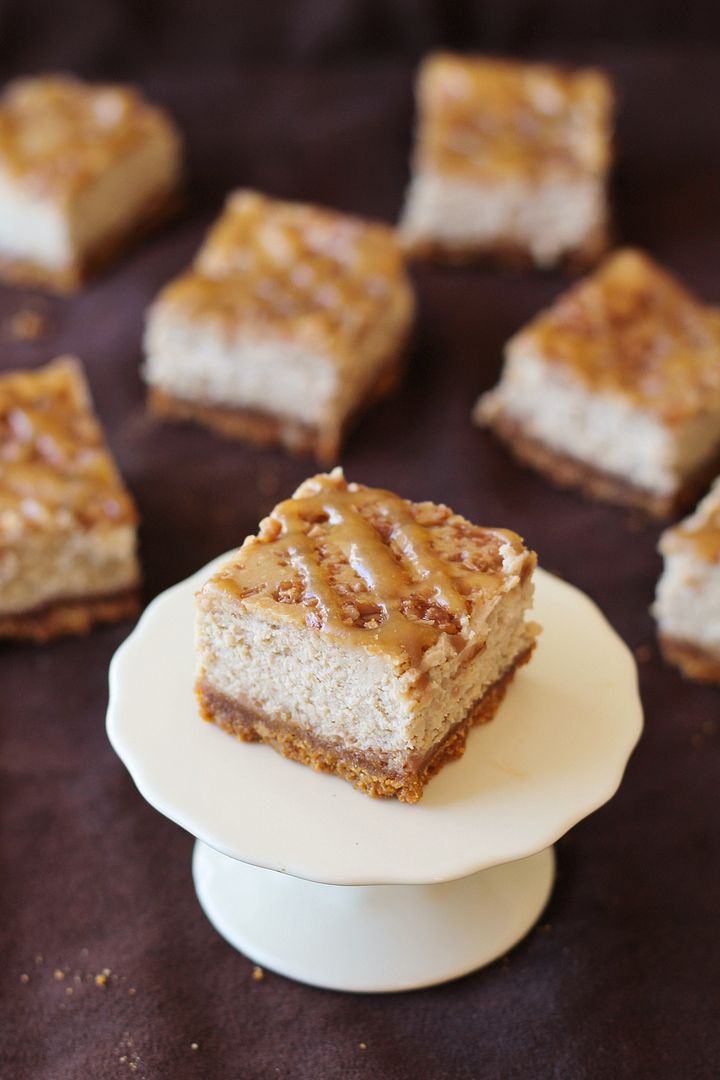
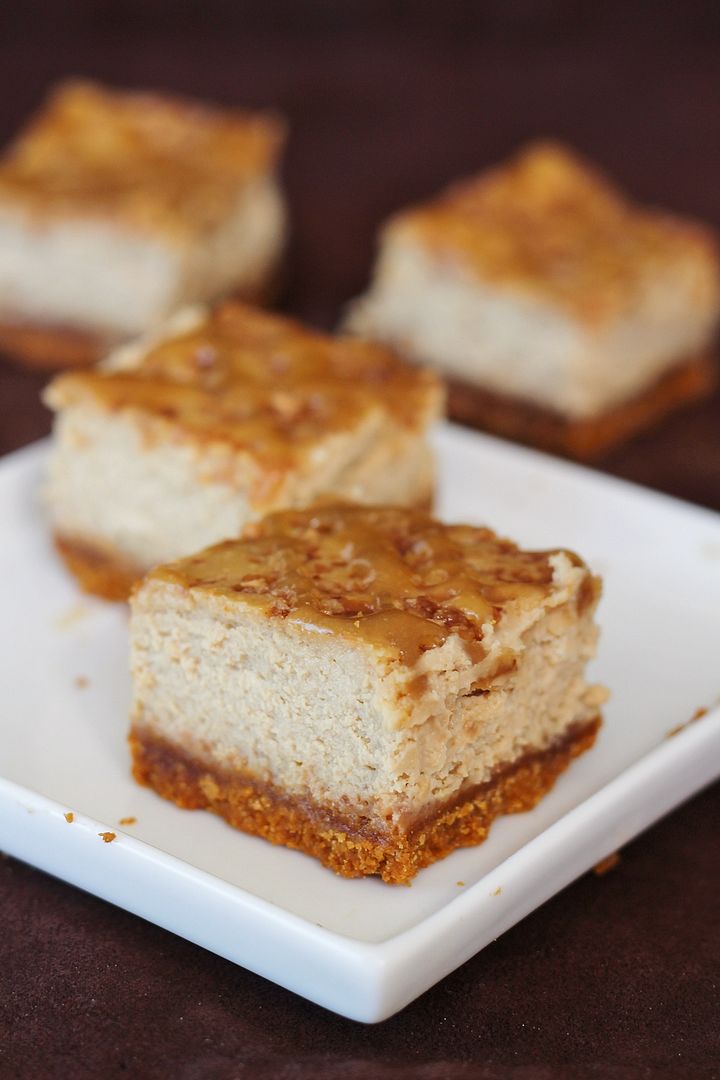
These creamy cheesecake bars have a standard graham cracker crust, but with toffee bits melted over the crust and sprinkled on top of the cheesecake, espresso mixed into the cheesecake, and a drizzle of caramel sauce overtop, giving them a lovely caramel latte flavour.  I'm so, so glad I pushed forward and made these because they may be one of my new favourite cheesecake bars!

Caramel Latte Cheesecake Squares

And what goes better with caramel latte cheesecake than a caramel latte or frappuccino – or any of your other favourite Starbucks drinks! To celebrate my blogiversary and give back to my loyal readers in a small way, I’m giving away a $30 gift card to one of my favourite places in the world, Starbucks!

I’m trying something new with this giveaway and using Rafflecopter, which many of you are likely familiar with, in an attempt to make things easier on all of us. Just use the widget below to enter and let me know if you have any problems - Canada or US entries only please.  The giveaway will close Monday July 29th, 2013, at midnight EST and I'll contact the winner soon after that, so be sure to use a valid email address/Facebook account. The e-gift card will be sent by email, so please make sure you have a working email account and access to a printer if you win!
(the rafflecopter will load immediately below this sentence; if you have a slow internet connection like the ridiculously slow one at my office today, just wait for it to appear!)

a Rafflecopter giveaway


Thanks for celebrating with me and for reading this blog – I truly appreciate all of you!

Oh and by the way, it's also my twin sister Genevieve's blogiversary at Vanilla & Spice today!  If you haven't checked out her blog before (it's full of healthy vegetarian recipes), be sure to stop by and say hi!

Caramel Latte Cheesecake Squares

Caramel Latte Cheesecake Squares

Adapted from Food & Drink and these cheesecake bars

Makes one 8x8 pan; 16-20 squares depending on how you slice them

Ingredients:
For the Crust:
1-1/2 cups graham cracker crumbs
2 tablespoons light brown sugar
2 tablespoons all-purpose flour
1/8 teaspoon salt
1/4 cup unsalted butter, melted and cooled
1/2 cup toffee bits

For the Cheesecake:
16 oz (2 bricks) cream cheese, softened
1/3 cup brown sugar
1/4 cup granulated sugar
2 large eggs
1/4 cup sour cream
2 teaspoons vanilla
1 tablespoon instant espresso
1/4 cup toffee bits

For the Caramel Sauce:
1 tablespoon unsalted butter
1/4 cup brown sugar
1 tablespoon milk
1/4 teaspoon vanilla extract

Directions:

Preheat oven to 325°F.

Line an 8-inch square baking pan with aluminum foil, leaving a few inches of foil draping over the sides of the pan (which will help with removal later).

Make the crust: Whisk together the graham cracker crumbs, brown sugar, flour, and salt in a medium bowl.  Pour the melted butter over the mixture, and stir together with a fork until all crumbs are moistened.  Transfer the mixture into the prepared pan and press evenly to form the crust.  Bake in preheated oven for 12-15 minutes, until crust is beginning to brown.  Remove from oven then pour the 1/2 cup of toffee bits in an even layer over top, pressing down lightly. Transfer to a cooling rack to cool for about 20-30 minutes.

Meanwhile, prepare cheesecake filling.  In a large bowl or bowl of an electric mixer, beat the cream cheese until smooth, about 3 minutes.  Beat in the two sugars until well combined, about 1 minute.  Beat in eggs one at a time, fully incorporating each egg into the mixture. Beat in sour cream until just combined.  Mix the vanilla extract and instant espresso together in a small bowl, then add to cheesecake mixture and mix until combined.

Pour cheesecake mixture over cooled crust, then sprinkle 1/4 cup toffee bits evenly on top (I used a bit more to fill in some gaps).  Place in middle rack of the preheated oven and bake for 40-45 minutes, until edges are set but the middle jiggles slightly (as a whole) when you shake the pan.  Transfer to a cooling rack and let cool to room temperature, about 2 hours.  Transfer to a refrigerator (I don’t cover mine) to cool completely, for at least 4 hours or preferably overnight.

Meanwhile, prepare caramel sauce by adding the butter and brown sugar to a small saucepan. Bring to a boil over medium-high heat and cook 1 to 2 minutes, until slightly thickened. Slowly stir in the milk and continue to simmer until thickened slightly. Remove from heat and stir in the vanilla extract.  Transfer to a small container and set aside until cheesecake has cooled to room temperature.  Drizzle caramel sauce over the cheesecake (I transferred mine to a small ziplock bag and snipped off the corner to drizzle with more accuracy) before refrigerating it (you could also do this step the next day after it has  been refrigerated).  *If you already have storebought caramel sauce at home and wish to use it instead, that would work fine too - I didn't have any so it was easier for me to just make some, which only takes about 5 minutes.

Slice cheesecake into bars.  Keep refrigerated.

June 25, 2013

Canada Day Cheesecake Bars

Canada Day Cheesecake Bars

Canada Day (which will be our country’s 146th birthday this year) is coming up on July 1st – yay long weekend!  I love coming up with recipes for Canada Day because there aren’t really a lot of ideas out there (especially compared to the number of red, white, and blue recipes!) so it’s easy to be creative, plus we’re lucky that our flag is fairly simple to represent using food because it has only two colours - red and white.

Canada Day Cheesecake Bars

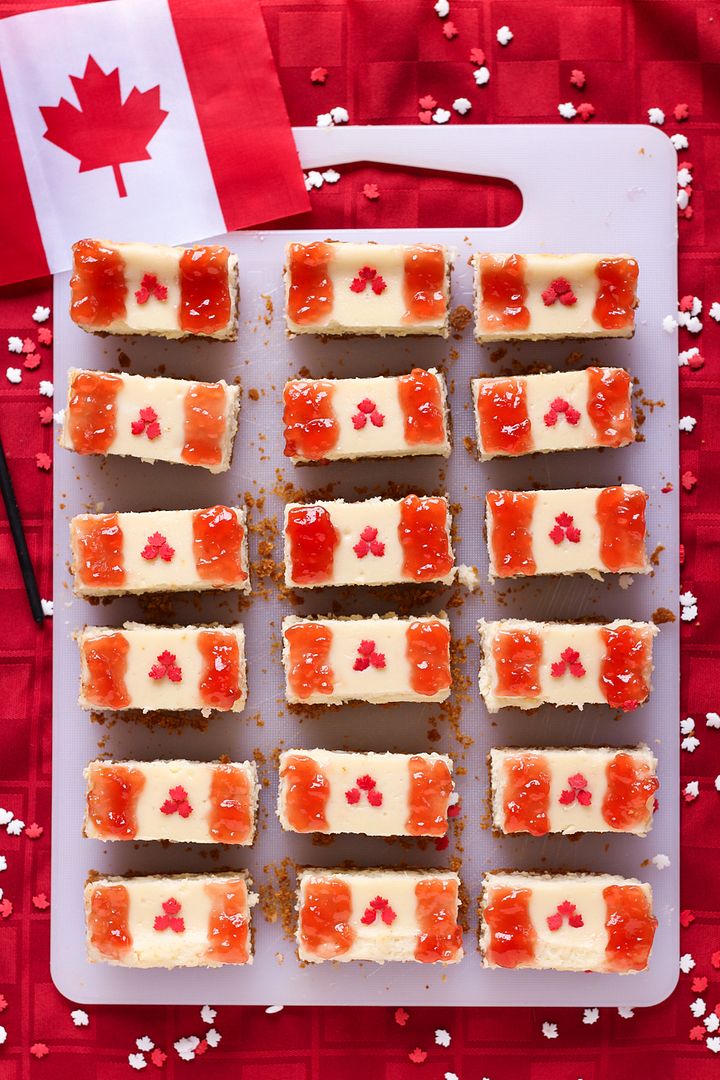
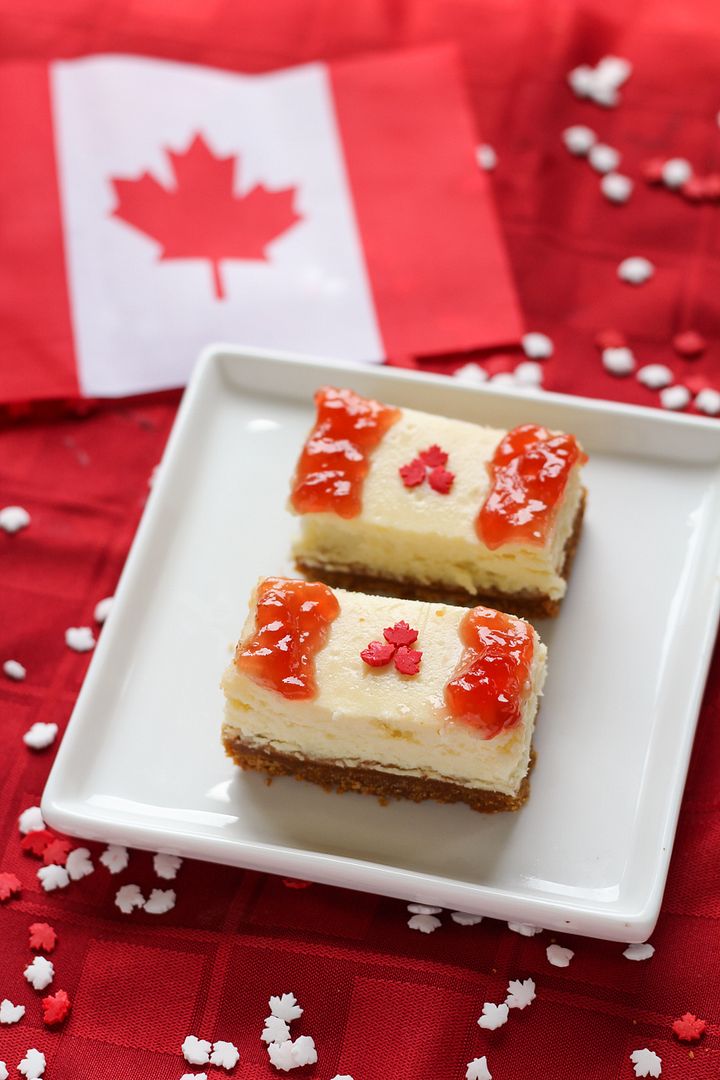
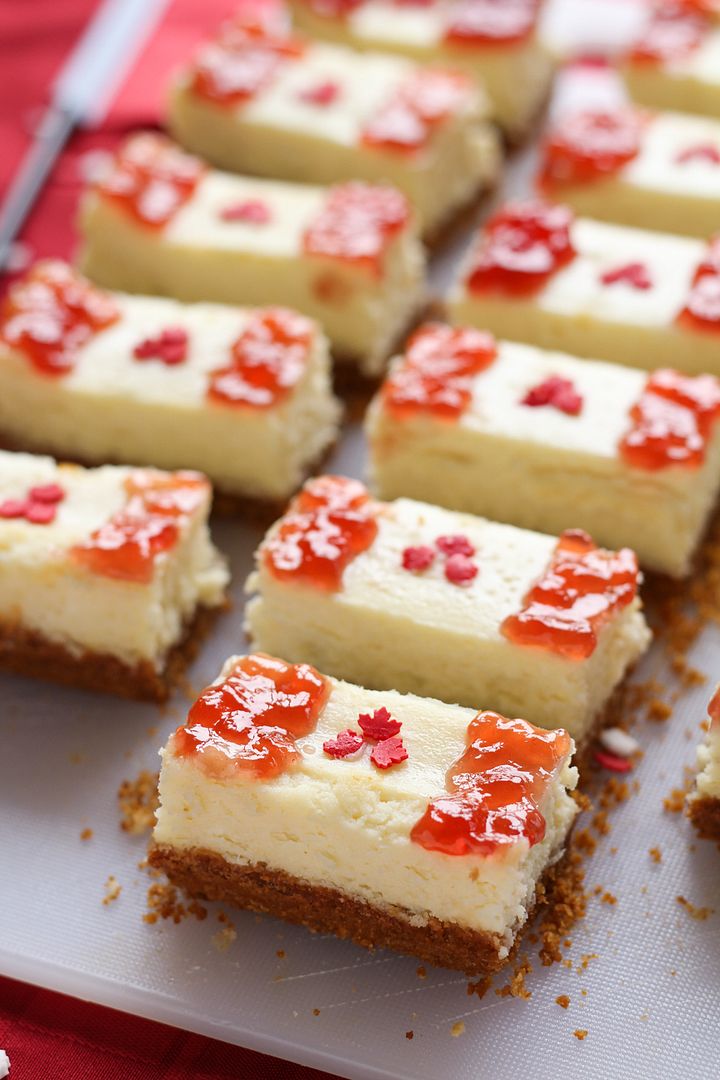
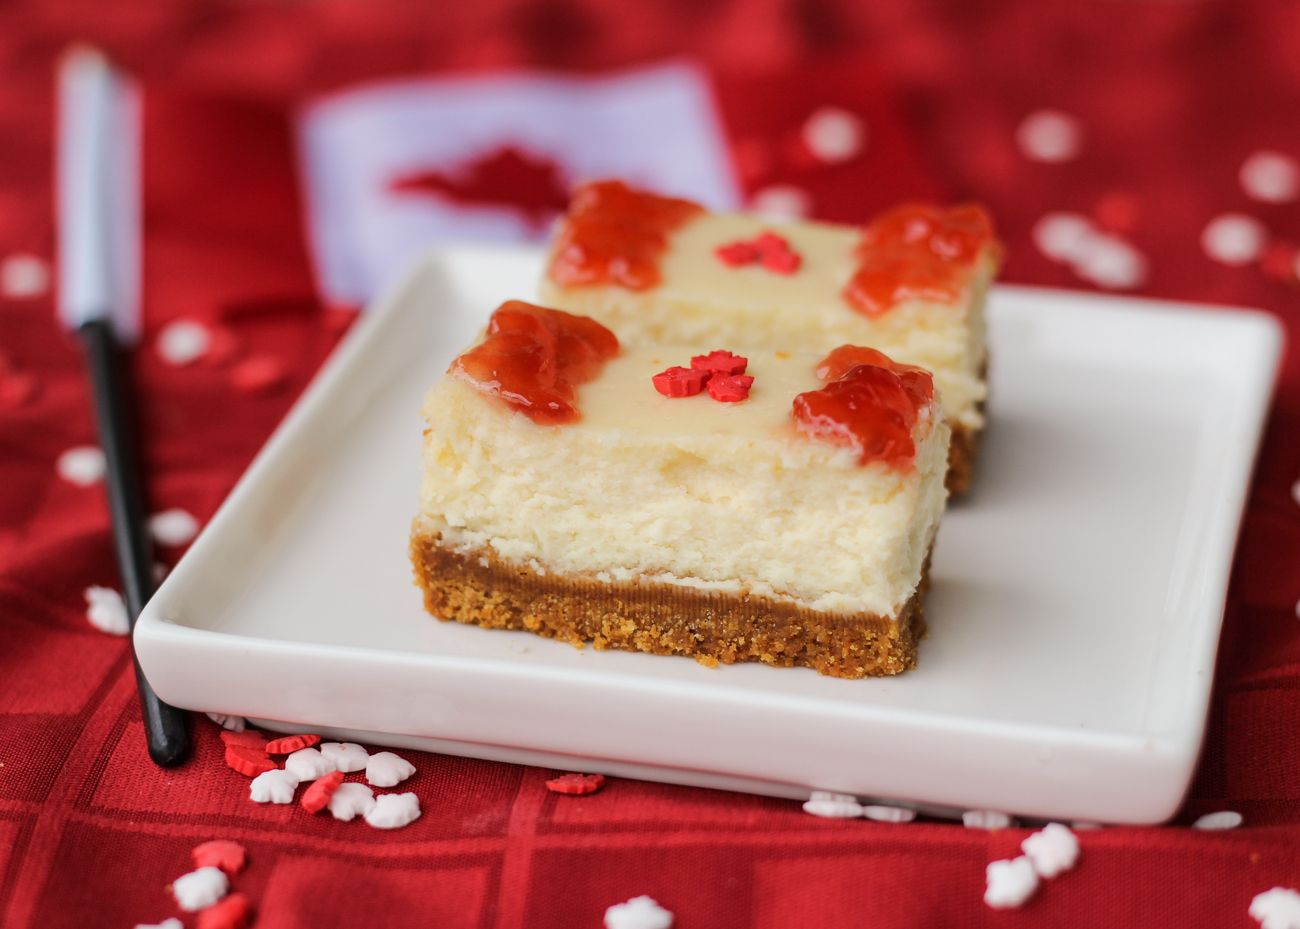
One idea I had last year but never had time to try was to make plain white cheesecake bars and top them with strawberry jam to create little Canada flags.  So I decided to give them a try this past weekend for a family get together, where I knew there would be lots of people to help me eat them all!  Plus my cousin is about to leave Canada for a few years, so Canadian flags were very appropriate!  

 I was a little behind in trying to finish and photograph these before I had to leave, so they were done in a bit of a rush, but I was so happy that they turned out just how I’d imagined in my head!
Canada Day Cheesecake Bars

The filling for these bars is plain vanilla cheesecake that’s rich and creamy (and didn’t crack at all, which I was thrilled about!).  Once I sliced it into bars, I just spread strawberry jam on the edges and placed maple leaf quins in the center to resemble the flag.  The quins (like these) are available at Bulk Barn this time of year, but if you can’t find them anywhere, you could just use more jam or another type of red sprinkle arranged in the shape of a leaf.

I got lots of compliments from my family on these bars, and I think they would be the perfect treat to bring to a Canada Day gathering this weekend!

Canada Day Cheesecake Bars

Canada Flag Cheesecake Bars

Flag idea my own; Cheesecake recipe adapted from here, here, and here

Makes one 8x8 pan; cut into 18 bars

Ingredients:

For the Crust:
1-1/2 cups graham cracker crumbs
3 tablespoons light brown sugar
2 tablespoons all-purpose flour
1/8 teaspoon salt
1/4 cup unsalted butter, melted and cooled

For the Cheesecake:
16 oz (2 bricks) cream cheese, softened
2/3 cup sugar
2 large eggs
1/4 cup sour cream
1 teaspoon vanilla

For the Topping:
Seedless strawberry jam (~1/4 cup)
Canada Day maple leaf quins (available at Bulk Barn)

Directions:

Preheat oven to 325°F.

Line an 8-inch square baking pan with aluminum foil, leaving a few inches of foil draping over the sides of the pan (which will help with removal later).

Make the crust: Whisk the graham cracker crumbs, brown sugar, flour, and salt.  Pour the melted butter over the mixture, and stir together with a fork until all crumbs are moistened.  Transfer the mixture into the prepared pan and press evenly to form the crust.  Bake in preheated oven for 12-15 minutes, until crust is beginning to brown.  Transfer to a cooling rack to cool for about 30 minutes.
Meanwhile, prepare cheesecake filling.  In a large bowl or bowl of an electric mixer, beat the cream cheese until smooth, about 3 minutes.  Beat in the sugar until well combined, about 1 minute.  Beat in eggs one at a time, fully incorporating each egg into the mixture. Beat in sour cream and vanilla until fully combined, about 30 seconds.

Pour mixture over cooled crust and return to oven.  Bake for 35-40 minutes, until edges are set but the middle jiggles slightly (as a whole) when you shake the pan.  Transfer to a cooling rack and let cool to room temperature, about 2 hours.  Transfer to a refrigerator (I don’t cover mine because I find the cheesecake ‘sweats’) to cool completely, for at least 3 hours or preferably overnight.

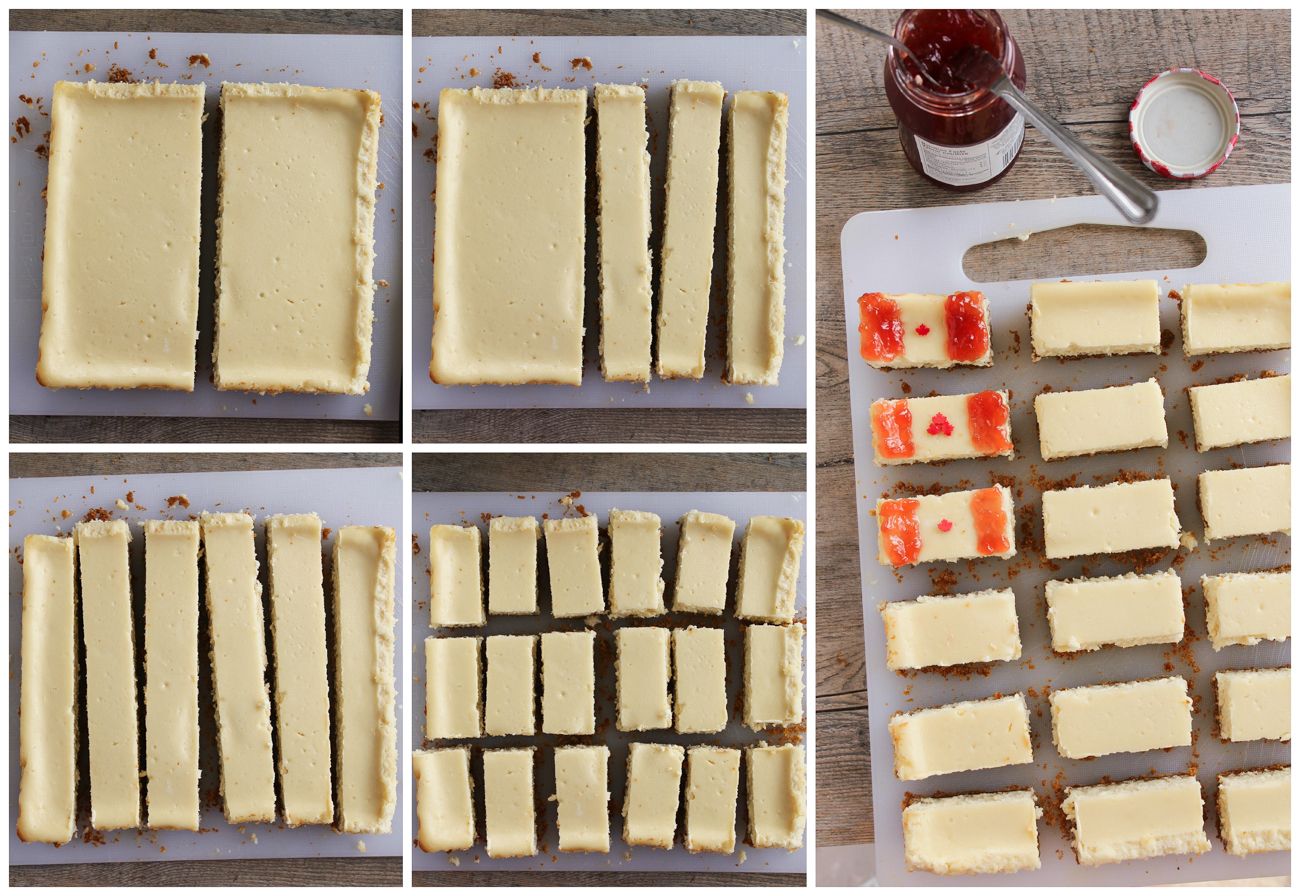
On the day you will serve the cheesecake bars, use the aluminum foil to lift the cheesecake out of the pan, then slice them into 18 small rectangles (6 columns and 3 rows - see picture below).  Stir jam first, then use a small butter knife or spoon to spread strawberry jam on the edges of each rectangle to resemble the Canada flag.  Use enough jam so it shows up well but not too much that it will fall off – you’ll get a feel for what amount to use after a couple tries.  Place three Canada leaf quins in the center to complete the flag (or if you don’t have any, you could use a blob of jam or red sprinkles if you can shape it into something that resembles a maple leaf!).  Keep bars refrigerated until ready to serve.  Don’t decorate them more than a day ahead.

Canada Day Cheesecake Bars

June 14, 2013

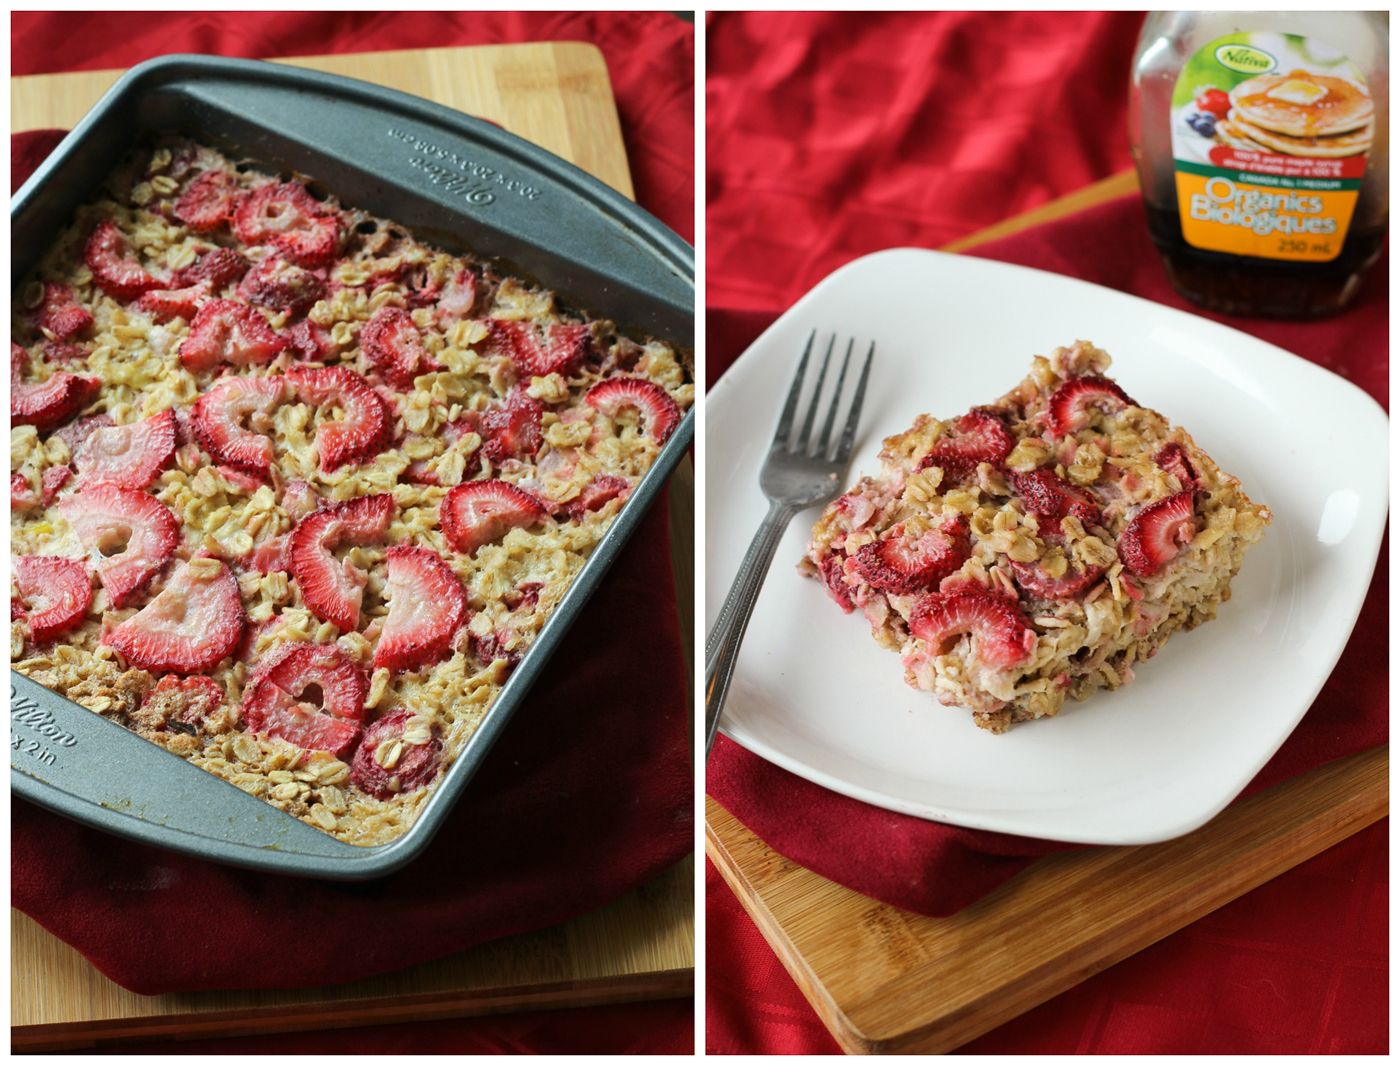
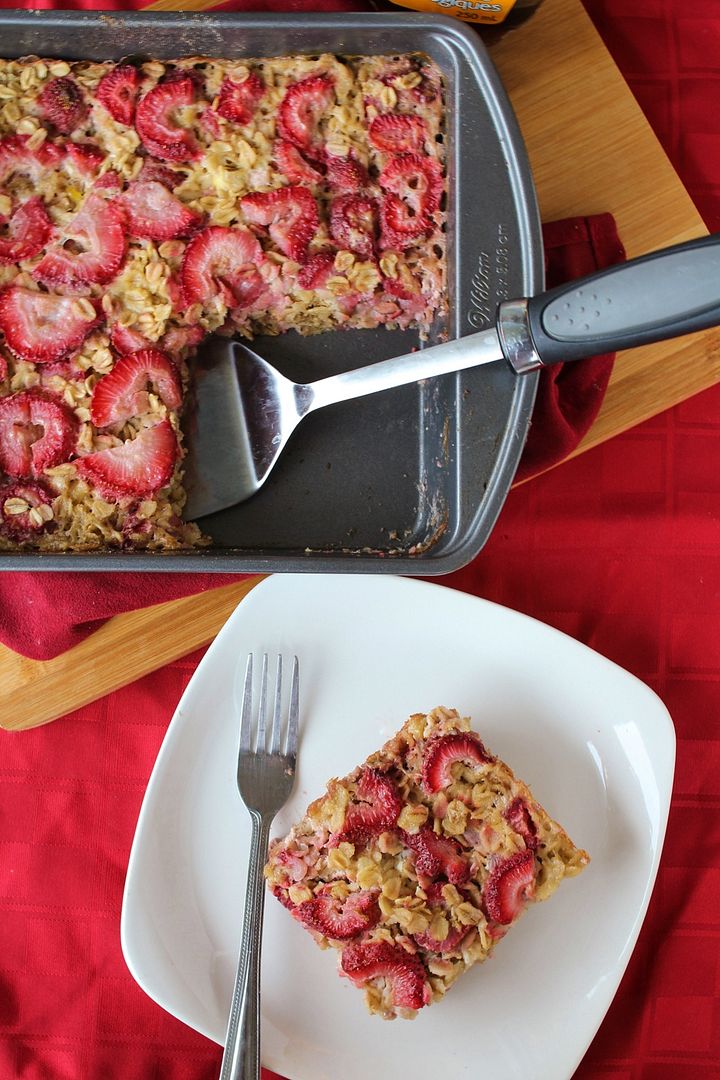
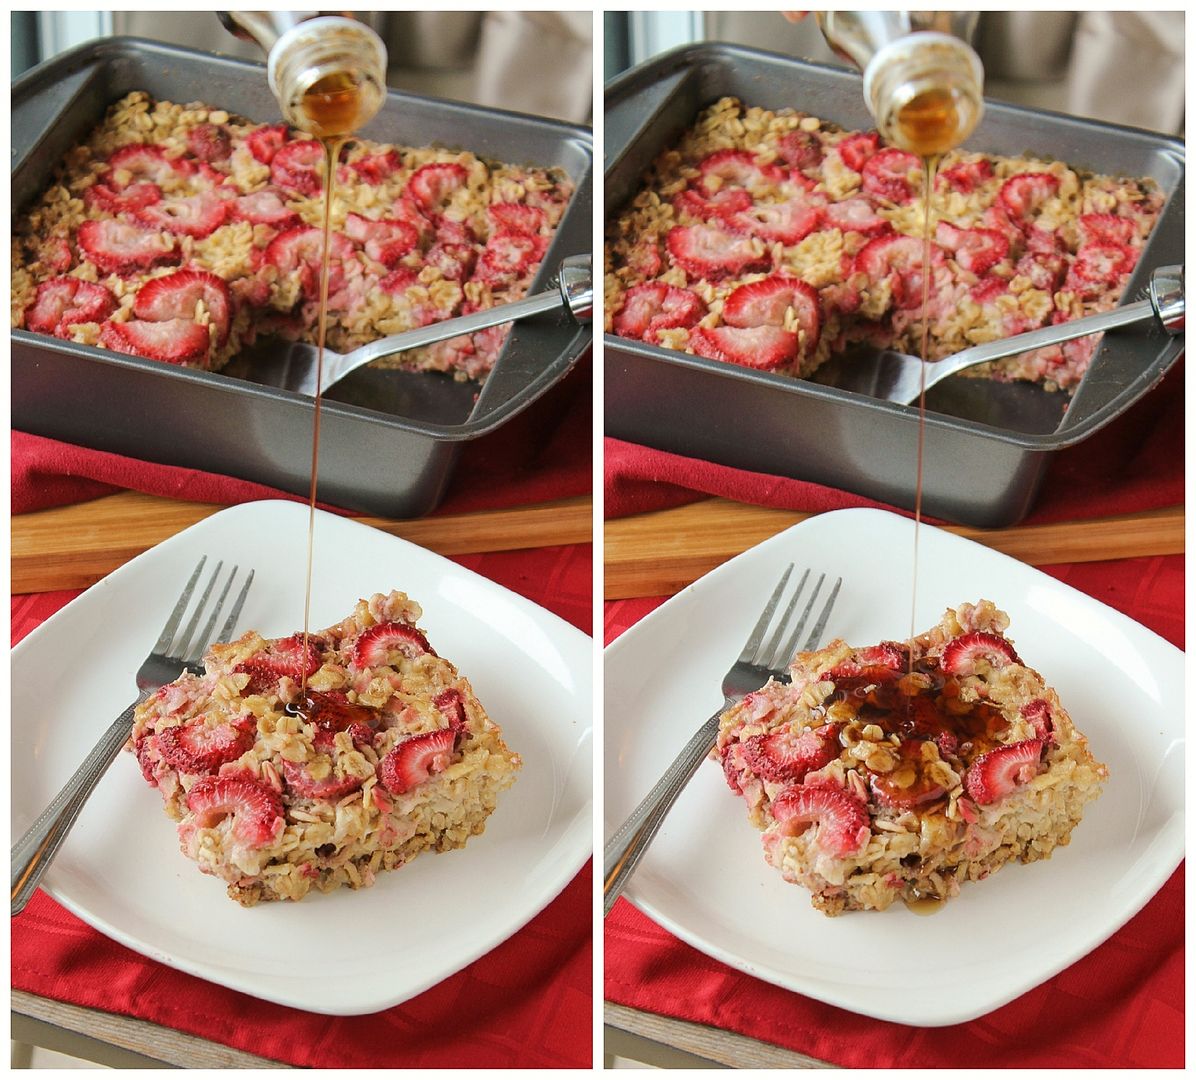
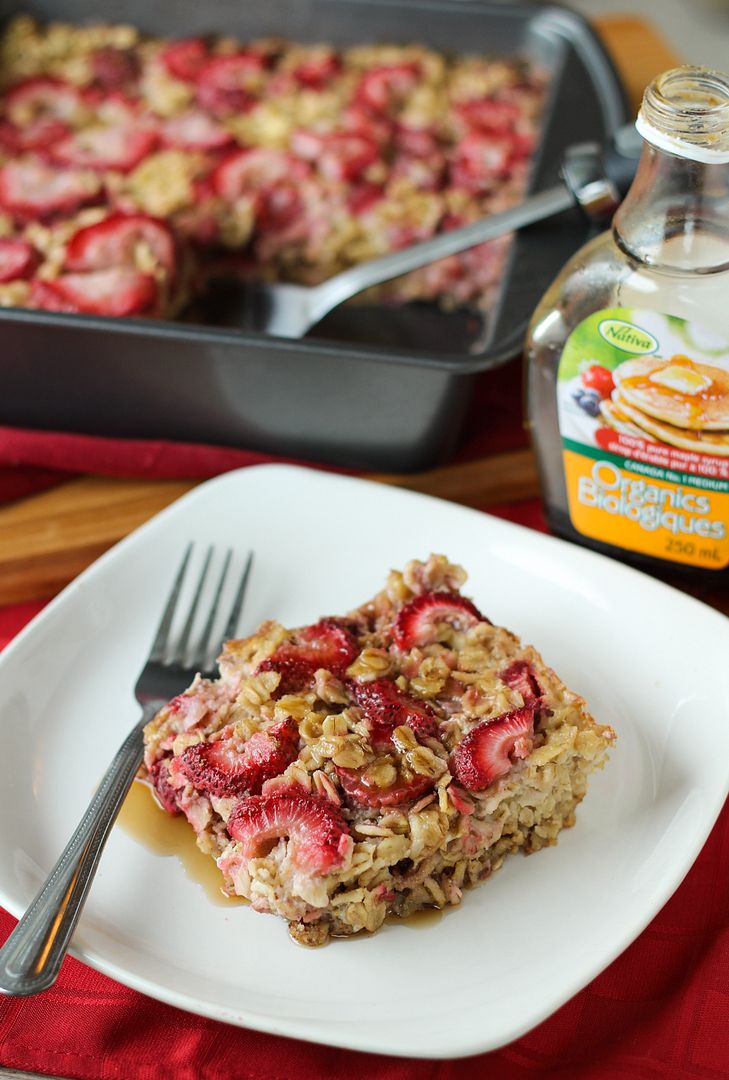
Strawberries & Cream Baked Protein Oatmeal

Strawberries & Cream Baked Protein Oatmeal

I was recently contacted by the nice folks at Visalus to see if I wanted to participate in their '90 for 90' series, where 90 bloggers will create 90 recipes using their Vi-Shape Shake Mix.  For those who haven’t heard of Vi-Shape or their Body by Vi 90 Day Challenge, the shake mix is a low-fat, low-calorie, gluten-free, lactose-free, high protein nutritional shake (like a protein powder but with more vitamins, from my understanding) that tastes and smells like cake mix!

I haven’t loved a lot of protein powders I’ve tried before, but this one actually smells just like cake mix, and I liked that it had more than just protein in it, so I was intrigued to try it in a recipe!

Strawberries & Cream Baked Protein Oatmeal

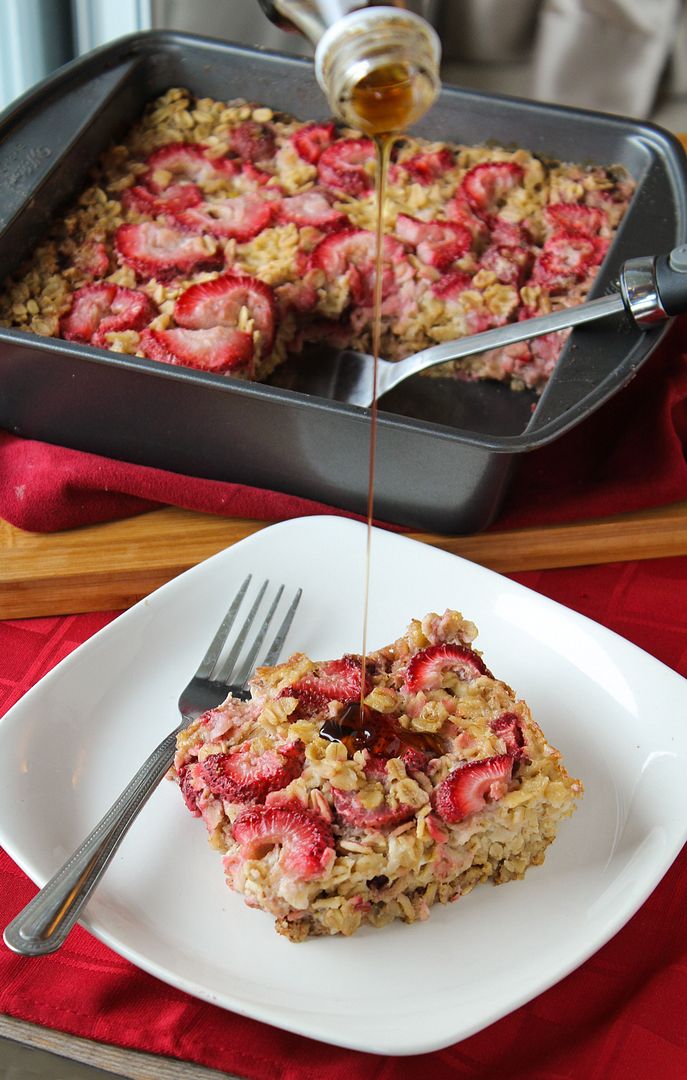
I came up with a few ideas before settling on my favourite one, this baked strawberries & cream oatmeal.  I love having oatmeal in the morning because it’s healthy and filling, but I’m usually too lazy to stand over a pot and wait for it to cook in the morning (and the instant stuff doesn’t usually cut it for me).  Baked oatmeal is so much better because you can mix together a batch, throw it in the oven to cook (hands-off), then have a bunch leftover for breakfasts through the week!

Strawberries & Cream Baked Protein Oatmeal

I looked at a lot of baked oatmeal recipes in developing this recipe, and most seemed to use a technique where they dump the oats and dry ingredients into the baking pan, then pour the wet on top and throw it in the oven, so the wet ingredients would slowly seep down through the oatmeal as it cooks.  The problem I had with this was that all the finer dry ingredients just fell right to the bottom, so you’d get super strong bites of cinnamon and salt when you got to the bottom, and the wet ingredients didn’t sink all the way down so I ended up with little bits of cooked egg on top, which wasn’t very appealing.

So the next time I just mixed all the wet and dry ingredients together before going in the pan, and it worked so much better, giving me firm, evenly mixed, and evenly baked delicious oatmeal.  The pictures I took were of the first version, but since they turned out well I didn’t bother redoing them because the next version looks almost the exact same.  Just picture this but a little more evenly cooked :)

Strawberries & Cream Baked Protein Oatmeal

Because the mix tastes like cake mix, it almost seems like you’re eating dessert for breakfast, and yet this is a healthy way to start the day, with only minimal sugar, no butter or oil, and lots of protein and vitamins from the Vi-Shape.  Some baked oatmeal recipes require lots of sugar and butter, and I tried this with more sugar and some olive oil instead of butter at first, but found I could reduce the sugar a lot and that the olive oil wasn’t even necessary.

I’m in love with this breakfast now, but I might have to use the rest of my Vi-Shape in some of the other amazing recipes I’ve been seeing, like individual vanilla cakes from Running to the Kitchen, yogurt covered blueberries from The Hungry Housewife, power waffles with cinnamon cream syrup from The Family Feed, or breakfast strawberry shortcake from A Nutritionist Eats - yum!

Strawberries & Cream Baked Protein Oatmeal

Strawberries & Cream Baked Protein Oatmeal

Makes 4-6 servings

Ingredients:

2 cups large-flake rolled oats (old fashioned oats)
1/4 cup light brown sugar
1 teaspoon baking powder
1/2 teaspoon salt
1 teaspoon cinnamon
1/2 cup Vi-Shape nutritional shake mix
1-1/2 cups sliced strawberries
2 cups low-fat milk (any type, as long as it's unsweetened - I’ve used almond milk and coconut-almond milk)
1 large egg
2 teaspoons vanilla extract

Directions:

Preheat oven to 375°F and spray an 8x8-inch square baking dish with non-stick cooking spray.

In a large bowl, whisk together the oats, sugar, baking powder, salt, cinnamon, and Vi-Shape.  In a separate medium bowl, whisk together the milk, egg, vanilla.  Add the wet ingredients to the dry ingredients and fold together with a flexible spatula until combined.  Stir in about 1 cup of the strawberries.  Pour mixture into prepared pan and spread out evenly as best as possible with your spatula.  Arrange remaining strawberries evenly on top (don’t press down on them so they stay on top).

Bake in preheated oven for 35-40 minutes until golden brown and set.  Let cool for a few minutes before slicing.  Serve warm, with maple syrup if desired.

------------------------------------------------------------------------------------------------------------------------
Disclosure: This post was sponsored by Visalus.  I'm happy to talk about their product, but they didn't tell me to - all thoughts and opinions I share on this blog are completely my own. :)  If you have any questions about Vi-Shape, please check out this page.

May 24, 2013

S'mores Bars

S'mores Bars

After spending the past holiday Monday laying on a beach drenched in sweat, it just seems wrong that today the temperature fell to below zero and there was snow in the air!   Every time I think summer is definitely here to stay this time, Mother Nature turns around and laughs in my face.  

I’m still very grateful that we had beautiful weather for our May long weekend though, and I’m hoping that my American friends are able to see some sun and get outside for your holiday Monday coming up! 

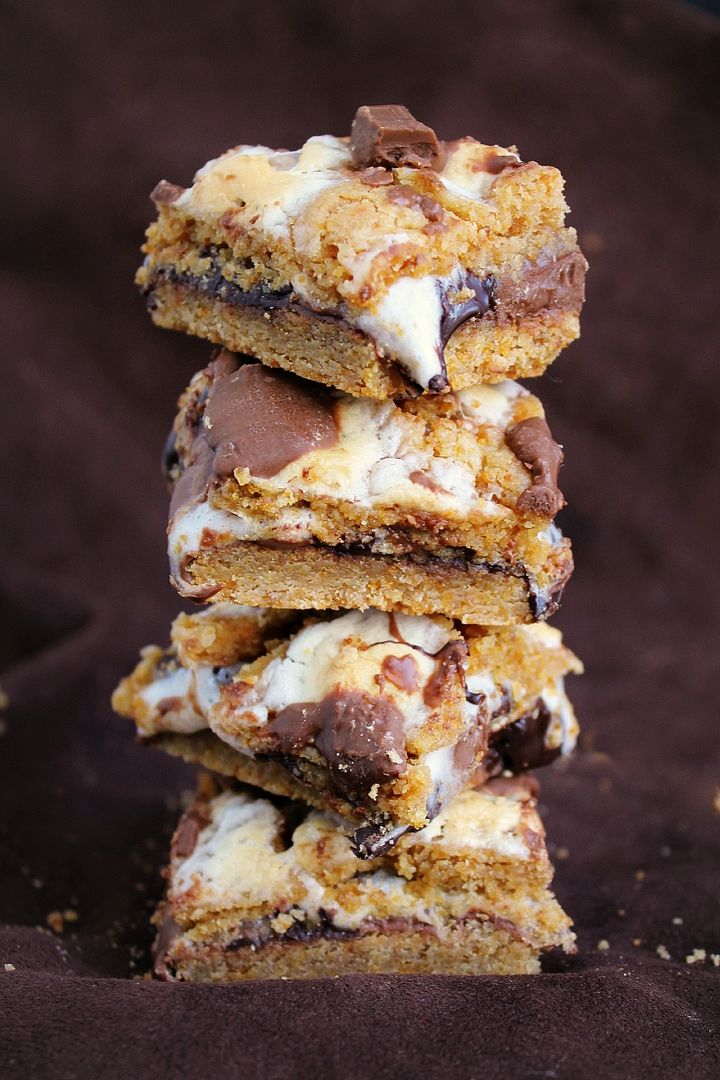
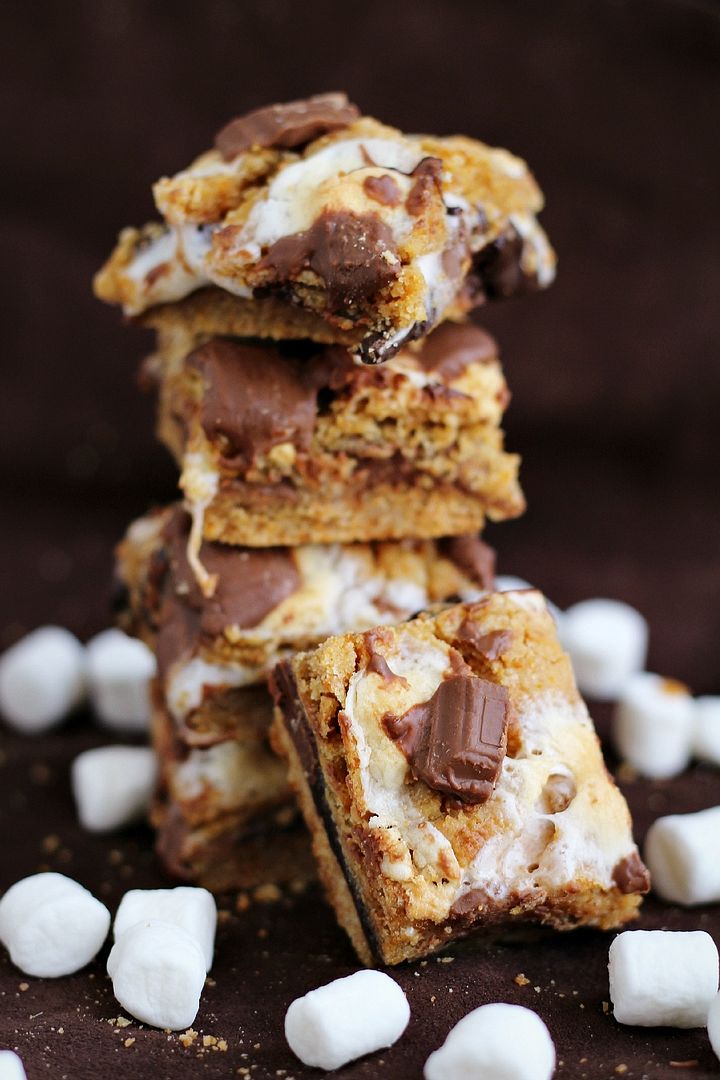
But whether you’re sitting outside around a bonfire or warming up inside by a fireplace this weekend, these s’mores bars will fit right in!

S'mores Bars

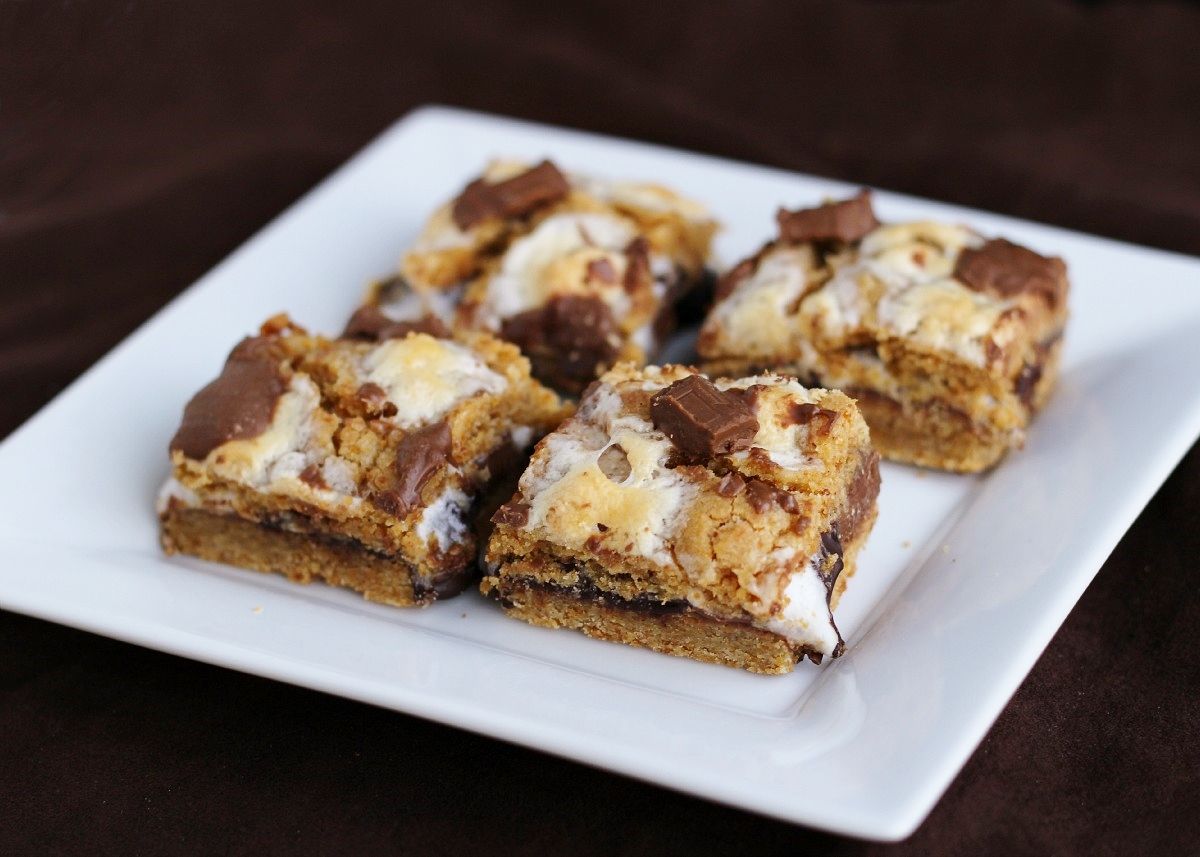
You’ve probably seen a recipe for s’mores bars before so these are nothing new; they’re made up of two layers of chewy graham cracker bars with layers of chocolate and marshmallows sandwiched in between.  I’ve made versions of them a couple of times in the past and absolutely loved them, but based on my experiences, I’ve made a few changes along the way to improve them a little.

I added cinnamon and brown sugar to add to the graham cracker flavour more, I replaced some of the milk chocolate with dark chocolate because I find that using all milk chocolate makes them just a bit too sweet and rich for my taste, and while I used to make a full sized recipe in a 9x13-inch pan, this time I used a much smaller pan because buying all that chocolate gets pretty expensive!  I also topped the bars with more marshmallows and chocolate so they look a little prettier on top and people can more easily tell what they are.


And while I’ve previously used marshmallow fluff as called for in other recipes, this time I couldn’t find it anywhere, so I used mini marshmallows instead - which also ended up being much cheaper!  When I bought them I was thinking that they would melt a little to become just like marshmallow fluff, but I apparently forgot my experiences with rice krispie squares which should have tipped me off that the marshmallows would melt a lot more!  

So I was a little disappointed when I took my bars out of the oven and didn’t see a pretty layer of thick melted marshmallows like I’ve had in the past using marshmallow fluff, but once I tasted them I realized that I liked these even better – the marshmallow flavour is still there and just gets infused throughout the bar, giving it a sticky gooey texture just like s’mores.  But if you can easily find marshmallow fluff and want that thick layer of fluff (see what I mean here), feel free to use it instead!
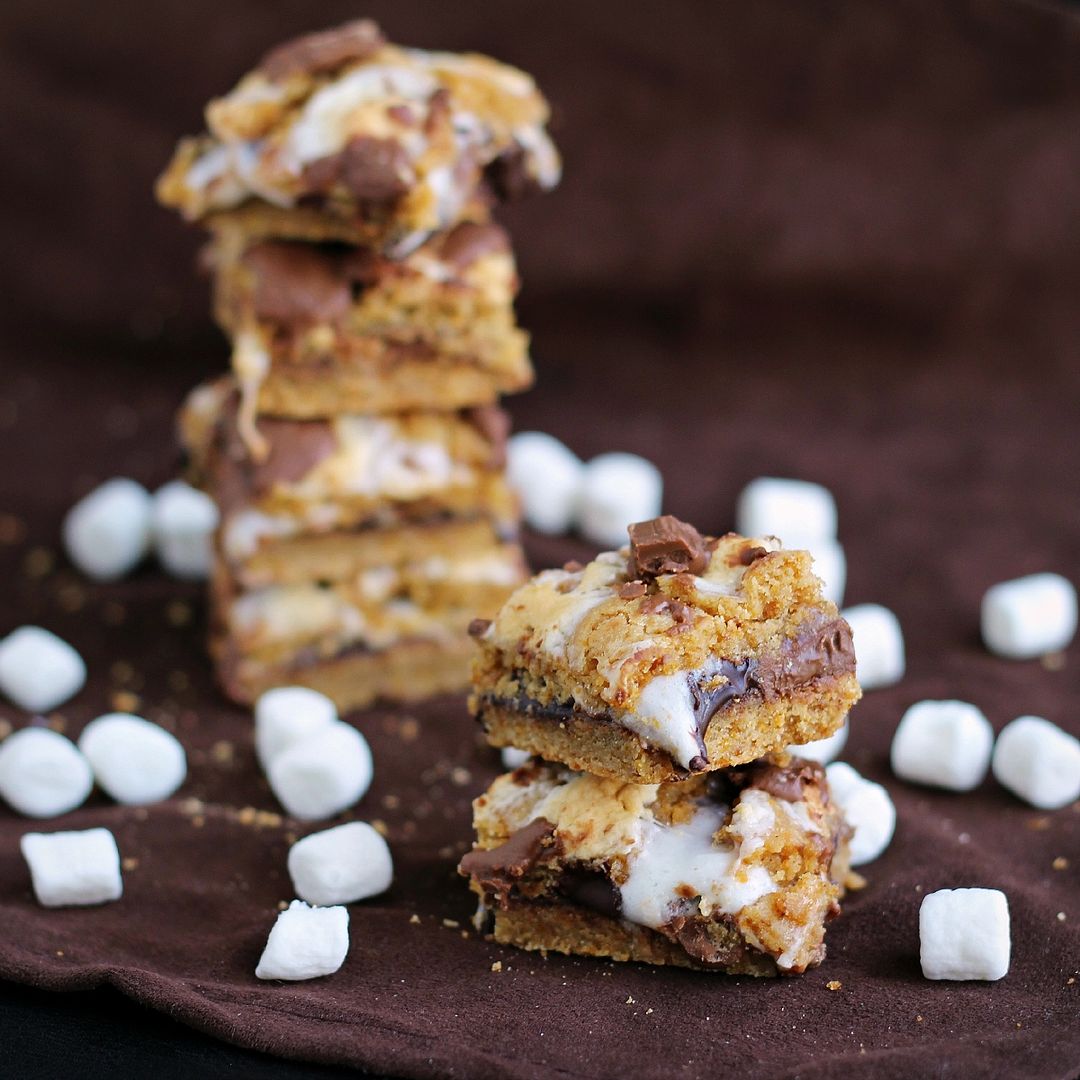
S'mores Bars

These are like a portable, less messy, and slightly more refined version of s’mores, so if you like s’mores, I think it’s safe to say you will love these.  They were a hit with Ryan’s coworkers (from what I hear) – I only ate one myself then had to give the rest away because I knew I would eat them all much too quickly! 

If you have Memorial Day get-together plans this weekend, these bars would fit right in!  Hope you have a great (and warm!) long weekend!
S'mores Bars

S’mores Bars


Makes one 8x8-inch pan; about 20 bars

Ingredients:

1-1/3 cups all-purpose flour
3/4 cup graham cracker crumbs
1 teaspoon baking powder
1/2 teaspoon cinnamon
1/8 teaspoon salt
1/2 cup unsalted butter, room temperature
1/2 cup sugar
1/4 cup brown sugar
1 large egg
1 teaspoon vanilla extract
2-1/2 to 3 cups mini marshmallows
300g (or 10-11oz) of chocolate bars – I used three 100g chocolate bars: 2 milk chocolate and 1 dark chocolate.  If you want the taste to be more like classic s’mores, use all milk chocolate.  If you prefer a more grown-up taste, use dark chocolate.  I used a mix of both because I find all milk chocolate to be a little too sweet for my tastes.

Directions:

Preheat oven to 350°F. Line an 8x8-inch baking pan with aluminum foil, leaving an overhang on the edges to lift the bars out later, and spray with non-stick cooking spray.

Whisk together the flour, graham cracker crumbs, baking powder, cinnamon, and salt in a medium bowl.  In a separate large bowl, cream the butter and sugars together with an electric or stand mixer on medium speed until light and fluffy, about 2-3 minutes.  Add the egg and vanilla and beat just until combined.  Slowly add the dry ingredients in three additions, mixing slowly after each addition until a dough forms.

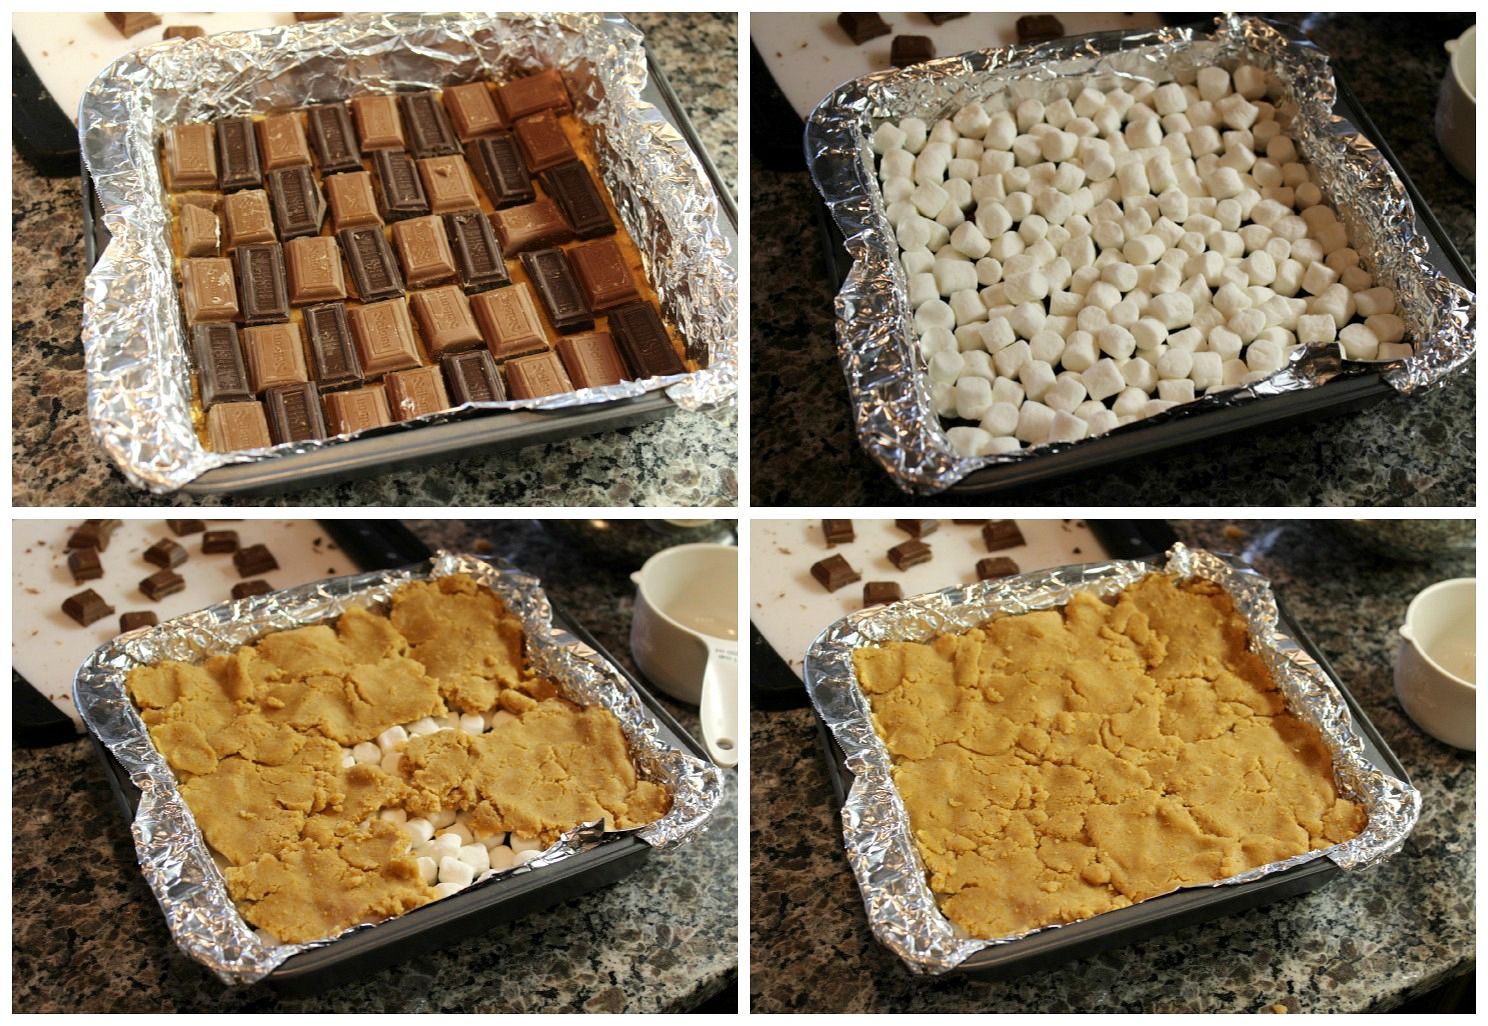
Divide the dough in half.  Press one half of the dough into the prepared pan in an even layer.  Divide your chocolate bars into individual squares, reserve at least 4 squares for later, and spread the remaining squares in an even layer on top of the dough.  Try to get them close together but don’t worry too much if there are little gaps.  I alternated the spacing of my milk and dark chocolate squares.  Cover with about 2 cups of mini marshmallows in a tight, even layer.  Top with the remaining half of the dough.  I grabbed pieces of dough, flattened them between my palms, and pieced them together to form one layer, but it would have been easier to roll the dough out in one piece and transfer that on top.  Do whatever works easiest for you.  Here’s a picture of what my process looked like:

making smores bars

Bake the bars in the preheated oven for 25 minutes.  Meanwhile, chop your leftover chocolate into smaller pieces and place in the freezer.  After 25 minutes, remove bars from oven, and sprinkle the top with about 1/2 cup of mini marshmallows along with the reserved chocolate.  Return to oven for an additional 5-8 minutes.

Let bars cool completely before cutting.  I sped mine along by placing them in the fridge, but it still took at least several hours to cool.  When ready, lift the bars from the pan using the foil, and cut into about 20 squares.  Serve at room temperature or warmed up slightly in the microwave.

October 12, 2012

Harvest Snack Cake

Harvest Snack Cake

I probably should have posted this recipe a little closer to Thanksgiving (which was this past weekend), because it would have tied in with it with perfectly, but I just haven’t been very organized lately! 
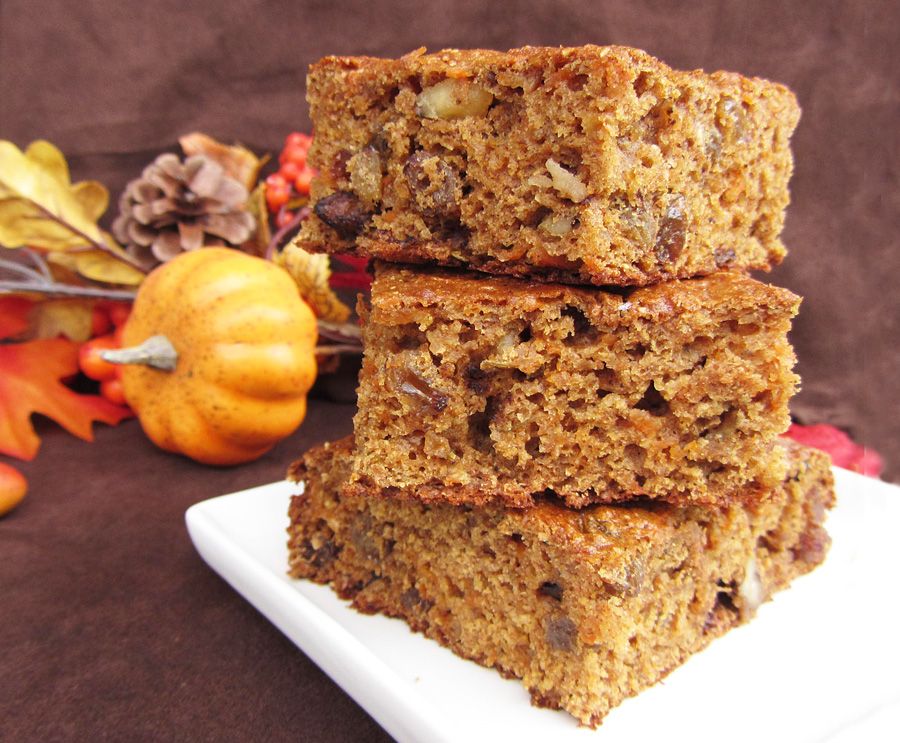
Canadian Thanksgiving is a celebration to give thanks for “the bountiful harvest with which Canada has been blessed” (source), along with all the other good things in our lives, especially our family and friends.  I love that there is a holiday specifically dedicated to celebrating the harvest and all the amazing food we are lucky to have readily available here!

Harvest Snack Cake

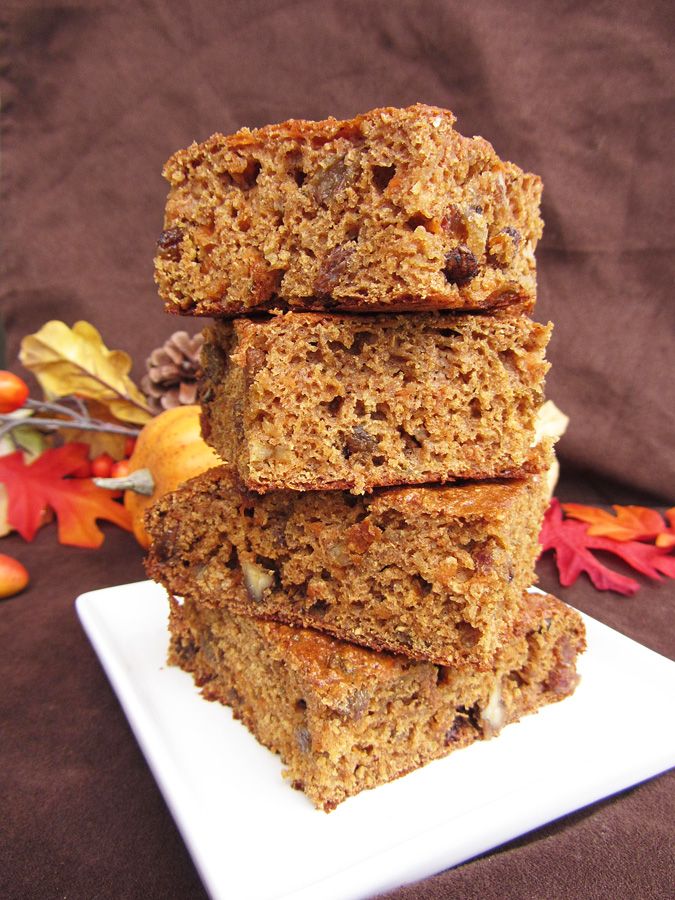
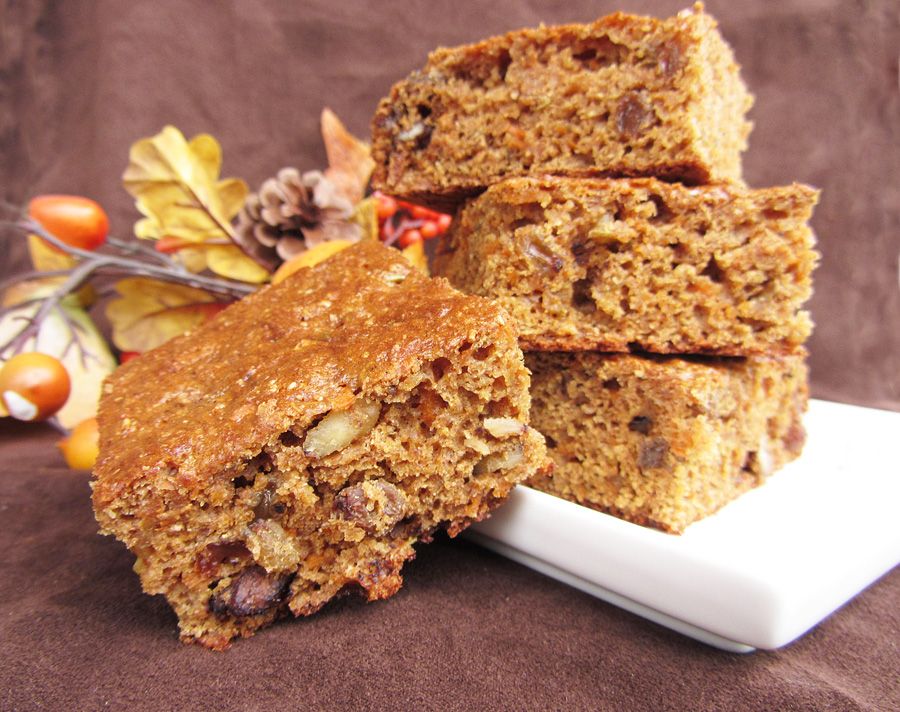
I’d love to tell you that I made this cake in honour of the harvest and Thanksgiving, but I honestly didn’t make the connection until now.  Still, this harvest snack cake is a great way to celebrate fall food and flavours!

This cake is easy to make, will fill your kitchen with the smell of fall, and is full of good-for-you ingredients like carrots, apples, and walnuts.  Plus, it uses whole wheat flour and contains no butter or oil, so in my books that makes it a pretty healthy snack.  Of course, there’s still sugar in it, so I’m not putting “healthy” in the title, but I certainly don’t feel guilty about eating a piece for my snack every day!

Harvest Snack Cake

Harvest Snack Cake

Adapted from Taste of Home

Makes about 16 squares

Ingredients:

2 cups whole wheat flour
1 cup packed brown sugar
2 teaspoons baking powder
1 teaspoon cinnamon
1/2 teaspoon nutmeg
1/4 teaspoon ground ginger
2 large eggs
1/2 cup unsweetened applesauce
1 teaspoon vanilla extract
3/4 cup grated carrot
3/4 cup grated apple (about 1 large apple – if one apple doesn’t reach ¾ cup, you can increase the amount of carrots so total grated carrots + apples = 1.5 cups)
1 cup raisins
1/2 cup chopped walnuts

Directions:

Preheat oven to 350°F.  Line the bottom of a 13x9 baking pan with parchment paper and spray lightly with cooking spray.  Soak your raisins in hot water for 5-10 minutes so they won't absorb the moisture from your cake during baking (drain your raisins before using them).

Whisk together the dry ingredients (flour to ginger) in a large bowl.  In a separate medium bowl, whisk the eggs, applesauce, and vanilla.  Add the wet ingredients to the dry ingredients and fold together with a spatula until just incorporated.  Fold in the carrots, apples, raisins, and walnuts.

Spread the batter evenly into the prepared pan, and bake in preheated oven for 30-35 minutes, or until toothpick inserted in the middle comes out clean.  Cool on a wire rack.

Note: I knew I wouldn’t eat all of this in a few days, so I kept about half of the squares in the freezer and found that they froze well.

October 02, 2012

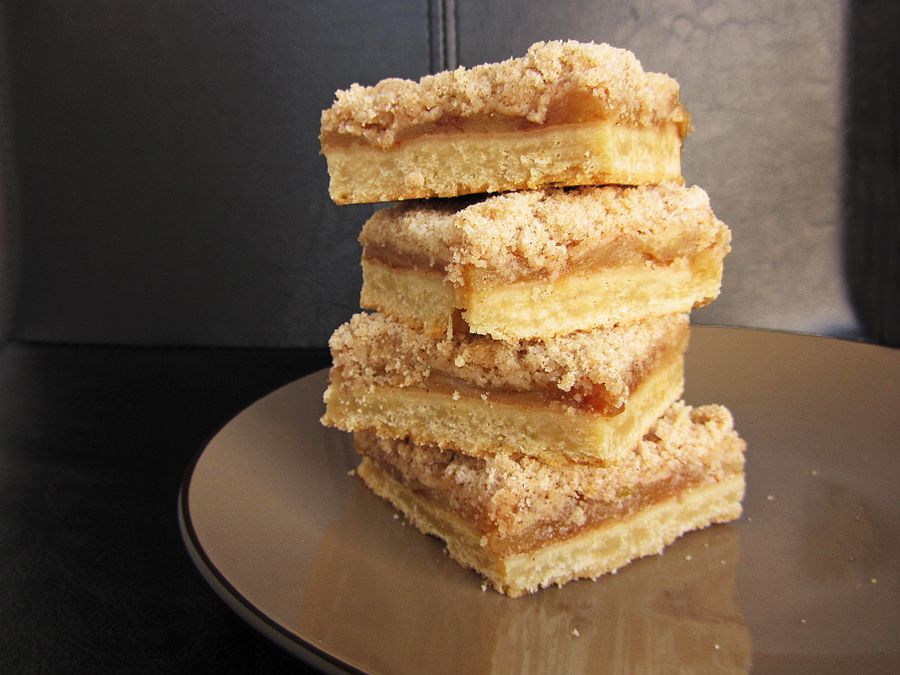
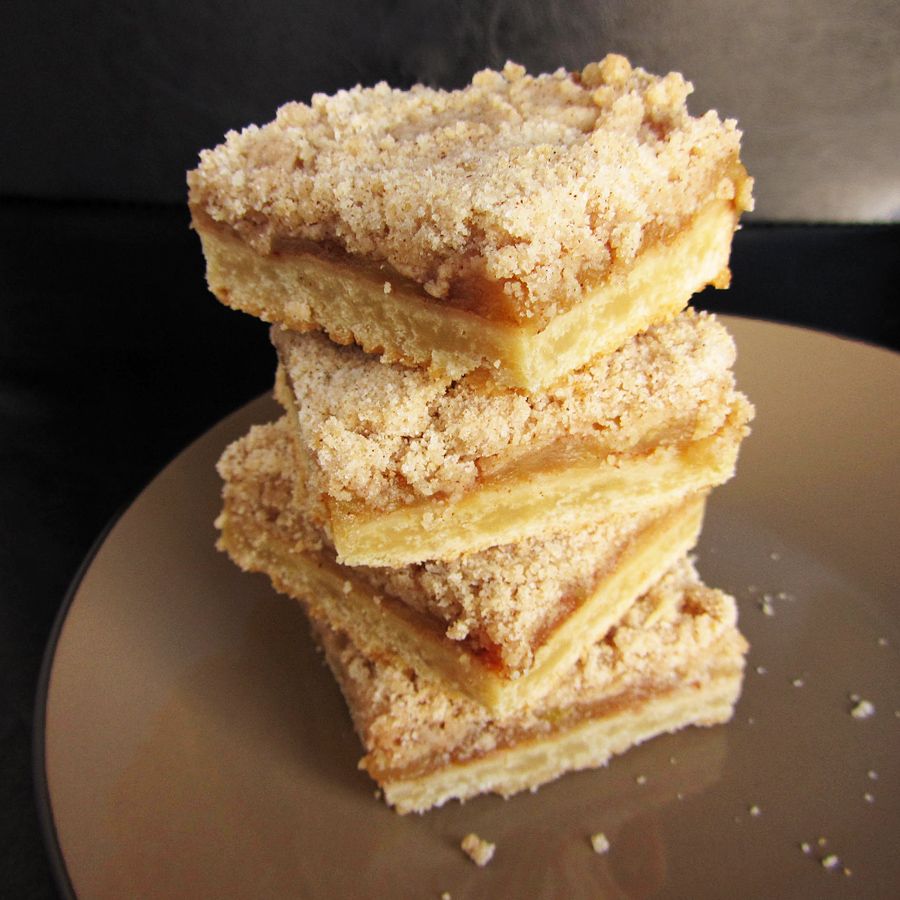
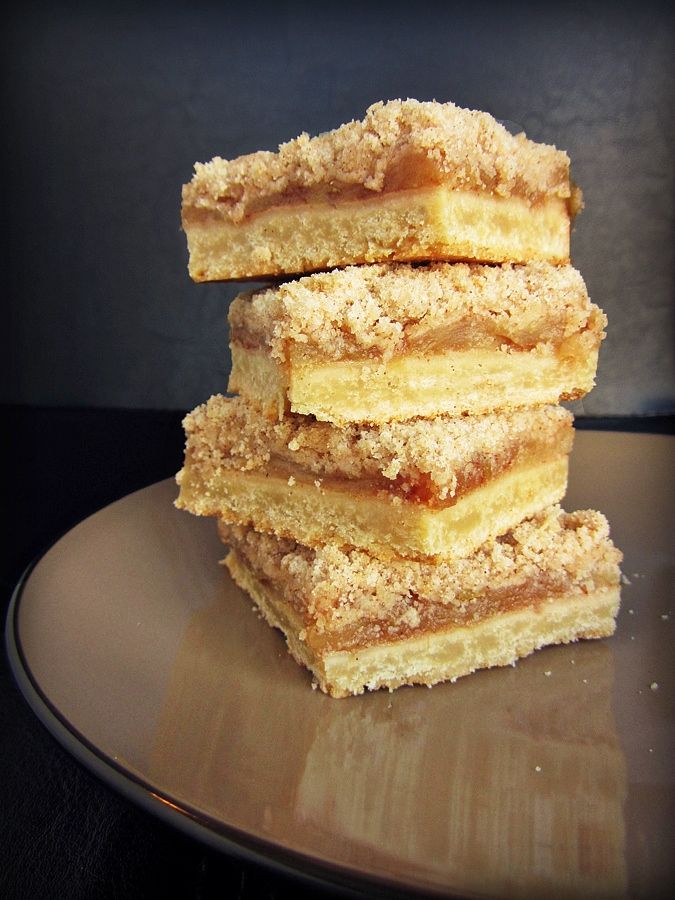
Apple Pie Bars

Apple Pie Bars

The weather has definitely been getting cooler around here, and while I love fall weather, I don’t love how much the weather fluctuates in a day!  In the summer I can leave in the morning in a t-shirt and know I’ll be okay all day, and in the winter I put on my winter coat and know I’ll need it all day, but in the fall I never know how to dress.  If I wear a jacket and boots in the morning then by the afternoon it’s sunny and warm and I look ridiculous because everyone else is out in t-shirts, but if I stay out until the evening, I’m freezing cold and almost wish I had a winter coat on!

This past Friday, Ryan and I waited in line to meet Dan Aykroyd, who was promoting his brand of vodka at an LCBO in London.  We didn’t realize that we would be waiting outside in line for THREE HOURS, and I only had a thin jacket on from the afternoon, so I was convinced I was going to freeze to death.  We did eventually get to meet him (and get a Ghostbusters blu-ray signed), which was pretty cool, and were entertained by the Ecto-1 in the parking lot while we waited,  but being outside that long made me realize that winter is not far away!

Apple Pie Bars

And while I’m not quite craving winter soups and stews yet, I am craving other fall favourites, especially anything with apples or pumpkin in it!  I already made a great apple and pear pie a couple of weeks ago, but I had to make these apple pie bars too because they’re one of my favourite desserts!  They’re just like apple pie in bar form – a buttery crust is topped with sautéed spiced apples and a crumble topping – so good!    

Yes, the list of ingredients looks long and I admit they take more time to put together than the average bar, but I’d say they’re about the same amount of work as making apple pie, and the end result can feed more people and tastes just as good! 

Apple Pie Bars

Apple Pie Bars

Adapted from Cookie Baker Lynn, originally from the book Great Cookies

Makes 20-24 bars

Ingredients:

For the Apples:
6-7 Granny smith or golden delicious apples, peeled, cored, and sliced into 1/4-inch thick slices
1/3 cup brown sugar
2 tablespoons fresh lemon juice
1 teaspoon cinnamon
1/4 teaspoon nutmeg

For the Crust:
2-1/4 cups all-purpose flour
1/2 teaspoon baking powder
1/4 teaspoon salt
1 cup unsalted butter
1/2 cup brown sugar
1/2 teaspoon vanilla extract
1 large egg

For the Streusel Topping:
3/4 cup all-purpose flour
1/4 cup granulated sugar
1/4 cup brown sugar
1 teaspoon cinnamon
Pinch of salt
1/4 cup unsalted butter, cold and cubed

Directions:

First, prepare the apples.  Combine apples, brown sugar, lemon juice, cinnamon, and nutmeg in a large saucepan over medium heat.  Cover the pan for 2 to 3 minutes, and uncover when the apples have released their juices.  Cook, stirring occasionally, until apples are golden brown and soft and there is no liquid left in the pan, about 15 minutes.  Set aside to cool.

Preheat oven to 375°F.  Line a 13x9-inch baking pan with aluminum foil, leaving an overhang up the sides so you can easily remove the bars later.  Lightly spray the foil with non-stick cooking spray.

Prepare the crust: In a large bowl, whisk together the flour, baking powder, and salt.  In a separate bowl, cream the butter and sugar on medium speed for about 2 minutes.  Add the egg to the butter mixture and mix to blend.  Add the dry ingredients in two additions, mixing on low speed (or by hand) until just combined after each addition.  The dough will be wet; drop it by clumps evenly across the prepared baking pan, then use your hands to press it down to evenly cover the pan in one smooth layer.  Prick the dough all over with a fork, then baked in preheated oven for 15-18 minutes, until crust is golden brown and begins to release from the sides of the pan.

Meanwhile, prepare the streusel topping:  In a large bowl, whisk together the flour, sugars, cinnamon, and salt.  Add the butter and mix with an electric mixer or use a pastry cutter to combine until the mixture is crumbly.

When the crust is done, remove from oven and reduce oven temperature to 350°F.  Spread the cooked apples over the hot crust, and sprinkle the streusel topping evenly over the apples, pressing gently to help it stick.  Return pan to oven and bake for 20-25 minutes, until topping is lightly browned and crisp.  Let rest in pan for at least 2-3 hours before removing and slicing – I leave mine in the fridge overnight so they’re very easy to cut the next day. 

Store bars in refrigerator, but bring to room temperature before serving (I prefer them this way).


I linked this recipe to Sweets for Saturday

Ingredient Index

Related Posts Plugin for WordPress, Blogger...