Showing posts with label sugar - icing. Show all posts

April 29, 2014

Birthday Cake Oreo White Chocolate Cheesecake

Birthday Cake Oreo White Chocolate Cheesecake

Last Thursday was my (and my twin sister Genevieve's!) birthday and I had a fantastic day being spoiled by my fiance, who took me to my first NHL playoff game that evening, which was really exciting even though the end result of the game didn't turn out quite how we'd hoped!

On the weekend I celebrated with my family, which meant that I got to choose a birthday dinner, but I made my own cake as usual because I look forward to it every year!  For dinner, my parents made a somewhat Mexican-themed meal with sangria, chips and guacamole, and caramelized pineapple and chicken quesadillas with a strawberry salsa - it was all amazing!
Birthday Cake Oreo White Chocolate Cheesecake

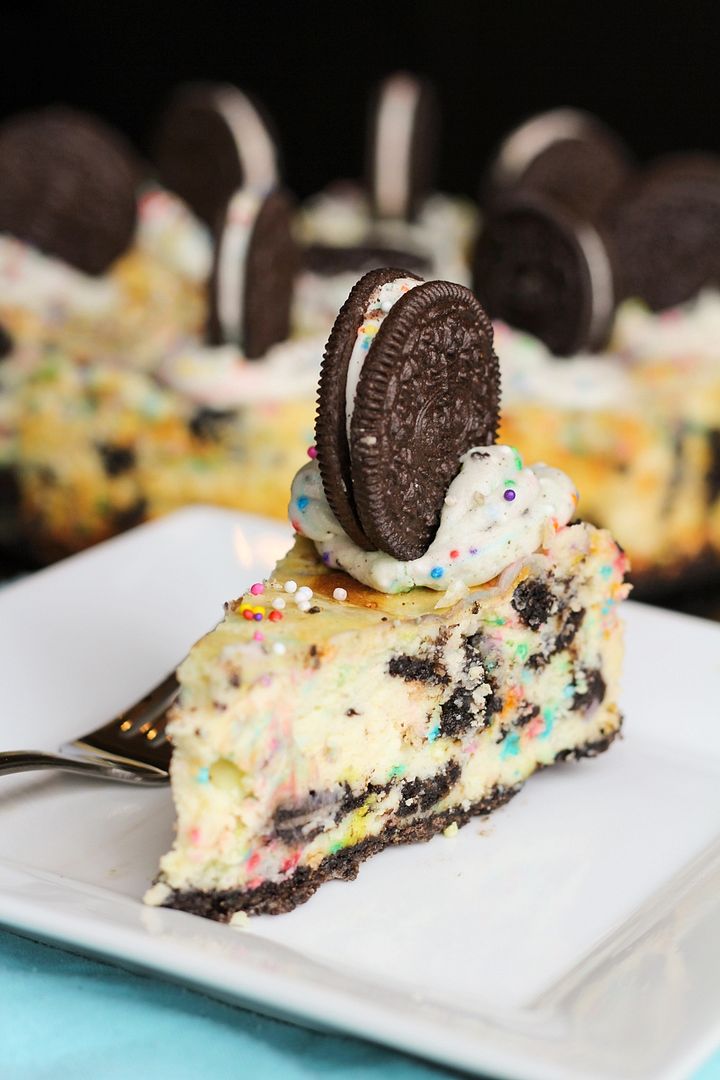
And for dessert, I made this festive birthday cake Oreo white chocolate cheesecake! 

As I mentioned in my last post, I'm not a huge fan of the typical white birthday cake with super sweet frosting, but cheesecake is a different story - I love any and every kind of cheesecake!
Birthday Cake Oreo White Chocolate Cheesecake

My older sister had just brought back birthday cake flavoured Oreos for us from her trip to the US, so I decided to incorporate them into a birthday cheesecake!  I don't think I've seen these Oreos anywhere in Canada but I could be wrong - if someone knows if they're available, let me know!  If you can't find them, you can still make this with regular Oreos, it just won't smell as much like birthday cake :)   I didn't have quite enough birthday Oreos to use throughout the cake by the time I got around to grabbing the package, so I just used half regular Oreos which worked fine!
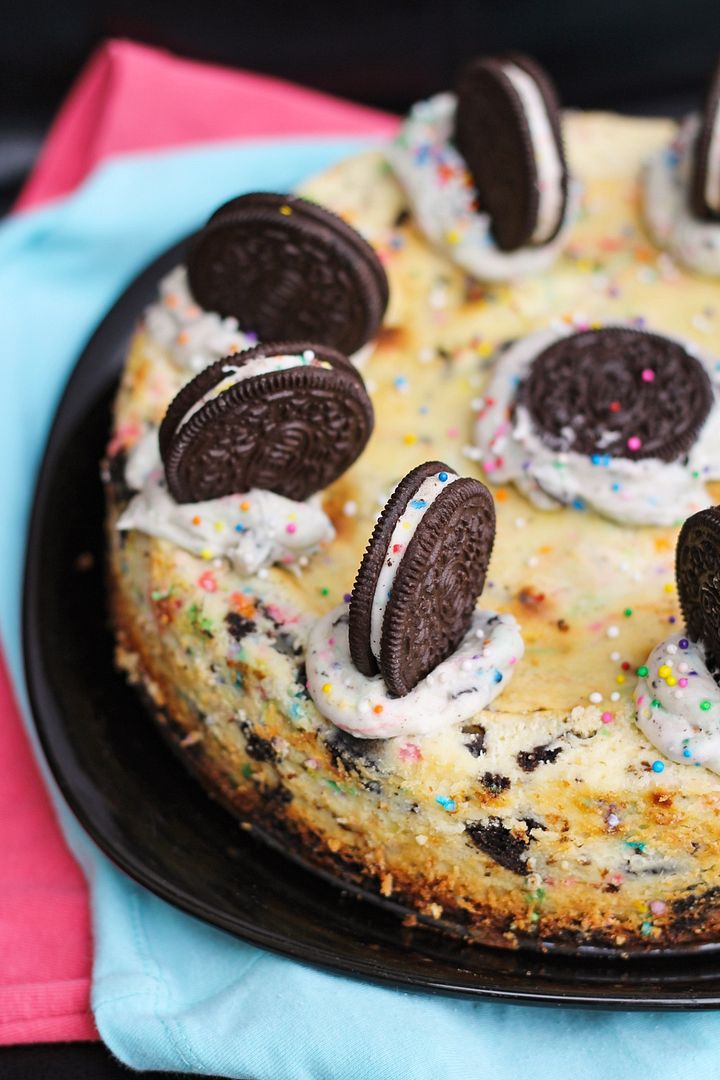
Birthday Cake Oreo White Chocolate Cheesecake

This cheesecake has an Oreo crust, with the birthday cake Oreos chopped up and mixed throughout the cheesecake batter, along with some sprinkles (necessary for anything birthday themed, of course) and melted white chocolate chips to enhance the sweet birthday cake flavour. 

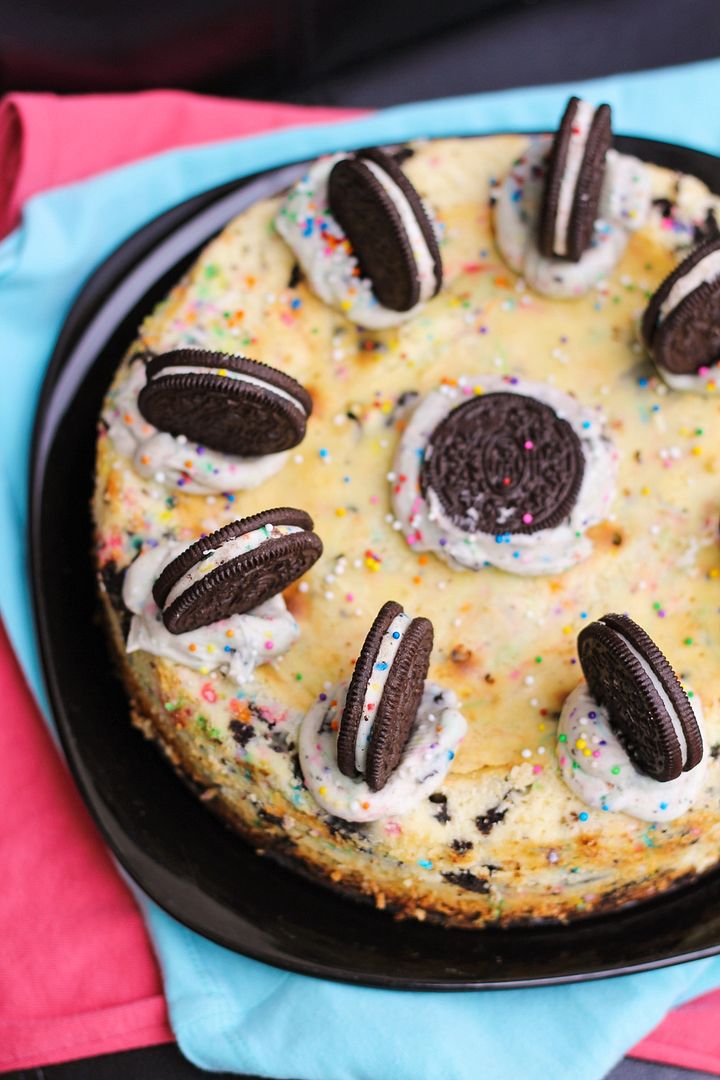
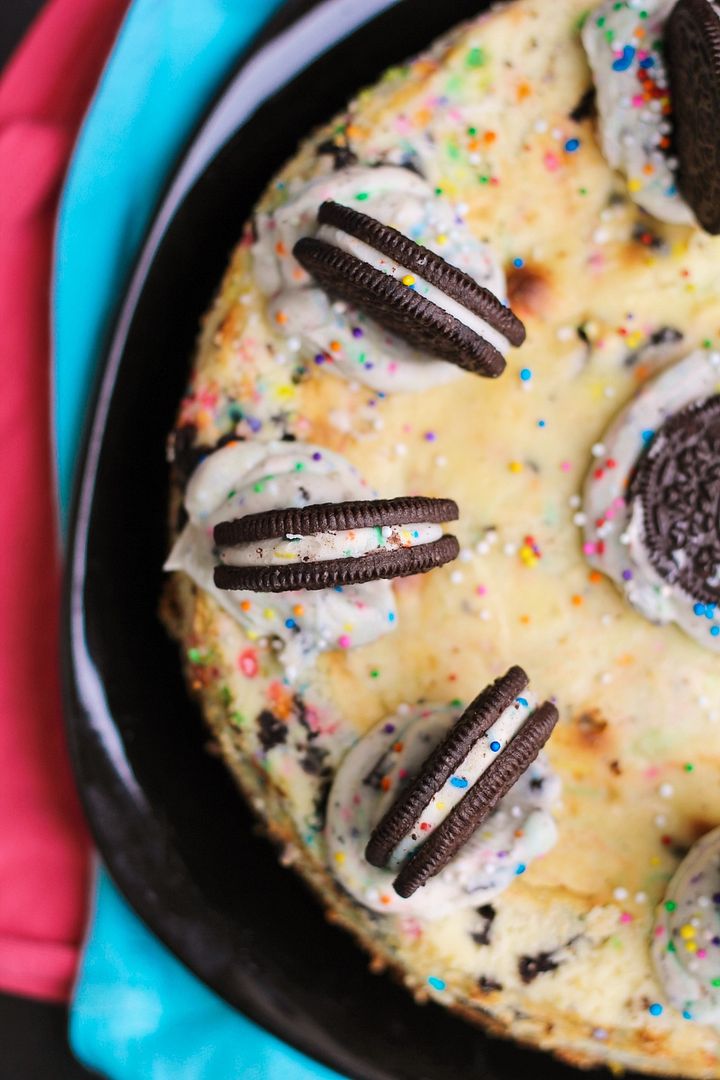
I also made a quick buttercream frosting, which I don't particularly like but in this case I needed it to stick some Oreos on top for decoration.  I mixed in some sprinkles and Oreo crumbs to the frosting which ended up turning the frosting into a somewhat unappealing grey colour, so if you want to avoid my mistake just leave the Oreos out of the frosting, there's plenty of Oreos elsewhere in the cake anyway!
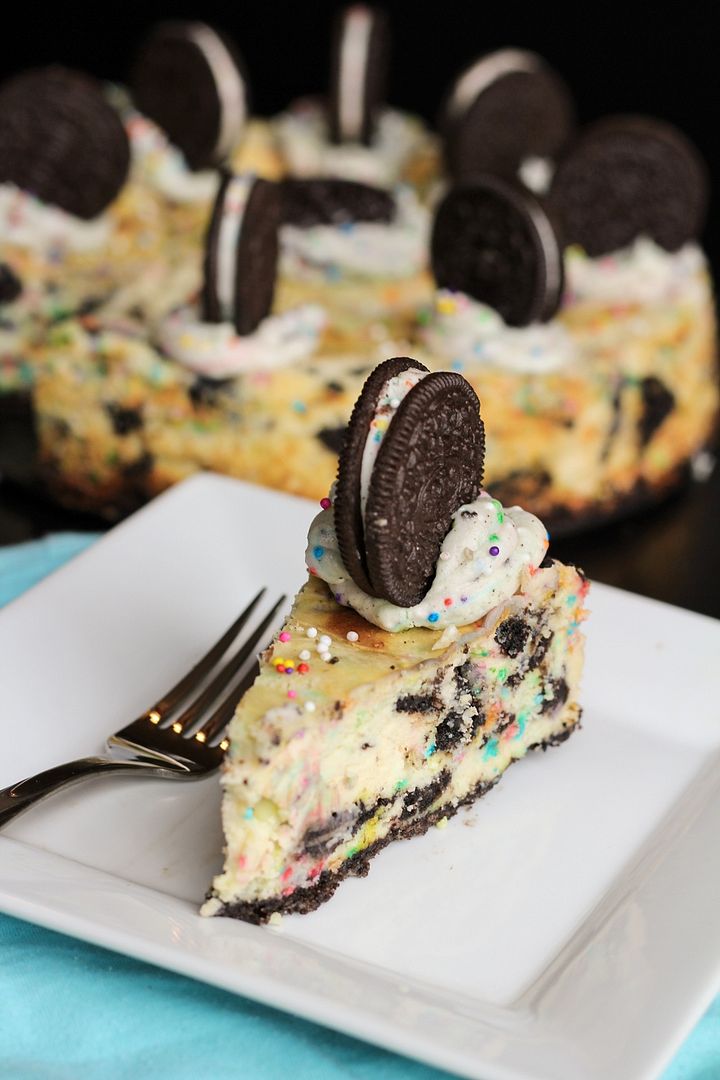
Birthday Cake Oreo White Chocolate Cheesecake

I have a tendency to overbake my cheesecakes because I'm always paranoid about them not being cooked all the way through and haven't quite mastered the art of knowing when a cheesecake is done yet, so as you can see mine was a tad overdone, but everyone still loved it! 

I loved how festive it looked, and it smelled and tasted just like a birthday cake but with the creamy texture of cheesecake - like a grown-up version of a kid's birthday cake to help make this getting older business a lot easier :) 
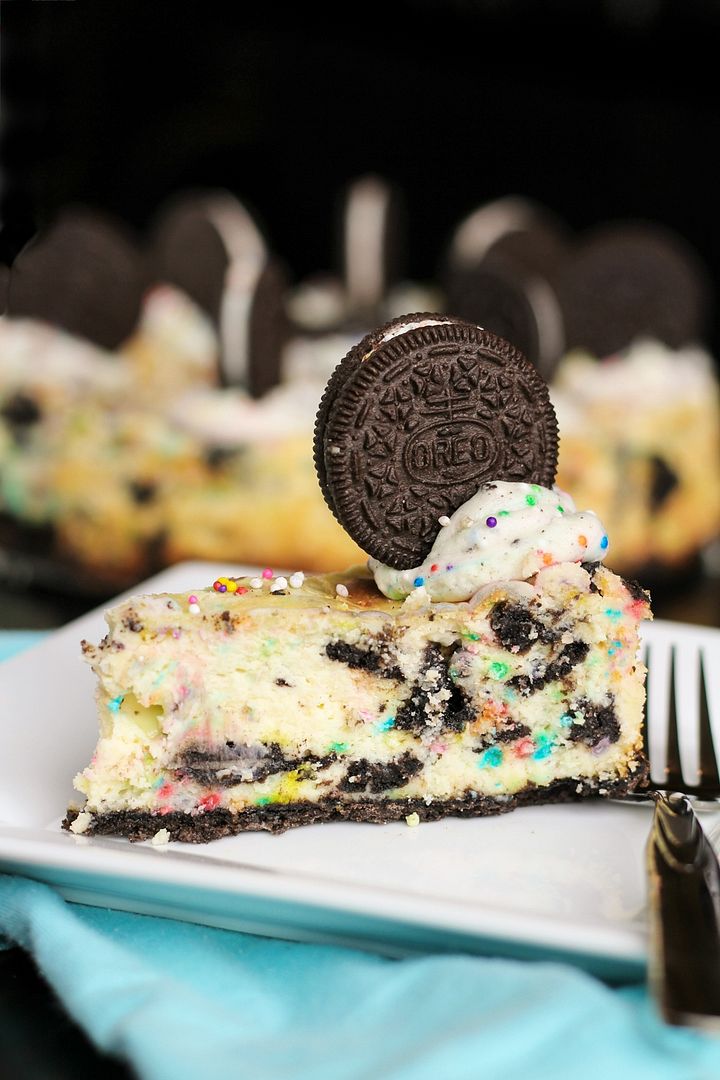
Birthday Cake Oreo White Chocolate Cheesecake

Birthday Cake Oreo White Chocolate Cheesecake


Makes one 9” cheesecake; serves around 12

Ingredients:

For the Crust:
16 Oreos – I used regular Oreos for the crust
3 tablespoons unsalted butter, melted

For the Filling:
2 cups white chocolate chips
1/2 cup half-and-half cream
3 (250g or 8oz) bricks of cream cheese, softened
1/2 cup sugar
3 large eggs
1 teaspoon vanilla extract
14 ‘Birthday Cake’ Oreos, chopped (I chopped each one into about 6 pieces)
2 tablespoons sprinkles

For the Topping (Optional):
1/4 cup unsalted butter, softened
3/4 cup icing sugar
1/4 teaspoon vanilla extract
2 teaspoons milk
6-8 Oreos
Sprinkles

Directions:

Preheat oven to 350°F.

Crush the 16 Oreos for the crust in a food processor or blender until they form crumbs.  Stir in melted butter with a fork and mix until combined, then transfer Oreo mixture to a 9” springform pan, and press evenly to cover the bottom in a thin layer.

In a metal bowl placed over a small saucepan of simmering water on the stovetop, melt white chocolate chips and half-and-half, stirring occasionally until melted and smooth.  Remove from heat.

In a large bowl or bowl of a stand mixer, beat cream cheese and sugar until smooth, 2-3 minutes.  Add eggs 1 at a time, beating just until blended after each addition.  Add vanilla extracte and melted white chocolate mixture and beat just until smooth.  Gently fold in the chopped Oreos and sprinkles with a flexible spatula.  Pour batter over prepared crust and gently tap the pan against the counter a few times to remove any air bubbles. 

Bake in preheated oven for 50-55 minutes, until center is almost set.  My cheesecake had some butter drip out the bottom of the pan, which is an issue with my pan, but in case you have the same issue, be sure to place a baking sheet on the rack below the cheesecake to catch any drippings.  You could also use a water bath if you prefer to bake your cheesecakes that way.  Once done, I turn off the oven and let my cheesecake cool in there for about 10-20 minutes or more, then remove transfer it to a wire rack.  Run a knife around the edge of the pan to loosen the cake so it doesn’t crack as it cools.  Let cool at room temperature for at least an hour, then refrigerate for at least 4 hours or overnight.

If you wish to decorate the cheesecake as I did, you can prepare a simple buttercream frosting to stick Oreos on to the top of the cake.  To make buttercream, beat 1/4 cup butter for 2-3 minutes until smooth and creamy.  Add 3/4 cup icing sugar slowly and mix on low speed until incorporated.  Mix in 1/4 teaspoon vanilla and 1 to 2 teaspoons milk until smooth.  If the frosting's too thin you can add more icing sugar; if it’s too thick you can add more milk.  I also stirred in 2 teaspoons of sprinkles and 1 crushed Oreo but this can alter the colour of the frosting (mine came out kind of grey) so I might recommend leaving those out and just adding sprinkles on top, or at least just leaving out the Oreos.  Pipe buttercream onto spots of the cake where you want to attach Oreos and stick Oreos into the frosting (see pictures). Keep cake refrigerated until ready to serve.

December 17, 2013

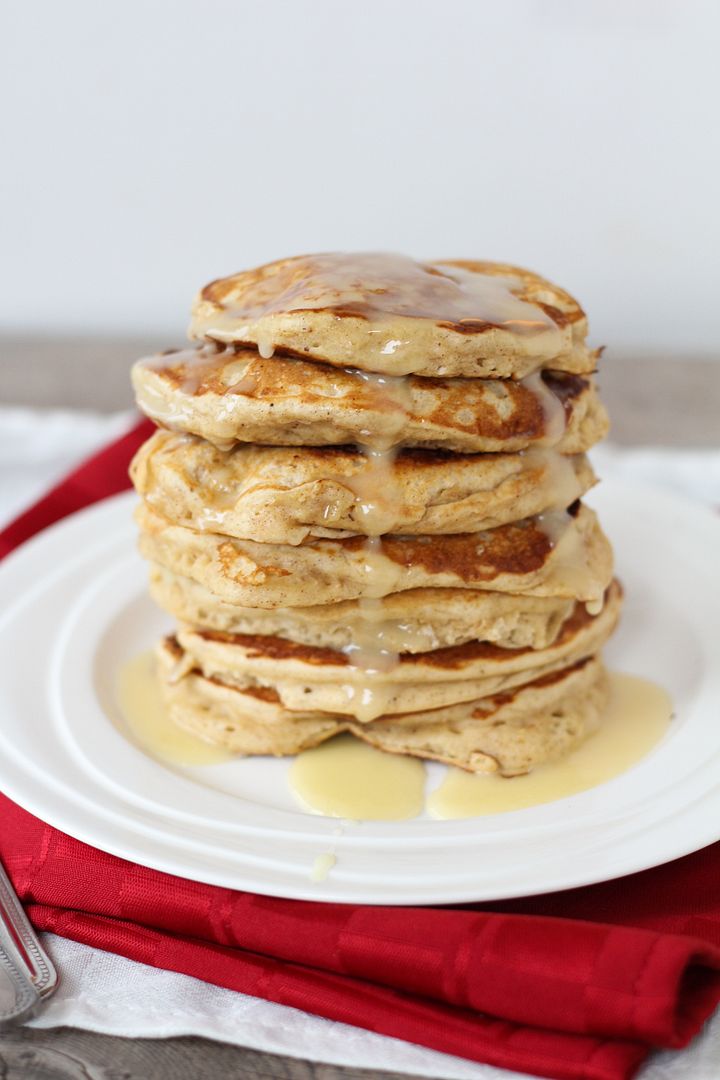
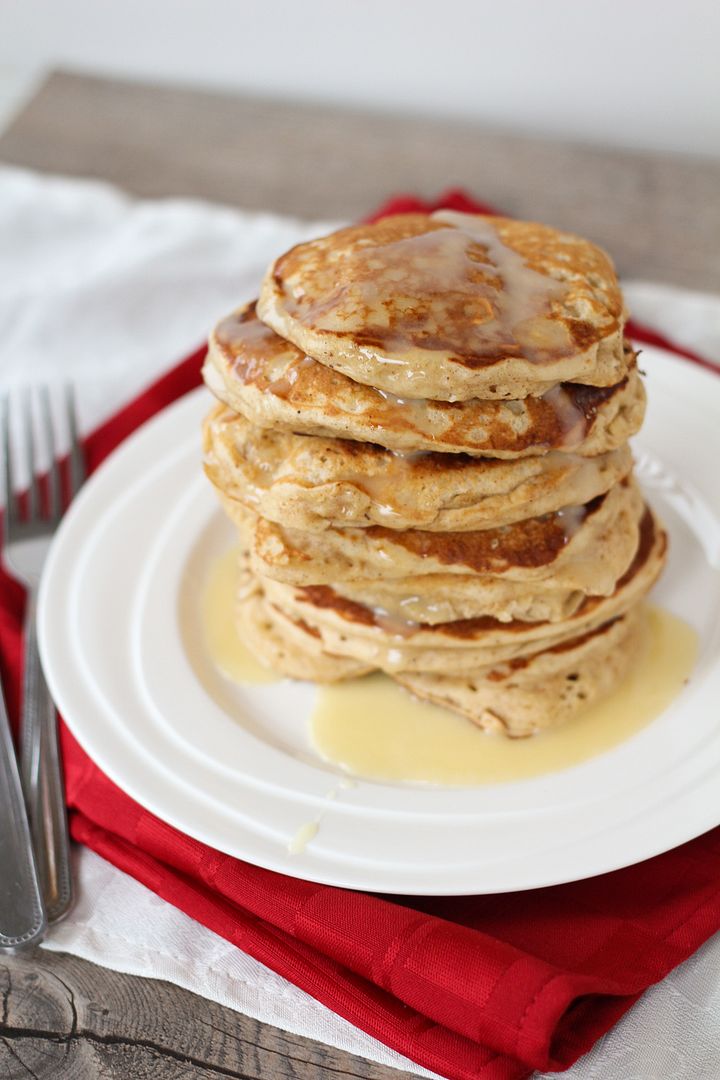
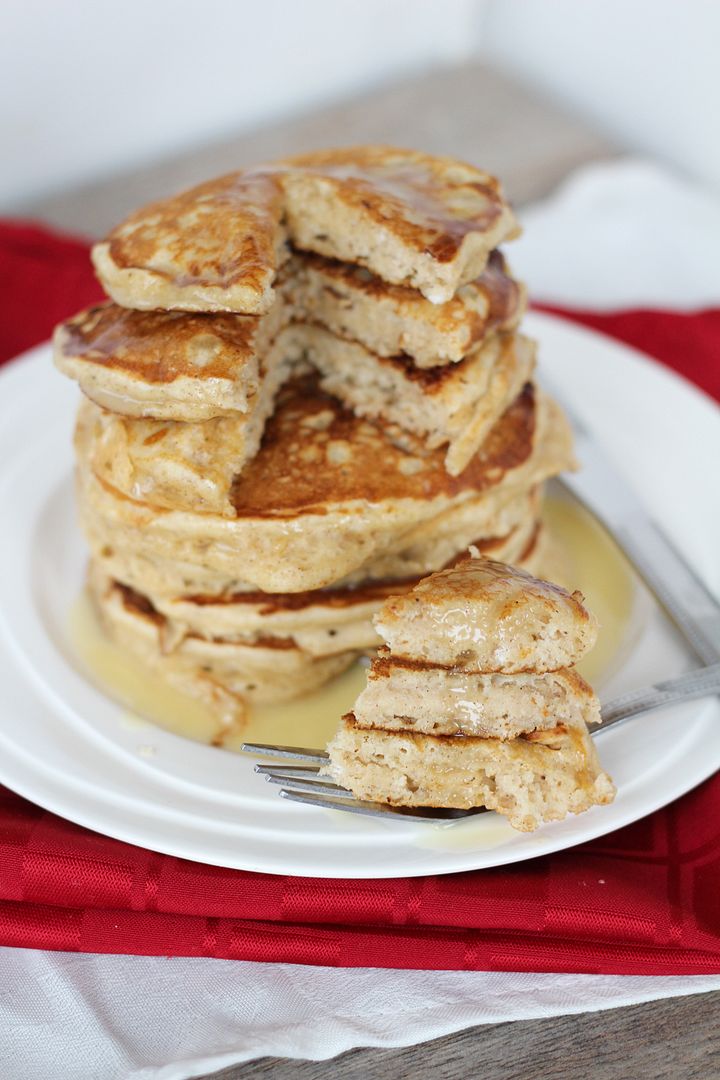
Eggnog Pancakes with Eggnog Glaze

Eggnog Pancakes with Eggnog Glaze

I can't believe Christmas is basically a week away and I haven't posted a single festive recipe on here yet.  I've been more focused on trying to get all my Christmas shopping done lately as I've had an extra hard time coming up with gift ideas this year and as it's looking now, I likely won't finish shopping until Christmas Eve.  Every year I tell myself I'm going to be more organized with everything Christmas-related but every year I end up with a TON of stuff to do last minute.  It's kind of part of the holiday rush and excitement though, and at least I usually get good deals by leaving my shopping so late!

Eggnog Pancakes with Eggnog Glaze

I do regret not being more organized with holiday recipes though.  I had a lot of ideas floating around my head in November but so far I've mainly just been consuming treats that involve eggnog and Kahlua or Baileys, which you don't really need a recipe for!  Other than those soft molasses cookies I told you about earlier, these pancakes are the only other festive thing I've made this year.  And while I'm disappointed I haven't been doing more cooking/baking, I'm pretty happy that the one thing I made turned out so well!

Eggnog Pancakes with Eggnog Glaze

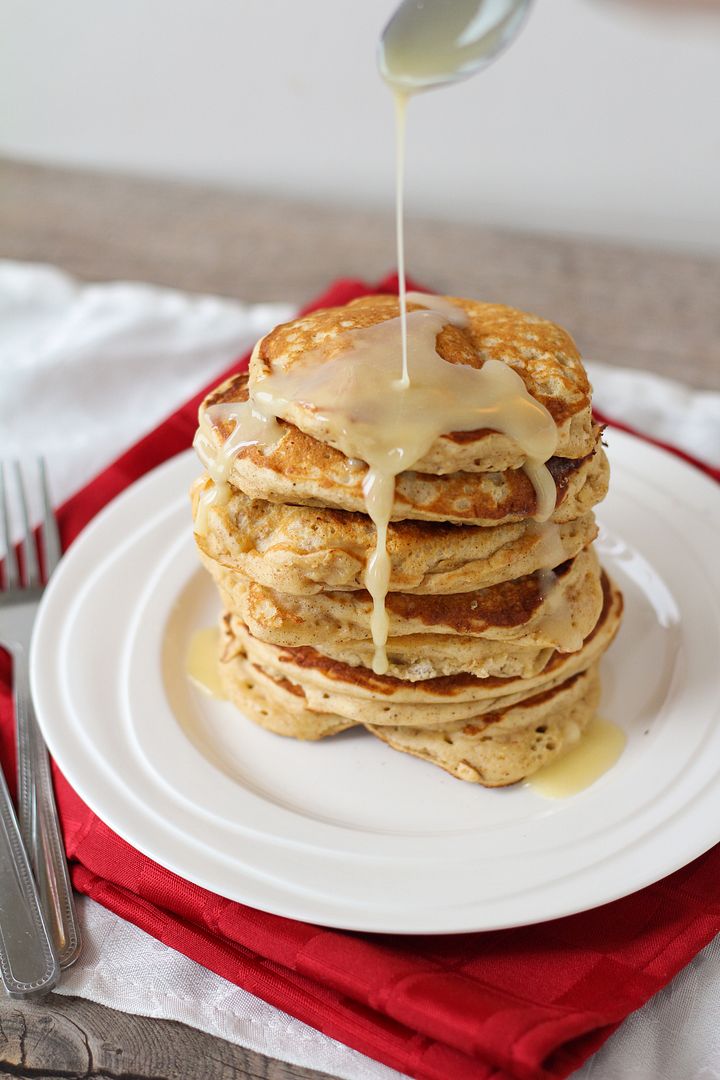
These pancakes are light and fluffy with eggnog in the batter and a pinch of spices to give them a subtle eggnog flavour, but the glaze is what really kicks up the eggnog flavour so you're certain you're eating a festive (and slightly decadent, but not over-the-top) breakfast and not just regular pancakes.  So don't skip it!  

I already can't wait to make these again for breakfast this weekend, and to hopefully squeeze in some holiday baking before then!

Eggnog Pancakes with Eggnog Glaze

Eggnog Pancakes with Eggnog Glaze

Recipe drew inspiration from several similar recipes, including Forkful of Comfort, Savory Simple, and SkinnyTaste

Serves about 4-6 (makes 16-18 pancakes)

Ingredients:

For the Pancakes:
2 cups all-purpose flour
4 teaspoons baking powder
1/2 teaspoon salt
1/2 teaspoon nutmeg
1 teaspoon cinnamon
2 large eggs, lightly beaten
2 cups eggnog (I used low-fat eggnog)
2 tablespoons vegetable or canola oil
2 teaspoons vanilla extract (or substitute half rum extract if desired)

For the Glaze:*
1/2 cup icing sugar
2 tablespoons eggnog
1 tablespoon maple syrup
1/2 teaspoon rum extract

Directions:

First, prepare the pancake batter.  Whisk all the dry ingredients (flour, baking powder, salt, nutmeg, and cinnamon) in a large bowl.  In a separate medium bowl, whisk together the wet ingredients (eggs, eggnog, oil, and vanilla extract).  Add the wet ingredients to the dry ingredients and fold together with a spatula until just combined (batter will be lumpy).

Heat a large non-stick skillet or griddle to medium heat and spray with non-stick cooking spray if necessary.  Pour pancake batter by 1/4 cup-fulls onto the pan.  Let cook until bubbles begin to form and pancake is browned on one side, a couple of minutes, then flip and cook until both sides are evenly browned.

While cooking pancakes, prepare the glaze by whisking all ingredients together in a small bowl.

Serve pancakes warm with a small amount of eggnog glaze on top.
*Note: The amount of glaze should be just enough for a small amount for each serving.  The glaze is quite sweet so you shouldn’t want too much, but feel free to double the amounts for the glaze if you like.

September 13, 2013

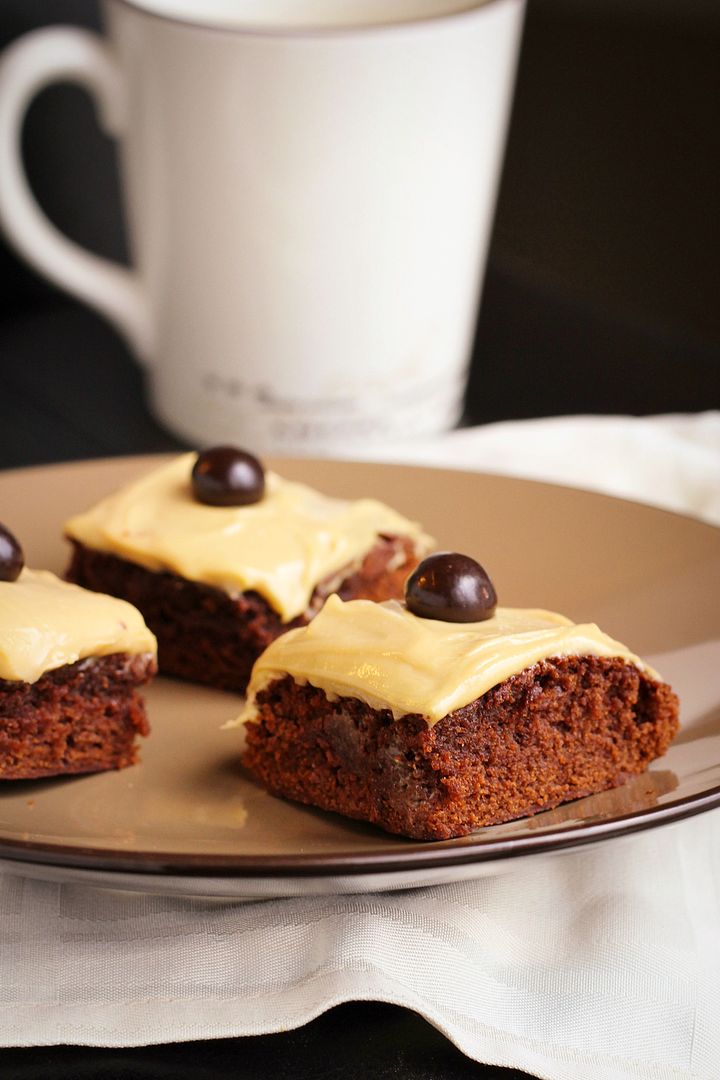
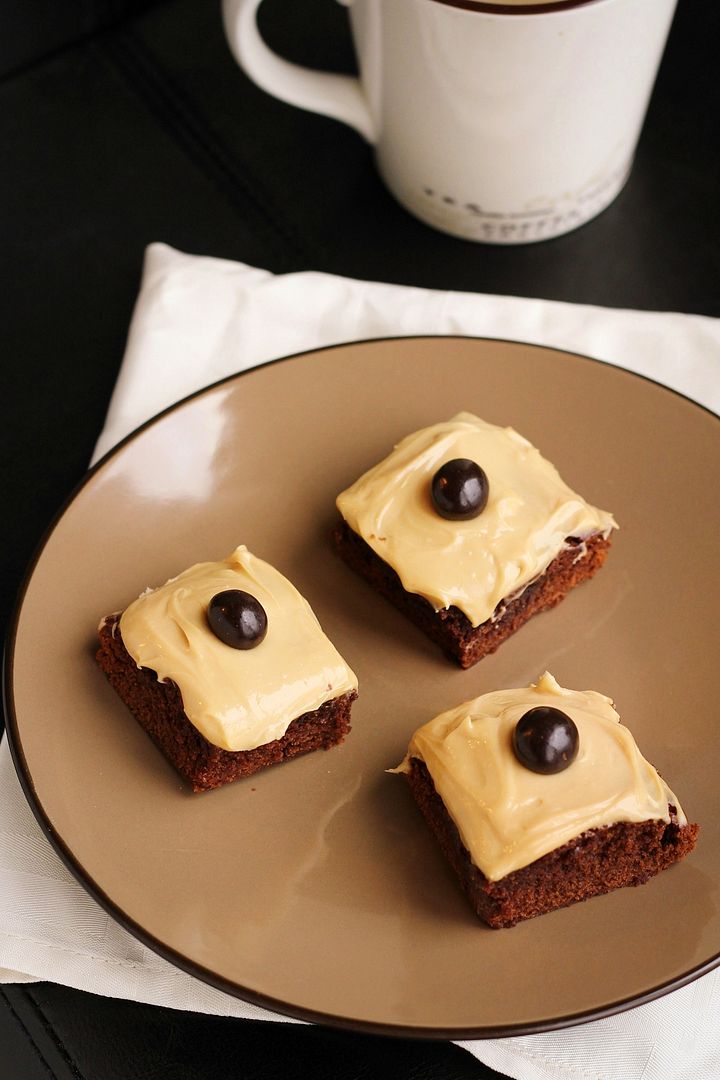
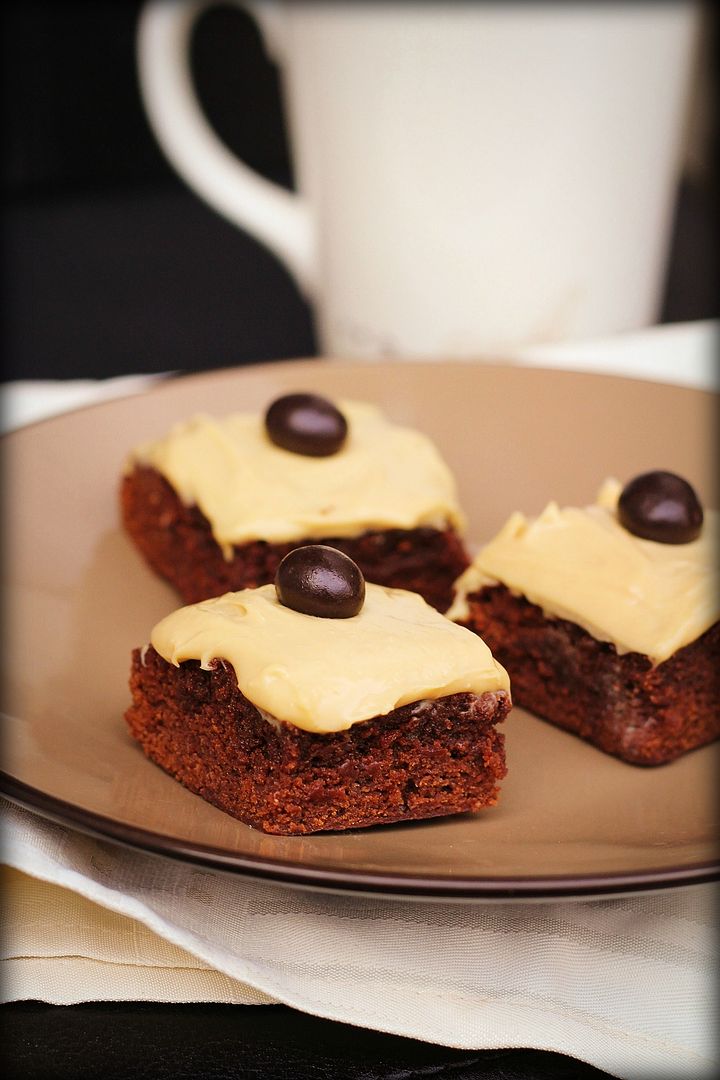
Frosted Mocha Brownies

Frosted Mocha Brownies

I love baking and used to bake treats all the time, but I can't even remember the last time I made a dessert before last weekend.  I actually don't eat dessert myself that often, but I like trying new recipes and sharing treats with others; the problem is that everyone I know seems to be on diets or trying to eat healthier lately (which is a good thing!), and there aren't really any big dessert-worthy celebrations in the summer, so I haven't had an excuse to bake in a long time!

This past weekend though, I had a sudden urge to bake something so I decided to stop waiting for an excuse and just make something to give away to the boyfriend's coworkers (after trying one myself, of course!).  I was in the mood for a warm and comforting dessert but wasn't quite ready to break out the apples and pumpkin yet (though now that it's cooled off, that will be up next!), so I decided to go with brownies.  Everyone loves brownies, and I had all the ingredients for these latte bars I'd had bookmarked for a while, so I went right to work!

Frosted Mocha Brownies

The original recipe for these bars was called 'latte bars', but since they're made up of coffee and chocolate, and mine turned out much more like brownies than bars, I'm calling them mocha brownies.  They're chewy and dense and everything you'd want a brownie to be (i.e. not too fudgey and not too cakey - just in between), with coffee in both the brownie, frosting, and the chocolate coffee beans on top, giving them the perfect amount of subtle coffee flavour.  I topped mine with a cream cheese frosting instead of buttercream because I think everything is better with cream cheese!

I'm not a huge chocolate lover but I do love coffee and I loved these bars, and so did the coworkers who were kind enough to help me eat them all!  I know the pictures are terrible (it was pretty dark out when I got time to take a few pics), but trust me that these are way better than I've made them look!

Hope you all have a great weekend!

Frosted Mocha Brownies

Frosted Mocha Brownies

Adapted from Land O Lakes

Makes one 8x8-inch pan; can be sliced into 16-20 brownies

Ingredients:

For the Brownies:
1 tablespoon instant coffee (+ 2 teaspoons hot water)
1 cup sugar
3/4 cup all-purpose flour
1/3 cup cocoa powder
1/4 teaspoon salt
1/2 cup unsalted butter, melted
2 large eggs
1 teaspoon vanilla extract

For the Frosting:
8 oz (one brick) cream cheese, softened (I used light cream cheese)
3/4 – 1 cup icing sugar
1/2 tablespoon instant coffee
1 teaspoon vanilla extract

For Topping:
16-20 chocolate covered coffee/espresso beans (or more, if desired)

Directions:

Preheat oven to 350°F.  Spray an 8x8 baking pan with non-stick cooking spray (I lined mine with parchment paper instead for easy removal after – use whatever method you like for brownies).

Prepare the brownies:  Combine instant coffee with hot water and mix until dissolved in a small bowl.  In a separate bowl, add the sugar, flour, cocoa powder, and salt, and whisk to combine.  In another separate bowl, whisk together the butter, eggs, vanilla extract, and coffee mixture until combined.  Add the wet ingredients to the dry ingredients and fold together with a spatula until just combined.  Spread the batter in the prepared pan and bake in preheated oven for 23-27 minutes, until a toothpick inserted in the middle comes out clean.

Prepare the frosting: Combine instant coffee with vanilla extract and mix to combine in a small bowl.  Beat cream cheese with an electric mixer in a large bowl or the bowl of a stand mixer, until smooth and creamy, 2-3 minutes.  Add icing sugar and mix until combined.  Add coffee-vanilla mixture and mix until combined.  Taste and add more sugar if needed (I don’t like it to be too sweet).  Keep frosting in fridge until bars have completely cooled.

Once bars have cooled, spread frosting over them (you might not need all the frosting), and slice into bars.  Top each bar with a chocolate coffee bean, or chop multiple coffee beans and sprinkle overtop.

April 16, 2013

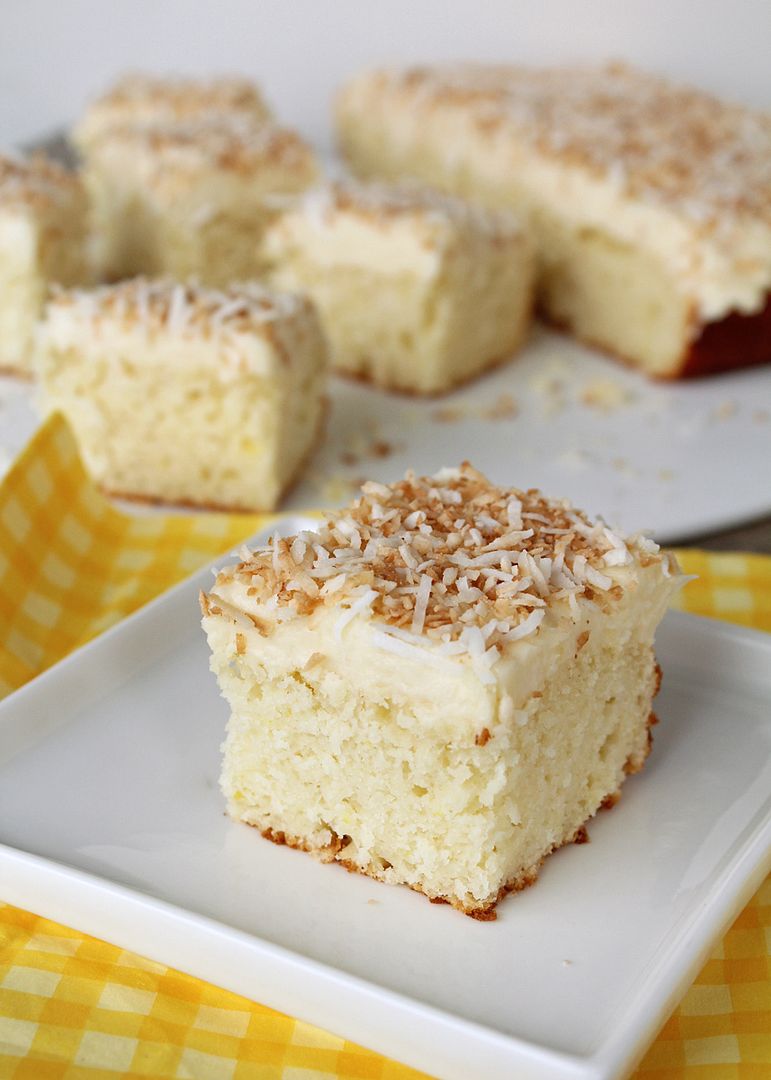
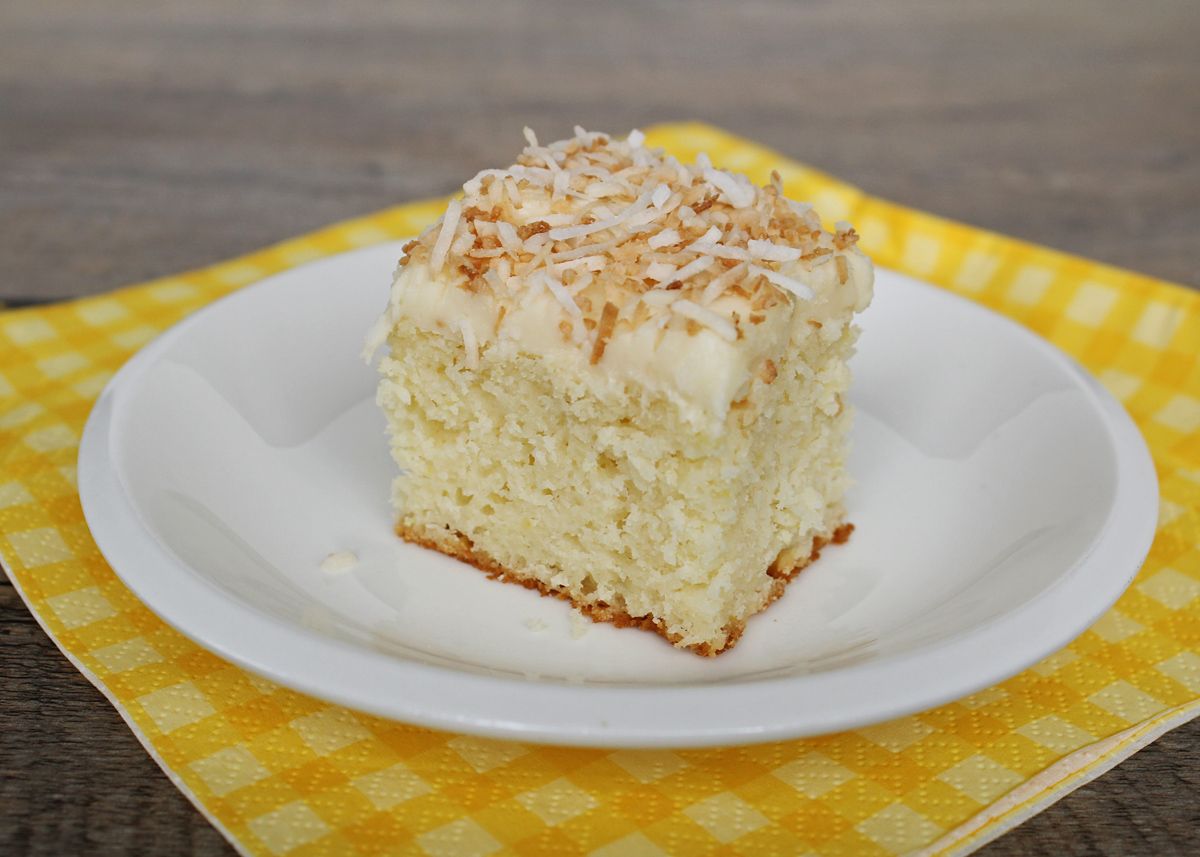
Lemon Yogurt Snack Cake with Coconut Cream Cheese Frosting

Lemon Yogurt Snack Cake with Coconut Cream Cheese Frosting

The sun has finally come through shining here the past few days, but for those who are still buried in snow, and for all of those affected by the events in Boston this past week, I'm sharing this bright and light lemon yogurt cake with coconut cream cheese frosting to help spread some warm and sunny thoughts.

Lemon Yogurt Snack Cake with Coconut Cream Cheese Frosting

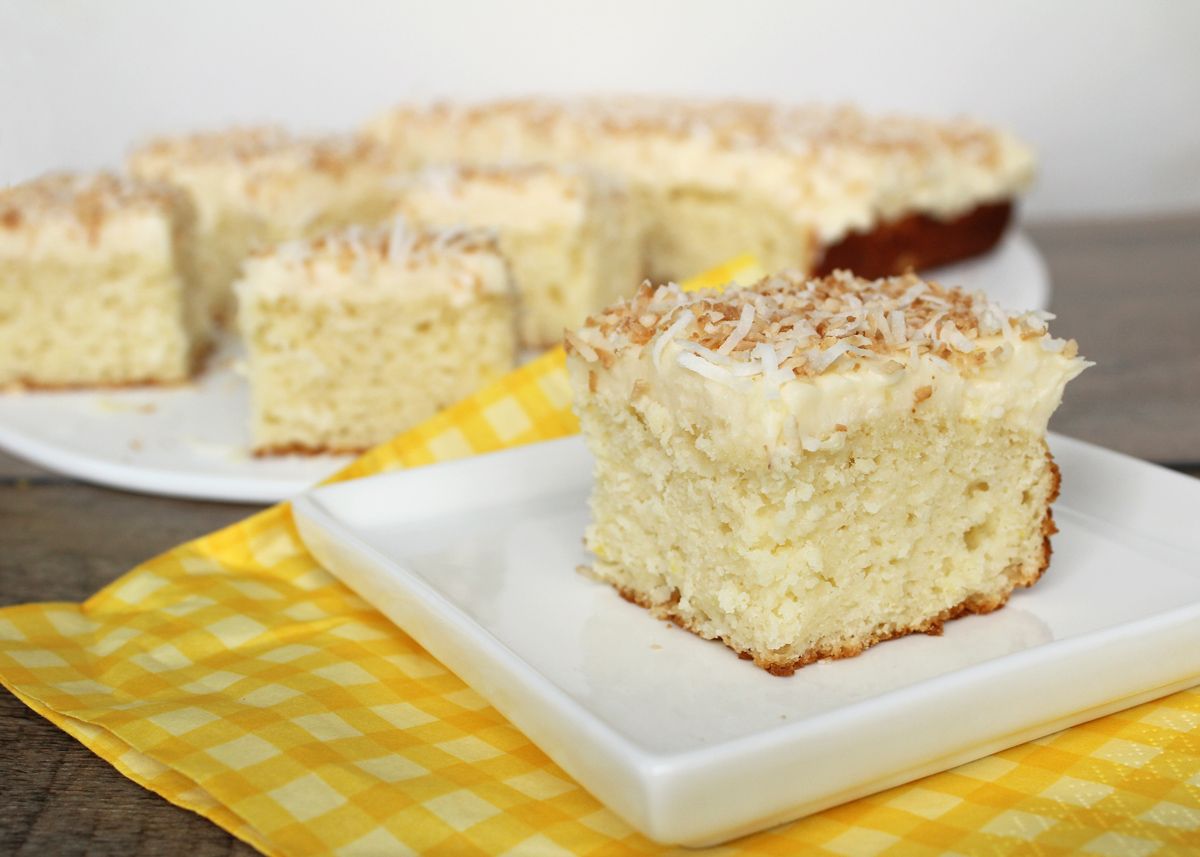
This is a simple snack cake made of a dense lemon yogurt cake base topped with a coconut cream cheese frosting and some toasted coconut flakes.  I tried to lighten it up a bit from the original recipe by reducing the oil and sugar, and the texture still came out great and I loved how the lemon and coconut flavours shone through and complemented each other.  This is a great spring cake to make and share with others to spread the sunshine :)

Lemon Yogurt Snack Cake with Coconut Cream Cheese Frosting


Lemon Yogurt Snack Cake with Coconut Cream Cheese Frosting

Adapted from Emily Loves Food

Makes one 9x9-inch cake, about 16-20 squares

Ingredients:

For the Cake:
1 cup plain low-fat Greek yogurt
1/3 cup vegetable oil
1/3 cup fresh lemon juice
2 teaspoons grated lemon zest
1/2 teaspoon vanilla
3/4 cup sugar
2 large eggs
2 cups all-purpose flour
1 tablespoon baking powder
1/2 teaspoon salt

For the Frosting:
8 oz cream cheese (reduced fat, if desired), at room temperature
1/4 cup unsalted butter, at room temperature
1-1/2 cups icing sugar (use 2 if you want it sweeter)
1/2 teaspoon vanilla extract (or coconut extract, if desired)
1/2 cup sweetened shredded coconut

1/2 cup sweetened shredded coconut, toasted for topping

Directions:

Preheat oven to 350°F.  Line a 9x9-inch baking pan with parchment paper on the bottom.

Mix the “wet” ingredients together with a whisk until well combined: yogurt, oil, lemon juice, lemon zest, vanilla, sugar, and eggs.  In a separate bowl, whisk together the dry ingredients: flour, baking powder, and salt.  Add the dry ingredients to the wet ingredients and stir until just combined.  Spread mixture into prepared baking pan and even out with a spatula.  Bake in preheated oven for 30-35 minutes, until a toothpick inserted in the middle comes out clean.  Remove from oven and let cake sit in pan for about 10 minutes to cool, then transfer cake to a wire rack to cool completely.

Meanwhile, prepare frosting.  Beat cream cheese and butter until smooth, about 2-3 minutes.  Add icing sugar and beat until combined.  Add vanilla and coconut and beat until just combined.  When cake has cooled, frost the top with the frosting.  It should  make a thick layer.

Toast the additional 1/2 cup of coconut in a dry skillet over medium heat until golden brown.  Sprinkle overtop frosting.

February 22, 2013

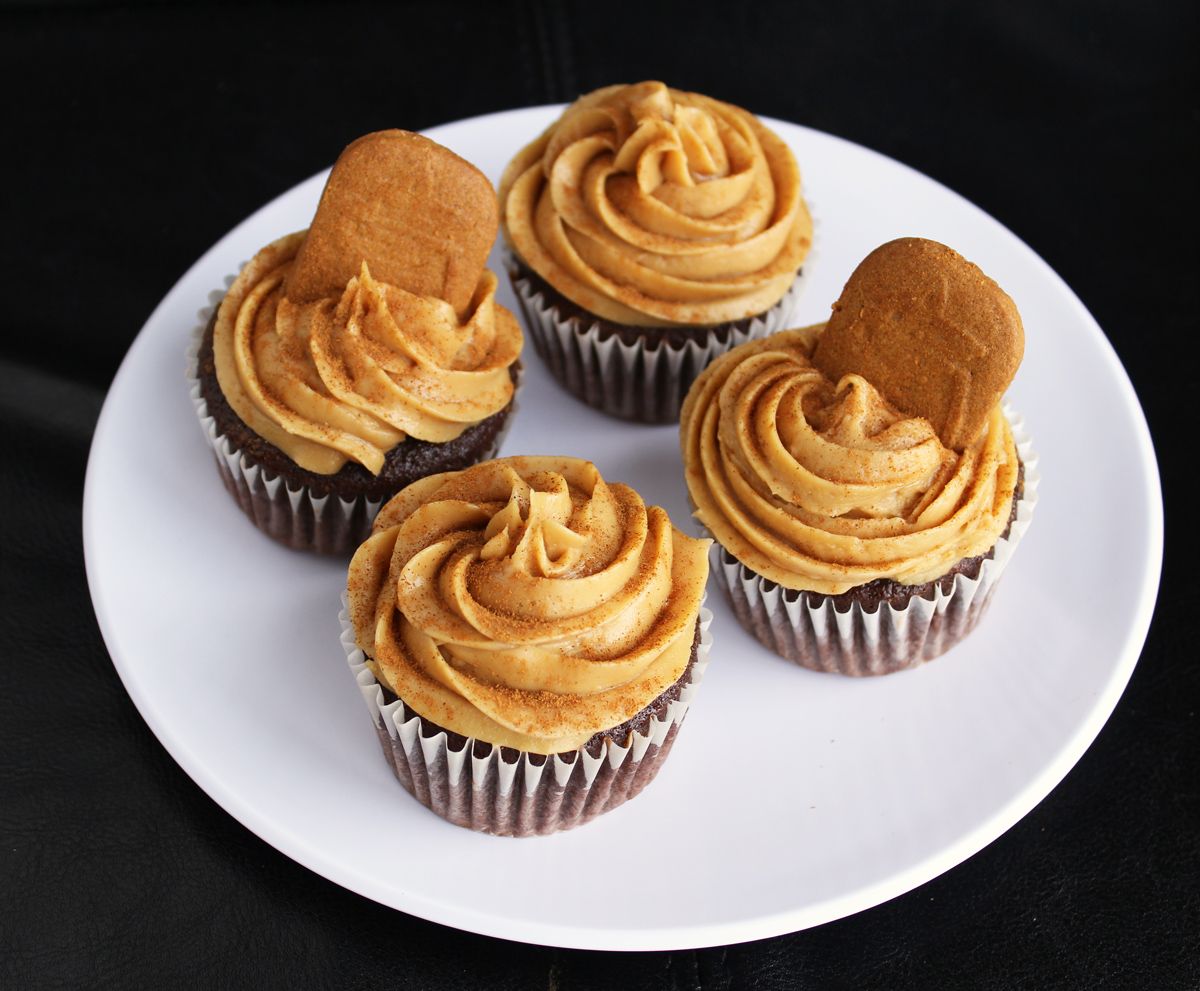
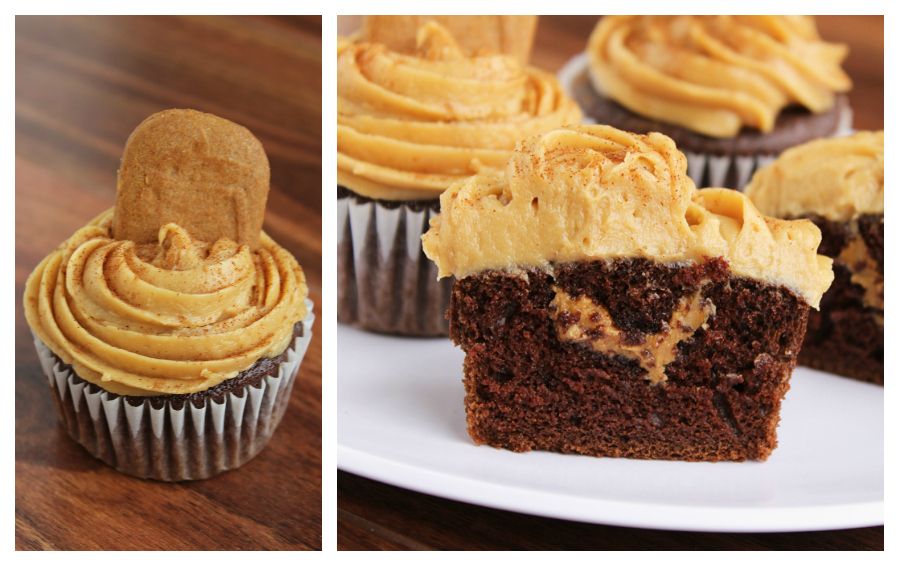
Chocolate Biscoff Cupcakes with Biscoff Cream Cheese Frosting

Chocolate Biscoff Cupcakes with Biscoff Cream Cheese Frosting

So this is the first Biscoff recipe on my blog, and I’m sure most of you are probably thinking that I’m the last one to the Biscoff party, which started almost two years ago. The thing is, Biscoff hasn’t really become as popular here in Canada as it has in the United States (or Europe, I assume, as that’s where it originated). In fact, when I sent these cupcakes to work with my boyfriend, he had to call me to ask me again what they were called because he had never heard of Biscoff, and apparently nobody at his work had either. And when I wrote about these cupcakes on Facebook, the first comment I got was asking me what Biscoff is.

So even though I feel like my fellow bloggers are probably already sick of Biscoff because it’s been popular on blogs for a while, in real life I don’t know anyone who’s even heard of the stuff, so I feel obligated to explain what it is!  But if you’ve already seen a thousand Biscoff recipes and have gone through fifty jars of the stuff at home, feel free to skip past these next paragraphs :)

Chocolate Biscoff Cupcakes with Biscoff Cream Cheese Frosting

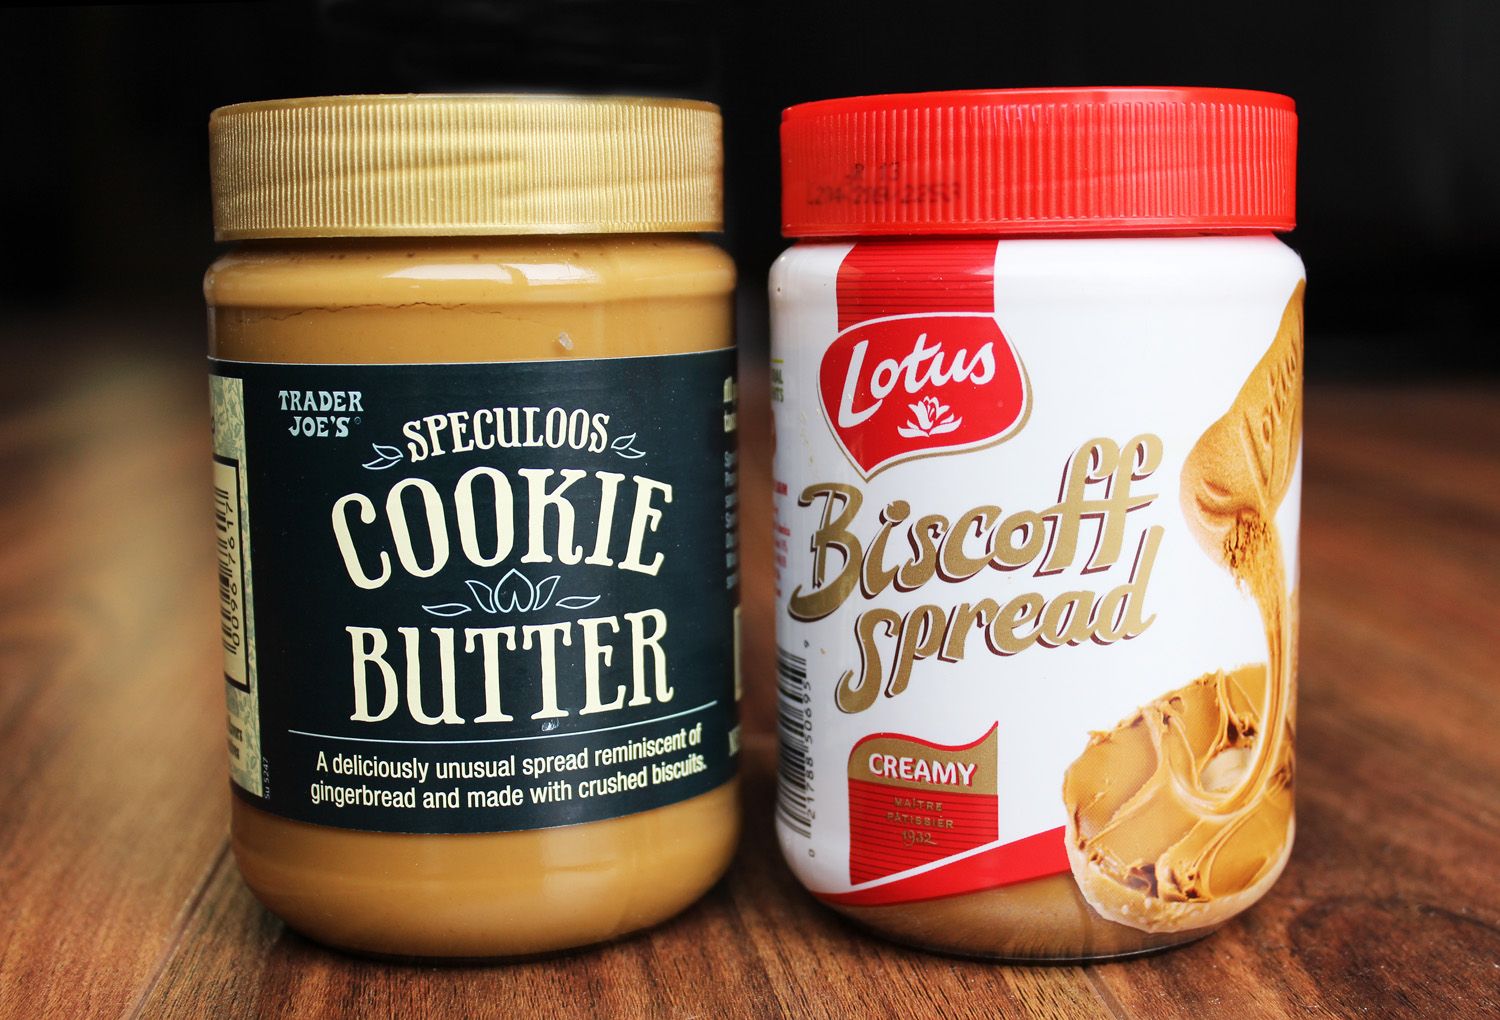
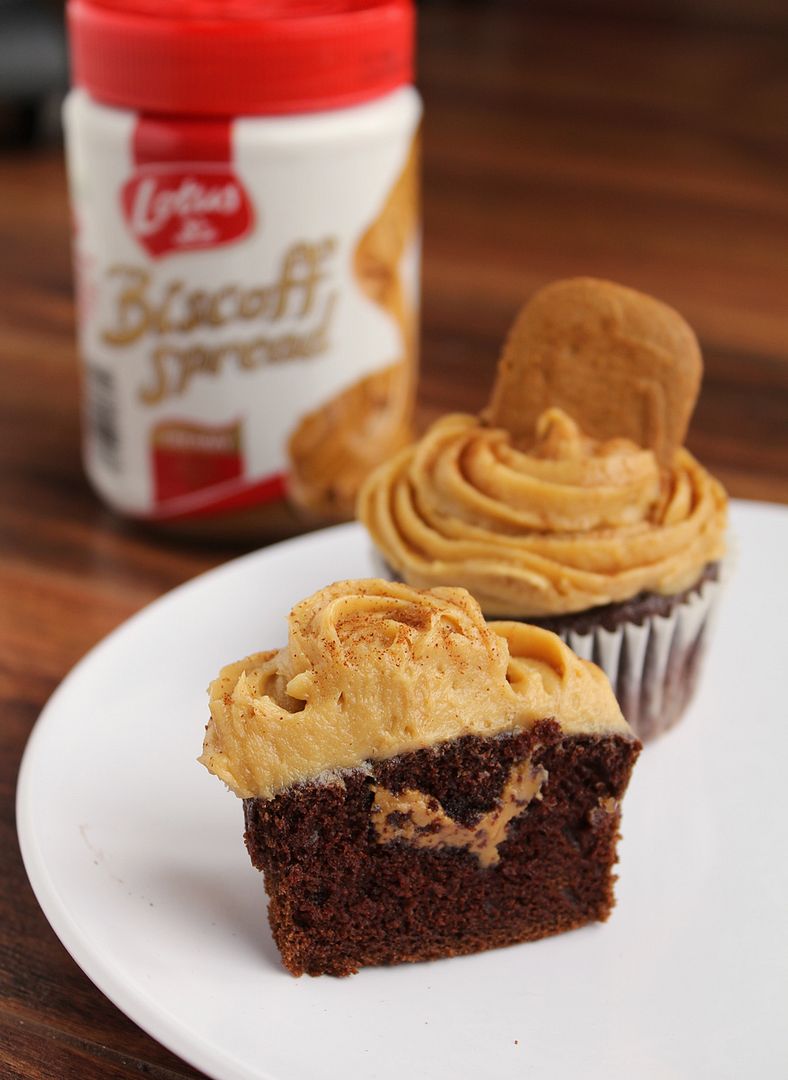
Biscoff cookies (“Europe’s favourite cookie with coffee”, according to their website), also known as Speculoos, are a crisp little Belgian cookie with a cinnamon/caramel/gingersnap-like flavour.  They originated in Europe but grew in popularity around the world when airlines like Delta started handing them out on flights.  A few years ago, the cookies were turned into a creamy spread with a consistency of peanut butter and taste of Biscoff/speculoos cookies.  The main ingredient in the spread is cookies, which is why it’s also referred to as cookie butter.  I think a lot of people eat the spread as they would peanut butter, such as on toast or as a dip for apples, but it’s also become really popular for use in baking.  There’s a nice little slideshow on Huffington Post of some of the ways you can use Biscoff spread!

cookie butter spreads

While it’s now available in many grocery stores in the United States, including Trader Joe’s, which has its own version called Speculoos Cookie Butter (pictured above), it hasn’t really appeared much in Canada yet, which is why most of my friends haven’t heard of it. I buy it when I go on trips to the US, but if you don’t live anywhere near the States (or Europe), I’d recommend looking in European grocery stores – I’ve actually spotted Biscoff at an Italian supermarket in Waterloo, Ontario, so it is out there!

 Chocolate Biscoff Cupcakes with Biscoff Cream Cheese Frosting

I had a hard time choosing what to make for my first experiment with Biscoff.  I’ve never really been a big fan of cupcakes, but I made some red velvet cupcakes on Valentine’s Day (which I posted about on Facebook, if you’re interested) and they turned out so well that they changed my mind about cupcakes.  Plus they are so fun to decorate!  

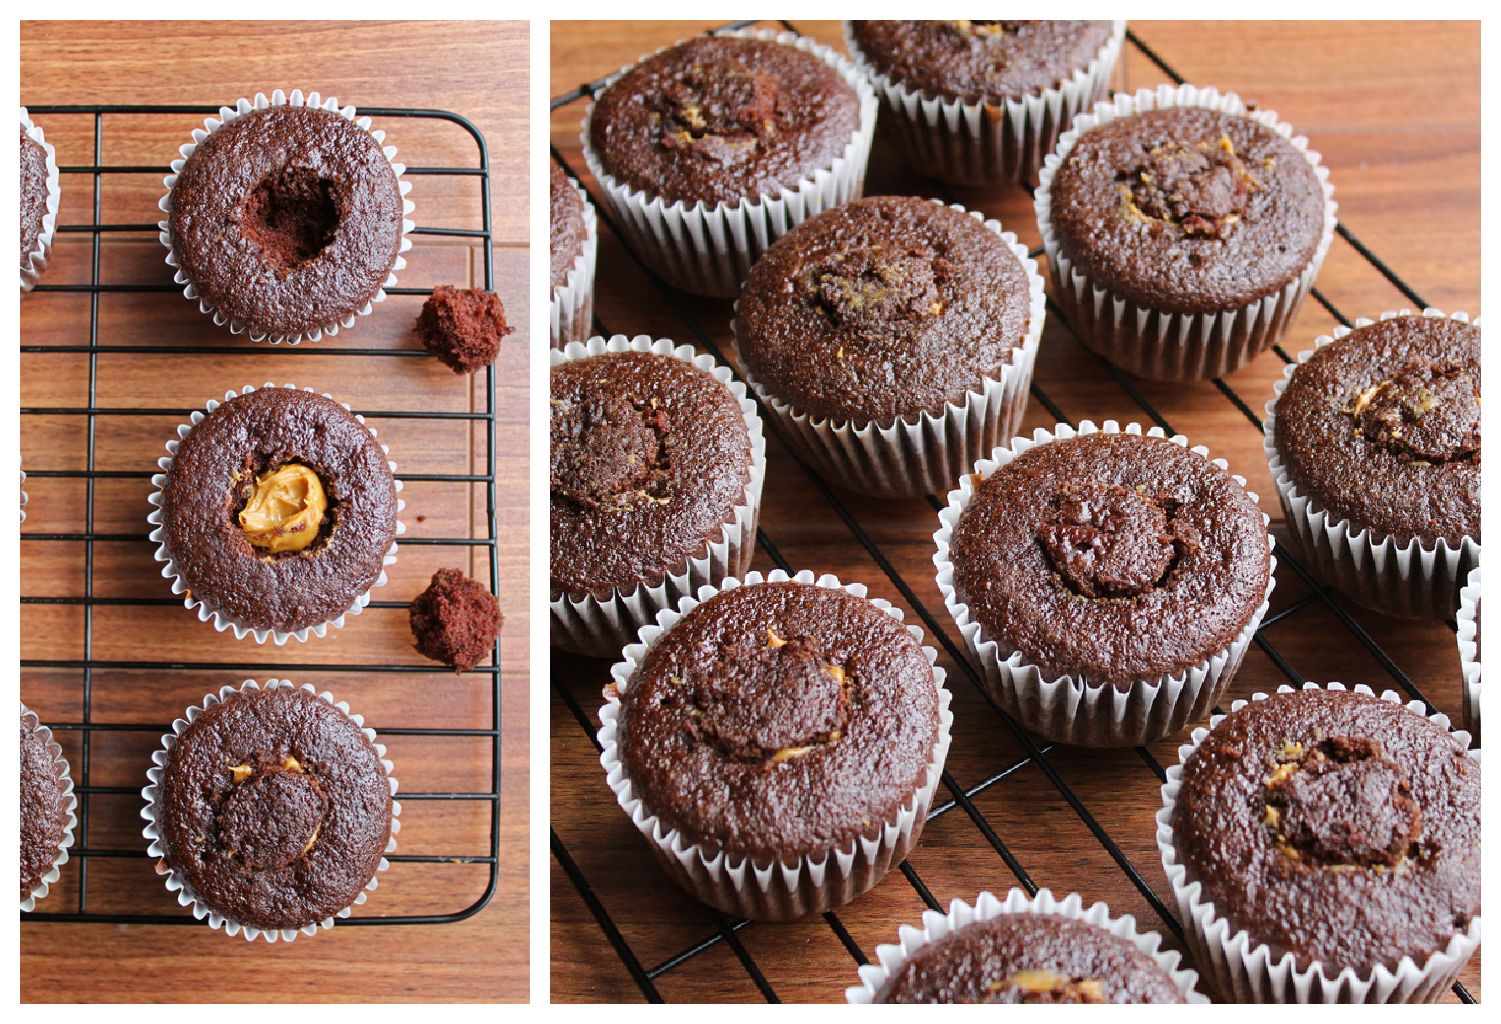
So I decided to make Biscoff cupcakes. My first thought was to make both the cupcake batter and frosting with Biscoff, but I thought that might be a bit too much, so I decided to go with a chocolate base instead.   I used Beantown Baker’s idea of stuffing a little Biscoff inside the cupcake for a fun surprise, which was super easy – you just have to cut a hole in the top of the cupcake after they’re done, fill it with a spoonful of Biscoff, and cover it back up.  Don’t try putting Biscoff in the center of the cupcake before you bake them – it will just sink to the bottom, trust me!  Here’s a little visual of how to fill the cupcakes:

 Filling Biscoff Chocolate Cupcakes

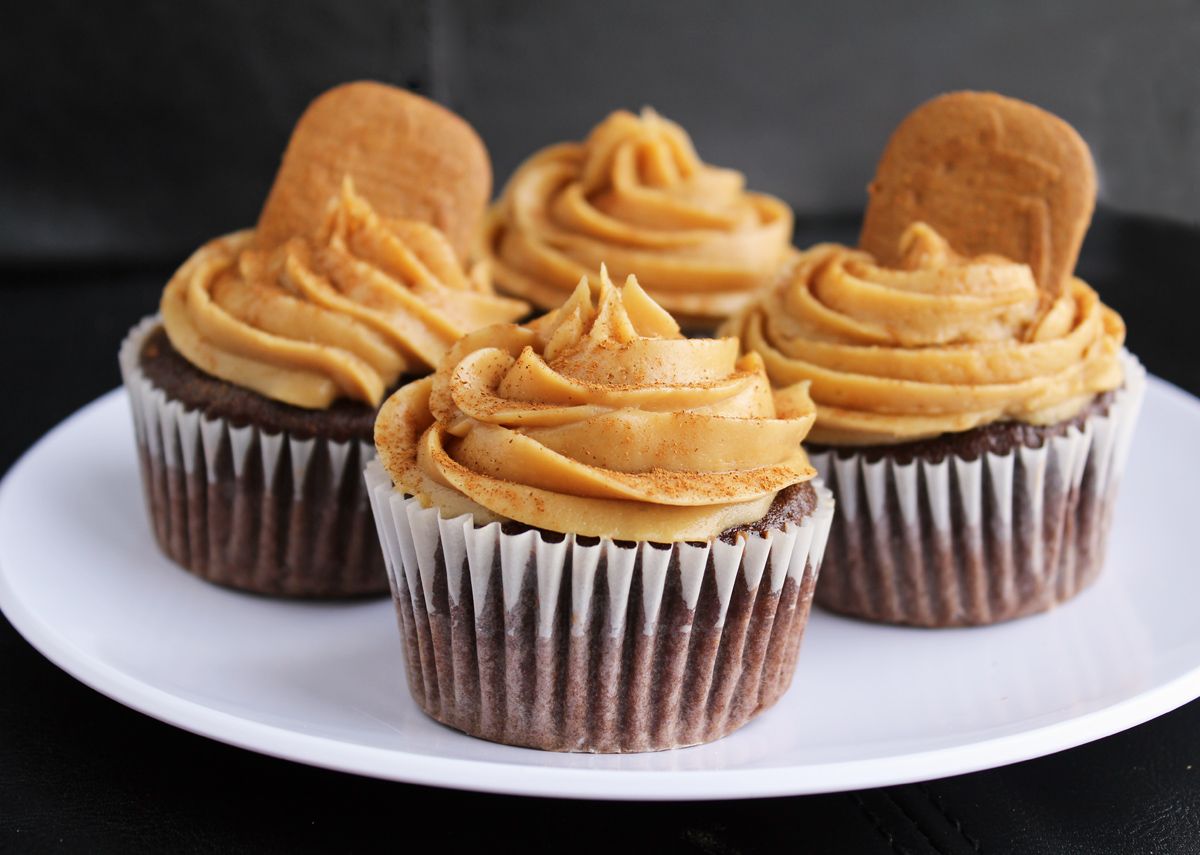
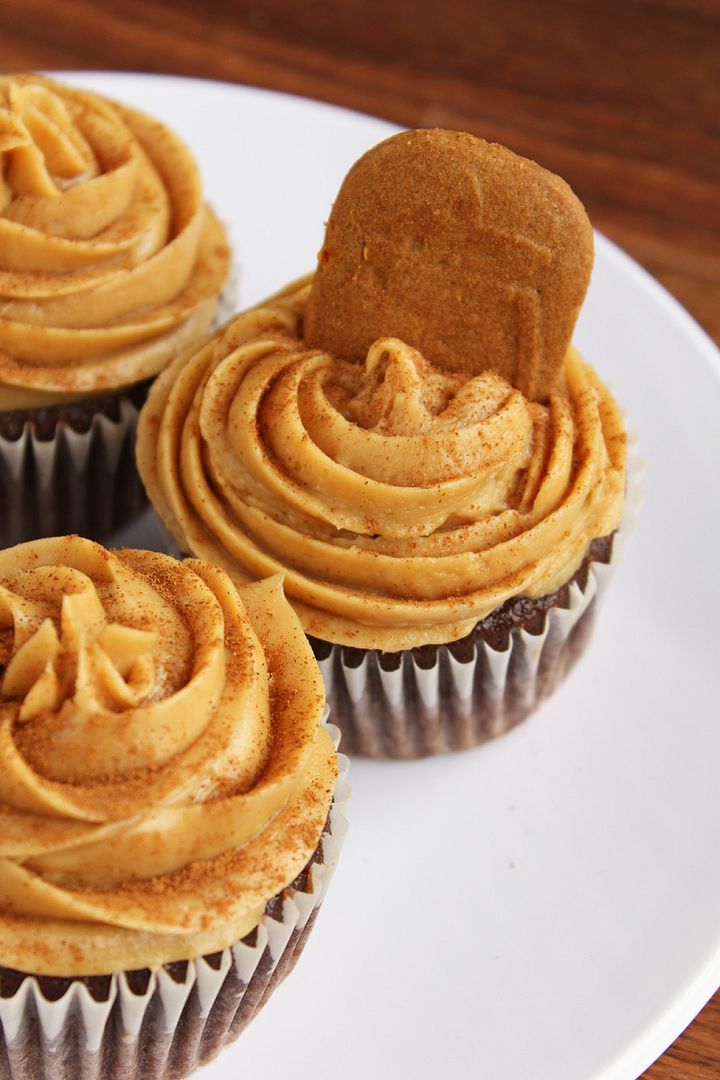
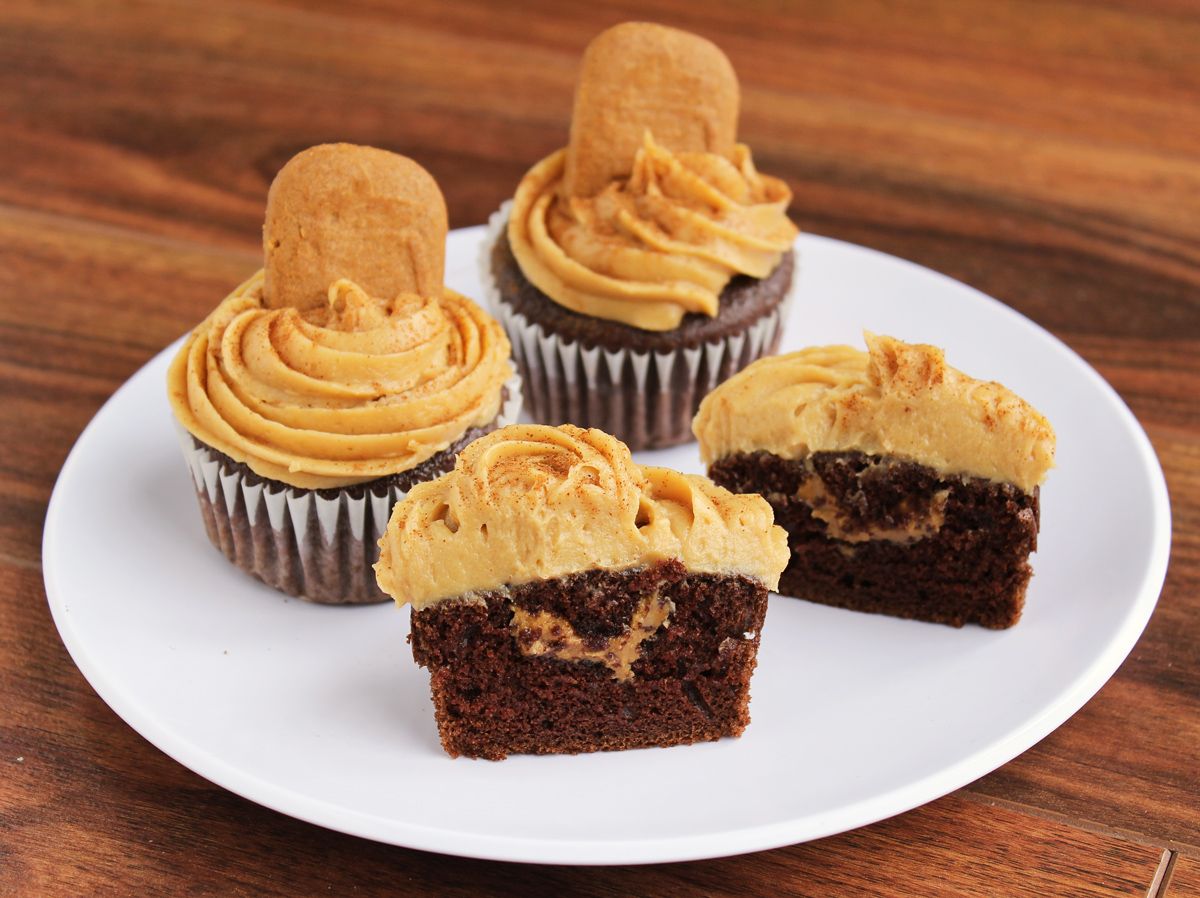
I was so happy with how these turned out! The Biscoff cream cheese frosting was my favourite part and the chocolate cupcake was the perfect complement to it, plus I loved the little surprise of Biscoff in the center! I ate two right after I made them then had to send the rest away to be shared before I got carried away, and I’m told they were very well received at work, even though most people probably didn’t know what they were eating!

 Chocolate Biscoff Cupcakes with Biscoff Cream Cheese Frosting

I still have a jar and a half of Biscoff to use up, so now that I’ve introduced you guys to it, expect to see a few more recipes here in the near future!

And if you have a favourite Biscoff recipe or way to use it, please feel free to share in the comments, I’d love to hear your ideas!

 Chocolate Biscoff Cupcakes with Biscoff Cream Cheese Frosting

Chocolate Biscoff Cupcakes with Biscoff Cream Cheese Frosting

Inspired by Beantown Baker, Chocolate cake recipe adapted from Hershey’s Kitchens, Biscoff frosting adapted from Biscoff

Makes about 12 cupcakes

Ingredients:

For the Cupcakes:
3/4 cup + 2 tablespoons all-purpose flour
1 cup sugar
1/4 cup + 2 tablespoons unsweetened cocoa powder
3/4 teaspoon baking soda
3/4 teaspoon baking powder
1/2 teaspoon salt
1/2 teaspoon cinnamon
1 large egg
1/2 cup milk
1/4 cup canola oil
1 teaspoon vanilla extract
1/2 cup brewed coffee
~1/4 cup Biscoff spread for filling

For the Frosting:
8 oz brick of cream cheese
1/2 cup Biscoff spread
1/2 cup icing sugar
1/4 teaspoon salt
1 teaspoon vanilla extract

Directions:

Preheat oven to 350°F.  Line a muffin tin with paper liners and spray with non-stick spray.

In a large bowl, whisk together the flour, sugar, cocoa powder, baking soda, baking powder, salt, and cinnamon until well combined.  In a separate bowl, whisk the egg, milk, oil, and vanilla extract until smooth.  Add the wet ingredients to the dry ingredients and mix well until smooth.  Stir in the coffee; batter will be thin.   Use a measuring cup to pour batter into liners, filling them only 2/3 full.  Bake in preheated oven for 22-25 minutes, until a toothpick inserted in the middle comes out clean.  Transfer to a wire rack and let cool completely.

Meanwhile, prepare frosting.  Beat the cream cheese and Biscoff together with an electric mixer until smooth, about 2 minutes.  Slowly add the icing sugar and mix on low speed until combined.  Mix in the salt and vanilla. 

Once cupcakes have cooled, use a sharp knife to cut a small cone out of the top of the cupcake.  Remove the top and fill with about 1 teaspoon of Biscoff spread.  Replace the top and push down to hide the biscoff inside the cupcake and create a flat surface on the top of the cupcake. (see here for pictures of the cone filling method).

Transfer cream cheese frosting to a piping bag (I fitted mine with a Wilton 1M tip) and frost cupcakes.  I decorated mine with Biscoff/Speculoos cookies and a dusting of cinnamon.

 Chocolate Biscoff Cupcakes with Biscoff Cream Cheese Frosting

December 19, 2012

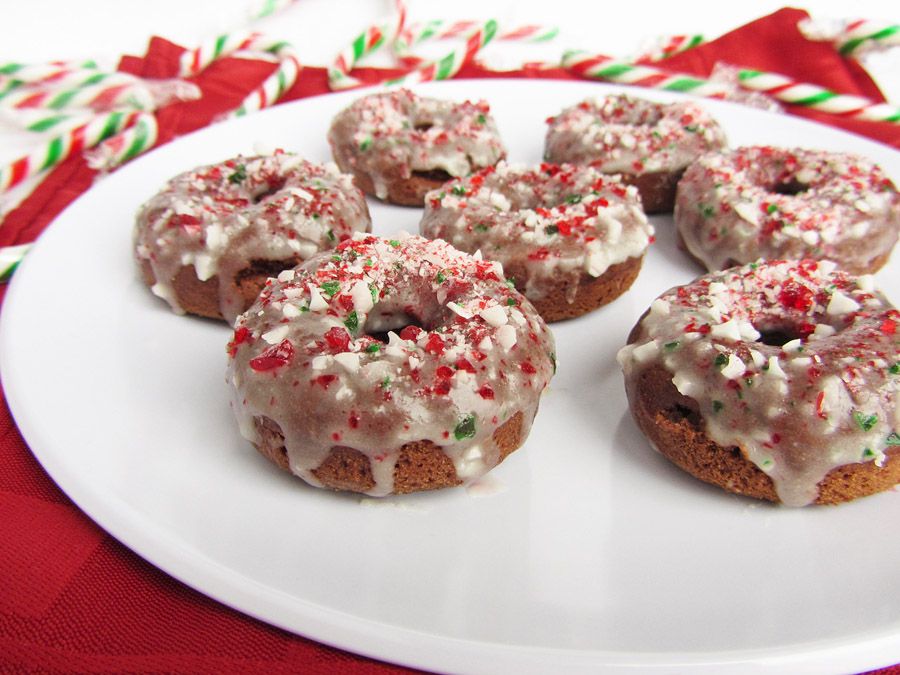
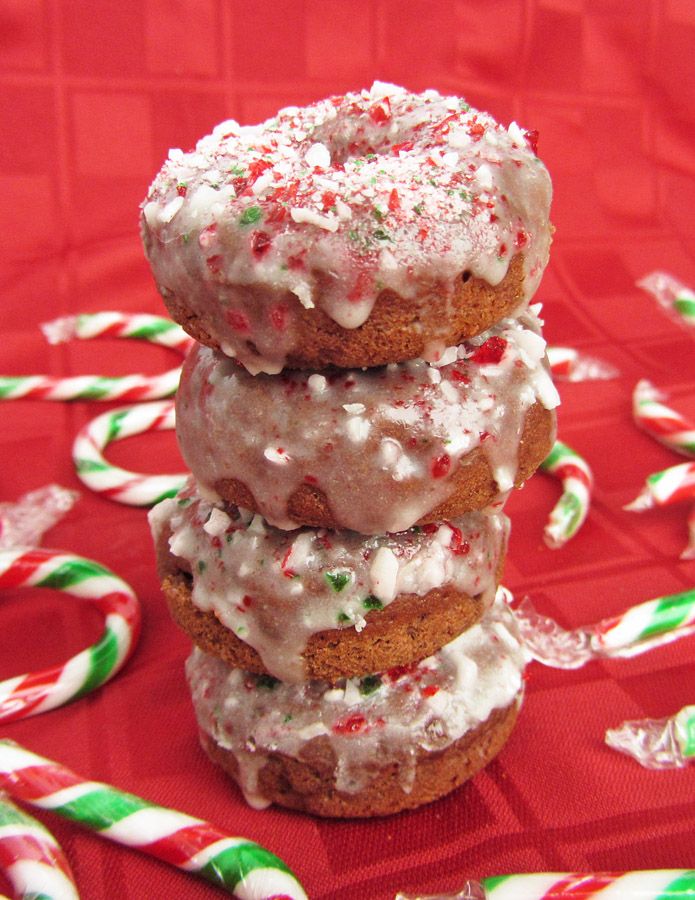
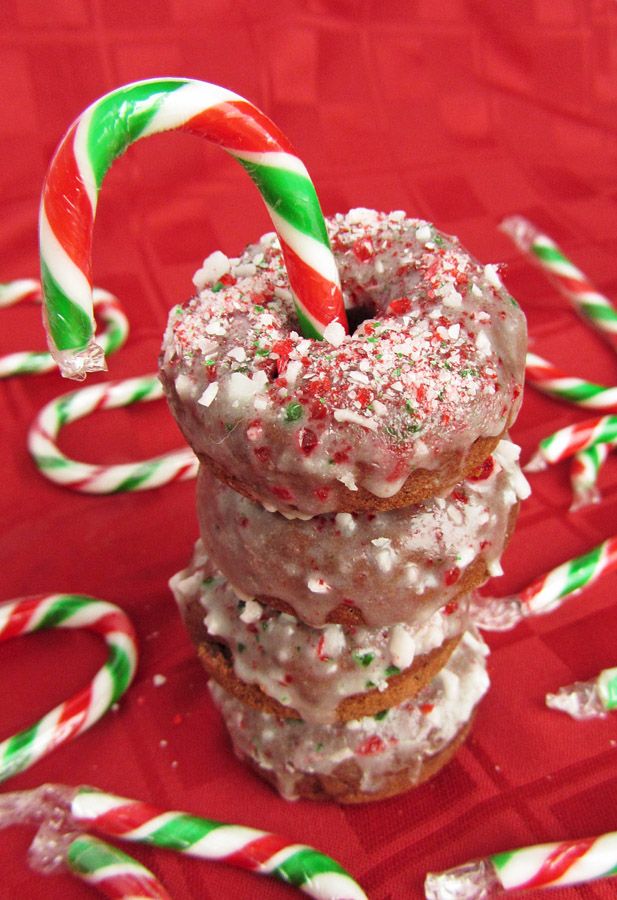
Mini Baked Peppermint Mocha Doughnuts

Mini Baked Peppermint Mocha Doughnuts

First I made cheesecake bars, then there were shortbread cookies, and now here I am with another peppermint holiday dessert, this time doughnuts! For those of you who hate peppermint, I promise this is the last one (at least for a little while)!

These go a step further than basic peppermint by adding chocolate and coffee flavours to resemble one of my favourite Starbucks’ holiday drinks, the peppermint mocha. (Although I’ve since discovered white peppermint mocha frappucinos and that is now my new favourite drink – try it!)

Mini Baked Peppermint Mocha Doughnuts

Though I don’t often make doughnuts because they’re better eaten fresh and I don’t usually have a big group of people to feed fresh doughnuts to, I do love them because they’re so cute and easy to eat, plus they’re a little better for you than their full-sized, fried counterpart.

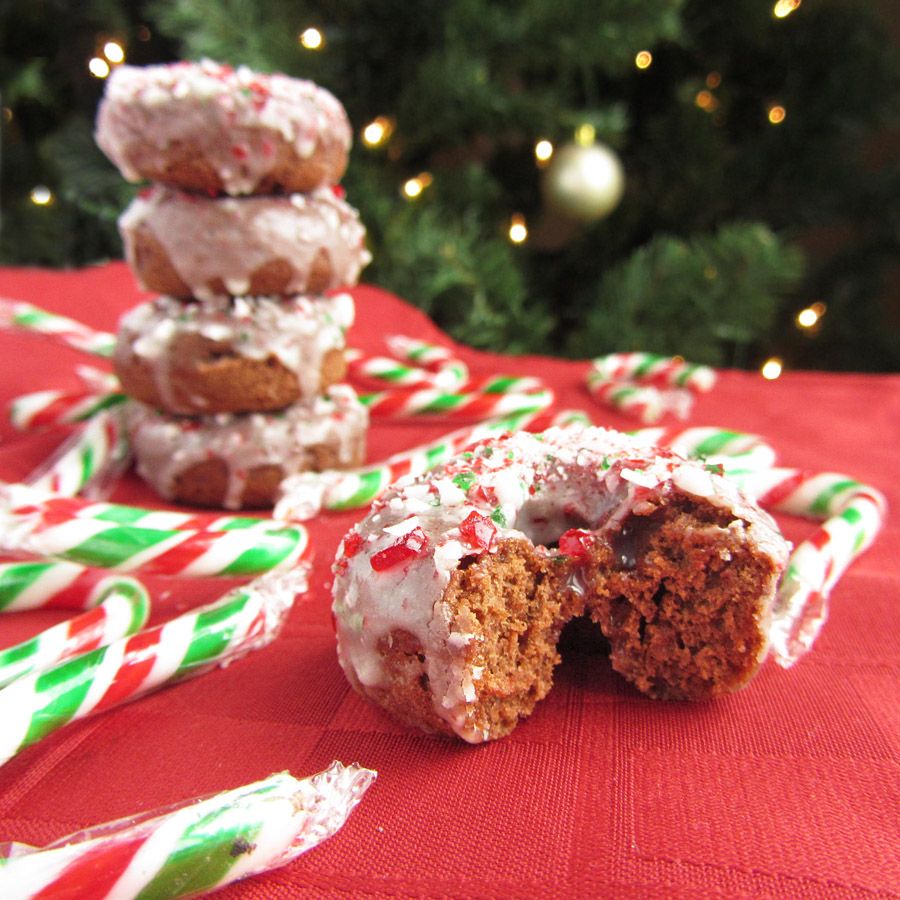
These little guys have a coffee chocolate base covered in a peppermint white chocolate glaze with a sprinkle of crushed candy canes on top. They’re so festive looking and reminded me a lot of a peppermint mocha!

These had just the right amount of subtle coffee flavour for me, but you could add more coffee or espresso powder if you want a strong coffee taste. Or you could eliminate it and just go with a chocolate base if you don’t like coffee. Similarly, you could eliminate the peppermint extract from the icing if you’re not into minty things – I know some people who tried these weren’t really a fan and I assume it’s because they either don’t like coffee baked goods or minty baked goods or the combination of the two. If you’re not sure if you do, just leave out the coffee and peppermint and you’ll have a chocolate doughnut with a little crunch of candy cane that will be just as good!

Mini Baked Peppermint Mocha Doughnuts

In other news, my holiday preparations are in a lot better shape than the last time I wrote – all but one of my gifts I ordered online have now arrived and I’ve finished my shopping for all but two people. I’m sure people who finished their shopping in November would scoff at that, but it’s pretty good for me! I’m also done with school for the semester (though I’ll still have work to do from home over the holidays) and am looking forward to spending lots of time with my family and boyfriend and doing lots of Christmassy activities over the next week!

Mini Baked Peppermint Mocha Doughnuts

Mini Baked Peppermint Mocha Doughnuts

Idea inspired by Starbucks’ peppermint mocha; glaze recipe my own; chocolate doughnut recipe adapted from Buns in My Oven

Makes 24 mini doughnuts

Ingredients:

For the Chocolate Coffee Doughnuts:
1 cup all purpose flour
1/4 cup + 2 tablespoons sugar
1 teaspoons baking powder
1/4 cup cocoa powder
1/4 teaspoon salt
1 tablespoon instant coffee
1 large egg
1/2 cup buttermilk (or regular milk with a teaspoon of white vinegar added)
1/2 teaspoon vanilla extract
1 tablespoon vegetable oil

For the White Chocolate Peppermint Glaze:
1/4 cup white chocolate chips
1/2 cup powdered sugar
1/2 teaspoon peppermint extract - optional for peppermint flavour, but you could leave out and just use the candy canes if you like
1-2 tablespoons milk
Crushed candy canes (about 1/4 cup total)

Directions:

Preheat oven to 325°F.  Lightly spray a mini doughnut pan with non-stick cooking spray.

In a large bowl, whisk together the flour, sugar, baking powder, cocoa, salt, and instant coffee.  In a medium bowl, whisk the egg, then whisk in the buttermilk, vanilla, and vegetable oil.  Add the wet ingredients to the dry ingredients and stir with a wooden spoon or spatula until just incorporated.  Transfer mixture to a ziplock bag, snip off the corner, and squeeze the batter into the doughnut pan, only filling each mold halfway full (they will puff up when baking).  It's a lot easier to fill the molds by squeezing it out of a bag, trust me.

Bake in preheated oven for 6-8 minutes, until cooked through and the top springs back when touched.  Remove from pan and let cool on a wire rack.

Prepare icing by melting the chocolate chips in a small bowl in the microwave, then stirring in the icing sugar and peppermint extract (if using).  Add 1 tablespoon of milk, stir, and add up to 1 additional tablespoon of milk until desired consistency is reached (I used the full 2 tablespoons, which makes a thin glaze).

Once doughnuts have cooled, dip the top of each doughnut in the icing, then set back on the wire rack, which should be placed over a baking sheet or sheet or parchment paper to catch drippings.  I like to coat each doughnut twice to ensure there is enough glaze.  Only coat a few doughnuts at a time the second time, then sprinkle crushed candy cane over the top while the icing is still wet so it sticks.

These are best served immediately and eaten on the same day, but note that after about half a day, the candy canes may start to melt into the icing.

Ingredient Index

Related Posts Plugin for WordPress, Blogger...