Showing posts with label tahini. Show all posts

April 10, 2014

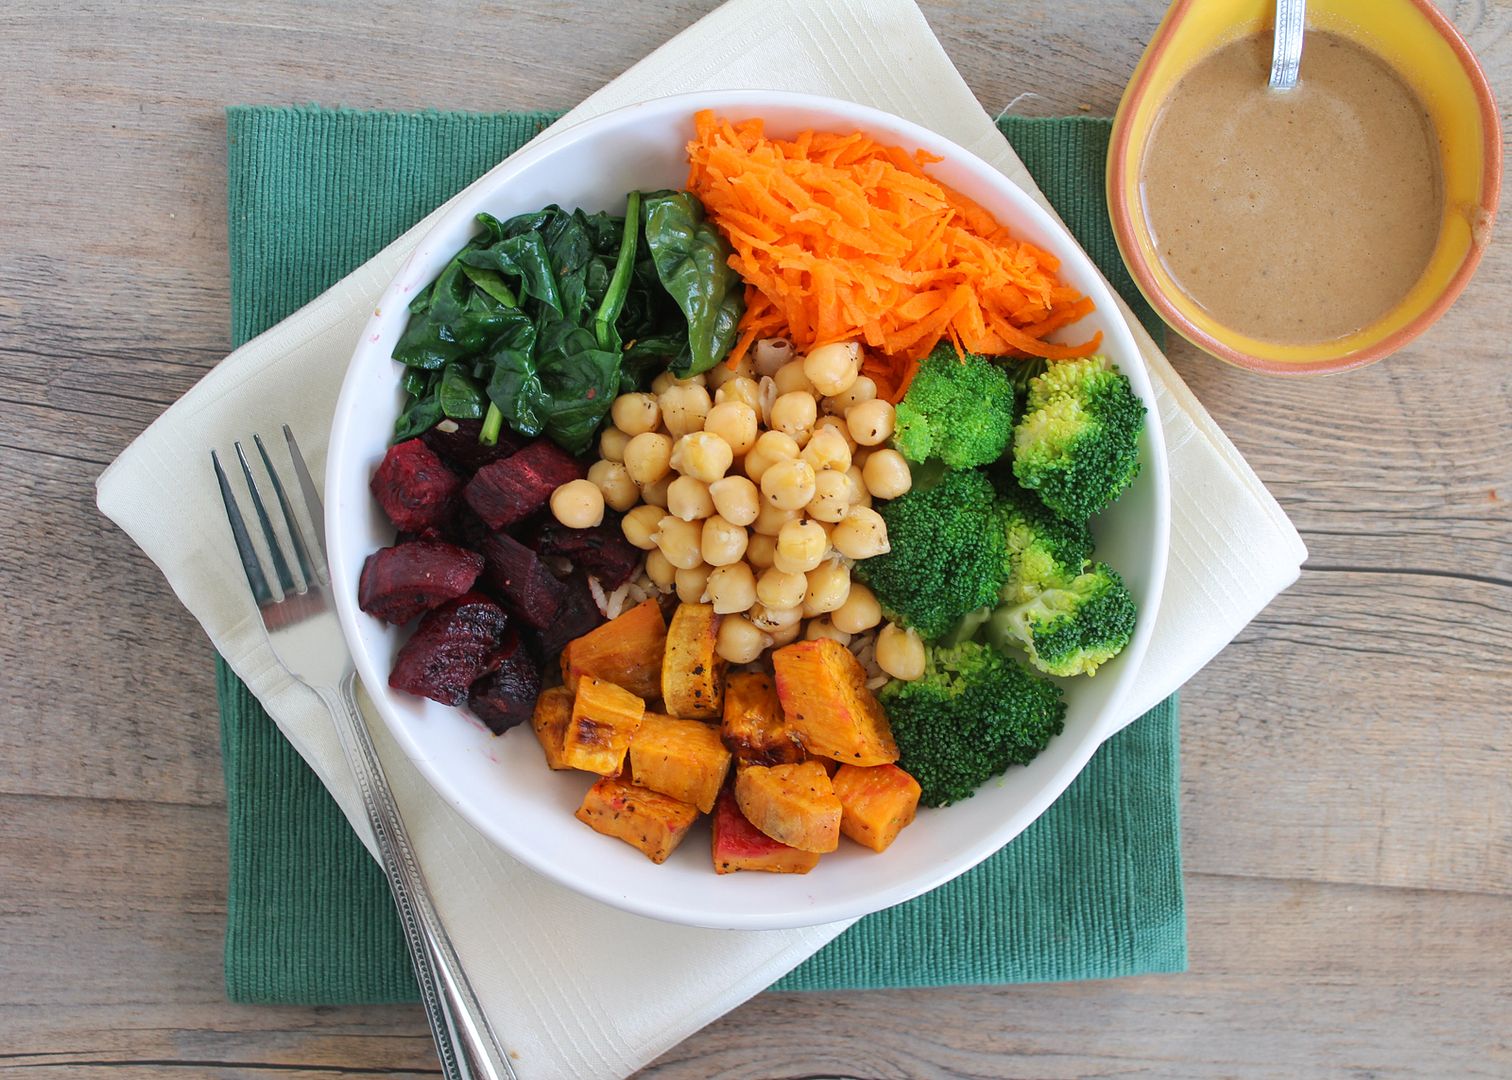
Chickpea & Veggie Brown Rice Barley Bowl with Tahini Dressing

Chickpea & Roasted Veggie Brown Rice Barley Bowl with Tahini Dressing

Healthy "bowls" seem to becoming more and more popular these days both across the internet and in cafes and restaurants.  They have many names and variations, but the basic concept is that you combine a base of grains (like rice, quinoa, barley, etc), several different vegetables (raw or cooked), a protein or two (chicken, tofu, beans, nuts, or cheese), and a delicious sauce to tie it all together, thus giving you a complete meal in a bowl.

I find myself drawn to any healthy meal that ends in "bowl" because I love a meal with different textures, flavours, and colours that all fit together in one dish, and these bowls are easy to make super nutritious.
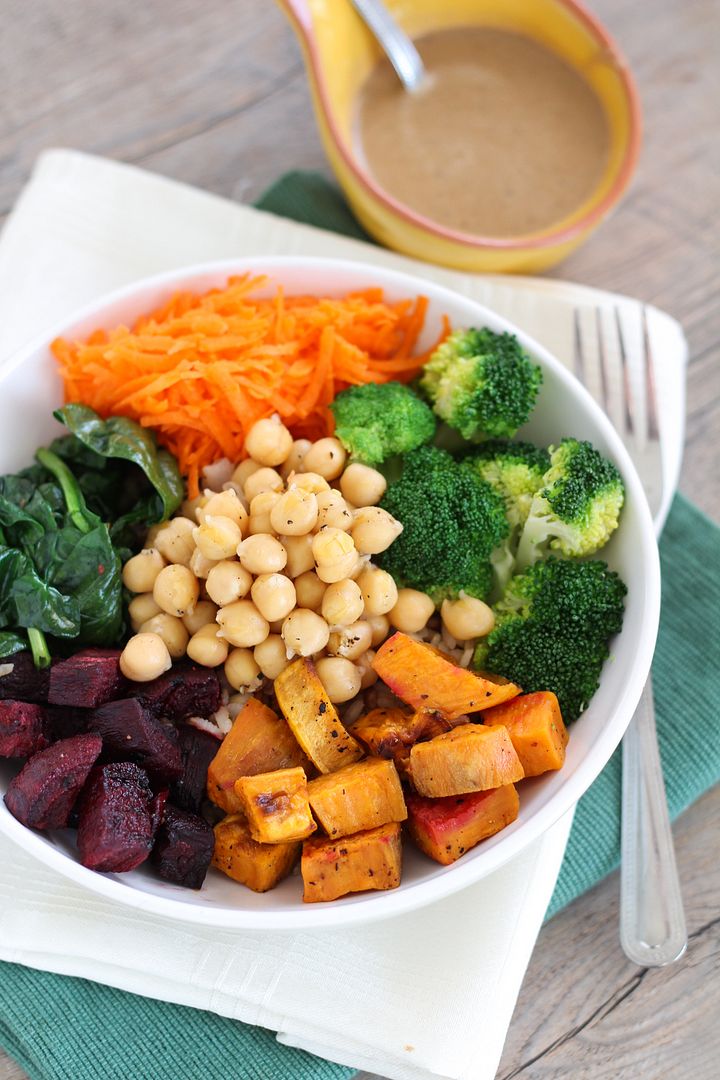
Chickpea & Roasted Veggie Brown Rice Barley Bowl with Tahini Dressing

The problem with ordering them in a restaurant is that they're usually pretty expensive, and while making them at home can require a bit of effort, it's cheaper and you can make a lot so that you have delicious healthy bowls for lunches through the week!

For my version, I combined the following:
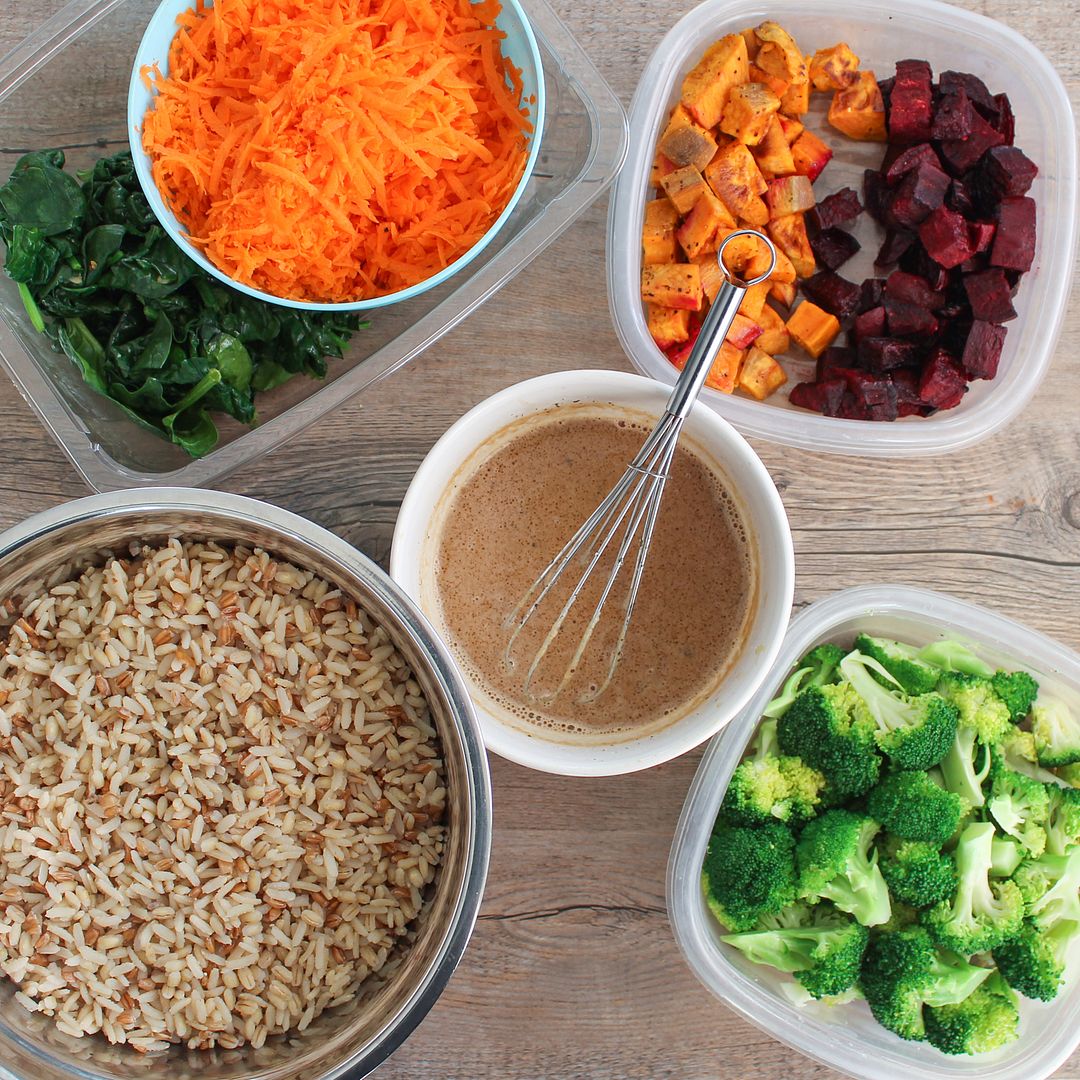
Chickpea & Roasted Veggie Brown Rice Barley Bowl with Tahini Dressing

Base - a mix of brown rice, barley, and spelt (I used a PC blend of the three for convenience!)
Veggies - steamed broccoli, roasted beets and sweet potatoes, sauteed spinach with garlic, and grated raw carrots
Protein - I forgot to include this in the picture above, but I used chickpeas
Sauce - tahini dressing with soy sauce and sesame oil for flavour!
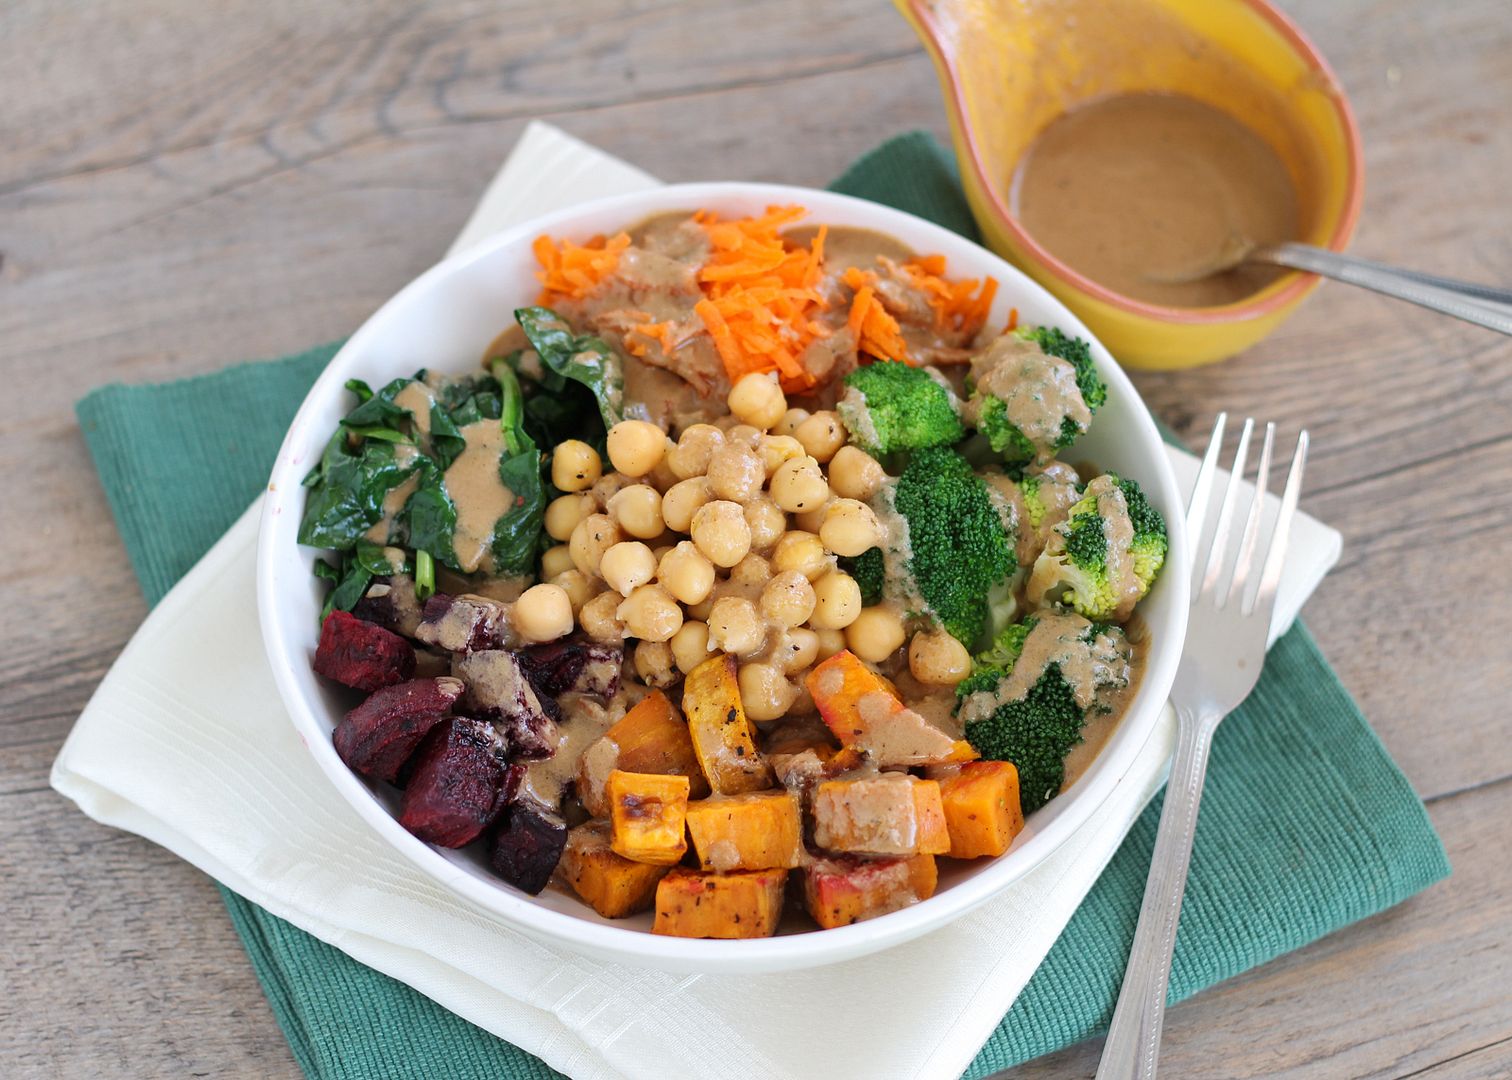
Chickpea & Veggie Brown Rice Barley Bowl with Tahini Dressing

Another nice thing about these is that they're highly adaptable, so if you don't like the ingredients that I used, you can make whatever substitutions you like, as long as you maintain a variety of colour and textures!

Try using quinoa as a base if you don't like rice; substitute the chickpeas for chicken or tofu if you like; grate raw beets instead of roasting them; sautee brussels sprouts or kale instead of spinach; roast squash instead of sweet potato ... you get the idea!
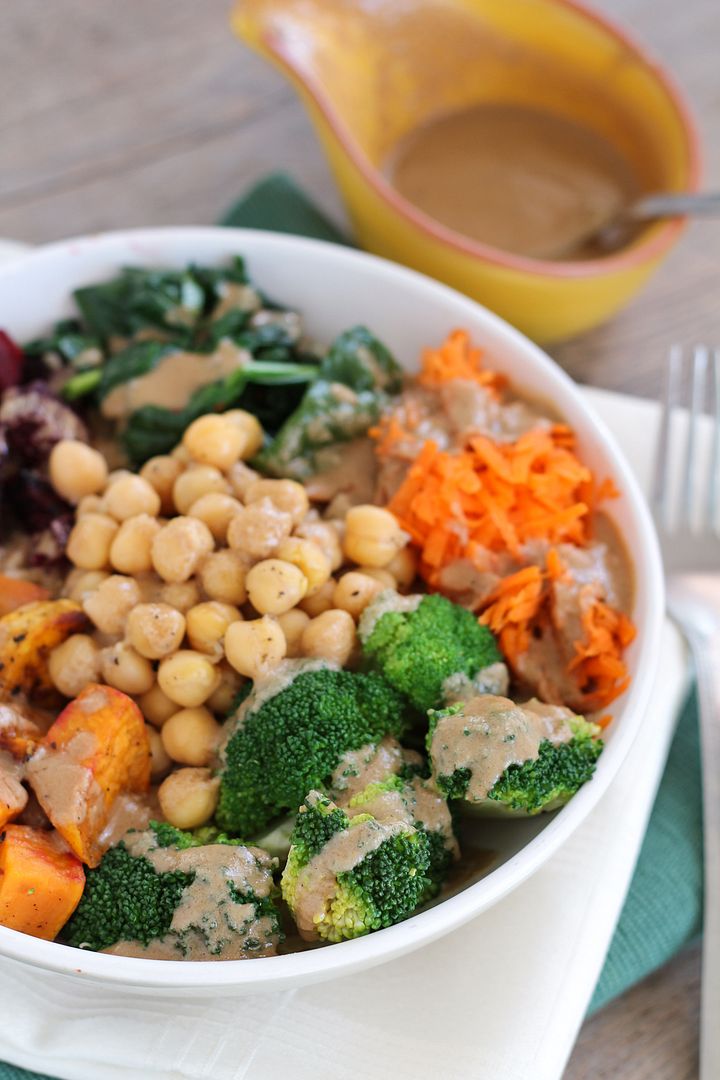
Chickpea & Veggie Brown Rice Barley Bowl with Tahini Dressing

This makes a filling lunch or dinner that will leave you feeling great.  If you're making enough to have leftovers (which I recommend you do!), just be sure to store the sauce separately or else it will get absorbed and leave the dish feeling sauceless, which won't be as good as sauce is the most important part!
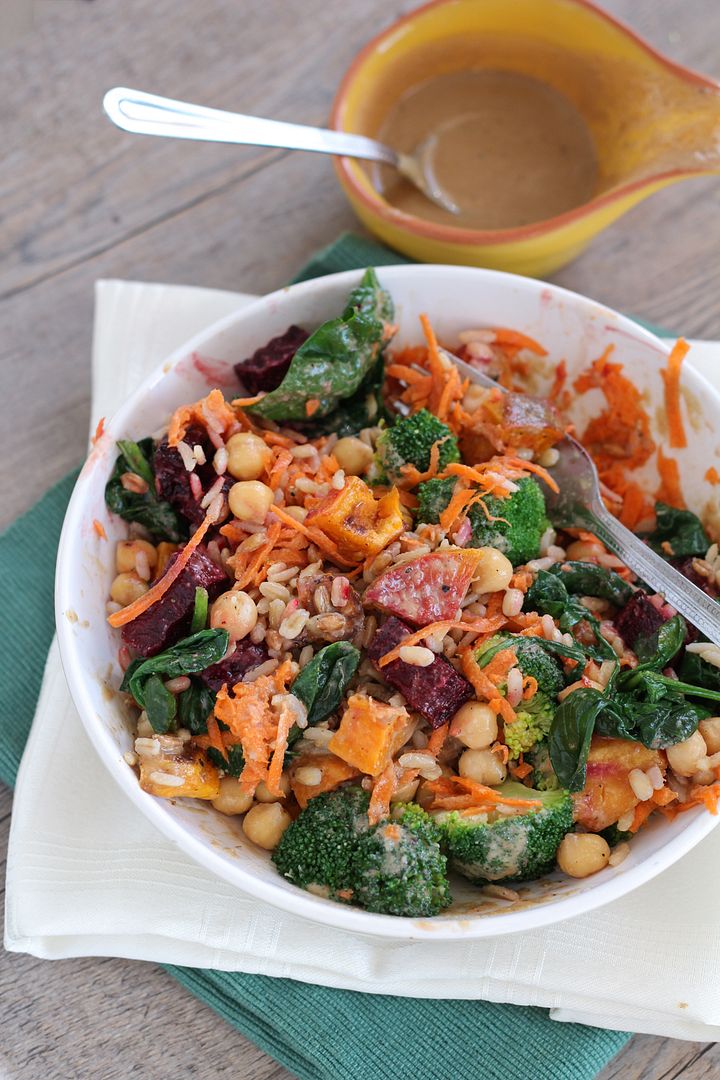
Chickpea & Veggie Brown Rice Barley Bowl with Tahini Dressing

Chickpea & Veggie Brown Rice Barley Bowl with Tahini Dressing

Inspired by several recipes, such as ones seen on Paint + Tofu, Dishing Up The Dirt, and Grace Bezanson

Makes 3-6 servings, depending on serving size

Ingredients:

For the Toppings:
~1 tablespoon olive oil
1 large sweet potato, chopped into bite-sized pieces
2 large beets, chopped into bite-sized pieces
1 head of broccoli, chopped into small florets
1 teaspoon sesame oil
1 clove garlic, minced
1 bunch of baby spinach (however much you like; I used a small container)
2 large carrots, grated (a food processor with the grater attachment works well for this!)
1 can of chickpeas, drained and rinsed

For the Base:
3-4 cups cooked brown rice and/or barley (I used a bag of mixed brown rice, barley, and spelt) or your favourite grain, such as quinoa (about 1 to 1-1/2 cups uncooked)

For the Sauce:
1/2 cup tahini
1/2 cup water
1/4 cup fresh lemon juice
1/4 cup soy sauce
2 teaspoons sesame oil
1 tablespoon + 1 teaspoon honey or agave
1/4 teaspoon each salt and pepper

Directions:

Preheat oven to 400°F.  Toss sweet potatoes and beets with olive oil, season with salt and pepper, and spread in an even layer on a foil-lined baking sheet. Roast in preheated oven for 25-35 minutes, until tender.  The sweet potatoes will likely be done sooner than the beets; just transfer them to a bowl and put the beets back in the oven.  I prefer roasting beets whole but this takes longer; if you have time, just roast the whole beet for 1 hour, drizzled with oil and wrapped in foil, then peel and chop it after.

Meanwhile, you can cook the broccoli, spinach, and your grains.  Steam the broccoli in a steamer basket over boiling water, covered, for about 2-3 minutes until bright green and tender.  Rinse with cold water and drain.  For the spinach, heat sesame oil in a large skillet over medium heat.  Add garlic and cook for 30 seconds (this is optional; you could also use a different oil if you like), then add spinach and cook just until wilted.  Remove from heat.  Cook your grains according to package directions; I cooked mine uncovered in simmering water for around 18 minutes, then seasoned with salt and pepper.

Prepare the dressing by whisking all ingredients in a small bowl until smooth.  Taste and adjust any amounts to your liking.  Note that this makes a lot of dressing and likely more than you’ll need; just save any extras for another use!

Prepare bowls by adding grains to the bottom, topping with vegetables (beets, sweet potatoes, broccoli, carrots, spinach) and chickpeas, and drizzling tahini dressing on top.  Toss to coat and season with salt and pepper, if desired.  You can eat this warm or at room temperature.

If you have leftovers, you can portion out everything together into containers except the sauce - that should  be kept separate and drizzled on right before eating so it doesn't get absorbed.
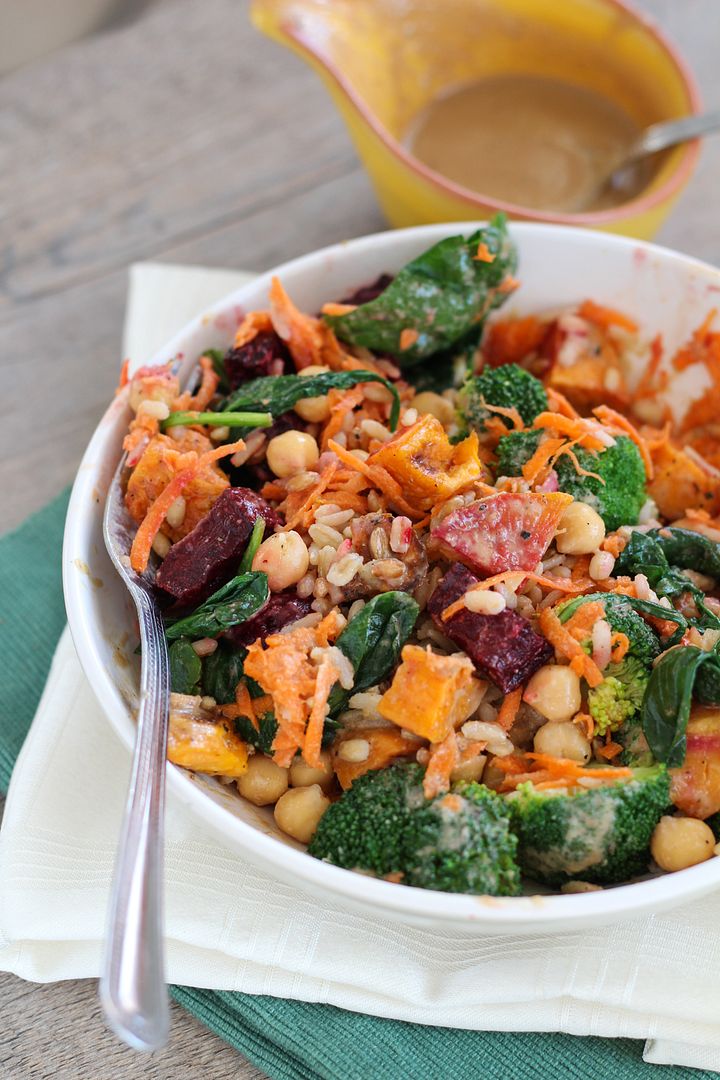
Chickpea & Veggie Brown Rice Barley Bowl with Tahini Dressing

November 26, 2013

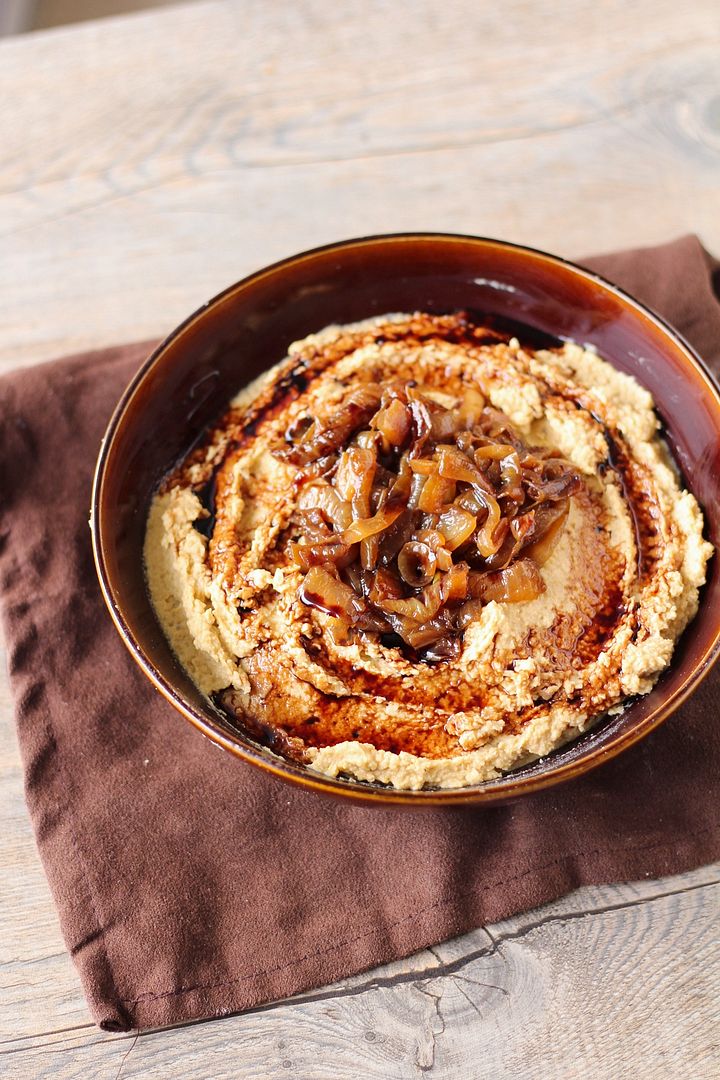
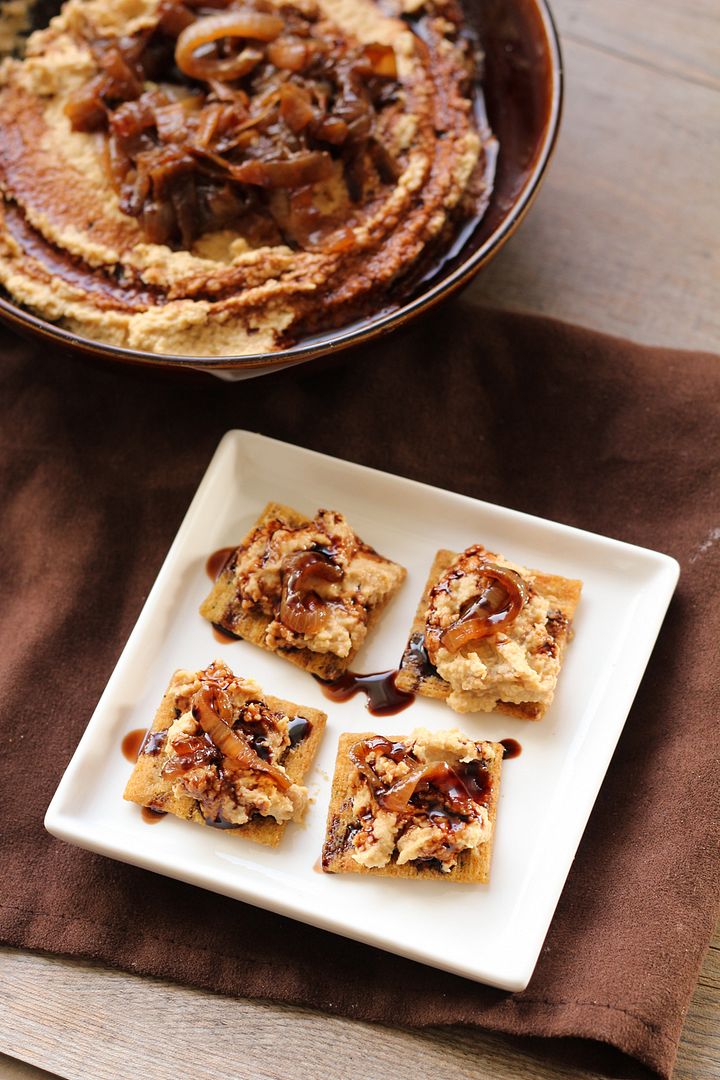
Balsamic Caramelized Onion Hummus

Balsamic Caramelized Onion Hummus

Sorry I haven't posted very much lately!  I had wanted to share a few Thanksgiving-y recipes before American Thanksgiving this week (even though we already had our Thanksgiving over a month ago, I always love an excuse to make comfort food!) but I just didn't have time.   I did, however, make this amazing balsamic caramelized onion hummus last weekend so I'm selling it as a last-minute Thanksgiving appetizer idea for my American friends, but you can and should make it any other time you want!

Balsamic Caramelized Onion Hummus

If you've read my blog for some time you know I love hummus, and especially trying new flavours of hummus.  I try to make it myself when I can because it's usually cheaper and healthier (plus you get a much bigger batch than the tiny containers from the store!), but I often buy it too, especially when a new flavour catches my eye at the grocery store.  The latest one to do so was Summer Fresh's caramelized onion hummus, which I completely devoured and then vowed to make my own version.

Balsamic Caramelized Onion Hummus

So I drew inspiration from the ingredient list on the container as well as a few recipes I easily found online to make my own recipe, and at the last minute decided to drizzle in a balsamic reduction to make it extra special!

Balsamic Caramelized Onion Hummus

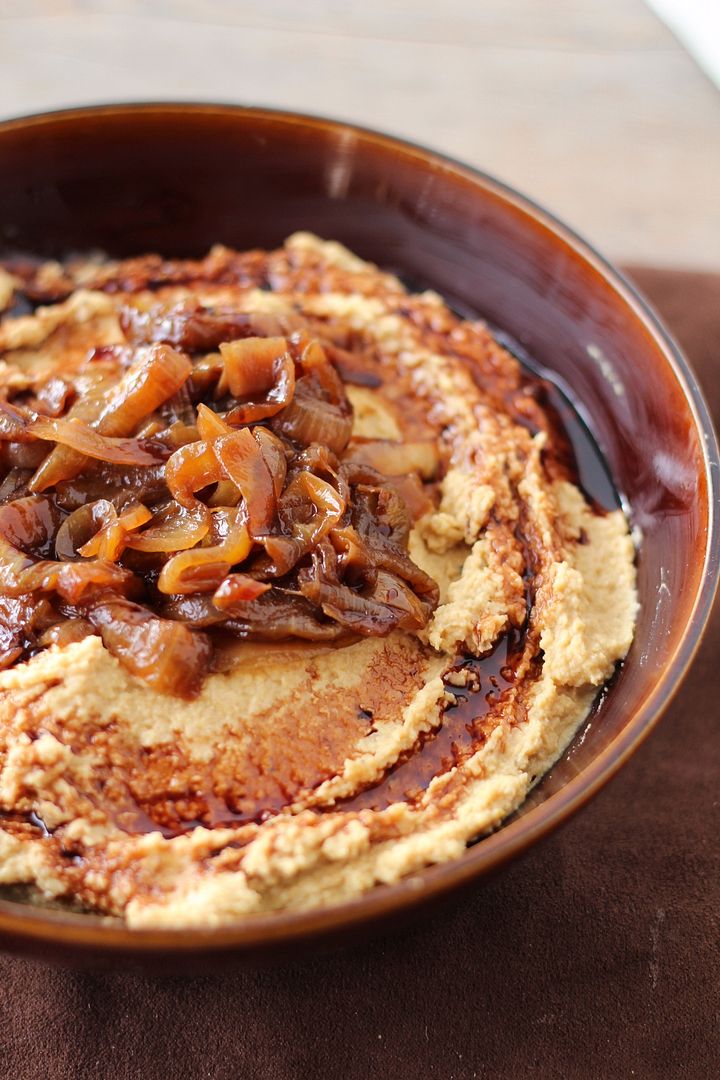
I know I say this after every hummus I make, but I think this is my new favourite hummus!  Caramelized onions are already one of my favourite things to add to any dish, but they work especially well blended into a creamy dip and complemented with the sweetness of the balsamic reduction.  I left some caramelized onions whole too which gave the dip a nice added texture.

Balsamic Caramelized Onion Hummus

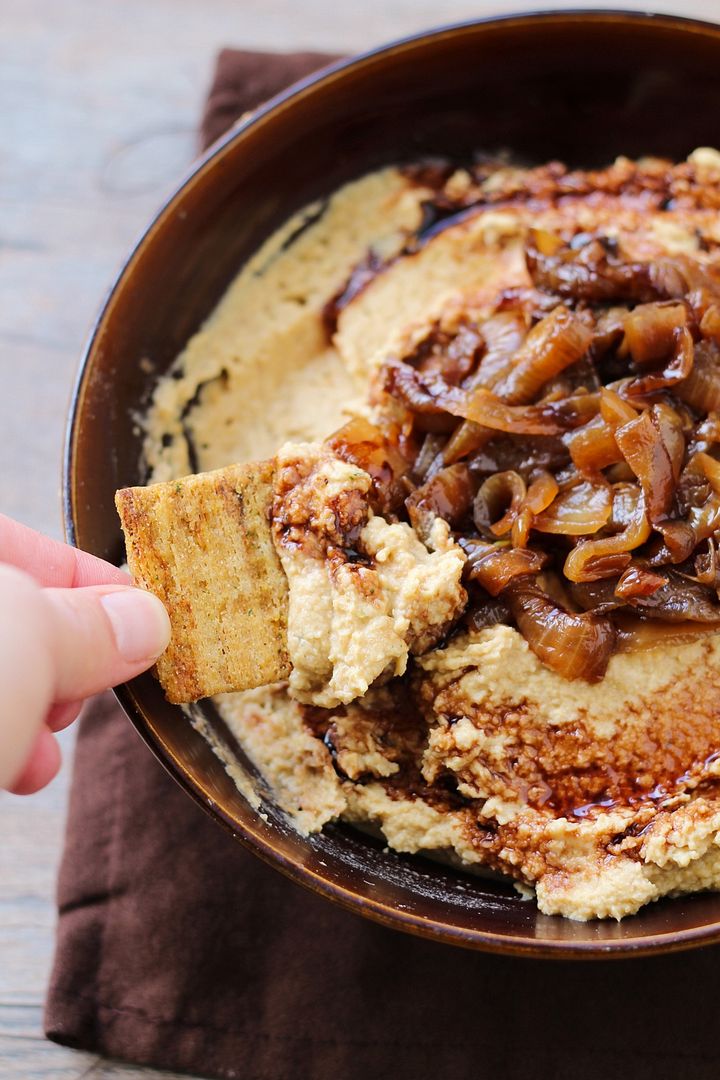
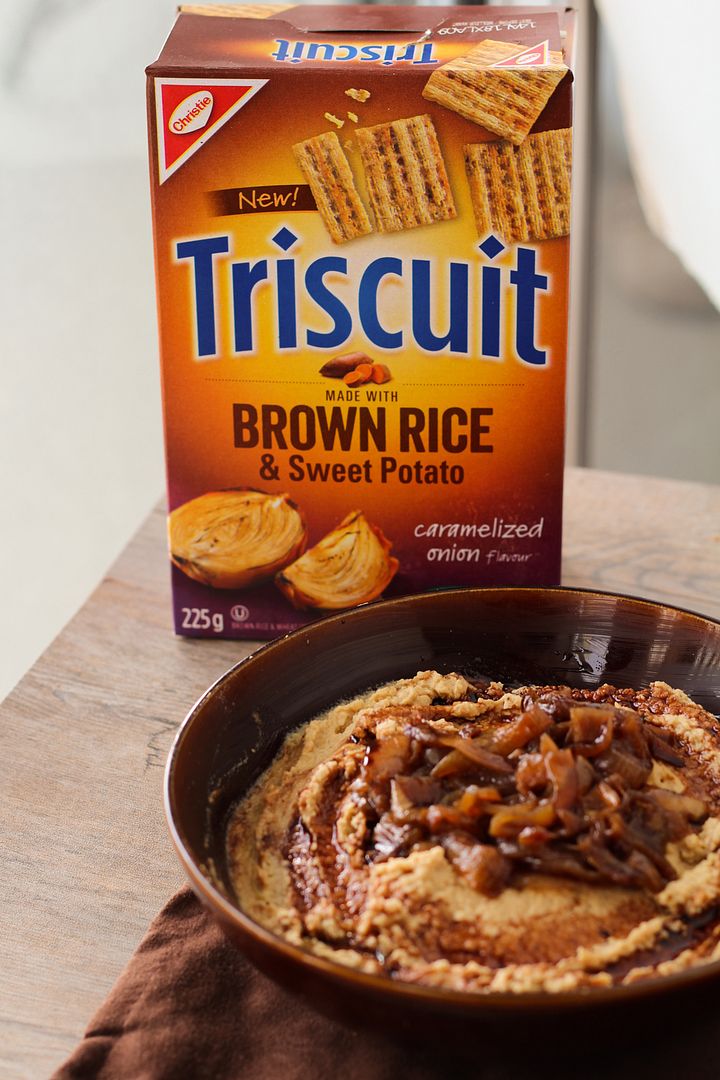
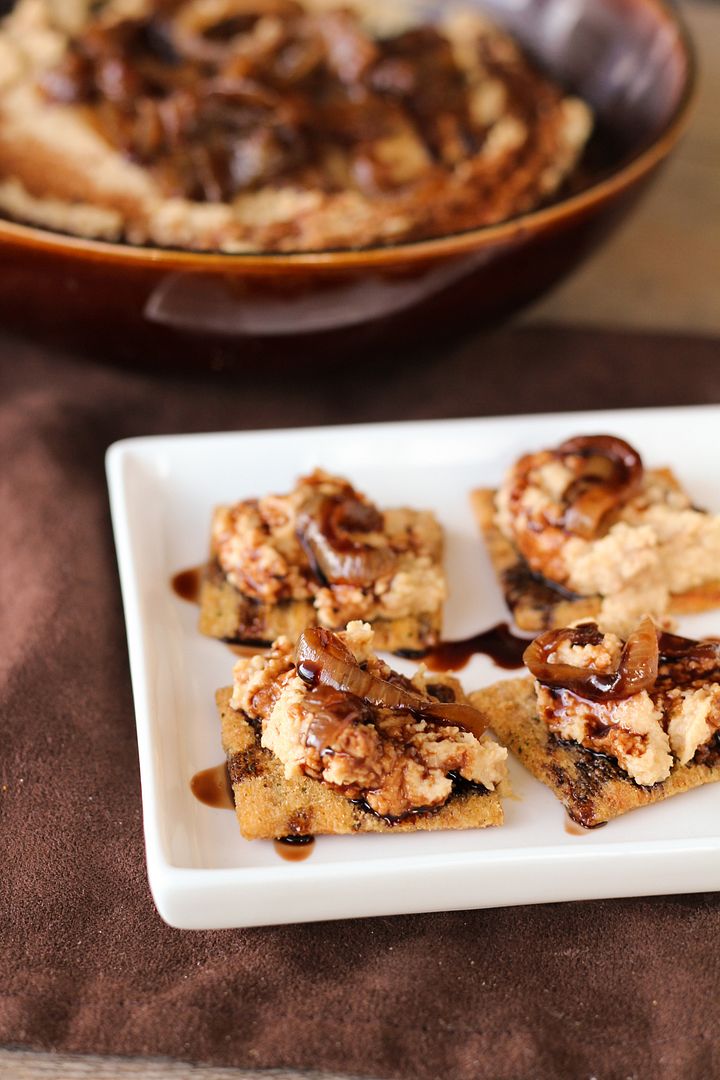
I ate mine with caramelized onion triscuits which obviously went perfectly well with the hummus.  They made great dippers, but if you want to make this a bit of a fancier appetizer, you can spread some hummus on the crackers and top them with a little caramelized onions and balsamic drizzle.
 A little more work but also a little prettier!

If you're celebrating Thanksgiving this week, I hope you have a wonderful time with family, friends, and food! 

Balsamic Caramelized Onion Hummus


Balsamic Caramelized Onion Hummus

Recipe inspired by Summer Fresh Caramelized Onion Hummus with additional inspiration from several sources including The Real Housewife, An Edible Mosaic, The Sweets Life

Ingredients:

2 teaspoons olive oil
2 medium yellow or sweet onions, thinly sliced
1-1/2 teaspoons brown sugar, divided
1/4 cup + 1 tablespoon balsamic vinegar, divided
1 (540mL) can chickpeas
3 tablespoons reserved liquid from can of chickpeas
3 tablespoons tahini
1 clove garlic, minced
1-1/2 to 2 tablespoons fresh lemon juice
1/2 teaspoon salt
1/4 teaspoon pepper

Directions:

Heat oil in a large non-stick skillet over medium heat.  Add onions and stir to coat with oil.  After about 5 minutes, season with a bit of salt.  Spread onions out evenly across the pan and let cook, stirring about every 3-4 minutes, until softened, about 20-30 minutes total.  In the last 5 minutes of cooking, add 1 teaspoon brown sugar and 1 tablespoon balsamic vinegar, and stir to coat.  Once they are caramelized to your liking, remove from pan.  Save a small amount of onions to top the hummus later, if desired.  Add the rest to the large bowl of a food processor. 

Meanwhile, reserve about 3 tablespoons of liquid from the chickpea can and drain and rinse the rest of the chickpeas.  Add 1/4 cup balsamic vinegar to a small saucepan, bring to a boil, and let simmer until reduced to a thick, syrupy liquid, about 1-2 tablespoons worth.  Remove from heat and set aside.

Add to the food processor the chickpeas, liquid from the chickpea can, tahini, garlic, lemon juice, 1/2 teaspoon brown sugar, salt, and pepper.  Process until smooth.  Adjust any ingredient amounts to your liking, if necessary.

Serve hummus topped with reserved caramelized onions and drizzle with the balsamic reduction.

April 23, 2013

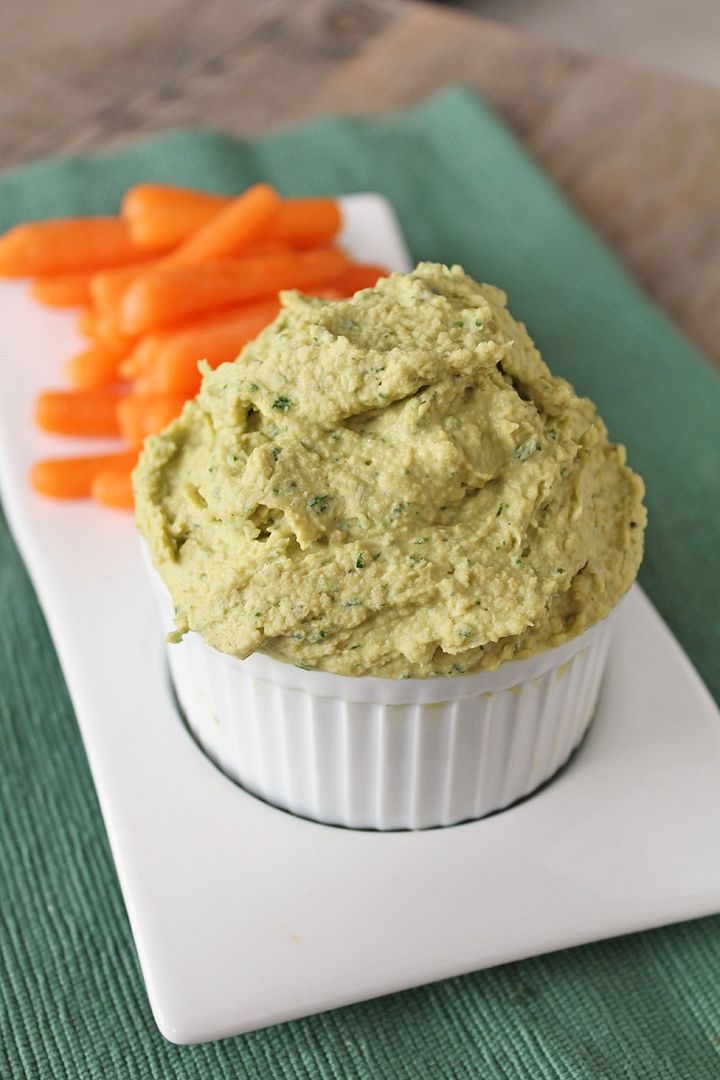
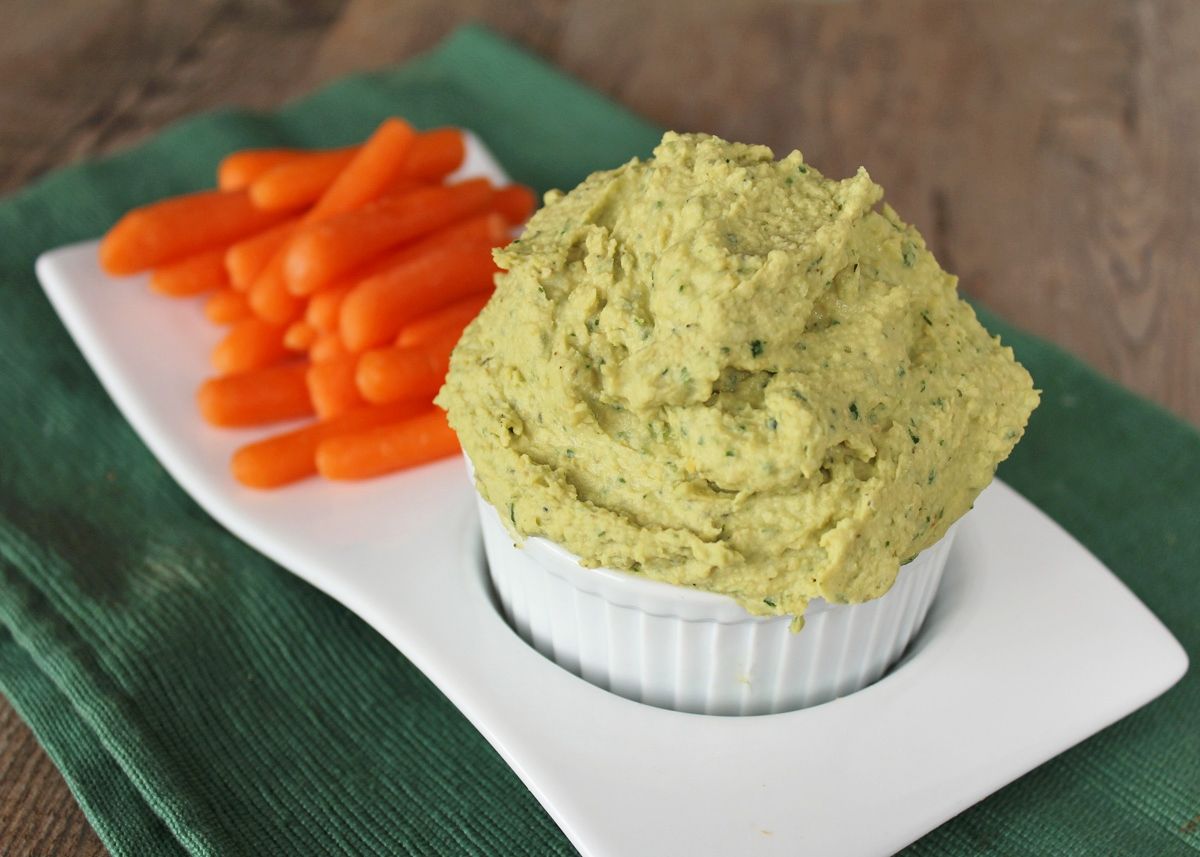
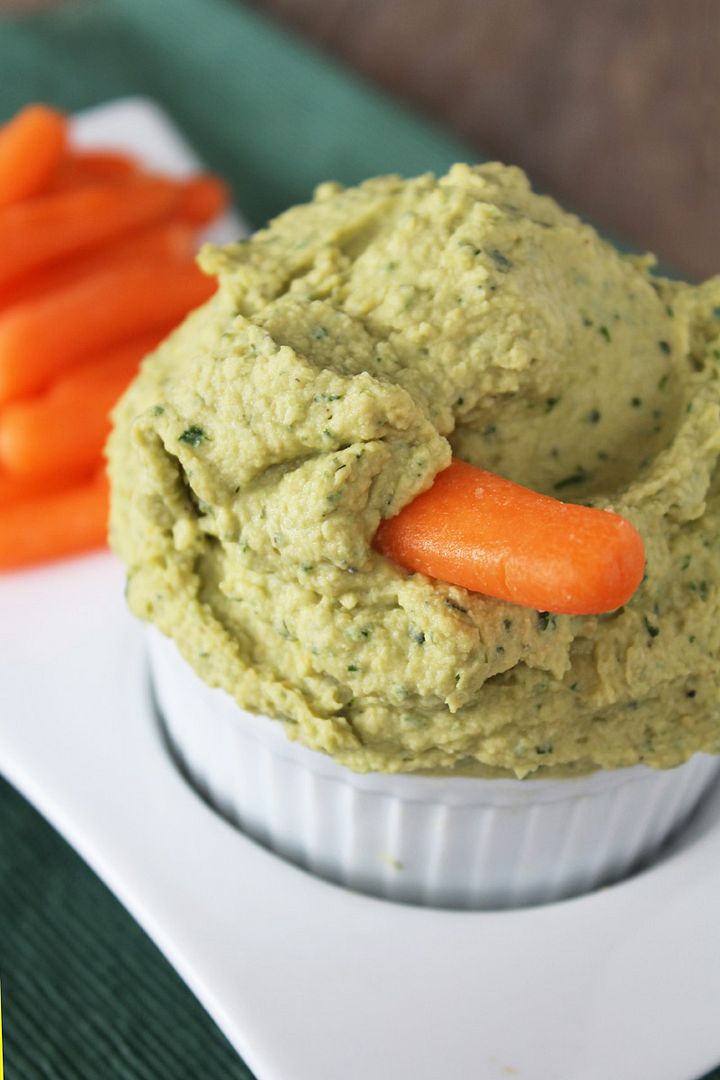
Cheezy Ranch Hummus

Cheezy Ranch Hummus

Before I get into this post, I feel the need to first clarify that I did not spell "cheesy" wrong in the title.  I'm guessing that the majority of people reading this already knew that, but for those who might not have heard the term "cheezy" before, it's used to describe something that tastes cheesy but doesn't actually use dairy cheese.  I'm not vegan and there is no way I could ever give up real cheese, but there are some dishes where cheese just doesn't really work, like in hummus.  Fortunately, there is a magical little ingredient called nutritional yeast that can blend right in to not only add cheesy flavour but also lots of nutrients.  Again, I'm sure a lot of you have heard of it before, but in case nutritional yeast is new to you (I had no idea what it was a couple of years ago), I described it more in this post for broiled pesto tomatoes, and I also used it in this pizza hummus to get the same cheesy flavour I was going for in this ranch version.

Cheezy Ranch Hummus

This hummus was inspired by Pickles & Honey's vegan cool ranch hummus I saw a while ago and loved.  I don't buy Doritos anymore because I know I'd eat the whole bag in one sitting, but Cool Ranch was always one of my favourite flavours.  I changed almost everything from the original recipe to make my own version, and I wouldn't say that mine is "cool ranch" flavoured, but rather combines elements of ranch dressing like fresh herbs and onion and garlic powder with nutritional yeast for a cheezy ranch hummus that makes a fantastic dip for veggies!

Cheezy Ranch Hummus

In other news, Spring has finally sprung in Southern Ontario and I couldn't be happier!  I love seeing flowers and robins and feeling the sun on my face again.  I hope those still stuck with the white stuff will see it all melt away soon!

Springtime

Cheezy Ranch Hummus

Inspired by Pickles & Honey

Ingredients:

1 (540mL or 19 fl oz) can chickpeas, drained and rinsed
3-4 tablespoons water
3 tablespoons tahini
2 tablespoons fresh lemon juice
3 tablespoons fresh chopped parsley
2 tablespoons chopped chives
1 tablespoon fresh chopped dill
1 teaspoon garlic powder
2 teaspoons onion powder
1/2 teaspoon salt
1/4 teaspoon pepper
2 tablespoons nutritional yeast
1/2 teaspoon dijon mustard
Dash Worcestershire sauce (optional, leave out to keep it vegetarian)
2 tablespoons extra virgin olive oil

Directions:

Add all ingredients except for the olive oil to the large bowl of a food processor.  Process until smooth.  Pour the olive oil into the feed tube of the food processor and let slowly drain into hummus as you continue to pulse.  Once everything is well combined, taste and adjust any amounts to your liking.  Store in the refrigerator and serve with veggies or as a sandwich spread.

January 25, 2013

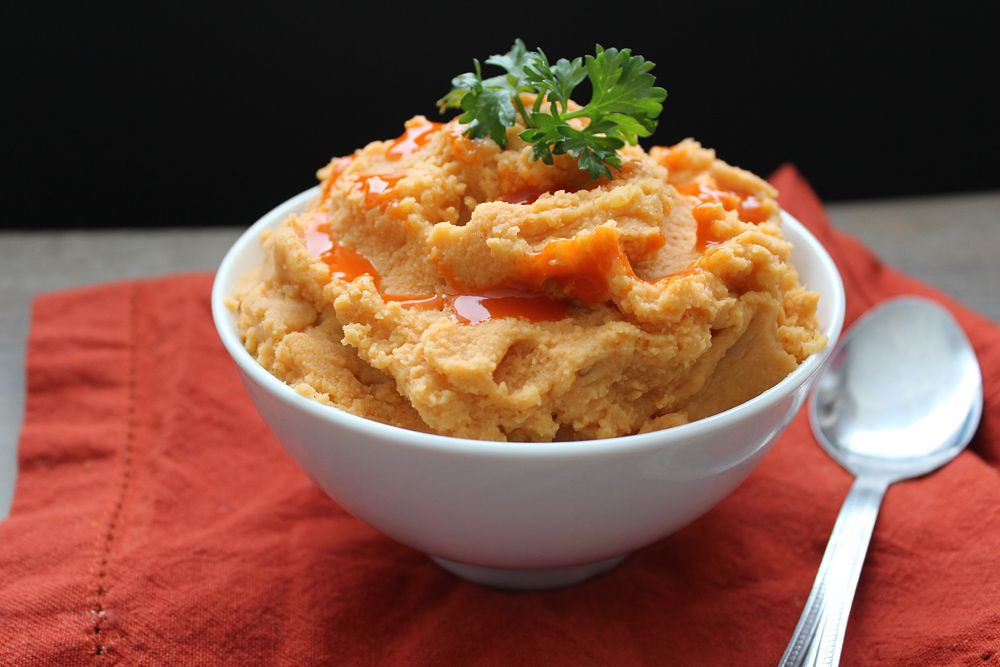
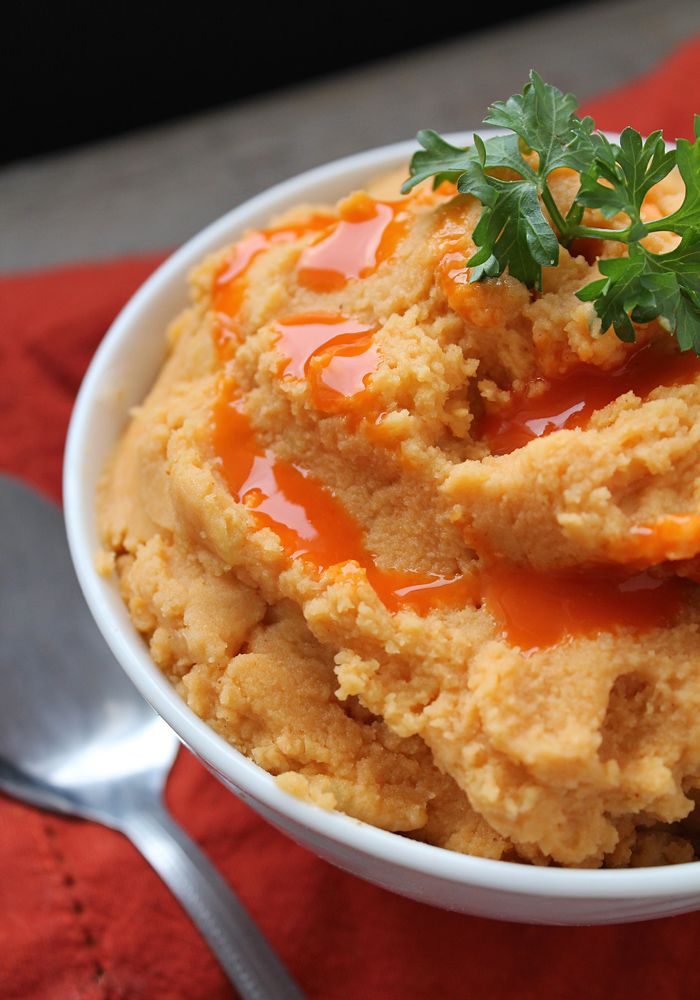
Buffalo Hummus Mashed Potatoes

Buffalo Hummus Mashed Potatoes

When I first saw hummus mashed potatoes on one of my favourite blogs, Gimme Some Oven, I thought it was such a fantastic idea – I love hummus and love mashed potatoes, so combining the two would not only taste great but would be a great way to healthify potatoes!

Of course, my mind starting immediately whirring with all the flavours of hummus you could use to change things up, and my first choice was buffalo.  If you love buffalo flavour and haven’t tried this hummus yet, you need to do so asap; I eat a lot of hummus and this is definitely one of my favourites!

These mashed potatoes are super easy to make – first you have whip up a batch of buffalo hummus, but that takes only five to ten minutes max, and you can do it while you wait for your potatoes to  boil.  Then you simply mash the potatoes, stir in some hummus, season with salt and extra buffalo sauce for spice, and that’s it!  There’s no adding tons of butter and cream, and you still end up with smooth and fluffy mashed potatoes, but with the added benefit of protein and healthy fats from the chickpeas and tahini in the hummus.

If you’re a fan of the buffalo/blue cheese combination, feel free to add some blue cheese in there - I didn’t have any on hand but I think it would have made a great addition!  This would make a great side dish to some chicken and steamed broccoli for a complete meal, but I liked it so much I ate it all on its own before I had a chance to try it that way!

Update: I realized after writing this post that these mashed potatoes are also vegan (correct me if I'm wrong, but from what I've read online, Frank's buffalo sauce does not contain milk products), giving you all the more reason to like them!  :)

Buffalo Hummus Mashed Potatoes

Buffalo Hummus Mashed Potatoes

Inspired by Sabra Hummus and Gimme Some Oven

Serves 3-4 as a side dish (can easily be doubled to serve more)

Ingredients:

1 pound Yukon Gold (yellow-fleshed) potatoes (about 2.5 cups peeled and cubed)
1-2 tablespoons buffalo sauce
Salt to taste

Directions:

Prepare a batch of buffalo hummus up to a few days in advance. 

Peel potatoes and chop into about 1” pieces.  Immediately transfer to a large pot and cover with cold water until potatoes are covered.  Bring to a boil, then reduce heat to a simmer and let cook 20-30 minutes, until potatoes are easily pierced with a fork.

Drain, then place potatoes back in the dry pot and let heat over medium heat until they appear dry, about 2-3 minutes.  Remove from heat and mash potatoes in the pot or in a bowl.  Add 3/4 cup hummus and mix.  Add 1 tablespoon of buffalo sauce, mix in, and add up to 1 additional tablespoon if desired.  Season with salt to taste.

May 18, 2012

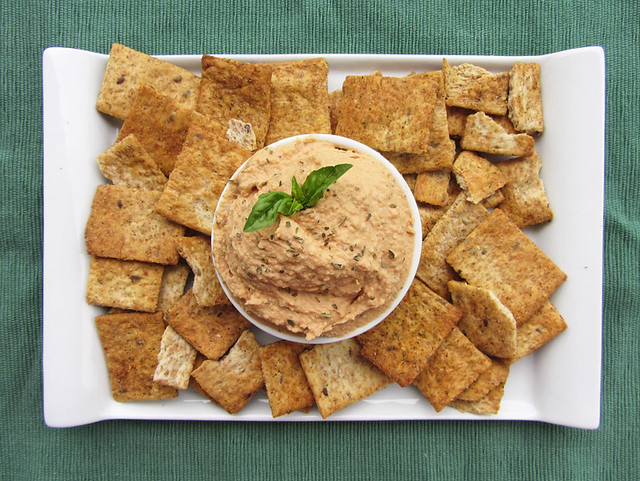
Pizza Hummus

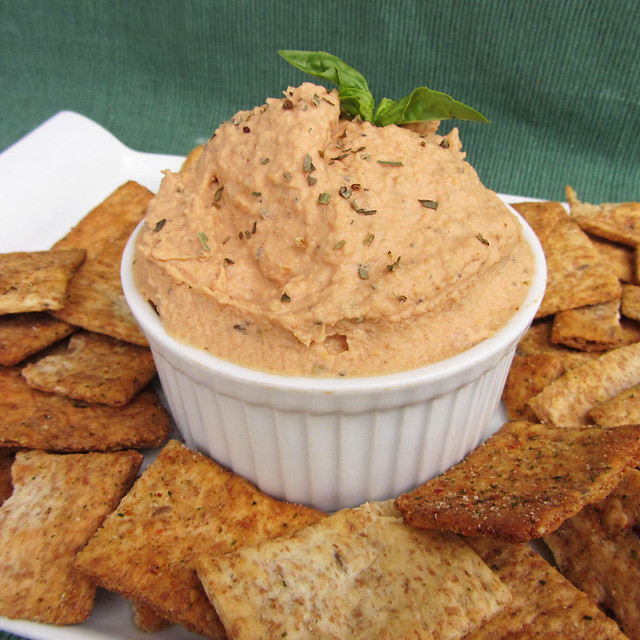
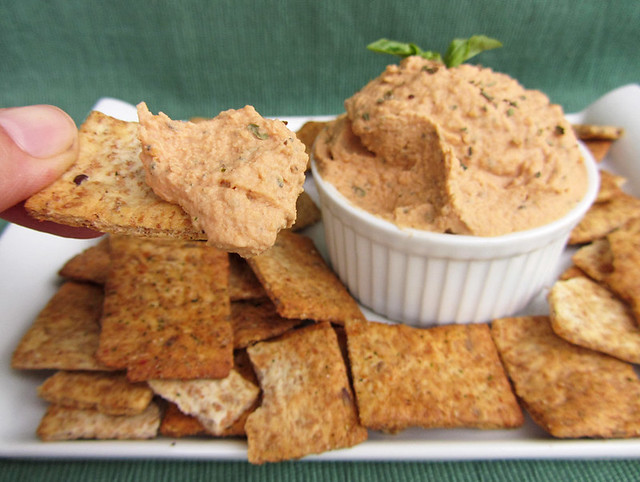
pizza hummus

It's a long weekend here in Canada, and I'm currently on a train headed toward our nation's capital, Ottawa, for a wedding weekend!  The weather is supposed to be hot and sunny over the next few days so it should be a great weekend!

I had a bit of a rough start to the trip this morning, waking up at the ungodly hour of 4:30am to be at the train station by 6am for a 6:30 train.  Around the time our train was scheduled to arrive, they announced that it was actually cancelled due to an accident, and we'd be switched to a later (and much less comfortable) train that would allow me only 15 minutes to make my connecting train in Toronto.  I haven't taken a train in ages so I was a bit panicked when we arrived at the station and I had no idea where to go or how to get to my next train!  I followed a crowd down a set of stairs, carrying my giant heavy suitcase along with three other bags, only to realize at the bottom that the exit led out to the street.  I turned around to try to go back up the stairs against a swarm of people trying to go down.  Just when I was sure I was going to topple backwards with all my bags in tow, an extremely nice guy carrying his bicycle down the stairs saw me struggling, grabbed my suitcase, and carried it AND his bicycle backwards all the way back up the stairs for me.  I'm definitely not a girl who gets offended from offers of help from strong men - I was so grateful!  I eventually managed to figure out how to get to my train and hopped on with about 5 minutes to spare before it left, and before the lump in my throat started to turn into tears haha - I'd had a dream the night before that I missed my train so I was so worried it was going to come true!  Anyways, the rest of the trip should be smooth sailing now, and I'm really excited to see a bit of Ottawa and also Quebec, which I rarely get to visit!

As I have about four free hours on the train before we arrive, I wanted to share a quick snack recipe that I made a while ago and have been dying to share!  You probably know by now that I love making hummus, but I was a bit nervous about the idea of pizza hummus, which I'd seen in my Food Network magazine a while back.  I loved their buffalo wing hummus from the same issue though, so I decided to give this one a shot too, and I was so glad I did!


pizza hummus

I noticed that Tessa from Handle the Heat recently wrote about this hummus too, so I thought now would be a good time to share it and spread the pizza hummus love further!  I made quite a few changes to the recipe though, as the original calls for 3 cups of chickpeas, which is an odd amount when working from canned chickpeas.  So I adjusted all the amounts to work with just  one regular can, and also added in some nutritional yeast, because what's a pizza hummus without cheesy flavour!

While it may seem odd, this hummus truly tastes like pizza, with just the right combination of tomato, herb, and cheese flavours.  Though the tomato paste gave it a rather unfortunate-looking pinkish hue, the taste totally made up for it!

I could not stop eating this hummus right after I made it, but I managed to force myself to put it in the fridge to save for later.  It still didn't last too long though!  I ate it with garden herb pita chips and I loved how the extra herbs in the chips enhanced the flavour of the pizza hummus.  I think I've seen parmesan herb pita chips before though, so if you can find those then they'd probably be an even better match!

Hope my fellow Canadians have a wonderful long weekend and get a chance to enjoy the sunshine!

pizza hummus

Pizza Hummus

Adapted from Food Network

Makes about 2 cups

Ingredients:

1 (540mL) can chickpeas
1/3 cup liquid from the chickpea can
3 tablespoon tahini
3 tablespoons tomato paste
1-1/2 tablespoons fresh lemon juice
2 cloves garlic, minced
1-1/2 teaspoons dried oregano
1 teaspoon dried basil
1/2 teaspoon salt
1 tablespoon nutritional yeast
2 teaspoons olive oil
Additional salt and pepper for seasoning

Directions:

Add all ingredients except for the olive oil to the large bowl of a food processor and blend until smooth.  Add olive oil to feed tube and process as the oil slowly mixes in.  Taste and season with salt and pepper if desired; adjust any amounts to your liking (e.g. Add more dried herbs for a stronger herb flavour, add more nutritional yeast for a stronger cheesy flavour, add more tomato paste for stronger tomato flavour, etc.)

May 10, 2012

Sesame Soba Noodle Salad

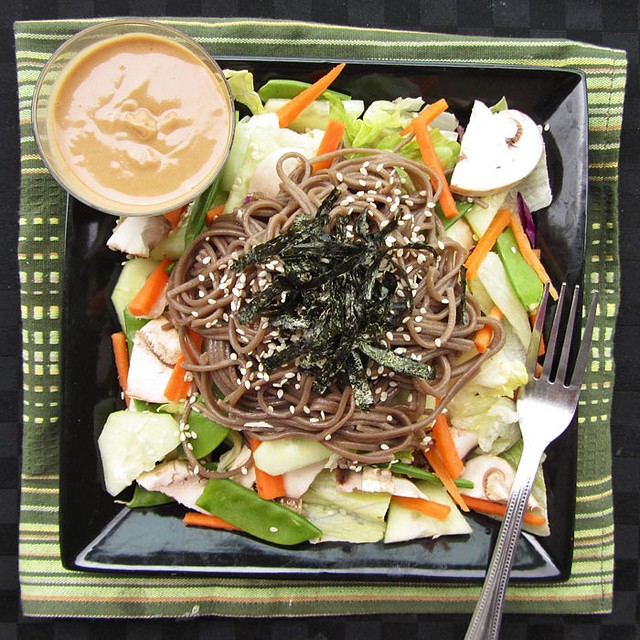
soba noodle salad

I'm back!  I had a wonderful, relaxing week on vacation in beautiful Cuba, but now I'm having a hard time adjusting back to work and reality!  I apologize for the lack of posts lately, as well as my delay in checking in with other blogs (I currently have over 800 unread blog posts in my Google Reader to get to!), but I'm hoping this tasty and refreshing sesame soba noodle salad will help make up for it!

This is actually a dish inspired by a meal I ate in a Japanese restaurant on my earlier trip to Singapore.  I wasn't exactly sure what I was ordering when I requested the soba noodle salad, but I certainly didn't expect to see lettuce and noodles mixed together!  I didn't have high hopes for it when it appeared in front of me, but was pleasantly surprised when I took a few bites.  Since the noodles were cold, the whole salad was light and refreshing with an interesting mix of textures that worked well together.  But what really made the dish stand out was the delicious sesame dressing that was served with it.  

You may remember the picture I posted of the dish back in my recap of what I ate in Singapore, where I promised I would try to replicate it back at home.  Well, I stayed true to my word and recreated it the weekend after I got home from that trip!

soba noodle salad 3

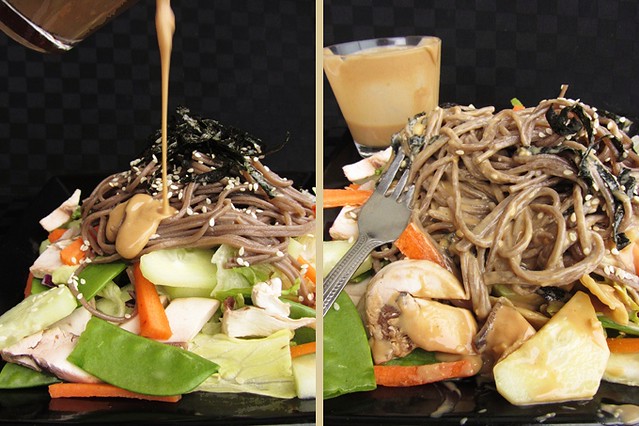
The salad part was easy - I just used some of my favourite salad ingredients, topped them with a pile of cooked soba noodles and a garnish of sliced nori and sesame seeds.  The salad dressing was a little harder as I had to play around with different ingredients quite a bit until I found the perfect balance, but I think I ended up with a pretty amazing dressing!

This salad tasted just as good as the one I remembered eating in Singapore - it was cool, fresh, and full of flavour thanks to the filling sesame peanut dressing.  It's great for summer and I will definitely be making this again now that my trip to Cuba has given me a taste of the hot weather I have to look forward to!

soba noodle salad 2

Sesame Soba Noodle Salad

Inspired by a dish I ate at Rakuzen in Singapore

Serves 2

Ingredients:

For the Dressing:
2 tablespoons peanut butter
1 tablespoon tahini
2 tablespoons sesame oil
2 tablespoons rice vinegar
1 teaspoon low-sodium soy sauce
1 clove garlic, minced
1 teaspoon minced ginger
1 teaspoon honey
Dash of salt
2 tablespoons water

For the Salad:
4-6 oz soba noodles (depending on desired amount)
Lettuce (desired amount for 2 people)
Sliced cucumber, carrot, mushrooms, and snowpeas (or other desired salad ingredients)

For Topping:
1 sheet of nori, thinly sliced for garnishing
2 tablespoons sesame seeds

Directions:

Cook soba noodles as per package ingredients.  Drain and rinse well with cold water.  Let cool.

In a small bowl, whisk together all ingredients for the salad dressing.  Taste and adjust any amounts to your liking, and add more water to thin it out if necessary.

Divide lettuce and salad ingredients between two bowls/plates.  Top with cooked cooled soba noodles.  Garnish with nori and sesame seeds and serve with sesame dressing.

April 06, 2012

Carrot Hummus

There's been a ton of cute Easter recipes floating around the internet lately, but they're mostly all for desserts. Of course there's nothing wrong with that, and I even contributed to the pile of nest/basket-themed Easter dessert recipes myself with these mini Easter basket lemon mousse tarts. But when I came across an idea on Pinterest for baby carrots planted in hummus pots, I thought it was so refreshing to see a healthy (but still adorable) Easter recipe!

I had no intention of copying the idea myself until I realized that they would give me the perfect excuse to make a carrot hummus, which I'd been wanting to try for a while. Because what's better than carrots planted in regular hummus? Carrots planted in carrot hummus, of course!

I found a recipe for carrot hummus on Pip & Ebby and only made a few slight changes to suit my tastes. Slicing and boiling the carrots seemed to be the fastest and easiest method to cook them before adding them to the hummus, but I saw other recipes where the carrots were roasted instead, which would probably give them a deeper flavour. I just didn't feel like waiting that long, so choose your cooking method depending on your own preferences!

Once the carrots are cooked, all that's left to do is blend them up with the standard hummus ingredients and season, season, season! As long as you keep tasting as you make hummus, I think it's pretty impossible to ever end up with an end product that you don't like. I kept mine pretty simple, but I could imagine lots of different spins on the recipe that would add even more flavour: adding ginger and sesame oil for an Asian-inspired hummus; adding cayenne, cinnamon, and more cumin for a Moroccan-inspired hummus; or adding cardamom and more honey for a slightly sweeter hummus - be creative!

To serve the hummus, I spread it in a wide, shallow bowl, and "planted" little sprigs of carrot greens in rows to look like a carrot patch. At first I didn't attach baby carrots to the carrot tops because I didn't want to copy the original idea exactly, but halfway through photographing the dish I added them in just to see what it would look like, and it looked a million times better! If you're serving this hummus for Easter or any other spring gathering, I'd highly recommend checking out Pottery Barn Kids to get the instructions on how to plant baby carrots in the hummus!

I think this would make a great appetizer for an Easter gathering, but I've been enjoying eating it on my own all week as a dip for carrots and crackers - it's really tasty! I had planned on trying to save some for our Easter gathering on Sunday, but there won't be any left by then so I might have to make another batch!

Hope you all have a great Easter, Passover, or just enjoy the long weekend!


Carrot Hummus

Recipe adapted from Pip & Ebby, Carrots in hummus idea inspired by Pottery Barn Kids

Makes about 2 cups

Ingredients:

1 cup sliced carrots
1 19-oz can chickpeas
1/4 cup tahini
3 tablespoons lemon juice
1/2 tablespoon honey
2 cloves garlic, minced
1/2 teaspoon cumin
1/4 teaspoon paprika
Generous pinches of salt and pepper (to taste)
2 tablespoons olive oil

Directions:

Place chopped carrots in a large saucepan and cover in water. Bring to a boil, cover, and let cook 5-8 minutes, until carrots are tender. Drain and rinse with cold water to cool.

Place all ingredients except for the olive oil in the large bowl of a food processor and blend until smooth. Slowly add olive oil through the feed tube while processing.

Taste and adjust any seasonings to your liking – I added more lemon juice and salt, but if you wish it to be sweeter you could add more honey, or for more spice, try increasing the cumin and adding some cayenne!

February 22, 2012

Sesame Soy Spaghetti Squash with Broccoli and Edamame

sesame soy spaghetti squash with broccoli and edamame
After the rather indulgent caramel latte pancakes I last posted (not to mention the amount of pancakes I ate yesterday), I felt like I should post something healthier today. This sesame soy spaghetti squash with broccoli and edamame is a dish I’ve made quite a few times lately because it’s so healthy and really tasty!

I think the inspiration for this dish originally came from this steamed broccoli and squash with tahini dressing that I saw in a Whole Living magazine. I liked the idea but ended up changing everything around to my own tastes, so that the only parts of the original that really remained were the broccoli and tahini.

For my tahini sauce, I wanted to give it more of an Asian flavour with sesame and soy sauce. After a bit of experimentation, I came up with a sauce that I thought was full of flavour, and is filling and healthy from the addition of the tahini (sesame seed paste).

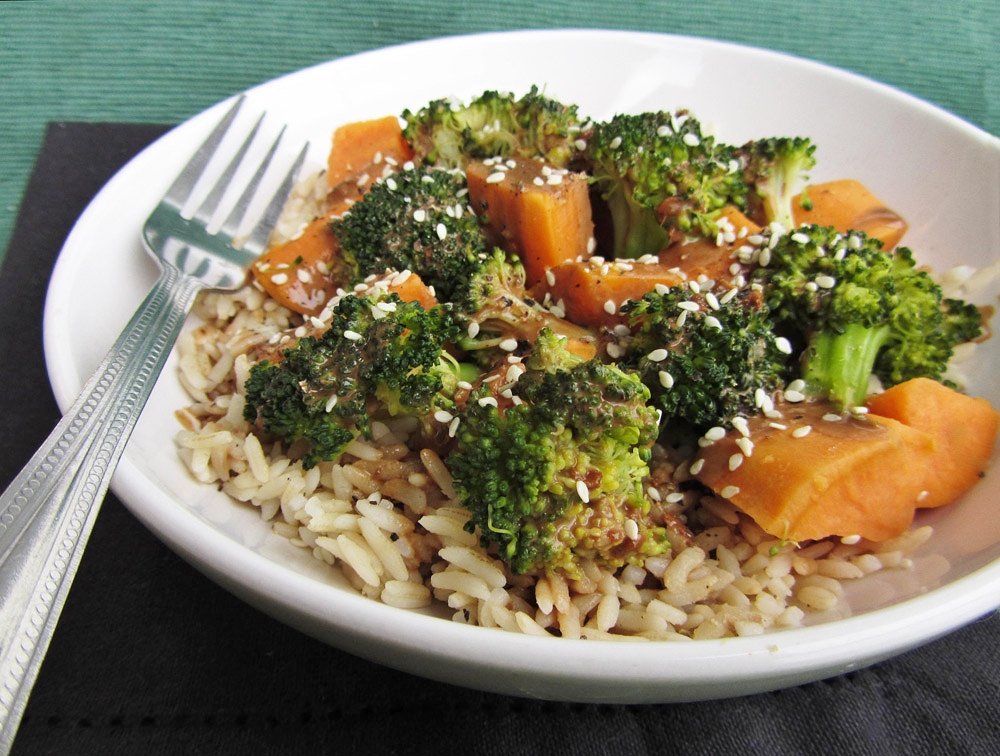
The first time I made the sauce, I paired it with steamed broccoli and sweet potato over brown rice (pictured below):

sesame soy broccoli and sweet potatoes on riceWhile I loved the sauce and veggies, I didn't like the way the rice absorbed all of the sauce and didn't think the textures of the dish were quite right.

So for my second try, I decided to make the same dish over soba noodles instead:

sesame soy broccoli and sweet potatoes on soba noodles
The soba noodles provided a much better base for both the sauce and the vegetables, and I really loved this version.

But a few days later I had a spaghetti squash to use up, so I decided to try the dish again, using the spaghetti squash as the base instead of soba noodles. Since I already knew that the sesame soy tahini sauce went well the sweet potatoes, I figured squash would also pair well with it.

If you've never tried spaghetti squash before, it's a lot like other winter squashes except that when the flesh is cooked, it scrapes off like strands of spaghetti! This makes it a great healthy and low-carb substitute for pasta - I've seen it in lots of recipes from basic tomato sauce with spaghetti squash to baked dishes with lots of other add-ins.

spaghetti squash
I used the cooked spaghetti squash "noodles" as the base for my latest version of this sesame soy tahini dish. I kept in the steamed broccoli but this time I added cooked edamame for protein. This combination turned out to be my favourite version of all, and was also the healthiest!

I think I've now found the dish I'm going to stick with, but if I experiment more in the future, I may try pairing the sesame soy sauce with salmon or chicken, I think that would go really well!
sesame soy spaghetti squash with broccoli and edamame
Sesame Soy Spaghetti Squash with Broccoli and Edamame

Makes 2 servings

Ingredients:

Sesame Soy Tahini Sauce:
3 tablespoons tahini (sesame seed paste)
2 tablespoons low-sodium soy sauce
1 tablespoon rice vinegar
1 teaspoon sesame oil
2 teaspoons honey
1 teaspoon minced fresh ginger
1 clove garlic, minced
Dash of cayenne pepper
1-2 tablespoons water

Half of a spaghetti squash
Half a head of broccoli, chopped into florets
1 cup frozen shelled edamame
Sesame seeds for topping
Salt and pepper

Directions:

Preheat oven to 400°F. Cut spaghetti squash in half and scoop out the seeds and pulp from the center. Place one half with the cut side facing down on a greased or lined baking sheet (keep other half wrapped in the fridge for another use). Roast for 30-40 minutes, or until tender - it may take longer, depending on the size of your squash. When done, use a fork to scrape the flesh off the skin and into a bowl (it will scrape off in strands, like spaghetti).

While the squash is cooking, prepare the remaining components:

Whisk together all ingredients for the sauce. Taste and adjust any seasonings to taste. If the sauce is too thick, add a bit more water to thin it out.

Place chopped broccoli in a steamer basket and steam over boiling water for 3-5 minutes, until crisp-tender and bright green. Set aside. Cook edamame according to package directions.

When all components are ready, divide spaghetti squash into two bowls, top with broccoli and edamame, and drizzle sesame soy tahini sauce overtop. Top with sesame seeds and season with salt and pepper, if desired.

This is best eaten on the day that it's made.

December 27, 2011

Masala Hummus

masala hummusI know I post a lot of hummus recipes on here, but I think there's always room for more easy appetizers that can feed (and please!) a crowd, especially with New Year's parties coming up! I actually made this hummus to serve as an appetizer on Christmas and everyone loved it. There was still tons left over so I've been enjoying it over the last couple days as a quick snack or lunch to fuel me through all my Boxing Day shopping!

This was actually my first attempt at a "copycat" recipe, trying to replicate one of my favourite storebought hummuses (is that a word?): PC's masala hummus. I love the infusion of Indian spices into their hummus and the way they're balanced out by the hint of sweetness from the honey. But since hummus is so easy to make at home (provided you have a food processor), I can't justify buying small tubs of it when I can make a much larger batch for much less money myself.

To make my own masala hummus, I incorporated most the ingredients from the ingredient list in amounts that I thought would work, then I tasted, tasted, and tasted some more until I finally reached what I thought to be a close enough match (with agreement from my fellow taste-testers at home). While the final product wasn't a perfect match for the PC brand, I still loved the flavour and creaminess of my version and will happily eat it from now on instead of having to buy it from the store.

If you want to make/serve your own hummus but Indian flavours aren't your thing, try one of my two other favourites: beet hummus and buffalo wing hummus!

masala hummus
Masala Hummus

Recipe by Once Upon a Cutting Board, Inspired by PC's masala hummus

Makes about 2 cups

Ingredients:

1 (19oz) can of chickpeas, drained and rinsed
1/3 cup liquid from the can of chickpeas
3 tablespoons tahini
2 tablespoons fresh lemon juice
1 tablespoon honey
2 tablespoons finely chopped onion
1 clove garlic, minced
1 teaspoon garam masala
1/2 teaspoon turmeric
1/2 teaspoon cumin
1/2 teaspoon ginger powder
3/4 teaspoon salt
2 tablespoons extra virgin olive oil

Directions:

Add all ingredients except for the olive oil into the bowl of a food processor and process until smooth. Add the olive oil to the feed tube and let slowly pour into the bowl as the motor is running, until it's well incorporated. Taste and adjust any seasonings if necessary.

November 23, 2011

Buffalo Wing Hummus

buffalo wing hummus

You may have noticed that I have a slight obsession with making hummus (see here, here, and here), but considering that the top two most popular recipes on my blog are hummus recipes, I’m thinking you guys won’t mind if I post another one!

I’d been dreaming about this buffalo wing hummus ever since I first saw it in September’s Food Network magazine, and once I tried it I couldn’t believe I didn’t make it sooner! This is easily my new favourite hummus recipe; it tastes exactly like buffalo wings but in a healthy dip form. It’s also the creamiest hummus I’ve made, even though it doesn’t contain any oil like most recipes. This dip makes a healthy snack served with celery or carrot sticks, but is also delicious served with pita chips or even off your finger ;)

If you love buffalo wings but are looking for a healthier way to enjoy their flavour, try this hummus out, you won’t regret it!

buffalo wing hummus
P.S. I want to wish all my American readers a very happy Thanksgiving!! And if you missed it earlier, be sure to check out my Thanksgiving recipe roundup if you need some last minute ideas!

Buffalo Wing Hummus

Adapted from Food Network

Makes about 2 cups of hummus

Ingredients:

1 (19oz) can no-salt added chickpeas (about 2 cups)
1/3 cup liquid from the chickpea can
1 clove garlic, minced
3 tablespoons tahini
2 tablespoons fresh lemon juice
1 teaspoon paprika
2 tablespoons barbeque sauce
2 to 3 tablespoons hot buffalo sauce
1/2 tablespoon distilled white vinegar (optional, you may want to taste before adding this as some brands of buffalo sauce can already taste quite vinegary)
1/2 to 1 teaspoon salt
Freshly ground pepper for seasoning, optional

Directions:

Place all ingredients in the bowl of a food processor and process until smooth.  For amounts that have a range (i.e. the buffalo sauce and salt), start with the smaller amount and add more after tasting if desired.  Taste and adjust any other amounts to your liking.

Serve with celery sticks, carrots, pretzels, or pita chips. Store in the refrigerator.

*Note: Because this recipe uses the liquid from the chickpea can, it's a good idea to buy no-salt added chickpeas.  If you can't find that and are watching your sodium, you can also make this by replacing the chickpea liquid with about 1 tablespoon olive oil and 3 tablespoons water.

Update: Here are a couple more (brighter) photos from a more recent batch in February 2014:

buffalo wing hummus

buffalo wing hummus

October 22, 2011

Sweet Potato Hummus

sweet potato hummusI've mentioned before how much I love making hummus because it's so quick and easy to make yourself, it makes a healthy and filling snack that can last you through the week, and there are so many different flavours out there to try (like beet hummus and spicy pumpkin hummus)!

When I was flipping through my Power Foods cookbook the other week, this sweet potato hummus recipe caught my eye. I'd never tried sweet potato hummus before but it sounded like the perfect combination for fall, and I'll take any excuse I can to bring delicious (and healthy!) sweet potatoes into a recipe.

This hummus did take a little longer to make than other types of hummus because you have to cook the sweet potatoes first, but the steaming method called for in the recipe was one of the quickest and easiest ways I've ever tried to cook a sweet potato. I think roasting them might bring out a little more of the flavour of the sweet potato, but in this case, I preferred the convenience of the steaming method.

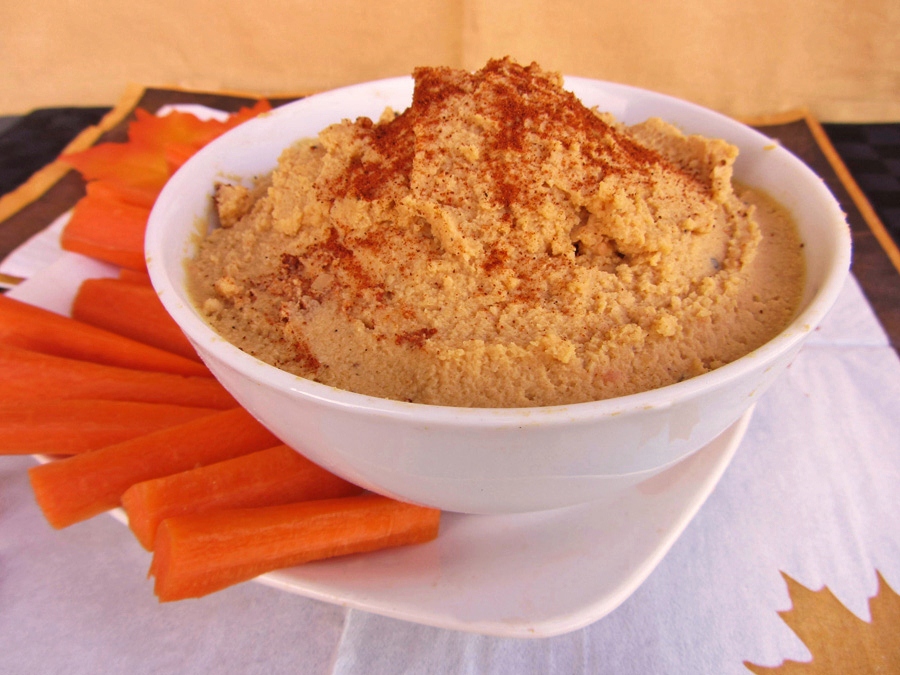
The hummus had just the right amount of sweetness and hint of spice, and was delicious served with carrots or pitas as a healthy snack. Since it was a little on the thick side for hummus, it also made a great spread to serve on bread - and it went perfectly with the leftover sweet potato bread I had in the freezer!

I hope you guys aren't sick of hummus yet because I'm not and I plan on trying a lot of new recipes in the near future!

sweet potato hummus with carrot
Sweet Potato Hummus

Adapted from Whole Living

Ingredients:

1 pound sweet potatoes, peeled and cut into 1-inch pieces
1 (15-oz) can chickpeas, drained and rinsed
3 tablespoons fresh lemon juice
1/4 cup tahini
2 teaspoons ground cumin
1 teaspoon nutmeg
2 garlic cloves, minced
1/4 cup olive oil
Salt and pepper

Directions:

Fill a large pot with a couple inches of water. Bring to a boil and set a steamer basket overtop. Add potatoes to the steamer, reduce heat to a simmer, cover and cook until potatoes are tender, about 10-12 minutes. Let cool slightly.

Transfer potatoes to a food processor. Add chickpeas, lemon juice, tahini, cumin, nutmeg, and garlic. Puree until smooth. Pour olive oil into the feed tube of the food processor, allowing it to slowly drizzle into the bowl with the motor running. Once oil has been incorporated, season with salt and pepper to taste. If hummus is too thick, add up to 2 tablespoons of water to thin it out. Taste and adjust any amounts to your liking.

Serve with a sprinkle of paprika if desired. Store in an airtight container in the refrigerator for up to 1 week.

Ingredient Index

Related Posts Plugin for WordPress, Blogger...