Showing posts with label tomato. Show all posts

October 28, 2014

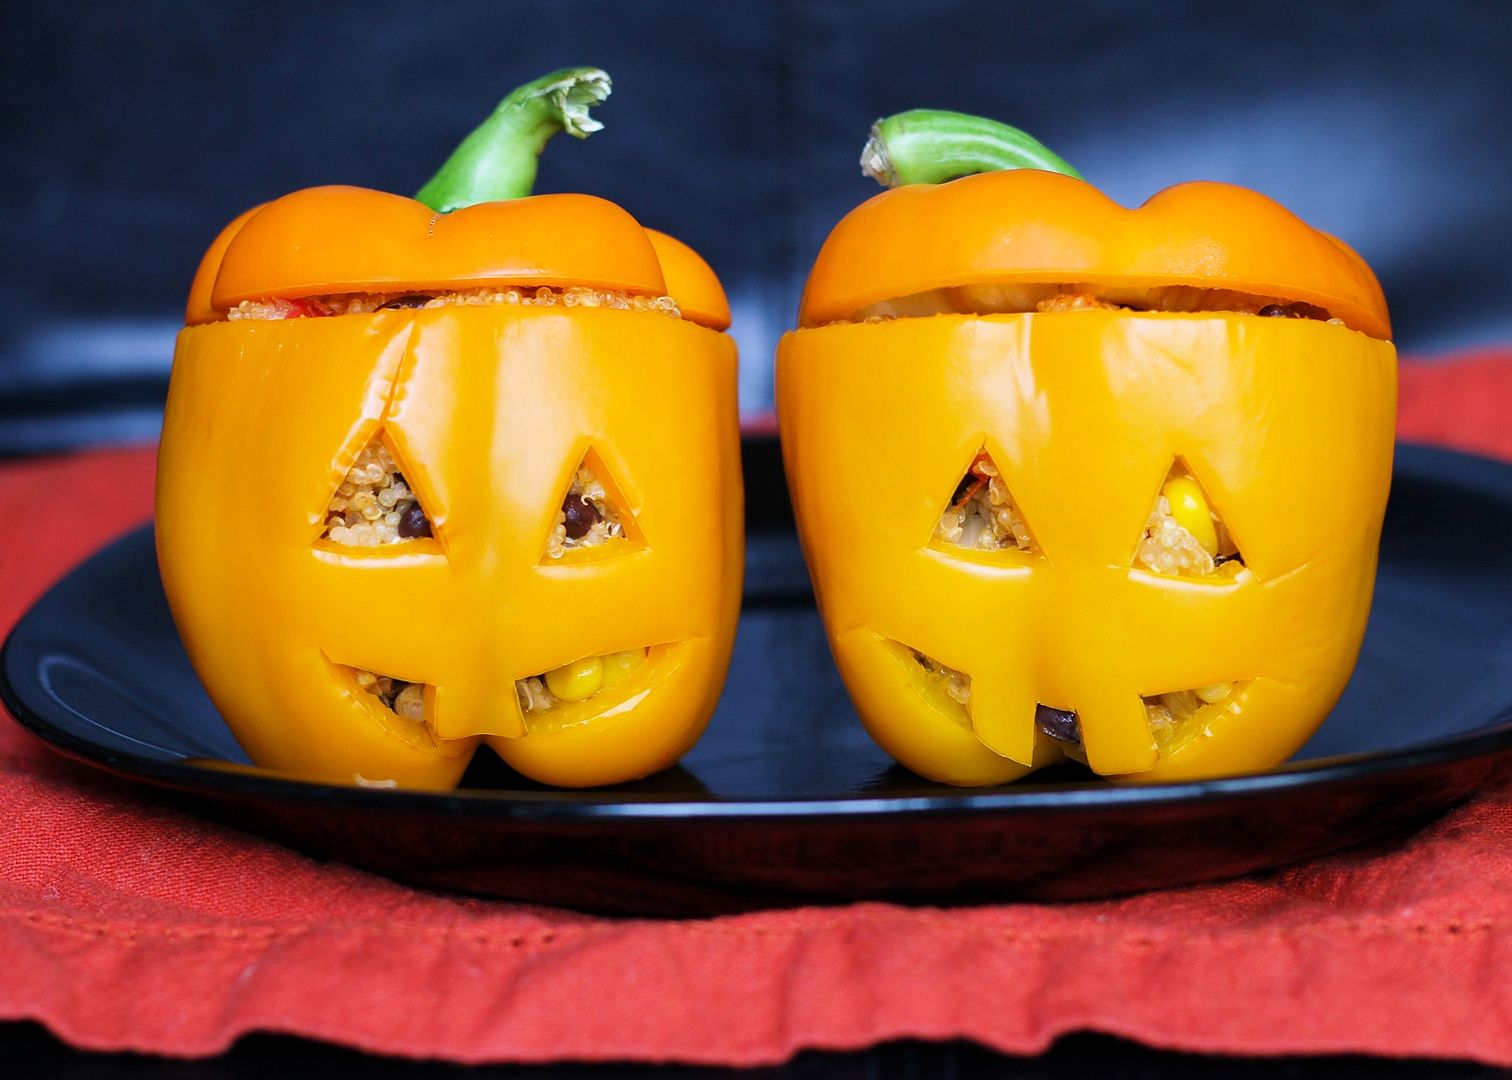
Southwestern Quinoa Stuffed Pepper Jack O' Lanterns

Southwestern Quinoa Stuffed Pepper Jack O' Lanterns - easy and fun dinner idea for Halloween!

I love making cute Halloween themed treats, and dinner ideas are even better since there are already so many sweets around this time of year.  I've seen the idea of carving stuffed peppers like jack o' lanterns on several blogs before and wanted to try it for myself this year.  Even though I'm certainly not the first to try these, they turned out so cute and tasty that I had to share them with you guys!
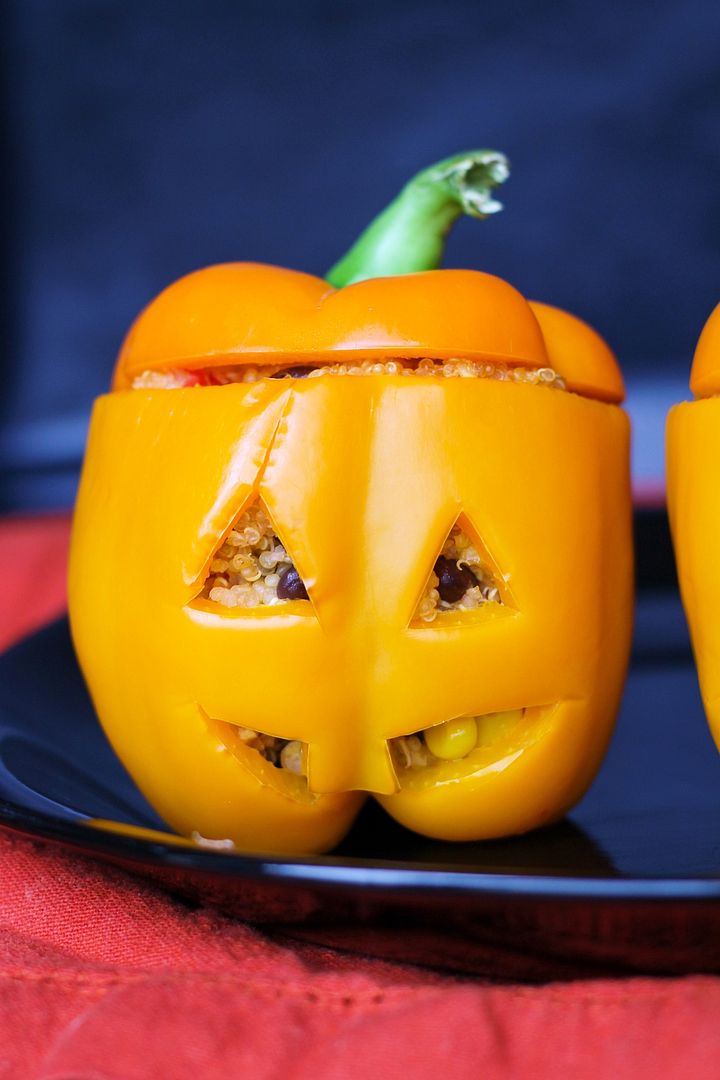
Southwestern Quinoa Stuffed Pepper Jack O' Lanterns - easy and fun dinner idea for Halloween!

These are also really easy to make and completely customizable!  Just find some orange peppers, cut the tops off and scrape out any seeds or ribs inside, then carve your jack o lantern face with a small knife.  You don't want to cut out too big of holes so that the filling could escape, but even though these are a lot smaller to work with than pumpkins, I found them much easier to "carve"!

After prepping your little pumpkin lookalikes, you make your filling, stuff the insides of the peppers, and bake them to soften the peppers.  I also like to parboil the peppers first to reduce the amount of time needed to soften the peppers in the oven later, which will also help save time if you're trying to make these on Halloween evening before trick or treating starts!
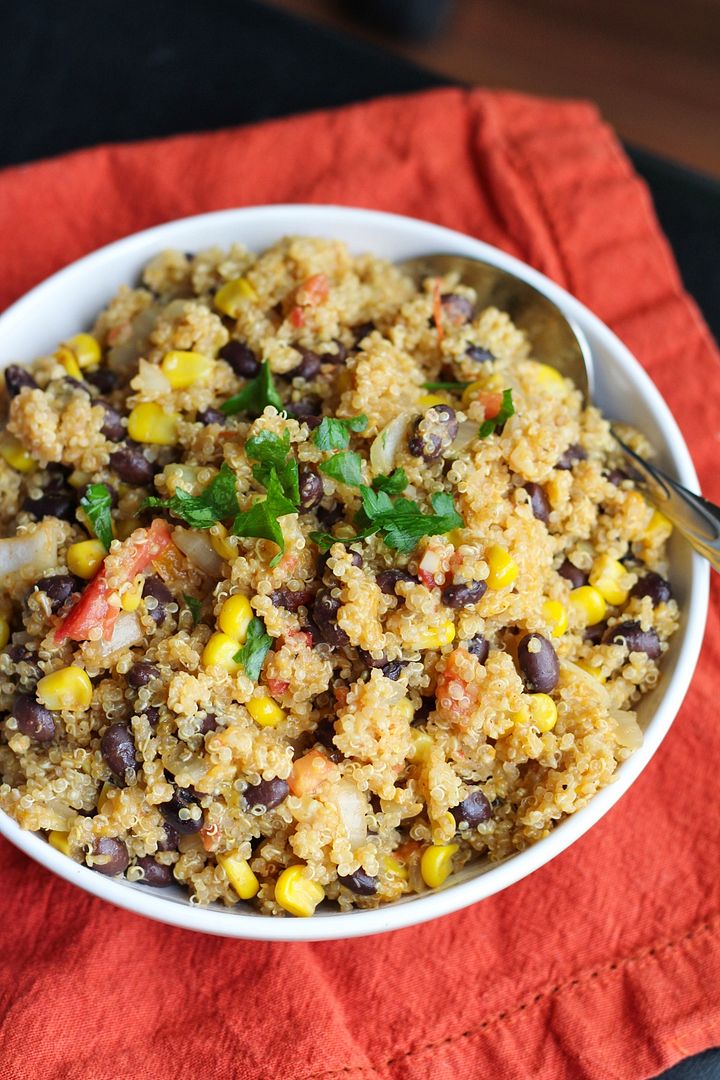
southwestern quinoa

I filled mine with one of my favourite southwestern-flavoured quinoa mixtures, which is vegetarian and pretty healthy too.  I cook the quinoa in vegetable broth which is important for giving it more flavour, then mix in some sauteed onion and garlic, tomatoes, black beans, corn, spices, and cheese.  You could add in more vegetables like spinach or mushrooms if you like, or leave out the spices if your kids won't like them.

I'm going to a Halloween potluck tomorrow and plan on making some scary cookies so if those turn out well I'll have another treat to share later this week!  Happy week of Halloween!
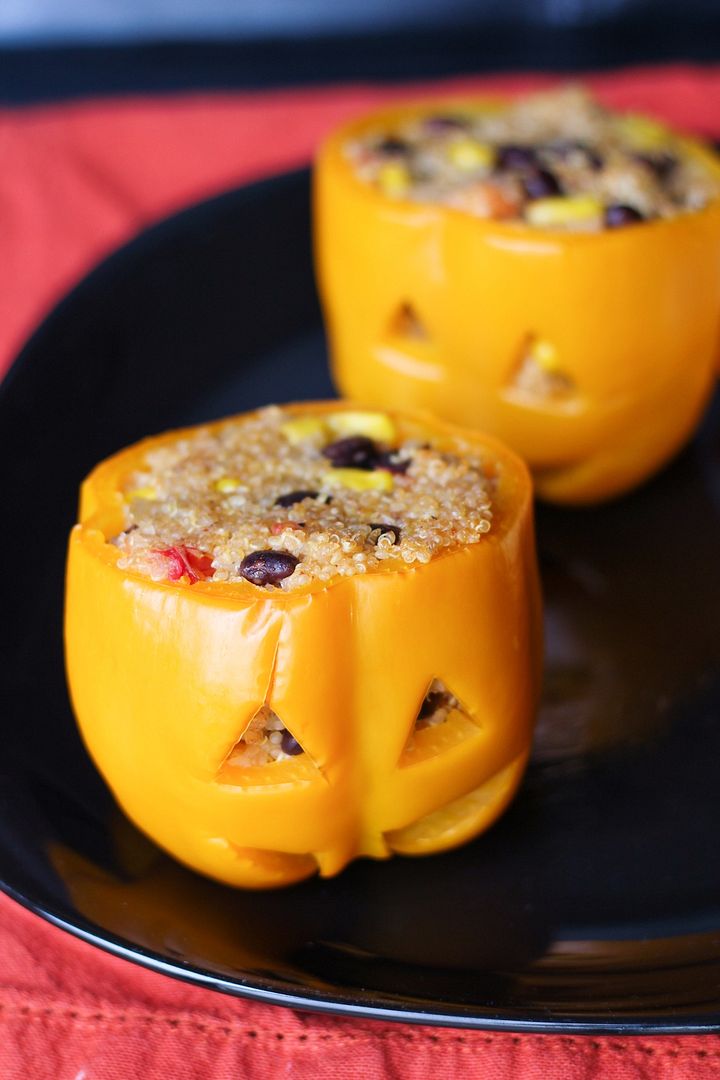
Southwestern Quinoa Stuffed Pepper Jack O' Lanterns - easy and fun dinner idea for Halloween!

Southwestern Quinoa Stuffed Pepper Jack O’ Lanterns

Serves 4-6

Ingredients:

2 cups vegetable broth
1 cup dry quinoa
4-6 orange bell peppers
1 teaspoon olive oil
1 yellow onion, diced
1 clove garlic, minced
2 small tomatoes, diced
1 (540mL) can black beans, drained and rinsed
1 cup corn kernels (thawed if frozen)
1 teaspoon cumin
1/2 teaspoon chili powder
Salt and pepper
1 cup shredded cheddar cheese (or Mexican or taco blend)

Directions:

Bring 2 cups of vegetable broth to a boil in a medium saucepan.  Add quinoa, cover, reduce heat to simmer and let simmer for 15 minutes.  Remove from heat and let sit, covered, for 5 minutes.  Remove lid and fluff with a fork.

Meanwhile, cut the tops off the bell peppers and use a knife to scrape out the remaining seeds and ribs of the pepper, leaving the pepper in tact (as seen in pictures).  Leave the tops aside if you wish to include them for presentation later.  Bring a large pot of water to a boil, with enough water to cover the peppers.  Add peppers and let simmer for about 4 minutes, until slightly softened.  Carefully remove and set aside.

Preheat oven to 350°F.

In a medium pan, heat oil over medium-high heat.  Add onion and saute for about 5 minutes, stirring often, until softened.  Add garlic and saute for 30 seconds, stirring. Add tomatoes, black beans, corn, cumin, and chili powder, and season with salt and pepper.  Stir and saute for a few minutes.  Remove from heat, stir in quinoa and cheddar cheese and mix until incorporated.

Spoon quinoa mixture into the peppers.  There should be enough to fill 6 peppers or you can really fill 4 peppers quite full, and might still have some quinoa leftover.  You could also just stop now and eat the quinoa on its own!  Leave tops off the peppers, spray a 9x13 glass baking dish with non-stick cooking spray, and place filled peppers standing up in the dish.  Cover with aluminum foil and bake in preheated oven for 25-35 minutes, until peppers are softened to your liking (I did 25 minutes as I was impatient but would have preferred 30).  Remove and serve with tops on the peppers if desired.  Eat by slicing everything up with a knife and fork and eating the quinoa and pepper together.


--------------------------------------------------------------------------------------------------
For more Halloween dinner ideas, try these:

Halloween mummy potatoes with turkey meatballs

Halloween Mummy Potatoes with Meatballs

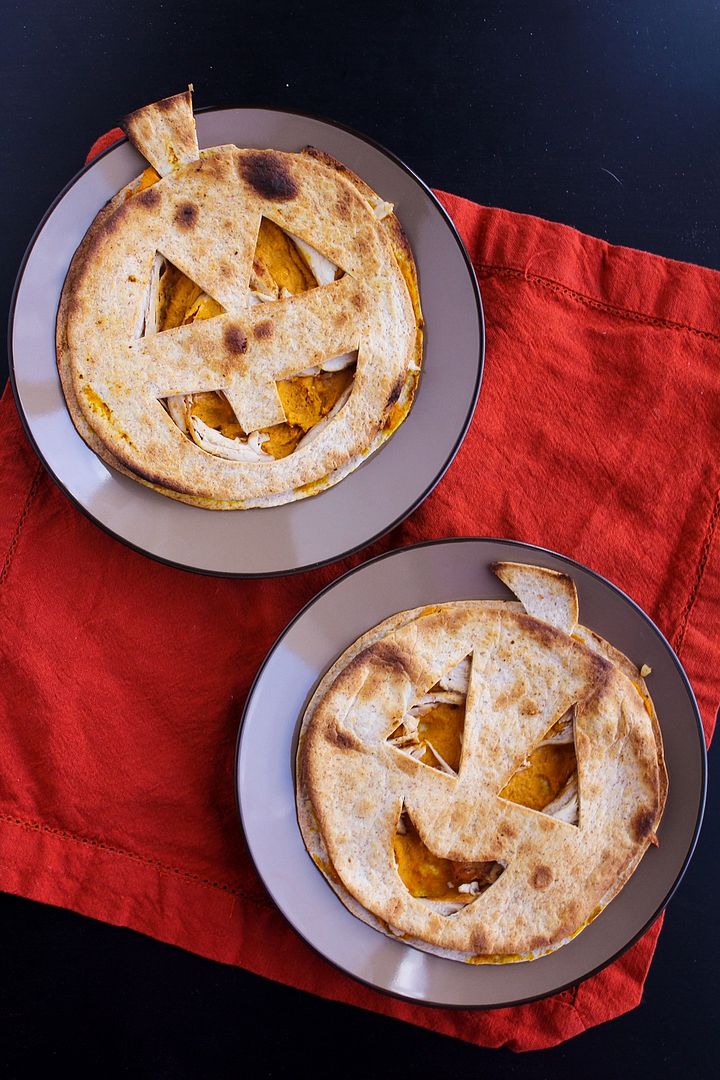
Pumpkin, chicken, & goat cheese quesadillas

Pumpkin, Chicken, & Goat Cheese Quesadillas(for Halloween!)

September 19, 2014

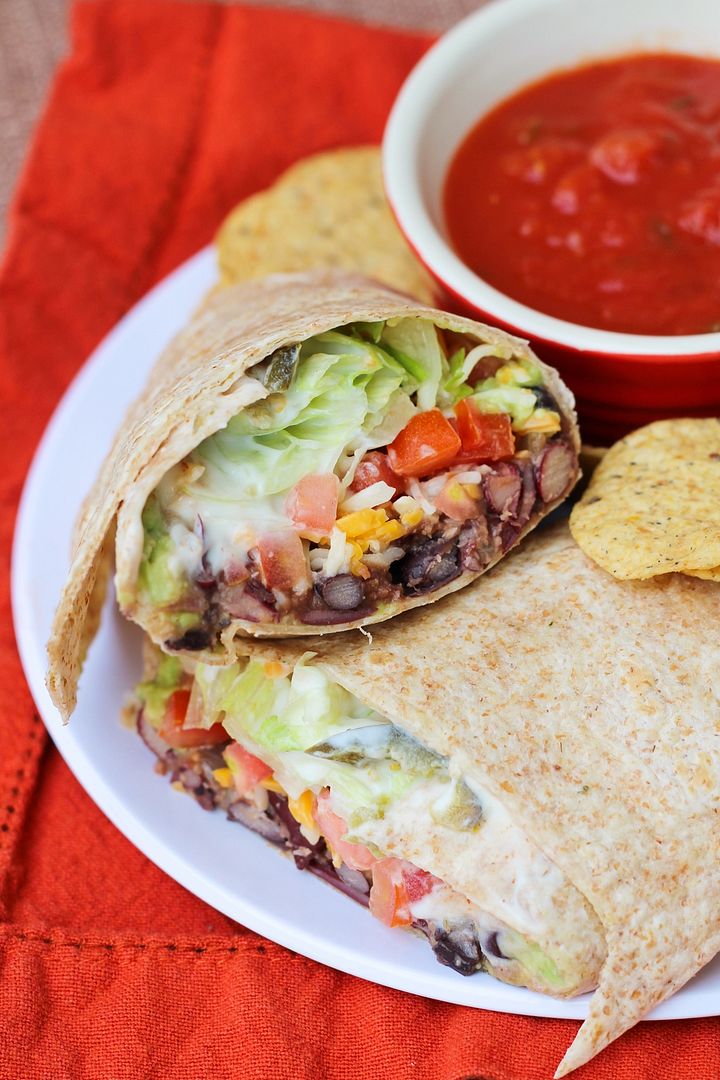
Chipotle Bean Burritos

Chipotle Bean Burritos

As much as I love cooking, I don’t like having to coordinate a bunch of dishes at once or cook multiple nights in a row, so meals that consist of one dish and make lots of leftovers are a favourite around here. And these burritos fit the bill perfectly!

I consider these a fairly healthy version of a burrito with beans instead of meat, some veggies, low-fat sour cream, not too much cheese, and whole wheat tortillas (which taste just as good as regular tortillas in my opinion!).
Chipotle Bean Burritos

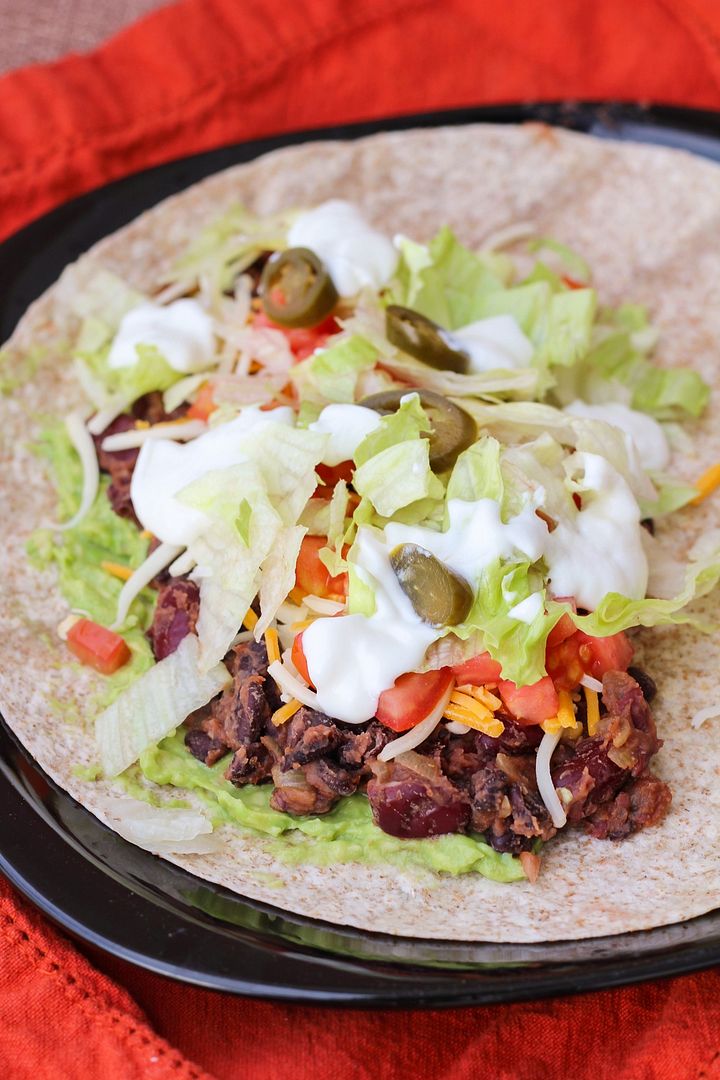
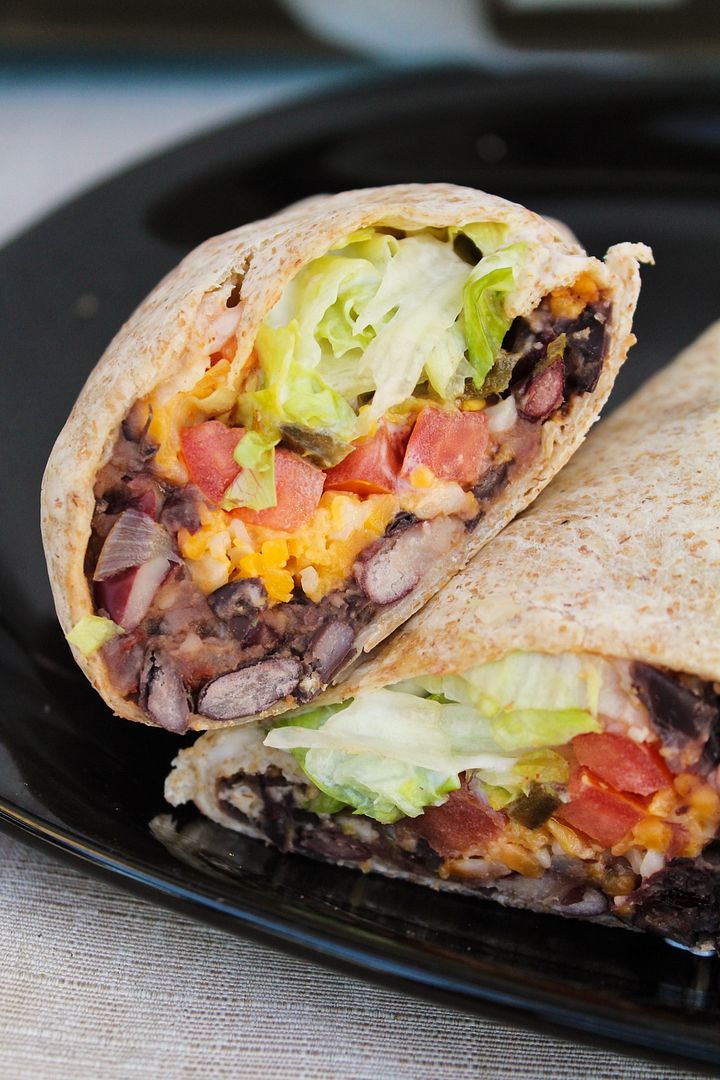
These also involve fairly minimal effort to make, and make six servings, which meant lots of leftovers for us!  To prepare them, a mixture of black beans and kidney beans gets cooked with some onion, garlic, vegetable broth, spices, chipotle sauce, and salsa to give it lots of flavour. It’s then rolled up with lettuce, tomatoes, mashed avocado, cheese, sour cream, a few pickled jalapenos, and some chipotle hot sauce for a packed and flavour-filled meal-in-one.

Chipotle Bean Burritos

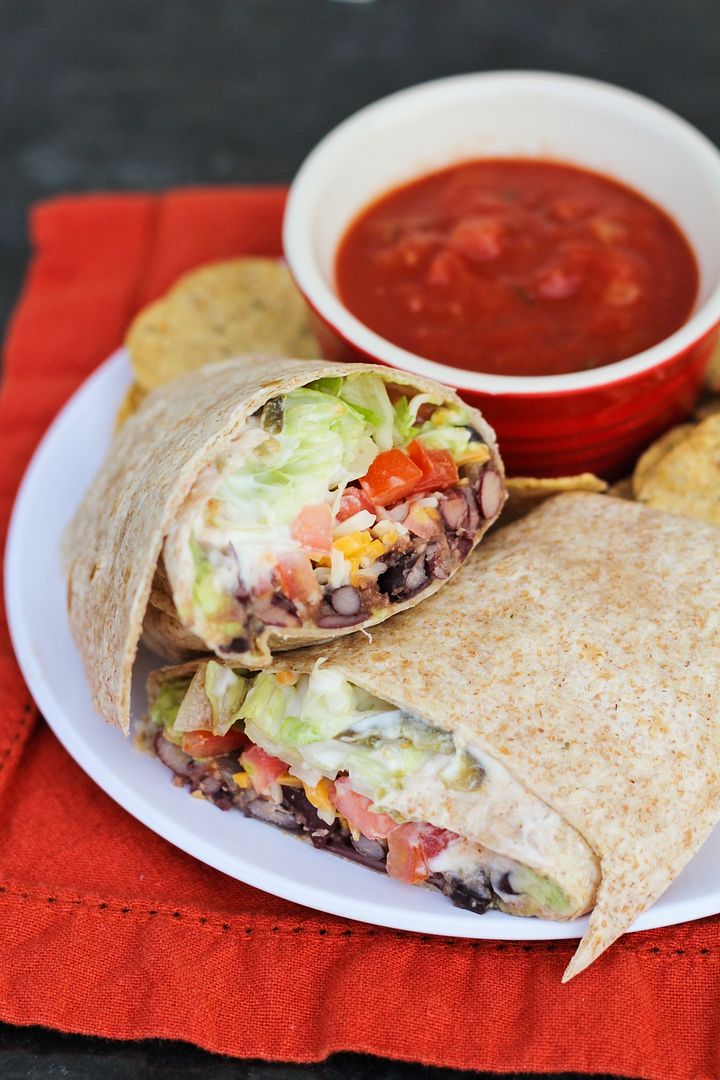
We ate these three nights in a row this week and liked them more each time. That may have to do with my getting much better at rolling them with more practice (the last picture was the third night’s burrito which I thought looked much better than the first!)

Ryan commented on how good these are each time too and said they’re way better than beef burritos, and I’d have to agree! (though I don’t like beef anyway, so I’m a little biased)

Chipotle Bean Burritos


Chipotle Bean Burritos

Adapted from Cooking Light

Serves 6

Ingredients:

For the bean mixture:
1 teaspoon canola or olive oil
2 cloves of garlic, minced
1 small yellow onion, diced
1/2 teaspoon chipotle chile powder*
1/4 teaspoon salt
1/2 cup vegetable broth
1 (540mL) can black beans, drained and rinsed
1 (540mL) can kidney beans, drained and rinsed
1/2 cup chunky salsa – Mild or medium depending on your preference.  You could also use a chipotle salsa for more chipotle flavour!
2 teaspoons chipotle chile in adobo

Remaining burrito ingredients:
6 large (10-inch) whole wheat tortillas
2 large or 3 small ripe avocados
~1 cup shredded cheddar or monterey jack cheese (or a blend of cheese)
3 plum tomatoes, diced
1-1/2 to 2 cups shredded iceberg lettuce
~1/4 cup pickled jalapenos, optional
~6 tablespoons low-fat sour cream
Chipotle or regular hot sauce, optional

*I get chipotle chile powder at the bulk store.  If you can't find it, you can use a combination of regular chile powder and some cumin for spice.

Directions:

Heat oil in a large non-stick saucepan over medium heat.  Add onion and saute about 5 minutes, stirring often, until translucent and starting to turn golden brown.  Add garlic and saute for 30 seconds.  Add chile powder and salt and stir to coat for another 30 seconds.  Stir in vegetable broth and beans and bring to a boil.  Let simmer about 7-10 minutes, or until no liquid remains. Remove from heat and stir in salsa and chipotle sauce.  Partially mash mixture.

Warm tortillas up for about 30 seconds in the microwave, wrapped in damp paper towel, so they are easier to roll.  To form burritos, spread 1/6 of the bean mixture (so it divides evenly among 6 burritos) onto one half of the tortilla, leaving about a 1-inch border.  Top with avocado, cheese, tomatoes, lettuce, pickled jalapenos, sour cream, and hot sauce (again dividing evenly among 6 burritos).  Roll up the side closest to the filling, then fold in each end, and roll the burrito toward the empty side of the tortilla, wrapping the filling completely.  Others prefer to fold in the sides of the burrito first, then roll up from the bottom.  I've also seen starting with the filling in the middle.  Use whatever method works for you but make sure to roll tightly and keep the filling in!
Serve while filling is still slightly warm.  I like to warm my completed burrito up in the toaster oven for a couple minutes before eating to make sure it's warm throughout.

If you have leftovers, keep everything separate.  Warm bean mixture up in the microwave and then prepare burrito as before.

May 22, 2014

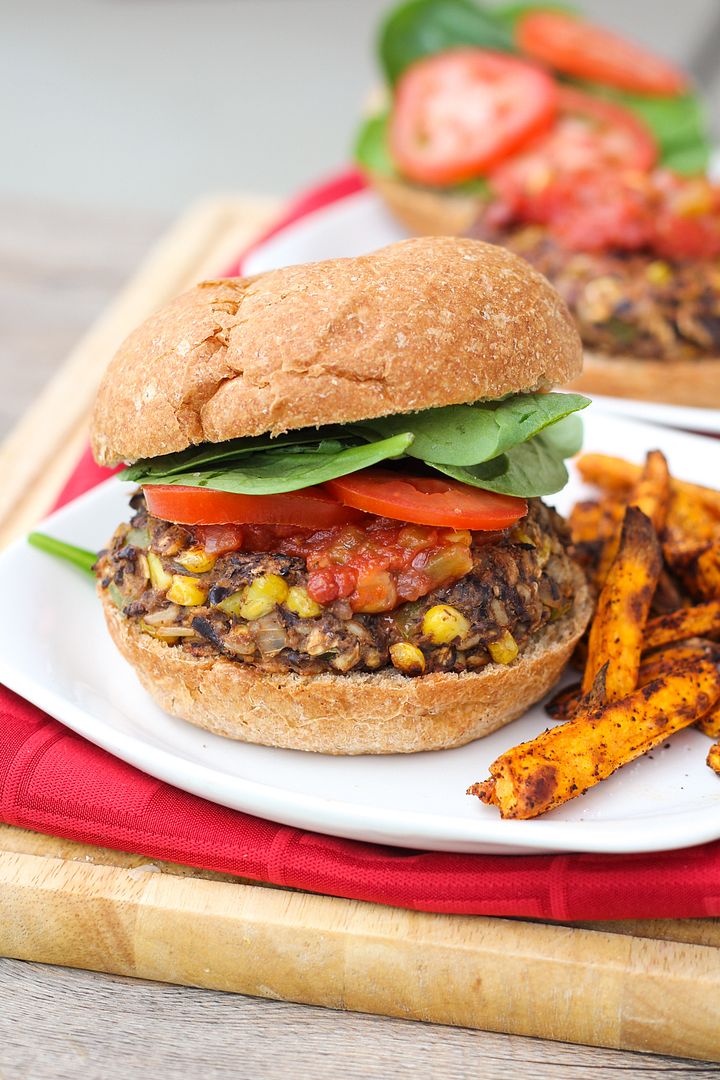
Southwestern Black Bean & Brown Rice Veggie Burgers

Southwestern Black Bean & Brown Rice Veggie Burgers

The (almost) return of summer means the return of burger season - one of my favourite foods!  I still make them in the winter on the stovetop (and even in the summer I use the stovetop because I'm scared of bbqs), but there's something about summer that makes me crave burgers all the time.

I've never liked beef burgers though, and a regular beef patty with the standard toppings doesn't appeal to me much.  Instead, I love experimenting with different chicken and turkey burgers - like buffalo chicken and cheddar burgers or apple turkey burgers with caramelized onions and brie - and veggie burgers, which are so customizable, like lemon chickpea quinoa burgers or portabello mushroom burgers with roasted red peppers and provolone!

Southwestern Black Bean & Brown Rice Veggie Burgers

I love trying out new flavours and for my first veggie burgers of the post-winter season (it's hard to call this summer yet), I went with a Southwestern theme!

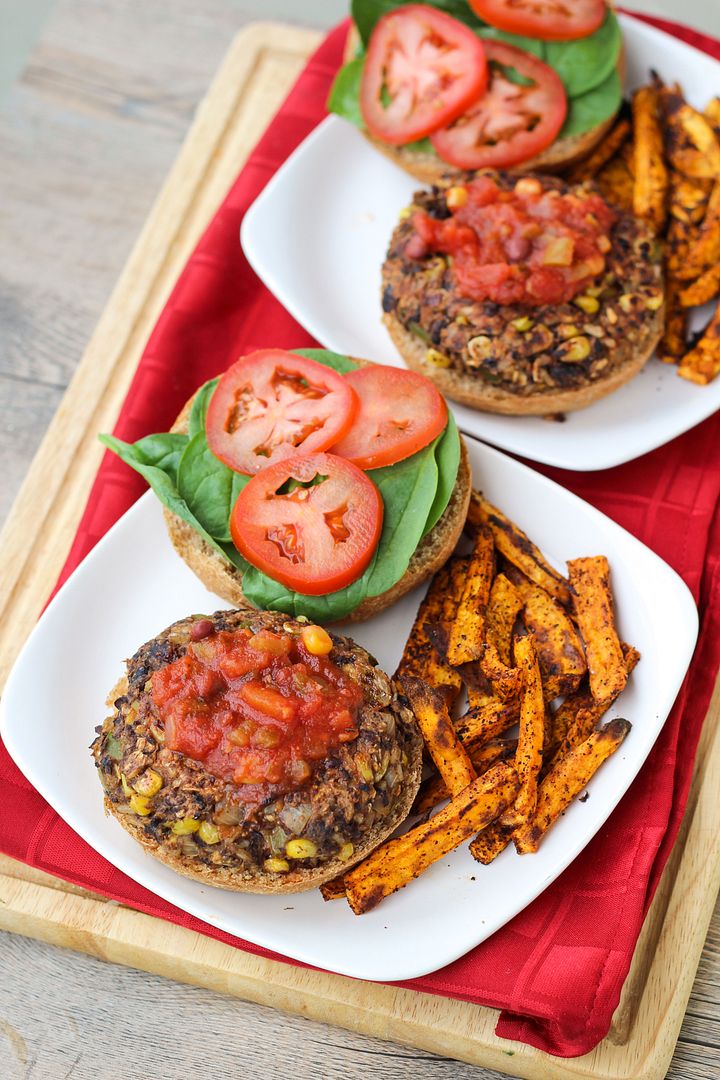
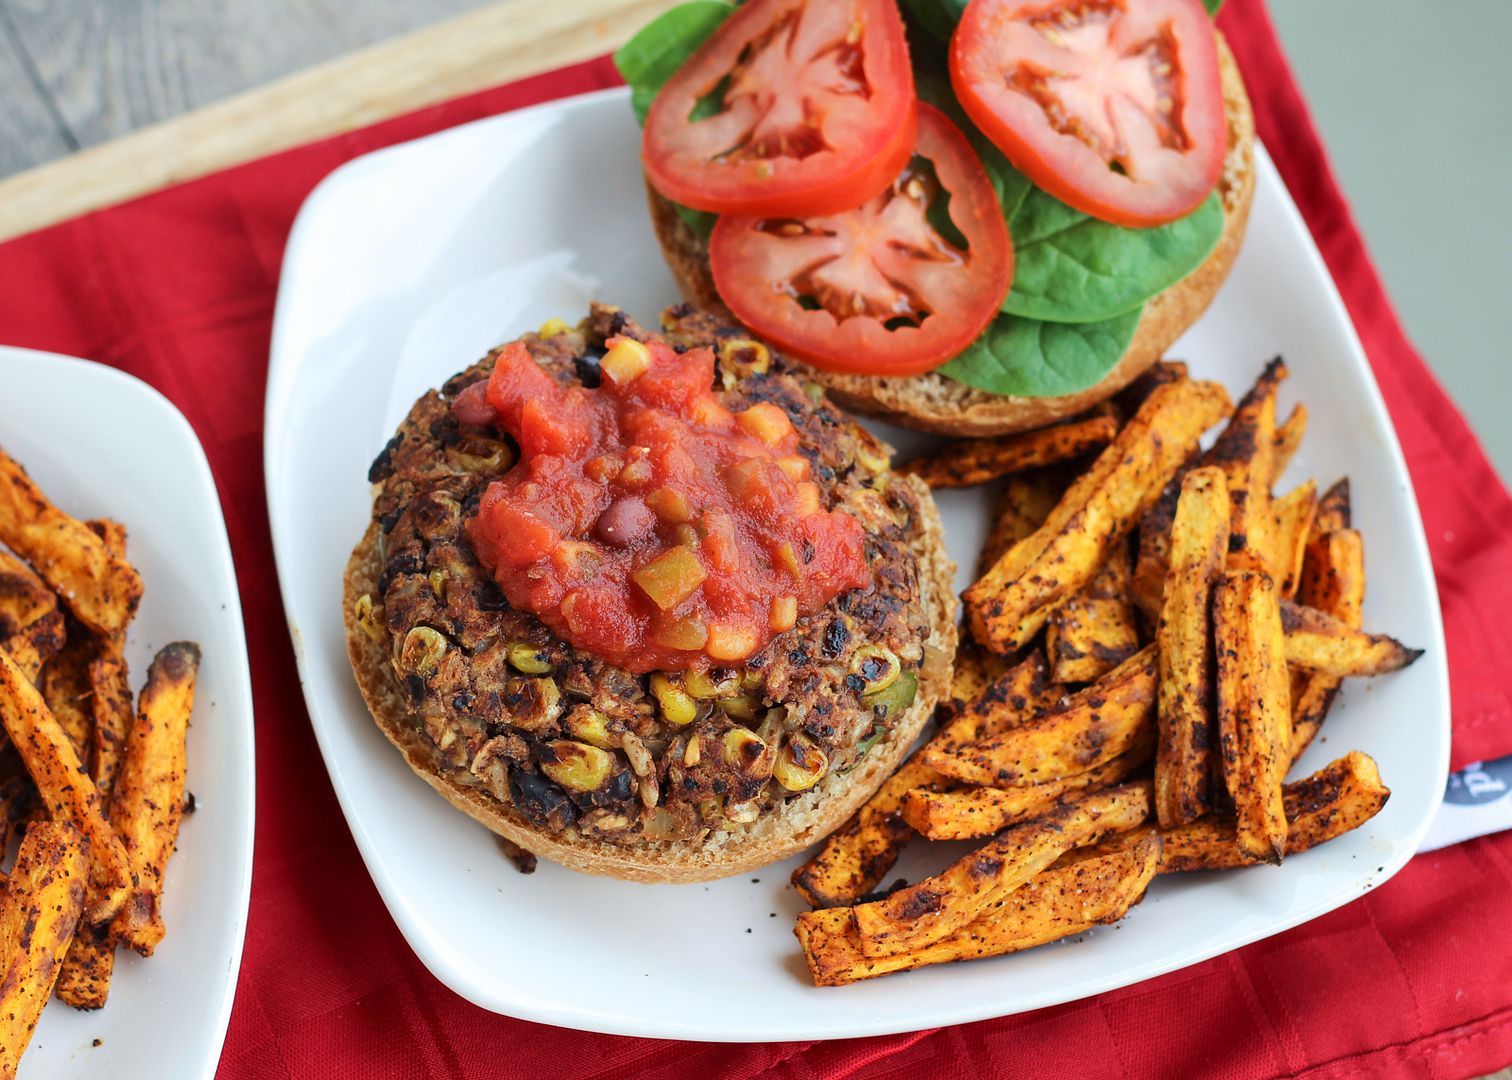
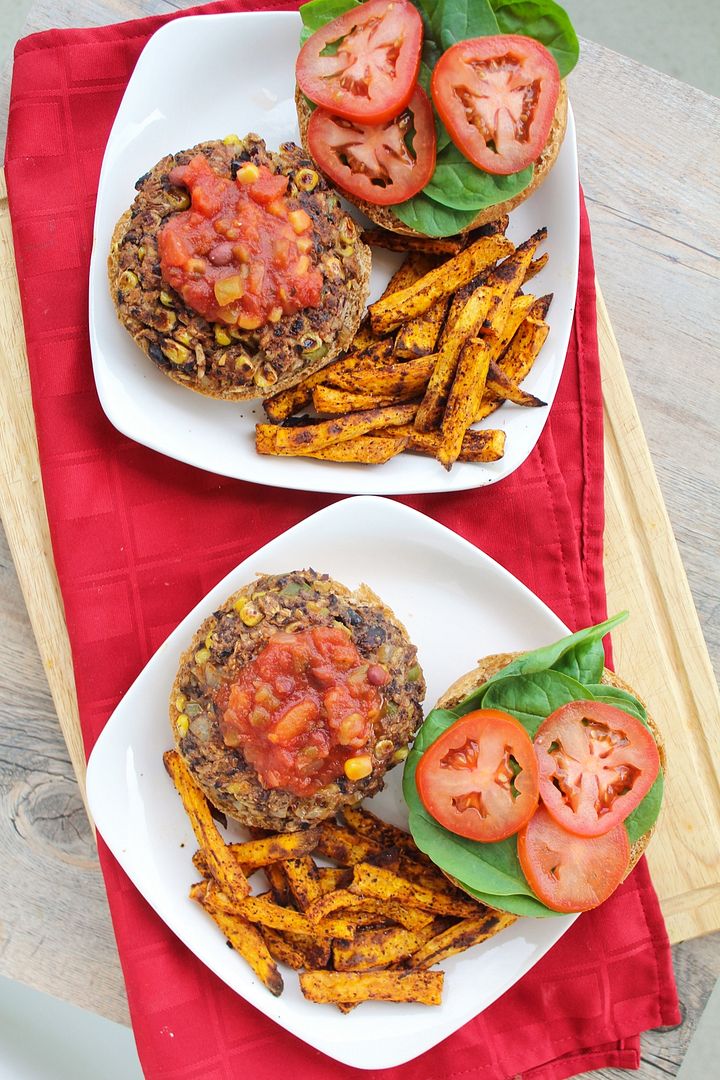
The veggie patties for these burgers are hearty and full of real veggies, just how I like them!  The base is a mixture of brown rice, oats, and black beans for plenty of protein and fiber, and mixed in are some onions, garlic, peppers, corn, and plenty of spices for added nutrition and flavour.


Southwestern Black Bean & Brown Rice Veggie Burgers

Ryan and I ate these for dinner three nights in a row (another great thing about veggie burgers is getting a lot of food for a pretty low cost!) and ate them differently each night.

The first time I topped mine with salsa and served them with chipotle sweet potato fries as pictured, which made for a pretty spicy meal though I still loved it!  The second night I added cheese on top, skipped the salsa, and used a light ranch dressing instead which was also awesome.  And the third night I crumbled my patty up and served it over a big spinach salad which was a refreshing change! 
If I had avocado I would have definitely added it to all three meals but avocados are so expensive these days I have to sadly try to limit my use of them.

You can eat these however you like and with whatever toppings you think sound good - hope you enjoy them as much as we did!

Southwestern Black Bean & Brown Rice Veggie Burgers

Southwestern Black Bean & Brown Rice Veggie Burgers

Inspired by and adapted from similar recipes seen on Simply Scratch, Veggie Belly, and Katherine Martinelli

Makes 6 burgers

Ingredients:

For the Burgers:
1/2 cup uncooked whole grain brown rice – I used pre-cooked instant rice
1/2 cup rolled oats, divided
1 (540mL) can of no-salt added black beans, rinsed and drained
1 medium yellow onion, diced
1/2 cup diced bell peppers – I used half a green pepper but you could use a mixture of green and red
3 cloves garlic, minced
3/4 cup thawed frozen corn kernels
1 teaspoon ground cumin
1 teaspoon chili powder
1/4 teaspoon salt
1 teaspoon chipotle chili powder for added spice (or substitute paprika)
1 large egg, lightly beaten

For Topping:
6 whole wheat hamburger buns
Lettuce or spinach
Sliced tomatoes
Sliced ripe avocado
Salsa (optional)
Cheddar or Monterey jack cheese (optional)

Directions:

Cook the rice according to package directions.  Let drain well.

Pulse 1/4 cup oats in a food processor to form crumbs.  Keep remaining 1/4 cup of oats whole.  Transfer all oats to a large bowl.  Reserve 1/4 cup black beans and transfer remaining beans to the food processor.  Pulse until most of the beans are mashed (but not completely mushy).  Add to the large bowl with the oats.

Heat oil in a large skillet over medium-high heat.  Add onions and peppers and sauté until softened, 7-10 minutes, stirring occasionally.  Add garlic and sauté for another minute.  Add corn and reserved 1/4 cup of black beans and stir.  Add all spices and sauté for another minute, stirring.  Remove from heat and let cool slightly.

Add vegetable mixture and rice to the bowl with the oats and black beans.  Add whisked egg and stir mixture until combined.  Form into 6 large patties or 8 smaller ones, if desired (I made 6 patties).

Heat two large skillets over medium heat.  Spray with non-stick cooking spray or use a light amount of oil.  Add 3 patties per pan and cook about 5-6 minutes per side, turning carefully in between, until browned and cooked through.  If using cheese, add slices to the tops of the patties about a minute or two before they’re done cooking to melt the cheese.  Remove from heat.

Add patties to buns and top with lettuce, tomatoes, avocado, salsa, or desired other toppings.  You could also crumble the patties and serve them on salad!

May 10, 2013

California Omelette

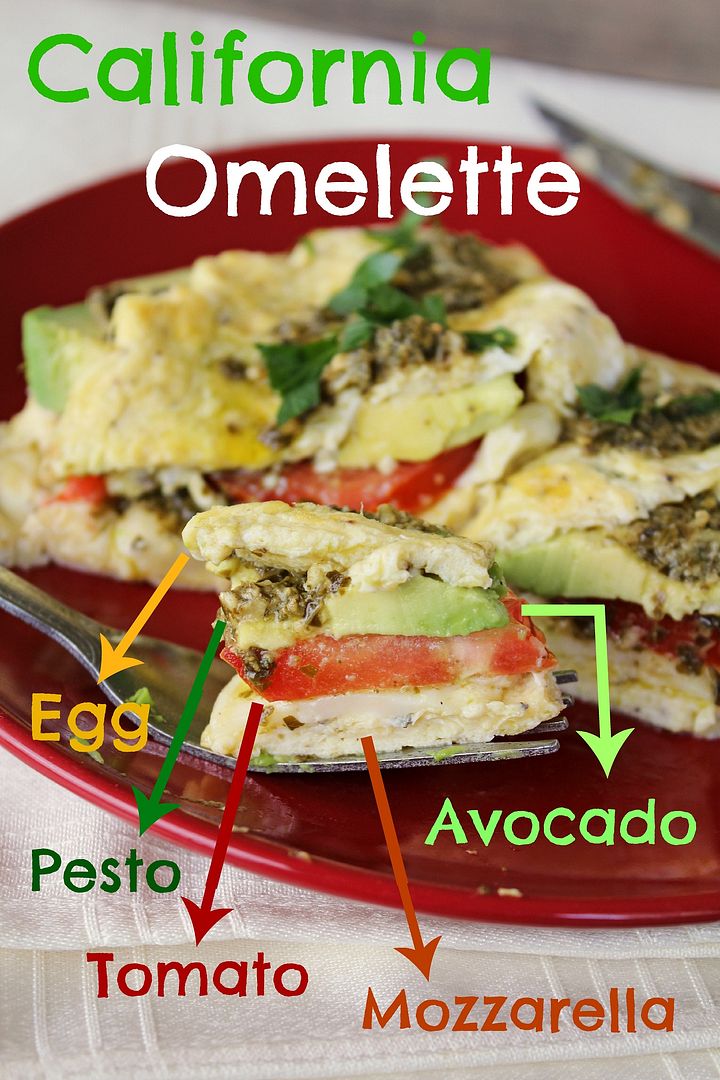
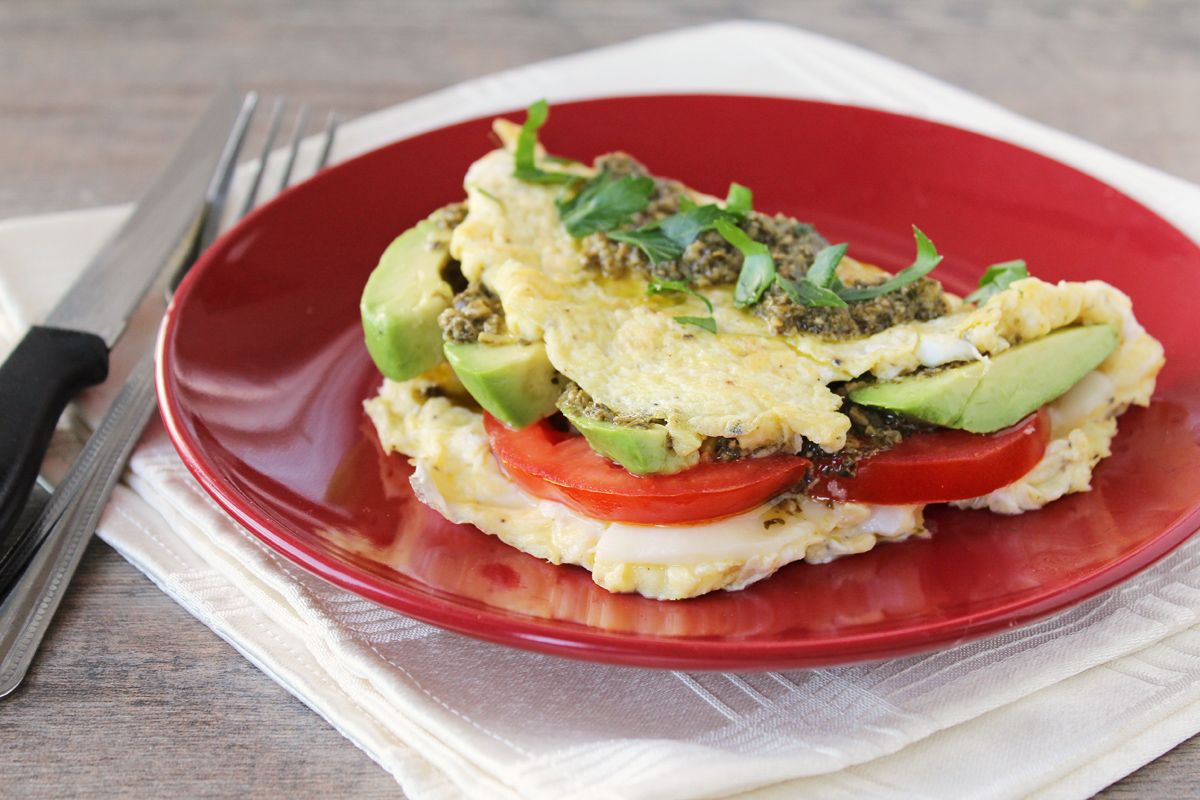
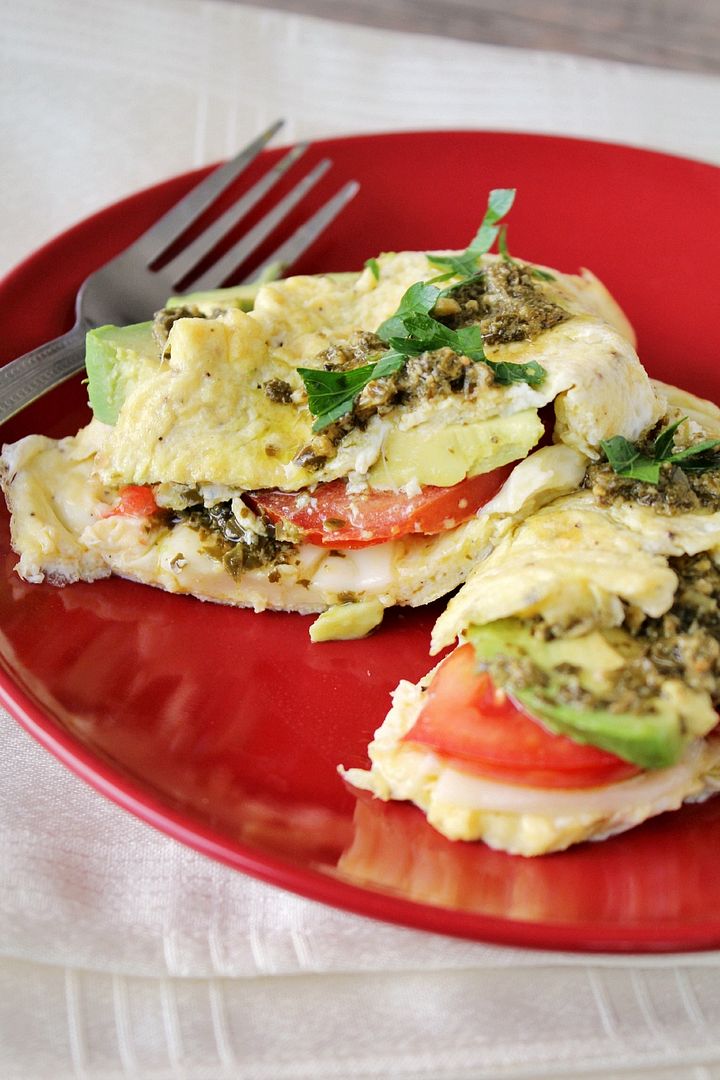
California Omelette with avocado, tomato, pesto, mozzarella

There were two dishes I ate during my trip to Boston last March that I was determined to try for myself once I returned home.  One was fish tacos, which I seemed to get a version of at every restaurant I went to because they were all so good, and the other was a California omelette that I treated myself to for breakfast at Sauciety in our hotel on the last morning.

When I looked up California omelette recipes later, it seemed that there are about a million different versions of them, but the one ingredient that appears to be common to them all is avocado.  The version I'd tried also included pesto, tomatoes, and mozzarella, and since I loved the combination of those four ingredients so much, I decided to just stick with them and create my own version off memory.

California Omelette with avocado, tomato, pesto, mozzarella

And I wouldn’t have wanted this any other way – it is so good!  I loved it when I had it in the restaurant but I think I loved it even more at home, where I could control the proportions of ingredients to my own liking (and of course, if you make this yourself at home you should do the same, taking the amounts I listed as a guide).

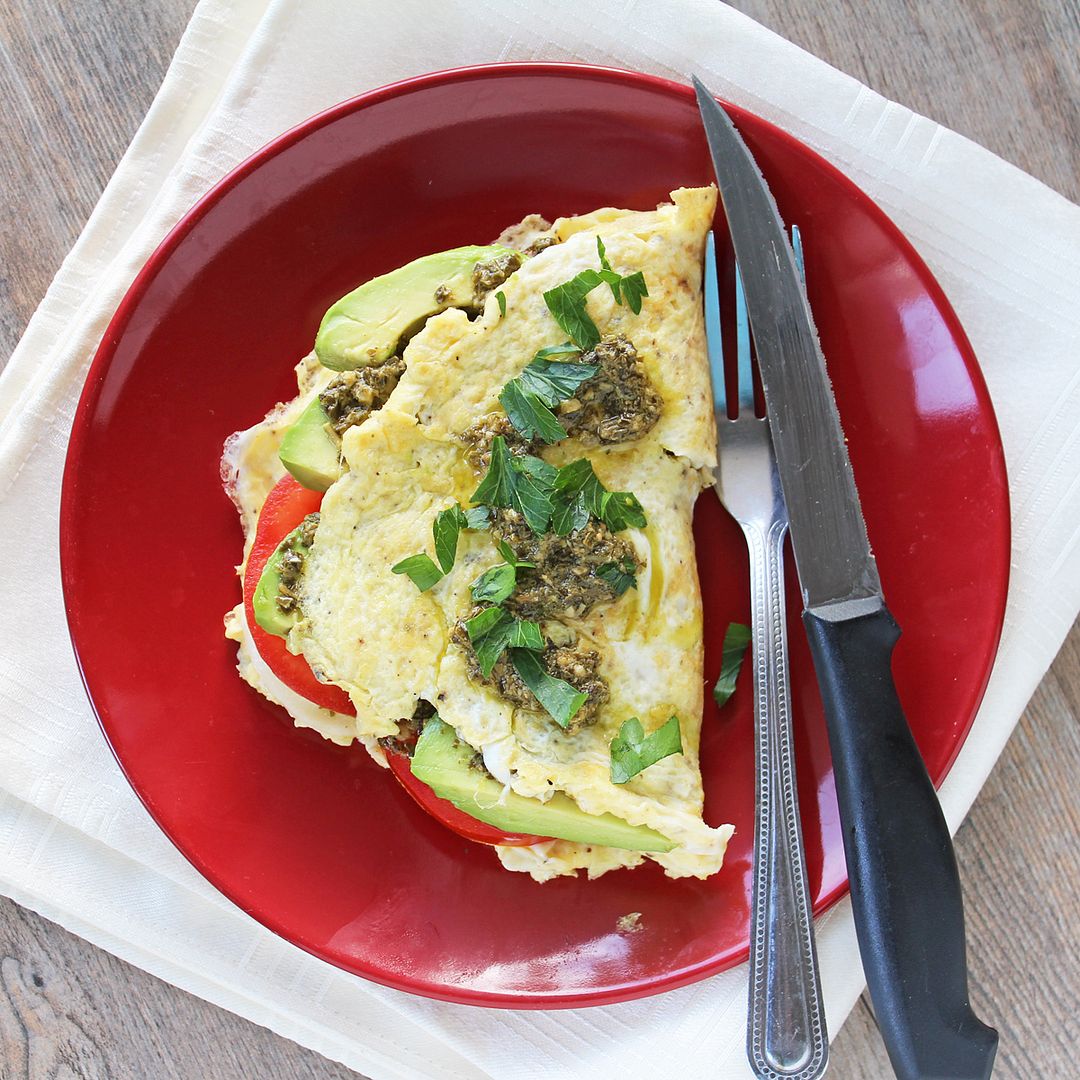
I've never been able to get the whole omelette technique down pat, and as you can tell from the pictures, my omelette certainly isn’t the prettiest thing in the world, but the flavour more than made up for it! 

California Omelette with avocado, tomato, pesto, mozzarella

With Mother’s Day coming up this weekend, I think this would be a great savoury brunch offering to serve her!  We are still menu planning for our own mom’s special meals – we’re still figuring out dinner and dessert, but for brunch we’re going towards the sweet side and are leaning towards either banana blueberry pancakes or this strawberry rhubarb baked French toast.  If you're also searching for menu ideas for Mother’s Day, you can check out what we made for our mom last year in this post. 

I hope all the moms out there have a fantastic Mother’s Day!

California Omelette with avocado, tomato, pesto, mozzarella

California Omelette (with mozzarella, pesto, tomatoes, and avocado)

Serves 1

Ingredients:

2 large eggs (fresh, good quality eggs are better)
1-2 tablespoons water (optional)
Salt & pepper
1 teaspoon butter or olive oil
A few slices of mozzarella cheese (about 1 oz)
2 slices of tomato
Half a ripe avocado, sliced
1-2 tablespoons pesto
Chopped parsley or herbs for sprinkling on top, if desired

Directions:

In a small bowl, beat the eggs, water (if using; I think it makes them fluffier but some prefer to leave out any liquid), and a pinch each of salt and pepper until mixed.

Heat butter or olive oil in an 8- or 9-inch non-stick skillet over medium-high heat.  Pour in the egg mixture.  Let sit for a few seconds until edges of omelette begin to set, then use a flexible heat-proof spatula to gently stir the eggs in a circular motion until thickened.  Gently push any cooked portions of egg toward the center of the skillet and tilt the skillet to allow uncooked egg to flow into empty spaces. 

When eggs are almost set on surface, layer the mozzarella, tomato, avocado, and pesto over half the omelette.  Gently fold the other half over the filling, and slide the omelette out onto a plate.  Serve sprinkled with chopped parsley or herbs and an additional drizzle of pesto, if desired.

March 07, 2013

Shamrock Personal Pizzas for St. Patrick's Day

Shamrock Personal Pizzas for St. Patrick's Day

Last year, I made these heart-shaped personal pizzas with heart-shaped toppings for Valentine's Day, and I loved them so much that I decided to try to do the same thing for St. Patrick's Day, but with shamrock pizzas and shamrock toppings!

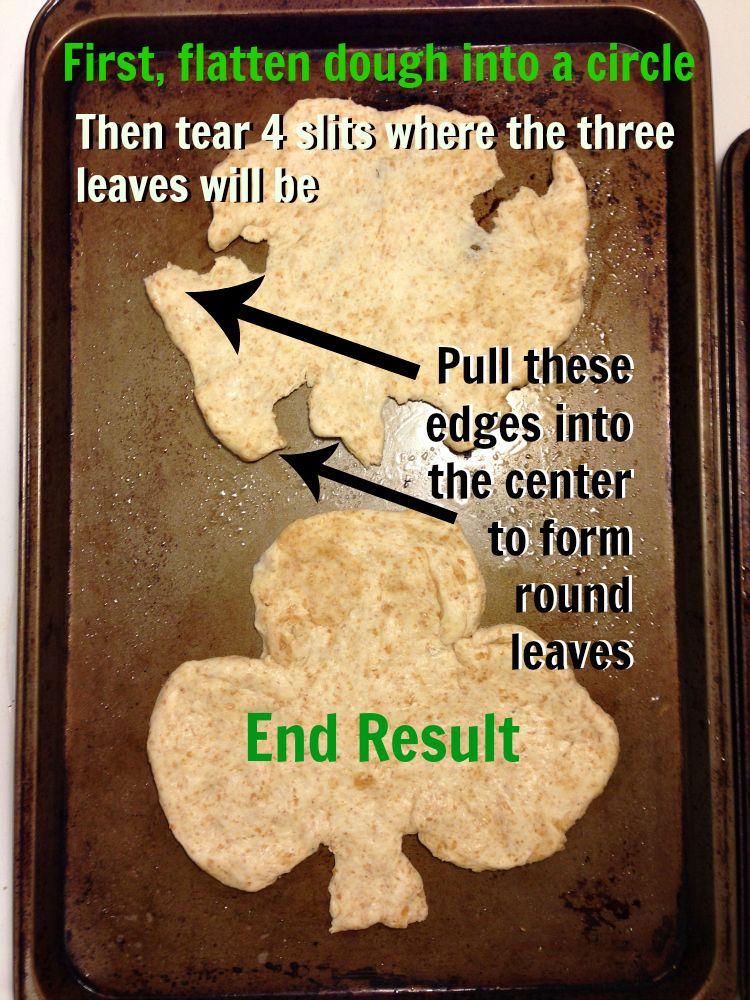
These follow the same method as the heart-shaped pizzas - just divide a ball of pizza dough in four, shape each piece into a shamrock, then top each one with desired St. Paddy's themed toppings, depending on individual tastes!

Let's start with the dough.  You can either buy a storebought ball of dough, which is what I did with the heart-shaped pizzas, or make your own.  For these ones, I made Martha Stewart's whole wheat pizza dough.  I cut the recipe in half, which made enough to form 4 personal pizzas.  I skipped the freezing step, and went ahead and baked them two at a time, for 15 minutes at 450°F.  Here's my attempt at showing how to form each ball of dough (after it had risen) into a shamrock shape - it's super easy!

 Making shamrock shaped pizzas

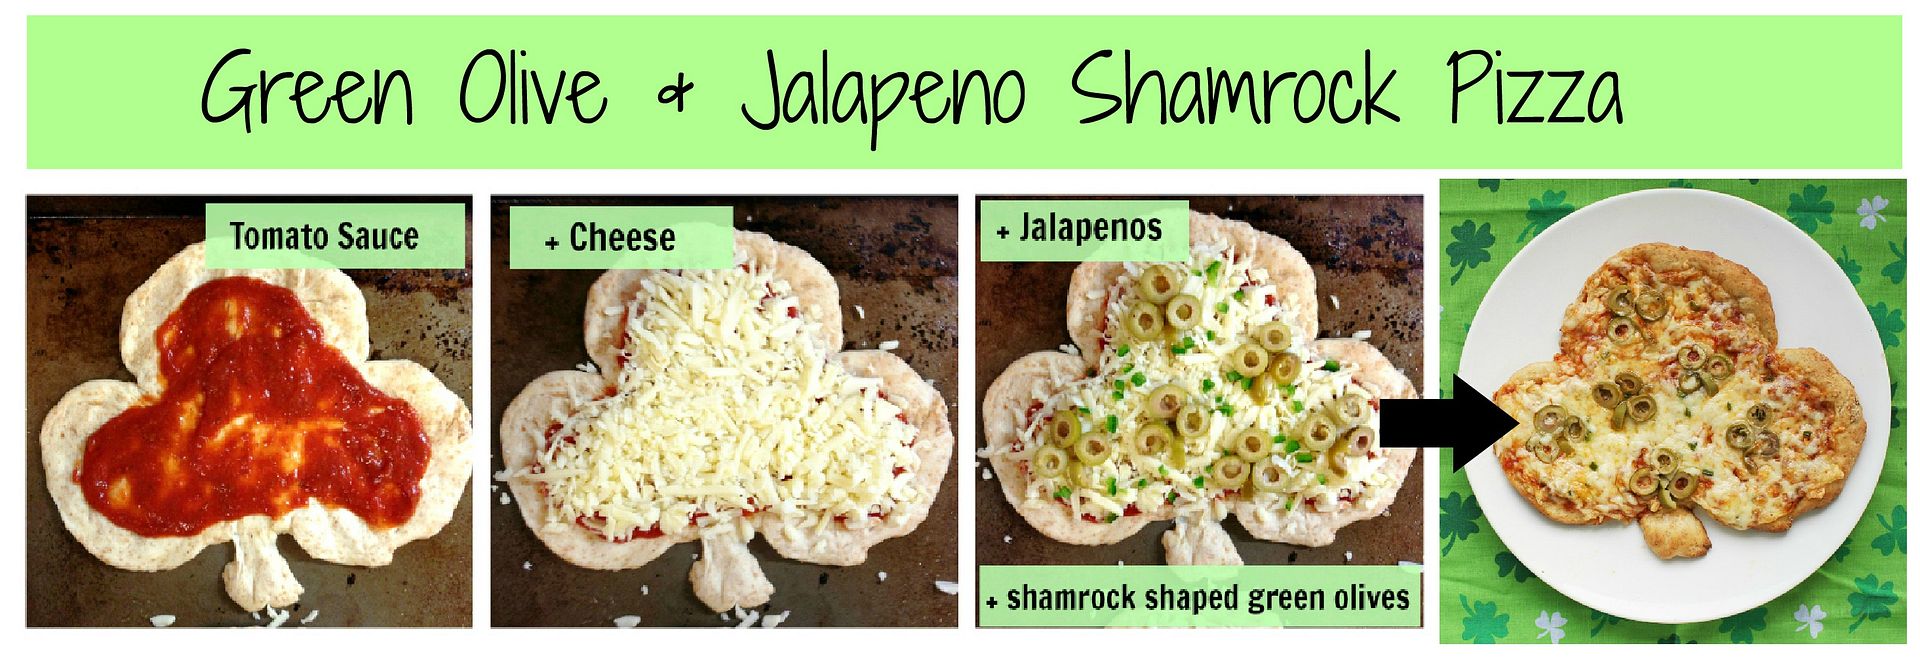
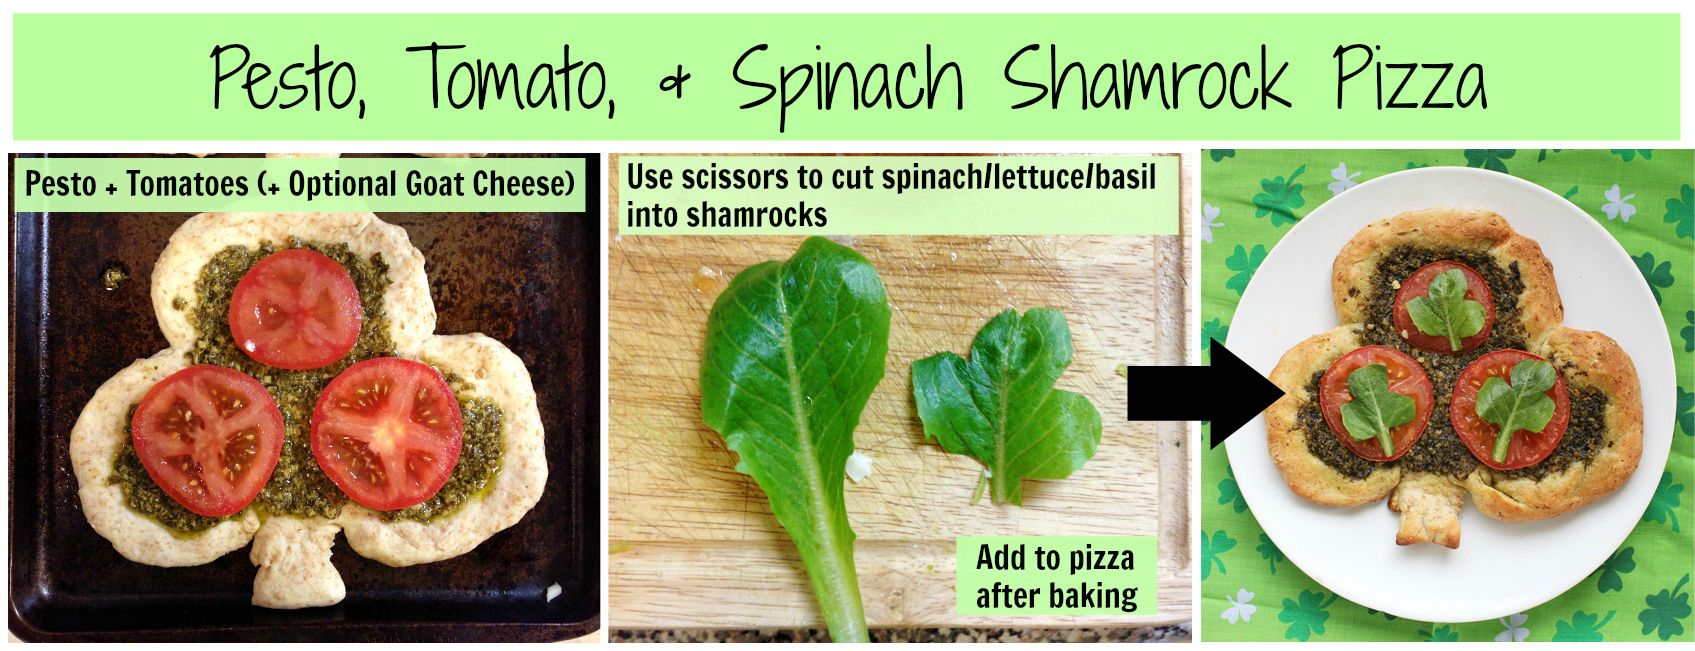
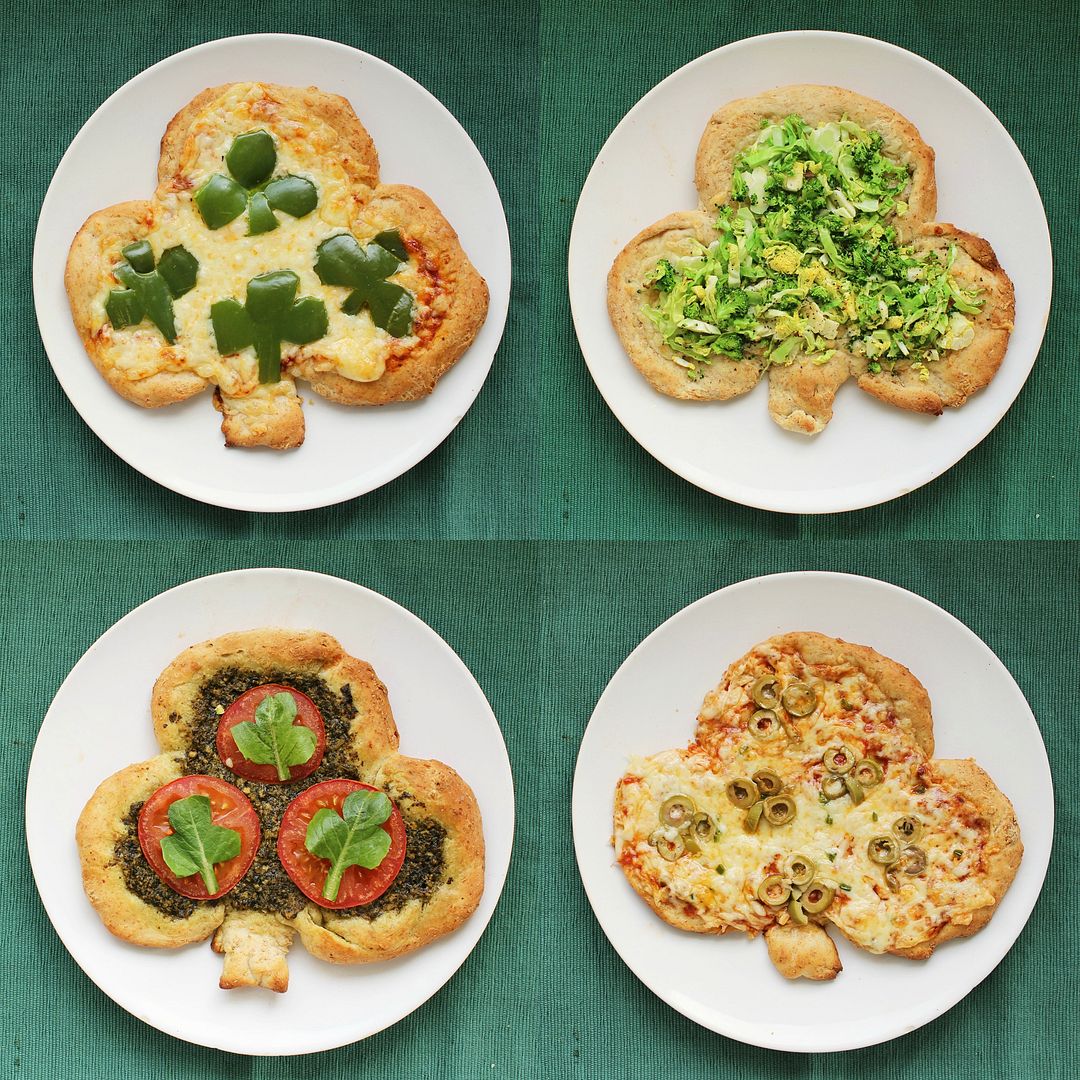
Let's move on to the toppings!  I tried four different topping ideas, which I'll describe below.  If the pictures are too small to read, just right click and 'view image' to see them larger.

Shamrock Personal Pizzas for St. Patrick's Day

The green pepper pizza was my favourite visually.  It was a little tricky to cut the green pepper into shamrock shapes, and mine certainly weren't perfect, but you can at least tell what they're supposed to be!  Just cut a green pepper in half, remove the seeds and membranes, cut each half in two, flatten your four pieces, and cut them into shamrock shapes.  You won't need the whole pepper, but this gives you a little space to work with in case you make a mistake!

 Shamrock Personal Pizzas for St. Patrick's Day

I thought this was my most creative idea - combining green olive slices and stems to form shamrock shapes - but the finished product didn't look quite as nice as it did before it was baked.  The olives slid around a little during baking (probably because I used way too much cheese), so I had to try to put them back in place afterwards.  Next time, I might just wait to place the olives on the pizza after baking so they don't get covered up by cheese and you can tell what they're supposed to be!

 Shamrock Personal Pizzas for St. Patrick's Day

This one's really easy because you can just use kitchen scissors to cut a leaf of lettuce, spinach, or basil into a shamrock shape!  I paired mine with a pesto spread (to keep it green) and tomatoes, and I had intended to add goat cheese but then realized I didn't have any, so just picture it on there!

 Shamrock Personal Pizzas for St. Patrick's Day

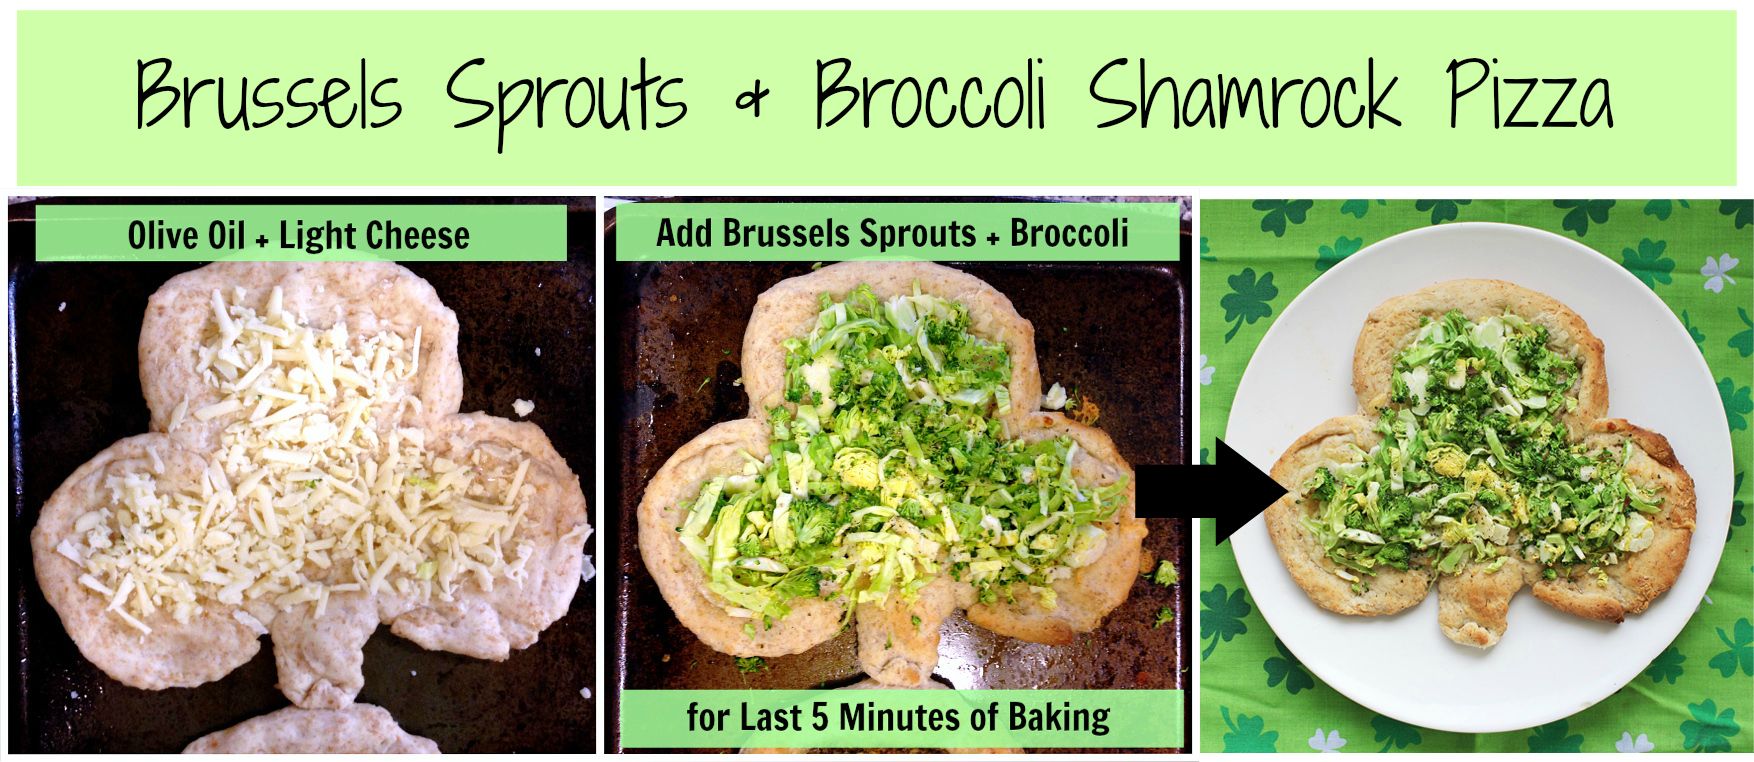
This was my attempt at a healthier pizza, and instead of using shamrock shaped toppings, I covered the whole thing with green ingredients!  I spritzed the dough with olive oil, topped it with a bit of mozzarella (but gruyere would be good too), then put it in the oven for 10 minutes.  Next, I added a layer of chopped brussels sprouts and broccoli, seasoned it with salt and pepper, and popped it back in the oven for 5 minutes until the greens were just starting to brown on the edges.  The result was a crisp and light pizza that was actually my favourite!

Shamrock Personal Pizzas for St. Patrick's Day

These made the perfect individual sized pizzas and I loved having a different one to eat each day for leftovers!  The clover shape actually breaks perfectly into three "slices", which makes them easy to eat.  If you have other ideas for green toppings that would work on these, feel free to share them in the comments!

March 01, 2013

Kenyan Ugali with Peanut Stew

Kenyan Ugali with Peanut Stew

So it's been a fairly busy and stressful week here, with tons of school work I’m behind on, blog problems, knee problems, and icky weather, among other things.  And during weeks like that, it’s amazing what some comfort food (and a bottle of wine) can do to help you relax in the evening!

This dish probably isn’t what most people would think of as comfort food, but it’s definitely one of those hearty and cozy meals that fills your belly and warms your soul, and just so happens to be one of the tastiest meals I’ve had in a while.

 Kenyan Ugali with Peanut Stew

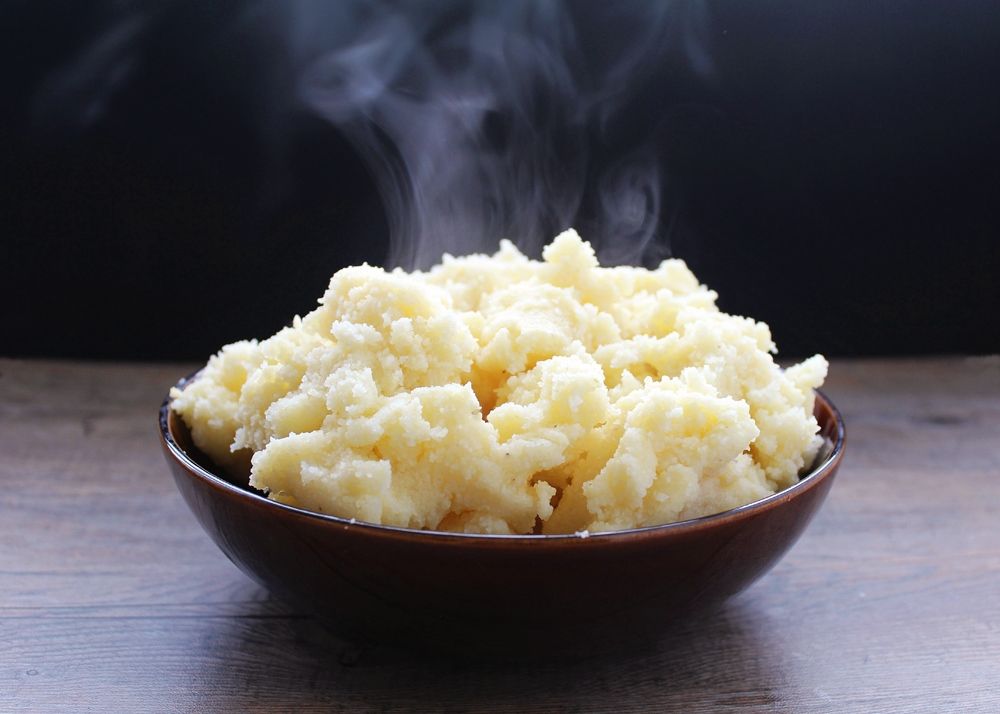
I’m sure some of you are waiting for me to explain what on earth “ugali” is, and to be honest, I’d never heard of it until I made this dish. From what I’ve learned, it’s a starchy staple dish in several African countries.  It’s very similar to polenta, and is made of just white corn meal that’s cooked with water to a thick, dough-like consistency (not creamy and smooth like polenta), and it's usually eaten with some sort of meat or vegetable stew. Fortunately my sister has been to Kenya and tried ugali a few times there, so she was able to give me some advice as I was making it and assure me that the thick texture was how it’s supposed to be!

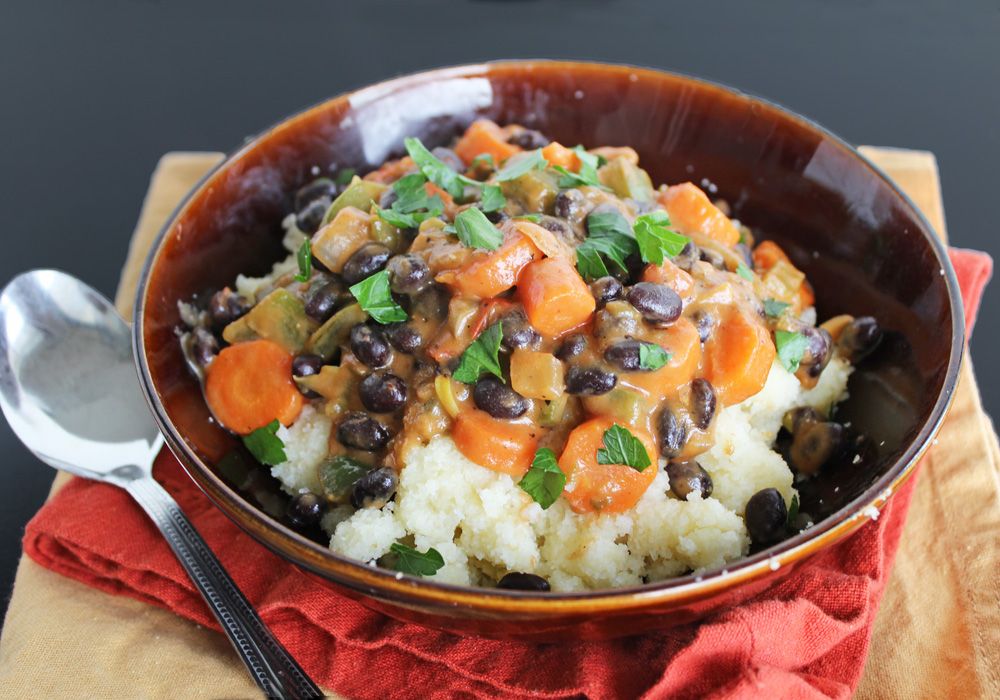
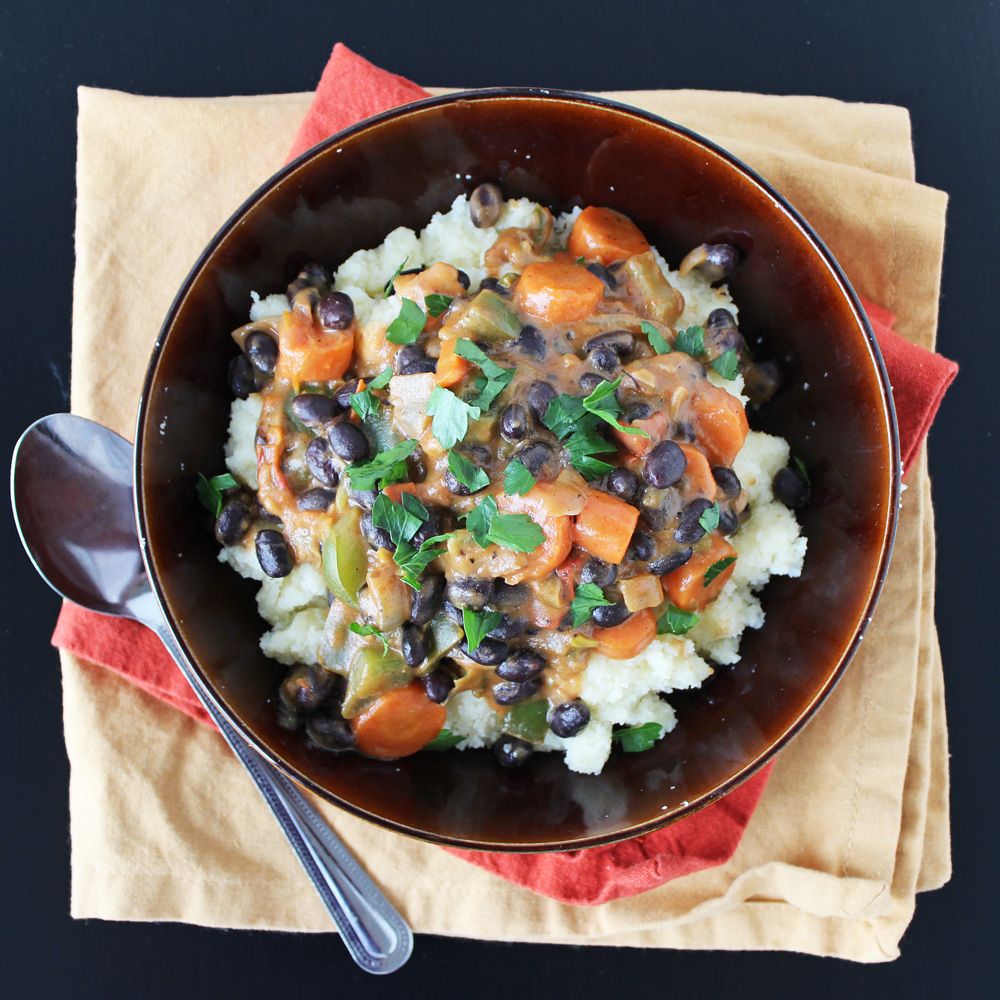
Ugali is super easy to make and also really cheap – all you need is cornmeal! (I found white cornmeal in the Mexican section of my regular grocery store). And though it’s normally made with water, I used half vegetable broth to cook my cornmeal just to infuse some extra flavour into it. The consistency of the final product is so thick that you could grab a ball of it in your hand (and indeed you can use that to dip into other dishes or grab meats or veggies), and while I think it would normally be served in one big ball in the shape of a bowl, I broke mine up a bit so you could see the texture here:

Ugali

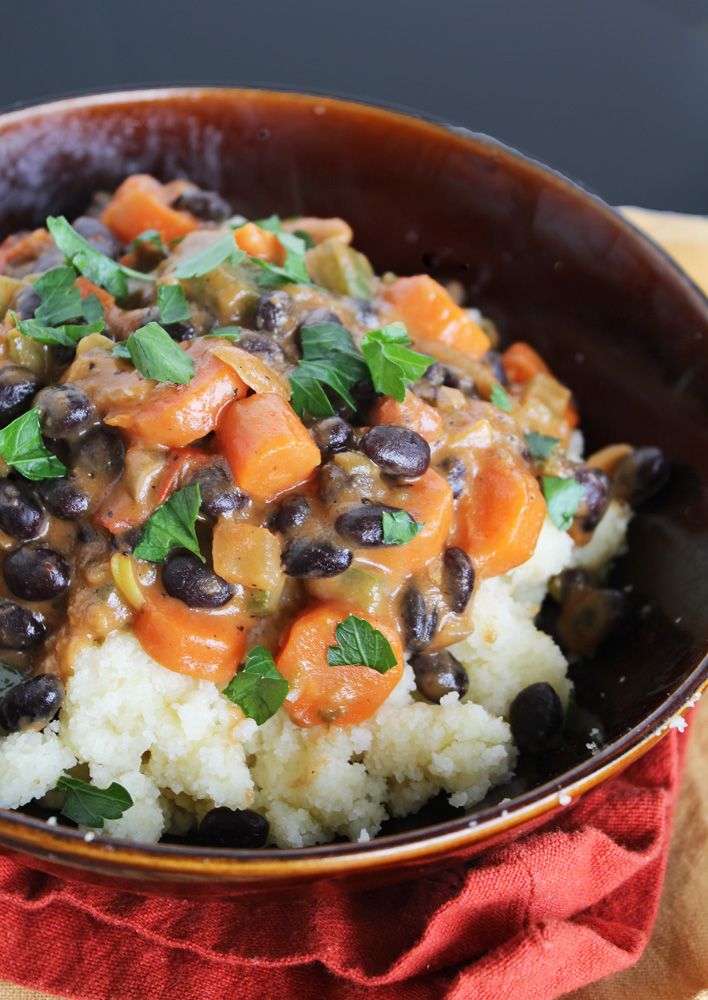
The ugali makes a great base for a stew, and I paired mine with a rich and creamy peanut vegetable stew.  I added carrots, black beans, and parsley to the original recipe, so I’m not sure how authentic my stew is or if it would ever be eaten with ugali, but it was so good that I didn’t care!  The finished dish was full of veggies and protein, was super filling, and just so hearty and comforting.  If you’re in need of a dish to warm your soul and are looking to try something new and a little different for dinner, I highly encourage you to give this a try! 

And if you like trying new cuisines, my friend Courtney just redesigned her site with a focus on ethnic vegetarian food, so go check it out at The Fig Tree!

 Kenyan Ugali with Peanut Stew

Kenyan Ugali with Peanut Stew

Adapted from The Ethnic Vegetarian

Serves 4-6

Ingredients:

For the peanut stew:
1 tablespoon olive oil
1 medium yellow onion, chopped
3 cloves garlic, minced
2 tomatoes, chopped
1 green bell pepper, chopped
2 carrots, peeled and diced
1/2 a jalapeno or chile, seeds and veins removed, minced
Dash of cayenne pepper
Salt and pepper
1 can black beans, drained and rinsed
1/2 cup smooth peanut butter
1/2 cup hot water

For the ugali:
2 cups vegetable broth
2 cups water
1/2 teaspoon salt (optional)
4 cups white cornmeal

Chopped parsley for serving (optional)

Directions:

Heat olive oil in a large nonstick skillet over medium high heat.  Add onion and saute until softened, about 5 minutes, stirring occasionally.  Add garlic, tomatoes, green pepper, carrots, jalapeno, cayenne, and salt and pepper to taste.  Let cook for 10-15 minutes, stirring often.  Mix together the peanut butter and hot water in a small bowl until smooth.  Add black beans and peanut butter mixture to the vegetables and let cook on low heat for about 10 minutes, until thickened slightly.

Meanwhile, bring the vegetable broth and water for the ugali to a boil in a medium saucepan.  Slowly and gradually add the white cornmeal, stirring constantly with a whisk to prevent lumps from forming.  Reduce heat to medium-low and continue to stir regularly until the mixture pulls away from the sides of the pot and becomes very thick, about 10 minutes (mine took less time).  Remove from heat.

Serve by dividing ugali among bowls and spooning peanut stew overtop.  Top with parsley and season with additional salt and pepper, if desired.

August 30, 2012

Eggplant & Zucchini Involtini with Ricotta Filling and Tomato Sauce

Eggplant and Zucchini Involtini

What is involtini you ask?  Good question, and one that even after much Googling, I’m not 100% sure I know the correct answer to.

You see, involtini are little roll-ups common in Italian cooking, that are usually made of a thin slice of meat rolled around a filling and baked with a sauce, but can also be made vegetarian using eggplant instead of meat.  The confusion lies in the fact that ‘rollatini’ seems to have the same definition.  According to Wikipedia, rollatini and involtini are actually the same thing – the dish is called involtini in Italy but over here it’s called rollatini.  That seems to clear things up except that rollatini recipes seem to more often be made with eggplant and that eggplant also seems to often be breaded.

Eggplant and Zucchini Involtini

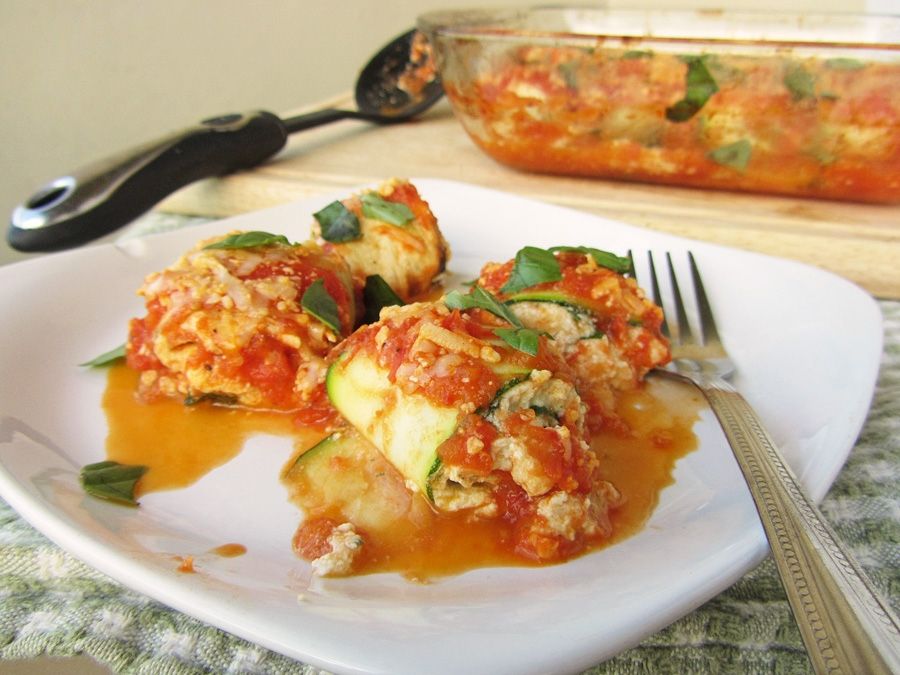
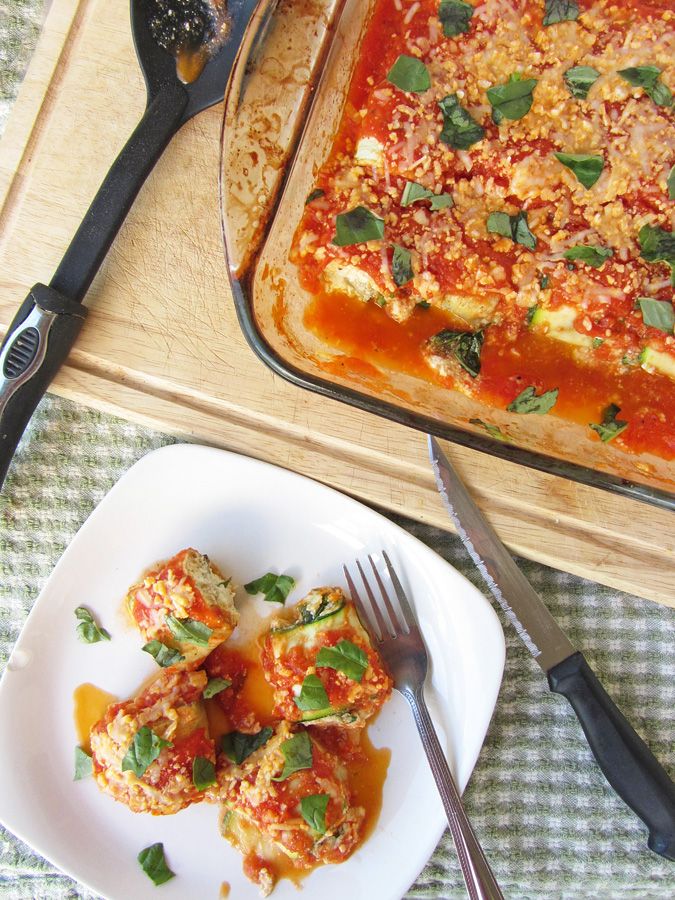
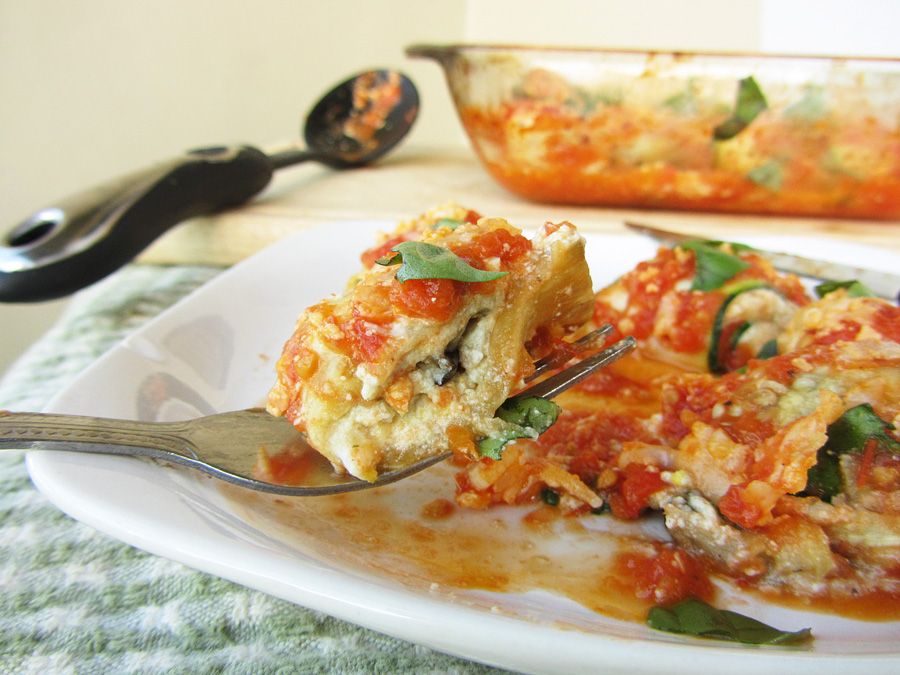
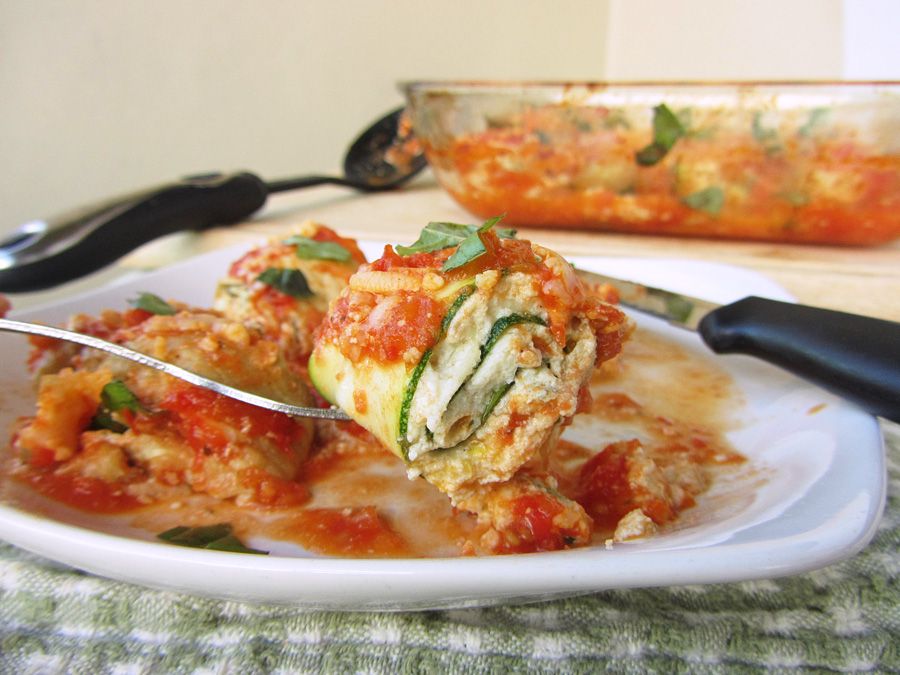
And now I’ve gone ahead and made things even more confusing for you by throwing zucchini into the mix!  I rolled up thin slices of eggplant and zucchini around a seasoned ricotta filling, then baked them in an easy homemade tomato sauce topped with parmesan cheese.  They’re comforting and warm while being light and summery at the same time, with flavours reminiscent of eggplant parmesan or lasagna.  Whether or not this should be named involtini or rollatini may be up for debate, but I don’t care because all I know for sure is that they’re really tasty!

I couldn’t decide which I liked better.  This was the eggplant roll-up – a bit more classic and comforting tasting:

Eggplant Involtini

And the zucchini version is pictured below – it was more fresh and light tasting and looked a little prettier! 

Have you heard of involtini/rollatini before?  I'm curious to hear what you call it!

Zucchini Involtini

Eggplant & Zucchini Involtini with Ricotta Filling and Easy Tomato Sauce

Adapted from Cooking Light and The Fig Tree

Serves 4 (four involtini each)

Ingredients:

1 large eggplant
1 large zucchini
Cooking spray
Salt & Pepper

For the Tomato Sauce:
1 tablespoon olive oil
1-1/2 pounds ripe tomatoes, roughly chopped
2 garlic cloves, crushed
1/2 tablespoon balsamic vinegar
Salt & Pepper

For the Filling:
1 large egg
300g (~10oz) light ricotta
1/4 cup grated parmesan cheese
1/4 cup breadcrumbs (I used Italian seasoned breadcrumbs)
1/4 cup chopped basil
1 teaspoon lemon zest
1 teaspoon lemon juice
1/2 teaspoon salt
Pepper

For Topping:
1/4 cup grated parmesan
Sprinkle of chopped basil

Directions:

Preheat oven to broil and adjust oven rack to top third of oven.  Slice the eggplant and zucchini lengthwise into thin (1/4-inch thick) slices, producing 16 slices total (8 of each, if desired).  I also sliced the skin off my eggplant slices because I'm not a big fan of the skin, but it's not necessary if you don't mind it.  Line a baking sheet with foil and spray with cooking spray.  Lay eggplant and zucchini slices on the baking sheet and sprinkle with salt and pepper.  Broil for about 3-5 minutes per side, flipping over before broiling the other side.

Note – with my zucchini, I just used a vegetable peeler to very thinly slice the zucchini, and didn’t bother pre-cooking it.  This resulted in a firmer texture, so if you prefer that, you can skip the broiling step for the zucchini.  I recommend broiling the eggplant though.

Meanwhile, prepare the tomato sauce by adding all ingredients (olive oil, tomatoes, garlic, balsamic, salt and pepper) to a medium saucepan, bringing to a boil, then reducing heat to a simmer and simmering for 15 minutes.  Remove from heat and let cool, then transfer to a food processor and puree.

Prepare the filling by mixing all ingredients (egg to pepper) together in a large bowl.

Reduce oven heat to 375°F.  Pour about a third of the tomato sauce into the bottom of an 8x8 glass baking dish.  Spread 2 tablespoons of ricotta mixture onto each eggplant and zucchini slice, then roll up like a jelly roll.  Place rolls seam side down into the baking dish, and top with remaining tomato sauce.  Sprinkle with 1/4 cup parmesan cheese, then bake for 25 minutes.  Sprinkle with fresh chopped basil and serve.

August 14, 2012

Fresh Corn Dip with Tomatoes and Basil

Fresh Corn Dip with Tomatoes and Basil

There are people who love tofu, people who absolutely hate tofu, and people who say they hate tofu but have really only tried it one way, and if they just ate it roasted or sautéed with a flavourful marinade and seasonings then they would probably change their mind. 

I fall somewhere between the second or third category – I’ve always strongly maintained that I hate tofu, and though I admit I haven’t tried every preparation of it, I have tried it at least a couple of times and just can’t get past the texture.  I’m a big texture person – I hate crab, lobster, and shrimp, for example, not because of the taste but because of that horrible texture that I can only describe as rubbery (I’m getting grossed out right now just thinking about it!).  So I don’t just discriminate against tofu, I discriminate against textures!

Fresh Corn Dip with Tomatoes and Basil

Now moving on to something I love, I cannot get enough of fresh summer corn lately.  I can eat a whole bowl of corn kernels with a bit of salt and pepper as a snack and be the happiest girl in the world, and I love incorporating corn into my dinners too.   

Lately I’ve been seeing a lot of corn dip recipes around the web that look amazing, but are often loaded with cheese or cream or other not-so-light ingredients, and since I’m usually the only one eating whatever I make, I didn’t like the idea of having to eat that all by myself.  So I was intrigued when I saw a lighter, fresher corn dip recipe on Whole Living, with tomatoes, basil, and … you guessed it - tofu!

Fresh Corn Dip with Tomatoes and Basil

So it was a battle between my love for corn and my hatred for tofu – which would win out?  Well as you already know, my need for corn dip in my life was stronger, and I convinced myself that maybe silken tofu isn’t as bad as regular tofu, and maybe when it’s mixed into a dip I wouldn’t notice it, and maybe if I added a little goat cheese to the tofu then it would mask any “tofu-y” taste.

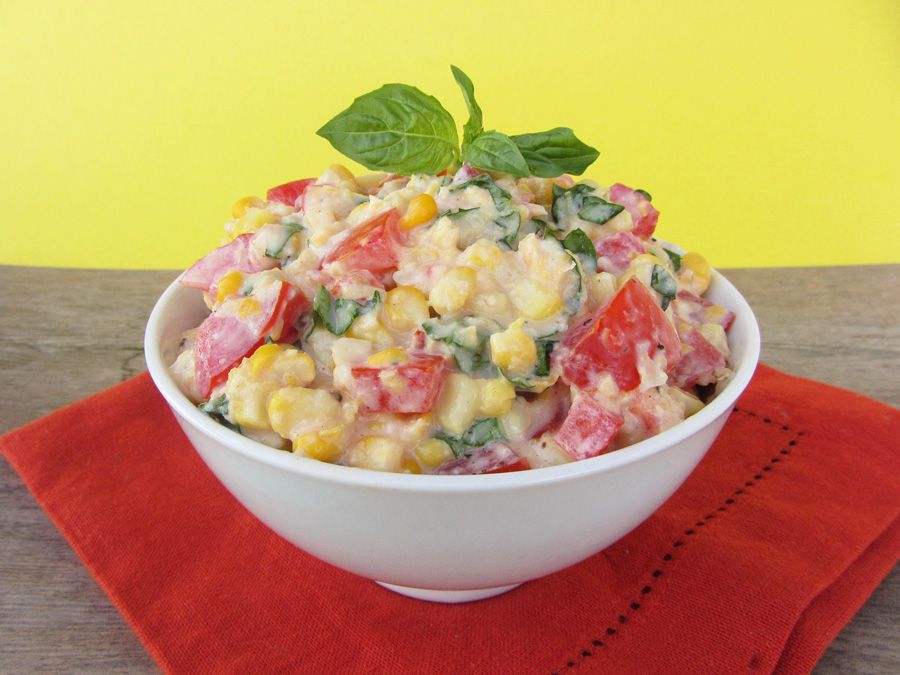
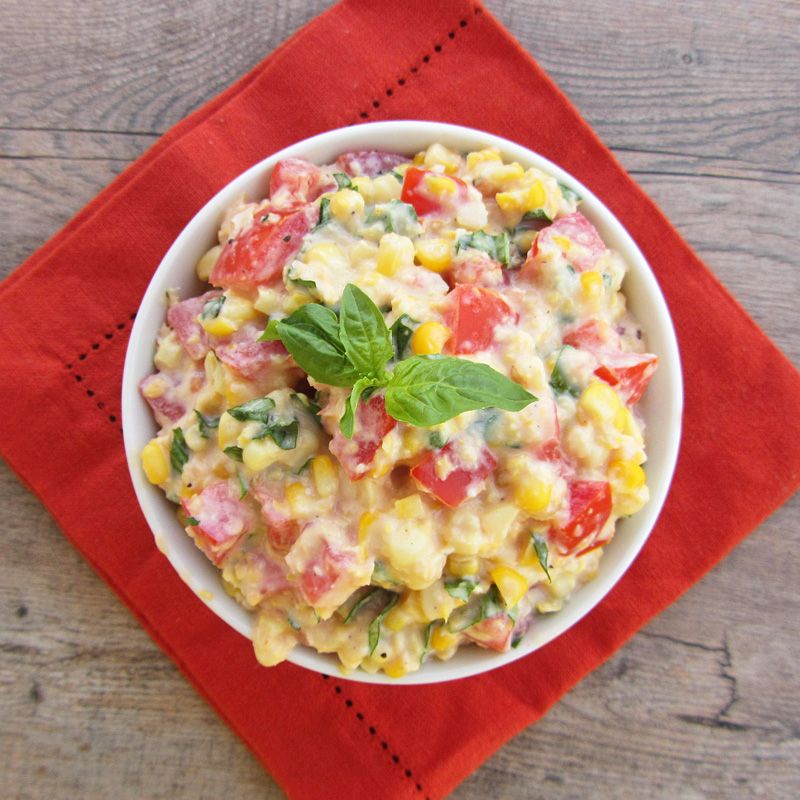
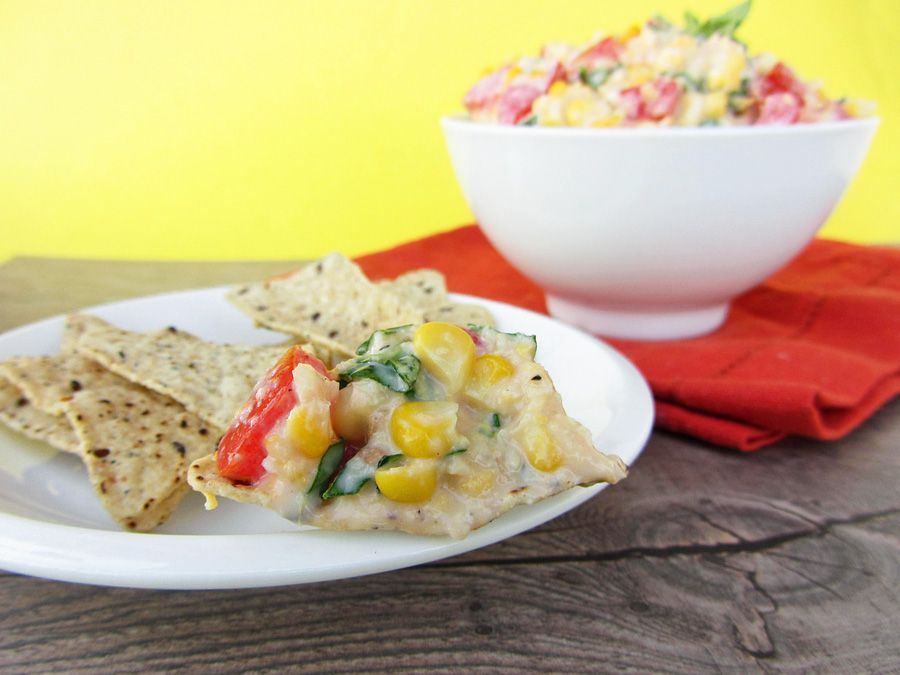
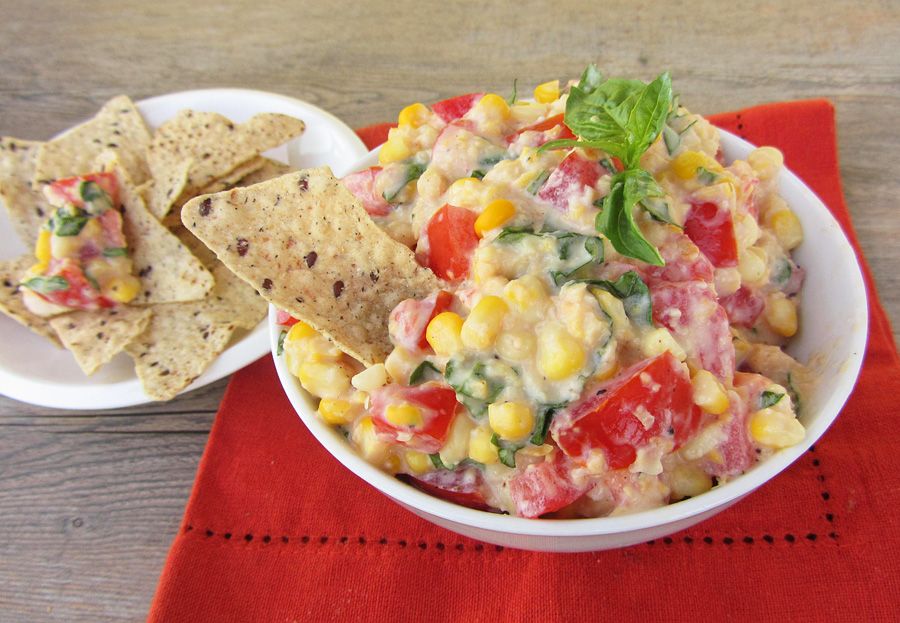
And it turns out that every one of those assumptions was right!  The tofu added creaminess to the dip in a way that made it light and fluffy, but I didn’t taste the tofu one bit!   All I tasted was summer in a bowl – the fresh flavours of corn, tomato, and basil, with a bit of tang from the goat cheese and lime juice that helped to cut the sweetness of the corn.  One bite and I was in love with this dip.  I ate it with tortilla chips and spread it on slices of hearty multigrain bread and both ways were delicious! 

Fresh Corn Dip with Tomatoes and Basil

This makes a fantastic summer appetizer, and you don’t even need to tell anyone there’s tofu in it because they won’t know!  And while I’m not sure this converted me to a tofu-lover, I’m definitely intrigued with the idea of sneaking tofu into things in ways that I won’t notice it!  In fact, I’ve already tried a second recipe to use up the rest of my silken tofu and I loved it too, so give this one a try so you can get excited about the second recipe coming soon!

Fresh Corn Dip with Tomatoes and Basil

Fresh Corn Dip with Tomatoes, Basil, and Tofu!

Adapted from Martha Stewart as seen on Whole Living

Serves 4-8 as an appetizer

Ingredients:

2 cups fresh corn kernels (from about 2 large ears)
1/3 cup milk (I used skim)
1/3 cup silken tofu
2 ounces goat cheese
2 teaspoons fresh lime juice
Salt and freshly ground pepper
1 cup chopped tomato (about 2 medium tomatoes)
1/3 cup basil leaves, thinly sliced

Directions:

Cut the kernels off your ears of corn into a large bowl, and rub the back of a large knife along the cobs to extract the corn milk.  Heat 1/3 cup milk in a large skillet over medium-high heat and add the corn.  Cook for 7-9 minutes, stirring occasionally, until corn is tender and most of the milk has been absorbed.  Let cool.

Add 2/3 cup of the cooked corn to a food processor along with the tofu, goat cheese, and lime juice.  Process until smooth, and add salt and pepper to taste.  Transfer to a serving bowl and stir in the remaining corn, tomato, and basil.  Taste and adjust seasoning if necessary.  Serve with tortilla chips or on bread.

July 13, 2012

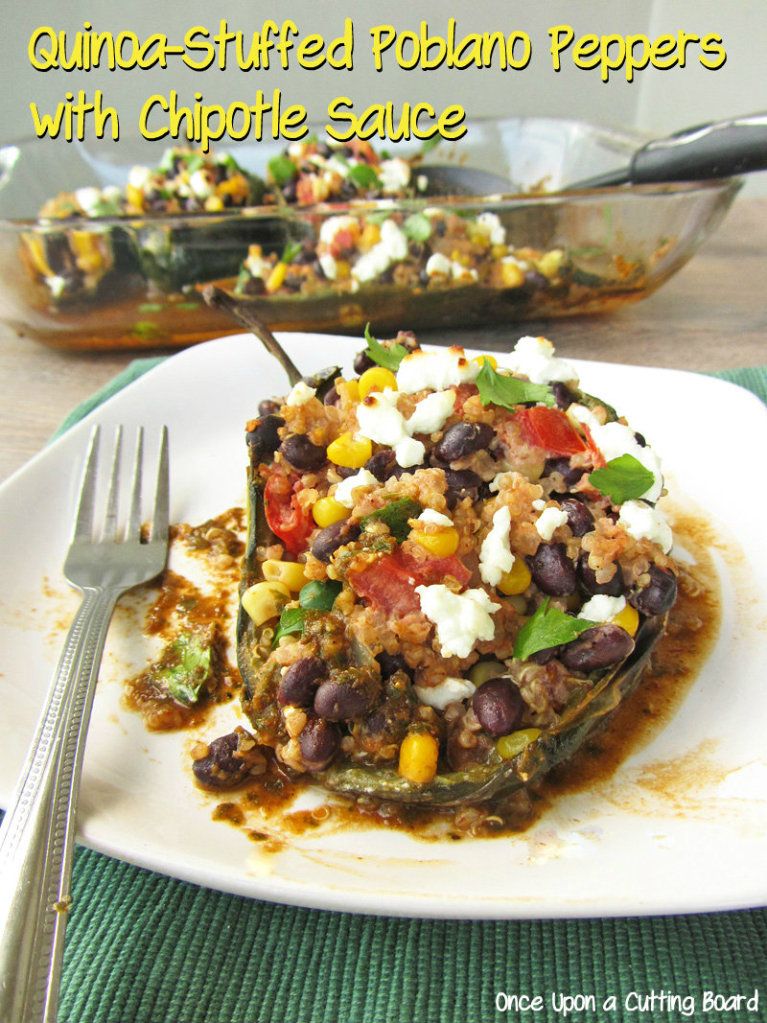
Quinoa-Stuffed Poblano Peppers with Chipotle Sauce

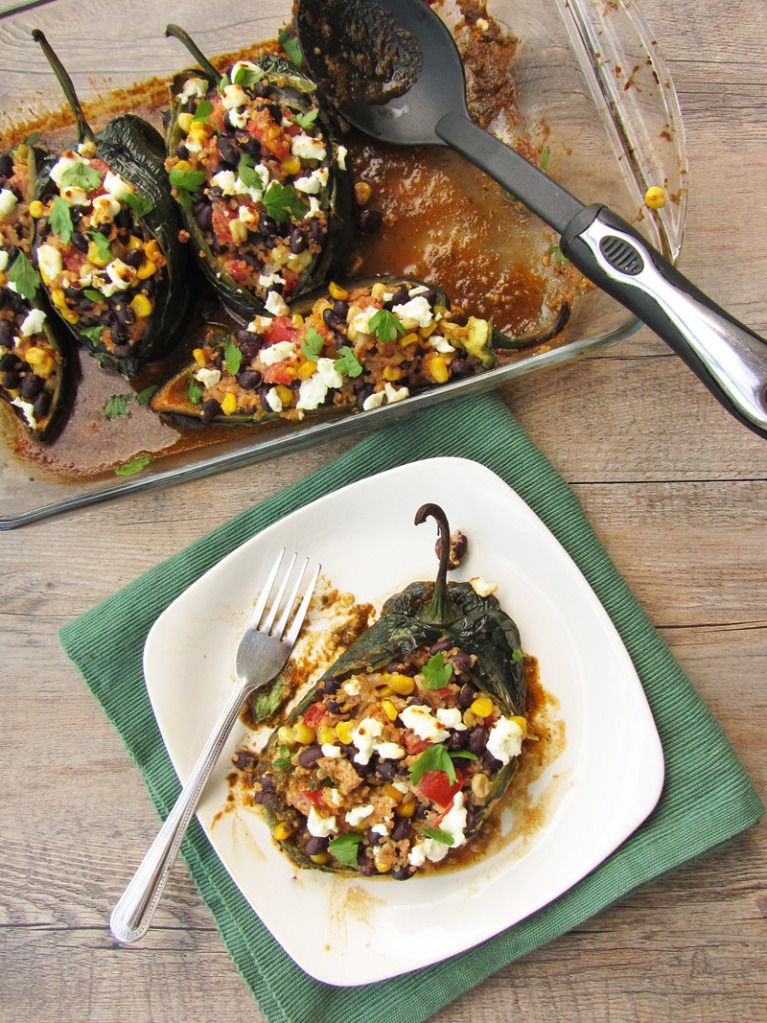
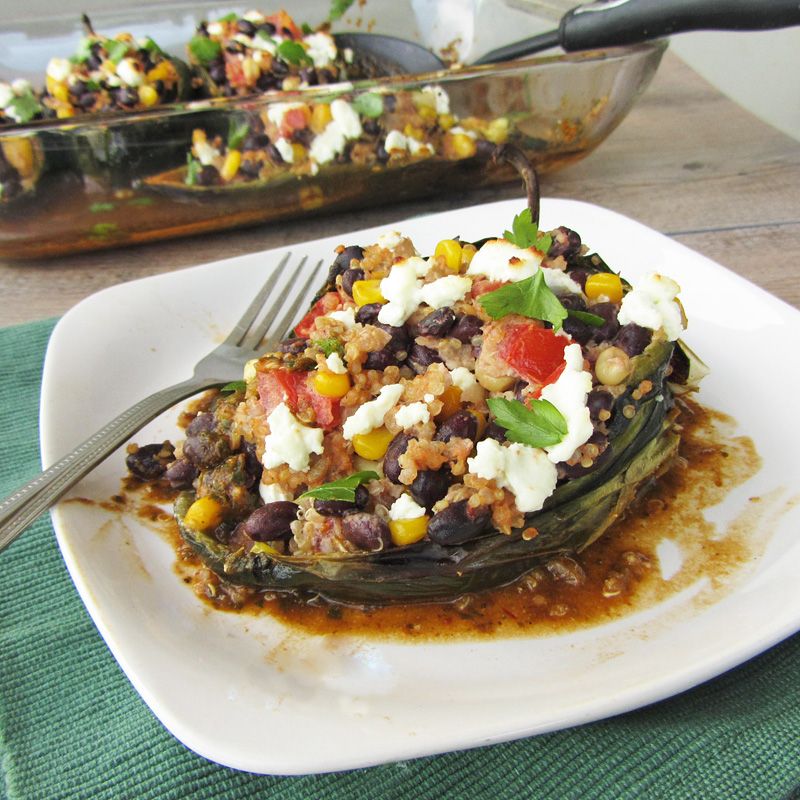
Quinoa-Stuffed Poblano Peppers with Chipotle Sauce

Have you ever had one of those nights where everything seems to go wrong in the kitchen?  This was one of those times.  It started with a blender explosion – I’d made my chipotle sauce in the blender, removed the lid, then thought “I really wouldn’t want a blender explosion right now, I’d better press the Off button again just to make sure it’s really off” (don’t ask why I thought that made sense at the time).  Of course, the 'off' button also doubles as sort of ‘on’ button (who designs blenders?), and my sauce went flying all over the kitchen.  If you follow me on Facebook, you may recall a picture of this little disaster that I posted (yes, it was all the way back in April, but please don’t take that as a reflection of the quality of this dish, it was amazing, I just haven’t had the chance to share it yet!)

Then I realized that the handy little microwavable package of frozen corn I’d bought was in fact not regular corn, but was coated in a LOT of butter sauce.  The butter sauce proceeded to explode out of the plastic bag in the microwave, so not only did I have to clean it out of there, I also had to try to rinse/wipe it off every piece of frozen corn because I didn’t want it to ruin my dish.  Once that was out of the way, I proceeded to dump way too much oil in my pan for cooking the onion, then forgot about the onions so they almost burnt, then sliced all the way through one of my peppers when I was stuffing it so I had to cut it in half …. You get the picture.

After all that, I was praying that this dish wouldn’t also turn out to be a disaster, but it blew away all my expectations and turned out so good! 

Quinoa-Stuffed Poblano Peppers with Chipotle Sauce

I’ve made stuffed green peppers before, but these were so much better.  The poblanos are roasted before stuffing so they’re nice and soft.  They also have a really nice flavor that’s very mild for a hot pepper, so they don’t give off much heat.  And they make the perfect vessel for stuffing, especially with a delicious quinoa, vegetable, and goat cheese mixture!

The filling in these was so flavourful, and I loved that it had a bit of richness from the melted goat cheese.  There wasn’t enough cheese to mask the flavours of the ingredients though, which I really liked.  The chipotle sauce was really spicy, but when you spoon just a little over your pepper, it adds the perfect level of spice (or you can just leave it in the pan if you don’t like spice!) 

All in all, this was a fantastic vegetarian meal that was both healthy and filling, and definitely worth my little series of kitchen disasters!

Quinoa-Stuffed Poblano Peppers with Chipotle Sauce

Quinoa-Stuffed Poblano Peppers with Chipotle Sauce

Adapted from Whole Living

Serves 4

Ingredients:

4 large poblano peppers
2 teaspoons plus 1 tablespoon vegetable oil
1/3 cup dry quinoa, rinsed
1/3 cup vegetable stock (optional)
1 tablespoon chopped chipotle chile in adobo sauce
1 garlic clove
Salt and pepper
1/2 cup fresh cilantro leaves, roughly chopped, plus more for garnish
1 small yellow onion
1 cup frozen corn kernels, thawed (or fresh cooked corn from the cob)
1 can black beans, drained and rinsed
2 roma tomatoes, diced
4 ounces goat cheese

Directions

Preheat oven to 475°F.  Rub poblano peppers with two teaspoons of vegetable oil and place on a parchment paper-lined baking sheet.  Roast in the preheated oven until soft and slightly blackened in spots, about 15-20 minutes, flipping once.  Let cool.

Meanwhile, bring 1/3 cup water and 1/3 cup vegetable stock to a boil in a medium saucepan (I like to use part vegetable stock for quinoa to infuse extra flavour, but it’s not necessary if you don’t have any open vegetable stock, you can use 2/3 cup water instead).  Add quinoa, cover, and reduce heat to medium-low to simmer.  Cook until tender, about 15 minutes.  Remove from heat and let stand 5 minutes, then remove lid and fluff with a fork.

While peppers and quinoa are cooking, prepare the chipotle sauce in a blender.  Combine chipotle chile, garlic, 3/4 cup water, and a dash each of salt and pepper in the blender and blend until smooth.  Add 1/2 cup cilantro and pulse a few times to combine.  Set aside.

In a large saucepan or deep skillet, heat 1 tablespoon oil over medium-high heat.  Add onion and sauté until soft, about 5 minutes.  Add corn, black beans, tomato, and cooked quinoa and stir until heated through, about 2 minutes.  Add 2 ounces goat cheese and stir until it's melted and completely mixed in.  Season with salt and pepper to taste.

Make a small slit down the length of one side of each pepper, being careful not to cut through to the other side.  Carefully remove seeds, leaving stem end intact.  Spoon quinoa mixture into each pepper to fill them.

Pour chipotle sauce into a 9x13-inch baking dish.  Transfer stuffed peppers to the dish, and dot with remaining 2 ounces goat cheese.  Bake until cheese is golden, 15 to 20 minutes.  Cool in pan 10 minutes and serve warm, sprinkled with additional chopped cilantro if desired.

July 03, 2012

Buffalo Chicken Burgers

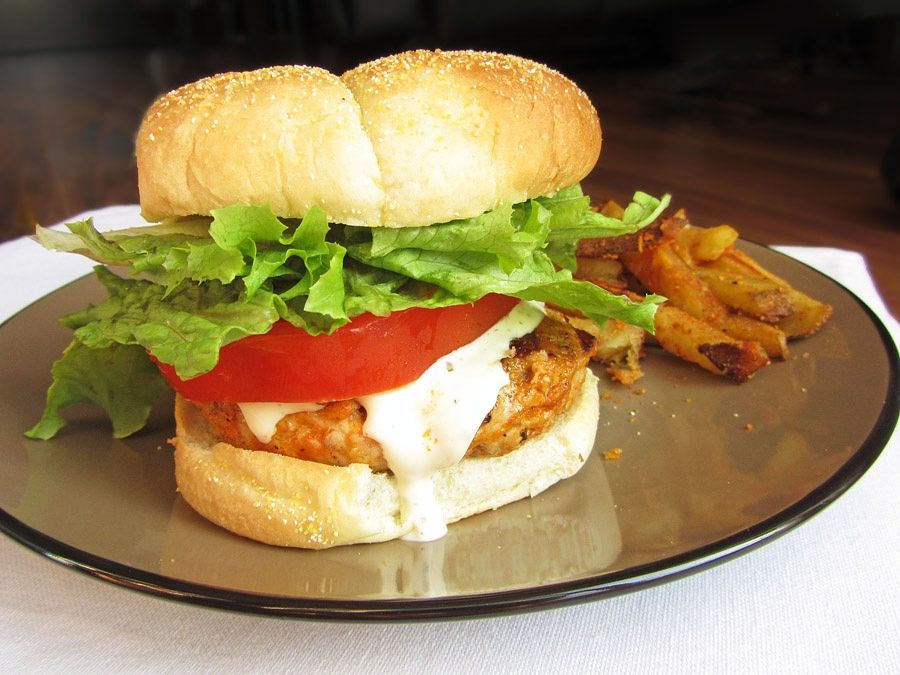
Buffalo Chicken Burgers

I had a great long weekend this past weekend, including a Canada Day party, fireworks, plenty of time in the sun relaxing with family and Ryan, and lots of great food!  The best thing I ate this weekend had to be these buffalo chicken burgers that are one of Ryan and my favourite meals.  And with 4th of July barbecues likely in store for many of my American readers tonight and tomorrow, I thought this would be a great recipe to share today!

These are ridiculously easy to make, and Ryan and I always love them every time we make them.  We’re both big fans of anything buffalo wing flavoured, so infusing that flavour into a juicy homemade chicken burger with fresh toppings and lots of sauce makes for a pretty amazing dinner, and so much better than any storebought frozen chicken burgers, which we have not had good experiences with!

Buffalo Chicken Burgers

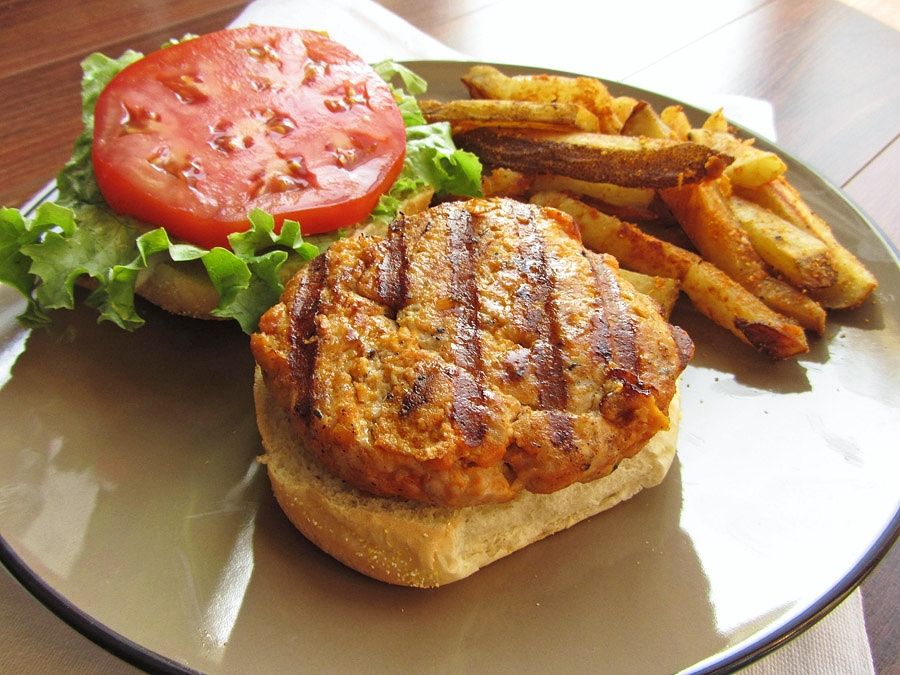
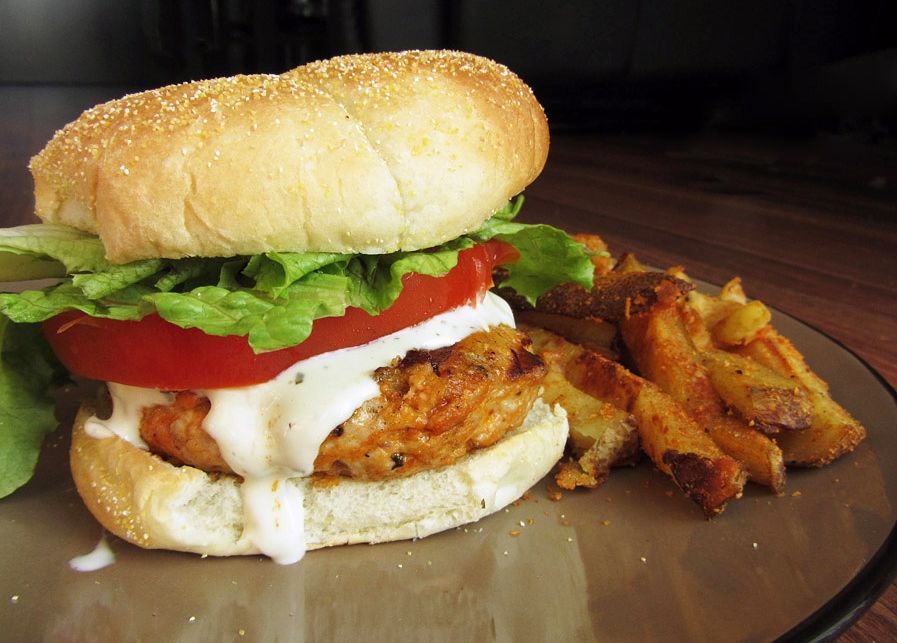
I know the pictures of this burger don’t do it justice, but this was one of those times when I just wanted to eat my dinner while it was still hot, without having to worry about styling it, finding good lighting to photograph it in, taking a million shots to get the best angle, and then reheating it before eating because by that time it would be ice cold.  Instead, I took a few quick pictures right before I ate it, so they’re not great but at least you know I didn’t spend forever making my burger look as pretty as possible but not at all how it would look in real life.  What you see is what you get!  (Well, except that when I took the pictures, I’d forgotten to add the extra buffalo sauce, which for me is a must!)

If you’re looking for a new and exciting way to eat chicken burgers this summer, or a healthier alternative to a beef burger, give these a try!  If you’re a buffalo wing fan, you won’t be disappointed! 

And happy Independence Day to my friends south of the border!

Buffalo Chicken Burgers

Buffalo Chicken Burgers

Adapted from How Sweet It Is

Serves 4

Note: I have made these many times as both chicken and turkey burgers - both work!

Ingredients:

For the burger patties:

1 lb (450g) ground lean or extra-lean chicken (or ground lean turkey may also be used!)
1/2 teaspoon salt
1/2 teaspoon pepper
1/2 teaspoon italian seasoning
1/2 teaspoon paprika
1/4 cup buffalo wing sauce or Frank's red hot sauce
1/4 cup breadcrumbs
1/4 cup grated parmesan cheese

For the rest of the burgers:
4 whole wheat burger buns
Lettuce
Tomato
Buffalo sauce
Low-fat ranch or blue cheese dressing
Cheddar cheese (optional)

Directions:

Mix up all ingredients for the chicken (or turkey) patties in a large bowl (using a fork, potato masher, or clean hands) until well blended, but being careful not to overmix. Form into four patties and press a small indentation in the center of each patty. Always be sure when making burger patties not to press hard on the meat or you will end up with tough patties - be as gentle as possible with every step!

If cooking on the barbecue: Preheat grill to medium to medium-high heat and lightly oil or spray. Grill for 4-5 minutes per side, or until the internal temperature reaches 165°F. In the last couple minutes of cooking, place cheese on burger to melt, if desired.

If cooking on the stovetop: Preheat two large non-stick skillets over medium-high heat. Cook the patties in the skillets for about 8-10 minutes total, flipping halfway, until cooked through. In the last couple minutes of cooking, place cheese on burgers to melt, if desired.

Place burgers on buns and top with lettuce, tomato, and desired sauces.

I like to serve these with baked sweet potato fries or as pictured above, Emeril Lagasse's oven baked parmesan paprika fries.

June 08, 2012

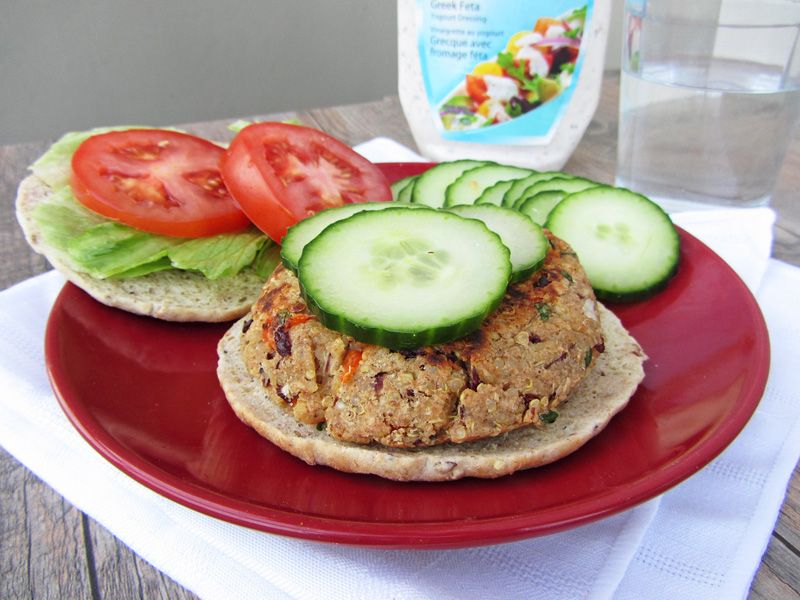
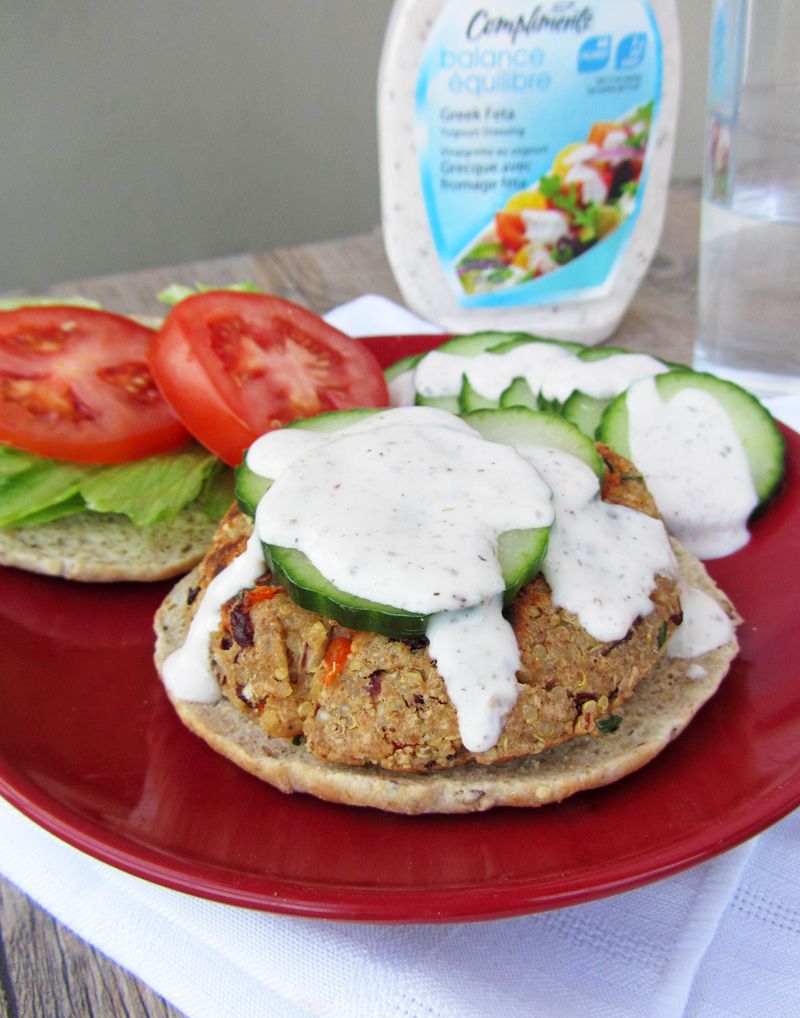
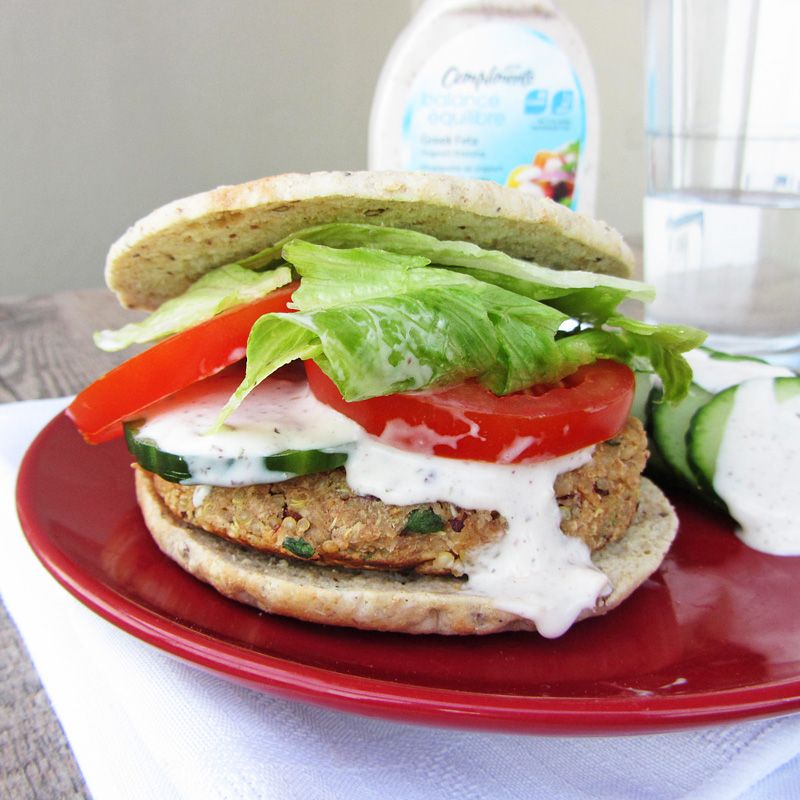
Mediterranean Quinoa Veggie Burgers

Mediterranean Quinoa Burgers

I always associate summertime with the five B's: beaches, backyards, barbeques, beer, and burgers.  There's nothing better than being able to eat dinner in the backyard and biting into a freshly cooked burger that's just oozing with flavourful toppings.  I actually just returned from a delicious lunch at The Works, a burger chain in Canada with a pretty crazy list of burger toppings.  I had a turkey burger with avocados, roasted red peppers, havarti, and a vegetable mayo sauce, and it was messy but one of the tastiest burgers I've had in a while!

While I'm not much of a beef burger eater, I absolutely love chicken burgers, turkey burgers, and pretty much every type of veggie burger.  I know some people are super picky about their veggie burgers and I'm not sure why; maybe it's because they're looking for a veggie burger that tastes just like a meat burger?  What I like about veggie burgers is that they don't remind me of meat burgers, and there are so many different kinds to try - black bean, chickpea, sweet potato, lentil, portobello mushroom, and even quinoa burgers!

I've tried many of the veggie burger varieties I just listed, except for a quinoa burger, which is surprising because I love quinoa!  So I decided to remedy that last week and kick off the start to burger season with these Mediterranean quinoa feta burgers.

Mediterranean Quinoa Burgers

These are a great healthy and tasty alternative to traditional meat burgers.  They're full of Mediterranean flavours both in the quinoa patties, which include red pepper, garlic, parsley, and feta, and in the burger toppings, for which I used lettuce, tomato, cucumber, and a storebought Greek feta yogurt dressing.  If you can't find a similar dressing, you could easily just use crumbled feta or make your own feta yogurt dressing with a recipe like this one.  You can also change up the toppings however you like - I think roasted red peppers would work really well with these!

I loved the way the quinoa added an extra texture to the burger so it wasn't completely mushy like some bean burgers can be, and that it added lots of protein to the dish so I still felt full afterwards.  I served mine with a side of cucumbers drizzled in the feta yogurt dressing to keep my meal light and healthy, but the fact that the burgers are healthy could easily justify eating them with a big side of fries!

These probably won't satisfy someone looking for a veggie burger that tastes like a meat burger, but they're a great option for anyone looking for a healthy alternative to a traditional burger.

Mediterranean Quinoa Burgers

Mediterranean Quinoa Burgers

Adapted from Whole Living

Makes 6-7 quinoa patties

Ingredients:

For the patties:
1 cup dry quinoa
1 (540mL) can kidney beans or chickpeas, drained and rinsed
1 shallot, minced
1 clove garlic, minced
1/2 a red pepper, finely chopped
1/4 cup chopped parsley
1/3 cup crumbled light feta
2 egg whites, lightly whisked
1 teaspoon kosher salt
1/2 teaspoon ground pepper
1/2 cup to 1 cup panko bread crumbs
Non-stick cooking spray

For the Burgers:
6-7 multigrain thin hamburger buns
Lettuce, tomato, cucumber for topping
Feta cheese (optional)
Feta yogurt sauce (storebought or homemade)

Directions:

Cook quinoa as per package directions and let cool slightly.

Mash the kidney beans in a large bowl.  Add the cooked quinoa, shallot, garlic, red pepper, parsley, feta, egg whites, salt, and pepper, and mix well.  Add 1/2 cup bread crumbs and attempt to form a patty.  If the mixture is too wet to hold together well, continue adding more bread crumbs (up to an additional 1/2 cup) to reach a texture where the patty will hold its shape when you pick it up gently with your hand.  Shape mixture into 6 or 7 round patties.

Heat a large non-stick skillet over medium heat and spray with non-stick cooking spray.  Cook patties in batches, about 5 minutes per side, until golden brown and cooked through.

Serve quinoa patties on hamburger buns, topped with lettuce, tomato, cucumber, and feta yogurt salad dressing or feta cheese.

February 13, 2012

Heart-Shaped Personal Pizzas (with heart-shaped toppings!)

Four heart shaped personal pizzasHappy Valentine's Day!

If you're still looking for last minute meal ideas to make for your loved one(s) tomorrow, I've got the perfect idea for you: heart-shaped personal pizzas with heart-shaped toppings!

I say "idea" because I'm not actually providing a recipe here - pizza's one of those things that you don't really need measurements in a recipe to make (unless you're making your own dough, in which case, I can't help you there because I just bought a refrigerated storebought pizza dough for these).

All you have to do for these adorable little guys is divide a regular-sized pizza dough (storebought or homemade) into four, then shape each portion into a heart. This part was a lot easier than I expected; my hearts weren't perfect, but you can definitely tell they're hearts! If you're having difficulty shaping the dough, just let it rest a while longer until it's easier to work with. For a few of the hearts, I had to cut off some of the dough from the top part in order to get the heart right, but they all held their shape pretty well.

Once you have your dough shaped into four personal-sized hearts, then you can top each one according to individual tastes and bake them (I baked two at a time). In order to make my pizzas extra special, I topped each one with different heart-shaped toppings! Check out my topping ideas below:

1) Pepperoni Hearts:

heart shaped pepperoni personal pizzaThis one was one of the easiest - I just bought sliced pepperoni and cut each slice into a heart using a knife. You can even stack the pepperoni slices on top of each other to cut multiple hearts at a time, so this pizza takes no time at all to prepare. I paired the pepperoni with simple tomato sauce and mozzarella cheese.

2) Tomato Hearts:

heart shaped tomato personal pizzaTomato is my favourite pizza topping, and combined with mozzarella and basil, it makes for my very favourite pizza! The tomatoes were the hardest of all the toppings to cut into hearts, and they probably made the least obvious looking hearts, but I think they still turned out cute! I placed each heart on top of a slice of mozzarella instead of shredding the cheese first, but either works!

3) Red Bell Pepper Hearts:

heart shaped red pepper personal pizzaI thought these were the most fun because the red pepper was the least obvious ingredient to turn into a heart. All you have to do is slice a red bell pepper and line up two slices together to form a heart shape (you'll have to trim the ends off to get the right angle for your heart). I combined my red pepper slices with spinach and goat cheese, and while I'm not usually a fan of peppers on pizza, this was one of my favourites!

4) Roasted Red Pepper Hearts:

heart shaped roasted red pepper personal pizzaThis was one of those last minute ideas I had that I wasn't very sure about, but it ended up being one of the best looking pizzas! I bought a jar of roasted red peppers, then just pulled out a big slice and cut it into small hearts using a paring knife. You could also roast your own red pepper if you have the time; I was just lazy. You could pair roasted red peppers with any other toppings you want but I kept it simple with just mozzarella cheese and tomato sauce.

If you don't like any of the above ideas, here are a few more ideas for toppings you could shape into hearts, which I didn't have enough dough to try with:

- Roasted red beets
- Roasted sweet potatoes
- Plain cheese with hearts drawn on in bbq or tomato sauce (for picky kids)
- Strawberries or apples (for the more adventurous types!)

I was so happy with how these turned out - not only did they look adorable, but they tasted amazing (what's not to like about pizza?!) and were the perfect size for one person.

And don't think that these can only be made on Valentine's Day! Save this idea and make heart-shaped pizzas any time you want to show your family, friends, or partner (or just yourself!) some love - they're guaranteed to put a smile on anyone's face :)

Ingredient Index

Related Posts Plugin for WordPress, Blogger...